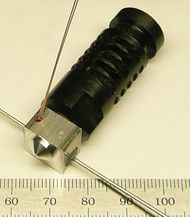
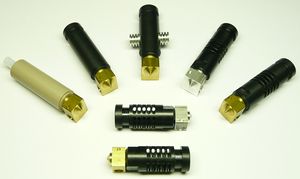
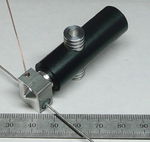
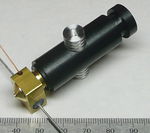
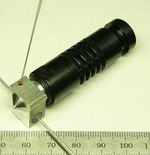
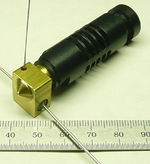
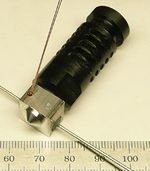
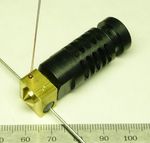
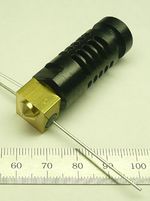
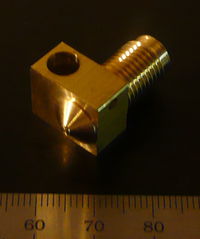
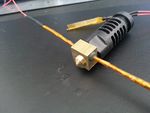
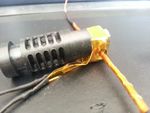
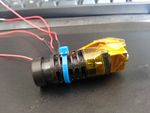
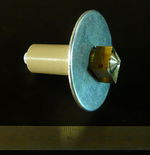
J Head Nozzle
Release status: working
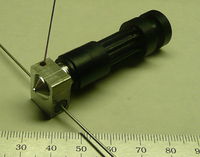
| Description | J-Head Nozzle and Thermal Barrier Based on a combination of ideas from the Makerbot Mk 5 hot end, The Inline Heater Variation, and some ideas from Brian Briggs.
|
| License | GPL
|
| Author | |
| Contributors | |
| Based-on | |
| Categories | |
| CAD Models | |
| External Link |
Contents
- 1 Introduction
- 2 Printing Instructions and Tips
- 3 Parts List
- 4 Parts Descriptions
- 5 Assembly
- 6 Installation
- 7 Notes
- 8 Working Examples
Introduction
This nozzle is a combination of ideas from other nozzle designs combined with a goal to reduce the number of custom machined parts to a bare minimum. By reducing the number of machined parts, it is hoped that the cost of this hot-end can be kept down while improving the reliability.
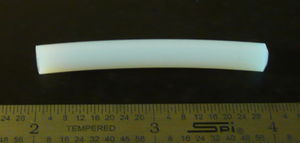
The use of a machined piece of round PTFE, as a liner, was requested in one of two designs by Brian Briggs.
The idea of using the PTFE tubing as a liner, from the Cold End to the tip, was borrowed from the Makerbot Mk V extruder design.
The PTFE tubing also acts to "bridge" the joint between the PEEK insulator and the brass nozzle/heater. By not having the filament in contact with this joint it is hoped that any possibility of leakage will be completely eliminated.
The use of a combination heater and nozzle was borrowed from ParCan's Inline Heater Nozzle Variation. However, instead of the heater resistor being mounted parallel to the path of the filament it is mounted perpendicular to the path of the filament. This was done to both reduce the length of the nozzle and to make it a little easier to run the leads from the heater resistor. Combining the heater and nozzle also helped to meet the goal to keep the number of custom machined parts to a minimum.
Advantages
- Internally, the filament path is identical to that of an already proven design.
- The design is simple as the number of custom machined parts is kept to a minimum.
- If necessary, the PTFE liner can be replaced by using an off-the-shelf piece of PTFE tubing.
- The PTFE is not stressed nor used to provide support. This reduces a point of failure that is part of other designs.
- A resistor is used as a heater. There is no need to wrap nichrome wire or to bake a heater core.
- Heat transmission is improved as there is no thermal junction where a separate heater screws onto the nozzle.
- With most versions weighing in at under 25 grams and the lightest version weighing in at under 13 grams, this design is very light.
- Significantly more reliable at printing PLA than other designs. The set screw on the PTFE ensures even compression for a good seal to the brass. PLA becomes soft at very low temperatures and is also a very good adhesive. Minimizing crevices and using a long non stick liner path is ideal.
Disadvantages
- Considerable machining is required.
- Not suitable for materials that print at over 248 degrees Centigrade.
Printing Instructions and Tips
- The use of a cooling fan, for printing PLA, is highly recommended. If a cooling fan is not used, the chances of the hot-end jamming is greatly increased.
- Do not obstruct the airflow through the cooling vents or, with the Mk III-B, around the heat sink.
Parts List
Mk I
Summary: First J-Head hot-end.
| Quantity | Part | Description | Part Number |
| 1 | J-Head(v1.x) | Machined Brass Nozzle/Heater Combination, Version 1.x | |
| 1 | Nozzle Holder (v1) | Machined PEEK Nozzle Holder, Version 1.x | |
| 1 | PTFE liner (v1) | 1/8" ID, 1/4" OD PTFE tubing, Version 1 | McMaster-Carr 5033K31 |
| 1 | Heater Resistor | Axial, 5.6 ohm, 1%, 5W | UB5C-5.6-ND |
| 1 | Thermistor 1 | EPCOS 100K | B57560G104F |
| 1 | Support Washer | Optional 1/2" Fender Washer | McMaster-Carr 91090A114 |
Mk II
Summary: Added a hollow set-screw to retain the PTFE liner.
| Quantity | Part | Description | Part Number |
| 1 | J-Head (v1.x) | Machined Brass Nozzle/Heater Combination, Version 1.x | |
| 1 | Nozzle Holder (v2) | Machined PEEK Nozzle Holder, Version 2 | |
| 1 | PTFE liner (v1) | 1/8" ID, 1/4" OD PTFE tubing, Version 1 | McMaster-Carr 5033K31 |
| 1 | Heater Resistor | Axial, 5.6 ohm, 1%, 5W | UB5C-5.6-ND |
| 1 | Thermistor 1 | EPCOS 100K | B57560G104F |
| 1 | Hollow-lock socket set screw | 5/16-24 hollow-lock socket set screw | McMaster-Carr 91301A150 |
| 1 | Support Washer | Optional 1/2" Fender Washer | McMaster-Carr 91090A114 |
Mk III
Summary: Added a heat sink in order to print PLA. To reduce weight, an aluminum nozzle is used.
| Quantity | Part | Description | Part Number |
| 1 | J-Head Nozzle (v2) | Machined Aluminum Nozzle/Heater Combination, Version 2 | |
| 1 | Nozzle Holder (v3) | Machined PEEK Nozzle Holder, Version 3 | |
| 1 | Heat Sink | Machined Aluminum Heat Sink | |
| 1 | PTFE liner (v1) | 1/8" ID, 1/4" OD PTFE tubing, Version 1 | McMaster-Carr 5033K31 |
| 1 | Heater Resistor | Axial, 5.6 ohm, 1%, 5W | UB5C-5.6-ND |
| 1 | Thermistor 1 | EPCOS 100K | B57560G104F |
| 1 | Hollow-lock socket set screw | 5/16-24 hollow-lock socket set screw | McMaster-Carr 91301A150 |
| 1 | Support Washer | Optional 1/2" Fender Washer | McMaster-Carr 91090A114 |
Mk III-B
Summary: Added a heat sink in order to print PLA.
| Quantity | Part | Description | Part Number |
| 1 | J-Head Nozzle (v1.x) | Machined Brass Nozzle/Heater Combination, Version 1.x | |
| 1 | Nozzle Holder (v3) | Machined PEEK Nozzle Holder, Version 3 | |
| 1 | Heat Sink (v1) | Machined Aluminum Heat Sink, Version 1 | |
| 1 | PTFE liner (v1) | 1/8" ID, 1/4" OD PTFE tubing, Version 1 | McMaster-Carr 5033K31 |
| 1 | Heater Resistor | Axial, 5.6 ohm, 1%, 5W | UB5C-5.6-ND |
| 1 | Thermistor 1 | EPCOS 100K | B57560G104F |
| 1 | Hollow-lock socket set screw | 5/16-24 hollow-lock socket set screw | McMaster-Carr 91301A150 |
| 1 | Support Washer | Optional 1/2" Fender Washer | McMaster-Carr 91090A114 |
Mk IV
Summary: Removed the heat sink and added a series of vents to provide cooling. To reduce weight, an aluminum nozzle is used.
| Quantity | Part | Description | Part Number |
| 1 | J-Head Nozzle (v2) | Machined Aluminum Nozzle/Heater Combination, Version 2 | |
| 1 | Nozzle Holder (v4) | Machined PEEK Nozzle Holder, Version 4 | |
| 1 | PTFE liner (v1) | 1/8" ID, 1/4" OD PTFE tubing, Version 1 | McMaster-Carr 5033K31 |
| 1 | Heater Resistor | Axial, 5.6 ohm, 1%, 5W | UB5C-5.6-ND |
| 1 | Thermistor 1 | EPCOS 100K | B57560G104F |
| 1 | Hollow-lock socket set screw | 5/16-24 hollow-lock socket set screw | McMaster-Carr 91301A150 |
| 1 | Support Washer | Optional 1/2" Fender Washer | McMaster-Carr 91090A114 |
Mk IV-B
Summary: Removed the heat sink and added a series of vents to provide cooling.
| Quantity | Part | Description | Part Number |
| 1 | J-Head Nozzle (v1.x) | Machined Brass Nozzle/Heater Combination, Version 1.x | |
| 1 | Nozzle Holder (v4) | Machined PEEK Nozzle Holder, Version 4 | |
| 1 | PTFE liner (v1) | 1/8" ID, 1/4" OD PTFE tubing, Version 1 | McMaster-Carr 5033K31 |
| 1 | Heater Resistor | Axial, 5.6 ohm, 1%, 5W | UB5C-5.6-ND |
| 1 | Thermistor 1 | EPCOS 100K | B57560G104F |
| 1 | Hollow-lock socket set screw | 5/16-24 hollow-lock socket set screw | McMaster-Carr 91301A150 |
| 1 | Support Washer | Optional 1/2" Fender Washer | McMaster-Carr 91090A114 |
Mk V
Summary: Reduced the size and increased the length of the melt zone. To reduce weight, an aluminum nozzle is used.
| Quantity | Part | Description | Part Number |
| 1 | J-Head Nozzle (v5) | Machined Aluminum Nozzle/Heater Combination, Version 5 | |
| 1 | Nozzle Holder (v5) | Machined PEEK Nozzle Holder, Version 5 | |
| 1 | PTFE liner (v1) | 1/8" ID, 1/4" OD PTFE tubing, Version 1 | McMaster-Carr 5033K31 |
| 1 | Heater Resistor | Axial, 5.6 ohm, 1%, 5W | UB5C-5.6-ND |
| 1 | Thermistor 1 | EPCOS 100K | B57560G104F |
| 1 | Hollow-lock socket set screw | 5/16-24 hollow-lock socket set screw | McMaster-Carr 91301A150 |
| 1 | Flat Washer | 1/4" OD Flat Washer | McMaster-Carr 98032A436 |
Mk V-B
Summary: Reduced the size and increased the length of the melt zone.
| Quantity | Part | Description | Part Number |
| 1 | J-Head Nozzle (v4) | Machined Brass Nozzle/Heater Combination, Version 4 | |
| 1 | Nozzle Holder (v5) | Machined PEEK Nozzle Holder, Version 5 | |
| 1 | PTFE liner (v1) | 1/8" ID, 1/4" OD PTFE tubing, Version 1 | McMaster-Carr 5033K31 |
| 1 | Heater Resistor | Axial, 5.6 ohm, 1%, 5W | UB5C-5.6-ND |
| 1 | Thermistor 1 | EPCOS 100K | B57560G104F |
| 1 | Hollow-lock socket set screw | 5/16-24 hollow-lock socket set screw | McMaster-Carr 91301A150 |
| 1 | Flat Washer | 1/4" OD Flat Washer | McMaster-Carr 98032A436 |
Mk V-BV
Summary: As the old thermistor was discontinued, the Semitec thermistor was substituted.
| Quantity | Part | Description | Part Number |
| 1 | J-Head Nozzle (v4.1) | Machined Brass Nozzle/Heater Combination, Version 4 | |
| 1 | Nozzle Holder (v5) | Machined PEEK Nozzle Holder, Version 5 | |
| 1 | PTFE liner (v2) | 1/8" ID, 1/4" OD PTFE tubing, Version 2 | McMaster-Carr 5033K31 |
| 1 | Heater Resistor | Axial, 5.6 ohm, 1%, 5W | UB5C-5.6-ND |
| 1 | Thermistor 5 | Semitec | 104GT-2 or 104NT-4-R025H42G |
| 1 | Hollow-lock socket set screw | 5/16-24 hollow-lock socket set screw | McMaster-Carr 91301A150 |
| 1 | Flat Washer | 1/4" OD Flat Washer | McMaster-Carr 98032A436 |
Mk VI-B
Summary: Uses a heater cartridge and two thermistors. If the firmware (Marlin) is properly configured, and the thermistors are not reporting the same temperature, the firmware will turn off the heater cartridge.
| Quantity | Part | Description | Part Number |
| 1 | J-Head Nozzle (v4.2) | Machined Brass Nozzle/Heater Combination, Version 4.2 | |
| 1 | Nozzle Holder (v5) | Machined PEEK Nozzle Holder, Version 5 | |
| 1 | PTFE liner (v2) | 1/8" ID, 1/4" OD PTFE tubing, Version 2 | McMaster-Carr 5033K31 |
| 1 | Ceramic Heater Cartridge | 12V, 30W, 15mm long, 6mm diameter | |
| 2 | Thermistor 5 | Semitec | 104GT-2 |
| 1 | Set Screw | 4-40 Set Screw | McMaster-Carr 91375A103 |
| 1 | Hollow-lock socket set screw | 4-40 hollow-lock socket set screw | McMaster-Carr 91301A005 |
| 1 | Hollow-lock socket set screw | 5/16-24 hollow-lock socket set screw | McMaster-Carr 91301A150 |
| 1 | Flat Washer | 1/4" OD Flat Washer | McMaster-Carr 98032A436 |
Mk 7-B
Summary: New nozzle holder design.
| Quantity | Part | Description | Part Number |
| 1 | J-Head Nozzle (v4.2) | Machined Brass Nozzle/Heater Combination, Version 4.2 | |
| 1 | Nozzle Holder (v6) | Machined PEEK Nozzle Holder, Version 6 | |
| 1 | PTFE liner (v2) | 1/8" ID, 1/4" OD PTFE tubing, Version 2 | McMaster-Carr 5033K31 |
| 1 | Ceramic Heater Cartridge | 12V, 30W, 15mm long, 6mm diameter | |
| 2 | Thermistor 5 | Semitec | 104GT-2 |
| 1 | Set Screw | 4-40 Set Screw | McMaster-Carr 91375A103 |
| 1 | Hollow-lock socket set screw | 4-40 hollow-lock socket set screw | McMaster-Carr 91301A005 |
| 1 | Hollow-lock socket set screw | 5/16-24 hollow-lock socket set screw | McMaster-Carr 91301A150 |
| 1 | Flat Washer | 1/4" OD Flat Washer | McMaster-Carr 98032A436 |
Mk 8
Summary: New brass nozzle with axial thermistor and heater cartridge set-screws.
| Quantity | Part | Description | Part Number |
| 1 | J-Head Nozzle | Machined Brass Nozzle/Heater Combination, Version | |
| 1 | Nozzle Holder | Machined PEEK Nozzle Holder | |
| 1 | PTFE liner | 2mm ID/ 4mm OD OD PTFE tubing 0.875" long | McMaster-Carr 52335K32 |
| 1 | Ceramic Heater Cartridge | 12V, 30W, 15mm long, 6mm diameter (or similar) | |
| 1 | Thermistor 7 | Honeywell | 135-104LAC-J01 (1%) / 135-104QAD-J01 (2%) / 135-104LBF-J01 (5%) / 135-104LAF-J01 (5%) |
| 1 | Set Screw | 4-40 Set Screw | McMaster-Carr 91375A103 |
| 1 | Hollow-lock socket set screw | 4-40 hollow-lock socket set screw | McMaster-Carr 91301A005 |
| 1 | Hollow-lock socket set screw | 1/4-20 hollow-lock socket set screw | McMaster-Carr 91301A029 |
Sundries
| Description | Part Number | Notes |
| PTFE Insulation For EPCOS or Semitec Thermistor, 0.012" ID | McMaster-Carr 5335K9 | |
| PTFE Insulation For Heater Resistor, 0.047" ID | McMaster-Carr 5335K15 | |
| 20 AWG High Temperature Wire | McMaster-Carr 8209K11 |
Note: *A good drill-chart for anyone with plans to make one can be found here http://whatisacnc.com/index.php?cID=241
Parts Descriptions
Machined Parts
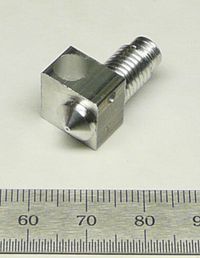
J-Head Nozzle
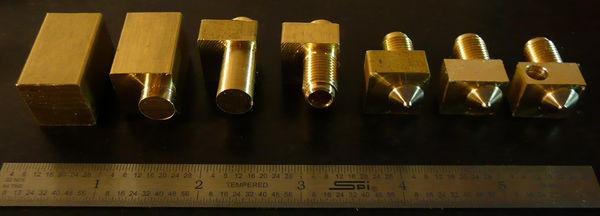
Version 1
Material: Brass Bar Stock, 5/8" Square Or 5/8" x 1/2" Rectangular, 1.125" Long
Finished Weight: 11.1 grams
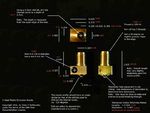
Note: These instructions differ from the machining example displayed in the above picture and are only one example of how the nozzle can be machined. The machining process can vary depending upon available machinery and tooling. The minimum machining requirements are a metal lathe with a 4-jaw independent chuck.
- Cut a piece of brass bar stock 1.125" long plus enough to adequately hold the stock in the lathe.
- On the brass bar stock, find the center of the axis of the nozzle. This can be done by various means ranging from using a milling machine to using marking fluid, a height gauge, and a surface plate.
- Mount the brass bar stock in a 4-jaw chuck on a lathe. Adjust the chuck so that the nozzle axis is on center.
- Turn the threaded end of the nozzle down to 0.375 +0.000 -0.004.
- Thread the nozzle to 3/8-24 up to the shoulder of the heater section.
- Drill out the center of the nozzle using a 6.5mm drill bit.
- Turn off the last 3 threads, at the end of the nozzle, and cleanup the threads.
- Cut a 30 degree taper on the very end of the threaded end of the brass nozzle. This is to completely eliminate the internal gap between the brass nozzle and the PEEK thermal barrier. This gap would exist due to the internal taper created by the cutting edge of the drill bit.
- Remove the work piece and mount it by the threaded end so that the threaded end is centered in the lathe.
- Cut-off any excess material.
- Machine the nozzle tip to the desired profile.
- Drill the nozzle orifice.
- Mill or turn off the excess material in the heater section. This can be accomplished by mounting the nozzle in the 4-jaw chuck sideways so that the excess material is presented for machining. If available, a milling machine can also be used. (If a 5/8" x 1/2" piece of bar stock is used, this step will be skipped.)
- Using a letter size A drill bit, drill out the hole for the heater resistor.
- Drill out the hole for the thermistor.
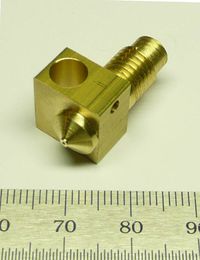
Version 1.1
Material: Brass Bar Stock, 5/8" Square Or 5/8" x 1/2" Rectangular, 1.125" Long
Finished Weight: 14.4 grams w/optional improvements
With the exception of the following changes, the dimensions are identical to Version 1 of the J-Head Nozzle. These changes were implemented in early December of 2011.
- Melt Chamber: Drill out the internal cavity to a depth of 0.560 with the 6.5mm drill bit. Finish drilling the internal cavity with a 3.5mm drill bit.
- Nozzle Orifice Spout Diameter: Reduce the diameter of the nozzle orifice spout from 0.080 to 0.050. This will reduce the size of the tip that can catch on the print.
- Start of Nozzle Orifice Taper: Start the taper at 0.050 from the heater block section. This will add room for optional insulation.
Version 2
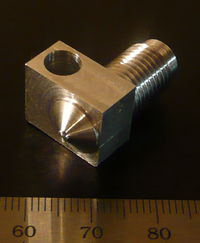
Material: Aluminum Bar Stock, 5/8" Square Or 5/8" x 1/2" Rectangular, 1.125" Long
Finished Weight: 3.8 grams
Note: The primary reason for using aluminum is to save weight. The alloy should be 2024, 7075, or a similar harder, high quality, alloy. Softer alloys, such as 6061, are not recommended.
The blueprint and instructions are identical to Version 1 of the J-Head Nozzle.
Version 3
Material: Aluminum (2024 or 7075) Bar Stock, 1/2" Square, 1.000" Long
Finished Weight: Unknown
(Instructions are incomplete at this time.)
- Cut a piece of aluminum bar stock 1.000" long plus enough to adequately hold the stock in the lathe.
- On the aluminum bar stock, find the center of the axis of the nozzle. This can be done by various means ranging from using a milling machine to using marking fluid, a height gauge, and a surface plate.
- Mount the brass bar stock in a 4-jaw chuck on a lathe. Adjust the chuck so that the nozzle axis is on center.
- Turn the threaded end of the nozzle down to 0.375 +0.000 -0.004. The threaded end will be 0.500" long.
- Thread the nozzle to 3/8-24 up to the shoulder of the heater section.
- Drill out the center of the nozzle, to a depth of 0.500", using a 6.5mm drill bit. The depth will be measured from the side of the hole.
- Drill out the melt chamber using a 3.5mm drill bit.
- Turn off the last 3 threads, at the end of the nozzle, and cleanup the threads.
- Cut a 30 degree taper on the very end of the threaded end of the brass nozzle. This is to completely eliminate the internal gap between the brass nozzle and the PEEK thermal barrier. This gap would exist due to the internal taper created by the cutting edge of the drill bit.
- Remove the work piece and mount it by the threaded end so that the threaded end is centered in the lathe.
- Cut-off any excess material.
- Machine the nozzle tip to the desired profile.
- Drill the nozzle orifice.
- Using a number 8 drill bit, drill out the hole for the heater resistor.
- Drill out the hole for the thermistor.
Version 4
OpenSCAD drawing: Jhn_nozzle_v4.scad
Material: Brass Bar Stock, 1/2" Square, 1.000" Long
Finished Weight: 11.3 grams
- Cut a piece of brass bar stock 1 inch long plus enough to adequately hold the stock in the lathe.
- On the brass bar stock, find the center of the axis of the nozzle. (The axis is centered at 0.250 +-0.001, from one edge, and 0.157 -0.000 +0.003 from an adjacent edge.) This can be done by various means ranging from using a milling machine to using marking fluid, a height gauge, and a surface plate.
- Mount the brass bar stock in a 4-jaw chuck on a lathe. Adjust the chuck so that the nozzle axis is on center.
- Turn the threaded end of the nozzle down to 0.3125 +0.000 -0.004. This section is 0.500 +-0.005 long.
- For the first 0.150 +-0.010, of the threaded section, down to an OD of 0.255 (6.5mm) +0.000 -0.002.
- Thread the nozzle to 5/16-24 up to the shoulder of the heater section.
- Drill out the center of the nozzle with a 3.5mm drill bit. This will create a heat chamber that is the entire length of the brass nozzle.
- Remove the work piece and mount it by the threaded end so that the threaded end is centered in the lathe.
- Cut-off any excess material.
- Machine the nozzle tip to the desired profile leaving the heater block section 0.325 thick.
- Drill the nozzle orifice.
- Using a size A drill bit, drill the heater resistor hole through the heater block section.
- Drill the thermistor hole.
Note: A size C Drill bit can be used if the heater resistor does not fit through the heater resistor hold. Care needs to be taken to ensure that the drill bit does not break through into the melt chamber. The remaining brass, between this hole and the edge opposite of the melt chamber, should be 0.020 +-0.002 thick.
Version 4.1
Instructions are identical to version 4. However, the thermistor hole is drilled for out for Thermistor 5.
Version 4.2
Coming soon.
Version 5
Material: Aluminum Bar Stock, 1/2" Square, 1.000" Long
Finished Weight: 3.7 grams
Note: The primary reason for using aluminum is to save weight. The alloy should be 2024, 7075, or a similar harder, high quality, alloy. Softer alloys, such as 6061, are not recommended.
The blueprint and instructions are identical to Version 4 of the J-Head Nozzle.
Version 6
Material: Brass Bar Stock, 1/2" Square, 1.000" Long
Finished Weight: ~11.3 grams (will need verified)
- Cut a piece of brass bar stock 1 inch long plus enough to adequately hold the stock in the lathe.
- On the brass bar stock, find the center of the axis of the nozzle. (The axis is centered at 0.250 +-0.001, from one edge, and 0.157 -0.000 +0.003 from an adjacent edge.) This can be done by various means ranging from using a milling machine to using marking fluid, a height gauge, and a surface plate.
- Mount the brass bar stock in a 4-jaw chuck on a lathe. Adjust the chuck so that the nozzle axis is on center.
- Turn the threaded end of the nozzle down to 0.3125 +0.000 -0.004. This section is 0.500 +-0.005 long.
- For the first 0.150 +-0.010, of the threaded section, down to an OD of 0.255 (6.5mm) +0.000 -0.002.
- Thread the nozzle to 5/16-24 up to the shoulder of the heater section.
- Drill out the center of the nozzle with a 3.5mm drill bit. This will create a heat chamber that is the entire length of the brass nozzle.
- Remove the work piece and mount it by the threaded end so that the threaded end is centered in the lathe.
- Cut-off any excess material.
- Machine the nozzle tip to the desired profile leaving the heater block section 0.325 thick.
- Drill the nozzle orifice.
- Using a size C drill bit, drill the heater resistor hole through the heater block section. The remaining brass, between this hole and the edge opposite of the melt chamber, should be 0.020 +-0.002 thick.
- Drill the thermistor hole. (Change this....)
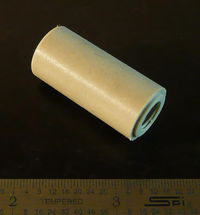
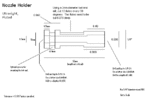
Nozzle Holder
Notes:
- PEEK nozzle holders have a maximum working temperature of roughly 248 degrees Celsius. Due to many variables, it is highly recommended that this temperature is not to be approached. Above this temperature, PEEK will melt and the hot-end will fail.
- PEEK normally is made in either tan or black and either color can be used. Black is normally used as it looks better, however, at times suppliers may be out of one color and the other color can be substituted.
Version 1
Note: Picture shown displays the 36.5mm nozzle holder without optional mounting groove.
Material: PEEK, 5/8" Round, 36.5mm Long Or 50mm Long
Note: The length can be increased, if necessary. (i.e. Increase the length to 50mm for the Sells Mendel and/or if the heat-sink is going to be installed.) All dimensions on the hot-end side, of the thermal barrier, would remain the same.
- Cut a piece of 5/8" round PEEK to length.
- Drill out the PEEK using a 6.5mm drill bit.
- Using a letter size Q drill bit, enlarge one end to a depth of 0.450 +-0.005.
- Internally thread the end to 3/8-24 using a bottom tap.
- (Optional) Turn a 0.500 -0.000 +0.005 shoulder for a distance of approximately 0.050. (This will keep the support washer centered and insulated from the brass nozzle.)
- (Optional) 4.76mm from the cold-end, turn a groove that is 4.64mm wide with an OD of 12mm.
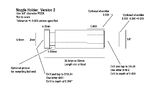
Version 2
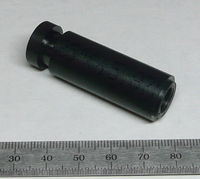
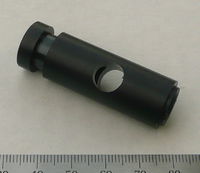
Note: Picture shown displays the 50mm nozzle holder with the optional mounting groove. Not shown is the opposite end, which is threaded for the hollow-lock socket set screw.
Material: PEEK, 5/8" Round, 36.5mm Long Or 50mm Long
Finished Weight: 9.6 grams (50mm, with mounting groove)
Note: The length can be increased, if necessary. (i.e. Increase the length to 50mm for the Sells Mendel and/or if the heat-sink is going to be installed.) All dimensions on the hot-end side, of the thermal barrier, would remain the same.
- Cut a piece of 5/8" round PEEK to length.
- Drill out the PEEK using a 6.5mm drill bit.
- Using a letter size Q drill bit, enlarge one end to a depth of 0.450 +-0.005.
- Internally thread the end to 3/8-24 using a bottom tap.
- (Optional) Turn a 0.500 -0.000 +0.005 shoulder for a distance of approximately 0.050. (This will keep the support washer centered and insulated from the brass nozzle.)
- Using a letter size I drill bit, drill out the cold end for a distance of 0.200.
- Internally thread the cold end to 5/16-24. (A special bottom tap has to be ground in order to finish threading this hole. This tap will not have any incomplete threads.)
- (Optional) 4.76mm from the cold-end, turn a groove that is 4.64mm wide with an OD of 12mm.
Version 3
Material: PEEK, 5/8" Round, 50mm Long
Finished Weight: 8.6 grams (50mm, with mounting groove)
- Cut a piece of 5/8" round PEEK to length.
- Drill out the PEEK using a 6.5mm drill bit.
- Using a letter size Q drill bit, enlarge one end to a depth of 0.450 +-0.005.
- Internally thread the end to 3/8-24 using a bottom tap.
- (Optional) Turn a 0.500 -0.000 +0.005 shoulder for a distance of approximately 0.050. (This will keep the support washer centered and insulated from the brass nozzle.)
- Using a letter size I drill bit, drill out the cold end for a distance of 0.200.
- Internally thread the cold end to 5/16-24. (A special bottom tap has to be ground in order to finish threading this hole. This tap will not have any incomplete threads.)
- (Optional) 4.76mm from the cold-end, turn a groove that is 4.64mm wide with an OD of 12mm.
- Using a 3/8" drill bit, drill heat-sink hole 0.787 -0.000 +0.040 from the hot-end.
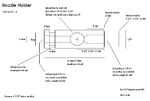
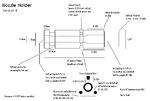
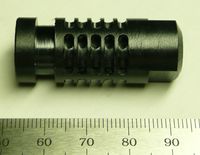
Version 4
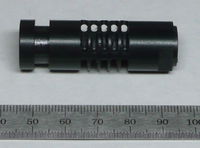
Material: PEEK, 5/8" Round, 36.5mm or 50mm Long
Finished Weight: 7.5 grams (50mm, w/mounting groove)
- Start with a completed version 2 nozzle holder.
- Optional: At the hot end of the nozzle holder, mill two flats opposite of each-other for using a 1/2" (13mm) open end wrench. Each flat will be 0.250 (6.5mm) wide and 0.250 (6.5mm) from the axis of the nozzle holder.
- Mount the nozzle holder in an indexer on a milling machine.
- Equip the milling machine with a 2mm or 3/32 end mill. (The dimensions of the end mill do not have to be very precise. If desired, a ball end-mill can be used in order to mill out grooves with the bottom rounded.)
- Start the first groove so that it's edge is 0.600" from the hot-end of the nozzle holder.
- Mill 3 grooves (36.5mm version) or 5 grooves (50mm version) as follows. The grooves will be interrupted for the supports.
- Each groove is 0.150" deep.
- The centers, of each groove, are 0.125" apart.
- Each groove has an angular cut of 90 degrees and is milled between the following angles: 0-90, 120-210, 240-330
- Each groove support is drilled out at the following angles with the center, of it's support, at 90 degrees to the end mill: 15, 135, 255
- To drill out each groove support, the end-mill is positioned so that it's edge, towards the center of the nozzle holder, is 0.150" from the outer edge of the nozzle holder.
File:J-head-iv.zip Solidworks model by UberVexer
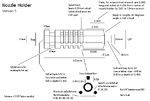
Version 5
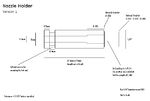
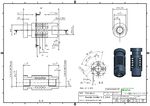
NOTE: This blueprint shows three supports. Four supports are now used as per the new blueprint, below.
Material: PEEK, 5/8" Round, 40mm Long
Finished Weight: 5.5 grams
- Cut a piece of 5/8" round PEEK to length
- Drill out the center of the PEEK using a 6.5mm drill bit.
- Using a letter size I drill bit, enlarge one end to a depth of 0.450 +-0.010.
- Drill out 0.125 +-0.005, from this end, to an ID of 0.320 +-0.005.
- Internally thread the end to 5/16-24 using a bottom tap. Ensure that the threads are cut no deeper than 0.450.
- Taper the hot-end such that there is a 30 degree taper that starts at 5mm from the axis of the nozzle and tapers outwards to the OD. Optionally, a shoulder could be cut in place of a taper. The purpose of this taper is to reduce the amount of contact the PEEK has with the brass.
- Using a letter size I drill bit, drill out the cold end for a distance of 0.300.
- Internally thread the cold end to 5/16-24.
- Optional: 4.76mm from the cold end, turn a groove that is 4.64mm wide with a root of 12mm.
- Optional: At the hot end of the nozzle holder, mill two flats opposite of each-other for using a 1/2" (13mm) open end wrench. Each flat will be 0.250 (6.5mm) wide and 0.250 (6.5mm) from the axis of the nozzle holder.
- Mount the nozzle holder in an indexer on a milling machine.
- Equip the milling machine with a 2mm or 3/32 end mill. (The dimensions of the end mill do not have to be very precise.)
- Start the first groove so that it's edge is 0.500" from the hot-end of the nozzle holder.
- Mill 5 grooves as follows. The grooves will be interrupted for the four supports.
- Each groove is 0.150" deep.
- The centers, of each groove, are 0.125" apart.
- Each groove has an angular cut of 60 degrees and is milled between the following angles: 0-60, 90-150, 180-240, 270-330
- Each groove support is drilled out at the following angles with the center, of it's support, at 90 degrees to the end mill: 75, 165, 255, 345
- To drill out each groove support, the end-mill is positioned so that it's edge, towards the center of the nozzle holder, is 0.150" from the outer edge of the nozzle holder.
Improvements:
Over time, slight improvements were added to this nozzle holder. The most reliable version has modifications to the groove closest to the brass nozzle. In this groove, the supports are not drilled out and the groove is milled to 0.130" deep. These changes add extra strength to this area.
Experimental, Fluted
Material: PEEK, 5/8" Round, 50mm Long
Finished Weight: 5.5 grams
Note: This nozzle holder is turned down and fluted in order to reduce the weight.
- Start with a completed version 2 nozzle holder.
- From the hot-end, turn the first 0.600 down to 0.550.
- Turn the section to be fluted down to 12mm.
- Mount the nozzle holder in an indexer on a milling machine.
- Using a 2mm ball end-mill, cut 12 flutes along the length of the center section. Each flute will be cut about 0.070 deep and will be cut at 30 degree intervals.
Heat Sink
Version 1
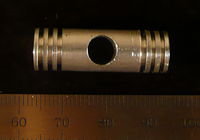
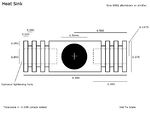
Material: Aluminum, 3/8" Round, 1.160" Long
Finished Weight: 3.6 grams
- Cut a piece of 3/8" round aluminum to length.
- Using a 1mm (0.040) cutoff tool, make 3 grooves in each end. The grooves will be 0.050 deep and 1mm apart.
- Using a 6.5mm drill bit, cross-drill the heat-sink to create the PTFE liner passage. This hole is to be centered in both directions.
- (Optional) Drill out each end for 0.350 with a number 25 drill bit. These holes are to lighten the heat sink.
Modifying the Nozzle Holder:
Note: Due to there being slightly less than 12mm clearance with a 36.5mm nozzle holder, between the cold-end of the nozzle holder and the heat sink, using a 50mm nozzle holder is advisable. (Different thermal barrier lengths are shown in the above pictures.)
- If it is desirable to orient the heat sink in a certain direction relative to the brass nozzle, install the brass nozzle.
- Using a 3/8" drill bit, cross-drill the nozzle holder so that the center of the hole is 0.787 -0.000 +0.040 from the hot end.
PTFE Liner
Version 1
Material: PTFE tubing, 0.250" OD, 0.125" ID (metric: 6.35 mm OD, 3.175mm ID)
- Using a razor knife, cut the tubing to desired length. The length is dependent upon the length of the nozzle holder used.
- Cut an approximately 30 degree (or greater) taper on what will be the hot-end of the PTFE liner.
- Optional: An internal taper can be made, on the cold end, by chucking the liner in a lathe and using a center drill. This taper improves the initial feeding of the filament into the hot-end.
Note: The prototype nozzle has worked without this taper. However, the taper would not have to be too precise as PTFE is quite flexible. If a lathe is not available, it may be possible to cut a workable taper with a pencil sharpener.
Version 2
Material: PTFE tubing, 0.250" OD, 0.125" ID (metric: 6.35 mm OD, 3.175mm ID)
- Using a razor knife, cut the tubing to slightly over 1 inch long.
- In a lathe, face off what will become the cold end.
- Cut an internal taper, on the cold end, by chucking the liner in a lathe and using a center drill. This taper improves the initial feeding of the filament into the hot-end.
- Turn the liner around in the chuck. Cut and face-off the liner so that it's total length is 0.915".
1.75mm Conversion
Mk II To Mk IV Series Hot-Ends
Two machined parts are required in order to convert a Mk I to Mk IV J-Head hot-end to use 1.75mm filament. They are the PEEK hollow set screw and the 1.75mm PTFE liner. In addition, if the nozzle has a melt chamber, it must be drilled out to 2mm as opposed to 3.5mm.
A quicker way, to perform the conversion, is to omit the PEEK hollow set screw and use a normal 5/16-24 hollow set screw. Drill the cold end of the 1.75mm PTFE liner out to 4mm for a depth of about 0.250". Then, install the PTFE liner and hollow set-screw. Take a piece of 4mm OD, 2mm ID PTFE tubing and install it in the cold end so that the tubing has bottomed-out in the liner. Then, cut the tubing to length with a razor knife.
PEEK hollow set screw
Material: PEEK, 5/16" round, 0.200" long
- If 5/16" PEEK is not available, turn down a small piece of 3/8" PEEK on a lathe.
- Externally thread the PEEK to 5/16-24.
- With a center drill, start a hole on the end. The taper, of the center drill, should be large enough to act as a guide when starting the filament.
- From the end of the PEEK rod, drill a hole about 0.250 deep with a 2mm drill bit.
- Cut off the hollow set screw so that it is about 0.200" long.
- Cut a slot, in the tapered end of the set screw, for a flat screwdriver. Note: A holder will probably have to be machined in order to prevent damage to the set screw when holding it in a vise.
- Deburr the set screw and clean up the threads.
1.75mm PTFE Liner
Material: PTFE, 1/4" round, 2.5" long
- Using a lathe, put a 30 degree taper on one end.
- Drill this end out as far as possible with a 2mm drill bit. (The hole should be started with a center drill.)
- Remove the liner, from the lathe, and test fit into the hot-end. (At this point, the hot-end is the brass nozzle with the PEEK nozzle holder installed.) Make a mark, with a razor knife, where the liner exits the hot-end.
- Remove the liner from the hot-end. Cut the liner about 4.5mm closer to the hot end of the liner from the mark you just made.
- Put the liner in the lathe with the cold end of it sticking out.
- Face off the end.
- Center drill with a center drill large enough to create an inside taper when completed. This taper will help to start the filament into the liner.
- Using a 2mm drill bit, drill out this end of the liner only until the hole connects with the 2mm hole drilled from the opposite end. The inside of the liner must be as smooth as possible from the hot end of the liner to where the two holes meet.
- If omitting the PEEK set-screw, drill out the cold end to a depth of 0.250" with a 4mm drill bit.
Mk V and Later Hot Ends
Note: To do a proper conversion, the brass nozzle should have been machined with the melt chamber drilled out to 2mm as opposed to 3.5mm.
Material: PTFE, 1/4" round, 1.0" long
- Using a lathe, face off both ends and reduce the total length to 0.920" +- 0.010".
- Drill out the center with a 2mm drill bit.
- Drill out one end, with a 4mm drill bit, to 0.100".
During installation, after the hollow set-screw has been installed, use a piece of 4mm OD/ 2mm ID PTFE tubing and install it in the cold end of the hot-end. This will act as a filament guide through the hollow set-screw.
Off-The-Shelf Parts
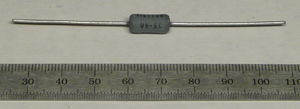
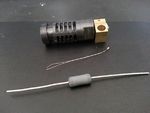
Heater Resistor
5.6 ohm (Large Standard)
Description: Axial, 5.6 ohm, 1%, 5W
Part Number: UB5C-5.6-ND
Weight: 1.6 grams
Note: If this resistor is unavailable, the 6.8 ohm (Large Alternate) resistor can be used.
6.8 ohm (Large Alternate)
Description: Axial, 6.8 ohm, 5%, 3W
Part Number: W21-6R8JI
Note: The outside diameter tolerance, of this resistor, is very loose. Because of this, the resistor will usually fit loosely in the hole. In order to install this resistor, fire cement or muffler putty is almost mandatory.
6.8 ohm (Small)
Description: Axial, 6.8 ohm, 5%, 3W
Part Number: RWMA-6.8CT-ND
Weight: 1.1 grams
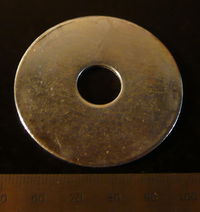
Support Washer
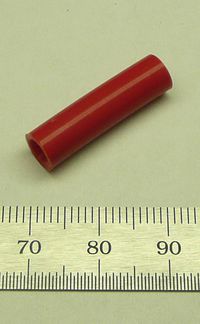
The support washer is optional. It can be drilled out with 3mm holes and M3 threaded rod can be used in order to provide additional support for the hot-end. If the support washer is not used, the nozzle holder can be secured in the extruder by using other means.
Note: Support, for the support washer, was discontinued with the Mk V series hot-ends.
Thermistors
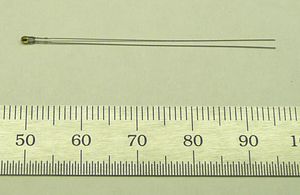
Thermistor 1
Note: Original 100k Thermistor
Part Number: B57560G104F (Replacement Part B57550G1104 ?)
Manufacturer: EPCOS
Description: NTC thermistor sealed in glass body
Tolerance: 1%
Data Sheet: NTC Thermistors For Temperature Measurement
Diameter of Glass Bead: 2.3mm +-0.2mm
Length of Glass Bead: 4.1mm +-0.5mm
Lead Length: 67mm +-0.5mm
Lead Diameter: 0.3mm
Recommended Beta: 4066
If using Sprinter firmware, select temperature table #1.
#define NUMTEMPS 61
short temptable[][2] = {
{ 23 , 300 },
{ 25 , 295 },
{ 27 , 290 },
{ 28 , 285 },
{ 31 , 280 },
{ 33 , 275 },
{ 35 , 270 },
{ 38 , 265 },
{ 41 , 260 },
{ 44 , 255 },
{ 48 , 250 },
{ 52 , 245 },
{ 56 , 240 },
{ 61 , 235 },
{ 66 , 230 },
{ 71 , 225 },
{ 78 , 220 },
{ 84 , 215 },
{ 92 , 210 },
{ 100 , 205 },
{ 109 , 200 },
{ 120 , 195 },
{ 131 , 190 },
{ 143 , 185 },
{ 156 , 180 },
{ 171 , 175 },
{ 187 , 170 },
{ 205 , 165 },
{ 224 , 160 },
{ 245 , 155 },
{ 268 , 150 },
{ 293 , 145 },
{ 320 , 140 },
{ 348 , 135 },
{ 379 , 130 },
{ 411 , 125 },
{ 445 , 120 },
{ 480 , 115 },
{ 516 , 110 },
{ 553 , 105 },
{ 591 , 100 },
{ 628 , 95 },
{ 665 , 90 },
{ 702 , 85 },
{ 737 , 80 },
{ 770 , 75 },
{ 801 , 70 },
{ 830 , 65 },
{ 857 , 60 },
{ 881 , 55 },
{ 903 , 50 },
{ 922 , 45 },
{ 939 , 40 },
{ 954 , 35 },
{ 966 , 30 },
{ 977 , 25 },
{ 985 , 20 },
{ 993 , 15 },
{ 999 , 10 },
{ 1004 , 5 },
{ 1008 , 0 }
};
Thermistor 5
Part Number: 104GT-2
Manufacturer: Semitec
Description: NTC 100k ohm 3%
Tolerance: 3%
Data Sheet: High Heat-Resistance and High Sensitive Thermistor
Diameter of Glass Bead: 1.35mm +-0.15mm
Length of Glass Bead: 3mm +-1mm
Lead Length: 45mm +-1mm
Lead Diameter: 0.15mm to 0.18mm
If using Sprinter firmware, select temperature table #5.
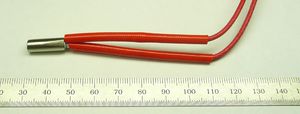
Ceramic Heater Cartridge
Assembly
Photo Series with detailed assembly instructions for current version of JHead
wiki.openhardware.co.za/index.php/Assembly_and_Wiring_of_a_J-Head_Hotend
Full instructions posted on the OpenHardware.co.za Wiki: http://wiki.openhardware.co.za/index.php/Assembly_and_Wiring_of_a_J-Head_Hotend
Mk I
- Secure the brass nozzle in a vise by the heater section.
- Optionally, install the support washer. If the support washer is to be used, drill the appropriate holes for the support rods prior to installation. (Note: The above pictures do not have holes drilled as it is possible that the hole locations could vary.)
- Screw the nozzle holder down into the nozzle. If necessary, use a pair of pliers to tighten the nozzle. The nozzle holder can be protected from the pliers by first wrapping it with a rag or paper towel.
- Using a dental pick, straightened out paper clip, small screw driver, etc., ensure that the nozzle holder is screwed down all the way by feeling for an internal gap between the brass and the nozzle holder. If a gap can be felt, screw the nozzle holder even tighter. If there is a gap, the PTFE liner can "flow" into the gap and eventually cause the print head to fail.
- Slide the PTFE liner down into the thermal barrier. The liner must be inserted by the tapered end and it is important that the tapered end is in contact with the inside of the tip of the nozzle.
- Cut the top end of the PTFE liner with a razor knife. It should project out of the nozzle holder slightly to ensure that the extruder keeps the PTFE liner from backing out.
Mk II
- Secure the brass nozzle in a vise by the heater section.
- Optional: Install the support washer. If the support washer is to be used, drill the appropriate holes for the support rods prior to installation. (Note: The above pictures do not have holes drilled as it is possible that the hole locations could vary.)
- Screw the nozzle holder down onto the nozzle. If no flats are milled, use a pair of pliers to tighten the nozzle. The nozzle holder can be protected from the pliers by first wrapping it with a rag or paper towel. If there are flats milled, a 13mm (1/2") open-end wrench can be used to tighten the nozzle.
- Using a dental pick, straightened out paper clip, small screw driver, etc., ensure that the nozzle holder is screwed down all the way by feeling for an internal gap between the brass and the nozzle holder. If a gap can be felt, screw the nozzle holder even tighter. If there is a gap, the PTFE liner can "flow" into the gap and eventually cause the print head to fail.
- Slide the PTFE liner down into the nozzle holder. The liner must be inserted by the tapered end and it is important that the tapered end is in contact with the inside of the tip of the nozzle.
- If the optional melt chamber has been added, to the nozzle, the PTFE will not make contact with the tip. Instead, it will make contact with the top edge of the melt chamber.
- If the PTFE liner doesn't seem to be seating properly, it may be because the PTFE liner is getting hung up on the inside edge of the brass nozzle. Follow the following directions:
- Unscrew the brass nozzle from the PEEK nozzle holder.
- Install the PTFE liner so that about 1/2 of it is sticking out the hot end of the PEEK nozzle holder.
- Screw the PEEK nozzle holder onto the brass nozzle. The PTFE liner will be pushed back as you push and screw the assembly together.
- You may need to follow this sub-set of directions after you have marked and cut the PTFE liner to the correct length.
- With a razor knife, mark the PTFE liner where it is flush with the top of the nozzle holder.
- Remove the PTFE liner.
- From the mark, use a razor knife to cut the PTFE liner about 5/32" towards the tapered end.
- Optional: Chuck the liner in a lathe and face-off the cold end of the liner. Then, using a center drill, make a slight internal taper in the end of the liner.
- Slide the PTFE liner back down into the thermal barrier.
- Screw in the hollow-lock socket set screw. It will need to be lightly tightened. Over-tightening may result in the PTFE liner becoming distorted.
Mk III
- Install the heat-sink. The heat-sink will probably need to be pressed in place. Care must be taken to ensure that the heat-sink liner passage is properly aligned with the nozzle holder liner passage. After the heat-sink is installed, ensure that the liner passage is clear of any debris.
- Secure the aluminum nozzle in a vise by the heater section.
- Optionally, install the support washer. If the support washer is to be used, drill the appropriate holes for the support rods prior to installation. (Note: The above pictures do not have holes drilled as it is possible that the hole locations could vary.)
- Screw the nozzle holder down onto the nozzle. If necessary, use a pair of pliers to tighten the nozzle. The nozzle holder can be protected from the pliers by first wrapping it with a rag or paper towel.
- Using a dental pick, straightened out paper clip, small screw driver, etc., ensure that the nozzle holder is screwed down all the way by feeling for an internal gap between the brass and the nozzle holder. If a gap can be felt, screw the nozzle holder even tighter. If there is a gap, the PTFE liner can "flow" into the gap and eventually cause the print head to fail.
- Slide the PTFE liner down into the nozzle holder. The liner must be inserted by the tapered end and it is important that the tapered end is in contact with the inside of the tip of the nozzle.
- With a razor knife, mark the PTFE liner where it is flush with the top of the nozzle holder.
- Remove the PTFE liner.
- From the mark, use a razor knife to cut the PTFE liner about 5/32" towards the tapered end.
- Slide the PTFE liner back down into the thermal barrier.
- Screw in the hollow-lock socket set screw. It will need to be lightly tightened. Over-tightening may result in the PTFE liner becoming distorted.
Mk IV
The assembly instructions are identical to those of the Mk II.
Mk V
- Secure the brass nozzle in a vise by the heater section.
- Wrap a couple of turns of PTFE tape (plumbing tape) around the brass threads.
- Screw the nozzle holder down onto the nozzle. If no flats are milled, use a pair of pliers to tighten the nozzle. The nozzle holder can be protected from the pliers by first wrapping it with a rag or paper towel. If there are flats milled, a 13mm (1/2") open-end wrench can be used to tighten the nozzle.
- Remove the brass nozzle from the vise.
- Slide the PTFE liner down into the nozzle holder. The PTFE liner needs to be inserted such that the flat end is making contact with the brass and the internally tapered end is towards the top.
- Install the washer.
- Screw in the hollow-lock socket set screw. Ensure that the washer stays centered while tightening this set screw. Use a piece of filament to ensure that the set screw is not too tight as the liner can become compressed and obstruct the passage. If this happens, slightly loosen the set screw.
Heater Resistor
The heater resistor can be installed one of 3 ways:
- Put a little bit of muffler repair putty on the resistor and slide it into the hole. It can be cured by letting it set a couple hours before bringing the hot-end up to temperature.
- Slide the heater resistor in the hole. If it fits tightly, this will work. If there is any gap, between the resistor and brass, it may result in failure of the heater resistor.
- Wrap a thin strip of aluminum foil around the heater resistor and adjust it by gradually cutting it shorter until the resistor and file slide it into. Care must be taken to ensure that the proper amount of aluminum foil is used in order to take up any gap between the heater resistor and the brass.
Thermistor
Note: The thermistor table, for Thermistor 1, is here.
- Insulate the leads to the thermistor. This is usually accomplished one of two ways.
- Use Kapton tape as insulation by separating the leads and sandwiching the leads in-between two strips of Kapton tape.
- Use PTFE insulation and slide it over each lead.
- Place the thermistor in its hole and secure it with Kapton tape.
Installation
Using the Mounting Holes in the Wade Extruder
- Insert the nozzle holder in the 5/8 inch (16mm) hot-end socket.
- Using a sharp instrument or other object, mark the 4 hole locations on the nozzle holder.
- Remove the nozzle holder.
- Using a round file, file the mounting grooves in the nozzle holder in order to create 2 grooves for the mounting screws or bolts to pass through.
- Install the hot end.
Using The Support Washer
Note: The support washer cannot be used for hot-ends starting with the Mk V.
- Prior to installing the optional support washer, mark and drill the appropriate mounting holes on the support washer.
- Install the optional support washer in between the J-Head Nozzle and the nozzle holder.
- Use the support rods, screws, and/or washers to hold the hot-end in place.
Using Wire With The Support Washer
- Cut 4 evenly-spaced slots in the support washer.
- Run the wire into the channels.
- Tighten the wire vertically and diagonally. Then wrap wire around the middle tightly, tightening all of the vertical and diagonal runs.
Using A Mounting Groove
Use a nozzle holder that is machined with the optional mounting groove and a cold-end that is designed for using a mounting groove or an adapter plate adapter plate for a mounting groove. In this configuration, a mounting groove is normally required.
Wildseyed Simple Hot End Mounting System
Note: Ensure that the cold-end either has a 5/8" mounting hole or can be drilled out to 5/8".
Follow the mounting instructions for the Wildseyed Simple Hot End.
Notes
General
- In the Mk1 version, the cold-end of the PTFE liner will need to be retained in order to prevent it from backing out of the hot-end. With some extruders, such as the Wade Extruder, the PTFE liner will easily be retained by the socket that retains the hot-end. If the liner is not properly retained, there is a high probability of the nozzle developing a leak.
- While printing ABS, if the nozzle clogs due to crystalized filament the temperature is most likely too high.
- Either black or tan PEEK can be used for the nozzle holders. Black PEEK is usually used as it looks nicer. However, sometimes suppliers are out of black PEEK and tan PEEK has to be substituted.
- When using a hot-end, with a vented PEEK nozzle holder (i.e. Mk IV-B), it is critical that the milled vents are not obstructed in any way. These vents are used to cool the hot-end by both removing as much PEEK as possible, to prevent the liner from being insulated, and to allow air to blow through and cool the hot-end. If these vents are obstructed (i.e. taped over), it is quite possible that PLA will jam in the hot-end.
Nozzle Orifice
Drill bit sizes and conversions
As drill bits usually drill holes slightly larger than their rated size, the following drill bits are used to drill out the orifice of J-Head nozzles:
| Rated Size | SAE Drill Bit Used | Actual Metric Size |
| 0.25mm | 0.0098 | 0.2489 |
| 0.30mm | 0.0118 | 0.2997 |
| 0.35mm | 0.0135 | 0.343 |
| 0.40mm | 0.0157 | 0.399 |
| 0.50mm | 0.0189 | 0.480 |
| 0.60mm | ||
| 0.70mm | ||
| 0.75mm | ||
| 0.80mm | ||
| 0.90mm | ||
| 1.00mm | N/A | 1.00 |
Notes:
- More sizes will be added as they become available.
- Smaller drill bits are used in order to keep the orifice size within the rated size and to increase the lifespan of the nozzle by ensuring that the orifice size will "wear to size" in the event that the orifice is slightly enlarged for any reason. (i.e. by cleaning with a piece of thin wire).
Nozzle orifice length
- Mk IV hot-ends (up to the middle of May 2012), and earlier models, had a nozzle orifice length of approximately 1.25mm.
- Mk IV hot-ends (after the middle of May 2012) and Mk V hot-ends have a nozzle orifice length of approximately 0.50mm.
Note: Due to the nature of 5c collets, the nozzle orifice length can vary as much as 0.25mm.
Troubleshooting
- PEEK appears to have a maximum temperature of 248 degrees C. If the nozzle pushes out of the PEEK nozzle holder, this temperature was most likely exceeded.
- If the nozzle is leaking, between the PEEK nozzle holder and the brass nozzle, check to see if the hollow set-screw is snug. This set-screw is located at the cold end and retains the liner. Wrapping PTFE tape, around the brass threads, will help to eliminate leaks as well.
- It is possible for the PTFE liner to impede the filament path if the hollow set-screw is too tight. This is because of the taper at the hot end of the PTFE liner.
- Ensure that the thermistor value is set to "1".
- In the event that the extruder is not feeding correctly, loosen up the pinch wheel and ensure that the filament can be fed by hand. Also, if possible, independently verify the temperature of the hot-end.
- If a cooling fan is blowing directly on a non-insulated nozzle, it is possible to have an uneven temperature on either side of the brass nozzle/heater. Under the right conditions, this can cause a condition where the temperature is correct, on one side, and too high, on the other. To resolve this problem, either insulate the brass or direct the airflow away from the brass.
Testing
Prototype
- While this nozzle is experimental, initial tests have proven to be very positive. At the time this note was added, the prototype had printed for well over 20 hours.
- Further testing indicates that it is critical that the internal gap, between the brass and the PEEK, is completely eliminated. If there is a gap, the PTFE will tend to "flow" into the gap and create a place for the filament to form a plug.
- Since this nozzle, internally, is similar to the Makerbot Mk V, testing indicates that it is probably a good idea to taper the PTFE at the hot-end of the nozzle.
- Testing of units with the internal gap, at the joint of the PEEK and the brass, have resulted in early failure. Replacing the PTFE liner would allow the nozzle to continue printing.
- Even with the internal gap, after two weeks the the initial prototype nozzle is still working.
- After almost a month, the initial prototype nozzle is still working. Due to the gap problem, it needs to have the PTFE liner replaced around once a week.
Mk I
- Initial testing of a nozzle, with the internal gap problem resolved, is very positive.
- A nozzle has been successfully tested extruding PLA.
- Some reservations have been expressed regarding the mounting of the nozzle. (Maybe the fender washer should be the recommended method or another method should be devised?)
- Extruding PLA can result in an early failure of the PTFE liner. This failure has been prevented by both increasing the feed rate of the filament and using a cooling fan. This is to keep the filament from getting to hot too high up in the liner. A heat-sink may be required in order to provide a more adequate solution.
- Due to this nozzle successfully printing both ABS and PLA, this entry has been updated to "working".
Mk I with Heat Sink
- Nozzles, with the experimental heat-sink, have been printing successfully. At this time, none have been reported to have printed PLA.
- The experimental heat-sink has shown to help considerably when printing with PLA. The configuration, that worked best, had the heat-sink with a fan providing active cooling. The air, from the fan, was directed to blow over the heat-sink and not the nozzle itself.
- When printing 3mm PLA, the heat-sink has proven to be very consistent and reliable.
Mk III-B
- PLA has been printed with a 0.70mm nozzle. However, there isn't enough heat provided by the heater resistor so the print speed has to be kept down. As a result, there is not advantage using a 0.70mm nozzle over a 0.50mm nozzle when printing with PLA.
Mk IV Original Prototype
- The version 3 nozzle, with a 6.8 ohm resistor, was used for testing.
- PLA has been printed with an airflow directed through the milled vents.
Mk V-B
- PLA has been printed successfully.
- ABS has been printed successfully.
- Some leakage has been reported when printing PLA. However, as long as the hollow set-screw is very tight, it isn't a problem. As "insurance", it is recommended to seal the brass threads with PTFE tape.
Experimental Light-Weight Hot End
- An experimental hot-end was built with a fluted nozzle holder and an aluminum nozzle (v2). A 1.75mm liner was installed and it was sent out for testing.
- With a fan, to provide cooling, this nozzle has successfully printed 1.75mm PLA.
- The light-weight aluminum nozzle should be insulated in order to maintain the proper temperature.
- This nozzle leaked. This was most likely due to the lack of a retainer for the 1.75mm liner.
Thermally Fused Hot-End
- An experimental brass nozzle was machined that would accommodate a thermal fuse.
- If a heater resistor were to be wired in series with the thermal fuse, the theory is that the thermal fuse would break the circuit to prevent the PEEK from melting. This would be ideal in the event of a thermistor failure.
- A static test was successful, however, thermal fuses are not yet readily available in the required temperature range.
Possible Future Modifications
Implemented Or Working
- If the extruder will not retain the PTFE liner, it may be possible to install a 5/16-24 hollow-lock socket set screw (McMaster-Carr part number 91318A550 or 91301A150) in the cold-end of the nozzle holder. (This has been implemented in the MK II.)
- Using 5/8 x 1/2 inch rectangular brass bar stock, instead of 5/8 inch square bar stock, will eliminate 1 machining operation, slightly reduce the cost of the raw materials, and may reduce the machining time for other operations as there will be less material to remove.
- Either the total length should be increased or two versions should be made available. The longer version would have a 50mm thermal barrier and the liner (for the MK I) should have an initial length of 3 1/2 inches.
- A groove-mount design could be created. However, a hollow-lock socket set screw (above) or a custom hollow set screw would have to be used to retain the liner. (The nozzle holder blueprint has been updated to include this option.)
- Add a starting taper to the cold end of the PTFE liner. (This has been implemented in the MK II.)
- A heat-sink option could be added to the nozzle holder.
- It may be possible to convert this extruder to 1.75mm by replacing the PTFE tubing with a piece of 1/4" PTFE that has been drilled out to 1.75mm. (This has been proven to work.)
- Use an aluminum nozzle made out of a high-strength aluminum alloy, such as 2024 or 7075. This should lighten the nozzle as well as improve the thermal conductivity of the nozzle. (Depending upon the alloy, the thermal conductivity, can be more than twice that of brass and an aluminum nozzle should be around 1/3rd the weight of a brass nozzle.)
- Turn the center of the nozzle holder down to 12mm and add fluting in order to provide cooling and weight reduction.
- Change to the 6.8 ohm heater resistor. The 6.8 ohm heater resistor has a smaller OD and, as a result, the heater block size could be reduced. (A prototype has been machined. Since it fits in a 13mm x 13mm piece of bar-stock, it is worth pursuing. The prototype weighs 3.1 grams.)
- Cut grooves in the nozzle holder to help keep the nozzle holder cold at the cold-end. (Grooves, with supports have been milled in a test nozzle holder.)
- Shorten the brass nozzle and reduce the number of threads. This will result in there being less brass to heat up and the heat-sink could be moved closer to the hot-end. (The threaded end, of the MK V, has been reduced to 0.500" from 0.560".)
Testing Phase
Under Consideration
- Use an axial thermistor installed in a through-hole. (Due to the limited amount of brass, in the J-Head Mk V-B, an axial thermistor cannot be installed properly and efficiently without a re-design of the nozzle.)
- Add a thermal fuse to prevent the PEEK from melting in the event of a thermistor (or other) failure. (See testing notes, above.)
Rejected
Note: Rejected ideas may be re-visited in the future.
- Add the capability to mount a thermocouple.
- Improve the thermistor mounting by adding a clamp or retaining system.
- Add shallow grooves, in the PEEK over the end with the 3/8-24 threads. This will add more surface area to the PEEK and may help with the cooling of the nozzle holder.
Weights
Note: All weights include the heater and heat sensor unless otherwise noted. Weights may vary slightly from what is listed.
| Hot-End | Weight | Notes |
| J-Head Mk II | 27.1 grams | |
| J-Head Mk II | 17 grams | Using nozzle v2. |
| J-Head Mk III | 21.9 grams | |
| J-Head Mk III-B | 30.0 grams | |
| J-Head Mk IV | 16.8 grams | With nozzle v2, optional improvements, and v4 50mm nozzle holder |
| J-Head Mk IV-B | 25.6 grams | With nozzle v1 and v4 50mm nozzle holder. |
| J-Head Mk IV-B | 26.5 grams | With nozzle v1, it's optional improvements, and v4 50mm nozzle holder. |
| J-Head Mk V | 12.8 grams | |
| J-Head Mk V-B | 20.5 grams | |
| J-Head, Experimental Fluted | 14.7 grams | With nozzle v2 and fluted nozzle holder. |
| Geared Extruder Nozzle | 29.7 grams | Original design with aluminum heater block and without hardware. |
| ParCan v2 | 27.5 grams |
Working Examples
Pictures
First prototype in action. (Photo provided by Brian Briggs.)
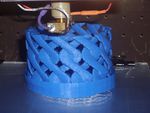
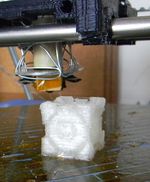
A test print using PLA. A high filament speed was used and there was little tuning of Skeinforge as the goal was to see if the nozzle would print with PLA. (Photo provided by Anthony Aragues.)
A five hour print, of a gear, in PLA. A J-Head nozzle (Mk I), with an aluminum heat sink, was used. Please note the cooling fan configuration. (Photo provided by Anthony Aragues.)
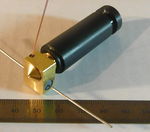
J-Head Mk IV-B thermsistor wiring (Photo provided by MotoBarsteward.)
J-Head Mk IV-B resistor wiring (Photo provided by MotoBarsteward.)
Note: Updated pictures - Remondo 00:28, 8 June 2012 (UTC)
