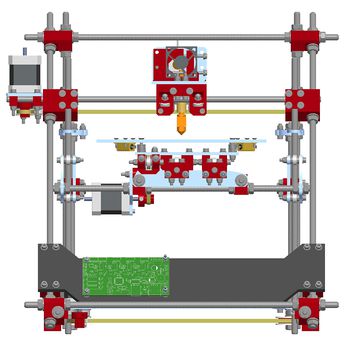
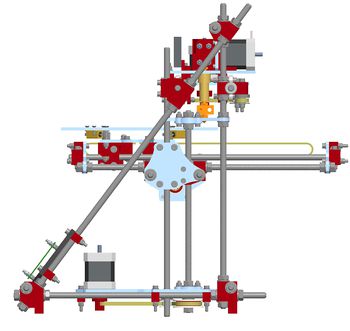
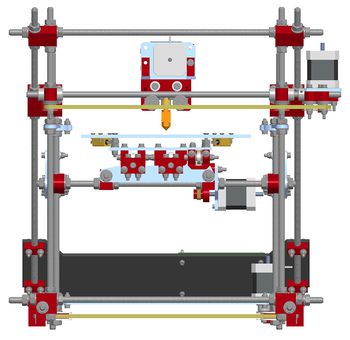
Orca v020
|
English • العربية • български • català • čeština • Deutsch • Ελληνικά • español • فارسی • français • hrvatski • magyar • italiano • română • 日本語 • 한국어 • lietuvių • Nederlands • norsk • polski • português • русский • Türkçe • українська • 中文(中国大陆) • 中文(台灣) • עברית • azərbaycanca • |
Release status: working
| Description | RepRap Orca v0.2
|
| License | GPL v2
|
| Author | |
| Contributors | |
| Based-on | |
| Categories | |
| CAD Models | |
| External Link |
Orca was V0.20 the first evolution of a machine which incorporates lasercut parts along
with 3D printed parts. It has since been superseded by Orca alternative build, Orca V0.30, Orca V0.40, Orca V0.42 and Orca V0.43.
RepRap as a community doesn't have a well defined process to decide "Well, time to stop making
machine X and start making machine Y"; if you were an entrepreneur
trying to sell machine Y (or machine X) you might appreciate this.)
If you're new to Reprap, ask in our lovely forums or irc
for guidance about what machine to get and who the popular suppliers are.
Further discussion / analysis
--Sebastien Bailard 07:55, 28 July 2011 (UTC)
Contents
- 1 Index
- 2 How to get Orca
- 3 How to build Orca
- 3.1 Preparing
- 3.2 Mechanical construction
- 3.3 Wiring & Electronics
- 3.4 Firmware & print software
- 4 How to use Orca
- 5 Images
- 6 Videos
- 7 Status
- 8 Calendar
- 9 Users
- 10 FAQ
Index
RepRap Orca is the latest 3D printer in development by http://mendel-parts.com and well in short:
- Cheap, not too heavy, but still robust 3D printer, easy to transport (grab it on the front X-bar at the sides..) and optimized for 1.75mm filament.
- It still has a Mendel build size, but is simpler/faster to build. (with experience and proper manual, probably in one afternoon).
- Not much hardware is needed, but it is still stiff with short bars and belts etc.
- Doesn't contain too many (or too big, too complex) plastic parts, so it can print plastic parts for its daughter machines quickly. (A laser cutter is necessary for the lasercut parts.)
- each Orca can easily print a new Orca each day
RepRap Orca v0.2 is a little bit experimental, I initially only spent six evenings on the whole design/printing prototype/building/testing etc.. plan was not to release yet and release maybe v0.4, however since me and many others around were so impressed, we decided to launch this product already quicker as expected.
But therefore a lot of files are still a bit beta, meaning they can have weird tolerances etc., meaning: DON'T LOOK AT THE DETAILS :P (and don't send me emails why things are not 100% ok.. I know that..)
Specifications
- Printed Parts: ???
- Non-Printed Parts: ???
- Material Cost: ???
- Cost: ??? (fully assembled)
- Printing Size: 8"x8"x5" or 20cm x 20cm x 13cm
- Precision: ??? (position), ??? (printing)
- Speed: ??? (position), ??? (printing)
Features
- check videos for now.. but from what ive seen last few months, Orca can do anything a standard Mendel can do. But it probably even goes beyond that, its better on shortterm (I don't know longterm yet) in quality (with same hotend)/max speed/skipping problems etc.
However that depends very much on how perfect a printer is build/finetuned/experienced someone is..
- Like our Mendel nr.1 (yes Kulitorum, that is still your machine running daily production here after more then probably 15months now! LOL) it is still printing very nice quality one of the best, even with those crappy parts..
- So I guess its also a bit of luck and probably the energy and touch of the person who printed the plastic set for you as well.. (yes Adrian, your mendel (our Mendel nr.3 here) also is still printing great quality parts :) after probably 10-12months now..) happen to be those two Mendels from those two "godfathers" who perform greatest here. ;)
thanks again for all your inspiration.. and everyone else off course...
Benefits of this Design
- fast & easy to build (build time: 4-16hours depending on experience/manual status/finetuning needed etc)
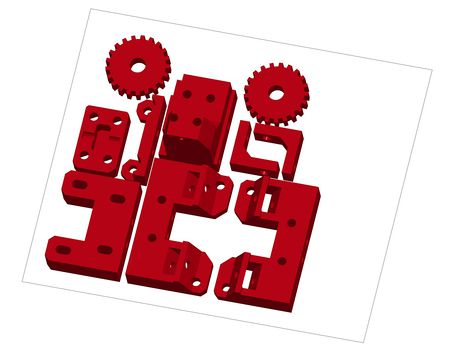
- All plastics (incl. extruder) can be printed in 15hours @ 50mm/s @ 0.32mm layers with 1.75mm filament
- Plastics are small & simple shaped, (total weight for an Orca set incl extruder: 350 gram vs 900 gram for a standard Mendel)
- only 4 simple cutting sizes for all threaded & smooth rod (in total: 10x330,7x400,2x500,2x265)
- short bars (max 400mm)
- short belts and simple routing/tensioning (3x 840/5mm wide or 1x 840/16mm wide cut in three)
- less bolts, nuts etc
- Very open frame
- very nice while building/working on it, highly accessible
- Printed Object good visible/accessible
- Extruder simple & small & very good visible/accessible/
- Smooth Z-axis & Z-axis moves down instead of up against gravity
- A lot of the important dimensions are in the thick sheet
- Footprint roughly 28x35cm (excl: studding sticking out & Y-cluster sticking out backward etc., since power supplies can be put under that..)
- Printsize roughly 200x200x130
- Model is easy scalable
- The extruder & hotend of Orca also fit (plug-n-play with GEN6) on (standard) Mendel.
- Cheap @ mendel-parts.com :P
Orca Electronics
We are also developing new electronics, in short: a very deluxe GEN6 with alot of addons/new features, like standalone printing from SD, multiple heated beds/extruders possible, smart acceleration and a Touchscreen (4,3") and alot more at a very competitive price..
The project is currently named "gen6 ultra" but will change, for now probably "Orca Electronics" ;)
But then newcomers will think the "Orca Electronics" are specific to the machine, and won't work with a Prusa, 1X2,
or This Week's Sexy Post-Prusa Mendel. :(
--Sebastien Bailard 20:49, 18 May 2011 (UTC)
Current naming status:
Orca Electronics aka: GEN6 Ultra / GEN6++ / Camiel's 2nd Generation Electronics / Mendel-Parts electronics v2 / naming still unsure etc
NOTE: current Orca v0.2 uses standard GEN6 and doesn't come with the touchscreen electronics yet..
Orca will be sold with the new touchscreen electronics probably earliest end of September..
How to get Orca
For Orca assembled:
For Orca complete kits:
For Orca parts:
How to build Orca
The four stages:
- 1. Preparing a build
- 2. Mechanical construction
- 3. Wiring & electronics
- 4. Firmware & print software
Preparing
BOM
Bill of Materials / What do I need for this Orca v0.2?
- Printed Plastics
- Smooth Rod
- Threaded Rod
- Bolts, nuts & washers
- Bearings
- Belts
- Electronics & opto's
- Extruder parts
- Heated bed parts
- Motors
- Thick & thin sheet
- Power supplies
(? silicon sealant/cooling fan/cooling paste/kapton ?)
Printed Plastics
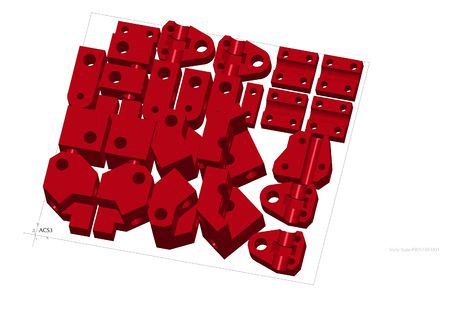
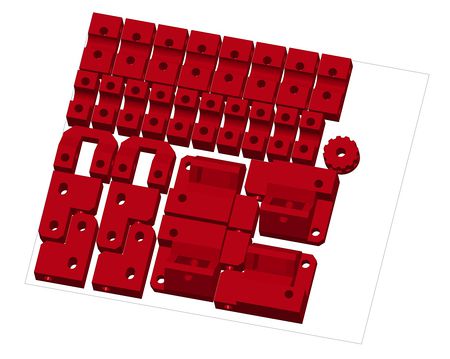
- 1x Printbed sm01 (STL can be found here: Orca v0.2 printbed01 )
- 1x Printbed sm02 (STL can be found here: Orca v0.2 printbed02 ))
- 1x Printbed sm03 (STL can be found here: Orca v0.2 printbed03 ))
This is a smaller then mendel printbed size bed, this was/is temporary/beta but all three together should be all plastics (some parts are not 100% necessary, but this is all inclusive version, also including our new Orca extruder)
Until we have sorted all the correct parts/assy names etc, this makes it possible for users to start already printing Orca plastics, without mixing up names with near future part file releases.
(oops.. I forgot to add the belt pullies, (since i print those FDM), but three nophead (standard Mendel) belt pullies are used also)
Smooth Rod
- 4x 330mm, 8mm diameter
- 2x 400mm, 8mm diameter
tolerances: +/- 5mm is probably ok..
Threaded Rod
- 6x 330mm, M8
- 5x 400mm, M8
- 2x 500mm, M8
- 2x 265mm, M8
tolerances: +/- 5mm is probably ok..
Bolts, nuts & washers
- this list is currently being finalised..
Bearings
- 38x 624ZZ (40pc needed with geared Orca extruder)
- 4x 608ZZ
Belts
- 3x 840mm T5 synchroflex timing belt - 5mm width
Electronics & opto's
- 1x Mendel-Parts GEN6 Electronics incl opto's (others should work too, however we cant give support on those (yet).
(this comes with the three opto's on cables and with wiring for the extruder (with a molex connector on one side, ferrules are used on the other side)
- 1x USB A-B cable (recommended: 3mtr length (for convenience))
Extruder parts
- 1x Mendel-Parts hotend v9 for 1.75mm with .35mm nozzle (recommended, but others should work too with some fitting/adapting probably)
- 1x Mendel-parts hotend v9 heaterblock kit (will be including thermistor, heat resistor, cooling fan (+ extension cabling)
- 1x hightemp heatshrink 2.4mm around 20cm (for use with ferrules, see below)
- 2x ferrule of 0.5mm (connecting G550 thermistor)
- 4x ferrule of 1.0mm (connecting heat resistor & extending hotend v9 cooling fan cables)
- 1x Thermistor G550 (recommended for GEN6)
- 1x Heat Resistor
- Silicone sealant upto 300C (longterm 300C...) (for placing thermistor and heat resistor in heater block)
- Kapton tape 13mm (for the insulation of thermistor G550 legs)
- 4x springs for extruder
- cooling fan 40x40mm
- M4 brass insert piece with centerhole drilled out to 5.0/5.1mm for direct drive extruder (don't forget to remove grub-screw while drilling if you upgrade an old one).
Or alternatively with old version / Orca geared extruder, a standard m4 insert piece is used with M4 thread
(in near future we will have an improved version and also in different materials etc.)
Heated bed parts
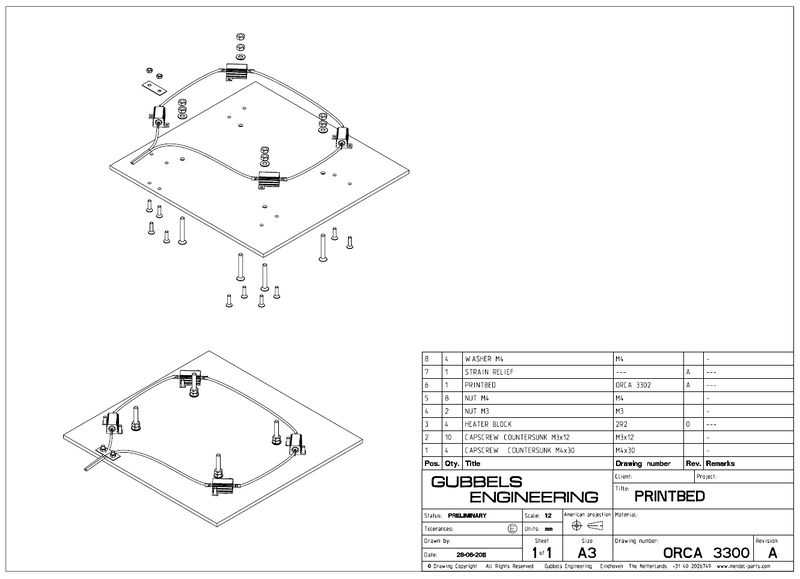
- 4x 1.5 Ohm heater block is recommended for Orca 4mm printbed, ideal with a 90W 12-22V powersupply, 12V=53C, 14v=60C .. 22V = 110C
- 4x printbed springs for orca 26Lx11
- 1x cabling for in between heater blocks, around 50cm long at least 0.75mm
- 1x PTFE sheet for use as strain relief (and optional under the springs)
optionally:
- 1x Cooling paste upto 150C (can be used in between printbed and heater blocks for better heat transfer, however I have serious doubts in how necessary this is..)
Motors
- 4x NEMA17 motors are needed for an Orca (preferable with 80cm cables), for the Orca extruder without gearing (latest version) high torque motors are necessary (and probably raising the potentiometer on the electronics too..)
All motor pullies now have grub-screws, but we still recommend to file a small flat side on the motorshaft, dont forget to use tape to protect the motor or use clay around the shaft.
(I use wide insulation tape with a hole in it that fits the motor shaft tightly then there is a good seal and no metal swarf are drawn in the motor (its magnetic..))
Power supplies
- 1x min. 60W 12V power supply for GEN6 electronics
- 1x min. 60W 12-18V power supply for PLA heated bed or min. 90W 12-22V for PLA & ABS heated bed
We use two separate powersupplies currently with our printers, it's more flexible and a good desktop adapter / powersupply (not ATX etc) with >150W is pretty expensive.
The heated bed powersupply sets the bed temperature by voltage currently to keep things simple..
If the default Orca (4x 1.5 Ohm) heater blocks are used approx.: 12V=54C / 14V = 61C / 22V = 110C etc.
Thick & thin sheet
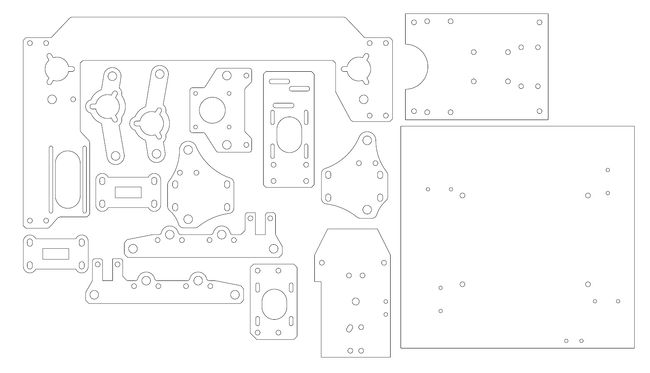
Orca v0.2 Thick sheet
- 3mm Aluminium (4pc - total area needed roughly: 80x80mm)
- 4x ORCA_2102_BEARING_SUPPORT_PLATE
- 4mm Aluminium (15pc - total area needed roughly: 300x550mm)
- 1x ORCA_2001_Z_FLOOR
- 2x ORCA_2101_Z-SUPPORT-PLATE
- 2x ORCA_3104_YZ_DRIVE_PLATE
- 2x ORCA_3105_YZ-SIDE-PLATE
- 2x ORCA_3107_Y_FRAME_ENDPLATE
- 1x ORCA_3111_Y_MOTOR_PLATE
- 1x ORCA_3201_Y_FROG
- 1x ORCA_3301_PRINTBED
- 1x ORCA_4002_X-MOTOR-PLATE
- 1x ORCA_5001_EXTRUDER_BASE_PLATE
- 1x ORCA_5002_EXTRUDER_MOTOR_PLATE
- 6mm POM (1pc - total area needed roughly: 94x365mm)
- 1x ORCA_6001_MAINBOARD
You can also print most of them Orca_alternative_build#Thick_sheet
Orca v0.2 Thin sheet
- 1mm Aluminium
- 3x optoflag (same as mendel v2, but they probably need to be cut shorter)
notes:
The circuit board holder also adds a bit of extra stiffness for x-direction of frame, however I've also printed without one..
Aluminium is strong & lightweight and a long-lasting material, however if you are one of those "wood-freaks", it should also work in wood..
maybe a little strengthening/adapting is necessary but I don't see big issues there.
Required Tools
You will need a "standard" toolbox to build an Orca. That includes, but is not limited to:
- Metric allen key / hex wrench set - (2,5mm = M3 (and countersunk M4 bolts) / 3mm = M4)
- (Combination) Wrench set - (5,5mm = M3 & 7mm = M4 & 10mm = M6 & 13mm = M8)
- Dikes/needle-nose pliers/small vice grips.
- Measuring device, preferably a set of callipers or a decent ruler
- Scissors
- Wire stripper
- Small files &/or a Dremel
- Drill & common bit sizes
- Countersunk drill (we will probably pre-countersunk Orca v0.2 thick sheet, however this is unsure yet..)
- side cutters
- Multimeter for checking powersupply connection, plus/minus
- Soldering iron and associated consumables (solder, sponge, wick, etc) for the heated bed.
Mendel-Parts.com GEN6 Electronics & opto's & motors are plug-n-play out of the box, no soldering required for those.
Mechanical construction
Overview
General assembly info/tips. Explanation of Orca axes, concept etc
CAD Files
STP/IGES/STL/DXF/PDF/JPG etc
see STL-printbeds for now for first STL files
| FILE | DESCRIPTION | LINK |
|---|---|---|
| Printbed assy orca sm01 | all parts 1/3 | .stl (save as) |
| Printbed assy orca sm02 | all parts 2/3 | .stl (save as) |
| Printbed assy orca sm03 | all parts 3/3 | .stl (save as) |
eDrawings & PDF sheets
eDrawings
PDF sheets
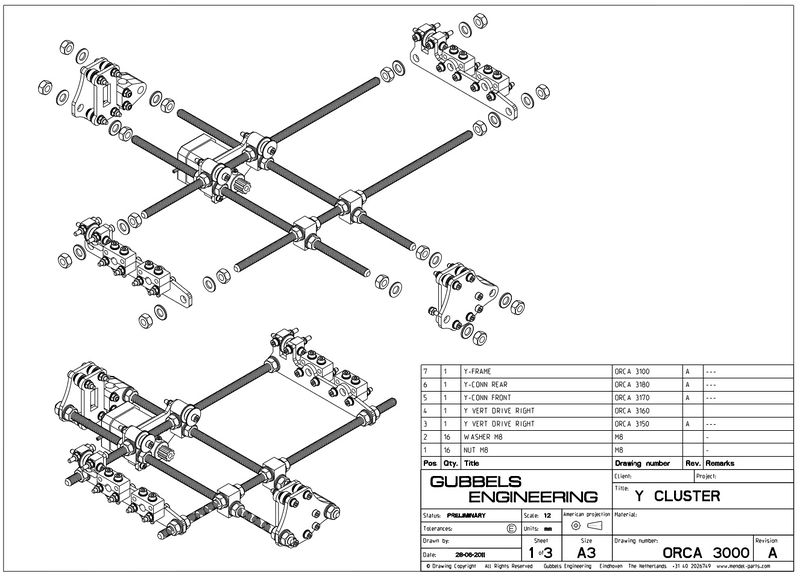
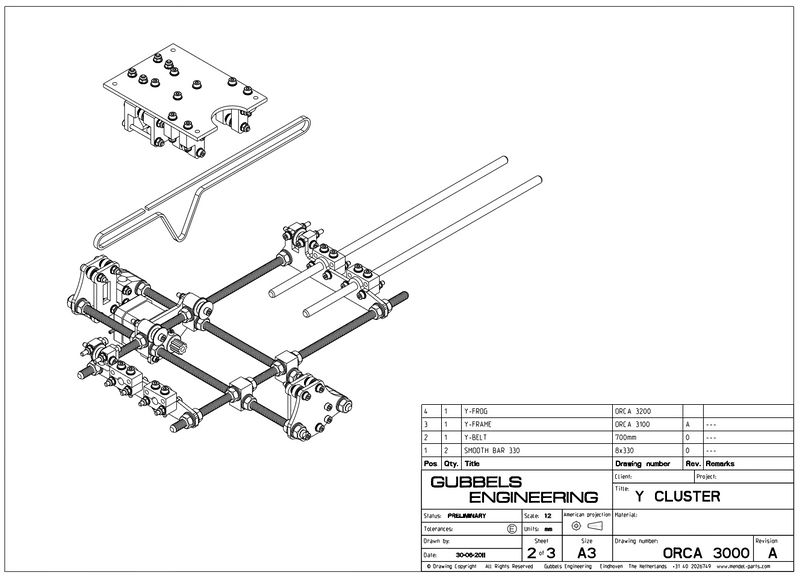
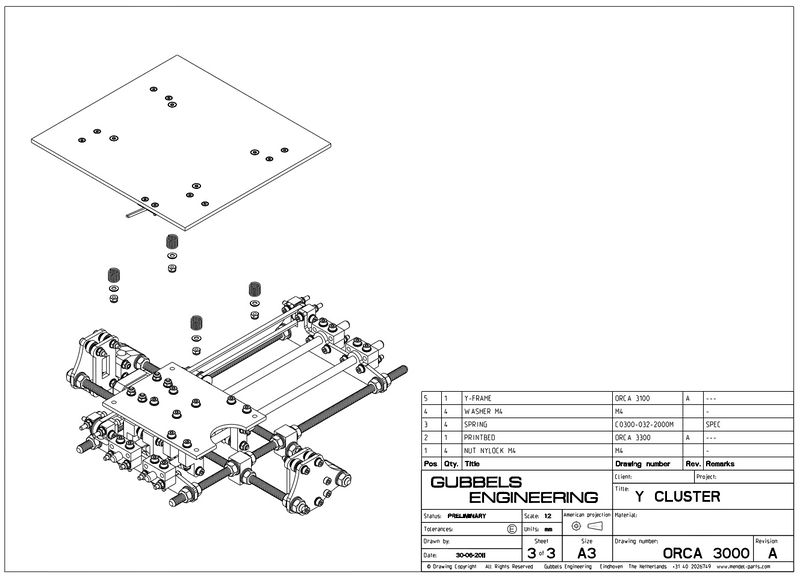
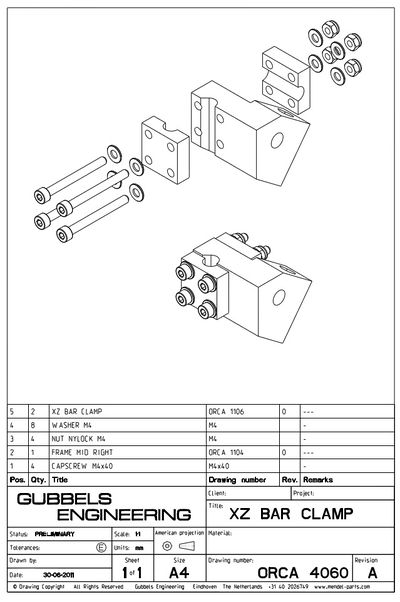
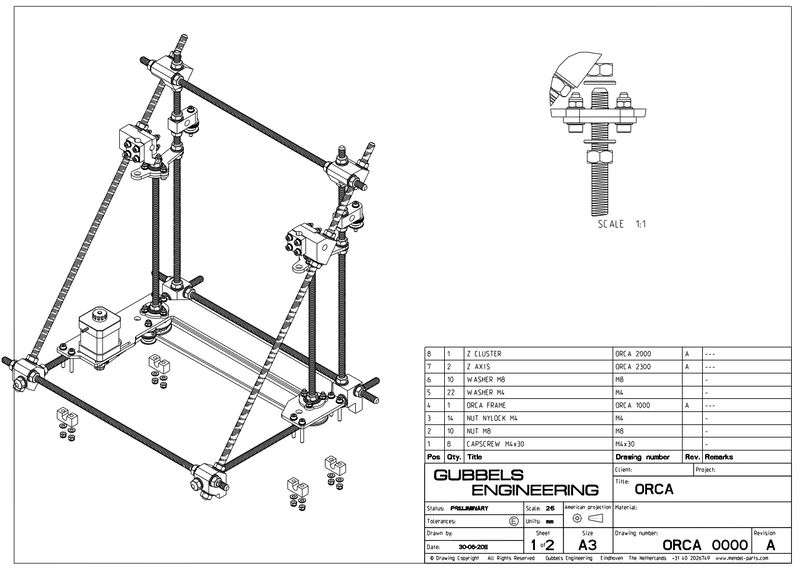
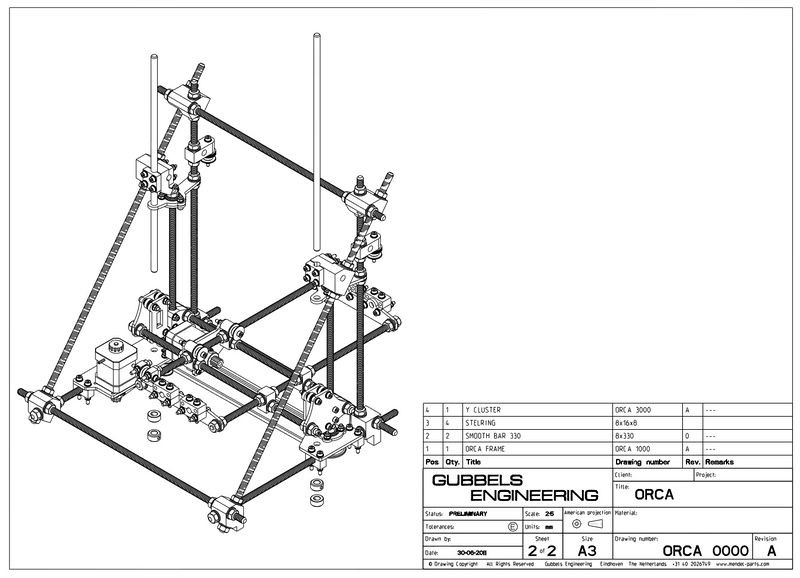
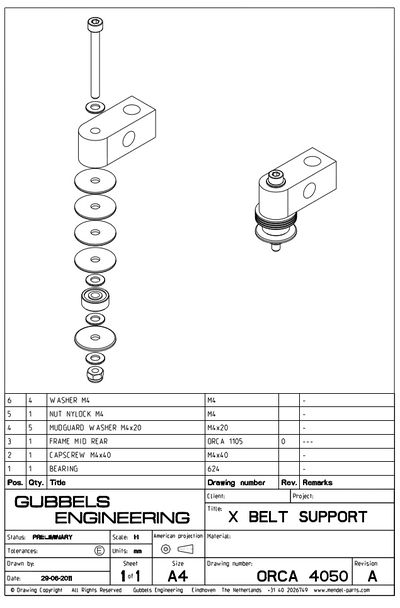
We are currently working on a first version of a (one-day-to-be-)professional assembly manual with exploded views/BOM's etc, just like an Ikea manual.. first version will be released end June/early July.
- dir for all current manual PDF's (under construction, use at your own risk currently)
-- NOTE: THESE DRAWINGS CAN CONTAIN (SMALL) ERRORS AT THE MOMENT

we will post comments this weekend on what is incorrect

and these drawings are far from finished (and more will be added)

however that will take a few more weeks probably

well better something then nothing..
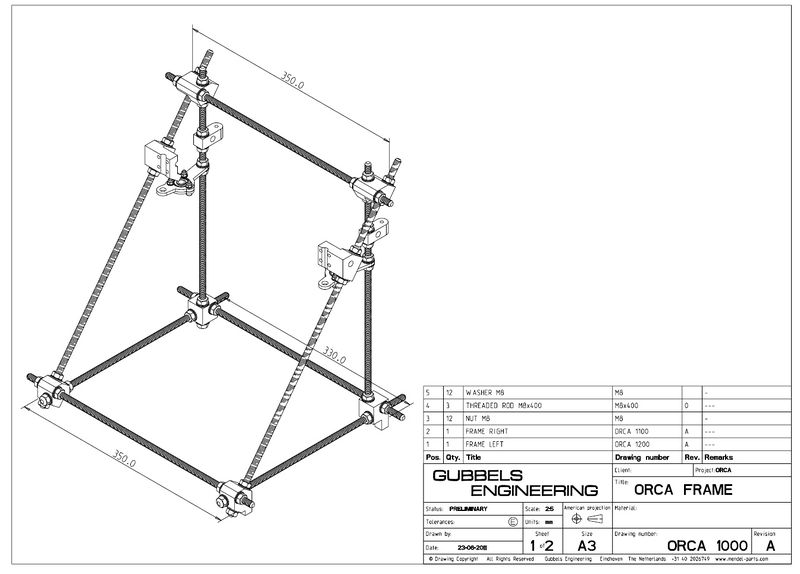
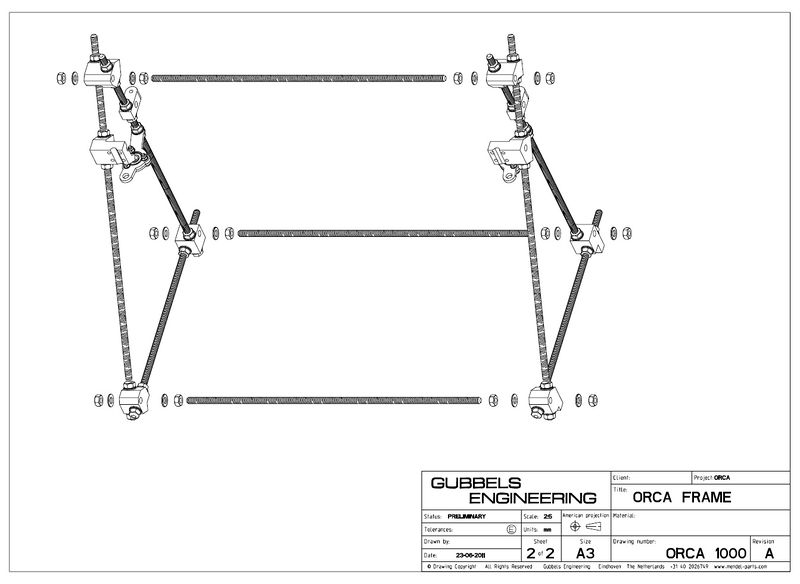
Step 1: Frame assembly
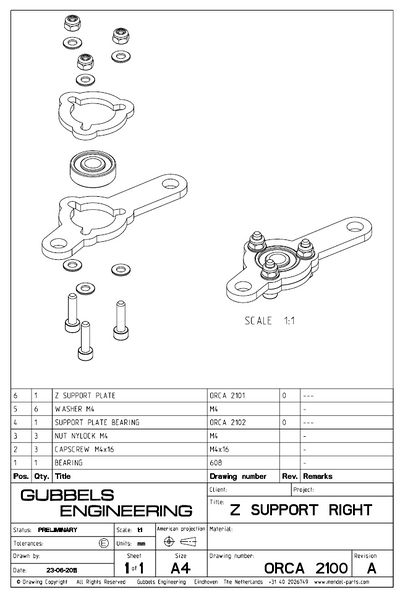
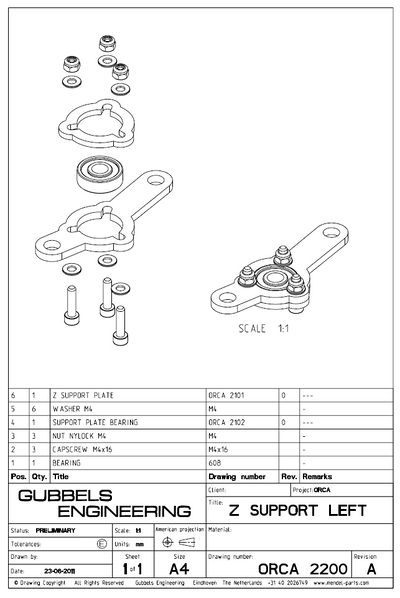
Z support right
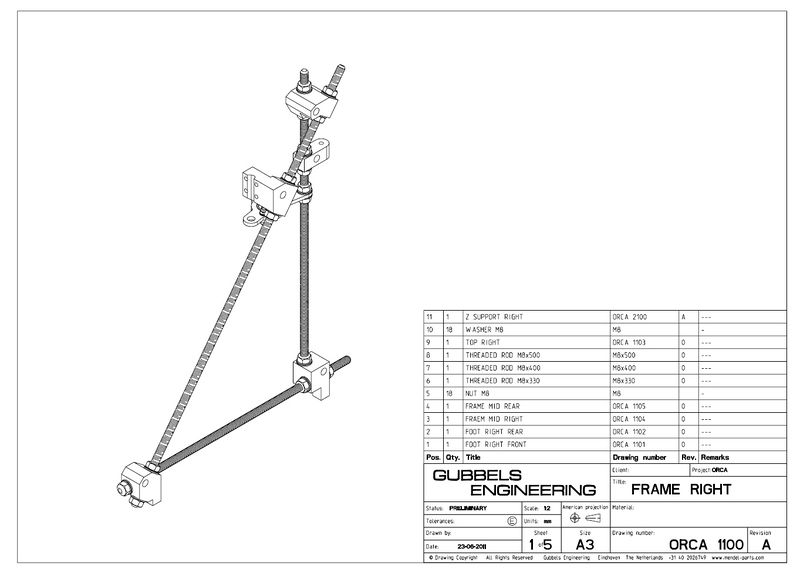
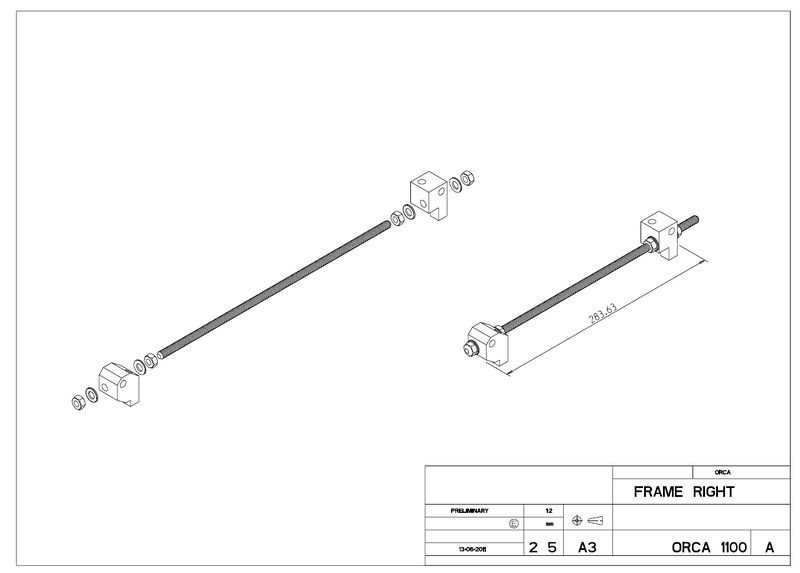
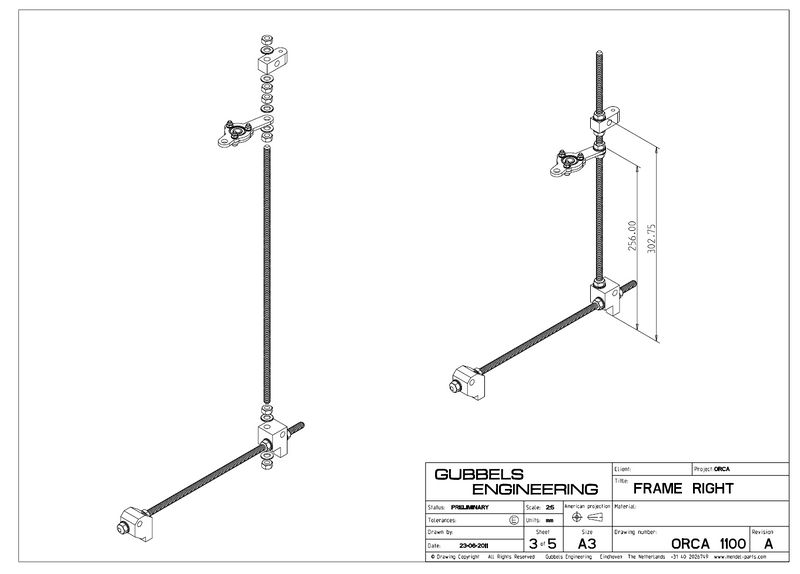
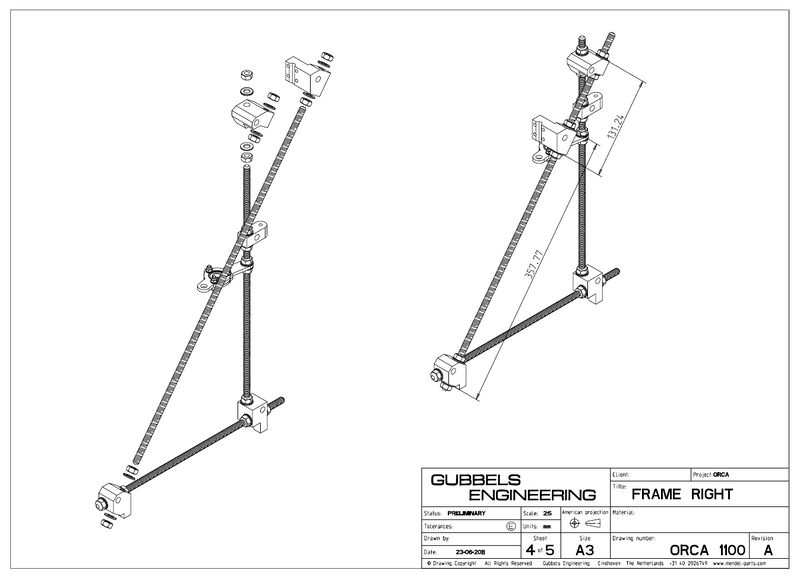
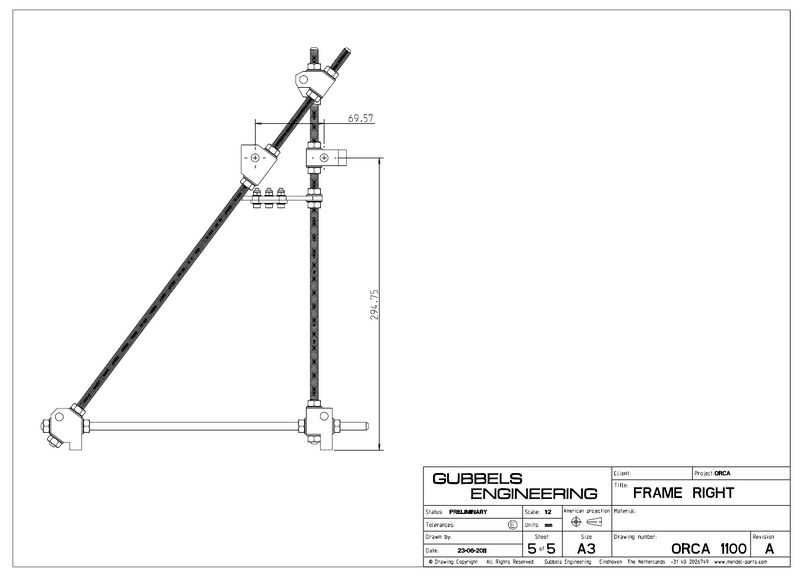
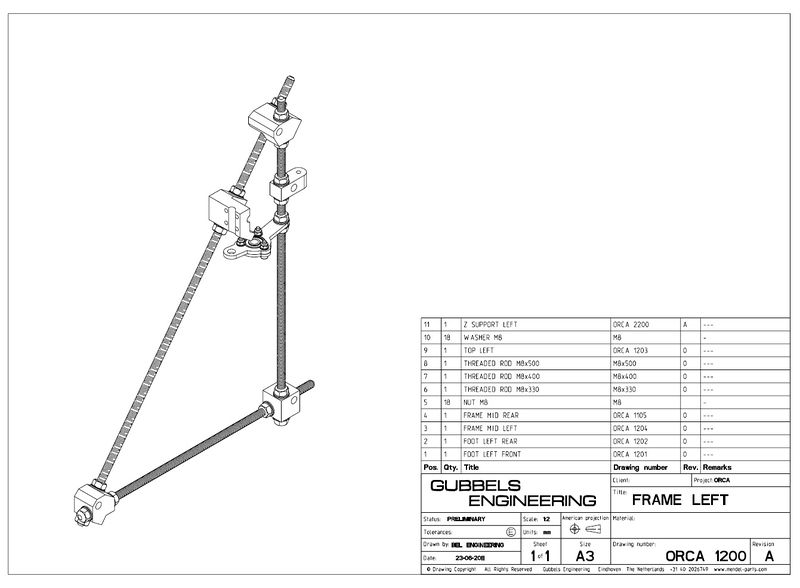
Frame right
Z support left
Frame left
Frame
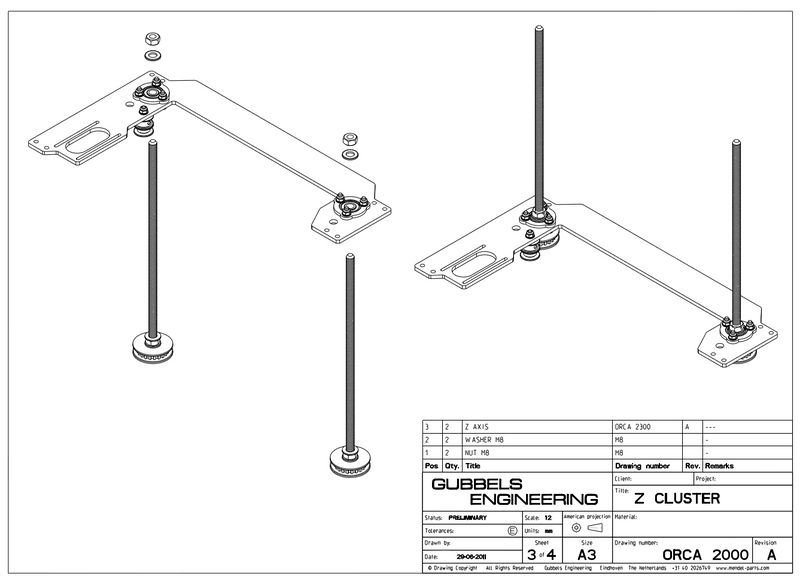
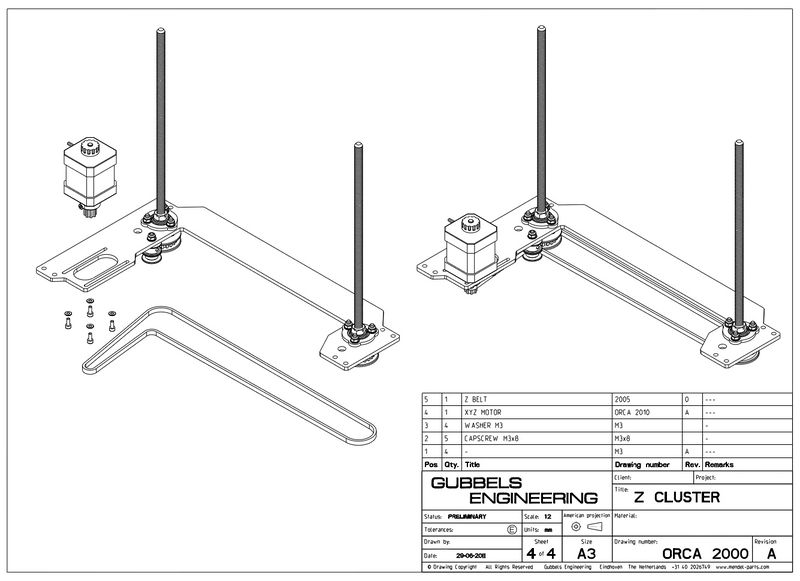
Step 2: Z-cluster assembly
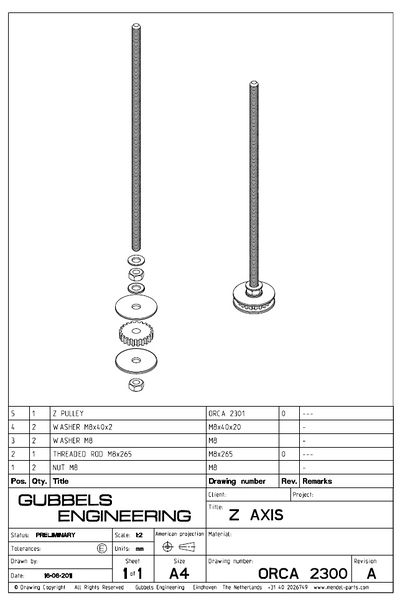
Z Axis
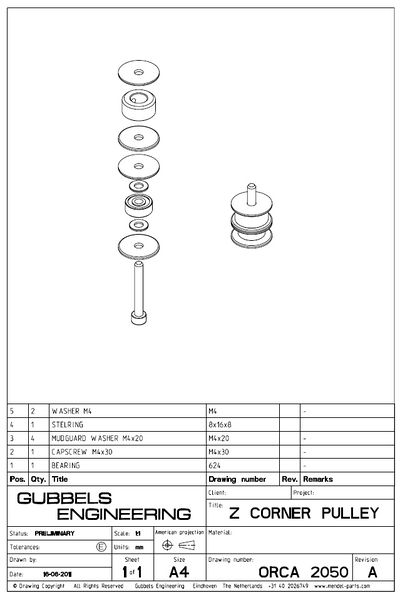
Z corner pulley
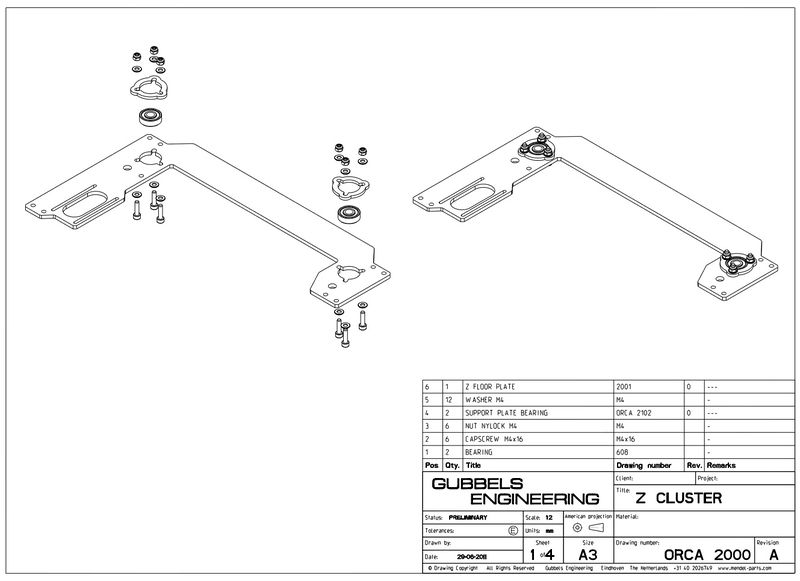
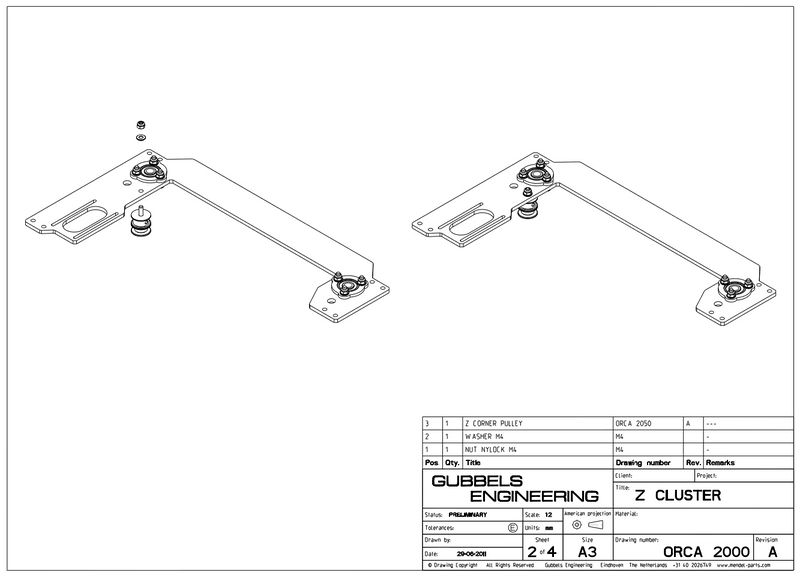
Z cluster
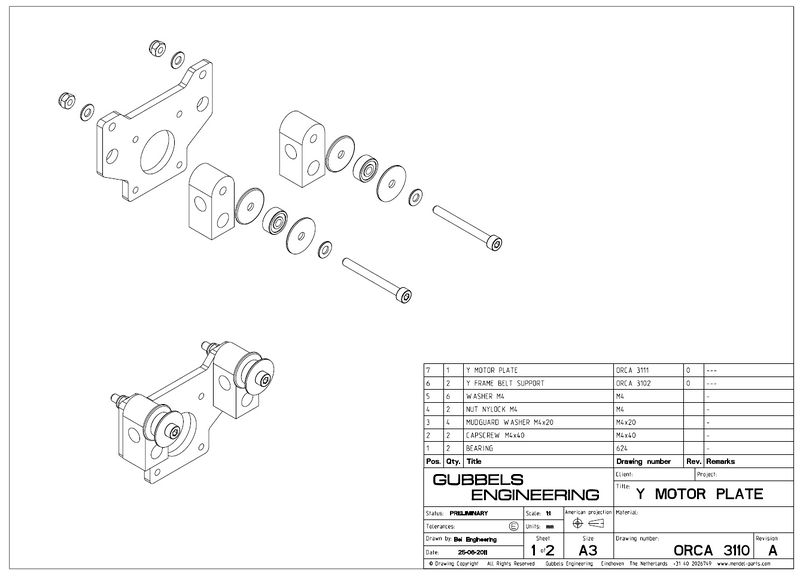
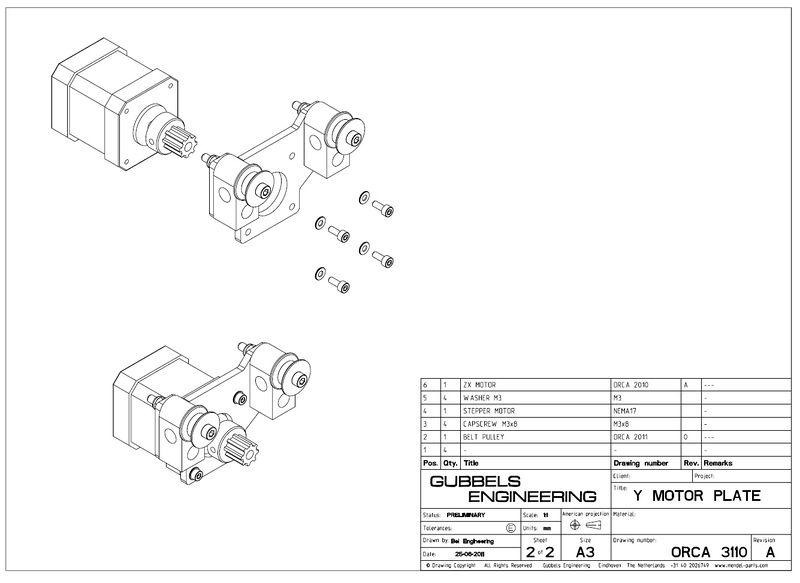
Step 3: Y-cluster assembly
Y motor plate
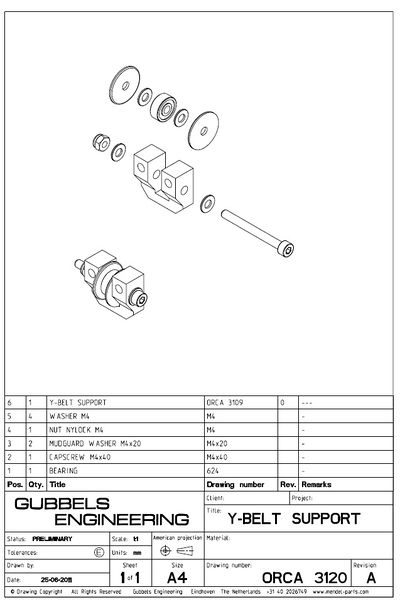
Y belt support
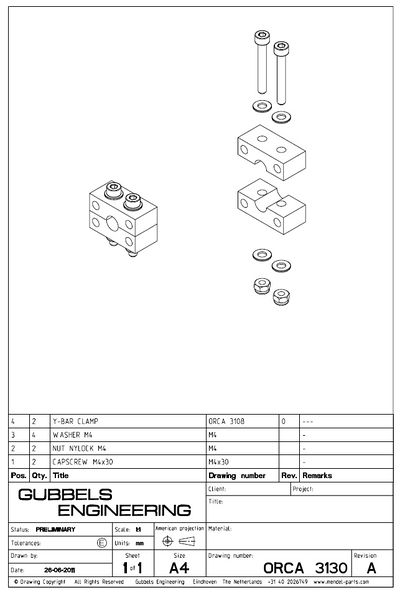
Y bar clamp
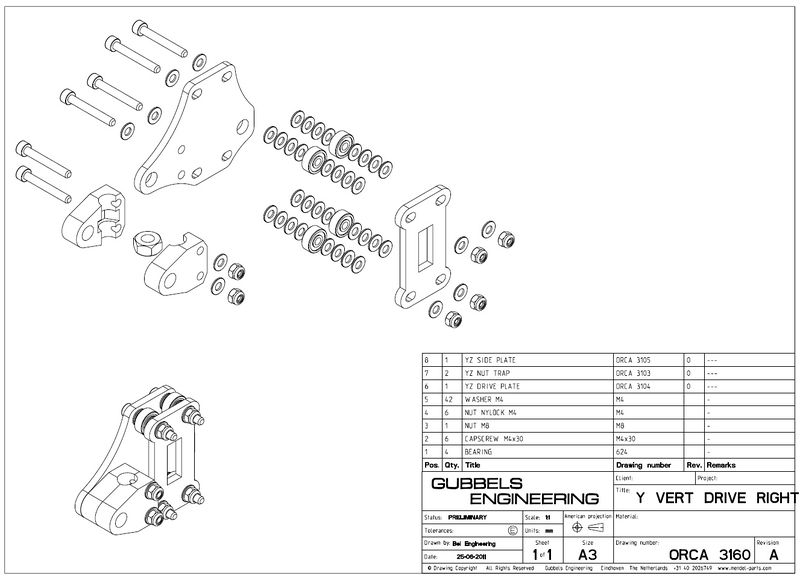
Y vert drive right
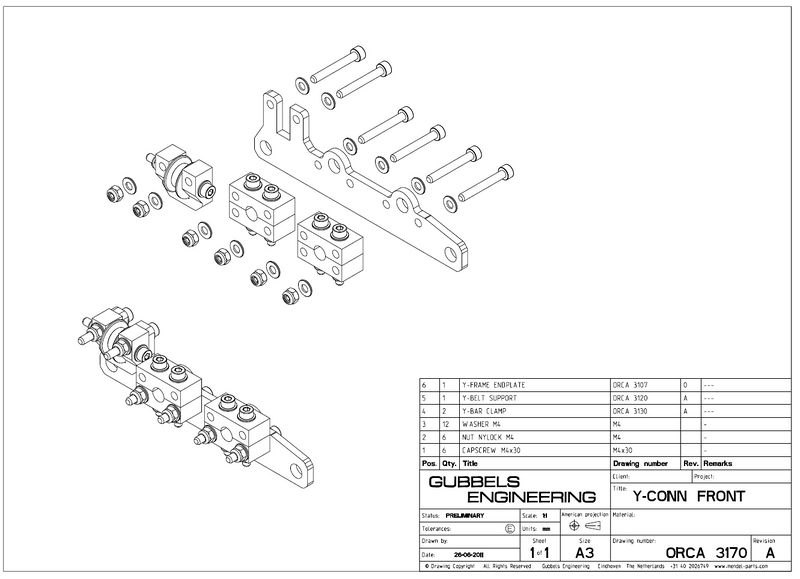
Y conn front
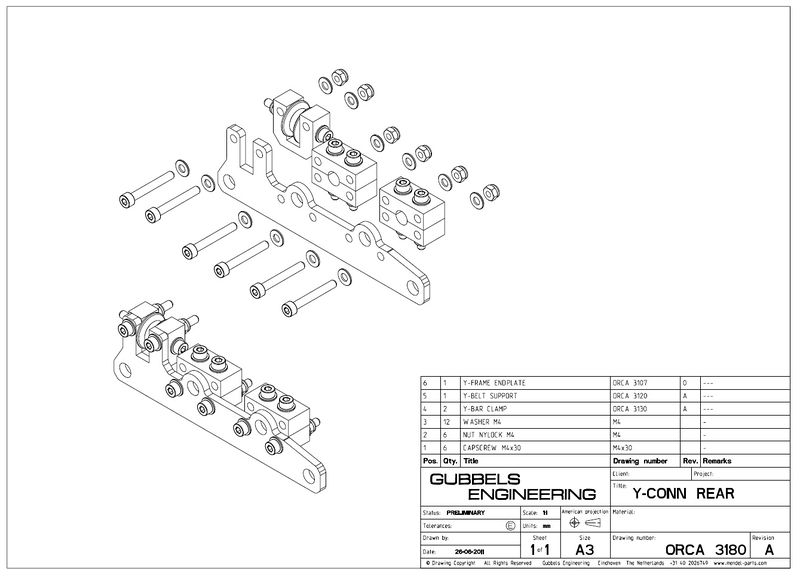
Y conn rear
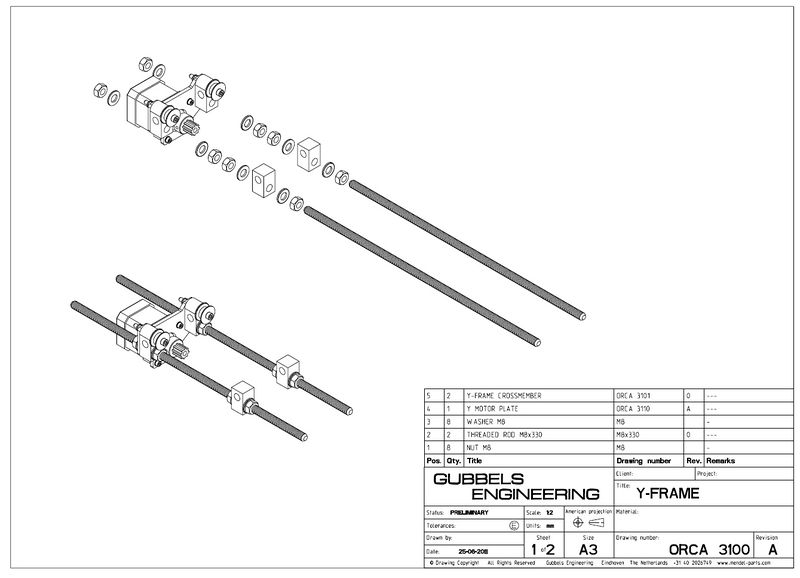
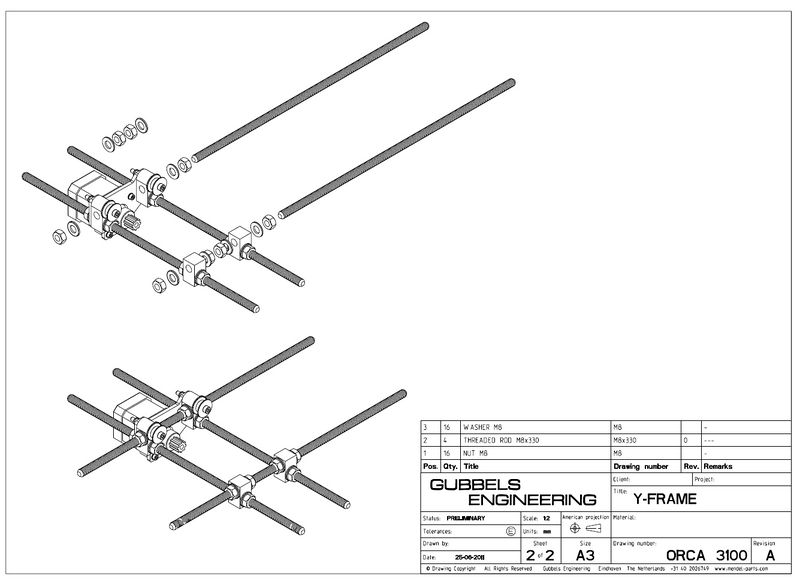
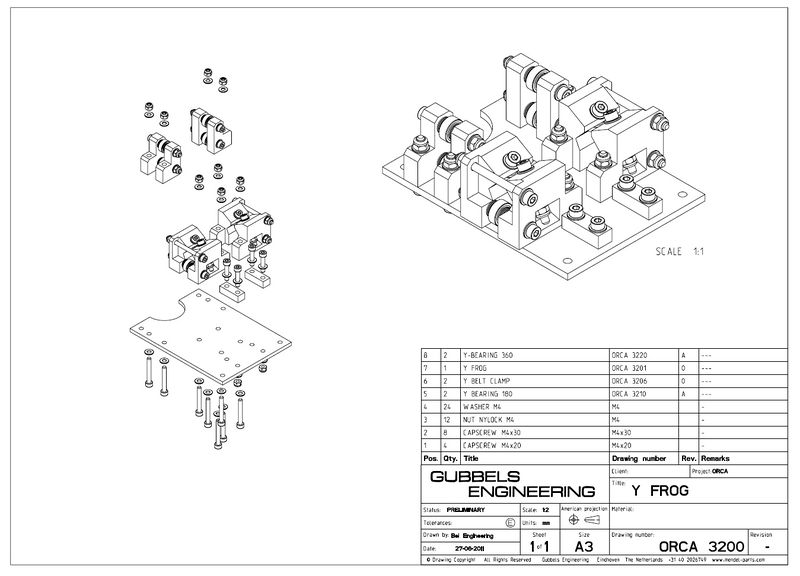
Y Frame
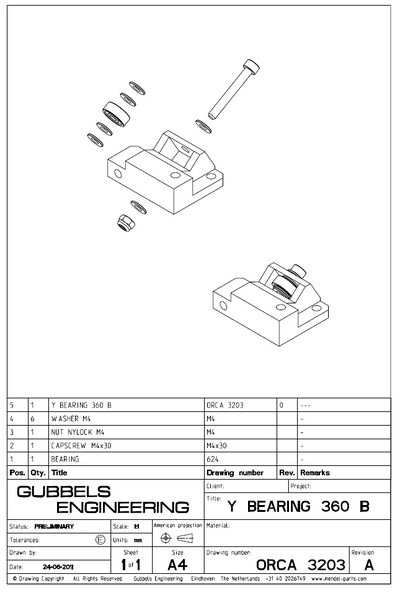
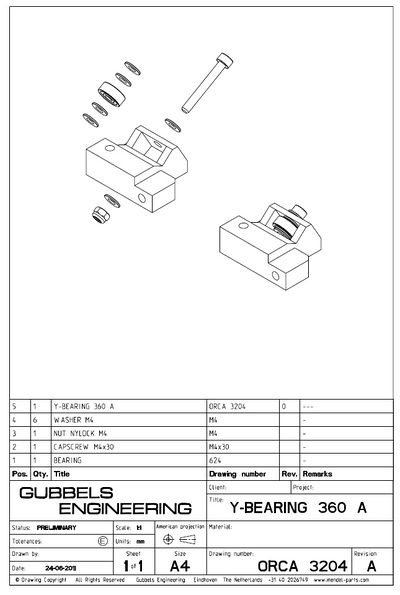
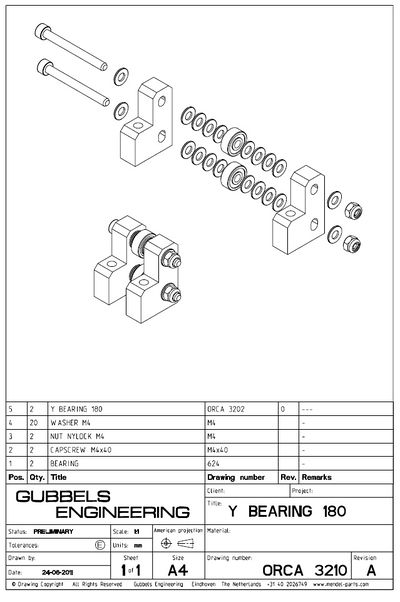
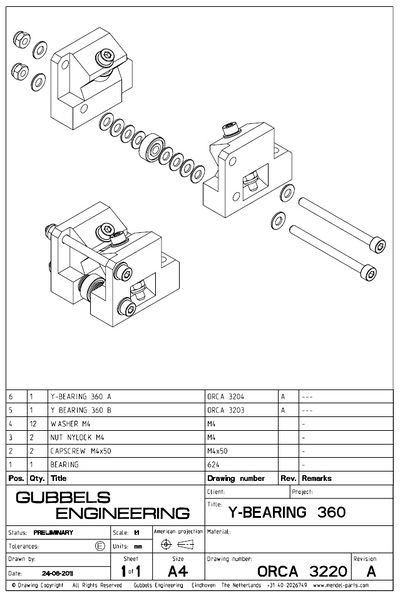
Y bearing 180 & 360
Y cluster
Step 4: Placing YZ-cluster
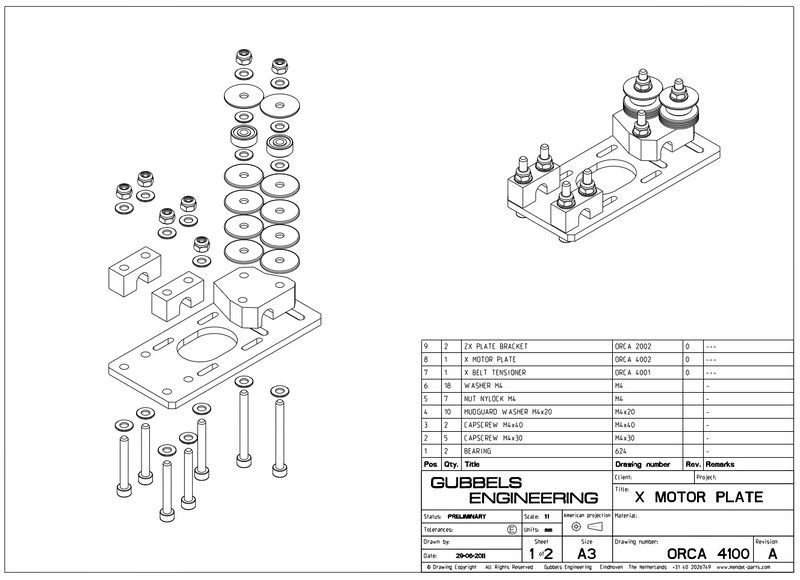
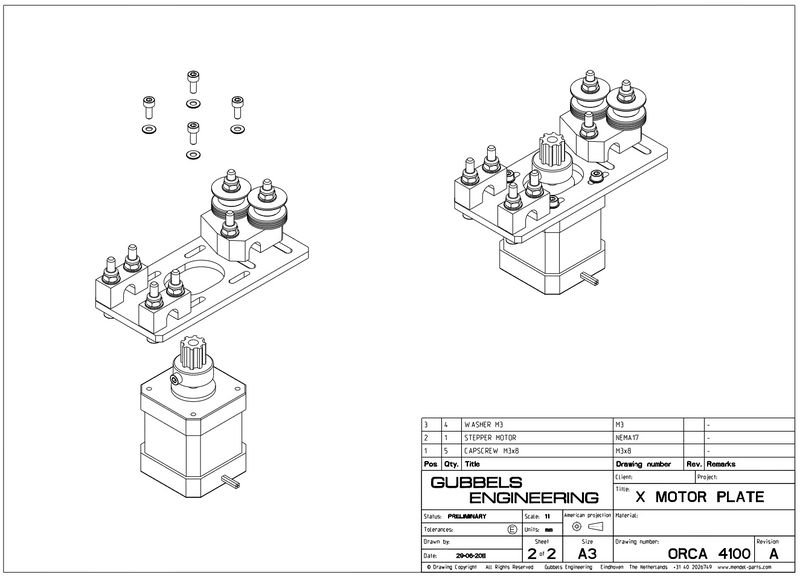
Step 5: X-cluster assembly
Step 6: Extruder & hotend assembly
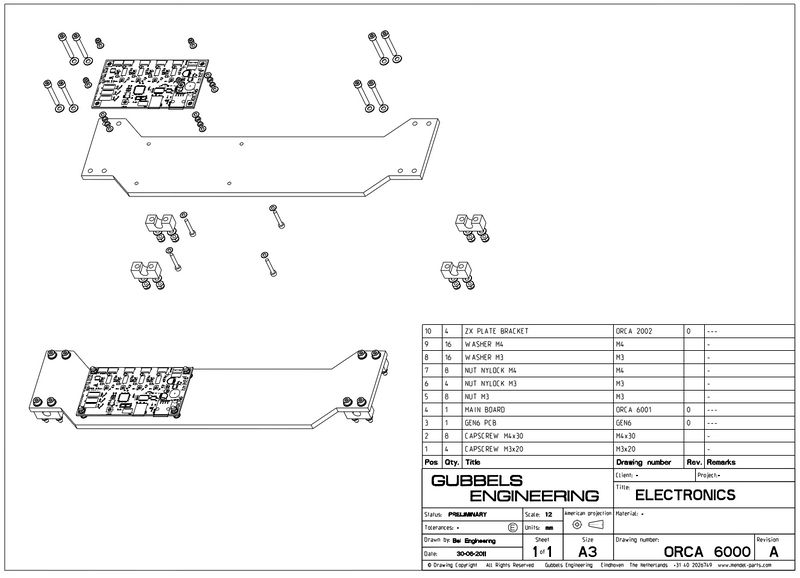
Step 7: Electronics assembly
//dont forget optoflags...
//option to build with some plastics less and with cable ties & "stelringen" instead)
Wiring & Electronics
Step 1: Fitting Electronics
For now see: GEN6 reprap wiki
Step 2: Fitting Opto's
- Opto's Can be placed on either end of the axis, but by default they are on the low end of the axes.
- This means (if assembled according the the instructions) if you are facing the front of the machine, zero should be to the left(X), away(Y), and all the way up till the extruder is touching the plate, without pushing it down. (Z)
- The direction of homing and location of endstops can be changed via the Configuration.h file during compilation.
Step 3: Powersupplies
Step 4: Cable ties
Step 5: (optional) Cooling fan
Firmware & print software
Firmware software
In order to properly use your Orca (depending on your controller) you must update to the latest firmware.
Build Firmware
- Download latest Arduino IDE from here
- Download latest Sanguino hardware interfaces from here
- Download latest Firmware Sources from here or better yet here
- Following the instructions in the README, open the Marlin.pde file from the Arduino IDE
- Build
- If you get complaints about "__vector_20" and/or "__vector_28" delete the files "wiring.c" and "wiring_serial.c" from the source directory and restart the program.
- Edit the firmware's Configuration.h (for instance if your endstops are in a different location, using different motors, thermistor, extruder etc.) and upload new firmware to GEN6 by connecting to the appropriate COM port and pressing upload.
Print software
Repsnapper v352
- Download & Installation
- Using the print software
- Test printer
- Download SFACT
- Alternatively you can use PyPy to run SFACT, depending on your level of technical experience, you can build tkinter (Skeinforge GUI, easy under linux, more complicated under Windows), or use it from command line, using normal Python to change the setting. It substantially speeds up skeining 2-3x
- Extract all the files into the directory called skeinforge (read README)
Note: Pronterface requires you have python and pyserial installed, also it is advisable you update your firmware when you first get your electronics.
How to use Orca
General usage
- Safety
- powersupplies
- emergency button
- manual Z adjust
- Transportation
Software setup
- Advanced printing (+skeinforge)
- finetuning firmware
Maintenance
- Cleaning
- Lubrication
- The Z-Axis Threaded Rods should be greased to prevent seizing, it shouldn't be necessary elsewhere due to the use of ball bearings.
Problem solving
- Extruder
- Filament
- Depending on the type of filament, even PLA, there are variations in the heating temperature. For instance 4043D PLA requires a temperature of at least 210C to properly extrude properly, but can be as low as 185C without problems (check your materials datasheet!). If you hear the extruder stepper skipping steps, raise the temperature.
- Heated bed
- Electronics
- Your Motor controllers may be under-powered (they should be at 2.0V to 2.8V, with higher voltages you may need a fan to cool the stepper drivers)so you need to adjust the trim-pots below the heatsinks Clockwise to increase the power, using the small gold pads marked "TP1", "TP2", "TP3", "TP4" and any of the gold pads in the corners to measure voltage. If you fail to calibrate them correctly your steppers may stall (skip) at certain points, ruining prints. There will be a noticable "jerk" in the motors coupled by with a loud noise, along with the alignment being messed up.
- Power
- USB/PC
- Frame
- If your machine rocks, check to see if the feet are firmly placed, next check the table as this could amplify a small, normally unnoticable problems. If your feet are indeed out of alignment, find adjust them by moving the front arm's diagnal supports up or down until they are very firm and very level with the table.
- X-cluster
- Make sure your belts are tight
- With 4 wahser on the pulley route, the part of the pulley which is under tension is not fully on the motor shaft, and can broke. To simply address that, just remove 3 washers and pinch the belt a little upper on the x-carriage. While you're at it, you can replace the M4x40 by M4x30, and with the washers+bearing on the head side of the bolt rather than on the nut side (keep everything together).
- Y-cluster
- Check the levelness of your table to any flat surface who is also level, make adjustments by first ensuring that the screw have the same number of threads in the nuts (to ensure equal flatness) next, it is tilted front to back, adjust the position of the bearing on the Z smooth rod until it is level.
- If these are equal also make sure the Z screw nuts are also equal.
- If these are equal than you may need to adjust the mechanical assembly of the Y by moving the nuts around etc.
- Make sure your belts are tight
- Check the levelness of your table to any flat surface who is also level, make adjustments by first ensuring that the screw have the same number of threads in the nuts (to ensure equal flatness) next, it is tilted front to back, adjust the position of the bearing on the Z smooth rod until it is level.
- Z-cluster
- If your Z axis stalls, grease it, also make sure the rods are aligned.
Images
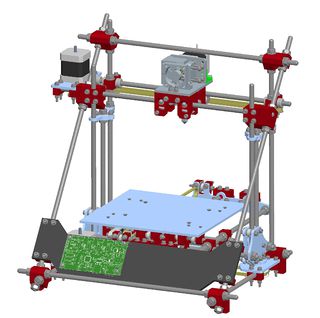
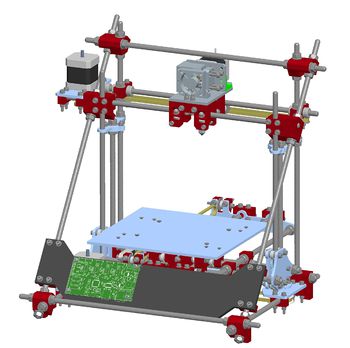
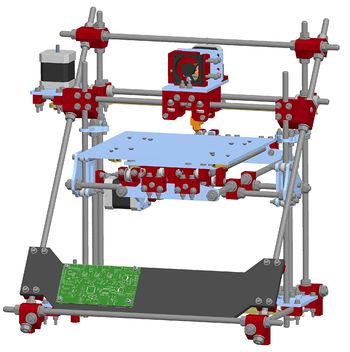
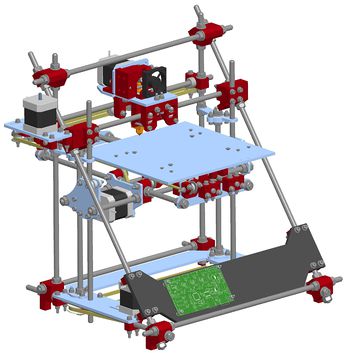
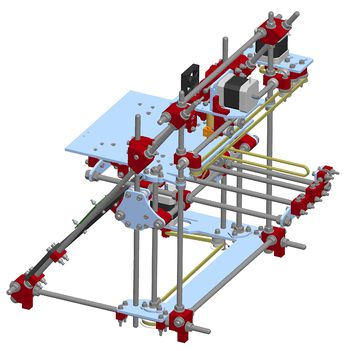
3D CAD screendumps
High-res photos
coming hopefully this weekend (if I (or others here) find a bit of time..
Videos
- <videoflash type="youtube">VKCQ5vk_2fo</videoflash>
Orca nr 4 printing Orca nr 5 (18-5-2011)
more videos can be found in our youtube channel:
more videos on youtube
Status
- Version 0.2, May 2011 a prototype serie of 12pc has been made/build and in June production start of first 100pc v0.2 after some delay, because of last minute new extruder and new hotend v9 for Orca (whole extruder and hotend also fit Mendel plug n play if you have Gen6..)
- Version 0.1, April 21, 2011, is the first prototype
Version 0.2
- more info soon
Version 0.1
- Some weekend in January, 2011 : The first basic concept has been drawn
- Some weekend in April, 2011: After on hold for some months, I've finished first files, printing the parts, building it.. and being amazed about it, even without any thick sheet (yet) its very solid... and it will be probably one printbed to print (excl extruder). So suddenly I start to realise that this printer is better then anything around atm (for the given selling price, since it will be cheap) and still has very high stifness and the shortest belts I've seen around (700/840/840mm) For those wo dont know, price of a 1380mm belt is around 2x the price of a 840mm and also long belts give alot more issues... Also the parts are very good printable/symmetric/etc and we are designing it all to have standard size bolts etc.. (alot of people dont know, but for example m4x35 is more expensive then m4x40.. so we focused also on using only a few standard sizes widely avaible etc.
(finally my many years of being a 3D CAD Engineer at a major product development office comes in use for the RepRap world...)
Calendar
PRESENT
July 2011
- early July - first Orca manual (exploded views/BOM's in pdf) is planned for early July
- early July - Thick sheet files will be released (PDF/DXF)
- early July - The single printed part & assembly files of orca v0.2 will be released (STL/STEP/IGES)
- 11-24 July - Orca build party @ Barcelona, (Camiel might be there himself a few days)
- mid July - first Orca electronics (basic) prototype testing is scheduled for mid July
- end July - production should be expanded with another 3 or more Orca's
so plan is to have in total for our production line by the end of July: 6-8 Orca's, 10-11 Mendels & 2 UP's, getting close to 20 printers :)
and another plan is that I (Camiel) will go to Barcelona for few days helping out and Ill go with a van and print new orca's on the road..
That plan (printing on the road) has been in my head for many months, and is prepared already..
Eindhoven (NL) to Barcelona (ES) is around 14hours.. so I should be able to print on each Orca a new Orca set while driving.
And Ill go with probably 3-5 Orca's printing while driving.
"Replicating on the move" or what is the term there..
"Dont drink and drive! Print and fly!" :)
PAST (who cares about that part, this world is going way too fast to look back..)
June 2011
- Orca printbed stl files are online
- first production serie of 100pc of Orca v0.2 thick and thin sheet has arrived
- Three Orca's are in our production line now (beside the Mendels), printing three new Orca sets daily
May 2011:
- first, very successful, Orca workshop held @ mendel-parts
- Orca was exposed on an exhibition @ TAC / Eindhoven, more info/pictures soon
Users
Camiel Gubbels is the lead developer/engineer/tester/supplier for this 3D printer.
Camiel's webshop is: Mendel-Parts.com
He's often (when he has freetime.. so lately rarely) in the IRC channel, if you need to ask a question.
FAQ
Q: Why is this new printer called "Orca"
A: someone in IRC kept misreading my Orsa (project codename) or well maybe on purpose not sure.. (Orsa = bear in Italian, since it looks a bit like a sitting bear (back in January... ), also Orca sounds better in English then Orsa.
