RepRapPro Huxley y axis assembly/es
|
English • العربية • български • català • čeština • Deutsch • Ελληνικά • español • فارسی • français • hrvatski • magyar • italiano • română • 日本語 • 한국어 • lietuvių • Nederlands • norsk • polski • português • русский • Türkçe • українська • 中文(中国大陆) • 中文(台灣) • עברית • azərbaycanca • |
| Introducción | Materiales y herramientas necesarios | Montaje de la estructura | Montaje de Y | Montaje de X | Montaje de Z | Montaje de la base calefactada | Montaje del extrusor |
| Montaje del calentador | Cableado | Puesta en marcha | Imprimiendo | Mantenimiento | Resolución de problemas | Mejoras |
Contents
Objetivo
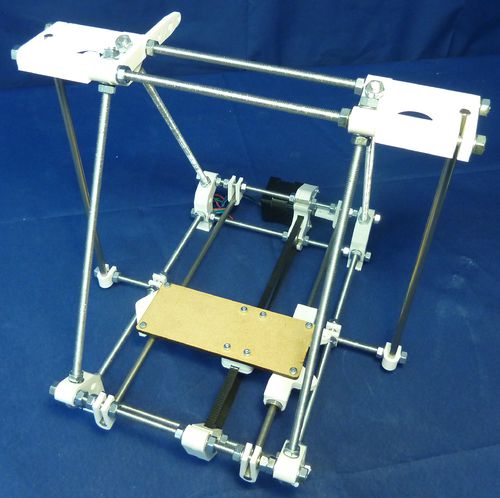
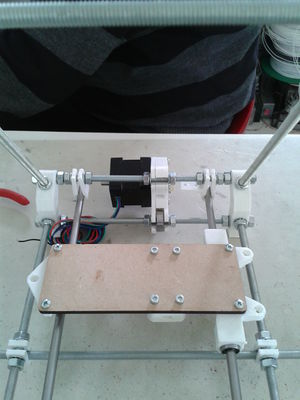
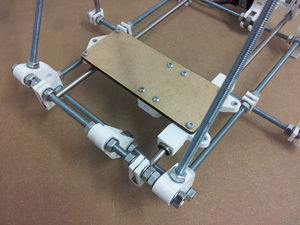
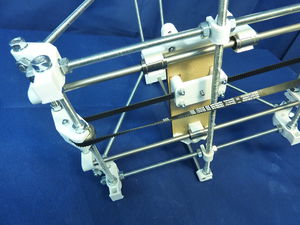
Al final de este paso, tu impresora debería tener esta pinta:
Herramientas
Necesitarás estas herramientas:
- Destornillador philips (de estrella)
- Llave inglesa
- Llave allen de 1.5mm
Paso 1: Montaje de la plataforma deslizante
ATENCIÓN: este paso se encuentra en desarrollo. Contrasta este texto con la versión en inglés antes de ponerte a montar.
En esta versión de la impresora, se han utilizado dos "huxley-bearing-holder-fixed" en lugar de un fixed y un float. Da mayor firmeza a la pieza pero requiere una mejor alineación de las varillas-guía de la base. Además, se ha tensado la correa a mano (varios modelos de belt-clamp con tensionador podrían servirte con modificaciones mínimas).
| Pieza | Cantidad | 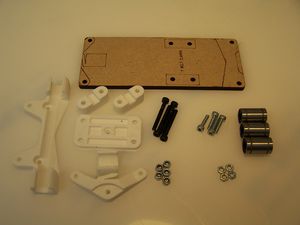
|
|
2 | |
|
2 | |
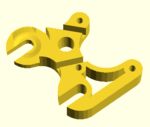
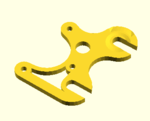
| Lasercut frog | 1 | |
| LM6UU Linear bearings | 4 | |
| M3 x 12 screw | 4 | |
| M3 x 25 screw | 4 | |
| M3 nyloc nuts | 5 | |
| M3 nuts | 4 |
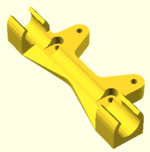
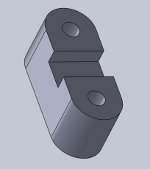
En primer lugar, monta los rodamientos lineales en ambos "huxley-bearing-holder-fixed". Puedes pegarlos con algún adhesivo para evitar que se salgan de su posición. Si son rodamientos impresos, la acetona puede ser el más adecuado.
FIXME: Añadir fotografía
A continuación corta una tabla fina de aproximadamente 7x13cm, esta hará de apoyo para la hotbed. Atornilla los "huxley-bearing-holder-fixed" de forma que queden perfectamente alineados con las varillas-guía de la hotbed. Para ello es recomendable hacer esto con las varillas directamente montadas en la estructura.
FIXME: Añadir fotografía
El siguiente paso es colocar la pieza en las varillas, montar las varillas en la estructura por medio de los barclamp colocados a tal efecto, y verificar que la base desliza con suavidad.
Step 2: Soporte del motor de Y y quía de la correa
| Partes | Cantidad | 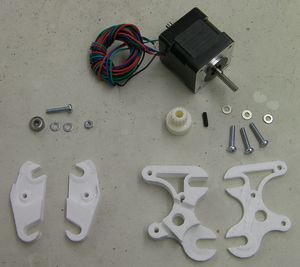
|
|
1 | |

|
1 | |
|
1 | |
|
1 | |
| Rodamiento axial 623 | 1 | |
| Tornillo M3 x 16mm | 4 | |
| Arandela M3 | 5 | |
| Tuerca M3 | 1 | |
| Motor a pasos NEMA 14 | 1 | |
| Tornillo prisionero M3x10mm | 1 | |
| Piñón de 14 dientes | 1 |
Soporte del motor
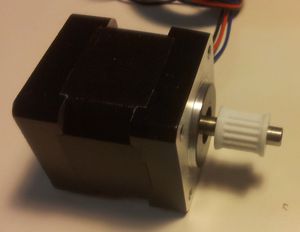
If you have a moulded pulley, screw the set screw into the toothed-belt pulley. Take care not to cross the threads - the plastic is not hard. Screw it in far enough to project into the hole down the middle, then back it off so it is no longer projecting. Blow any displaced pieces of plastic from the central hole. Put the pulley on the motor shaft with its hub outermost, as shown. Use the toothed belt to get it roughly the right distance along the shaft. Align the set screw with the flat on the shaft, and tighten it. Do not over tighten it - the pulley has an internal embedded nut, and over tightening will cause this to fracture the pulley.
If you have a printed pulley push it onto the shaft. It should be a tight fit, and you may have to tap it into place. Use a soft hammer, or a wood block. If you place a tube against the pulley that will fit over the motor shaft, you can tap the end of the tube to place the pulley. Support the motor shaft, not the motor body, from the other end as you tap. You can secure it with a drop of superglue if you like (make sure the shaft is completely free of grease). Take care that no glue gets near the shaft's entry to the motor.
When you fit the 14-tooth pulley to the Y axis stepper motor, ensure that the teeth face in towards the motor (the Y axis belt will not fit with the pulley the other way around). Leave about a millimetre at the bottom of the shaft so that the pulley can turn freely.
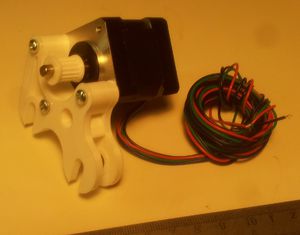
Screw the motor to the Y motor bracket using the three M3x16mm screws with washers under their heads (if the screws are a little short leave out the washers).
The Y motor goes at the back of the machine, with the motor to the left when looking from the front of the machine and the wires pointing in towards the 626 bearing slot.
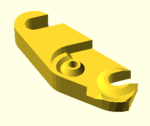
Fit the the Y motor bracket either side of the 626 bearing, and between the serrated washers on the top cross bar.
Move the Y sled to be at the same end, and make sure that the motor is positioned so that the bearings line up with the centre of the two holes in the sled that will hold the toothed-belt clamp.
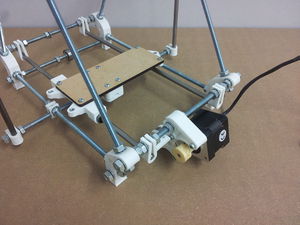
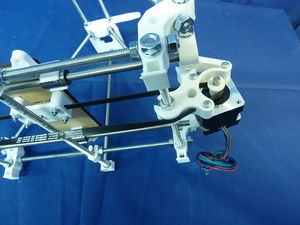
The Y axis motor end will now look like this:
Note the orientation of the stepper motor, with the wires pointing in towards the machine and the motor on the left of the bracket when looking at the machine from this end.
Soporte de la guía de la correa
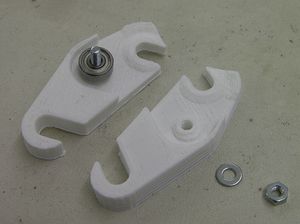
The Y axis idler end is also constructed from two printed parts. Screw them together with the bearing inside as shown. If the 16mm screw is a little short for the idler part, leave the washer off.
Move the Y sled to the front of the machine (i.e. the opposite end to the Y motor you just fitted) and use the Y belt holes to get the idler bracket in roughly the right place.
Measure the gap from one of nuts holding the motor bracket to the nut along from it that holds one of the smooth Y bar clamps.
Adjust the idler bracket so that the gap between its corresponding nut and its Y-bar-clamp nut is the same. Tighten the nuts to hold the Y idler bracket.
Step 3: Montaje de la correa de Y
For this step you just need one 600mm T2.5 PU toothed belt. Your T2.5 belt may have been supplied as a single piece used for both the Y axis and X axis assemblies, so when you cut off the excess belt you'll want to retain as much as possible of the remainder.
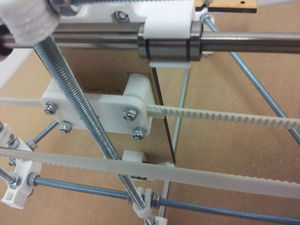
Route the belt through the Y axis motor end, around the 14-tooth pulley, under the bearing, along to the idler end with one twist so that the flat edge then goes under the 626 bearing, around the 623 bearing and back to the belt clamp. Feed the ends through and overlap the two ends of the belt by pulling it lightly and overlapping by about 5 or 6 teeth. Secure in the belt clamp by tightening the screws.
Line the belt up by eye. The top should be in line with the bottom and the belt should be square where it sits under the clamps.
Hand-turn the Y motor by holding the hub of the 14-tooth pulley between your fingers. You will be able to feel the clicks as the motor's rotor magnets run past the ends of its stator coils. Make sure everything on the Y axis stays in line and runs freely right from one end to the other and back.
