VIDEO POSTED! Details about the BerryBot3D
Posted by BerryBot3D
|
VIDEO POSTED! Details about the BerryBot3D March 29, 2013 01:14AM |
Registered: 11 years ago Posts: 83 |
First off a special thanks to:
John and Steve, SeeMeCNC (http://shop.seemecnc.com/)
Johann (http://reprap.org/wiki/Rostock)
Zack, Inventables (https://www.inventables.com/)
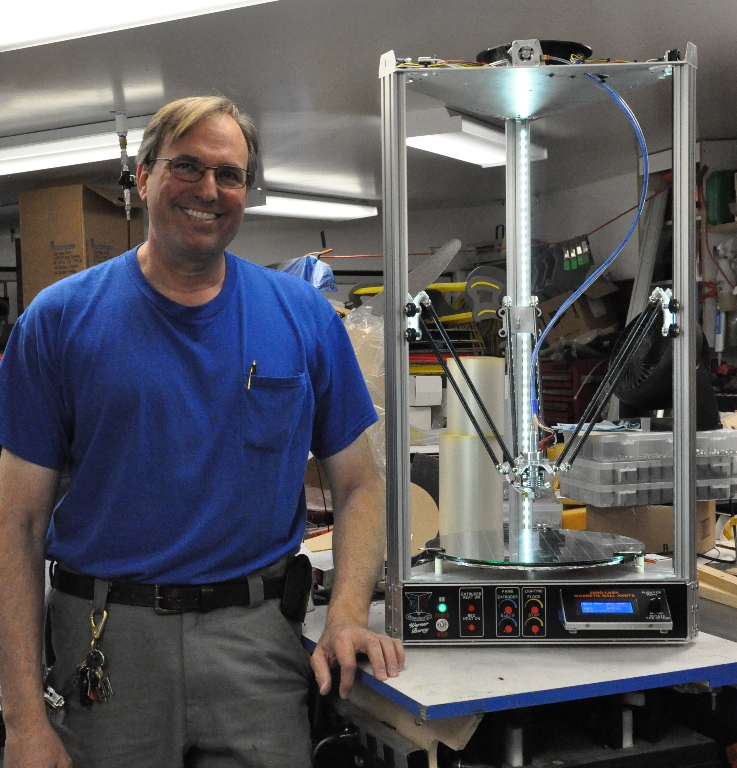
The BerryBot3d:
A one off, designed by Werner Berry
Platen 14"
Build volume 2460 sq inches. About 6 times the build volume of the Replicator 2
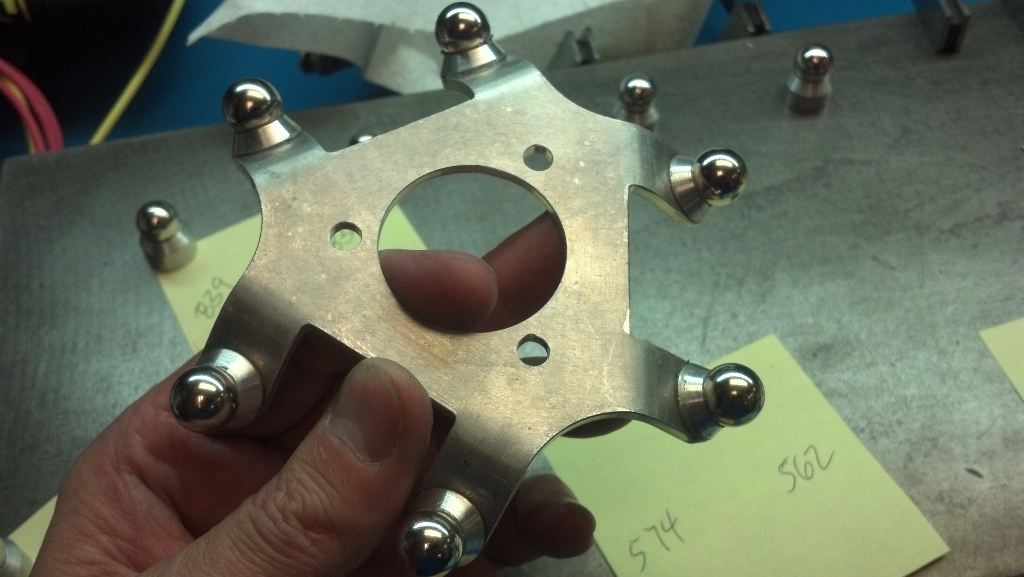
Zero lash ball joints fully capable of 50 micron LH prints.
The hot end can be popped off the magnets (disconnected) and reinstalled in less than 15 seconds. Nice for working on or color changes.
Filament reel mounted on top the top deck out of the way (Horizontally)
A simple minimal part count filament feeder that is mounted with magnets and can be removed in less then 10 seconds.
All aluminum frame designed with maximum cooling of the stepper motors and electronics.
A long cable attached LCD SD card control panel also mounted with magnets removable or mounted in 2 seconds. I love magnets!
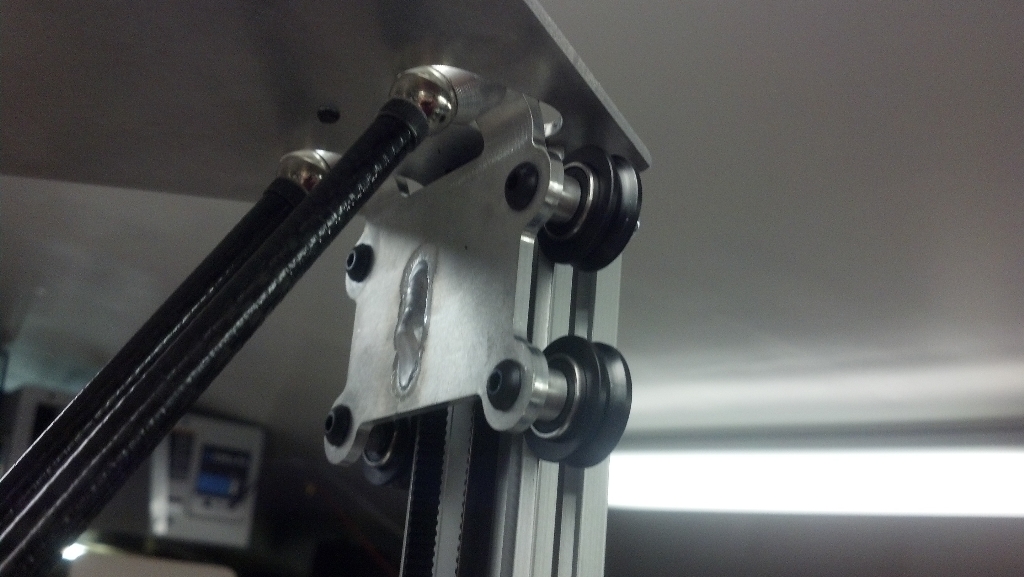
A fully adjustable preload, highly efficient, inexpensive, structural linear rail system.
A rapid heat 110 volt platen.
Easy micro adjustable top limit switches.
When I was about 6 years old my Mom came back from Switzerland where she was visiting family. She brought me back the coolest woodworking tool kit. I have been building things ever since. I love building things just like all of you. I had mastered woodworking and had my own cabinet shop at age 15. When I was somewhere around 16-17 I purchased a welder and felt like I was reborn! This new medium to work with was awesome!! In the past week I have had the same kind of feelings playing with my printer. I can hardly sleep because I am dreaming all night long about what I can do with this new dimension.
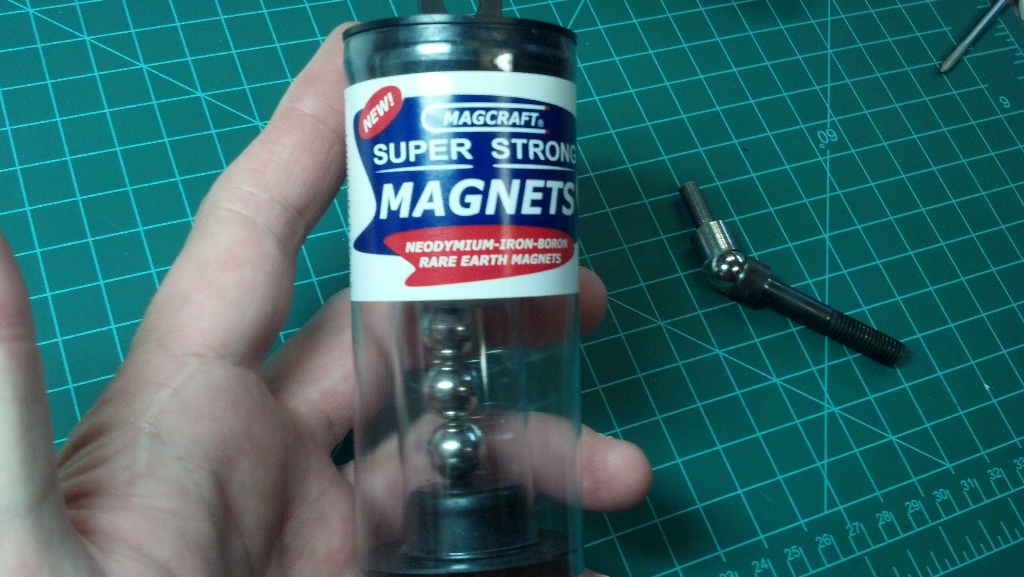
The feature I am most proud of is my magnetic joints, end effector/ hotend. It does look cool but my main design criteria were to build the most precision I could within a reasonable budget. When you see how simple this is you will want to give it a go. The magnetic balls are very very strong [www.fridgedoor.com] the cost is around $30 for all twelve. The beautiful thing is that there is virtually no play and so few parts. You can get an Idea of how is works watching this video. Watch the BerryBot3D in action
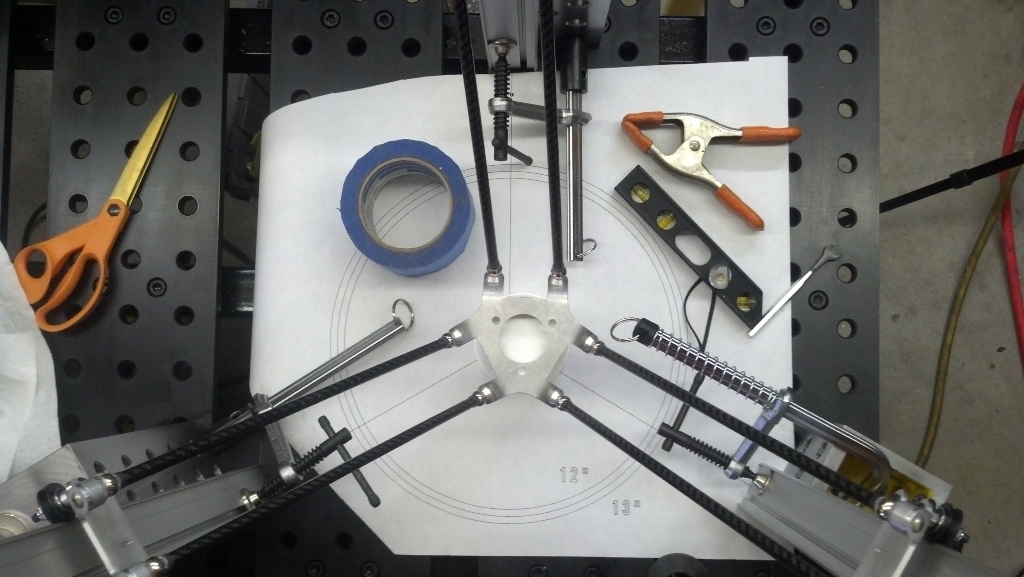
The scockets at the ends of the carbon fiber are equally simple. You could make them with a hand drill and ½ ball end mill. I got these from McMaster Carr: 91259A546 By the way I had some carbon fiber tube left over from RC modeling. I could have just as well used an inexpensive lightweight aluminum tube. The magnetic ball rides on a Teflon bearing pad. With 2-3 pounds of force there is almost no measurable friction. Something that I think is important to pay attention to is the positioning of the balls when JB welding them to the aluminum sockets so that they are located naturally north or south on the poles. You can feel the difference it in the way of counter force if they are not in alignment. When you watch it in action you can see that they move so little I am thinking they will last for years. Then the bearing replacement is nothing more than a small Teflon disk I punch out of this material I purchased from McMaster Carr: 76025A333 It’s enough for material for 10 lifetimes! I believe there is nothing that will come close to giving the precision the magnet joints can provide for so little money?
When I get more time I will post some more details pics and video links.
Happy Building!
Werner
Edited 3 time(s). Last edit at 03/30/2013 11:23PM by BerryBot3D.
John and Steve, SeeMeCNC (http://shop.seemecnc.com/)
Johann (http://reprap.org/wiki/Rostock)
Zack, Inventables (https://www.inventables.com/)
The BerryBot3d:
A one off, designed by Werner Berry
Platen 14"
Build volume 2460 sq inches. About 6 times the build volume of the Replicator 2
Zero lash ball joints fully capable of 50 micron LH prints.
The hot end can be popped off the magnets (disconnected) and reinstalled in less than 15 seconds. Nice for working on or color changes.
Filament reel mounted on top the top deck out of the way (Horizontally)
A simple minimal part count filament feeder that is mounted with magnets and can be removed in less then 10 seconds.
All aluminum frame designed with maximum cooling of the stepper motors and electronics.
A long cable attached LCD SD card control panel also mounted with magnets removable or mounted in 2 seconds. I love magnets!
A fully adjustable preload, highly efficient, inexpensive, structural linear rail system.
A rapid heat 110 volt platen.
Easy micro adjustable top limit switches.
When I was about 6 years old my Mom came back from Switzerland where she was visiting family. She brought me back the coolest woodworking tool kit. I have been building things ever since. I love building things just like all of you. I had mastered woodworking and had my own cabinet shop at age 15. When I was somewhere around 16-17 I purchased a welder and felt like I was reborn! This new medium to work with was awesome!! In the past week I have had the same kind of feelings playing with my printer. I can hardly sleep because I am dreaming all night long about what I can do with this new dimension.
The feature I am most proud of is my magnetic joints, end effector/ hotend. It does look cool but my main design criteria were to build the most precision I could within a reasonable budget. When you see how simple this is you will want to give it a go. The magnetic balls are very very strong [www.fridgedoor.com] the cost is around $30 for all twelve. The beautiful thing is that there is virtually no play and so few parts. You can get an Idea of how is works watching this video. Watch the BerryBot3D in action
The scockets at the ends of the carbon fiber are equally simple. You could make them with a hand drill and ½ ball end mill. I got these from McMaster Carr: 91259A546 By the way I had some carbon fiber tube left over from RC modeling. I could have just as well used an inexpensive lightweight aluminum tube. The magnetic ball rides on a Teflon bearing pad. With 2-3 pounds of force there is almost no measurable friction. Something that I think is important to pay attention to is the positioning of the balls when JB welding them to the aluminum sockets so that they are located naturally north or south on the poles. You can feel the difference it in the way of counter force if they are not in alignment. When you watch it in action you can see that they move so little I am thinking they will last for years. Then the bearing replacement is nothing more than a small Teflon disk I punch out of this material I purchased from McMaster Carr: 76025A333 It’s enough for material for 10 lifetimes! I believe there is nothing that will come close to giving the precision the magnet joints can provide for so little money?
When I get more time I will post some more details pics and video links.
Happy Building!
Werner
Edited 3 time(s). Last edit at 03/30/2013 11:23PM by BerryBot3D.
Attachments:
open | download - Me and BerryBot3D.jpg (483.9 KB)
open | download - 2013-02-27 14.11.50.jpg (397.2 KB)
open | download - 2013-02-27 15.27.35.jpg (404.2 KB)
open | download - 2013-02-27 15.57.56.jpg (364.9 KB)
open | download - 2013-02-27 19.09.54.jpg (366.5 KB)
open | download - 2013-02-27 19.34.09.jpg (388.9 KB)
open | download - 2013-03-03 13.42.25.jpg (416.1 KB)
open | download - 2013-03-03 14.16.00.jpg (406.6 KB)
open | download - 2013-03-26 20.36.06.jpg (539.5 KB)
open | download - 2013-03-07 12.45.51.jpg (378.9 KB)
|
Re: Details about the BerryBot3D Pics and Video! March 29, 2013 01:28AM |
Registered: 13 years ago Posts: 2,947 |
Beautiful work and very clever engineering. Did you do much testing of the magnetic ball joint before building the machine? My hats off to you for pulling it off so cleanly.
| FFF Settings Calculator | Gcode post processors | Geometric Object Deposition Tool Blog |
| Tantillus.org | Mini Printable Lathe | How NOT to install a Pololu driver |
|
Re: Details about the BerryBot3D Pics and Video! March 29, 2013 11:01AM |
Registered: 11 years ago Posts: 83 |
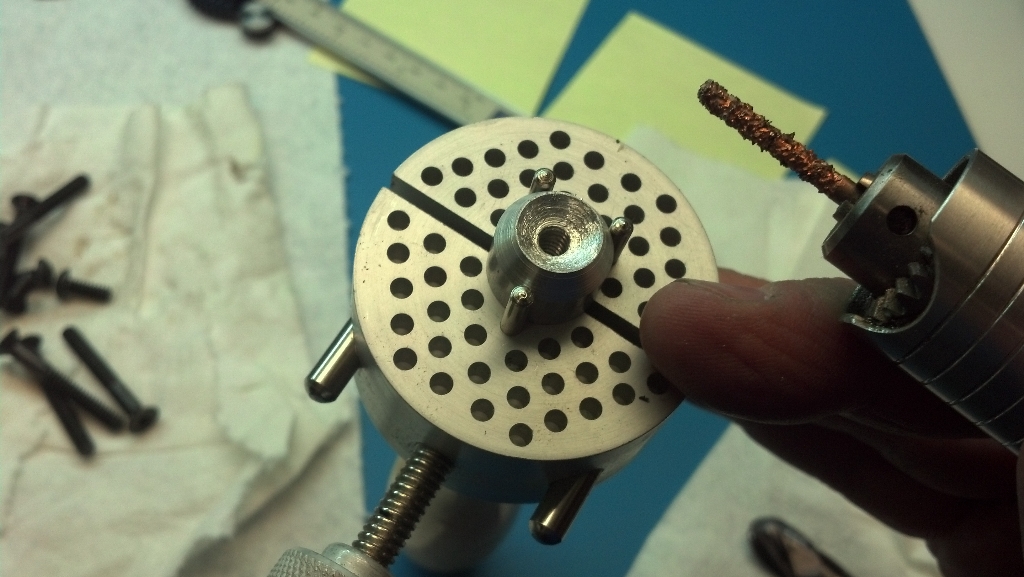
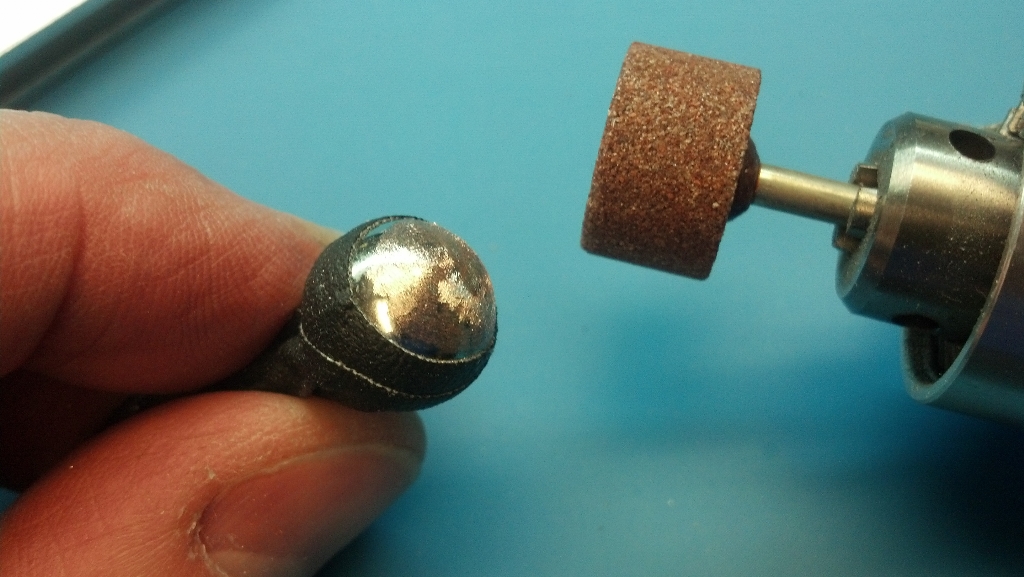
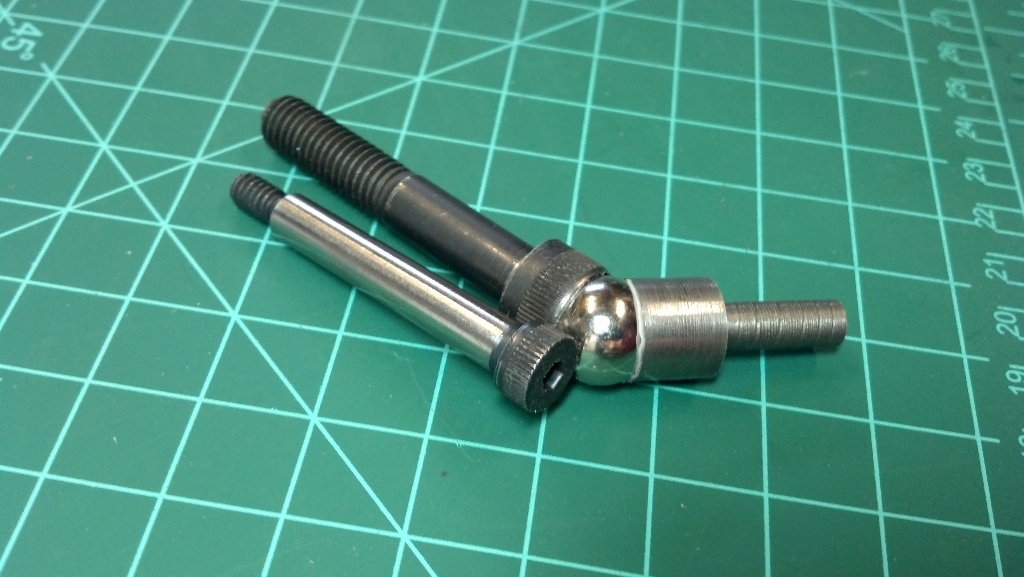
Hi Sublime, I did play around with them a lot before I decided to use them. The day I received the magnets I am using right now “Magcraft” ½ sphere. I took them out of the package 3 connected together I had to really work to get them to disconnect from each other I knew this would work. I had next to my desk a pc of ¾” drill rod weighing around 5 lb. I snapped the mag to the top of it and lifted it think wow this is not only going to work it’s going to work great! Here is a pic of the ball end socket I was going to machine until I started thinking it was way more work than it needed to be and just used the ¼ x 1-1/2” Hex Socket Head Shoulder Screw. (See the pic)
Werner
Werner
|
Re: Details about the BerryBot3D Pics and Video! March 29, 2013 01:00PM |
Registered: 13 years ago Posts: 2,947 |
I saw the picture of the sockect head cap screw that you had ground out in the above post but could not figure out that is started as a cap screw, nice outside the box thinking.
| FFF Settings Calculator | Gcode post processors | Geometric Object Deposition Tool Blog |
| Tantillus.org | Mini Printable Lathe | How NOT to install a Pololu driver |
|
Re: Details about the BerryBot3D Pics and Video! March 29, 2013 03:01PM |
Registered: 13 years ago Posts: 248 |
Hi Werner,
Well done! That's a neat and tremendously precise machine you've constructed. Your creativity and innovation with the use of super-magnet spheres for joints is outstanding! I think we can expect to see some adoption of that joint type moving forward.
Your energy and excitement for 3d printing is palpable in your posts! I love the way in your other post (Mr Yoda) that you couldn't wait for the print to finish before you started to post, because you knew you were producing something special, and had confidence it was going to work! :-)
I think many here have felt similar excitement when the first good print emerged. It's great you are sharing your work and excitement. I certainly look forward to seeing more photos and videos of your creation, when you get the opportunity to post. We are suckers for detail so there's no such thing as too much detail.
I'm curious about the heated bed you are using, and the make-up of the hot-end. Everyone will have their own aspect of interest so do share when time allows.
Congratulations and welcome to the forum!
Regards,
NumberSix
[numbersixreprap.blogspot.com]
|
Re: Details about the BerryBot3D Pics and Video! March 29, 2013 04:16PM |
Registered: 11 years ago Posts: 83 |
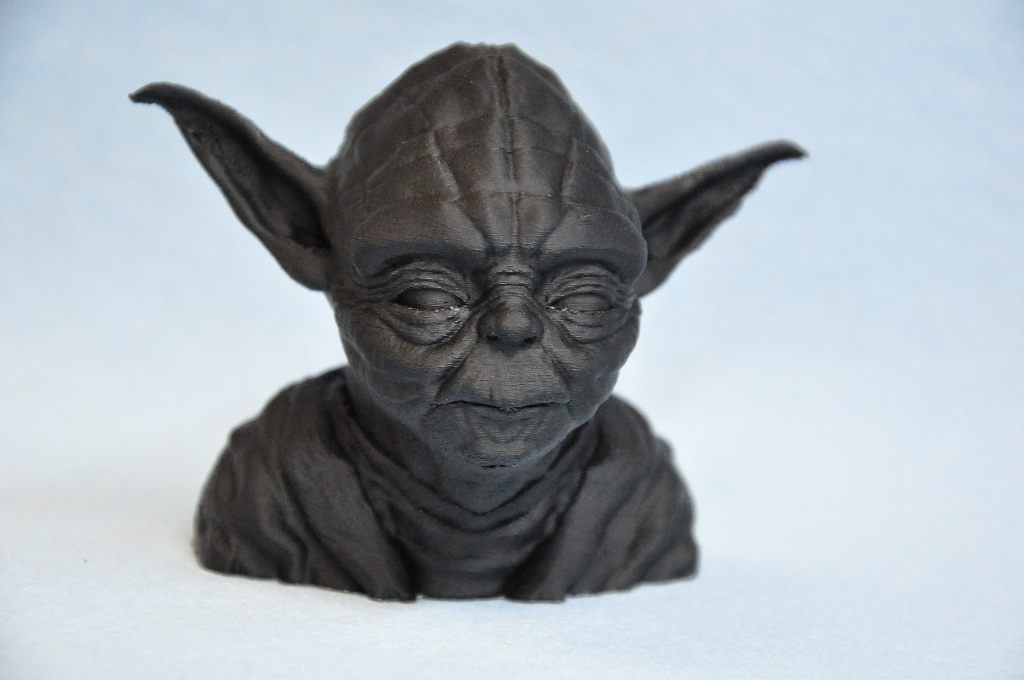
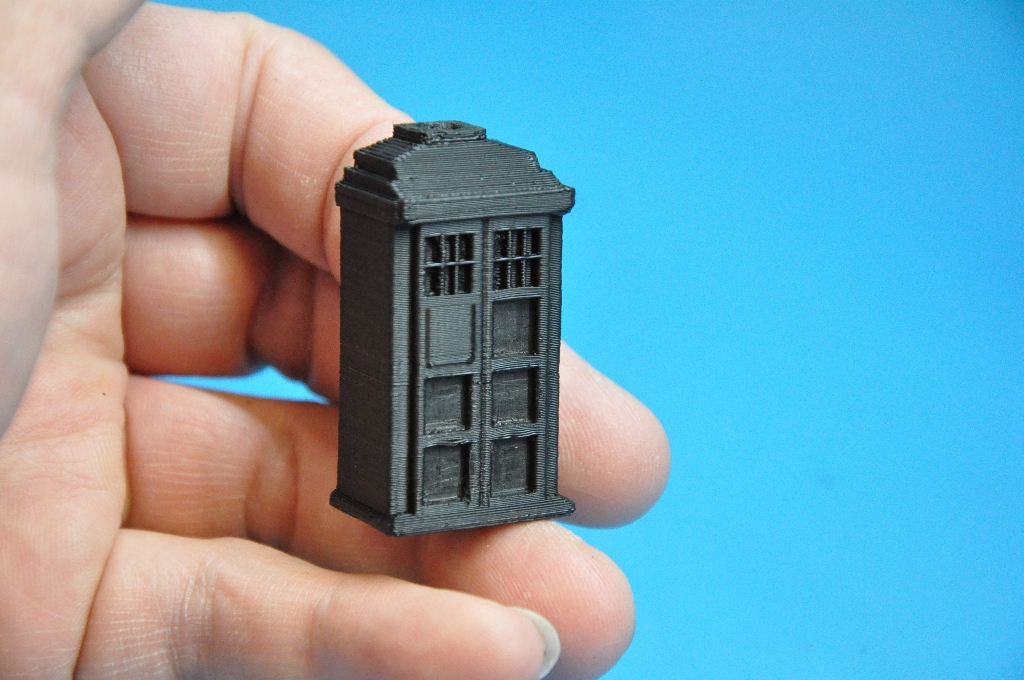
Here is a video of the BerryBot3D printing a 100 micron Yoda using 1.75 filament .35 nozzle black ABS: YouTube BerryBot3D printing
|
Re: Details about the BerryBot3D Pics and Video! March 29, 2013 07:38PM |
Registered: 11 years ago Posts: 83 |
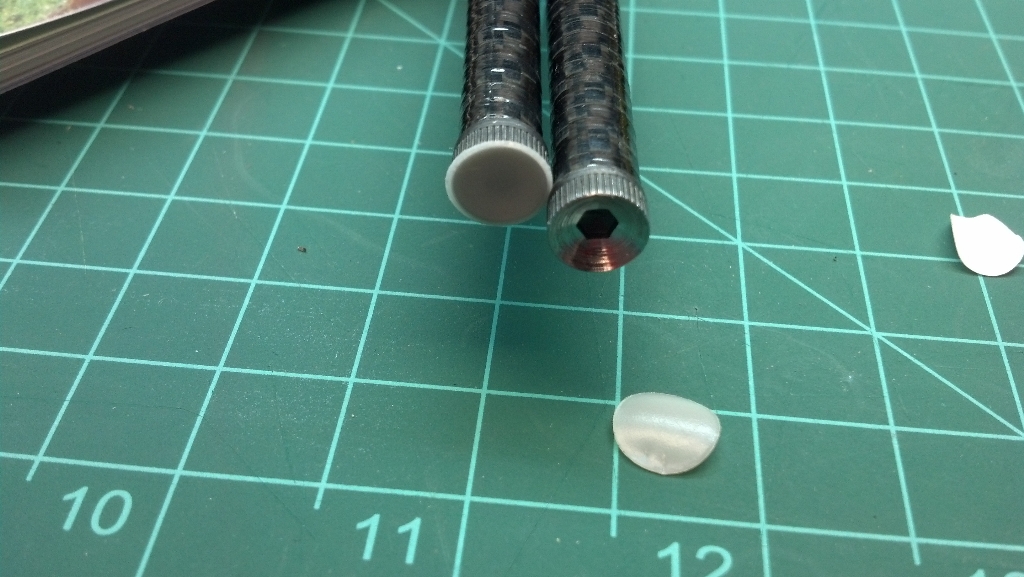
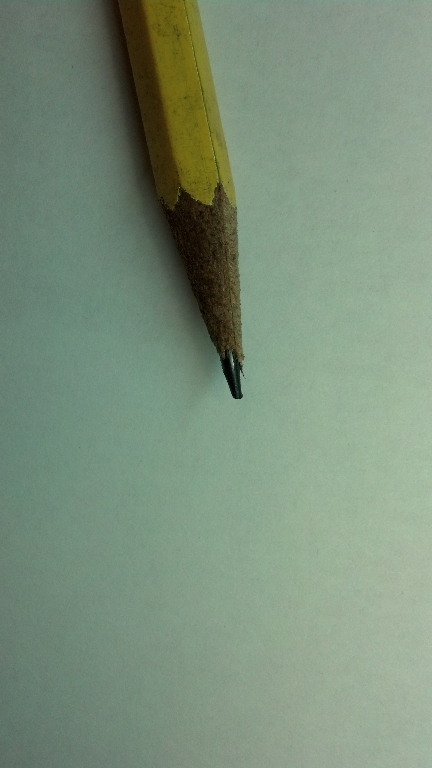
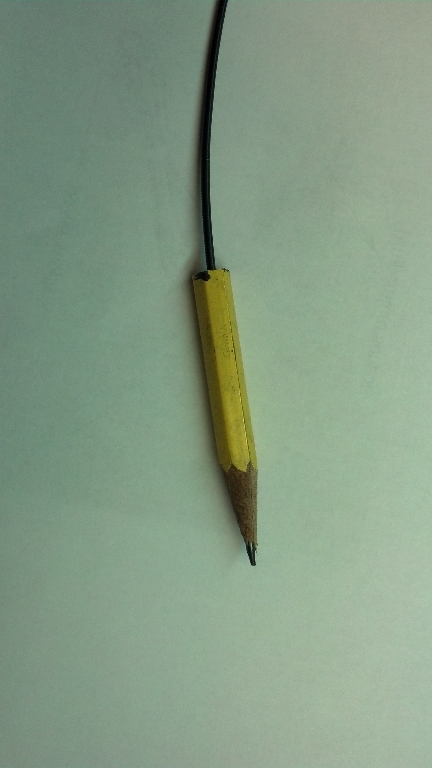
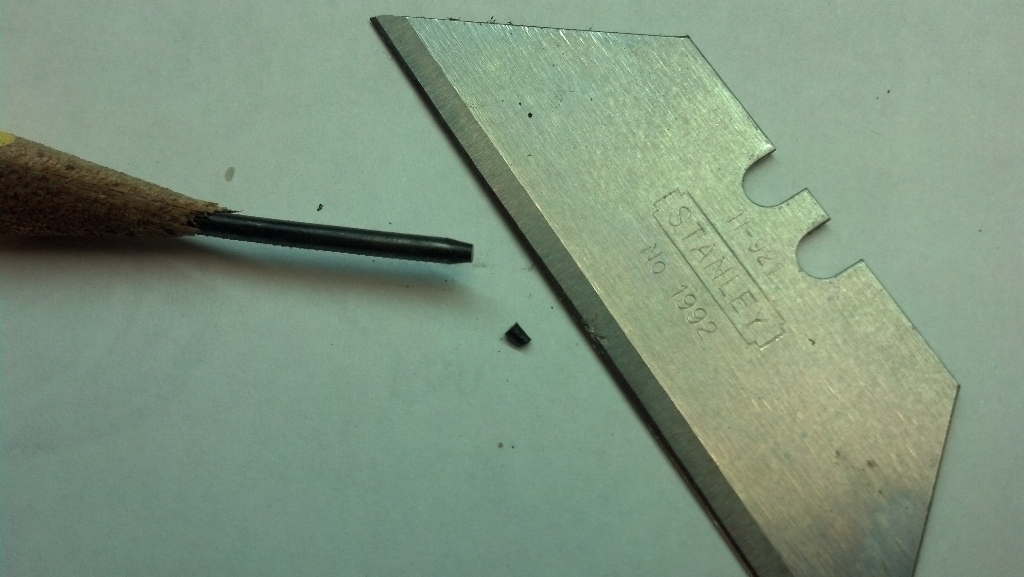
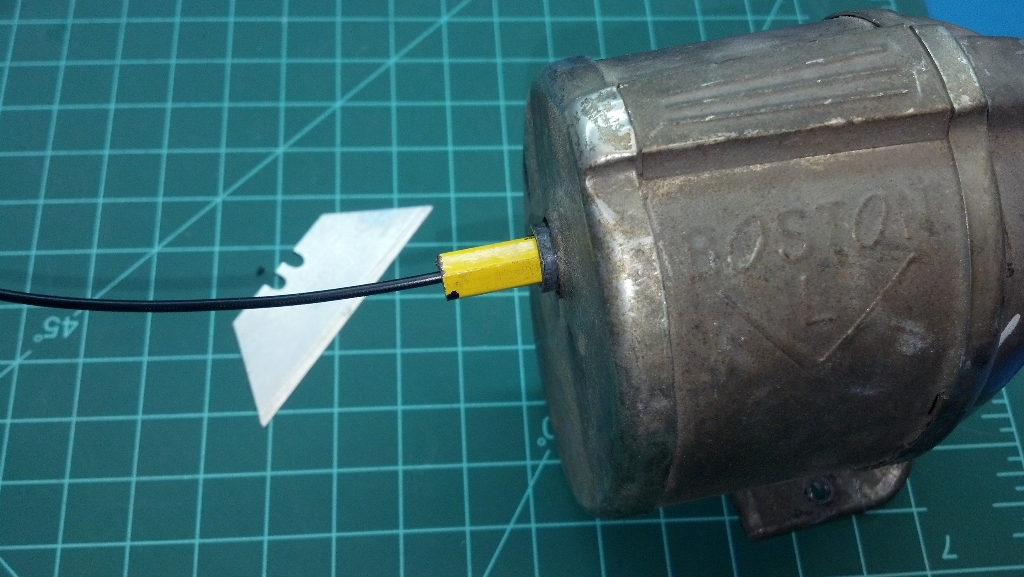
Hi NumberSix, Thanks for the note! I have so many pics and video I just need to get some time to do some editing. I am trying to get a video together talking about the mag hot end. I will put it up just as soon as I can. I am also working on a simple design to allow me to slide a filament end into an aluminum tube that looks just like the the tip of a pencil with a collar on it stopping it from going into the cutters of a pencil sharpener. The idea is to simply slide the filament into the aluminum tube guiding it on up to the cutters in order to perfectly sharpen the tip of the filament. Then I will just clip the very point off giving me a beautiful end to put into the feeder. I can change colors on the fly or put a new spool on when running out. I even had the crazy idea to have a micro switch in line with the filament, hooked up to a micro-processor to pause the print and send me a text message if I were to run out. I know crazy! Here are some pics of proof of concept. You could try it out like I did by just cutting a pencil end about 2” or so and drill out the lead. Slip it into the sharpener and slide the filament up to the cutter. It works great! I was able a few time to just push a blunt cut filament in and it did feed all the way through but couple of times the sharp corner caught on something at the hot end and stopped it. I figure this will be quick and fool proof. Ha-ha anyway so far so good. I have to confess something funnier than heck. I was about 8 hours into the 50 micron Mr. Yoda print when I walk over to my machine kicked on the video recorder to take a few more minutes of video when I noticed that the model was building off the window in Slic3r. So not giving it another thought and I do what I always do and that is to grab my mouse and center that sucker up! No sooner was I doing that and thinking to myself Werner you should probably leave it this alone………. My machine stopped……. I gasped for air and filled my pants, when….. it started moving again….. OOOoooo sh_t……. It stopped again……. And started moving again after about 2-3 seconds what seemed like 2-3 minutes. It did this about four times before it cleared out and headed toward completion. Now I know it would not have been the end of the world but I did have everyone I know watching as well as you Guys. I will post that video so you can feel what I went through. Wow….. Bla,Bla,Bla sorry! I am leaving now.
Werner
Edited 2 time(s). Last edit at 03/29/2013 07:59PM by BerryBot3D.
Werner
Edited 2 time(s). Last edit at 03/29/2013 07:59PM by BerryBot3D.
|
Re: Details about the BerryBot3D Pics and Video! March 30, 2013 07:06AM |
Registered: 13 years ago Posts: 248 |
Hi Werner,
Have you considered starting your own blog? The uploading mechanism here for photos and videos is a bit tedious, and you may have many ideas and episodes that would deserve their own breathing space. www.blogspot.com is a popular blog platform, and I'm sure there may be other suggestions.
You can still post here but point to the blog for more detail. Just a suggestion.
NumberSix
|
Re: Details about the BerryBot3D Pics and Video! March 30, 2013 01:59PM |
Registered: 11 years ago Posts: 83 |
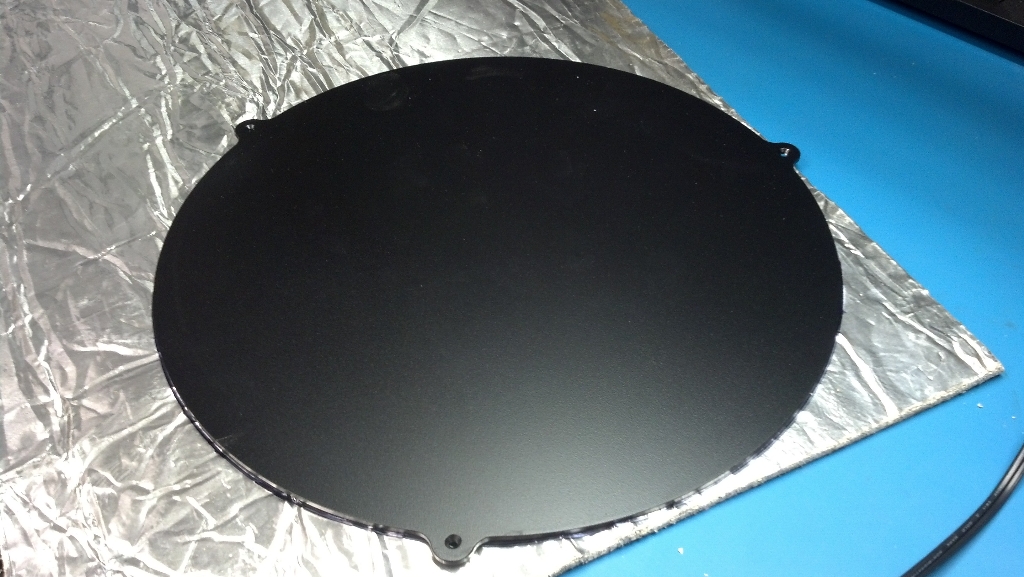
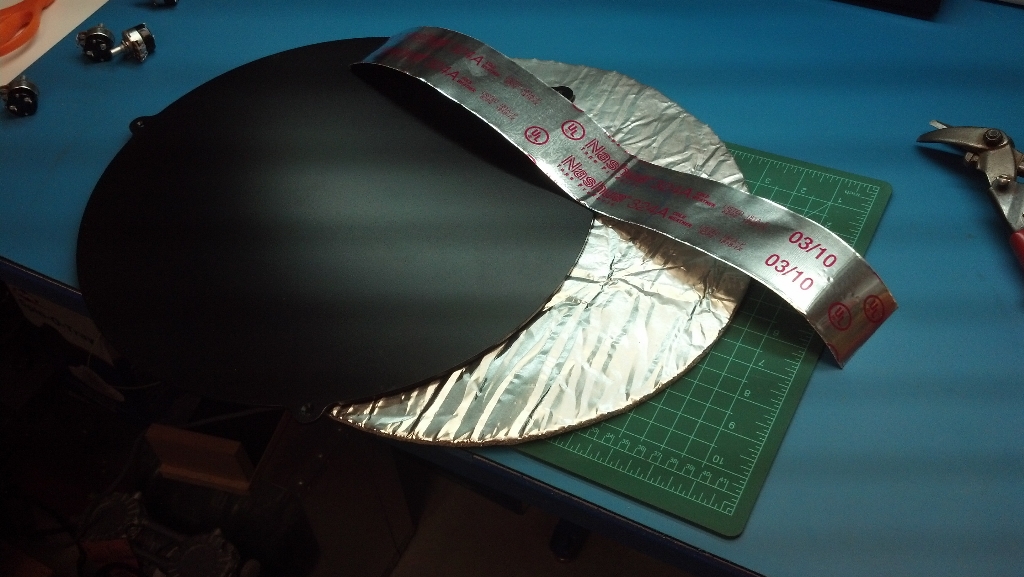
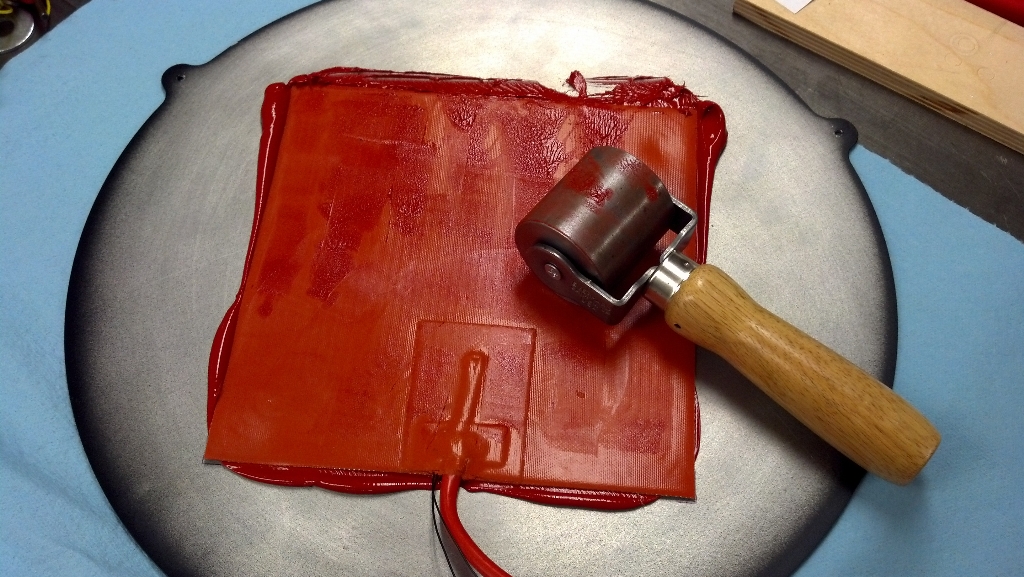
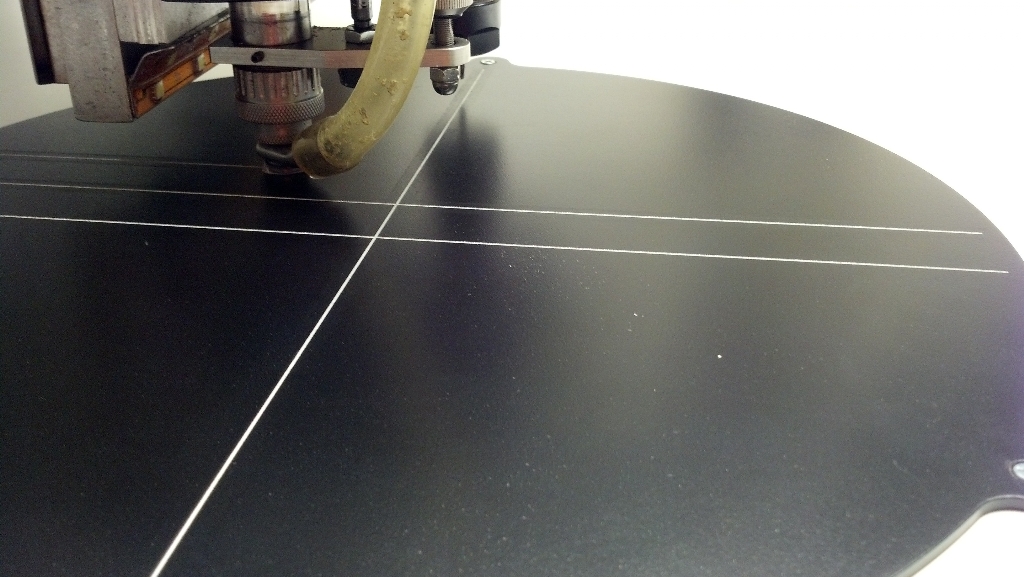
Hi #6, Thanks for the suggestion! Being truthful I don’t like writing, and frankly I know I don’t do it well. I did look at your blog and have to say very well done!! I especially like the clock you made, WOW really cool!! I thought I would post some pics of my platen for you. It is 1/8” aluminum that I powder coded with a special high temp powder. I then engraved it on my CNC. I used an 8x8 silicon heating pad I got from: [store.qu-bd.com]. It does work well to around 75c however I am not a very patient man, (My wife tells me) and it takes too long to heat up. Hence the heat gun you see in some of my pics. My rapid high temp design is way better and up to temp much much faster. Having such a huge platen has its drawback such as having so much more area dissipating heat. Another thing you have to think about is the expansion and contraction when you have such a large area. The glass is not too much of a problem it’s the aluminum. Just expanding 10-20 thou can crown your platen right into the nozzle with fixed mounting points. I built an airplane in 1997 and I am very adept to working with aluminum. The trick is to allow the platen to float to some extent. Allowing it to expand and contract maintaining is’s flatness if you will. Using Teflon standoffs ½ x 1” with a 1/4 “ bore allows for a 6/32 mounting screws. Just add a conical compression spring on the nut side and let the whole thing float in ¼” holes in the base. My rapid temp design is 110v and could be dangerous without the proper precautions. When I get it documented and finish the safety circuit I will post it for you. Some more food for thought is that if you were to want maximum precision on your larger prints it may be necessary to keep the heat on throughout the entire print.
Have a great day!
Werner
Have a great day!
Werner
Attachments:
open | download - 2013-03-22 11.33.23_432x768.jpg (164.2 KB)
open | download - 2013-03-22 13.29.08_1024x577.jpg (428.5 KB)
open | download - 2013-03-22 13.34.06_1024x577.jpg (410.4 KB)
open | download - 2013-03-22 17.34.18_1024x577.jpg (504.2 KB)
open | download - 2013-03-22 17.40.47_1024x577.jpg (417.9 KB)
open | download - 2013-03-22 16.29.04_1024x577.jpg (387.9 KB)
open | download - 2013-03-22 16.53.15_1024x577.jpg (474.9 KB)
|
Re: Details about the BerryBot3D Pics and Video! March 30, 2013 02:26PM |
Registered: 12 years ago Posts: 809 |
Werner,
The advancements that you've made certainly warrant some serious documentation. I was a little leery of deltas, but seeing your solution has convinced me. Seriously consider starting a github page to share (if you're so inclined) the progress. A blog would be a great vehicle to show off this development as well. And don't worry about the verbage - what you've posted on the forums so far more than tells me that you're more than capable of pulling it off.
Seriously, bravo!
- akhlut
Just remember - Iterate, Iterate, Iterate!
[myhomelessmind.blogspot.com]
|
Re: Details about the BerryBot3D Pics and Video! March 30, 2013 10:01PM |
Registered: 11 years ago Posts: 83 |
Thanks Akhlut, You Guys sure do a nice job with your Blogs!! I just really cant spend the time right now. I have so many machines that need to be designed and built. I should have the info video up in about an hour or so. I will post when it is up. You should give deltas a try akhlut I dont think you will ever go back? Have a great evening!
Werner
Werner
|
Re: Details about the BerryBot3D Pics and Video! March 30, 2013 11:21PM |
Registered: 11 years ago Posts: 83 |
|
Re: VIDEO POSTED! Details about the BerryBot3D March 31, 2013 12:32AM |
Registered: 13 years ago Posts: 301 |
It is pretty amazing that this is your first printer AND that you designed it. There are so many subtle ways to screw things up without having experience and still you just hit it out of the park. The production values for everything are just so nice too. I definitely look forward to your future work.
|
Re: VIDEO POSTED! Details about the BerryBot3D March 31, 2013 08:06PM |
Registered: 11 years ago Posts: 205 |
Werner,
I've been following the forums hers for some time and when I first saw pictures of a rostock design with all the universal joints and such my first thought was that this a nightmare design that would always suffer from inaccuracy of all those parts. Not to metion all the problems with a lack of stiffness due to having so many joints.
I am really impressed with your magnetic ball concept though. In one swell foop you have completely eliminated virtually all the bad features of the rostock design. The machine is also essentially crash proof. Doing something stupid simply breaks the magnets loose and stops any damage.
I can see that all that is needed to build an extremely accurate machine is to simply machine three linear bearing plates accurately, and the triangular head plate, then produce 6 push rods that are exactly the same length. Fortunately those operations are trivial with CNC! So I can see rostock machines really taking off now.
By the way, you mention your CNC multiple times, but never posted any pictures of it. I'd like to know more about it. I am building my own right now, and have printer head going on it. However I can see building a standalone rostock very shortly.
Nice Job!
Gary H. Lucas
|
Re: VIDEO POSTED! Details about the BerryBot3D March 31, 2013 08:40PM |
Registered: 12 years ago Posts: 177 |
This is an awesome piece of work, really love the magnetic ball + PTFE bearing discs idea. This should make a really significant cost saving over commercial ball joints - and even have further advantages such as quick detachment etc.
I also really love your magnetically detachable control panel - looks very reminiscent of 'pendants' used in CNC robotic arms and cranes etc.
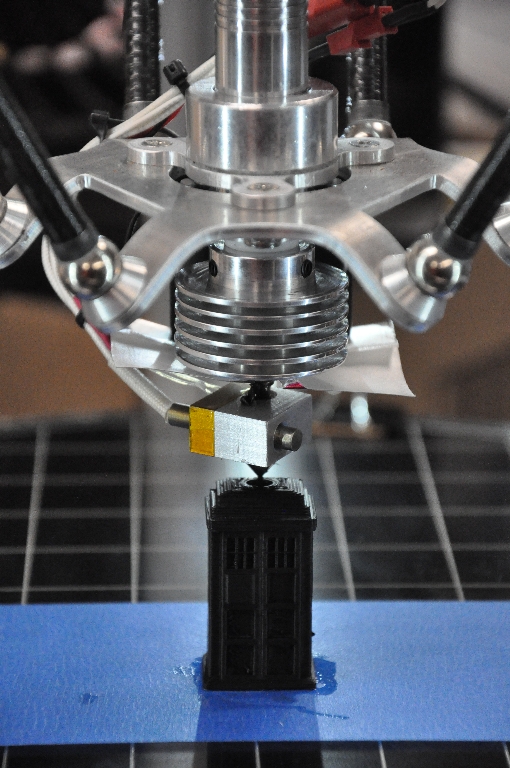
It is fascinating to see the parallel evolution of hot-ends, the conclusions you came to with having a sharp thermal transition enabled by an actively cooled heatsink are exactly the same that I (and many others here) have found. For a moment I did a double take at how close in design your part is to our hotend we are about to bring to market: http://www.e3d-online.com . Do I see a sliver of PTFE peeking out there from just between the heatsink and the carriage? Or is that the delrin part you mentioned?
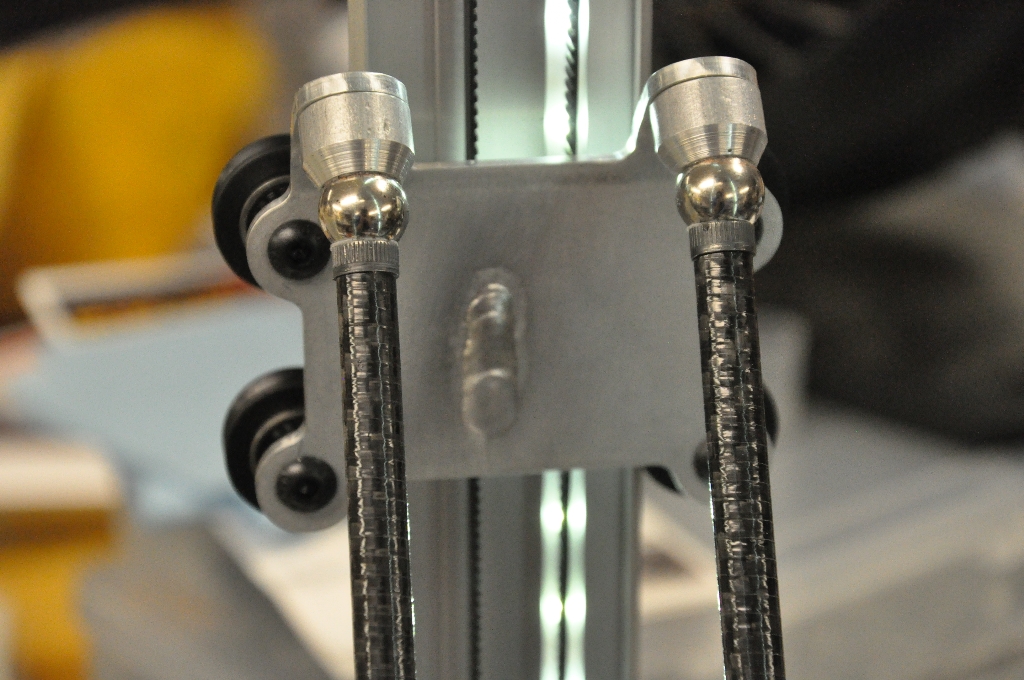
A tiny tip for you - I noticed that you have your homing switches lined up so that the carriage pushed against the end of the lever of the microswitch - the lever reduces the force needed to trip the switch. However if you think about it the best repeatability and precision would be to press as close to the hinge of the switch as possible, or remove the metal lever entirely and press against the small button. It looks like you could easily tweak this with that nice sprung adjustable strip system you have going on.
Awesome work!
Sanjay
I also really love your magnetically detachable control panel - looks very reminiscent of 'pendants' used in CNC robotic arms and cranes etc.
It is fascinating to see the parallel evolution of hot-ends, the conclusions you came to with having a sharp thermal transition enabled by an actively cooled heatsink are exactly the same that I (and many others here) have found. For a moment I did a double take at how close in design your part is to our hotend we are about to bring to market: http://www.e3d-online.com . Do I see a sliver of PTFE peeking out there from just between the heatsink and the carriage? Or is that the delrin part you mentioned?
A tiny tip for you - I noticed that you have your homing switches lined up so that the carriage pushed against the end of the lever of the microswitch - the lever reduces the force needed to trip the switch. However if you think about it the best repeatability and precision would be to press as close to the hinge of the switch as possible, or remove the metal lever entirely and press against the small button. It looks like you could easily tweak this with that nice sprung adjustable strip system you have going on.
Awesome work!
Sanjay
|
Re: VIDEO POSTED! Details about the BerryBot3D April 01, 2013 07:46PM |
Registered: 11 years ago Posts: 83 |
|
Re: VIDEO POSTED! Details about the BerryBot3D April 01, 2013 07:53PM |
Registered: 11 years ago Posts: 482 |
|
Re: VIDEO POSTED! Details about the BerryBot3D April 01, 2013 08:21PM |
Registered: 11 years ago Posts: 83 |
Thanks Sanjay for the tip! I did some tests and am getting consistently within a few thou with my setup which is not a problem but I do agree with you and may just flip them around to see how it differs. By the way very nice Hot End you Guys have got there. My first design was almost exactly what you have. My reason for switching to a sliding barrel was so I could increase the distance from tip to end effector plate allowing more clearance better ability to print multi parts one at a time. And slide it all the way up for max z distance printing. It works great for my delta. Yes I do have a Teflon sleeve in the barrel.
Werner
Werner
|
Re: VIDEO POSTED! Details about the BerryBot3D April 01, 2013 08:37PM |
Registered: 11 years ago Posts: 334 |
Berrybot3D that is a great design concept you have come up with. Once you assemble the magnet ends I bet that your design can go together in minutes.
BTW I am not great at documentation but I am creating a blog as well. Think of it more as a place to put up your pics and videos and keep notes.
When do we get to see some prints being made?
BTW I am not great at documentation but I am creating a blog as well. Think of it more as a place to put up your pics and videos and keep notes.
When do we get to see some prints being made?
|
Re: VIDEO POSTED! Details about the BerryBot3D April 01, 2013 11:13PM |
Registered: 11 years ago Posts: 83 |
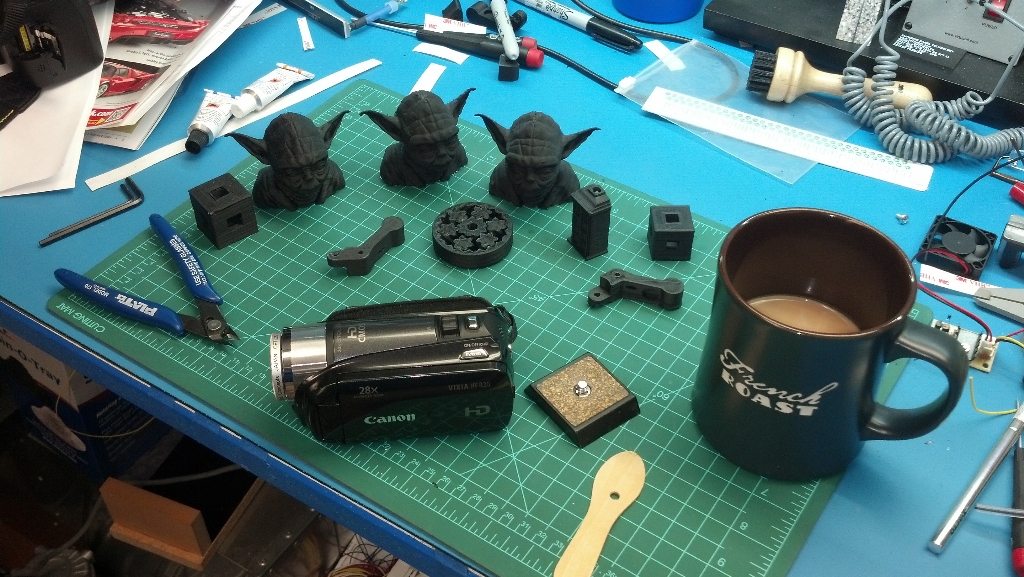
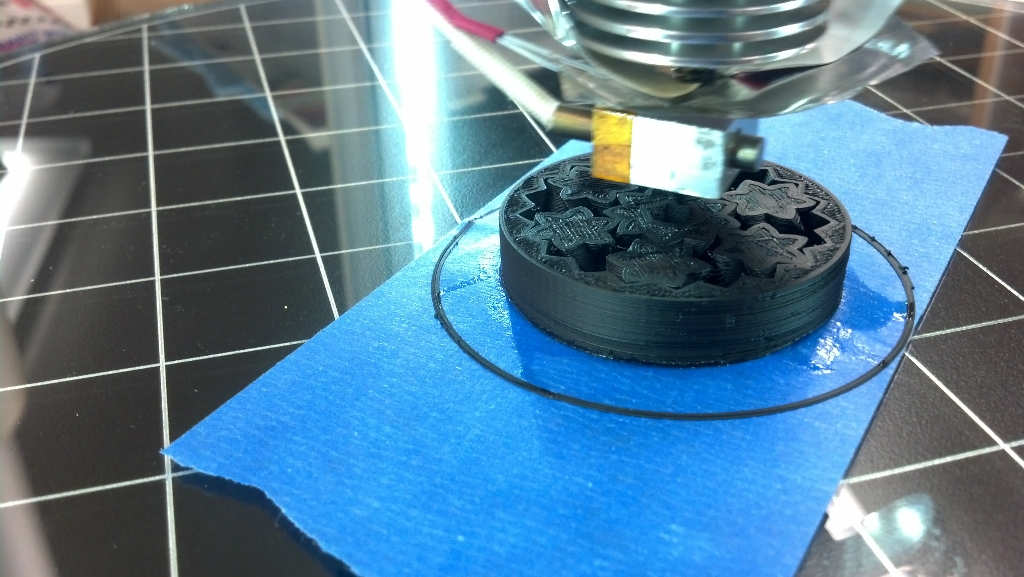
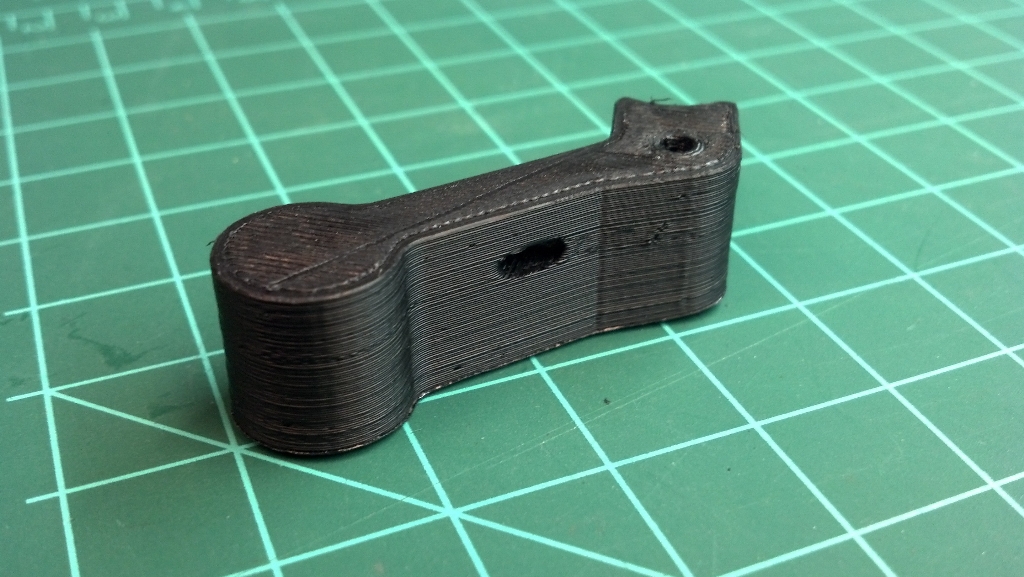
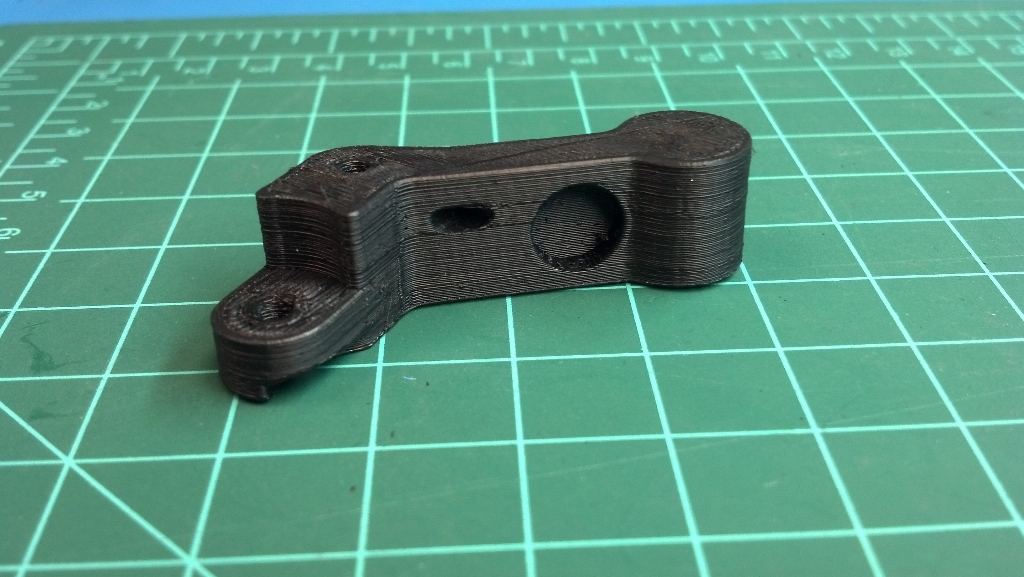
Thanks jzatopa, I have just about everything I have printed here in videos or pics but here are a few just for you! I thought the gear bearing would be a fail because I kept messing with the feed amount of the filament but it broke free and actually works great!! I feel bloging will take time away from building!
Thanks again Buddy!
Werner
Edited 1 time(s). Last edit at 04/01/2013 11:18PM by BerryBot3D.
Thanks again Buddy!
Werner
Edited 1 time(s). Last edit at 04/01/2013 11:18PM by BerryBot3D.
Attachments:
open | download - 2013-03-30 14.39.39.jpg (569.9 KB)
open | download - 2013-03-30 11.15.34.jpg (438.9 KB)
open | download - 2013-03-28 19.46.45.jpg (453.8 KB)
open | download - 2013-03-25 07.22.02.jpg (430 KB)
open | download - 2013-03-25 07.22.24.jpg (423.1 KB)
open | download - 2013-03-23 22.27.33.jpg (576.2 KB)
open | download - 2013-03-23 22.08.30.jpg (358.9 KB)
open | download - 2013-03-23 13.33.46.jpg (363.7 KB)
|
Re: VIDEO POSTED! Details about the BerryBot3D April 04, 2013 03:45AM |
Registered: 14 years ago Posts: 3,742 |
@BerryBot3D: There are a lot of people that would like to build your solution but don't have access to a CNC (myself included). I like the Rostock design but was worried about the arm / socket problem that you have apparently very elegantly solved. If you manufactured the extruder frame with magnetic balls and the carbon arms and the X, Y, Z arm plates with magnetic balls I am sure that quite a few people would buy them.
In any case, super design. The hot end is also the most current technology being an all metal hot end.
Bob Morrison
Wörth am Rhein, Germany
"Luke, use the source!"
BLOG - PHOTOS - Thingiverse
In any case, super design. The hot end is also the most current technology being an all metal hot end.
Bob Morrison
Wörth am Rhein, Germany
"Luke, use the source!"
BLOG - PHOTOS - Thingiverse
|
Re: VIDEO POSTED! Details about the BerryBot3D April 04, 2013 06:03AM |
Admin Registered: 17 years ago Posts: 7,879 |
Why not use a ball bearing for the mating half instead of a socket? Then all you need to do is glue them into printed plastic sockets.
Am I correct in thinking the two balls would roll against each other so there would be no friction at all so no wear? I think the geometry would be slightly different because you would have an extra link element which would be the line through the centre of the two balls. Didn't Viktor propose such a system many moons ago?
[www.hydraraptor.blogspot.com]
|
Re: VIDEO POSTED! Details about the BerryBot3D April 04, 2013 06:40AM |
Registered: 14 years ago Posts: 3,742 |
The question is if there is enought contact area.
When two balls are used then the contact area is very small - almost a point. Would it hold?
With the current implementation he has quite a bit of contact area with the magenetic ball - metal socket combination.
Bob Morrison
Wörth am Rhein, Germany
"Luke, use the source!"
BLOG - PHOTOS - Thingiverse
|
Re: VIDEO POSTED! Details about the BerryBot3D April 04, 2013 08:04AM |
Registered: 12 years ago Posts: 809 |
Magnet to magnet might not allow the effector to remain parallel to the platen due to the varying magnetic fields as motion occurs? Don't remember all that much about magnets...
/*EDIT
I hadn't had my coffee yet...
*/
Edited 1 time(s). Last edit at 04/04/2013 10:19AM by akhlut.
- akhlut
Just remember - Iterate, Iterate, Iterate!
[myhomelessmind.blogspot.com]
/*EDIT
I hadn't had my coffee yet...
*/
Edited 1 time(s). Last edit at 04/04/2013 10:19AM by akhlut.
- akhlut
Just remember - Iterate, Iterate, Iterate!
[myhomelessmind.blogspot.com]
|
Re: VIDEO POSTED! Details about the BerryBot3D April 04, 2013 08:07AM |
Registered: 14 years ago Posts: 3,742 |
nophead meant to use a ball bearing (metal) with a spherical magnet and NOT two spherical magnets!
I still think that the contact area would be two small for this to work effectively...
Bob Morrison
Wörth am Rhein, Germany
"Luke, use the source!"
BLOG - PHOTOS - Thingiverse
I still think that the contact area would be two small for this to work effectively...
Bob Morrison
Wörth am Rhein, Germany
"Luke, use the source!"
BLOG - PHOTOS - Thingiverse
|
Re: VIDEO POSTED! Details about the BerryBot3D April 04, 2013 08:43AM |
Admin Registered: 13 years ago Posts: 730 |
Quote
nophead
Didn't Viktor propose such a system many moons ago?
Here is Viktor's magnet-based tripod
|
Re: VIDEO POSTED! Details about the BerryBot3D April 04, 2013 09:16AM |
Registered: 13 years ago Posts: 301 |
|
Re: VIDEO POSTED! Details about the BerryBot3D April 04, 2013 09:21AM |
Registered: 14 years ago Posts: 3,742 |
Thanks for the link to Viktor's magnet-based tripod blog post.
@nophead: And it does look like Viktor used two ball magnets for each joint if I interpret the pictures correctly.
Bob Morrison
Wörth am Rhein, Germany
"Luke, use the source!"
BLOG - PHOTOS - Thingiverse
@nophead: And it does look like Viktor used two ball magnets for each joint if I interpret the pictures correctly.
Bob Morrison
Wörth am Rhein, Germany
"Luke, use the source!"
BLOG - PHOTOS - Thingiverse
|
Re: VIDEO POSTED! Details about the BerryBot3D April 04, 2013 10:18AM |
Admin Registered: 17 years ago Posts: 7,879 |
Yes two magnets would be stronger of course and even one magnet plus a steel ball would pull towards the pole so probably has no benefit. I wonder if it is as repeatable as a ball in a cup?
[www.hydraraptor.blogspot.com]
[www.hydraraptor.blogspot.com]
|
Re: VIDEO POSTED! Details about the BerryBot3D April 04, 2013 05:46PM |
Admin Registered: 16 years ago Posts: 13,884 |
... two magnets are more precise than a single magnet with a steel ball for the magnet poles better 'selfcentering' ability.
But you have to cover the hinges against dust - after some years open in my basement there was dust on the spheres, what was hearable as 'crackles' when moving the arms.
I've given away the Tripod last year, but can assemble the hinges, if someone is interested in behaviour and measuring ...
Edited 1 time(s). Last edit at 04/04/2013 05:49PM by VDX.
Viktor
--------
Aufruf zum Projekt "Müll-freie Meere" - [reprap.org] -- Deutsche Facebook-Gruppe - [www.facebook.com]
Call for the project "garbage-free seas" - [reprap.org]

Sorry, only registered users may post in this forum.