Sanding down heater cartridge
Posted by Ohmarinus
|
Sanding down heater cartridge April 13, 2014 04:54PM |
Admin Registered: 11 years ago Posts: 3,096 |
So, I ordered a Merlin hotend, received it this weekend, but the heater cartridge I received with the package doesn't seem to fit into the hotend. It doesn't even want to go in partially.
Is it safe to slightly sand down the metal hull of the cartridge? I won't take off a lot of material, as I think it's only a micron too thick somehow.
I don't feel like sanding the inside of the hotend heater block, as a cartridge is easier to replace.
Edited 1 time(s). Last edit at 04/13/2014 04:54PM by Ohmarinus.
|
Re: Sanding down heater cartridge April 13, 2014 04:59PM |
Registered: 10 years ago Posts: 1,381 |
|
Re: Sanding down heater cartridge April 13, 2014 05:57PM |
Admin Registered: 11 years ago Posts: 3,096 |
Alright, the other cartridges I have laying around are slightly longer than the heater block, but they fit perfectly without adjustments. I'll put those in. Together with the nice silicon insulation tape (self-fusing, vulcanizing etc) it will probably be good enough.
I've seen pictures around of those cartridges and that it might be a good idea to insert them all the way in so that the end side of the cartridge sticks out.
Meanwhile I'll sell my vendor an email that neither of the two supplied cartridges fit.
I've seen pictures around of those cartridges and that it might be a good idea to insert them all the way in so that the end side of the cartridge sticks out.
Meanwhile I'll sell my vendor an email that neither of the two supplied cartridges fit.
|
Re: Sanding down heater cartridge April 13, 2014 06:19PM |
Registered: 10 years ago Posts: 1,381 |
When a heater cartridge doesn't fit, it can be caused by the stamping of the heaters wattage, this raises the metal, and makes the tube oval.
Some times just running a file over the raised impressions fixes it.
I don't understand.
If the silicone is in direct contact with the heater cartridge you might melt or burn it.
Best to fully encase the heater cartridge, and use the heater block as a heat sink.
You could try wrapping the heater block, and heater cartridge with ceramic-mica paper before wrapping it with silicone.
Some times just running a file over the raised impressions fixes it.
Quote
Ohmarinus
I've seen pictures around of those cartridges and that it might be a good idea to insert them all the way in so that the end side of the cartridge sticks out.
I don't understand.
If the silicone is in direct contact with the heater cartridge you might melt or burn it.
Best to fully encase the heater cartridge, and use the heater block as a heat sink.
You could try wrapping the heater block, and heater cartridge with ceramic-mica paper before wrapping it with silicone.
|
Re: Sanding down heater cartridge April 13, 2014 07:53PM |
Admin Registered: 11 years ago Posts: 1,063 |
normally the cases are pretty thick, so you can get away with even giving them a slight touch with a bench grinder
-=( blog )=- -=( thingiverse )=- -=( 3Dindustries )=- -=( Aluhotend - mostly metal hotend)=--=( Facebook )=-
|
Re: Sanding down heater cartridge April 14, 2014 07:53AM |
Admin Registered: 11 years ago Posts: 3,096 |
Quote
thejollygrimreaper
normally the cases are pretty thick, so you can get away with even giving them a slight touch with a bench grinder
Thanks for this, now I am confident that grinding them a bit will do less harm. Still I'll keep it to a minimum, but I'll give it a try!
Update;
Okay, I've Dremeled down my heater cartridge successfully, it took about 10 minutes of grinding because I didn't want to ruin it in one go. Now it is a snug fit, just one more question, since I expect the heater cartridge to slightly expand inside the heater block, is it bad if the cartridge fits 'exactly' in the heater block? I mean, not that I have to hammer it in, but it is a precise fit.
Edited 1 time(s). Last edit at 04/14/2014 10:36AM by Ohmarinus.
|
Re: Sanding down heater cartridge April 14, 2014 06:34PM |
Registered: 11 years ago Posts: 1,592 |
A precise fit is better because you'll get a better distribution of heat. Getting it out after long use may or may not mean drilling it out if it sort of "fuses" into the ally block. My heater cartridge is a sliding fit which means it can be removed handily if I remove the hotend for any reason. You could, if you prefer, saw a fine slot in the block and drill a hole to clamp it but that would depend on the scope of the block.
_______________________________________
Waitaki 3D Printer
_______________________________________
Waitaki 3D Printer
|
Re: Sanding down heater cartridge April 14, 2014 06:50PM |
Registered: 10 years ago Posts: 1,381 |
I've used 6 inch long heaters in blind holes, in beryllium copper, and without anti-seize the heater cartridges fuse inside the wells.
I haven't tried it but I have read about using red high temperature automotive silicone inside the well of 3d printer hot ends.
Almost any thing is better at transferring heat than air, just as long it doesn't catch fire, or char.
But if you have a food or medical application, you don't want anti-seize near the finished product.
|
Re: Sanding down heater cartridge April 14, 2014 07:24PM |
Admin Registered: 11 years ago Posts: 3,096 |
Quote
A2
I've used 6 inch long heaters in blind holes, in beryllium copper, and without anti-seize the heater cartridges fuse inside the wells.
I haven't tried it but I have read about using red high temperature automotive silicone inside the well of 3d printer hot ends.
Almost any thing is better at transferring heat than air, just as long it doesn't catch fire, or char.
But if you have a food or medical application, you don't want anti-seize near the finished product.
I have it fitting precisely, wrapped the whole heated block afterwards with silicone high-temp tape from Mocap and before I applied the tape I set the thermistor inside the heater block with firegum from Holts. What a beautiful product. The firegum just goes from liquid to some kind of ceramic-like material when you heat the hotend above 125 degrees celsius. It is rated to handle temperatures up to a 1000 degrees celsius. Before applying the firegum I made sure the PTFE-liners on the thermistor leads were a bit tight up against the thermistor head so there is no chance of a short. I was afraid to lock the heater cartridge with this firegum because it sets really hard.
Waitaki,
The hotend I'm using is a Merlin, so it already has a screw that you can lock the heater cartridge in place with

Will install the new hotend tomorrow! Very curious to see how it performs.
|
Re: Sanding down heater cartridge April 14, 2014 08:55PM |
Registered: 10 years ago Posts: 1,381 |
Good solution to retain the thermistor, and transfer the heat to the glass bead.
You'll probably have to pick/chisel it out, but it's a good high temp adhesive.
sodium silicate, (water glass) + magnesium silicate, (Talc)+ kaolin (aluminium silicate) + water = muffler sealer.
Sodium silicate
In acidic solutions, the silicate ion reacts with hydrogen ions to form silicic acid, which when heated and roasted forms silica gel, a hard, glassy substance.
[en.wikipedia.org]
Talc
[en.wikipedia.org]
|
Re: Sanding down heater cartridge April 15, 2014 04:12AM |
Admin Registered: 11 years ago Posts: 3,096 |
Quote
A2
Good solution to retain the thermistor, and transfer the heat to the glass bead.
You'll probably have to pick/chisel it out, but it's a good high temp adhesive.
sodium silicate, (water glass) + magnesium silicate, (Talc)+ kaolin (aluminium silicate) + water = muffler sealer.
Sodium silicate
In acidic solutions, the silicate ion reacts with hydrogen ions to form silicic acid, which when heated and roasted forms silica gel, a hard, glassy substance.
[en.wikipedia.org]
Talc
[en.wikipedia.org]
Wow, that sounds good, the thermal conductivity seems to be quite good too. But I guess anything is better than air

|
Re: Sanding down heater cartridge April 15, 2014 04:18AM |
Registered: 10 years ago Posts: 1,381 |
|
Re: Sanding down heater cartridge April 15, 2014 08:05AM |
Admin Registered: 11 years ago Posts: 3,096 |
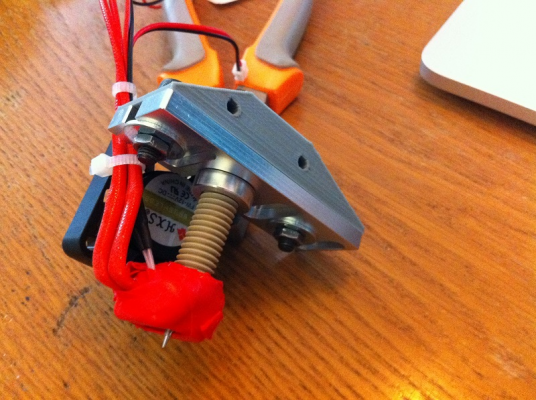
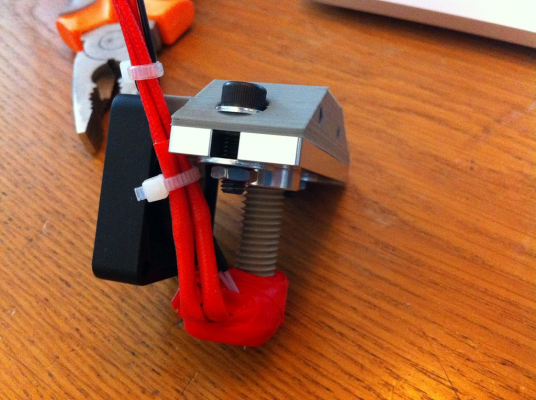
It doesn't really show it well, but this is how it looks after packaging. I added a piece of silicone that was left-over on the heater block, so it looks a bit messy.
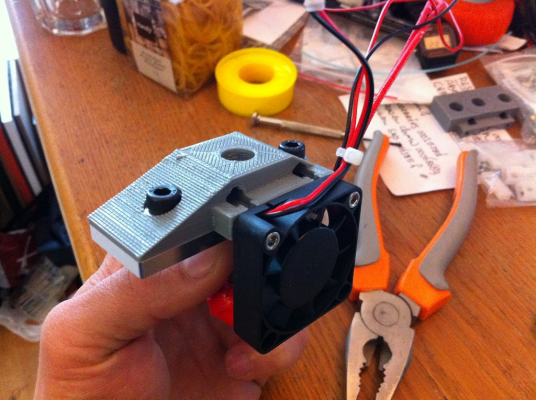
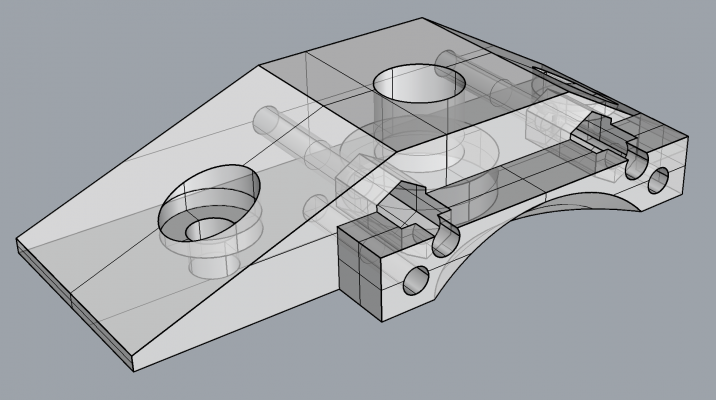
Also designed a simple part that connects the fan, bowden tube, aluminum plate and hotend together and onto the Prusa i3 X-carriage (it's on my MendelMax 1.5).
The unused holes in the backside of the connector have a hex-nut space on the other side. I have inserted the hex-nuts in the small hexagonal cavity and when I tighten the bolts all the way through the X-carriage the hex-nuts get pulled into the connector, locking everything in place very well. So the bolt comes from the backside of the X-carriage and goes all the way through it and through the connector.
Edited 2 time(s). Last edit at 04/15/2014 08:10AM by Ohmarinus.
|
Re: Sanding down heater cartridge April 15, 2014 08:35AM |
Registered: 10 years ago Posts: 1,381 |
That looks very nice, when you get it dialed in post some pics of your printed parts, and comment on the pros and cons of the Merlin.
I'm seeing more standoffs being used lately (latest fad) to raise the hot end up to increase the Z axis.
It looks to me like your configuration could be reconfigured with some stand offs.
The tiny nozzle makes the heater cartridge wires look like monster cables...
Tks!
I'm seeing more standoffs being used lately (latest fad) to raise the hot end up to increase the Z axis.
It looks to me like your configuration could be reconfigured with some stand offs.
The tiny nozzle makes the heater cartridge wires look like monster cables...

Tks!
|
Re: Sanding down heater cartridge April 15, 2014 04:31PM |
Registered: 10 years ago Posts: 6 |
I have a Mendel TriC, therefore 3 heater cartridge. The cartridge's core is 4mm x 10mm. I could only find 6mm x 20mm on the market. Where can I find the 4mm x10mm. I am gonna ruin my alum connector if I drill a bigger hole. I bought my printer directly from RepRap and could'nt find the part anywhere ... Can someone provide me with a link?
Thanks a lot.
Thanks a lot.
|
Re: Sanding down heater cartridge April 15, 2014 05:07PM |
Admin Registered: 11 years ago Posts: 3,096 |
Quote
viduino
I have a Mendel TriC, therefore 3 heater cartridge. The cartridge's core is 4mm x 10mm. I could only find 6mm x 20mm on the market. Where can I find the 4mm x10mm. I am gonna ruin my alum connector if I drill a bigger hole. I bought my printer directly from RepRap and could'nt find the part anywhere ... Can someone provide me with a link?
Thanks a lot.
You could also make a new topic for this, on one side you don't go slightly offtopic, and on the other side you probably get more useful reactions

|
Re: Sanding down heater cartridge April 20, 2014 12:23PM |
Admin Registered: 11 years ago Posts: 3,096 |
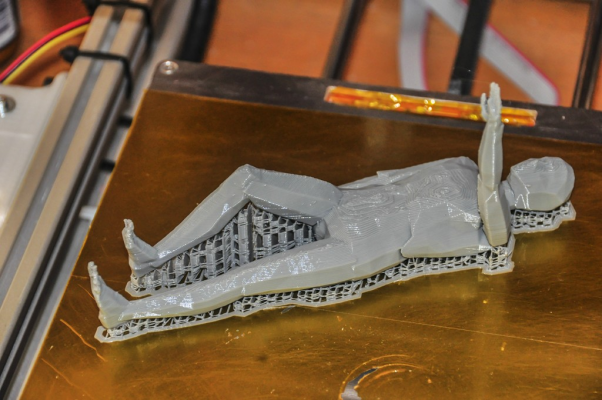
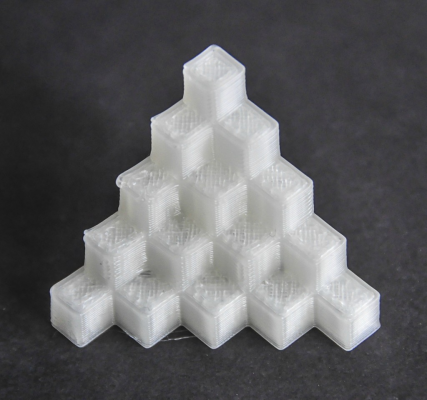
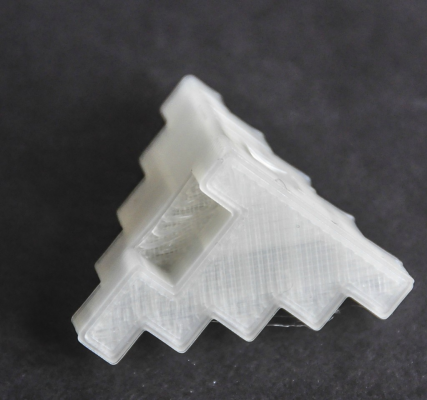
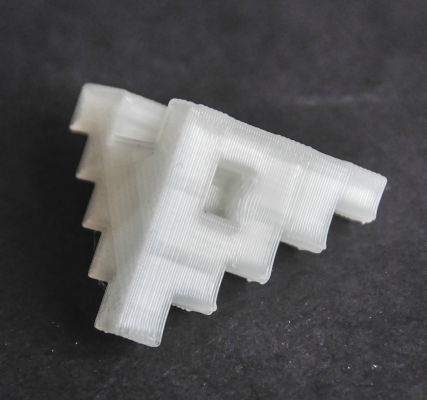
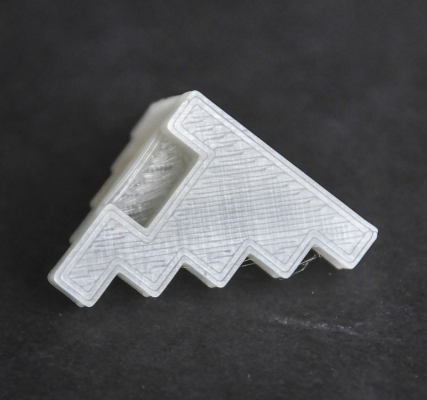
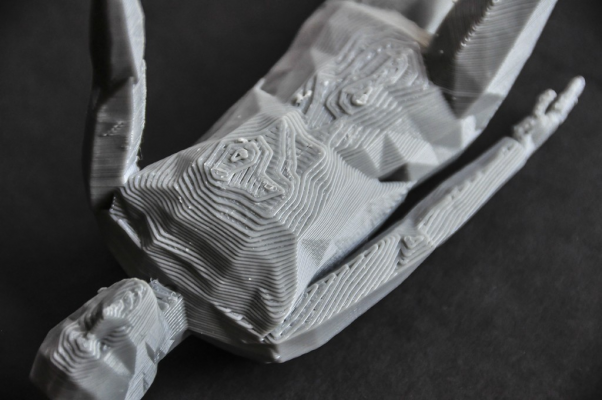
Hey A2, some first results of printing with the hotend 
Here's some sample images of 1.75mm PLA (repraper PLA) printed with the 1.75mm Merlin hotend.
Have a nice easter!

Here's some sample images of 1.75mm PLA (repraper PLA) printed with the 1.75mm Merlin hotend.
Have a nice easter!
|
Re: Sanding down heater cartridge April 20, 2014 03:49PM |
Registered: 10 years ago Posts: 1,381 |
Sorry, only registered users may post in this forum.
