Introducing The Mendel Uni-body
Posted by foton
|
Re: Introducing The Mendel Uni-body June 25, 2010 06:56AM |
Registered: 14 years ago Posts: 59 |
|
Re: Introducing The Mendel Uni-body June 25, 2010 07:13AM |
Registered: 14 years ago Posts: 59 |
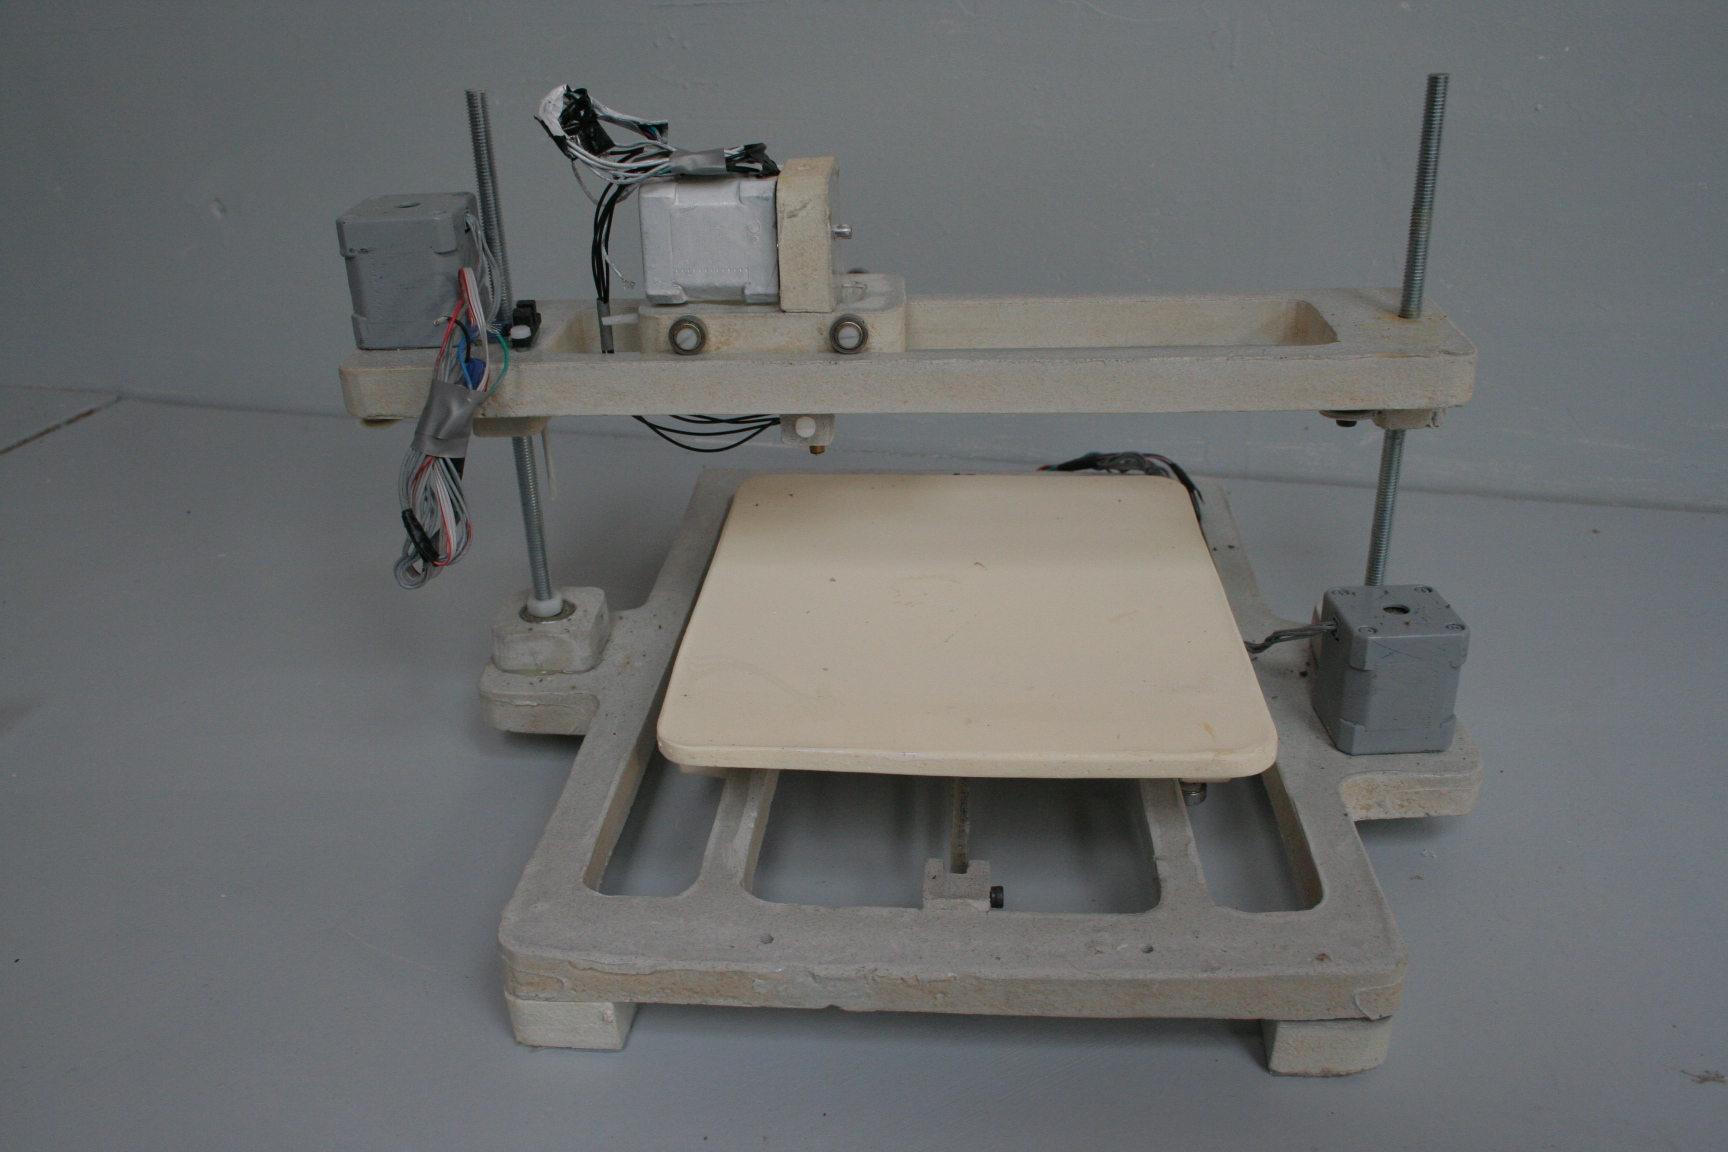
Ok, i think i have found a solutions to streamling the production and assembly, it looks some thing like this
Here´s some of the new stats:
Weight
Original ---- 3.0 kg aprox
Redesigned ---- 2.2 kg aprox
Size
Original ---- same size as the original Mendel (aprox)
Redesigned ---- same size
Materials
Original ---- polyurethane, nylon(fasteners), stainless steel(bearings)
Redesigned ---- polyester, nylon(fasteners), stainless steel(bearings)
Plastic Volume
Origional ---- 2500 ml aprox
Redesigned ---- 1800 ml aprox
Production time of parts
Original ---- 1hour aprox
Redesigned ---- 1hour aprox
Assembly time
Original ---- 5 to 7 hours aprox
Redesigned ---- 1 to 3 hours (unknown as of yet)
Production costs
Original ---- 60 to 70€ aprox
Redesigned ---- 30 to 35€ aprox
Shipping costs
Original ---- continental 50€ intercontinental 70-90€ aprox
Redesigned ---- continental 30-40€ intercontinental 50-80€ aprox
Still a few thing to be figured out and then I may have one or two up on ebay sooner or later all going well.
check out the wiki for more images and all the blurb
Edited 1 time(s). Last edit at 06/25/2010 07:28AM by foton.
|
Re: Introducing The Mendel Uni-body June 25, 2010 09:03AM |
Admin Registered: 17 years ago Posts: 7,879 |
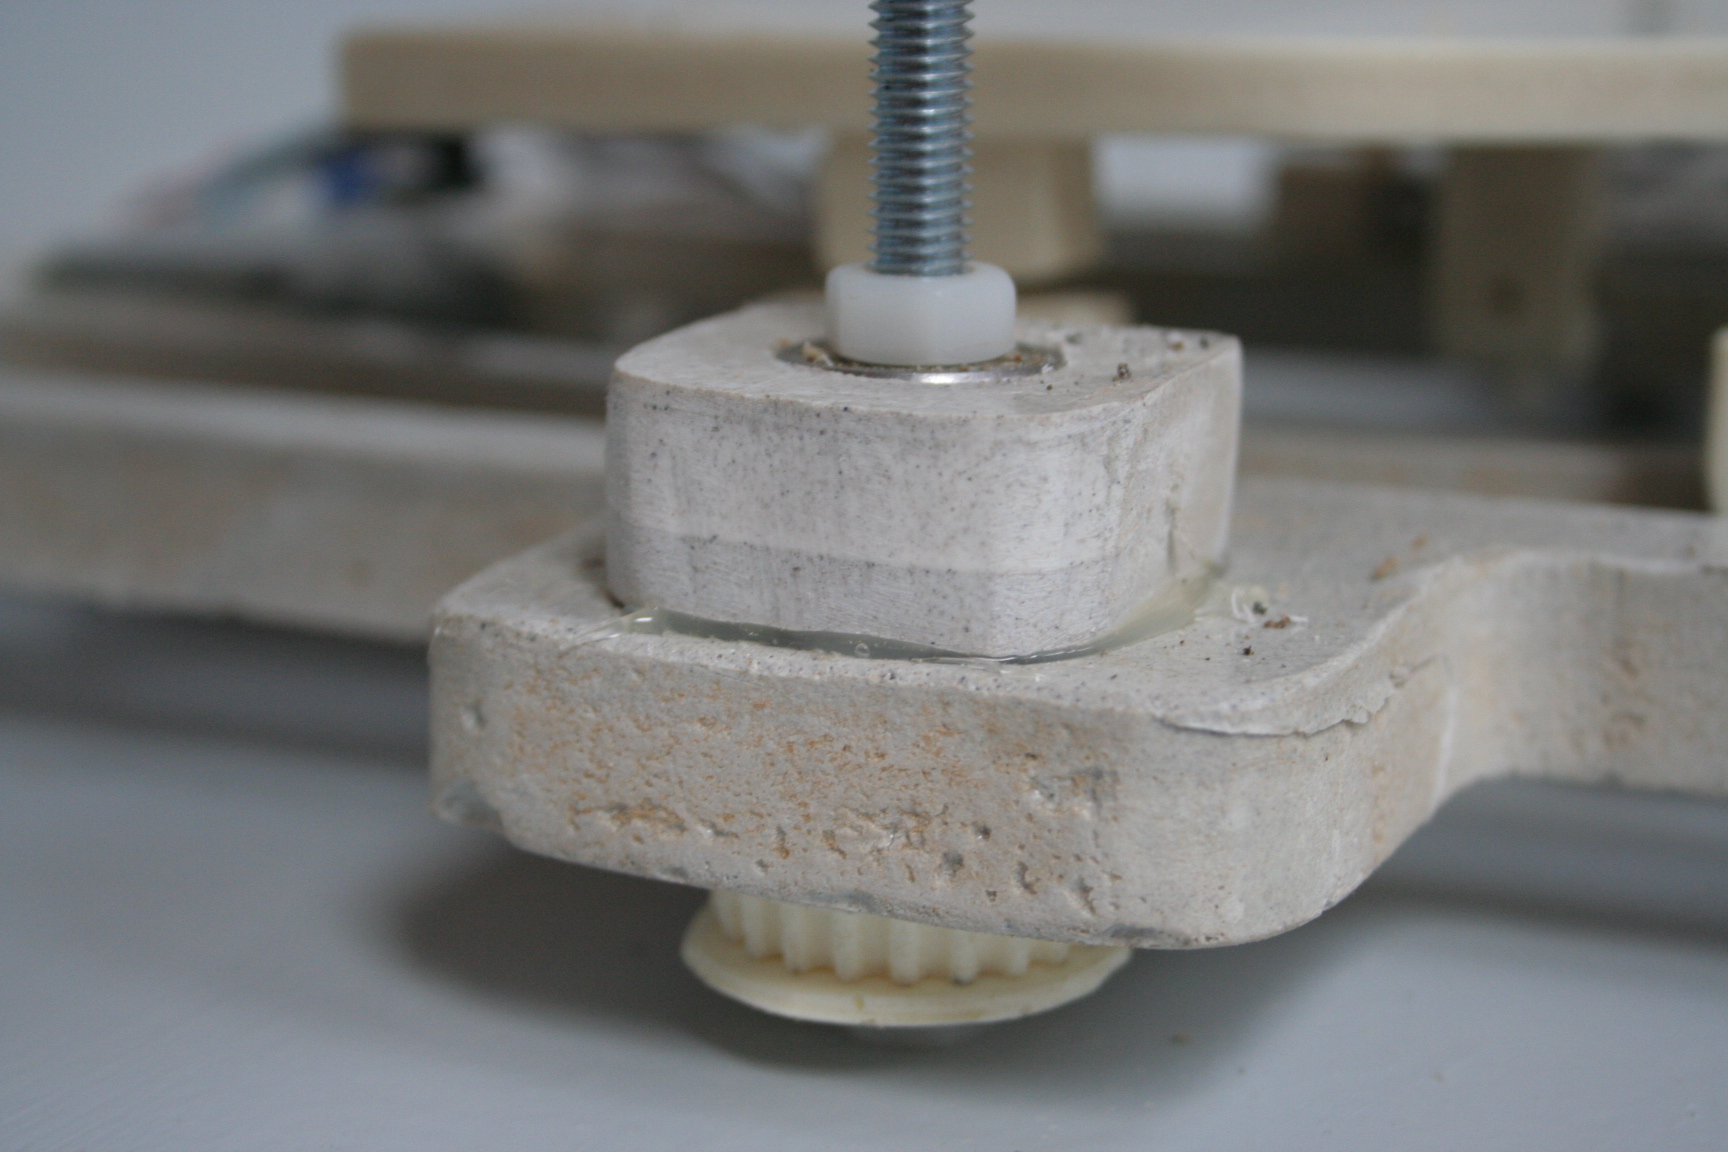
Very nice, but how well does it print?
The current metal Mendel frame is not rigid enough IMHO to throw around the mass of the extruder. This looks like it will wobble severely.
Edited 1 time(s). Last edit at 06/25/2010 09:05AM by nophead.
[www.hydraraptor.blogspot.com]
The current metal Mendel frame is not rigid enough IMHO to throw around the mass of the extruder. This looks like it will wobble severely.
Edited 1 time(s). Last edit at 06/25/2010 09:05AM by nophead.
[www.hydraraptor.blogspot.com]
|
Re: Introducing The Mendel Uni-body June 25, 2010 09:11AM |
Registered: 14 years ago Posts: 3,742 |
Quote
nophead
The current metal Mendel frame is not rigid enough IMHO to throw around the mass of the extruder. This looks like it will wobble severely.
 My thoughts exactly...
Without the M8 steel bars attached to the A-frame you have no stability whatsoever.
I would be very surprised if you could ever get a good print with this design!
Bob Morrison
Wörth am Rhein, Germany
"Luke, use the source!"
BLOG - PHOTOS - Thingiverse
|
Re: Introducing The Mendel Uni-body June 25, 2010 01:05PM |
Registered: 14 years ago Posts: 59 |
|
Re: Introducing The Mendel Uni-body June 25, 2010 03:25PM |
Admin Registered: 17 years ago Posts: 7,879 |
Well of course it is stable when you move the carriage manually, as the only force on the axis is due to friction, but "action and reaction are equal and opposite" so when the x-motor accelerates the carriage and extruder from 0 to, say, 40mm/s in a fraction of a millimetre you get considerable force on the z-rods and the frame, which your machine doesn't have.
[www.hydraraptor.blogspot.com]
[www.hydraraptor.blogspot.com]
|
Re: Introducing The Mendel Uni-body June 25, 2010 05:13PM |
Registered: 14 years ago Posts: 59 |
|
Re: Introducing The Mendel Uni-body July 08, 2010 10:42PM |
This seems interesting, and simple! - however, i can tell you first hand that without the metal rod bar supports, the plastic will crack, if not from the thermal cycles, then from the vibrations and pull of the motor that are completely absorbed by the plastic parts.
The stress on a part is different when manually moved, then when hooked up with a motor. One the inertia is a lot lower, and two the force is only felt at the part you are moving, not on the motor support. Be careful to recommend a low start speed for stepper motors. The motor torque is capable to put over 100lbs/inch of force in a joint just 1/16 of an inch thick piece of plastic.
Another issue is the z axis play, i don't see anything to hold down the table when it moves, other than gravity, and that may not be enough...
Also for those that suggested glass mixed with nylon, those are glass balloons, and it is very very difficult to mix correctly. Mix correctly and at the correct temp, a perfect lightweight solution. But mix wrong and it is a disaster. The balloons will migrate together, and cause a big area of your part to be glass dust. A perfect breaking spot when under stress.
If molded parts are to be used, they need to be sized already for the user, and be beefy enough to be taken apart several times. You would be surprised that people would rather fit a rod thru a smaller hole, than to drill it first.
Good job though, forgive my humble opinion.
I wish you the best in your design adventure!
|
Re: Introducing The Mendel Uni-body July 09, 2010 05:22PM |
Registered: 14 years ago Posts: 59 |
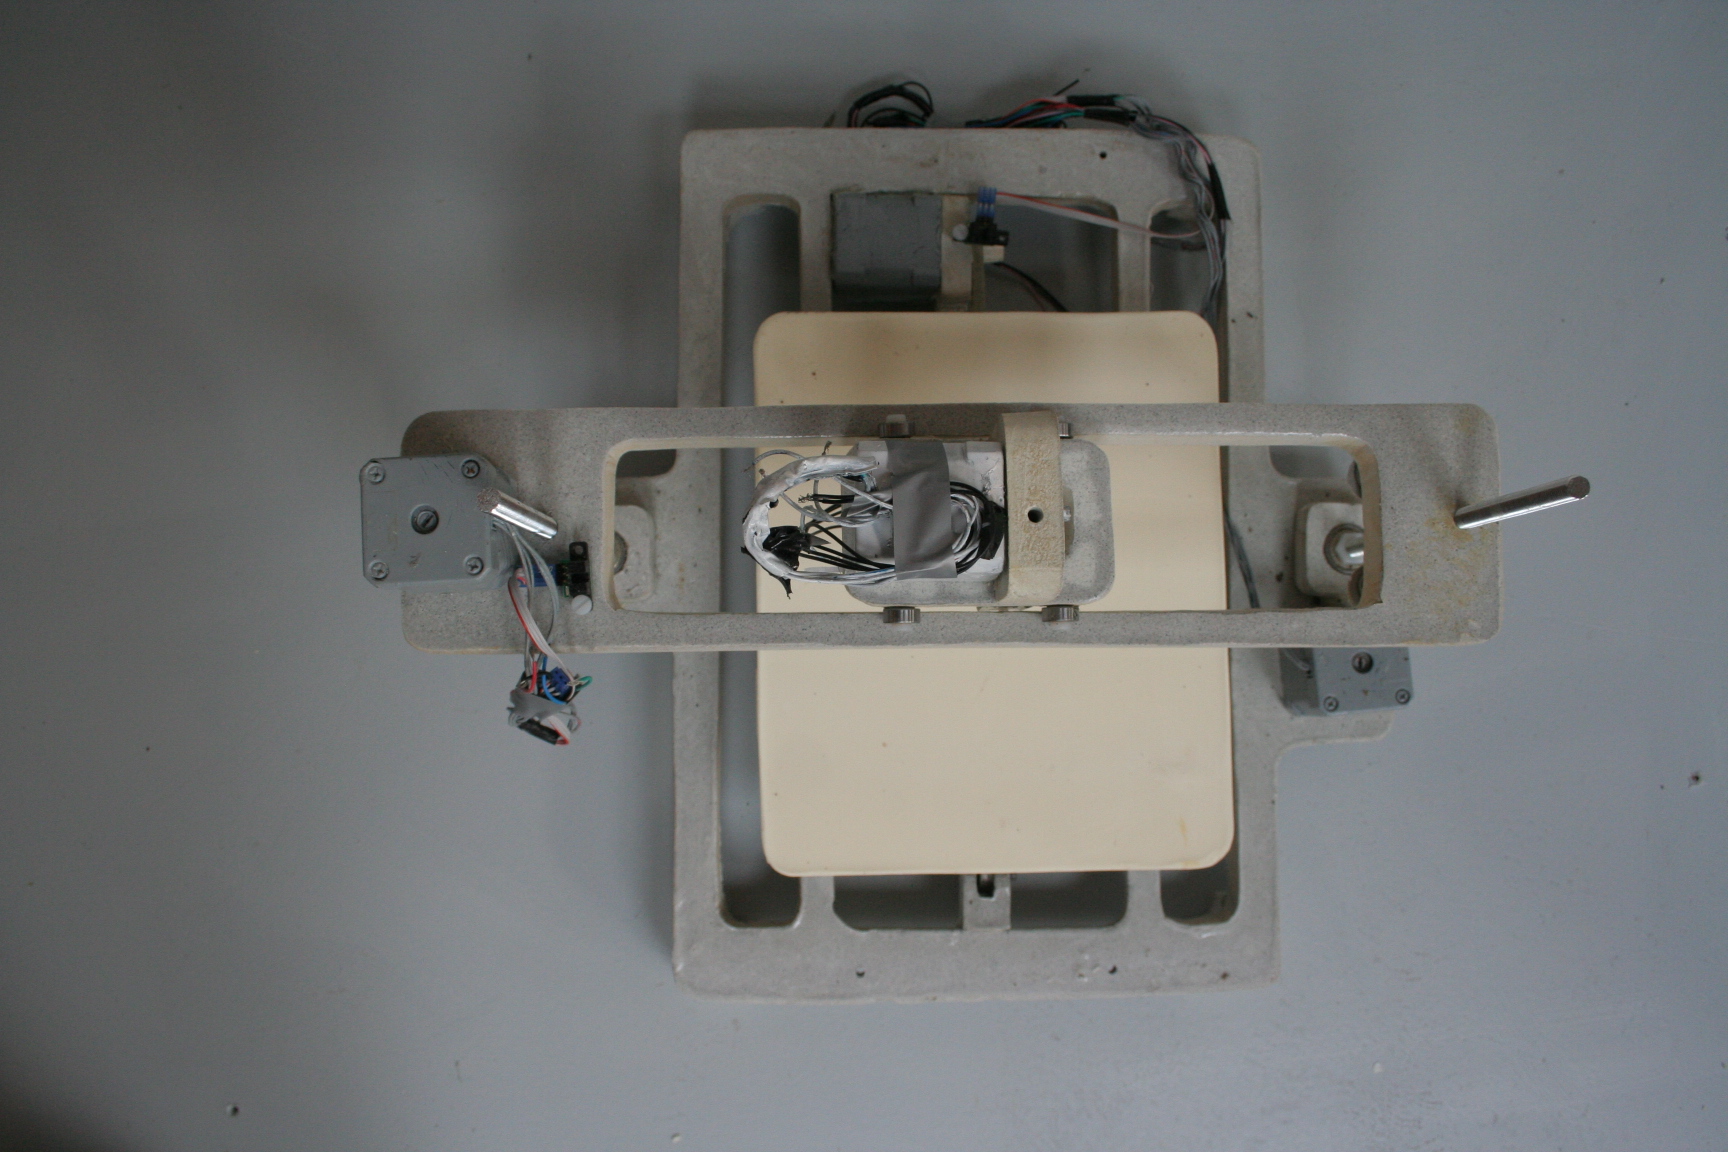
Hi James
Thanks for the tips always good to get other peoples view, I agree there´s still a lot of areas that need working on but
for anyone that´s following events, here´s a quick electronics testing of the x and y axes, thought i´d keep you posted!
Edited 1 time(s). Last edit at 07/18/2010 12:14PM by foton.
|
Re: Introducing The Mendel Uni-body July 09, 2010 11:19PM |
Registered: 13 years ago Posts: 78 |
That looks really good. IMO I think you are onto something. Using gravity as a retention for the X and Y axis has the potential to make design simpler and, parts quantity and cost lower. I work right next to an IKEA and I always walk in there and think about your flat pack 3D printer idea. If the plastic parts are big, it would substantially increase the penetration of reprap into society.
|
Re: Introducing The Mendel Uni-body July 15, 2010 04:15PM |
Registered: 14 years ago Posts: 59 |
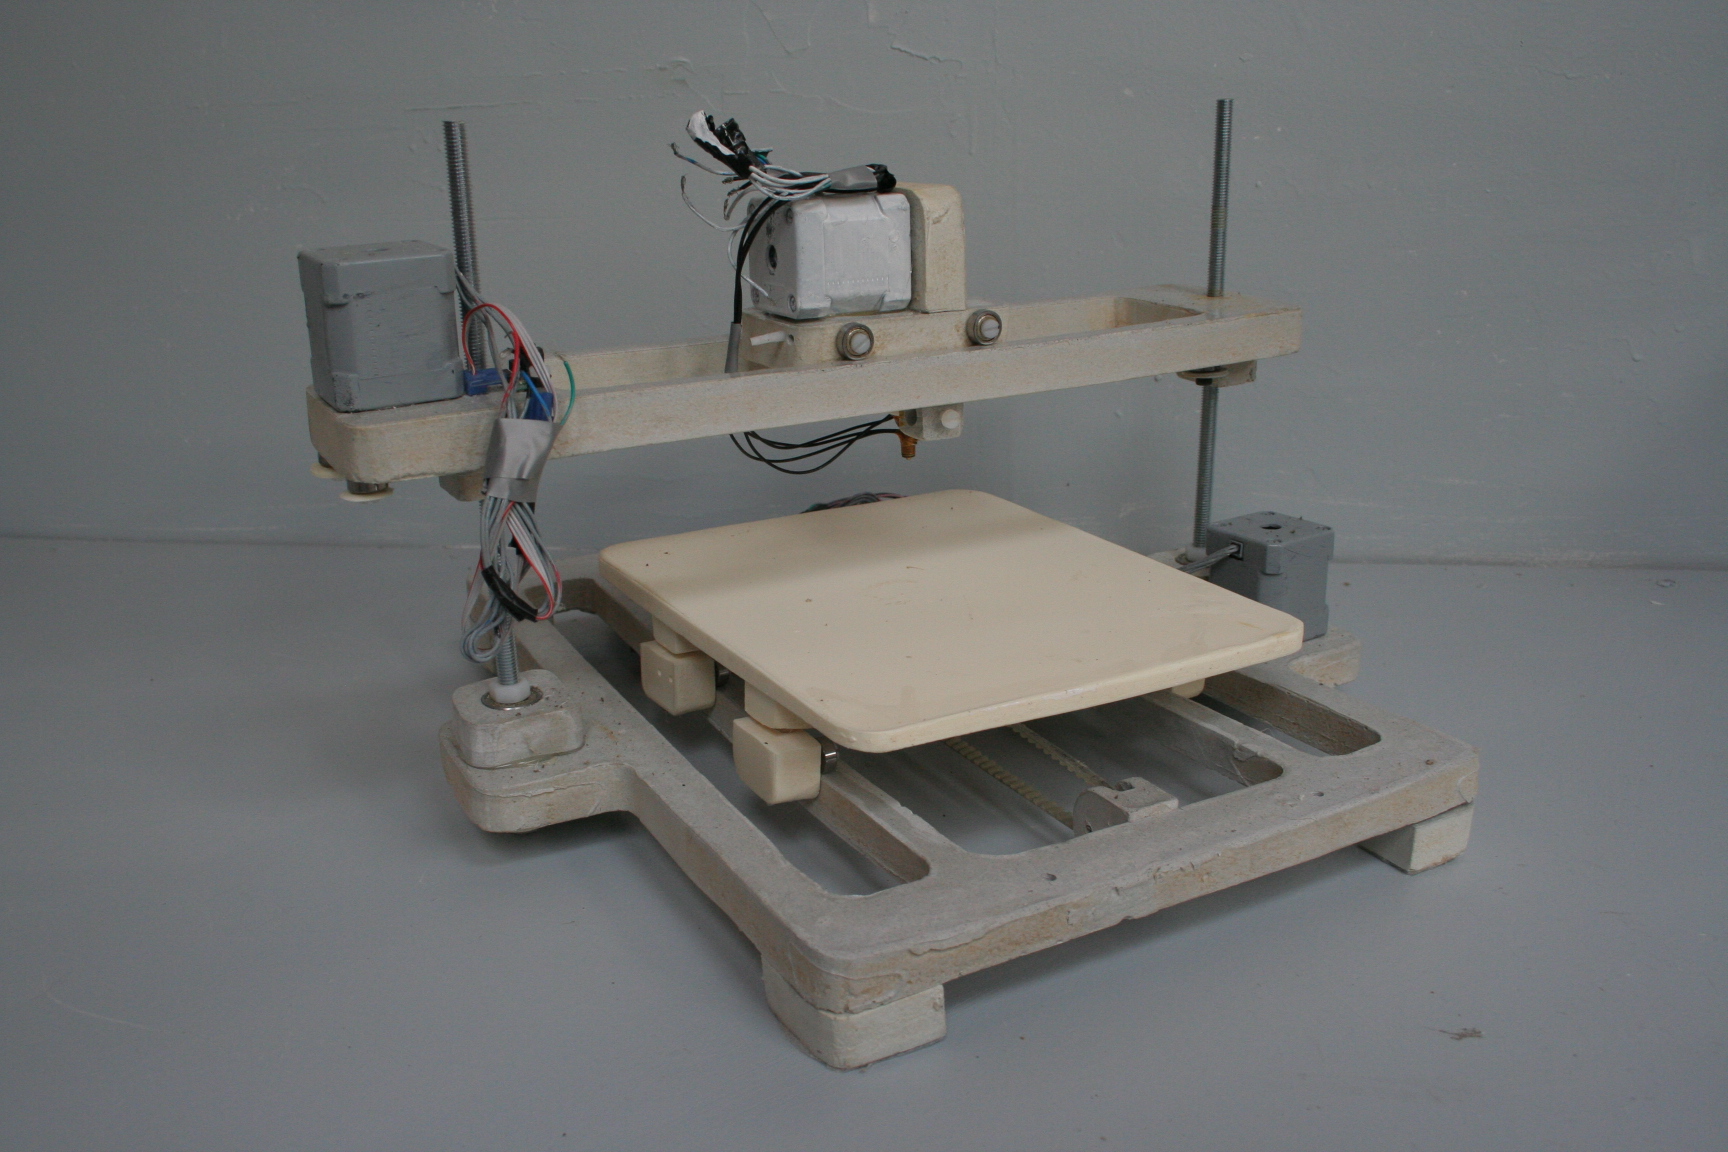
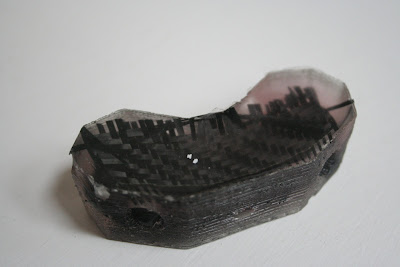
So i´ve been working on trying to improve the strength of the plastic and I think i´m starting to get somewhere it looks a bit like this...
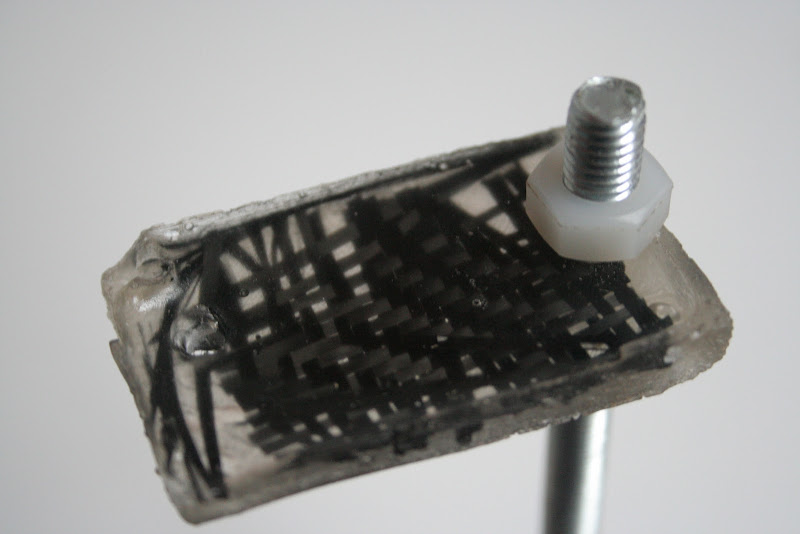
This is a carbon fiber reinforced polymer( CFRP ) basically carbon fiber embed in polyester and it´s pretty strong I haven´t got to far with testing it yet but if I had to guess I
would say it´s over twice the strength of the polyurethane original and it´s also a lot cheaper too, the only problems is its sightly brittle around the edges so it chips as you can see in the image where i drilled the holes, still have some more research and experimenting to do with this, heres a Mendel part i´ve been experimenting with.
|
Re: Introducing The Mendel Uni-body July 18, 2010 07:56AM |
Registered: 13 years ago Posts: 833 |
I saw your very interesting 2nd generation design. Simplifying certainly is fun!
Maybe it would be good to switch to a non-cartesian design of the Z-Axis. If you replace the Z-Axis by a simple lever mechanism attached at the far end on both sides, it might get more stable since it only has one degree of freedom: rotation around the achsis at said far end = up-down rotation of the extruder bridge.
Additional bonus: If the bridge is down, the height of the whole thing is minimized. So you could more easily stuff the machine away. Good for common households.
A lever-type Z-mechanism creates a need for maintaining an upright position of the extruder. There are probably several solutions to that. Some are: (1) Ignore it; since the height generally does not change that much, a slight inclination of the Extruder might not be a problem. (2) Parallelogram-type constraining mechanism. (3) A belt-type constraining mechanism which keeps the bridge parallel to the table. (4) Another stepper which rotates the bridge or just the tool by a given angle. This would create the additional benefit of being able to incline the tool, which might be useful for certain types of work. (5) Your solution here.

Sorry, only registered users may post in this forum.