New print surface material?
Posted by Mutley3D
|
Re: New print surface material? April 25, 2016 05:06PM |
Registered: 8 years ago Posts: 67 |
Quote
Mutley3D
Ali tooling plate is possibly a bit overkill, some views may differ. It is a large mass to get heated and may struggle to get to temp unless using powerful PSU and heater. If it is on a cart or moving bed type printer, its quite a mass to be moving.
PrintBite will be as flat as the material it is adhered to, and meets a number of industrial spec requirements. Its thickness is very consistent. I recommend using mirror tile or a float glass (boro or a toughened glass) from a glass supplier. Make sure the edges have been bevelled by the supplier (ie ground and deburred) to avoid stress cracks when heating. Avoid plain window glass.
HTH
I appreciate the answer.
My printing area is 360x360mm, and the bed will be ~380x380, which might be pretty hard to keep flat even with using tooling plate... I can't imagine a thin heatspreader along with mirror glass will be able to provide acceptable results - but it's a relatively cheap option, and I might have to try it.
Bed movement will be in Z axis only, so the big mass shouldn't be a big problem, and the heater I plan on buying is ~800W 230V...
The thing is, without having bought the aluminum plate, I can't test any of the build surface options. I hear many people are printing directly on kapton/painters tape and getting acceptable results - with bed moving in Z, that might be a viable option too...
|
Re: New print surface material? April 26, 2016 02:21AM |
Registered: 8 years ago Posts: 312 |
I would go with PrintBite, it simply works.
My sheet can preloaded with high temp glue film, so you could glue it directly only the aluminium plate. Much better solution than glass or anything else.
I had trouble getting the first layer to stick, but playing around with temperatures and nozzle heights I got it to stick and never looked back. I have been testing it with all sorts of materials and so far, everything sticks and releases great.
If you don't have the complete bed yet, it will be difficult to test different materials but perhaps you can get a quick plate cut with a water jet somewhere? 2 to 3 mm alu plate will be good enough to do the initial tests.
|
Re: New print surface material? April 26, 2016 03:38AM |
Registered: 9 years ago Posts: 1,699 |
Using Kapton tape worked more or less good for me, but Kapton tape is very sensitive if it would be hitted by the (hot) nozzle. One hit including movement and you can replace it. If you hit the right temperature the adhesision is very effective. This is for PLA. However PrintBite is more effective and it has another advantage. After cooling down (to less than 45°C in my case) the parts easily fell off the PrintBite. Using Kapton tape it can be a little bit tricky to remove the parts without damage. Kapton tape can give a smoother surface.
Slicer: Simplify3D 4.0; sometimes CraftWare 1.14 or Cura 2.7
Delta with Duet-WiFi, FW: 1.20.1RC2; mini-sensor board by dc42 for auto-leveling
Ormerod common modifications: Mini-sensor board by dc42, aluminum X-arm, 0.4 mm nozzle E3D like, 2nd fan, Z stepper nut M5 x 15, Herringbone gears, Z-axis bearing at top, spring loaded extruder with pneumatic fitting, Y belt axis tensioner
Ormerod 2: FW: 1.19-dc42 on Duet-WiFi. own build, modifications: GT2-belts, silicone heat-bed, different motors and so on. Printed parts: bed support, (PSU holder) and Y-feet.
Ormerod 1: FW: 1.15c-dc42 on 1k Duet-Board. Modifications: Aluminium bed-support, (nearly) all parts reprinted in PLA/ ABS, and so on.
|
Re: New print surface material? April 26, 2016 04:40AM |
Registered: 12 years ago Posts: 1,450 |
I have seen enough recommendations for PrintBite that I will try it as soon as my printers are in regular use again from a prolonged maintenance period. Having tried most things and found nothing completely dependable for printing ABS I think it worthwhile to note down my partial successes. Note that your experiences may differ
PLA is not a problem, 3M blue builders tape works consistently although no-name blue printers tape is not nearly so good.
Mike
Edited 1 time(s). Last edit at 04/26/2016 04:41AM by leadinglights.
PLA is not a problem, 3M blue builders tape works consistently although no-name blue printers tape is not nearly so good.
- In the early days I printed ABS straight onto clean glass. As long as the objects were smaller than 50mm across the widest surface (Yoda's head, Owl on log etc.,) adhesion was perfect. Cleaning needed nothing more than putting the glass plate in a dishwasher. After a while however, the adhesion became poor: Cleaning with Acetone, IPA, wire wool and many others had little effect although leaving the plate in bright sunlight did get it working again.
- Glass plate with hairspray didn't work at all, I might just as well have oiled the glass.
- Kapton tape works well but has a limited life and is not too easy to replace quickly and neatly. Kapton is also only usable if the first layer head clearance is good - poor adhesion if the first layer is too thick, damaged Kapton if it is too thin.
- When cleaning glass or Kapton take care what you wipe the plate with, some types of tissue have substances that dissolve in acetone and make for very poor adhesion. The most noticeably bad tissue is the "Plenty" brand, but most of the tough kitchen tissues are probably the same.
- Acetone slurry either on glass or Kapton: Sort of O.K., but unpredictable with edges lifting and sometimes sticking too firmly. Acetone slurry is my current default but I owe it no loyalty.
- Elmers Purple Glue Stick: about the same reliability as acetone slurry.
- Wolfbite; For a while was the love of my life - stuck right to the edge of any size piece and released completely when it cooled down. Just after I bragged on this forum how good it was it started ripping huge chunks out of my glass plates - the bottle now consigned to the naughty-shelf.
Mike
Edited 1 time(s). Last edit at 04/26/2016 04:41AM by leadinglights.
|
Re: New print surface material? May 01, 2016 09:32PM |
Registered: 8 years ago Posts: 916 |
I've been trying out PrintBite for a few weeks on one of my printers, and thought I'd share my experiences for those who are considering it.
For those in Australia, allow at least 3 weeks for it to arrive. Even though the seller claimed "If shipped via standard Airmail it will take 5-7 days", this certainly didn't apply to me.
The surface is really shiny, with a slight pattern on it. The material itself appears to be a type of fibreglass sheet, so it's easy to cut to shape with a sharp jigsaw. Remember to have a vacuum cleaner set up to suck up all the airborne fibres. You can also easily drill the material, it is quite easy to work with. The double sided adhesive that is applied to the surface seems very sticky, no issues with that at all.
To start with, I just clipped the surface to my build plate, heated up the printbed, and tried some prints with the same settings that worked really well for PEI...
Only to have it delaminate after a cm or so of height.
After talking with the supplier, he advised me to stick the surface directly to the heatbed, and bump up my bed temperature to 120 degrees.
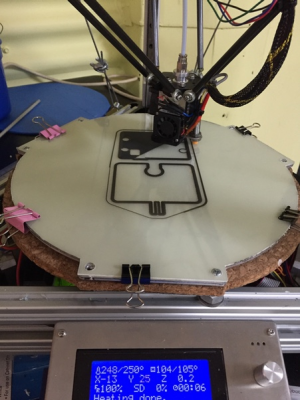
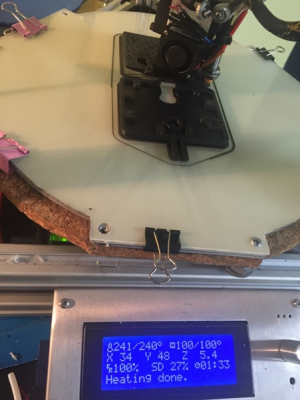
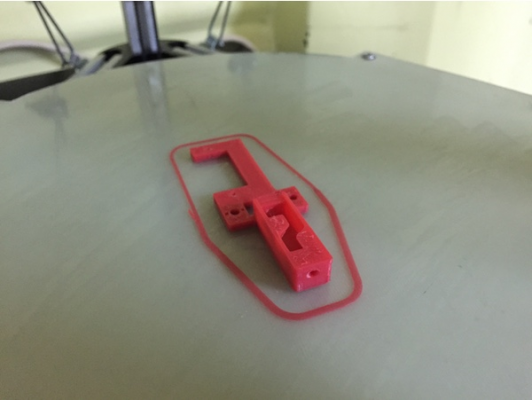
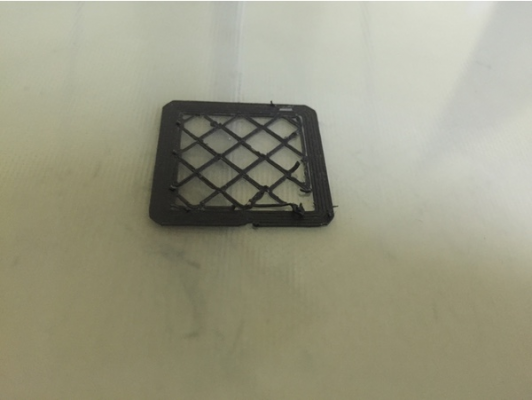
So I did. I tried a variety of temperatures on both heatbed and nozzle, as well as trying a range of different filaments. Eventually I got to the point where small brackets were working OK:
When the print bed cooled to below 50 degrees, the parts would completely separate from the bed as if they had just been placed there. You don't need to scrape them off at all, you can just pick them straight off the bed. If you haven't used a brim, then the part is ready for use straight away. I really like this feature of Printbite.
However, no matter what I tried, I was having trouble getting the first few mm of travel to stick properly to the bed after a retraction. This isn't much of a problem with most models -- if you miss the first little part of a line then the next layer will fix it up.
As luck would have it though, the model that I print the most of, has many retractions on the bottom layer.
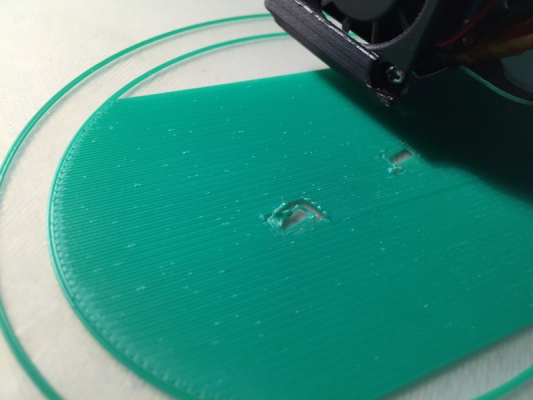
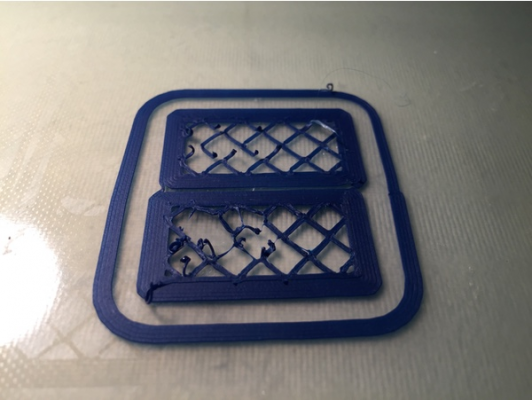
Here are some of the failures:
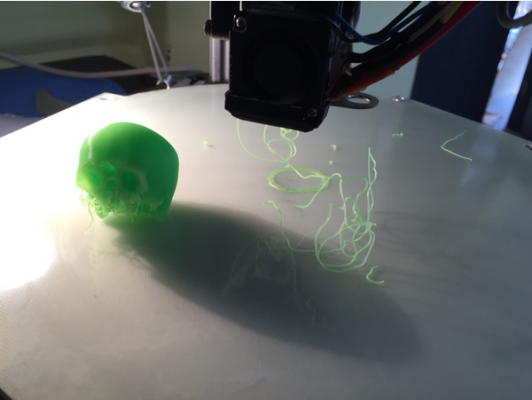
And here is the exact same model, printed with the same roll of filament, printed on PEI.
If the first layer does go down OK, then you're mostly out of the woods. However due to the adhesion not being as good as PEI, I had quite a few failures like this where the print head hit a small lump in the surface and knocked the part off the print bed. This was printed in PLA, with the recommended settings:
For most people, the performance of Printbite would be acceptable. They would just learn to work around any issues they face. Certainly, this is a vast improvement over having to put down glue or tape every time you want to print.
For me, however, I know how well a PEI surface performs, and anything with lower performance is just not acceptable to me. I'm going to pull off the PrintBite surface and install a PEI surface on this printer. Until then I just have to either use my smaller printer (with a PEI bed), or watch the print carefully to ensure that the print stays stuck properly while printing.
I hope this review helps people make up their mind.
|
Re: New print surface material? May 02, 2016 12:44AM |
Registered: 9 years ago Posts: 425 |
Thank you for your feedback. PrintBite is not PEI, different settings required. Advised you a few times in email support. The images you posted above are the ones you emailed me when stating your temps, which you told me were printed with ABS at 230 and PLA at 200. I advised 210 on PLA and 245 on ABS as per instructions. Perhaps this didnt translate.
Shipping delay was due to your local customs or post service. Every effort is made to ship promptly. Your case was 2 days from order as you said you had timeline. You were advised 7-10 days in transit time, and offered DHL shipping option which you would have got in 48 hours! You chose cheaper slower option - didnt work out for you on this occasion.
You hadnt stuck the plate down. It comes with adhesive backing specifically for adhering. Use without adhering will result in print failure. This is stated in instructions.
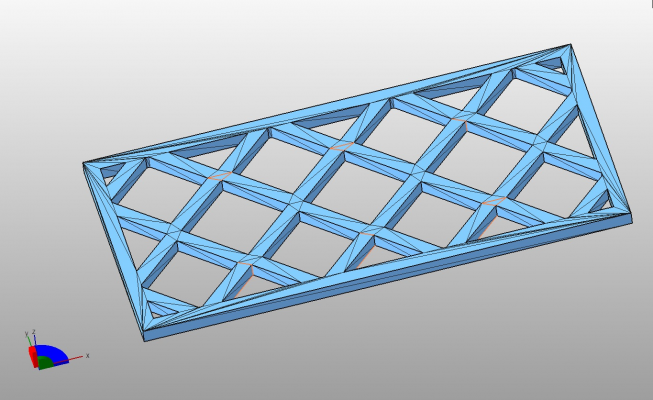
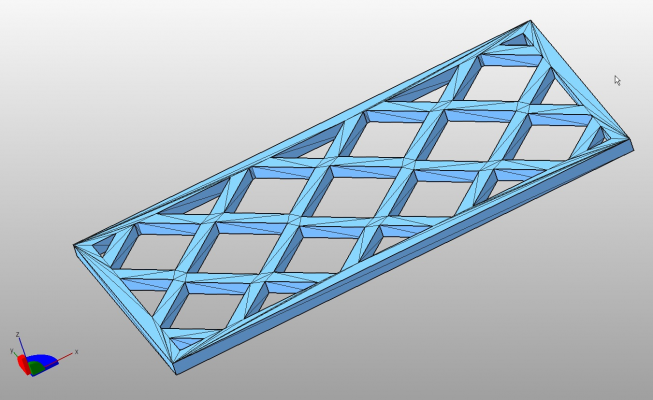
I looked at the file you sent me. Screen shot below is in netfab. Errors in the file around where your adhesion issues were. I too noticed odd behaviour when printing your original file. After netfab much more normal print moves. I suspect this is something you drew but your stl export settings not ideal or original geometry problematic.
Worth keeping on eye on in your CAD, but in any event it still stuck well for me using normal PrintBite temps as the images further below show. Netfab your models before printing is a good practice.
PrintBite is not PEI (and certainly not fibreglass, crazy suggestion) specific instructions are supplied for usage. Dissappointing the customs delay caused you issues and upset. I appreciate the feedback. I will tell Aussie customers 4 weeks in future to be on safe side, aswell as offering DHL.
+90% of users get dialled in and good results when they follow guidance, and are very happpy. Some have commented on benefits over PEI aswell. Greater range of material adhesion. Swings and roundabouts i guess, no one will please everyone all of the time.
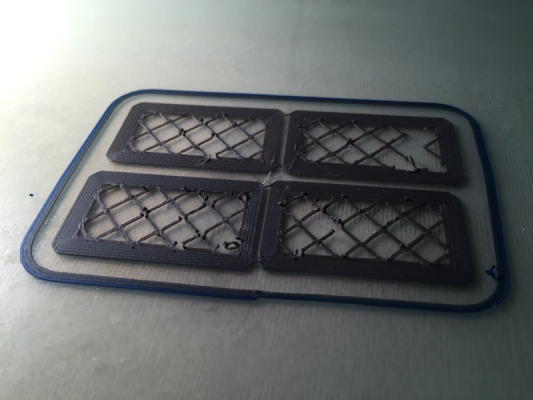
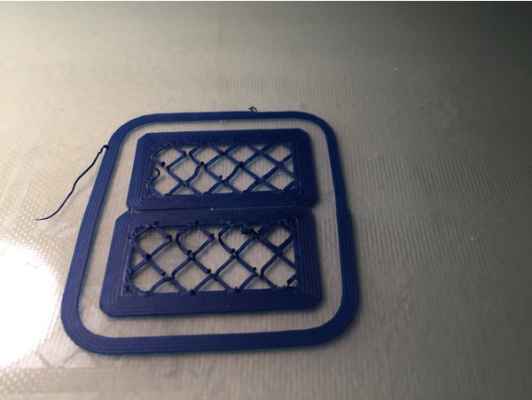
Images below for reference.
Netfab pre-repair - this is the underside of the model - unstitched triangles shown in orange colour
Netfab post repair - unstichced triangles removed and repaired
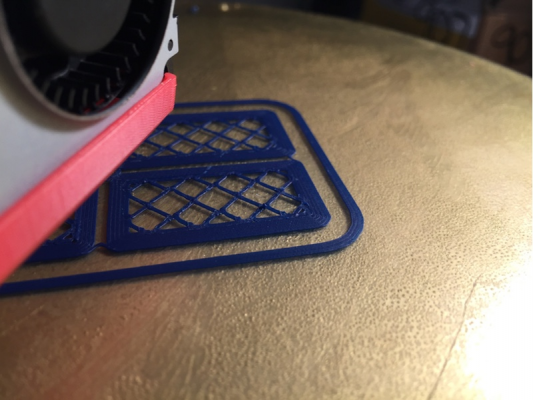
Quick test print 0.2 bottom layer worked first time also did 0.1 and 0.3 bottom layer, all same result - also printed without Brim
If you havent pulled it off yet, maybe retry with the advice above and netfabbing the stl, you might get improved results. If you do you will have wider material compatibility with PrintBite than PEI (ie Nylons PC's TCPTE etc)
Good luck!
Edited 1 time(s). Last edit at 05/02/2016 12:46AM by Mutley3D.
Shipping delay was due to your local customs or post service. Every effort is made to ship promptly. Your case was 2 days from order as you said you had timeline. You were advised 7-10 days in transit time, and offered DHL shipping option which you would have got in 48 hours! You chose cheaper slower option
 - didnt work out for you on this occasion.
 You hadnt stuck the plate down. It comes with adhesive backing specifically for adhering. Use without adhering will result in print failure. This is stated in instructions.
I looked at the file you sent me. Screen shot below is in netfab. Errors in the file around where your adhesion issues were. I too noticed odd behaviour when printing your original file. After netfab much more normal print moves. I suspect this is something you drew but your stl export settings not ideal or original geometry problematic.
Worth keeping on eye on in your CAD, but in any event it still stuck well for me using normal PrintBite temps as the images further below show. Netfab your models before printing is a good practice.
PrintBite is not PEI (and certainly not fibreglass, crazy suggestion) specific instructions are supplied for usage. Dissappointing the customs delay caused you issues and upset. I appreciate the feedback. I will tell Aussie customers 4 weeks in future to be on safe side, aswell as offering DHL.
+90% of users get dialled in and good results when they follow guidance, and are very happpy. Some have commented on benefits over PEI aswell. Greater range of material adhesion. Swings and roundabouts i guess, no one will please everyone all of the time.
Images below for reference.
Netfab pre-repair - this is the underside of the model - unstitched triangles shown in orange colour
Netfab post repair - unstichced triangles removed and repaired
Quick test print 0.2 bottom layer worked first time also did 0.1 and 0.3 bottom layer, all same result - also printed without Brim
If you havent pulled it off yet, maybe retry with the advice above and netfabbing the stl, you might get improved results. If you do you will have wider material compatibility with PrintBite than PEI (ie Nylons PC's TCPTE etc)
Good luck!
Edited 1 time(s). Last edit at 05/02/2016 12:46AM by Mutley3D.
|
Re: New print surface material? May 02, 2016 01:06AM |
Registered: 8 years ago Posts: 916 |
Quote
Mutley3D
The images you posted above are the ones you emailed me when stating your temps, which you told me were printed with ABS at 230 and PLA at 200. I advised 210 on PLA and 245 on ABS as per instructions. Perhaps this didnt translate.
You're right, it perhaps didn't translate to you. I've always printed ABS at around 250, as detailed in my email (and in posts above in this thread). I don't know where you got 230 from. It certainly wasn't from me.
Quote
Mutley3D
You hadnt stuck the plate down. It comes with adhesive backing specifically for adhering. Use without adhering will result in print failure. This is stated in instructions.
As mentioned above, I did a couple of prints without sticking it down to see how it worked. Again as stated above, I then stuck it down with the supplied adhesive. I wish I hadn't, as now I have to take it off somehow.
Quote
Mutley3D
If you havent pulled it off yet, maybe retry with the advice above and netfabbing the stl, you might get improved results. If you do you will have wider material compatibility with PrintBite than PEI (ie Nylons PC's TCPTE etc)
Good luck!
Thanks for the advice, I'll try using Netfab to see what happens. I wasn't aware that there were unstitched triangles in the model, perhaps 123D design doesn't make perfect STL files. I'll try running the model through it and see what happens.
Regardless, with the same toolpath on PEI, the prints stuck down well. Using the same toolpath on Printbite, the prints didn't stick for the very first mm or so of printing. This was visible on many different models, for a wide variety of filaments, and a wide variety of print settings. It wasn't something that I could resolve reliably.
btw the reference print you show above would be classed as a failure, as it has spikes of plastic that go right through the entrance point. This part is similar to lego. If that spike was present it would stop the other parts from having a good interference fit.
Just for the record, (and repeating what I've sent via email), I've tried filaments with the following settings:
ABS:
Nozzle: 240 to 265
Bed: 105 to 125
Retraction: 2.5 to 3mm
Extra length on restart: 0 to 0.5mm
Filament: 3 different manufacturers
Bed prep: Virgin to medium thickness ABS juice
PLA:
Nozzle: 200-220
Bed: 60 - 70
Filament: Only one manufacturer, but three different colours
Can you perhaps explain how this is not following guidance?
Thanks

|
Re: New print surface material? May 02, 2016 02:00AM |
Registered: 9 years ago Posts: 425 |
Each CAD package has its own quirks, none are perfect. It boils down to experience with a particular CAD package to know these quirks. Even I occassioanlly (although very rarely now) snap to a wrong point for example, although I quickly spot it before I end up too far into a design that it becomes a problem to rectify.
Your part, when sliced in Cura, did some very odd moves that appeared to try and lay down a couple of minuscule extrusion dots where there should be straight lines. it then went over them after with normal extrusion behaviour. If there is retraction going on during this time, there are all sorts of oddities that could occur.
There are some backstop practices one can perform to workaround/eliminate CAD related issues, again comes with experience. I dont know about 123D but there are also checks you can do in some packages to check if a solid is actually closed as opposed to non manofild, or containing naked edges. Sometimes if you import into Netfab and inspect where errors might be, then zoom in real close in the original CAD you can see where lines or surfaces arent quite where you thought you put them.
temps came from emails iirc. 245 on nozzle, 120 on bed will get you real close to full adhesion if not full adhesion, then you can adjust accordingly. Anything below these temps is not advised unless you have achieved full adhesion, and then want to turn down a bit, again this dependant on temp accuracy. Temps you read from your printing sw interface are only ever going to be relative not absolute, so your 245 might be someone elses 240 or 250. Try on the hot side, have a go with 125 on bed and 250 nozzle. Lose the advance, and use an extrusion width the same as your onzzle diameter. Also make sure you arent skipping steps on retracts << easy thing to miss.
I dont use advance algo's, i find they are a compensation for something else that isnt right in the machine. Perhaps try a different bottom layer thickness too.
In reality it looks like you are almost there, just a little bit more dialling in, perhaps there is something you havent considered changing as yet because it might not be obvious it would improve things. See how you go
Use with BOTH bed and nozzle set to upper temps, dropping one or other will result in less optimal performance. For ABS 105/110 will not be as good as 120 on the bed. For PLA use 210 or even 220 on nozzle and 70/75 on bed. Its a fine line to get the adhesion "switched on" but once your there you wil really notice it. I am sure you will get the results you need once you iron out this last little bit of dialling in.
Edited 3 time(s). Last edit at 05/02/2016 02:10AM by Mutley3D.
Your part, when sliced in Cura, did some very odd moves that appeared to try and lay down a couple of minuscule extrusion dots where there should be straight lines. it then went over them after with normal extrusion behaviour. If there is retraction going on during this time, there are all sorts of oddities that could occur.
There are some backstop practices one can perform to workaround/eliminate CAD related issues, again comes with experience. I dont know about 123D but there are also checks you can do in some packages to check if a solid is actually closed as opposed to non manofild, or containing naked edges. Sometimes if you import into Netfab and inspect where errors might be, then zoom in real close in the original CAD you can see where lines or surfaces arent quite where you thought you put them.
temps came from emails iirc. 245 on nozzle, 120 on bed will get you real close to full adhesion if not full adhesion, then you can adjust accordingly. Anything below these temps is not advised unless you have achieved full adhesion, and then want to turn down a bit, again this dependant on temp accuracy. Temps you read from your printing sw interface are only ever going to be relative not absolute, so your 245 might be someone elses 240 or 250. Try on the hot side, have a go with 125 on bed and 250 nozzle. Lose the advance, and use an extrusion width the same as your onzzle diameter. Also make sure you arent skipping steps on retracts << easy thing to miss.
I dont use advance algo's, i find they are a compensation for something else that isnt right in the machine. Perhaps try a different bottom layer thickness too.
In reality it looks like you are almost there, just a little bit more dialling in, perhaps there is something you havent considered changing as yet because it might not be obvious it would improve things. See how you go

Use with BOTH bed and nozzle set to upper temps, dropping one or other will result in less optimal performance. For ABS 105/110 will not be as good as 120 on the bed. For PLA use 210 or even 220 on nozzle and 70/75 on bed. Its a fine line to get the adhesion "switched on" but once your there you wil really notice it. I am sure you will get the results you need once you iron out this last little bit of dialling in.
Edited 3 time(s). Last edit at 05/02/2016 02:10AM by Mutley3D.
|
Re: New print surface material? May 02, 2016 06:21AM |
Registered: 8 years ago Posts: 93 |
This.Quote
Mutley3D
Temps you read from your printing sw interface are only ever going to be relative not absolute, so your 245 might be someone elses 240 or 250.
I've only used PLA with PrintBite so far, so I don't want to write a proper review until I've tried many other materials. But so far it's been superb. I'm currently using 230c nozzle temp with cheap PLA and 240c with proto-pasta's stainless steel stuff. I don't know if those are the actual temperatures of the hotend but it doesn't really matter. Just add 5-10c each time you try until it sticks.
I'm using 0.1mm layer height and a 0.25mm nozzle, even though the proto-pasta says to use 0.4mm minimum it's working great.
|
Re: New print surface material? May 06, 2016 06:34AM |
Registered: 9 years ago Posts: 1,699 |
Meanwhile I also have serious trouble with PrintBite. I managed to fix my Ormerod 1, but I am not getting ABS to stick at PrintBite. My Ormerod 2 is broken for the moment, but there it was sticking (and warping). There are only slightly differences between the printers:
MK2A heated bed with aluminium heat spreader instead of MK3 aluminium heated bed; same hot-end, but different fans.
I tried to heat up to 125°C, but no success.
BuildTak instead is sticking more or less good, but at least much better than PrintBite for the moment. I have no idea anymore.
Slicer: Simplify3D 4.0; sometimes CraftWare 1.14 or Cura 2.7
Delta with Duet-WiFi, FW: 1.20.1RC2; mini-sensor board by dc42 for auto-leveling
Ormerod common modifications: Mini-sensor board by dc42, aluminum X-arm, 0.4 mm nozzle E3D like, 2nd fan, Z stepper nut M5 x 15, Herringbone gears, Z-axis bearing at top, spring loaded extruder with pneumatic fitting, Y belt axis tensioner
Ormerod 2: FW: 1.19-dc42 on Duet-WiFi. own build, modifications: GT2-belts, silicone heat-bed, different motors and so on. Printed parts: bed support, (PSU holder) and Y-feet.
Ormerod 1: FW: 1.15c-dc42 on 1k Duet-Board. Modifications: Aluminium bed-support, (nearly) all parts reprinted in PLA/ ABS, and so on.
|
Re: New print surface material? May 06, 2016 06:58AM |
Registered: 8 years ago Posts: 93 |
|
Re: New print surface material? May 06, 2016 07:01AM |
Registered: 9 years ago Posts: 425 |
Treito, the ali heat spreader might be taking some of the heat energy away from the glass, and if the thermistor is in the heatbed below the ali and the glass on top, then your top surface temp is going to be significantly lower than what your thermistor is reading. The ali plate acts as a heat sink!
What temp are you extruding the ABS and what thickness bottom layer?
I would suggest trying a bit hotter, or removing the ali heat spreader and attaching the heater directly to the glass to put more heat into the glass.
also clean your surface with lab grade acetone (as opposed to nail varnish remover) as the surface might be greasy from fingers if you have been working on it.
PrintBite performance does not degrade over time.
|
Re: New print surface material? May 06, 2016 08:02AM |
Registered: 9 years ago Posts: 1,699 |
I did not clean it with Acetone yet and at least BuildTak fails, too.
So my MK2 is broken and for my MK1 in this setup PrintBite is new. I printed a little bit PLA onto PrintBite before, but the hot-end was broken.
Due to the different temperature readings I already raised up the bed temperature to 125°C (the thermistor is placed inside the heat spreader).
I am unsure to get rid off the heat spreader as the manufacturer extra added it to spread the heat better and otherwise there could be hot spots at the glass. i only use borosilicate glass by the way.
I stopped the temperature for ABS at 240°C because there is a PTFE liner inside the nozzle. Okay at this hot-end I would be able to complete exchange it, but at my old nozzle the PTFE liner was the cause of the defective.
Slicer: Simplify3D 4.0; sometimes CraftWare 1.14 or Cura 2.7
Delta with Duet-WiFi, FW: 1.20.1RC2; mini-sensor board by dc42 for auto-leveling
Ormerod common modifications: Mini-sensor board by dc42, aluminum X-arm, 0.4 mm nozzle E3D like, 2nd fan, Z stepper nut M5 x 15, Herringbone gears, Z-axis bearing at top, spring loaded extruder with pneumatic fitting, Y belt axis tensioner
Ormerod 2: FW: 1.19-dc42 on Duet-WiFi. own build, modifications: GT2-belts, silicone heat-bed, different motors and so on. Printed parts: bed support, (PSU holder) and Y-feet.
Ormerod 1: FW: 1.15c-dc42 on 1k Duet-Board. Modifications: Aluminium bed-support, (nearly) all parts reprinted in PLA/ ABS, and so on.
|
Re: New print surface material? May 06, 2016 08:08AM |
Registered: 9 years ago Posts: 425 |
|
Re: New print surface material? May 06, 2016 08:14AM |
Registered: 9 years ago Posts: 1,699 |
The surface was not often used and I said I did not use Aceton for cleaning. Normally I use window cleaner or aceton-free brake cleaner to clean the surface. Now I used brake-cleaner including aceton.
245°C is the limit for the PTFE-liner so to not destroy it I reduced the temperature to 240°C. Yesterday I had trouble with my Extruder for what reason ever, but it was filament related.
I try to heat up the bed now to 130°C and I will read the surface temperature with an IR-thermometer.
Slicer: Simplify3D 4.0; sometimes CraftWare 1.14 or Cura 2.7
Delta with Duet-WiFi, FW: 1.20.1RC2; mini-sensor board by dc42 for auto-leveling
Ormerod common modifications: Mini-sensor board by dc42, aluminum X-arm, 0.4 mm nozzle E3D like, 2nd fan, Z stepper nut M5 x 15, Herringbone gears, Z-axis bearing at top, spring loaded extruder with pneumatic fitting, Y belt axis tensioner
Ormerod 2: FW: 1.19-dc42 on Duet-WiFi. own build, modifications: GT2-belts, silicone heat-bed, different motors and so on. Printed parts: bed support, (PSU holder) and Y-feet.
Ormerod 1: FW: 1.15c-dc42 on 1k Duet-Board. Modifications: Aluminium bed-support, (nearly) all parts reprinted in PLA/ ABS, and so on.
|
Re: New print surface material? May 06, 2016 08:39AM |
Registered: 9 years ago Posts: 425 |
|
Re: New print surface material? May 06, 2016 08:41AM |
Registered: 9 years ago Posts: 1,699 |
I only have universal cleaner at home. I guess it is pure Aceton, but I am not sure.
Slicer: Simplify3D 4.0; sometimes CraftWare 1.14 or Cura 2.7
Delta with Duet-WiFi, FW: 1.20.1RC2; mini-sensor board by dc42 for auto-leveling
Ormerod common modifications: Mini-sensor board by dc42, aluminum X-arm, 0.4 mm nozzle E3D like, 2nd fan, Z stepper nut M5 x 15, Herringbone gears, Z-axis bearing at top, spring loaded extruder with pneumatic fitting, Y belt axis tensioner
Ormerod 2: FW: 1.19-dc42 on Duet-WiFi. own build, modifications: GT2-belts, silicone heat-bed, different motors and so on. Printed parts: bed support, (PSU holder) and Y-feet.
Ormerod 1: FW: 1.15c-dc42 on 1k Duet-Board. Modifications: Aluminium bed-support, (nearly) all parts reprinted in PLA/ ABS, and so on.
|
Re: New print surface material? May 06, 2016 09:20AM |
Registered: 9 years ago Posts: 1,699 |
It is universal thinner.
130°C and measured at the surface with 118°C. 245°C first layer and it does not stick enough but a little bit.
Slicer: Simplify3D 4.0; sometimes CraftWare 1.14 or Cura 2.7
Delta with Duet-WiFi, FW: 1.20.1RC2; mini-sensor board by dc42 for auto-leveling
Ormerod common modifications: Mini-sensor board by dc42, aluminum X-arm, 0.4 mm nozzle E3D like, 2nd fan, Z stepper nut M5 x 15, Herringbone gears, Z-axis bearing at top, spring loaded extruder with pneumatic fitting, Y belt axis tensioner
Ormerod 2: FW: 1.19-dc42 on Duet-WiFi. own build, modifications: GT2-belts, silicone heat-bed, different motors and so on. Printed parts: bed support, (PSU holder) and Y-feet.
Ormerod 1: FW: 1.15c-dc42 on 1k Duet-Board. Modifications: Aluminium bed-support, (nearly) all parts reprinted in PLA/ ABS, and so on.
|
Re: New print surface material? May 06, 2016 09:24AM |
Registered: 9 years ago Posts: 425 |
Quote
Treito
I only have universal cleaner at home. I guess it is pure Aceton, but I am not sure.
Please if you follow the guidelines you will not have any issues! A guess will not work.
Pure acetone - ebay - £5 for 1 ltr. or local chemist may have it but ask as it is behind the counter. DONT use nail poilish remover as this has oils and scents added.
|
Re: New print surface material? May 06, 2016 09:53AM |
Registered: 9 years ago Posts: 1,699 |
Quote
Use a pure window cleaner like Windex...
Since when this is not enough?
Slicer: Simplify3D 4.0; sometimes CraftWare 1.14 or Cura 2.7
Delta with Duet-WiFi, FW: 1.20.1RC2; mini-sensor board by dc42 for auto-leveling
Ormerod common modifications: Mini-sensor board by dc42, aluminum X-arm, 0.4 mm nozzle E3D like, 2nd fan, Z stepper nut M5 x 15, Herringbone gears, Z-axis bearing at top, spring loaded extruder with pneumatic fitting, Y belt axis tensioner
Ormerod 2: FW: 1.19-dc42 on Duet-WiFi. own build, modifications: GT2-belts, silicone heat-bed, different motors and so on. Printed parts: bed support, (PSU holder) and Y-feet.
Ormerod 1: FW: 1.15c-dc42 on 1k Duet-Board. Modifications: Aluminium bed-support, (nearly) all parts reprinted in PLA/ ABS, and so on.
|
Re: New print surface material? May 06, 2016 10:11AM |
Registered: 9 years ago Posts: 425 |
|
Re: New print surface material? May 06, 2016 10:14AM |
Registered: 9 years ago Posts: 1,699 |
Quote
Treito
Normally I use window cleaner or aceton-free brake cleaner to clean the surface.
I always used window-cleaner to clean the surface. Sometimes first the mentioned brake cleaner and after that window-cleaner again. I only said that I have no pure Acetone at home but only mixtures. Of course I have window cleaner.
Slicer: Simplify3D 4.0; sometimes CraftWare 1.14 or Cura 2.7
Delta with Duet-WiFi, FW: 1.20.1RC2; mini-sensor board by dc42 for auto-leveling
Ormerod common modifications: Mini-sensor board by dc42, aluminum X-arm, 0.4 mm nozzle E3D like, 2nd fan, Z stepper nut M5 x 15, Herringbone gears, Z-axis bearing at top, spring loaded extruder with pneumatic fitting, Y belt axis tensioner
Ormerod 2: FW: 1.19-dc42 on Duet-WiFi. own build, modifications: GT2-belts, silicone heat-bed, different motors and so on. Printed parts: bed support, (PSU holder) and Y-feet.
Ormerod 1: FW: 1.15c-dc42 on 1k Duet-Board. Modifications: Aluminium bed-support, (nearly) all parts reprinted in PLA/ ABS, and so on.
|
Re: New print surface material? May 07, 2016 05:07AM |
Registered: 9 years ago Posts: 425 |
Last night in the name of science, I cleaned a PrintBite surface with brake cleaner and tried printing with my usual black ABS. Adhesion diminished significantly.
I have tried to recover the adhesion by cleaning thoroughly with acetone to remove any possible brake cleaner residue to no avail. Brake cleaner seems to have had a permanent detrimental affect.
I have tried to recover the adhesion by cleaning thoroughly with acetone to remove any possible brake cleaner residue to no avail. Brake cleaner seems to have had a permanent detrimental affect.
|
Re: New print surface material? May 07, 2016 05:38AM |
Registered: 9 years ago Posts: 1,699 |
So you will say that brake cleaner destroy the PrintBite?
No problem I will pick another one and test it by myself without break cleaner. Which one did you use? With Acetone or without?
Slicer: Simplify3D 4.0; sometimes CraftWare 1.14 or Cura 2.7
Delta with Duet-WiFi, FW: 1.20.1RC2; mini-sensor board by dc42 for auto-leveling
Ormerod common modifications: Mini-sensor board by dc42, aluminum X-arm, 0.4 mm nozzle E3D like, 2nd fan, Z stepper nut M5 x 15, Herringbone gears, Z-axis bearing at top, spring loaded extruder with pneumatic fitting, Y belt axis tensioner
Ormerod 2: FW: 1.19-dc42 on Duet-WiFi. own build, modifications: GT2-belts, silicone heat-bed, different motors and so on. Printed parts: bed support, (PSU holder) and Y-feet.
Ormerod 1: FW: 1.15c-dc42 on 1k Duet-Board. Modifications: Aluminium bed-support, (nearly) all parts reprinted in PLA/ ABS, and so on.
|
Re: New print surface material? May 08, 2016 04:44AM |
Registered: 9 years ago Posts: 425 |
Brake Cleaner is an extremely harsh concoction of various chemical designed to dislodged and contain fine particle brake dust that have accummulated in conditions of 500c+.
Brake cleaner will damage paintwork and surface finishes of most materials. it has been widely adopted for other degreasing uses, but if you read the label, and search for its toxicity, you will find it it also extremely harmful to organic matter (including ourselves). It is even more harmful if it is heated up. It really is a sledgehammer. Do not use it at all. A 3d printer is more akin to a scientific instrument and should be treated as such.
If you use BC on PB you will destroy the PB. Sounds like we have found the root of your problem.
|
Re: New print surface material? May 11, 2016 07:36AM |
Registered: 8 years ago Posts: 45 |
|
Re: New print surface material? May 11, 2016 08:46AM |
Registered: 9 years ago Posts: 517 |
Quote
Anna & Karl
Does anyone have any indications how PrintBite behaves with capacitive proximity sensors? I am thinking about installing one and would be interested in your experiences. What about inductive sensors with aluminium under the PrintBite - would that be likely to work?
I would avoid using a capacitive sensor. They can be effected by temperature and humidity so are really not a good choice for 3D printers.
I used an inductive sensor with PrintBite. However, because of the thickness of the material (0.7mm IIRC), that reduced the height difference between the nozzle and sensor and I was having issues with the sensor catching on the part if the edge of the print curled up any. This was with the standard 4mm approach sensor. If you can use the 8mm version (it has a wider barrel), that should take care of the issue.
|
Re: New print surface material? May 11, 2016 08:51AM |
Registered: 9 years ago Posts: 425 |
Quote
Anna & Karl
Does anyone have any indications how PrintBite behaves with capacitive proximity sensors? I am thinking about installing one and would be interested in your experiences. What about inductive sensors with aluminium under the PrintBite - would that be likely to work?
Unfortunately I dont use or have experience of bed levelling sensors however there are some comments about it in this thread being used with inductive sensors.
I notice ElmoC's comment above - I can supply 0.5mm thickness if it will help, otherwise is it possible to add or increase a Z axis offset?
|
Re: New print surface material? May 11, 2016 08:59AM |
Registered: 9 years ago Posts: 517 |
Quote
Mutley3D
Quote
Anna & Karl
Does anyone have any indications how PrintBite behaves with capacitive proximity sensors? I am thinking about installing one and would be interested in your experiences. What about inductive sensors with aluminium under the PrintBite - would that be likely to work?
Unfortunately I dont use or have experience of bed levelling sensors however there are some comments about it in this thread being used with inductive sensors.
I notice ElmoC's comment above - I can supply 0.5mm thickness if it will help, otherwise is it possible to add or increase a Z axis offset?
Adding Z axis offset wouldn't help. The problem is the physical difference in height between the sensor and nozzle always remains fixed. As an example, on my Printrbot Simple Metal, without the PrintBite, the difference between the nozzle and sensor is about 1mm. When I add the extra 0.7mm in thickness to the bed, I have to raise the nozzle that much for clearance. So now the difference is 0.3mm. While the nozzle is still lower than the sensor, the sensor is now closer to the print and if there is any curling, the sensor can catch on it.
This isn't a complaint about PrintBite, but is just a statement about the physics involved in using an inductive sensor with it. You are going to lose in height difference between the nozzle and sensor the thickness of the material. If your bed has enough material in it that you can adjust the height of the sensor up (in my case, I couldn't), things will be fine. Or if you can use a more sensitive sensor, like an 8mm approach, that will also resolve the issue.
Edited 1 time(s). Last edit at 05/11/2016 09:31AM by ElmoC.
|
Re: New print surface material? May 11, 2016 09:29AM |
Registered: 12 years ago Posts: 1,450 |
I am about to try PrintBite on two of my printers but Anna & Karl's question about sensors made me think: Is PrintBite O.K. with brief contact with a hot end? The reason I ask is that I am using a piezoelectric sensor for bed leveling and Z contact detect [forums.reprap.org]
Contact force is less than 100 grams and duration is less than 20ms. With the hot end at 260°C and the bed at 115°C there is no visible trace left on Kapton tape.
Mike
Edited 1 time(s). Last edit at 05/11/2016 09:29AM by leadinglights.
Contact force is less than 100 grams and duration is less than 20ms. With the hot end at 260°C and the bed at 115°C there is no visible trace left on Kapton tape.
Mike
Edited 1 time(s). Last edit at 05/11/2016 09:29AM by leadinglights.
Sorry, only registered users may post in this forum.
