An alternative to buying a bad kit for $300-500
Posted by the_digital_dentist
|
Re: An alternative to buying a bad kit for $300-500 October 02, 2016 05:06PM |
Registered: 8 years ago Posts: 318 |
I bought a duo for $280
Can't wait to begin the tear down! Should we start a new thread at some point as the upgrade process begins?
Anyway, Looks pretty cool and can't argue with the price!
If you need some help, or don't understand what I just said, feel free to send me a PM anytime
Printer: Prusa i3, 2 E3D v6 Hotends, Arduino + RAMPS 1.4 with a Bypassed 5V Regulator, 400w Insignia ATX PSU, Custom Designed Bowden Extruders
|
Re: An alternative to buying a bad kit for $300-500 October 02, 2016 09:45PM |
Registered: 11 years ago Posts: 5,780 |
In case anyone else decides to replace plastic bits with metal bits, here are my drawings:
[www.youmagine.com]
I haven't made a new Y axis belt clamp yet, but the drawing should be adequate to do the job. I can report that the aluminum X axis motor mount does not flex/tilt like the plastic one did.
I'll be designing a new, adjustable Z=0 switch next. It will probably attach to the upper right rear corner of the frame with a plastic or aluminum piece attached to the Z axis cantilever (there are two predrilled holes ready and waiting).
Ultra MegaMax Dominator 3D printer: [drmrehorst.blogspot.com]
|
Re: An alternative to buying a bad kit for $300-500 October 02, 2016 09:48PM |
Registered: 8 years ago Posts: 1,671 |
|
Re: An alternative to buying a bad kit for $300-500 October 02, 2016 10:46PM |
Registered: 8 years ago Posts: 318 |
Lol found this in an amazon comment about the printer:
By all means contact your cr3dit card company and demand a chargeback..give their fraud department a link to these reviews and get your money back...even if you mange to do your own costly and time consuming upgrades to get it to function it still will not function as well as a machine thats 25 percent the price
I say, challenge accepted
If you need some help, or don't understand what I just said, feel free to send me a PM anytime
Printer: Prusa i3, 2 E3D v6 Hotends, Arduino + RAMPS 1.4 with a Bypassed 5V Regulator, 400w Insignia ATX PSU, Custom Designed Bowden Extruders
|
Re: An alternative to buying a bad kit for $300-500 October 02, 2016 10:57PM |
Registered: 11 years ago Posts: 5,780 |
Those are hangers for the trash bin/nozzle scraper.
The CubeX designers used a monumentally stupid Z=0 switch design that only operates when the extruder carriage is at specific XY coordinates (a reed switch mounted on the extruder carriage senses a magnet glued to the bottom of the build plate). If there were some sort of malfunction where the Z axis motor keeps turning beyond Z=0, the bed plate will hit the extruder nozzles and the left Z axis bearing will hit the frame corner piece, so I don't think the Z nut plate will be able to bang into those posts. It would be very easy to print some "collars" for the frame pieces that will act as mechanical stops/bumpers for the Z axis bearings (maybe I'll put my TPU filament to use for that).
Other design flaws I see after spending more time looking at it:
1) the Y axis cable chain on the left side of the machine is supported by a narrow plastic shelf. To me it looks like the radius of curvature is too small and that will lead to failure of the wires in the drag chain. I will probably remove the shelf and just let the drag chain hang in a larger loop.
2) the teflon filament feed tubes are long and bent in multiple places causing a lot of friction when pulling the filament through them. I will make a new cover that will hold the filament over the top of the machine and feed it straight down to the extruders.
3) I'll probably print some TPU shoes to put over the aluminum feet of the machine.
4) New Z=0 switch
5) 24V power supply???
6) A friend who has already swapped out the controller board tells me that the extruder design is a little weird- the filament hole at the entry of the extruder is off center causing the filament to bend around the pinch roller before it ever contacts the drive gear. That is why these things were always getting jammed up with broken, brittle PLA filament. If the filament survived the bends in the teflon feed tubes it still had to make it through that one last curve. He solved the problem by simply drilling the holes larger. There is no adjustment for pinch wheel pressure...
Edited 1 time(s). Last edit at 10/03/2016 08:08AM by the_digital_dentist.
Ultra MegaMax Dominator 3D printer: [drmrehorst.blogspot.com]
|
Re: An alternative to buying a bad kit for $300-500 October 03, 2016 12:25AM |
Registered: 11 years ago Posts: 5,780 |
I have taken off the extruders for closer examination- mine do not appear to have the offset filament entry hole problem- filament goes straight in, no problems. Maybe there was a drawing revision or just poor quality control...
The extruders are mounted on the carriage using a single screw each. The extruder and hot-end come out together. Hot end cooling fans are mounted on the extruder carriage, not the hot-ends.
Each extruder has a PCB mounted on it. The board has three opto interruptors on it- one checks for presence of the filament in the entry to the extruder and two monitor discs attached to the drive gear and pinch roller. If one turns but not the other, it's a safe assumption that the filament isn't feeding. That's a nice touch, and could prove useful... If the hot-end looks bent in the picture that's because it is :{ . The nozzles appear to be made of aluminum, so I guess I won't be using a brass brush to clean them off! Close inspection under a microscope and with a caliper reveals that one nozzle is 0.7mm dia. and the other is 0.5mm. Hmmmm. I'm glad I looked- that would have taken a while to figure out.
The left hole is for the mounting screw, the right hole is filament entry:
Three optical sensors monitor filament motion:
The hot-end has a 10mm diameter throat that is held firmly by a screw that clamps a part of the extruder down on it. That screw is the only thing that allows you to adjust the extruders nozzles to be at the same Z height. There's no real fine control- you loosen the screw then tighten it down again. I assume the procedure to set the nozzles to equal heights is to loosen both extruder hot-end clamp screws, bring the bed up to contact both (and lift them slightly), then tighten the screws down. It looks like there's about 2 mm of adjustment space available. I don't think it would be hard to turn an E3D down on a lathe to fit the 10mm hole. The tip of the nozzle is about 68 mm below the body of the extruder (+/- 1 mm or so for equal height adjustment).
There's a little tab on the edge of the hot-end that fits in a slot in the extruder body, presumably to keep the hot end from just falling out when you loosen the clamp screw.
The drive gear is an iIt's able to go from very easy to extremely difficult filament insertion doing that.
Edited 3 time(s). Last edit at 10/03/2016 10:40PM by the_digital_dentist.
Ultra MegaMax Dominator 3D printer: [drmrehorst.blogspot.com]
The extruders are mounted on the carriage using a single screw each. The extruder and hot-end come out together. Hot end cooling fans are mounted on the extruder carriage, not the hot-ends.
Each extruder has a PCB mounted on it. The board has three opto interruptors on it- one checks for presence of the filament in the entry to the extruder and two monitor discs attached to the drive gear and pinch roller. If one turns but not the other, it's a safe assumption that the filament isn't feeding. That's a nice touch, and could prove useful... If the hot-end looks bent in the picture that's because it is :{ . The nozzles appear to be made of aluminum, so I guess I won't be using a brass brush to clean them off! Close inspection under a microscope and with a caliper reveals that one nozzle is 0.7mm dia. and the other is 0.5mm. Hmmmm. I'm glad I looked- that would have taken a while to figure out.

The left hole is for the mounting screw, the right hole is filament entry:

Three optical sensors monitor filament motion:


The hot-end has a 10mm diameter throat that is held firmly by a screw that clamps a part of the extruder down on it. That screw is the only thing that allows you to adjust the extruders nozzles to be at the same Z height. There's no real fine control- you loosen the screw then tighten it down again. I assume the procedure to set the nozzles to equal heights is to loosen both extruder hot-end clamp screws, bring the bed up to contact both (and lift them slightly), then tighten the screws down. It looks like there's about 2 mm of adjustment space available. I don't think it would be hard to turn an E3D down on a lathe to fit the 10mm hole. The tip of the nozzle is about 68 mm below the body of the extruder (+/- 1 mm or so for equal height adjustment).

There's a little tab on the edge of the hot-end that fits in a slot in the extruder body, presumably to keep the hot end from just falling out when you loosen the clamp screw.

The drive gear is an iIt's able to go from very easy to extremely difficult filament insertion doing that.

Edited 3 time(s). Last edit at 10/03/2016 10:40PM by the_digital_dentist.
Ultra MegaMax Dominator 3D printer: [drmrehorst.blogspot.com]
|
Re: An alternative to buying a bad kit for $300-500 October 03, 2016 03:36AM |
Registered: 10 years ago Posts: 79 |
Hmm, that is interesting. It's like they designed this whole machine with no concept that people might have to adjust things.
I have already ordered a set of e3d V6 hotends for it. I had hoped to reuse the extruders, but those things look dubious at best. No real tension adjustment, an oversized direct drive wheel, and ONE mounting screw? I might have to buy new ones. Though, that is a super deep groove on that drive wheel. They might be worth trying out...
Either way, I am planning on stripping most of the fancy crap off the X carriage. I don't need the circuit boards and frosted plexi-glass, or the weight they add. I'll probably loose the big drag chain too, and just use a piece of 3mm filament for cable support. Once you remove the nylon feed tubes from that bundle, that drag chain just seems like overkill and more needless moving mass. I don't know though, that's something I will decide once I rip into it.
I'm getting really excited for this thing to get here though. I just want to start tearing it apart and throwing in new parts. The tracking number says it will be here by the 11th.
Are you planning on keeping that clear acrylic back-plate with the cable management, or do you think it will vibrate too much?
Edited 1 time(s). Last edit at 10/03/2016 05:50AM by TheJones.
|
Re: An alternative to buying a bad kit for $300-500 October 03, 2016 08:06AM |
Registered: 11 years ago Posts: 5,780 |
I don't think the back plate rattles at all. My friend's machine runs pretty quietly.
The plate that the extruders mount on is actually made of steel. The only reason I can figure that they did that was because the screws that hold the extruders down are threaded into it. It's about 3mm thick and if they had used aluminum there would probably have been a lot of stripped holes.
The single screw mount seems to be pretty solid.
The frosted plexiglass that holds the filament guide tubes can be removed and the metal bracket can be trimmed off to leave just the piece that holds the end of the drag chain. The hot-end cooling fans are held on using those weird rubber things that were used to hold the fans on the controller board. I have never seen anything rubbery that lasts more than a few years, especially when stretched, like those things are. Would it have been too expensive to use screws?
The print cooling fans are screwed firmly to the extruder carriage.
The hot-end wires for the heater and thermistor come very close to rubbing the X axis belt- you'll want to add a zip ties to hold them against the heatsink. The E3D heatsink is larger diameter than these and may not fit through the hole in the extruder carriage plate- you may have to design a new plate. Watch out for that X axis belt while you're at it.
Overall I like these machines but there are a bunch of small details that were handled strangely.
Ultra MegaMax Dominator 3D printer: [drmrehorst.blogspot.com]
|
Re: An alternative to buying a bad kit for $300-500 October 03, 2016 09:21AM |
Registered: 11 years ago Posts: 5,780 |
More pictures...
Extruder carriage with extruders in place. The three screws circled in yellow are used to hold the plastic filament guide plate and the steel drag chain anchor in place. You have to remove those screws and two others to get the extruders off the carriage plate. The two red circles are the X axis belt tensioners/clamps. The one on the right is hard to access with tools, so the one on the left (right side of the machine when viewed from the front) is where you're going to be adjusting belt tension. Note the proximity of the straight section of belt to the tensioner on the left side- the belt is rubbing! The green circles show where the hot-end wires can rub against the X axis belt. This is fixed by zip tying them to the hot-end heatsinks.
Extruder carriage with extruders removed. Red circles are the X axis belt tensioner/clamps. The one one the left is hard to get to because of the hot-end fan, so adjust tension using the one on the right. The green circles are studs for mounting the extruders. The light blue circle is the area where the hot-end heat-sink goes through the plate. It is about 21.5 mm dia. E3D V6 heatsinks are 22.3 mm diameter and will not fit. Either enlarge the holes in the plate (steel, maybe a little difficult), shave off the E3D heatsink about 2 mm (relatively easy- aluminum), or fabricate a new carriage plate with appropriate sized holes (if you use aluminum you can probably reduce moving mass a little). The yellow circle shows where the fan cables pass under the guide rail- in my machine, the cable actually rubs the guide rail- easily fixed by repositioning the cable and a zip tie.
X axis belt tensioner. This is where the belt rubs against the tensioner clamp in my machine. I trimmed about 6 mm off the length of the belt and reassembled it and now the belt clears the tensioner by about 1.5 mm.
X axis belt tensioner nut. The belt enters a slot in the side of the nut and is held in place by a grub screw. In my machine, the belt wrapped all the way around the tensioner leaving no clearance between the moving belt and the tensioner (the X axis belt rubbed on belt that was wrapped around the tensioner). I trimmed about 6 mm off the length of the belt and the problem was solved. Though there are two such tensioners/clamps on the carriage, this one is the only one you'll find easy to access. You adjust it by loosening the screw from the top of the carriage and using the provided 8mm wrench to rotate the tensioner nut until the belt is tight, then tighten the screw. Be careful with the wrench on the nut- it's aluminum and if you don't ensure that the wrench is fully engaged with it you may round off the corners.
X axis motor and Y axis belt clearance. The two circles show where the belt can rub against the X axis motor mount screws. You can stack washers under the X axis motor mount standoffs to lift the motor a little, or just countersink the screws, or use screws with flatter heads to mount the X axis motor. In my machine, the belt was rubbing the screws even with the plastic motor mount.
Edited 2 time(s). Last edit at 10/03/2016 10:39AM by the_digital_dentist.
Ultra MegaMax Dominator 3D printer: [drmrehorst.blogspot.com]
Extruder carriage with extruders in place. The three screws circled in yellow are used to hold the plastic filament guide plate and the steel drag chain anchor in place. You have to remove those screws and two others to get the extruders off the carriage plate. The two red circles are the X axis belt tensioners/clamps. The one on the right is hard to access with tools, so the one on the left (right side of the machine when viewed from the front) is where you're going to be adjusting belt tension. Note the proximity of the straight section of belt to the tensioner on the left side- the belt is rubbing! The green circles show where the hot-end wires can rub against the X axis belt. This is fixed by zip tying them to the hot-end heatsinks.

Extruder carriage with extruders removed. Red circles are the X axis belt tensioner/clamps. The one one the left is hard to get to because of the hot-end fan, so adjust tension using the one on the right. The green circles are studs for mounting the extruders. The light blue circle is the area where the hot-end heat-sink goes through the plate. It is about 21.5 mm dia. E3D V6 heatsinks are 22.3 mm diameter and will not fit. Either enlarge the holes in the plate (steel, maybe a little difficult), shave off the E3D heatsink about 2 mm (relatively easy- aluminum), or fabricate a new carriage plate with appropriate sized holes (if you use aluminum you can probably reduce moving mass a little). The yellow circle shows where the fan cables pass under the guide rail- in my machine, the cable actually rubs the guide rail- easily fixed by repositioning the cable and a zip tie.

X axis belt tensioner. This is where the belt rubs against the tensioner clamp in my machine. I trimmed about 6 mm off the length of the belt and reassembled it and now the belt clears the tensioner by about 1.5 mm.

X axis belt tensioner nut. The belt enters a slot in the side of the nut and is held in place by a grub screw. In my machine, the belt wrapped all the way around the tensioner leaving no clearance between the moving belt and the tensioner (the X axis belt rubbed on belt that was wrapped around the tensioner). I trimmed about 6 mm off the length of the belt and the problem was solved. Though there are two such tensioners/clamps on the carriage, this one is the only one you'll find easy to access. You adjust it by loosening the screw from the top of the carriage and using the provided 8mm wrench to rotate the tensioner nut until the belt is tight, then tighten the screw. Be careful with the wrench on the nut- it's aluminum and if you don't ensure that the wrench is fully engaged with it you may round off the corners.

X axis motor and Y axis belt clearance. The two circles show where the belt can rub against the X axis motor mount screws. You can stack washers under the X axis motor mount standoffs to lift the motor a little, or just countersink the screws, or use screws with flatter heads to mount the X axis motor. In my machine, the belt was rubbing the screws even with the plastic motor mount.

Edited 2 time(s). Last edit at 10/03/2016 10:39AM by the_digital_dentist.
Ultra MegaMax Dominator 3D printer: [drmrehorst.blogspot.com]
|
Re: An alternative to buying a bad kit for $300-500 October 03, 2016 10:31AM |
Registered: 11 years ago Posts: 5,780 |
Changing hot-ends- E3D V6
The E3D v6 has a 16 mm diameter mount, 22.3 mm dia heatsink fins, and is about 63 mm long from the end of the mount to the tip of the nozzle.
The CubeX hot ends have 10 mm diameter mount and are about 68 mm from the bottom of the extruder to the tip of the nozzle. The heatsink fins are 20 mm dia. The extruder carriage plate has a 21.5 mm hole for the hot-end heatsink.
Assuming you turn down the E3D V6 hot-end to 10 mm to fit the mount, and you shave a few mm off the heatsink fins so it will fit through the extruder carriage plate, you still have to worry about the length. If you put 5 mm of the E3D hotend into the extruder body, you're left with about 58 mm measured from the bottom of the extruder to the tip of the nozzle. That's 10mm shorter than the stock extruder/hot-end combo. If I raise the bed until it contacts the extruder nozzles, the edges of the print cooling fan frames are about 10 mm above the bed. If you use an E3D hot-end without some sort of extension, the print cooling fans will be at about the same level as the nozzles. Not good.
Possible solutions- use smaller print cooling fans, discard the print cooling fans completely, or make an extension for the E3D hot end.
If you want to change both extruder and hot-end, to the E3D Titan and the E3D V6, the distance from the bottom of the extruder to the tip of the hot-end is about 50 mm. Hmmm. That's going to require a complete extruder carriage redesign.
Ultra MegaMax Dominator 3D printer: [drmrehorst.blogspot.com]
|
Re: An alternative to buying a bad kit for $300-500 October 03, 2016 12:59PM |
Registered: 11 years ago Posts: 1,049 |

|
Re: An alternative to buying a bad kit for $300-500 October 03, 2016 06:50PM |
Registered: 11 years ago Posts: 5,780 |
I didn't bother running it, just started tearing into it. We have a CubePro Trio at the makerspace that uses the same mechanism that made good prints and ran quietly using the stock controller and slicer. It's been converted to a smoothieboard controller and runs just as quietly. I have not played with it since the conversion was done last week, but I don't anticipate any problems. We also have a CubeX Duo with a heated bed that has the original controller board. The guy who donated it was using the Kisslicer tricks to get it to run on generic filament. I have never printed on it. It will get a new controller board soon.
I designed a Z=0 limit switch that mounts on the machine's frame today. It will have a screw adjustment to set the Z=0 position. I'll print it and check fit tomorrow.
Edited 1 time(s). Last edit at 10/03/2016 10:46PM by the_digital_dentist.
Ultra MegaMax Dominator 3D printer: [drmrehorst.blogspot.com]
I designed a Z=0 limit switch that mounts on the machine's frame today. It will have a screw adjustment to set the Z=0 position. I'll print it and check fit tomorrow.


Edited 1 time(s). Last edit at 10/03/2016 10:46PM by the_digital_dentist.
Ultra MegaMax Dominator 3D printer: [drmrehorst.blogspot.com]
|
Re: An alternative to buying a bad kit for $300-500 October 04, 2016 12:14AM |
Registered: 11 years ago Posts: 5,780 |
I removed the X axis motor mount again and countersunk the holes, then used flat head screws to hold the motor to the plate, solving the belt rubbing on the motor screw heads problem. I was putting it all back together and of course, one of the plastic belt clamp pieces cracked. Doh! I knew I should have made those from metal, too. One more job for tomorrow...
It's kind of a stupid design if you think about it- all the clamping force on the motor plate that attaches it to the Y axis bearing has to pass through the plastic pieces that have a compressible rubber belt sandwiched between them. You can get away with this if the belt clamps are metal because they can flex without breaking. Plastic will tend to crack...
I guess I'll be fabricating the right side Y axis belt clamp and these pieces tomorrow. A few minutes with a band saw and a drill press will have it all sorted out.
Ultra MegaMax Dominator 3D printer: [drmrehorst.blogspot.com]
|
Re: An alternative to buying a bad kit for $300-500 October 04, 2016 05:42PM |
Registered: 10 years ago Posts: 79 |
I dig the adjustability on that endstop. I probably would have rotated the switch mount 90 degrees and just atached an "L" shaped piece of aluminum to the back Y-carriage plate. Your approach like a lot nicer. 
Also, I was kind of shocked to see those plastic clips back on your machine in the first place. It's not surprising that they cracked though. Acrylic looks nice, but has horrible mechanicals properties.
You might be able to get away with using the bottom grooved plate though, since it's supported by the aluminum mounting plate behind it, and shouldn't flex. Then you can just make a new cap piece out of aluminum to clamp it all down.
|
Re: An alternative to buying a bad kit for $300-500 October 05, 2016 10:47AM |
Registered: 11 years ago Posts: 5,780 |
I'm not real happy with that Z=0 switch design. I'll probably change in in the next day or two. I put it in the right rear corner because that area is wide open with no interference issues. I'm looking at using an optical switch instead. I have a couple opto interruptor boards that came out of some sort of machine
In the meantime, I printed some parts for the Y axis belt clamps, and countersunk the X axis motor screws to eliminate the interference with the belt. The top pieces of the belt clamps are made from phenolic, and they're pretty ugly but they do the job and won't break. I may replace them with aluminum just because they are so butt-ugly. I updated the youmagine post with the printed parts: [www.youmagine.com]
These are the printed parts- they have a slot for the belt and some ridges that engage the belt teeth. The thickness was calculated to keep the belts parallel to the guide rail.
When the top piece is tightened down the belt is pushed down on the ridges hard so it's a combination of friction and tooth engagement that keeps the belt in place. Notice- no more belt interference with the motor screws.
Here the right side belt clamp in place:
Edited 1 time(s). Last edit at 10/05/2016 11:06AM by the_digital_dentist.
Ultra MegaMax Dominator 3D printer: [drmrehorst.blogspot.com]
In the meantime, I printed some parts for the Y axis belt clamps, and countersunk the X axis motor screws to eliminate the interference with the belt. The top pieces of the belt clamps are made from phenolic, and they're pretty ugly but they do the job and won't break. I may replace them with aluminum just because they are so butt-ugly. I updated the youmagine post with the printed parts: [www.youmagine.com]
These are the printed parts- they have a slot for the belt and some ridges that engage the belt teeth. The thickness was calculated to keep the belts parallel to the guide rail.

When the top piece is tightened down the belt is pushed down on the ridges hard so it's a combination of friction and tooth engagement that keeps the belt in place. Notice- no more belt interference with the motor screws.

Here the right side belt clamp in place:

Edited 1 time(s). Last edit at 10/05/2016 11:06AM by the_digital_dentist.
Ultra MegaMax Dominator 3D printer: [drmrehorst.blogspot.com]
|
Re: An alternative to buying a bad kit for $300-500 October 05, 2016 07:04PM |
Registered: 10 years ago Posts: 79 |
|
Re: An alternative to buying a bad kit for $300-500 October 05, 2016 07:24PM |
Registered: 11 years ago Posts: 5,780 |
I'm working on a redesign of the Z=0 switch mount. Stay tuned...
Ultra MegaMax Dominator 3D printer: [drmrehorst.blogspot.com]
Ultra MegaMax Dominator 3D printer: [drmrehorst.blogspot.com]
|
Re: An alternative to buying a bad kit for $300-500 October 05, 2016 11:14PM |
Registered: 11 years ago Posts: 5,780 |
Here it is... The gray parts are printed. The bracket will attach to the upper rear horizontal and the right rear vertical rods by snap fit. I'll drill a couple holes in the metal Z nut plate to mount the adjuster screw block. If it works I'll post the files to youmagine.com
I have to work tomorrow and Friday so I won't get a chance to print it for a couple days.
Ultra MegaMax Dominator 3D printer: [drmrehorst.blogspot.com]
I have to work tomorrow and Friday so I won't get a chance to print it for a couple days.

Ultra MegaMax Dominator 3D printer: [drmrehorst.blogspot.com]
|
Re: An alternative to buying a bad kit for $300-500 October 06, 2016 05:24PM |
Registered: 10 years ago Posts: 79 |
IT CAME EARLY!
That's the good news. The bad news is that hotends and the Mk2 upgrade parts for my other printer aren't here yet to free up the hand-me-down parts, so all i can really do is tear-down.
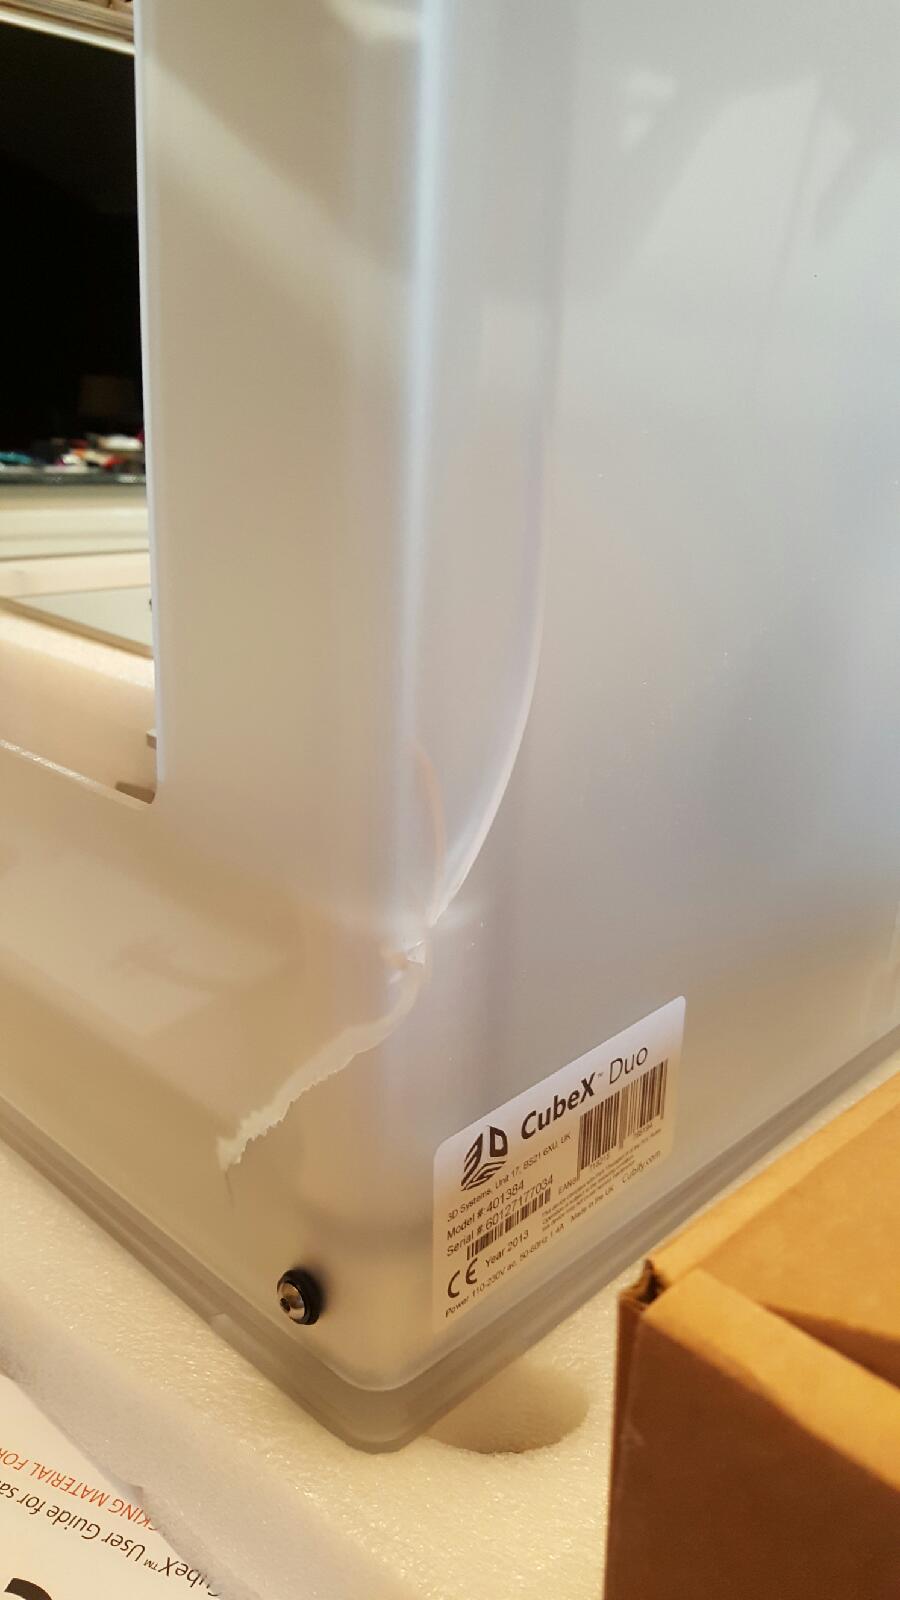
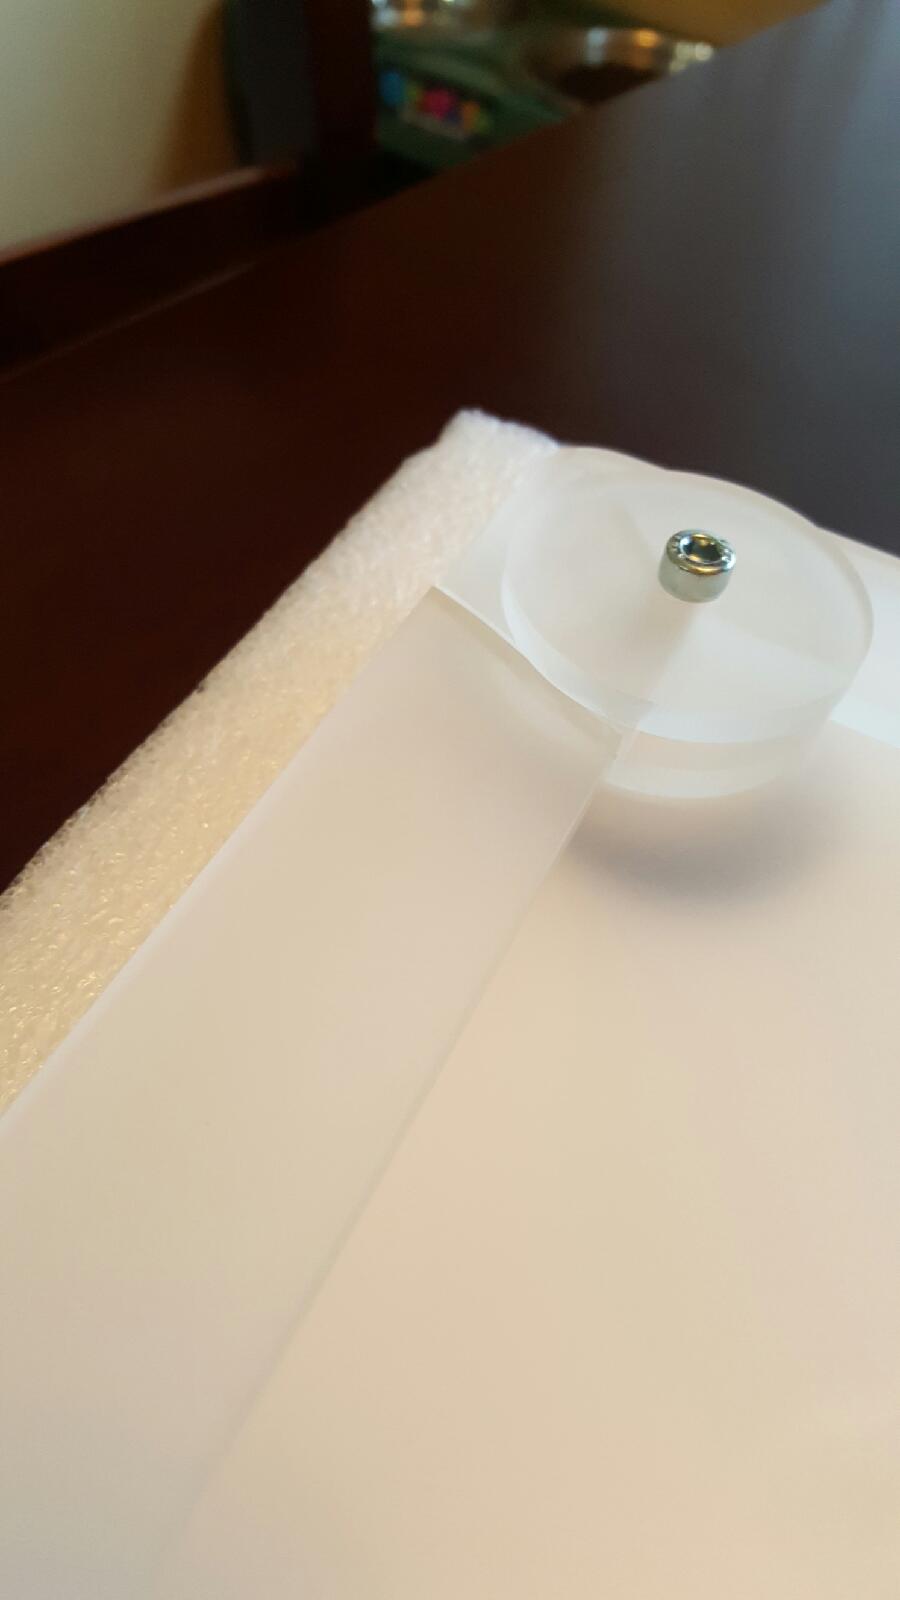
Also, it was factory packed, but my acrylic pieces have several cracks in them. Half the corners on the base plates are cranked, as well as a big one of the main shell (Pictures below). For that big one I'll probably just drill stress relief holes at the ends of the crack, and then apoxy something over the top of it for strength.
I was wondering, did yours have cracks in it too? Either way, everything structural looks fine. I suppose there's only so much you can expect when buying a discontinued item from an eBay seller.
That's the good news. The bad news is that hotends and the Mk2 upgrade parts for my other printer aren't here yet to free up the hand-me-down parts, so all i can really do is tear-down.
Also, it was factory packed, but my acrylic pieces have several cracks in them. Half the corners on the base plates are cranked, as well as a big one of the main shell (Pictures below). For that big one I'll probably just drill stress relief holes at the ends of the crack, and then apoxy something over the top of it for strength.
I was wondering, did yours have cracks in it too? Either way, everything structural looks fine. I suppose there's only so much you can expect when buying a discontinued item from an eBay seller.
|
Re: An alternative to buying a bad kit for $300-500 October 06, 2016 06:33PM |
Registered: 11 years ago Posts: 5,780 |
I was lucky and had no cracked plastic, but I did get one bent hot-end. The way those covers are made is an invitation to cracking. They were smart enough to use plastic bushings on the screws that hold the cover to the frame, but they probably had to figure that out the hard way.
Save all the pieces you strip out of the machine until you have the whole thing up and running. It's easy enough to make a new enclosure if you have to.
Check the X axis belt path- I had interference from one of the belt clamps/tensioners and from wires on the hot-ends. I fixed the problem with the belt clamp by cutting about 6 mm off the length of the belt. I fixed the problem with the wires using zip ties to keep the wires against the hot-end heat sinks.
The Y axis belt on the left side had some interference with the X axis motor screws and even the X axis motor plate mounting standoffs. I fixed the screw problem by countersinking the holes in the X motor mounting plate and using flat head M3 screws to mount the X motor. I tried tweaking the pulley position on the left side Y axis motor to help clear the standoffs, but it was nearly against the motor body already, so I put washers between the Y motor and its mount to move the belt enough to clear the standoffs.
I have removed the teflon filament feed tubes from the machine and will be feeding filament down from the top (the metal ferrules unscrew from the ends of the tubes). Since the teflon tubes are gone, I don't need the acrylic plate on top of the extruders to position them, so I took that out, too. I then cut the stainless steel bracket that was holding the plate on the machine and anchors the drag chain so all that is left of it is a vertical stick that anchors the drag chain. I cut the bracket with a hack saw, but after doing that, I say it would have been easier to make a new part out of a strip of aluminum.
Be sure to check the extruder nozzle sizes- mine appear to be 0.5 and 0.7 mm diameter.
Ultra MegaMax Dominator 3D printer: [drmrehorst.blogspot.com]
Save all the pieces you strip out of the machine until you have the whole thing up and running. It's easy enough to make a new enclosure if you have to.
Check the X axis belt path- I had interference from one of the belt clamps/tensioners and from wires on the hot-ends. I fixed the problem with the belt clamp by cutting about 6 mm off the length of the belt. I fixed the problem with the wires using zip ties to keep the wires against the hot-end heat sinks.
The Y axis belt on the left side had some interference with the X axis motor screws and even the X axis motor plate mounting standoffs. I fixed the screw problem by countersinking the holes in the X motor mounting plate and using flat head M3 screws to mount the X motor. I tried tweaking the pulley position on the left side Y axis motor to help clear the standoffs, but it was nearly against the motor body already, so I put washers between the Y motor and its mount to move the belt enough to clear the standoffs.
I have removed the teflon filament feed tubes from the machine and will be feeding filament down from the top (the metal ferrules unscrew from the ends of the tubes). Since the teflon tubes are gone, I don't need the acrylic plate on top of the extruders to position them, so I took that out, too. I then cut the stainless steel bracket that was holding the plate on the machine and anchors the drag chain so all that is left of it is a vertical stick that anchors the drag chain. I cut the bracket with a hack saw, but after doing that, I say it would have been easier to make a new part out of a strip of aluminum.

Be sure to check the extruder nozzle sizes- mine appear to be 0.5 and 0.7 mm diameter.
Ultra MegaMax Dominator 3D printer: [drmrehorst.blogspot.com]
|
Re: An alternative to buying a bad kit for $300-500 October 06, 2016 06:51PM |
Registered: 10 years ago Posts: 79 |
Those hotends are coming off as soon as my e3d V6's get here, so I'm not so worried about their nozzle size.
What I'm trying to decide now is if I should turn down the e3d heatsink to fit into that extruder, or if i should make an adapter/mount to attach it underneath.
I'm leaning towards making an adapter so I can use a different extruder if I need to in the future. Cutting the heatsink down is kind of a one way street, there's no going back without buying a new one.
Edited 1 time(s). Last edit at 10/06/2016 06:54PM by TheJones.
|
Re: An alternative to buying a bad kit for $300-500 October 06, 2016 08:02PM |
Registered: 8 years ago Posts: 1,671 |
|
Re: An alternative to buying a bad kit for $300-500 October 06, 2016 08:39PM |
Registered: 11 years ago Posts: 5,780 |
Quote
TheJones
Those hotends are coming off as soon as my e3d V6's get here, so I'm not so worried about their nozzle size.
What I'm trying to decide now is if I should turn down the e3d heatsink to fit into that extruder, or if i should make an adapter/mount to attach it underneath.
I'm leaning towards making an adapter so I can use a different extruder if I need to in the future. Cutting the heatsink down is kind of a one way street, there's no going back without buying a new one.
Even if you make an adapter for the length, you'll either have to trim the heat sink diameter or enlarge the holes in the stainless steel extruder carriage plate. It's probably easier to turn down the aluminum heatsink than to enlarge the irregularly shaped hole in the plate. I think it would be a major PITA to have to detach the hot-end from the extruder (from underneath) if you are going to take the extruder off the machine to clean it out, etc.
I'm going to give the stock extruders and hot-ends a try-out. If they work OK I don't see any reason to change them. I'm not a big fan of ungeared extruders, but they seem well enough designed to push the filament as hard as the motor torque will allow. We'll see what the hot-ends can do. They have a rather long heated area with the heater wrapped around the tube, and an actively cooled heatsink. If the internal geometry is good, they may turn out to be pretty good. The 230k thermistors may be a bit of a challenge, but that's just tweaking values in the firmware and calibrating.
Ultra MegaMax Dominator 3D printer: [drmrehorst.blogspot.com]
|
Re: An alternative to buying a bad kit for $300-500 October 06, 2016 11:12PM |
Registered: 10 years ago Posts: 79 |
I was actually thinking about keeping the stock hotends around and drilling put the tips to make them high flow, and maybe make this thing into a high-speed low-res machine for making mechanicals parts and large scale objects.
But for now I'm just going with the V6's, it works well on my other machine, and having parts commonality is nice.
Now that I think about it though, maybe I'll cut the heatsinks after all. They're cheap, and it will leave me in a better position to go back to the other ones later, if that's what I decide to do.
I'll do some more work on it this weekend. I won't be running it untill I can strip the heating pad off my other printer anyway.
|
Re: An alternative to buying a bad kit for $300-500 October 07, 2016 09:48PM |
Registered: 11 years ago Posts: 5,780 |
I was able to print the z=0 switch today. It holds the switch very solidly, but has a couple minor problems that I am going to tweak. I'll post the final file on youmagine.com in a day or two.
The switch is a standard, miniature microswitch, about 20 x 9 x 6.5 mm like this, but without the lever: [goo.gl]
Ultra MegaMax Dominator 3D printer: [drmrehorst.blogspot.com]
The switch is a standard, miniature microswitch, about 20 x 9 x 6.5 mm like this, but without the lever: [goo.gl]

Ultra MegaMax Dominator 3D printer: [drmrehorst.blogspot.com]
|
Re: An alternative to buying a bad kit for $300-500 October 08, 2016 09:20PM |
Registered: 11 years ago Posts: 5,780 |
I'm designing two versions of the Z=0 switch bracket and adjuster screw mount, one to work with the original plastic Z axis nut plate and the other for my aluminum version of the nut plate. The only real difference is the thickness of the plate (4.9 mm vs 9.1 mm), so differences will be minor.
I'll post my CAD model of the printer soon. It makes it much easier to figure out how to make modifications...
Ultra MegaMax Dominator 3D printer: [drmrehorst.blogspot.com]
I'll post my CAD model of the printer soon. It makes it much easier to figure out how to make modifications...

Ultra MegaMax Dominator 3D printer: [drmrehorst.blogspot.com]
|
Re: An alternative to buying a bad kit for $300-500 October 08, 2016 11:17PM |
Registered: 10 years ago Posts: 79 |
I tore into the cubex today, and found a couple interesting things.
I actually like the extruder more than I thought I would, once I got my hands on it. The drive wheel engages nicely, and the whole things feels really solid. I have a few ideas for improvements, and I'll post more about them when my new hotends arrive.
Speaking of hotends, I found one bothersome thing, and one thing that was very concerning.
First, it's not all metal. There is a PTFE liner that extends down to the melt zone. So no high-temp prints here, which is disappointing because I was hoping to turn this into a high-flow hotend for structural parts and maybe try using polycarbonate. Looks like that's not going to happen with this piece. Also, it may not have been suitable for that anyways, since a lot of what looked like melt-zone turned out to be PTFE lined, making it much shorter than I thought it would be.
As annoying as it was to find that, the second thing I found is what was really scary. There is an uninsulated portion of the hotend power wire, about half a millimeter from the grounded metallic portion of the hotend.
I'm glad I wasn't using this thing as is, that's a pretty significant safety issue. Even if nothing melted or caught fire, that could/would have burned up components on the board if it were bumped wrong. I have pictures I'll post later, but my phone won't make them small enough to upload. I need to figure out a picture hosting solution.
If anyone is planning on using these hotends, give it a thorough look-over first.
|
Re: An alternative to buying a bad kit for $300-500 October 09, 2016 07:40AM |
Registered: 11 years ago Posts: 5,780 |
Check your nozzle diameters! Assuming that you have two 0.5 mm nozzles could lead to all sorts of time wasted trying to debug prints:
Edited 2 time(s). Last edit at 10/09/2016 09:14AM by the_digital_dentist.
Ultra MegaMax Dominator 3D printer: [drmrehorst.blogspot.com]

Edited 2 time(s). Last edit at 10/09/2016 09:14AM by the_digital_dentist.
Ultra MegaMax Dominator 3D printer: [drmrehorst.blogspot.com]
|
Re: An alternative to buying a bad kit for $300-500 October 09, 2016 07:08PM |
Registered: 11 years ago Posts: 5,780 |
Here is an EPCOS thermistor data sheet that includes a 230K part. I don't know if it's the same one these hot-ends use, but it's a good starting point.
Ultra MegaMax Dominator 3D printer: [drmrehorst.blogspot.com]
Ultra MegaMax Dominator 3D printer: [drmrehorst.blogspot.com]
|
Re: An alternative to buying a bad kit for $300-500 October 09, 2016 08:24PM |
Registered: 11 years ago Posts: 5,780 |
Quote
TheJones
There is a PTFE liner that extends down to the melt zone. So no high-temp prints here, which is disappointing because I was hoping to turn this into a high-flow hotend for structural parts and maybe try using polycarbonate. Looks like that's not going to happen with this piece. Also, it may not have been suitable for that anyways, since a lot of what looked like melt-zone turned out to be PTFE lined, making it much shorter than I thought it would be.
I hadn't taken the hot-end apart that far. Here's what it looks like:


I couldn't get the teflon tube out because there was a piece of filament stuck in there.
Ultra MegaMax Dominator 3D printer: [drmrehorst.blogspot.com]


Sorry, only registered users may post in this forum.