3 Point Bed Leveling Mounting Locations
Posted by Pheneeny
|
3 Point Bed Leveling Mounting Locations December 29, 2016 12:26PM |
Registered: 7 years ago Posts: 41 |
I'm researching 3 point bed leveling for my corexy build, and I've seen two types of mounting location.
The most popular seems to be mounting 2 of the points in both corners of one edge, and another point in the middle of the opposite edge.
The other design I saw and like better is a mounting point placed in the middle of 3 of the edges.
The latter design is what the_digital_dentist has, and that seems to be the most intuitive to me, but I'm wondering what the advantages and disadvantages are between these two systems.
|
Re: 3 Point Bed Leveling Mounting Locations December 29, 2016 07:36PM |
Registered: 7 years ago Posts: 34 |
It's a matter of lever arms.
Imagine that the printer bed is not just a flat plate between the leveling screws, but maybe four times as big in any direction as the distance between any two leveling screws, and all that pesky frame and other stuff is mysteriously gone, but the leveling screws still work as they would otherwise.
When you adjust one leveling screw up or down, where does the bed tilt? Where does the center of the pivoting happen? It's the imaginary line between the other leveling screws that are not being adjusted. That imaginary line does not move. When you adjust a different leveling screw, the center of pivoting moves to the line between the two non-moving levelers.
How much any point on the bed moves for a given movement of a leveler depends on where it is in relation to the moving leveler and the pivot line. A point right at the leveler moves exactly as much as the leveler, a point halfway to the pivot line moves half as much (and in the same direction!), and a point at the imaginary line doesn't move at all. A point on the other side of the imaginary pivot line moves proportionately, but in the opposite direction (i.e. down for up and up for down) as the leveler.
Any arrangement of three points works, but it's simpler for humans to deal with if they all have the same relative effect and amount of effect. That only happens when the three points form an equilateral triangle. In the equilateral triangle setup, each leveler is halfway between the other two on a perpendicular line from the pivot line, so each has the same proportional effect.
Putting three in the middles of three sides has an interesting effect. The one across from the side without a leveler see-saws the bed around the middle of the bed, as the pivot line runs across the bed between the two other levelers. That's actually kind of handy. But the two levelers on opposite sides pivot the bed at an angle that's not aligned with either of the X, Y, or Z axes of the bed. To me, that seems to be confusing. It's probably just a limitation of my imagination.
I like putting two levelers along one Y-axis edge, and the third in the middle of the opposing edge. This is still going to give you two non-orthogonal adjusters, but it will provide for setting one point in the middle of the Y axis halfway between the two-leveler side, and then level the rest of the bed by adjusting just the one-leveler side. That way the adjustment is to adjust Y front-to-back (for the way I set mine up) then adjust Y side to side. Seems more intuitive to me.
But as I said, it may be a limitation of my own.
|
Re: 3 Point Bed Leveling Mounting Locations December 29, 2016 08:21PM |
Registered: 11 years ago Posts: 5,780 |
It really doesn't matter where you put them, but adjustment is easiest if a line drawn between two of the screws is parallel to either X or Y axis. The real considerations about placement have more to do with your ability to reach the screws to make the adjustments, and that will depend on the construction of your printer.
Ultra MegaMax Dominator 3D printer: [drmrehorst.blogspot.com]
Ultra MegaMax Dominator 3D printer: [drmrehorst.blogspot.com]
|
Re: 3 Point Bed Leveling Mounting Locations December 30, 2016 11:45AM |
Registered: 7 years ago Posts: 41 |
Thanks for the responses, it really helped. I'm now leaning more towards the one mid point mount and two corners. It will be a little easier to accomplish with my build, and seems like it may be a little more stable, since the other method leaves roughly half of the bed floating unsupported.
How important is it to have an equilateral triangle in the mounting points? I can make an equilateral triangle with the mounting points, but I would need to bring the two mounts on the same edge closer together, away from the corners, to make that work. That's doable, but is it worth it?
How important is it to have an equilateral triangle in the mounting points? I can make an equilateral triangle with the mounting points, but I would need to bring the two mounts on the same edge closer together, away from the corners, to make that work. That's doable, but is it worth it?
|
Re: 3 Point Bed Leveling Mounting Locations December 31, 2016 04:12PM |
Registered: 7 years ago Posts: 5 |
|
Re: 3 Point Bed Leveling Mounting Locations January 01, 2017 09:20AM |
Registered: 11 years ago Posts: 5,780 |
You don't need an equilateral triangle, nor do you want it. It really is best if the two in-line screws are as close to the corners of the bed as possible, provided you have bearings to support the undercarriage near the edges of the bed and/or a rigid undercarriage plate.
Here's a Taz printer that I converted to 3 point leveling and cast aluminum bed after the glass bed broke (yeah, they do that, unlike "fragile" aluminum).
The two leveling screws along the front edge of the bed, parallel to the X axis, had to be put relatively close together, away from the corners of the bed. This was done to get them as close to the bearings/guide rails as possible because the bed plate was rather flexible and the corners of the undercarriage plate weren't well supported. When leveling, specifically when adjusting the pitch in the X axis, turning one of those screws causes both front corners of the plate to move. If the screws were located at the corners, turning one screw would not move the other corner and leveling would be a little quicker and easier. As it is it takes a little back and forth screw adjustment along the front edge of the bed to ensure that the bed is properly aligned to the pitch of the X axis. Once that is done the roll is adjusted in seconds by moving the plate forward, putting the nozzle along the back edge of the plate, and then just turning the third leveling screw. The changes in this printer took it from requiring releveling weekly to requiring releveling only if we move the machine off the shelf that it normally sits on. Unlike the original glass bed, the aluminum plate heats evenly and almost the entire surface is printable (see below). I would have preferred to make the screws adjustable from the underside of the bed using thumbwheels but the construction of the machine didn't allow any clearance on the underside and I didn't want to rebuild the whole thing.
In the arrangement I used in my own printer, Son of MegaMax, there is no back and forth adjustment required. The screw at the rear is the "reference" screw and all leveling is done using the other two screws. It takes longer to describe it than it does to actually perform the leveling operation. I have not releveled the bed in the 4 months since I last took the Y axis apart to make some mechanical changes. Prior to that I had not releveled it in over 6 months. The positioning of the screws in SoM was selected for multiple reasons, including keeping the leveling screws close to the bearing blocks on the linear guides. I used to have thumbwheels to adjust the bed leveling, but removed them when I realized that I didn't need to make frequent adjustments. Now the leveling screws are locked down tight with nuts.
Why does the location of the bearing blocks matter when selecting leveling screw locations? At the bearing blocks, unwanted movement is the smallest because the bearings are following and supported by the guide rails. As you get away from the bearing blocks on a cantilevered undercarriage, any unwanted motion that occurs at the bearing block is amplified by the cantilever length. Using a flexible undercarriage introduces the possibility of more unwanted motion. The Taz originally had 4 "leveling" screws at the corners of the relatively stiff glass bed and a very flexible undercarriage. Turning those screws bent the undercarriage more than it moved the glass plate. It was impossible to print anywhere but the central area of the bed because it wasn't flat, and you can't level a surface that isn't flat.
The Taz has one remaining problem- the Y axis guide rails are not quite parallel in the vertical direction. That's a direct consequence of using 3D printed rail supports. The relative positioning of guide rails requires more accuracy than almost anything else in a 3D printer. Guide rail supports are no place for 3D printed parts.
Ultra MegaMax Dominator 3D printer: [drmrehorst.blogspot.com]
Here's a Taz printer that I converted to 3 point leveling and cast aluminum bed after the glass bed broke (yeah, they do that, unlike "fragile" aluminum).

The two leveling screws along the front edge of the bed, parallel to the X axis, had to be put relatively close together, away from the corners of the bed. This was done to get them as close to the bearings/guide rails as possible because the bed plate was rather flexible and the corners of the undercarriage plate weren't well supported. When leveling, specifically when adjusting the pitch in the X axis, turning one of those screws causes both front corners of the plate to move. If the screws were located at the corners, turning one screw would not move the other corner and leveling would be a little quicker and easier. As it is it takes a little back and forth screw adjustment along the front edge of the bed to ensure that the bed is properly aligned to the pitch of the X axis. Once that is done the roll is adjusted in seconds by moving the plate forward, putting the nozzle along the back edge of the plate, and then just turning the third leveling screw. The changes in this printer took it from requiring releveling weekly to requiring releveling only if we move the machine off the shelf that it normally sits on. Unlike the original glass bed, the aluminum plate heats evenly and almost the entire surface is printable (see below). I would have preferred to make the screws adjustable from the underside of the bed using thumbwheels but the construction of the machine didn't allow any clearance on the underside and I didn't want to rebuild the whole thing.
In the arrangement I used in my own printer, Son of MegaMax, there is no back and forth adjustment required. The screw at the rear is the "reference" screw and all leveling is done using the other two screws. It takes longer to describe it than it does to actually perform the leveling operation. I have not releveled the bed in the 4 months since I last took the Y axis apart to make some mechanical changes. Prior to that I had not releveled it in over 6 months. The positioning of the screws in SoM was selected for multiple reasons, including keeping the leveling screws close to the bearing blocks on the linear guides. I used to have thumbwheels to adjust the bed leveling, but removed them when I realized that I didn't need to make frequent adjustments. Now the leveling screws are locked down tight with nuts.
Why does the location of the bearing blocks matter when selecting leveling screw locations? At the bearing blocks, unwanted movement is the smallest because the bearings are following and supported by the guide rails. As you get away from the bearing blocks on a cantilevered undercarriage, any unwanted motion that occurs at the bearing block is amplified by the cantilever length. Using a flexible undercarriage introduces the possibility of more unwanted motion. The Taz originally had 4 "leveling" screws at the corners of the relatively stiff glass bed and a very flexible undercarriage. Turning those screws bent the undercarriage more than it moved the glass plate. It was impossible to print anywhere but the central area of the bed because it wasn't flat, and you can't level a surface that isn't flat.
The Taz has one remaining problem- the Y axis guide rails are not quite parallel in the vertical direction. That's a direct consequence of using 3D printed rail supports. The relative positioning of guide rails requires more accuracy than almost anything else in a 3D printer. Guide rail supports are no place for 3D printed parts.
Ultra MegaMax Dominator 3D printer: [drmrehorst.blogspot.com]
|
Re: 3 Point Bed Leveling Mounting Locations January 09, 2017 12:45AM |
Registered: 7 years ago Posts: 41 |
|
Re: 3 Point Bed Leveling Mounting Locations January 09, 2017 07:10AM |
Registered: 11 years ago Posts: 5,780 |
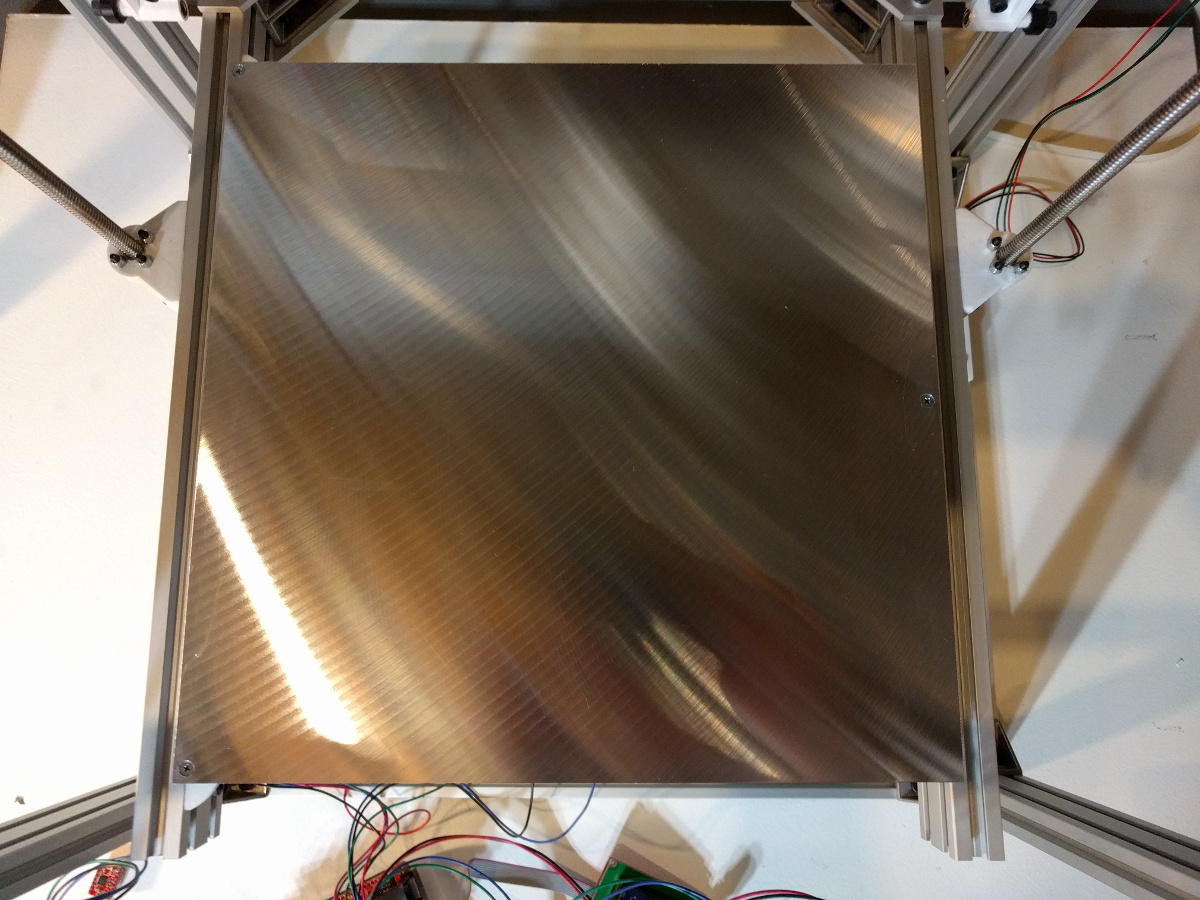
It looks god to me! There's nothing like the finish on a fresh piece of tooling plate!
Ultra MegaMax Dominator 3D printer: [drmrehorst.blogspot.com]
Ultra MegaMax Dominator 3D printer: [drmrehorst.blogspot.com]
Sorry, only registered users may post in this forum.