Reviving a Makerbot Replicator 2X
Posted by Ohmarinus
|
Reviving a Makerbot Replicator 2X June 27, 2020 05:24PM |
Admin Registered: 11 years ago Posts: 3,096 |
Hi all, so.. Last week, by a lucky streak I got a Makerbot Replicator 2(eXperimental) for free. It was used in the makerspace of the art academy where I work, but the machines got replaced with Ultimakers that do a much better job. The machine comes with a heated bed, dual extruder and everything works on 24v, the power adapter is included.
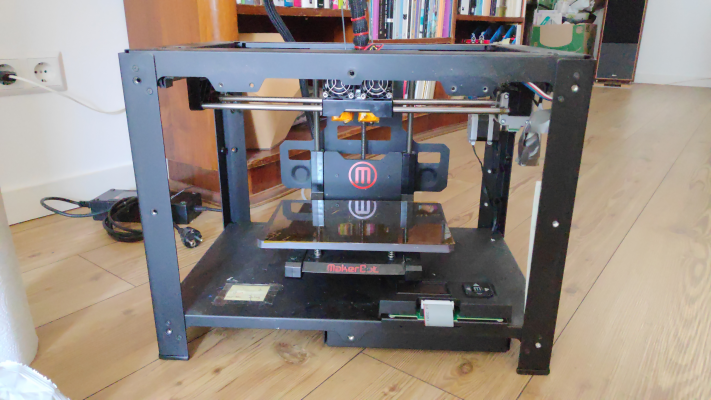
Here's the machine after taking off all the covers:
Now, the things I am thinking of doing:
- Making it single extruder (so I basically have one spare extruder)
- Making it suitable for PLA printing (I heard it's more suited for ABS by design)
- Adding in ABL through inductive probe (this one is a MUST and can be mounted in the spot where one extruder is removed maybe)
- Adding Marlin 2.x on the machines main board
What I'm running into is that I don't have a manual and also can't really find out if it's possible to upload Marlin to the main board. Additionally I haven't found anyone that added ABL to the native board. So it would probably just be wisest to buy an SKR 1.3 (or 1.4) with TMC2209 stepper drivers and WIFI and go fully open source on the machine?
Now what I'm wondering, what would be the 'must have' improvements on such a machine? The heated bed for example looks awesome with the casted iron bed, but the plastic plate in between the arms that hold the heated bed in place looks bent. I cannot imagine this delivering a sturdy surface that gives a consistent print height during prints.
Also, the machine uses 'maintenance free' bushings, I would assume sintered bronze bushings, but the previous user has used all kinds of different grease and lube to lubricate the bushings. Could this cause the pores in the sintered bushings to clog up? Right now I have just removed all the excess grease with paper towel and it all still looks like it's in good shape.
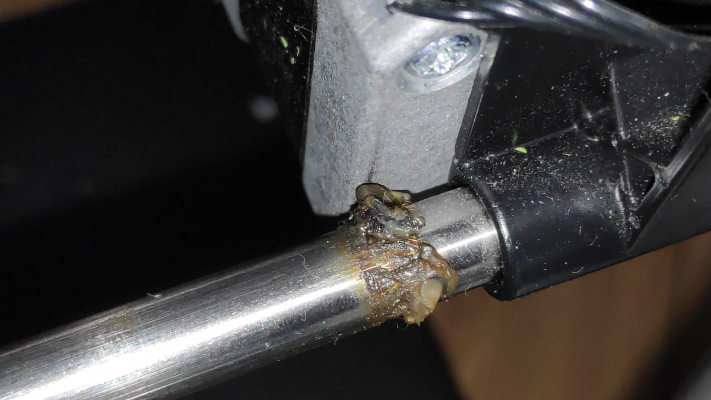
Look at this nasty gunk.. All rods were covered in this and the bushings were just carrying this stuff along with them as well:
So if anyone has good comments on what definitely needs improvement, I'm all ears.
Also found this topic, but it didn't really give any additional feedback on if the user managed to convert the machine:
[reprap.org]
Personally, I have built a bunch of machines, self-designed and by design of others so converting the machine really isn't a challenge. The big challenge for me would mostly be trying to reuse the existing parts and electronics if possible.
Edited 2 time(s). Last edit at 06/27/2020 05:26PM by Ohmarinus.
http://www.marinusdebeer.nl/
|
Re: Reviving a Makerbot Replicator 2X July 11, 2020 05:25AM |
Admin Registered: 11 years ago Posts: 3,096 |
Okay, so a little further down the line. I couldn't find much about this system. I guess it's too expensive for most people to ditch it, while the base machine really isn't that great. So because it was an investment, most people don't want to sell it for a small price, I see them being offered a lot but mostly always for prices of €1000,- and up.
Now, the frame really is quite sturdy and has great potential, but it needs a lot of changes to make this viable.
After doing a lot of research I have decided that it's not worth trying to reuse most of the parts in the machine, except for the frame, rods, lead screw, extruders, heated bed and stepper motors. Everything else will be upgraded/customized with:
- SKR 1.4 with TFT touchscreen and WiFi
- DIN4 connector so original 24v PSU can be reused
- TMC2209 using sensorless homing
- Inductive probe for the Z-axis
- E3D v6 hotend
- Custom cables
- LM8SUU linear bearings
- Latest Marlin firmware
In total the parts I had to order only cost me €114,32
The cables etc I already had laying around as well as the tools for crimping and the crimps themselves. Besides that a new carriage and a TFT-screen box needs to be printed and designed. TFT-controller box is already printed meanwhile.
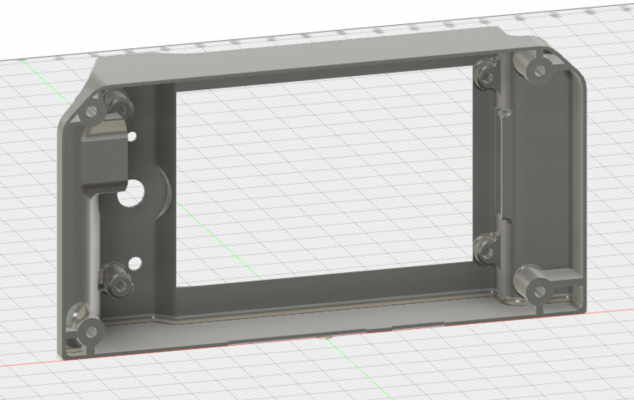
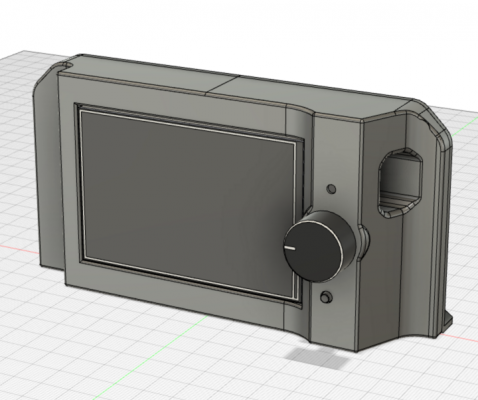
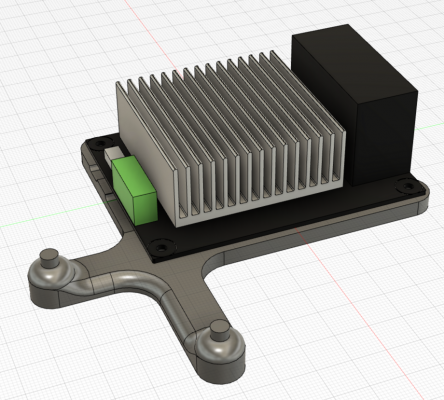
Fusion360 sketch of the controllerbox:
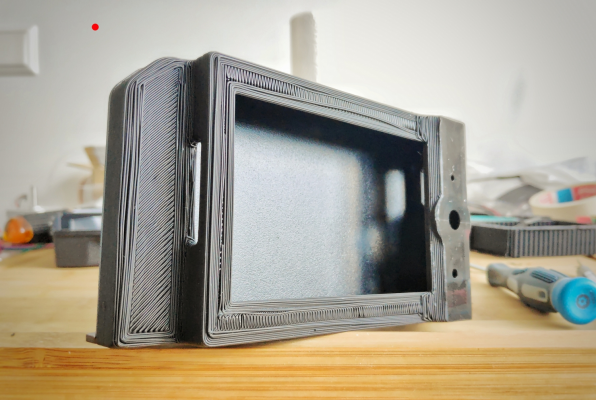
I know it looks quite bad, but it works!
Things left to do:
- hotend/extruder mount for the X-axis design and printing
- replacing the bushings with bearings
- adding cork as insulation underneath the heated bed and mounting it permanently for ABL
- lasercutting adapter board to fit SKR 1.4 underneath the printer
- wiring
- designing and printing new adapter faceplate that the DIN4 connector mounts to
- deciphering the PSU output pins
The last one I need a little help with, because I couldn't find a schematic what the four pins actually do that come from the PSU. Would it be possible to simply connect all the positive and negative terminals together on the DIN4 connector and just use it as if there are only one + and - terminal?
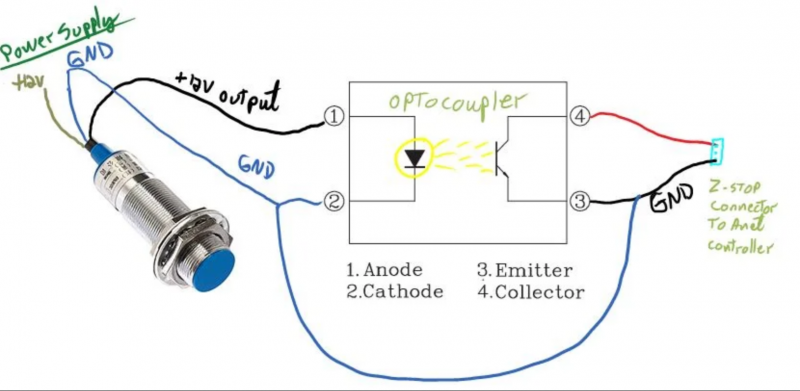
For hooking up the inductive probe I have made a separate topic because I expect more people might want to try that one out. As I couldn't find a suitable opto coupler for 24v I want to go the route of using a voltage divider to lower 24v down to 5v or 3.3v not sure what's needed for the probe sensor connection on the SKR 1.4 yet.
Edited 2 time(s). Last edit at 07/11/2020 05:30AM by Ohmarinus.
http://www.marinusdebeer.nl/
Now, the frame really is quite sturdy and has great potential, but it needs a lot of changes to make this viable.
After doing a lot of research I have decided that it's not worth trying to reuse most of the parts in the machine, except for the frame, rods, lead screw, extruders, heated bed and stepper motors. Everything else will be upgraded/customized with:
- SKR 1.4 with TFT touchscreen and WiFi
- DIN4 connector so original 24v PSU can be reused
- TMC2209 using sensorless homing
- Inductive probe for the Z-axis
- E3D v6 hotend
- Custom cables
- LM8SUU linear bearings
- Latest Marlin firmware
In total the parts I had to order only cost me €114,32
The cables etc I already had laying around as well as the tools for crimping and the crimps themselves. Besides that a new carriage and a TFT-screen box needs to be printed and designed. TFT-controller box is already printed meanwhile.
Fusion360 sketch of the controllerbox:
I know it looks quite bad, but it works!

Things left to do:
- hotend/extruder mount for the X-axis design and printing
- replacing the bushings with bearings
- adding cork as insulation underneath the heated bed and mounting it permanently for ABL
- lasercutting adapter board to fit SKR 1.4 underneath the printer
- wiring
- designing and printing new adapter faceplate that the DIN4 connector mounts to
- deciphering the PSU output pins
The last one I need a little help with, because I couldn't find a schematic what the four pins actually do that come from the PSU. Would it be possible to simply connect all the positive and negative terminals together on the DIN4 connector and just use it as if there are only one + and - terminal?
For hooking up the inductive probe I have made a separate topic because I expect more people might want to try that one out. As I couldn't find a suitable opto coupler for 24v I want to go the route of using a voltage divider to lower 24v down to 5v or 3.3v not sure what's needed for the probe sensor connection on the SKR 1.4 yet.
Edited 2 time(s). Last edit at 07/11/2020 05:30AM by Ohmarinus.
http://www.marinusdebeer.nl/
|
Re: Reviving a Makerbot Replicator 2X July 11, 2020 05:36AM |
Admin Registered: 16 years ago Posts: 13,884 |
... you can modify a 5v-optocoupler for 24V with a resistor of 1k9 when it needs 10mA ... or a higher value for lower working current 
Viktor
--------
Aufruf zum Projekt "Müll-freie Meere" - [reprap.org] -- Deutsche Facebook-Gruppe - [www.facebook.com]
Call for the project "garbage-free seas" - [reprap.org]

Viktor
--------
Aufruf zum Projekt "Müll-freie Meere" - [reprap.org] -- Deutsche Facebook-Gruppe - [www.facebook.com]
Call for the project "garbage-free seas" - [reprap.org]
|
Re: Reviving a Makerbot Replicator 2X July 11, 2020 05:52AM |
Admin Registered: 11 years ago Posts: 3,096 |
Quote
VDX
... you can modify a 5v-optocoupler for 24V with a resistor of 1k9 when it needs 10mA ... or a higher value for lower working current
Ohhh I wish I knew this two weeks ago! Haha. I guess I'll order one anyway in that case, but meanwhile still try to get it working by doing the voltage divider. It's just going to take a while again before the opto arrives. Thing is all the other parts will arrive early next week so I want to get started on the build a.s.a.p. Thanks for this info!
ps I assume I don't need an optocoupler board, but could just make the schematic with an optocoupler and a resistor without the board?
Edited 1 time(s). Last edit at 07/11/2020 06:03AM by Ohmarinus.
http://www.marinusdebeer.nl/
|
Re: Reviving a Makerbot Replicator 2X July 11, 2020 09:37AM |
Admin Registered: 16 years ago Posts: 13,884 |
... yes - if you have the shematics/datasheet for a 5V part, then simply check for the current you'll need and calculate the resistor by:
24V - 5V = 19V
e.g. -- needed current for operation = 2mA ==> then for resistor (R=U/I): R = 19V/0,002A => 9k5 (or even better 10k, what's a standard value) ...
Viktor
--------
Aufruf zum Projekt "Müll-freie Meere" - [reprap.org] -- Deutsche Facebook-Gruppe - [www.facebook.com]
Call for the project "garbage-free seas" - [reprap.org]
|
Re: Reviving a Makerbot Replicator 2X July 11, 2020 05:22PM |
Admin Registered: 11 years ago Posts: 3,096 |
Quote
VDX
... yes - if you have the shematics/datasheet for a 5V part, then simply check for the current you'll need and calculate the resistor by:
24V - 5V = 19V
e.g. -- needed current for operation = 2mA ==> then for resistor (R=U/I): R = 19V/0,002A => 9k5 (or even better 10k, what's a standard value) ...
Thanks for your advice!! I did some more research, went to the electronics shop to get a PC817 optocoupler, got two for free and it works like a charm. both 3.3v and 5v are being pulled down to 0.006 volts when I touch the probe on a metal surface. Nicely divided and the optocoupler is an elegant solution. Time to solder myself a small board.
Solution is also discussed here:
[reprap.org]
Would I be able to safely connect the ground in this manner?
Source: [www.instructables.com]
Edited 3 time(s). Last edit at 07/11/2020 05:39PM by Ohmarinus.
http://www.marinusdebeer.nl/
|
Re: Reviving a Makerbot Replicator 2X August 03, 2020 11:56AM |
Admin Registered: 11 years ago Posts: 3,096 |
So far I've converted the machine fully now to bowden, SKR 1.4, inductive probe (found a 5v one), E3D v6 and all the bells and whistles (wifi as well).
First bed leveling sequence got me to:
It's not great, I'll have to do some more research into how to stabilize the bed. Maybe even try to make bed arms out of aluminium. I had expected the bed would be precisely flat it being a cast iron bed, but apparently it's not.
Can it be that the sensor provides different values because the bed isn't uniform in thickness?
Second try:
Update:
Printing went fine! Got some wonderful prints out of the machine, that is, until the extruder decided to melt down. The extruder motor got terribly hot. I have changed the 800ma down to 600ma immediately but the extruder already got molten too much.
The machine is a wonderful piece of equipment and can run pretty fast while still delivering good prints. I will cannibalize a metal extruder from another printer for now and design a new bracket in the meantime.
Edited 2 time(s). Last edit at 08/04/2020 05:26AM by Ohmarinus.
http://www.marinusdebeer.nl/
First bed leveling sequence got me to:
Bilinear Leveling Grid:
      0      1      2
 0 -0.210 -0.012 -0.100
 1 -0.220 +0.007 -0.172
 2 -0.304 -0.137 -0.349
It's not great, I'll have to do some more research into how to stabilize the bed. Maybe even try to make bed arms out of aluminium. I had expected the bed would be precisely flat it being a cast iron bed, but apparently it's not.
Can it be that the sensor provides different values because the bed isn't uniform in thickness?
Second try:
echo:busy: processing
Bilinear Leveling Grid:
      0      1      2
 0 -0.175 +0.025 -0.057
 1 -0.195 +0.037 -0.130
 2 -0.284 -0.115 -0.332
Update:
Printing went fine! Got some wonderful prints out of the machine, that is, until the extruder decided to melt down. The extruder motor got terribly hot. I have changed the 800ma down to 600ma immediately but the extruder already got molten too much.
The machine is a wonderful piece of equipment and can run pretty fast while still delivering good prints. I will cannibalize a metal extruder from another printer for now and design a new bracket in the meantime.
Edited 2 time(s). Last edit at 08/04/2020 05:26AM by Ohmarinus.
http://www.marinusdebeer.nl/
|
Re: Reviving a Makerbot Replicator 2X August 11, 2020 01:29PM |
Registered: 3 years ago Posts: 16 |
Congats! Coincidentally I just refurbished my Rep2X as well.
I also had a lot of previous upgrades I kept:
Dragon hot-ends fit E3D nozzle dimensions, so I used this replacement carriage mount. Worked great, looks great, only issue is the plastic acts as a heat barrier between steppers and heat break bar and carriage which served as a heat sink as well so my extruder steppers will overheat and soften the filament until it jams. I've added small heatsinks to the top of the steppers and this has definately helped but I may need more. I have a CNC machine so am designing a custom heatsink that will go under the steppers and will also be cooled by the E3D fans. XYZ motors can take a heatsink on the back, but steppers cant on the back for clearance reasons but can on the top. Possibly we can replace the extruder steppers with a high performance pancake stepper and get clearance for heat sinks.
[www.thingiverse.com]
This machine is now sooo quiet! Lots of torque in the 2209s, more than the steppers can handle and not overheat. Printing first layers with the BL touch is easy! Dragon hotends are performing really well. Love it. Love Marlin and its many options. Rep2X IMO is a great frame to do a refurbish on.
Have you printed anything yet?
- BTT SKR 1.4 Turbo
- Trinamic TMC2209 stepper modules
- Dual Dragon Hotends
- E3D heaters/thermisters
- TFT 35 Touch screen
- BL Touch probe
I also had a lot of previous upgrades I kept:
- Bottleworks magnetic glass printing base
- Bottleworks alumninum arms
- better extruder tensioners (not sure where I got them)
Dragon hot-ends fit E3D nozzle dimensions, so I used this replacement carriage mount. Worked great, looks great, only issue is the plastic acts as a heat barrier between steppers and heat break bar and carriage which served as a heat sink as well so my extruder steppers will overheat and soften the filament until it jams. I've added small heatsinks to the top of the steppers and this has definately helped but I may need more. I have a CNC machine so am designing a custom heatsink that will go under the steppers and will also be cooled by the E3D fans. XYZ motors can take a heatsink on the back, but steppers cant on the back for clearance reasons but can on the top. Possibly we can replace the extruder steppers with a high performance pancake stepper and get clearance for heat sinks.
[www.thingiverse.com]
This machine is now sooo quiet! Lots of torque in the 2209s, more than the steppers can handle and not overheat. Printing first layers with the BL touch is easy! Dragon hotends are performing really well. Love it. Love Marlin and its many options. Rep2X IMO is a great frame to do a refurbish on.
Have you printed anything yet?
|
Re: Reviving a Makerbot Replicator 2X August 11, 2020 02:13PM |
Admin Registered: 11 years ago Posts: 3,096 |
Quote
guru_florida
Congats! Coincidentally I just refurbished my Rep2X as well.
- BTT SKR 1.4 Turbo
- Trinamic TMC2209 stepper modules
- Dual Dragon Hotends
- E3D heaters/thermisters
- TFT 35 Touch screen
- BL Touch probe
I also had a lot of previous upgrades I kept:
- Bottleworks magnetic glass printing base
- Bottleworks alumninum arms
- better extruder tensioners (not sure where I got them)
Dragon hot-ends fit E3D nozzle dimensions, so I used this replacement carriage mount. Worked great, looks great, only issue is the plastic acts as a heat barrier between steppers and heat break bar and carriage which served as a heat sink as well so my extruder steppers will overheat and soften the filament until it jams. I've added small heatsinks to the top of the steppers and this has definately helped but I may need more. I have a CNC machine so am designing a custom heatsink that will go under the steppers and will also be cooled by the E3D fans. XYZ motors can take a heatsink on the back, but steppers cant on the back for clearance reasons but can on the top. Possibly we can replace the extruder steppers with a high performance pancake stepper and get clearance for heat sinks.
[www.thingiverse.com]
This machine is now sooo quiet! Lots of torque in the 2209s, more than the steppers can handle and not overheat. Printing first layers with the BL touch is easy! Dragon hotends are performing really well. Love it. Love Marlin and its many options. Rep2X IMO is a great frame to do a refurbish on.
Have you printed anything yet?
Wow, thanks for sharing, that sounds great. Also very useful thingiverse link. I found it before but decided to design my own simpler mount as I first wanted to try out a bowden-drive system where the extruder motor sits outside of the hotbox

I have mounted heatsinks on all the stepper motors and probably have to lower the mA settings on the TMC2209's. I notice that with the standard setting of 800mA the motors get too hot.
Do you drive the 24v heated bed directly from the SKR 1.4? I have ordered a special heatbed MOSFET to take the strain off of the SKR 1.4 but to be honest, while doint some test prints, I noticed the SKR 1.4 can take the heated bed perfectly. And what about sensorless homing, do you use it?
Also, I'm using an inductive probe instead of a BLtouch, sadly the nuts keeping the probe in place keep loosening up because the 24v fan on the E3D v6 is making so much noise and is causing a lot of hard vibration. This shakes loose the inductive probe so I'll have to fix it with cyanoacrylate I guess. I'll have to design a new bracket in which I add a custom tightening bolt with a nylon locknut to clamp around the probe and hold it that way. Also, eventually I want to design a smaller carriage as I'm not ready to start trying out dual-nozzle setups and am currently reusing the dual-setup X-carriage.
As far as prints go, I've only printed two hollow vases and a calibration box and then noticed there was something wrong with one of the interior ABS injection molded corner brackets. It was completely cracked in two!!! So I decided to make ABS slurry and glue the part with it and also strengthening it by adding more material and gluing on two small reinforcement parts. Makerbot didn't reply to my service request and I cannot register with the serial number of the machine for getting in touch with them to get a replacement. On top of that no shop in the world wanted to sell me the replacement part because they all only ship inside their own country because of nonsense reasons. So I had to fix it with ABS glue. Mounted it today but we are currently in a severe heatwave for over a week already so I am not able to start printing until somewhere next week I guess.
Here's a video of a simple stepper-driver cooling tunnel I made for the SKR 1.4 board:
[www.youtube.com]
And here a wall-thickness tryout print:
[www.youtube.com]
All the parts I printed for the machine are in PLA so I will have to reprint the good parts with the machine again in ABS before they melt. Sadly my other printers can only print PLA so this will be a dedicated machine for ABS and higher-temperature filaments mostly. I ordered a titanium polished hotend barrel for the E3D to see if it can also be used for PLA, maybe I'll have to polish the inside a little bit extra myself to make sure no PLA is going to stick.
Still a lot to improve and I really hope the broken bracket I fixed holds in a heated chamber.. Otherwise I'll have to design my own part and print it in ABS or something.. I'm pretty bummed out no shop is interested in sending me the part and Makerbot just doesn't care. It basically would ruin the machine if it happened to someone who cannot design their own parts.
Also, the extruder I created melted because it was in the heated chamber first.. So I ordered an aluminium one, this also has the added effect of not being able to use the compact style extruder for now. I wist the aluminium extruder replacements were still available, since they only take up half of the space on the motor face they are very flexible in use.
I'm looking forward to more of a showcase surrounding your conversion! Thanks for sharing,
Marinus
Edited 1 time(s). Last edit at 08/11/2020 02:39PM by Ohmarinus.
http://www.marinusdebeer.nl/
|
Re: Reviving a Makerbot Replicator 2X August 11, 2020 04:45PM |
Registered: 3 years ago Posts: 16 |
Yes, it's exponential too, so 500mA should probably half the heat which is what I am running at now. It seems to be good. I think bowden-drive is a good decision except I am not sure how well it will work with ninja-flex which is something I want to do. Keep me posted on how you get along, all other things considered I think bowden it is the better way to go. Just for the heat dissipation reason!Quote
I have mounted heatsinks on all the stepper motors and probably have to lower the mA settings on the TMC2209's. I notice that with the standard setting of 800mA the motors get too hot.
Yes, it takes about 15mins to heat upQuote
Do you drive the 24v heated bed directly from the SKR 1.4? I have ordered a special heatbed MOSFET to take the strain off of the SKR 1.4 but to be honest, while doint some test prints, I noticed the SKR 1.4 can take the heated bed perfectly. And what about sensorless homing, do you use it?
 but it works. I have my eyes on a large FET+heatsink but not a priority atm.
No issues here, I can barely tell the fan is on but am am running at 220, not 255 so it makes a difference. I've always found the dual extrusion a PITA. Always seems 1 of the nozzles is not working or second nozzle lifts up the edge of a print. I considered dumping the second but I'm giving it one more go, I would really like to use 1 for dissolvable support.Quote
Also, I'm using an inductive probe instead of a BLtouch, sadly the nuts keeping the probe in place keep loosening up because the 24v fan on the E3D v6 is making so much noise and is causing a lot of hard vibration. This shakes loose the inductive probe so I'll have to fix it with cyanoacrylate I guess. I'll have to design a new bracket in which I add a custom tightening bolt with a nylon locknut to clamp around the probe and hold it that way. Also, eventually I want to design a smaller carriage as I'm not ready to start trying out dual-nozzle setups and am currently reusing the dual-setup X-carriage.
Slurry should work...or load some filament into dremel tool and rotate it into the part using friction welding....or use a soldering iron to cut a V into the crack and melt some new stuff in there. Im not sure what plastic those parts are made of though. Sacrifice the plastic from the spool holders in the back if you still have them....those are useless lolQuote
As far as prints go, I've only printed two hollow vases and a calibration box and then noticed there was something wrong with one of the interior ABS injection molded corner brackets. It was completely cracked in two!!! So I decided to make ABS slurry and glue the part with it and also strengthening it by adding more material and gluing on two small reinforcement parts. Makerbot didn't reply to my service request and I cannot register with the serial number of the machine for getting in touch with them to get a replacement. On top of that no shop in the world wanted to sell me the replacement part because they all only ship inside their own country because of nonsense reasons. So I had to fix it with ABS glue. Mounted it today but we are currently in a severe heatwave for over a week already so I am not able to start printing until somewhere next week I guess.

OH man! I love the TMC cooling tunnel! I gotta print me one of those

Do you mean the part that bolts onto the stepper? It probably didnt melt from the heated chamber but the stepper temp running at 800mA.Quote
Also, the extruder I created melted because it was in the heated chamber first.. So I ordered an aluminium one, this also has the added effect of not being able to use the compact style extruder for now. I wist the aluminium extruder replacements were still available, since they only take up half of the space on the motor face they are very flexible in use.
Looks like I am having a new problem with my X rail
 Just now. It's jamming and losing steps.
|
Re: Reviving a Makerbot Replicator 2X August 12, 2020 03:03AM |
Admin Registered: 11 years ago Posts: 3,096 |
Quote
guru_florida
Yes, it's exponential too, so 500mA should probably half the heat which is what I am running at now. It seems to be good. I think bowden-drive is a good decision except I am not sure how well it will work with ninja-flex which is something I want to do. Keep me posted on how you get along, all other things considered I think bowden it is the better way to go. Just for the heat dissipation reason!Quote
I have mounted heatsinks on all the stepper motors and probably have to lower the mA settings on the TMC2209's. I notice that with the standard setting of 800mA the motors get too hot.
Ahhh, I didn't know it's exponential! But I notice these motors really don't need that much current. Which is nice because with 24v they are able to run faster and apparently they have more torque. I'll try 500 as well. Sounds like a good starting point. with 800mA they were almost cooking, it kinda scared me.
Quote
Yes, it takes about 15mins to heat upQuote
Do you drive the 24v heated bed directly from the SKR 1.4? I have ordered a special heatbed MOSFET to take the strain off of the SKR 1.4 but to be honest, while doint some test prints, I noticed the SKR 1.4 can take the heated bed perfectly. And what about sensorless homing, do you use it?but it works. I have my eyes on a large FET+heatsink but not a priority atm.
15 minutes... That's a long time. Mine takes between 8 and 10 minutes I believe. Probably a little faster even, but still it's quite long compared to my 12v Delta printer that heats up in 3-5 minutes. Super fast prototyping, especially for small objects it's nice to have a short heatup time. I am not sure if an external FET helps speed up the heating process, but since I have a FET laying around now I can try it out.
Quote
No issues here, I can barely tell the fan is on but am am running at 220, not 255 so it makes a difference. I've always found the dual extrusion a PITA. Always seems 1 of the nozzles is not working or second nozzle lifts up the edge of a print. I considered dumping the second but I'm giving it one more go, I would really like to use 1 for dissolvable support.Quote
Also, I'm using an inductive probe instead of a BLtouch, sadly the nuts keeping the probe in place keep loosening up because the 24v fan on the E3D v6 is making so much noise and is causing a lot of hard vibration. This shakes loose the inductive probe so I'll have to fix it with cyanoacrylate I guess. I'll have to design a new bracket in which I add a custom tightening bolt with a nylon locknut to clamp around the probe and hold it that way. Also, eventually I want to design a smaller carriage as I'm not ready to start trying out dual-nozzle setups and am currently reusing the dual-setup X-carriage.
Do you have an official E3D hotend or a Trianglelab clone? I'm starting to think I have a defective fan.
Quote
Slurry should work...or load some filament into dremel tool and rotate it into the part using friction welding....or use a soldering iron to cut a V into the crack and melt some new stuff in there. Im not sure what plastic those parts are made of though. Sacrifice the plastic from the spool holders in the back if you still have them....those are useless lolQuote
As far as prints go, I've only printed two hollow vases and a calibration box and then noticed there was something wrong with one of the interior ABS injection molded corner brackets. It was completely cracked in two!!! So I decided to make ABS slurry and glue the part with it and also strengthening it by adding more material and gluing on two small reinforcement parts. Makerbot didn't reply to my service request and I cannot register with the serial number of the machine for getting in touch with them to get a replacement. On top of that no shop in the world wanted to sell me the replacement part because they all only ship inside their own country because of nonsense reasons. So I had to fix it with ABS glue. Mounted it today but we are currently in a severe heatwave for over a week already so I am not able to start printing until somewhere next week I guess.
OH man! I love the TMC cooling tunnel! I gotta print me one of those
I can share the STL with you? Wanted to upload it on thingiverse, but since thingiverse isn't working right lately and my designs have disappeared into space, I'm hesitant to upload anything. The tunnel is designed for a 4010 radial fan.
Quote
Do you mean the part that bolts onto the stepper? It probably didnt melt from the heated chamber but the stepper temp running at 800mA.Quote
Also, the extruder I created melted because it was in the heated chamber first.. So I ordered an aluminium one, this also has the added effect of not being able to use the compact style extruder for now. I wist the aluminium extruder replacements were still available, since they only take up half of the space on the motor face they are very flexible in use.
Looks like I am having a new problem with my X railJust now. It's jamming and losing steps.
Do you use the original bushings by any chance? I have replaced the bushings with LM8SUU linear bearings and have to say it makes all the difference!
http://www.marinusdebeer.nl/
|
Re: Reviving a Makerbot Replicator 2X August 12, 2020 02:12PM |
Registered: 3 years ago Posts: 16 |
Heatbed: 15mins: 10 mins to 100degC, 15 to 110degC. Are you only heating to 100 maybe? I have a bottleworks heatbed and I think it added time....but much better than stock table was.
I have 2 Trianglelabs hotends. I wouldnt exactly call them a clone, but a mix between the E3D and Mosquitto. I was contemplating E3D, which I am a big fan of their stuff, but wanted the stainless steel and no-teflon insert of the mosquitto type....but in a E3D mount. lol. Quality of the Trianglelabs seems very good. Heater, thermistor and nozzles are genuine E3D.
So far the 2209s barely go above room temp so I wont add a fan yet, but will if anything changes. Thanks for the offer! One word of caution, if your fan fails, which they always do, the tunnel will act to trap the heat and you won't even see it. Though the 2209s seem like they wont get hot anyway at 5-800mA.
I am using original sleeve bearings. I bought some LM8SUU from Fargo (good stuff) but they were terribly noisy and grindy and immediately went back. But I think there is something going on with these sleeves right now and they have to at least be taken off and cleaned. I already cleaned the shafts well. I might try the linear bearings again. I might try the Solid Polymer kind but I hear unless you compress fit them into the mount (not possible with our Rep 2x carriage) then the clearance is sloppy.
Fiddled with the machine for hours but I am *down* for the count atm. Pure X moves smooth but has a dirty sound, Y has a vibration. Circles are really noisy and vibrating. Could be bearings, or could even be bad wiring....hard to tell yet. Strange I get a bunch of prints the last 2 weeks without issue.
FYI I've been playing with the bed leveling. Thought my glass bed was a little unlevel, but now I think it may be the weight of the carriage is causing rail deflection in the center. Measured curve is convex and what you would expect with deflection. Not a big deal since Marlin measures and counter-acts it but thought you might see it too. Likely not as much since your Bowden carriage is probably one-fifth the weight of mine. It's max 0.3mm off, typically <0.15mm.
Posting my test GCode. It might come in handy for you to test movement. It simply does a bunch of perimeter moves, hourglass figures and circles at different speeds. Since you have a 2X bed and probably configured for the same [-125, -70, 125, 70] bed dimensions (original Rep2X coords with 0,0 centered in the bed middle).
I have 2 Trianglelabs hotends. I wouldnt exactly call them a clone, but a mix between the E3D and Mosquitto. I was contemplating E3D, which I am a big fan of their stuff, but wanted the stainless steel and no-teflon insert of the mosquitto type....but in a E3D mount. lol. Quality of the Trianglelabs seems very good. Heater, thermistor and nozzles are genuine E3D.
So far the 2209s barely go above room temp so I wont add a fan yet, but will if anything changes. Thanks for the offer! One word of caution, if your fan fails, which they always do, the tunnel will act to trap the heat and you won't even see it. Though the 2209s seem like they wont get hot anyway at 5-800mA.
I am using original sleeve bearings. I bought some LM8SUU from Fargo (good stuff) but they were terribly noisy and grindy and immediately went back. But I think there is something going on with these sleeves right now and they have to at least be taken off and cleaned. I already cleaned the shafts well. I might try the linear bearings again. I might try the Solid Polymer kind but I hear unless you compress fit them into the mount (not possible with our Rep 2x carriage) then the clearance is sloppy.
Fiddled with the machine for hours but I am *down* for the count atm.
 Pure X moves smooth but has a dirty sound, Y has a vibration. Circles are really noisy and vibrating. Could be bearings, or could even be bad wiring....hard to tell yet. Strange I get a bunch of prints the last 2 weeks without issue.
FYI I've been playing with the bed leveling. Thought my glass bed was a little unlevel, but now I think it may be the weight of the carriage is causing rail deflection in the center. Measured curve is convex and what you would expect with deflection. Not a big deal since Marlin measures and counter-acts it but thought you might see it too. Likely not as much since your Bowden carriage is probably one-fifth the weight of mine. It's max 0.3mm off, typically <0.15mm.
Posting my test GCode. It might come in handy for you to test movement. It simply does a bunch of perimeter moves, hourglass figures and circles at different speeds. Since you have a 2X bed and probably configured for the same [-125, -70, 125, 70] bed dimensions (original Rep2X coords with 0,0 centered in the bed middle).
|
Re: Reviving a Makerbot Replicator 2X August 12, 2020 02:13PM |
Registered: 3 years ago Posts: 16 |
|
Re: Reviving a Makerbot Replicator 2X August 15, 2020 07:33AM |
Admin Registered: 11 years ago Posts: 3,096 |
Quote
guru_florida
Heatbed: 15mins: 10 mins to 100degC, 15 to 110degC. Are you only heating to 100 maybe? I have a bottleworks heatbed and I think it added time....but much better than stock table was.
I am heating to 110ºC as well
 I am not sure what heatbed I have, it's a cast iron bed it seems. Not even all over, but definitely good enough. Today I converted the SKR 1.4 to use this MOSFET:
[www.aliexpress.com]
Now heats up fully from 26ºC to 110ºC in 4 minutes and 37 seconds! And the MOSFET itself doesn't really get hot. I also upgraded the wire gauge to a thicker size, turns out, even with 24v you better use thick enough wire. It was quite a chore since I had to rewire everything from the connector down to the MOSFET including an on/off switch. Did you just short both poles of the PSU? I connected both Positive and Ground poles so I only have one + and - .
When starting a print it takes exactly 8 minutes from when I start the print until it actually starts extruding and printing with ABS at 235ºC nozzle and 110ºC bed (including doing the Automated Bed Leveling sequence with probing 9 points on the bed and a filament wipe on the side of the bed).
Quote
I have 2 Trianglelabs hotends. I wouldnt exactly call them a clone, but a mix between the E3D and Mosquitto. I was contemplating E3D, which I am a big fan of their stuff, but wanted the stainless steel and no-teflon insert of the mosquitto type....but in a E3D mount. lol. Quality of the Trianglelabs seems very good. Heater, thermistor and nozzles are genuine E3D.
It's so strange, my trianglelabs hotend fan vibrates so incredibly hard that it loosened up the nuts on the M5 inductive probe. And these nuts were secured by using the lock-washers. Gonna glue it on today. No more moving parts on the X-carriage.
Quote
So far the 2209s barely go above room temp so I wont add a fan yet, but will if anything changes. Thanks for the offer! One word of caution, if your fan fails, which they always do, the tunnel will act to trap the heat and you won't even see it. Though the 2209s seem like they wont get hot anyway at 5-800mA.
Right now I'm using them at 500mA like you, will see how hot they get and adjust accordingly. I'd rather have a little more power and don't mind a little bit of heat, but I don't want to get it too hot as well.
Update: I raised them to 650mA because I had some issues with the extruder skipping. However I now found out it was due to the extruder itself and not the current. I really have to get a better extruder soon...
Quote
I am using original sleeve bearings. I bought some LM8SUU from Fargo (good stuff) but they were terribly noisy and grindy and immediately went back. But I think there is something going on with these sleeves right now and they have to at least be taken off and cleaned. I already cleaned the shafts well. I might try the linear bearings again. I might try the Solid Polymer kind but I hear unless you compress fit them into the mount (not possible with our Rep 2x carriage) then the clearance is sloppy.
Fiddled with the machine for hours but I am *down* for the count atm.Pure X moves smooth but has a dirty sound, Y has a vibration. Circles are really noisy and vibrating. Could be bearings, or could even be bad wiring....hard to tell yet. Strange I get a bunch of prints the last 2 weeks without issue.
FYI I've been playing with the bed leveling. Thought my glass bed was a little unlevel, but now I think it may be the weight of the carriage is causing rail deflection in the center. Measured curve is convex and what you would expect with deflection. Not a big deal since Marlin measures and counter-acts it but thought you might see it too. Likely not as much since your Bowden carriage is probably one-fifth the weight of mine. It's max 0.3mm off, typically <0.15mm.
Posting my test GCode. It might come in handy for you to test movement. It simply does a bunch of perimeter moves, hourglass figures and circles at different speeds. Since you have a 2X bed and probably configured for the same [-125, -70, 125, 70] bed dimensions (original Rep2X coords with 0,0 centered in the bed middle).
My bed used the bottom-left corner as zero, I haven't tried to mimic the original machine settings. So the size that I have set now is:
248mm x 153mm
Beyond that I'm using Stallguard on the X and Y, and the Z-axis is leveled with the inductive probe.
I'm thinking of adding a piece of cork underneath the heated bed to prevent heat going into the printer arms, hoping that the arms will heat up more uniformly by ambient heat of the chamber instead of radiating heat from the underside of the heated bed.
Been waiting on some orders for a VERY long time, magnetic heat plate with spring steel PEI coated plate, new full metal extruder... I hope it comes soon. I've never been waiting on orders this long. What that arrives I can finally start reprinting the machine parts in ABS to make the final machine design that can handle more heat. Everything is now made in PLA

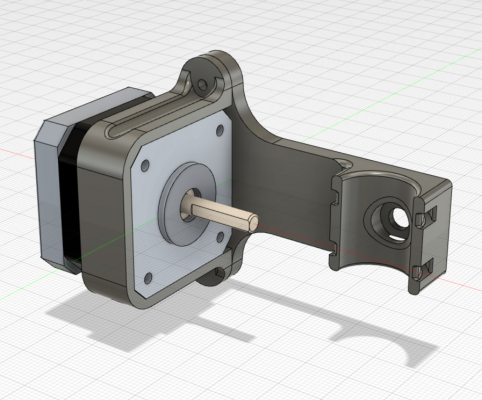
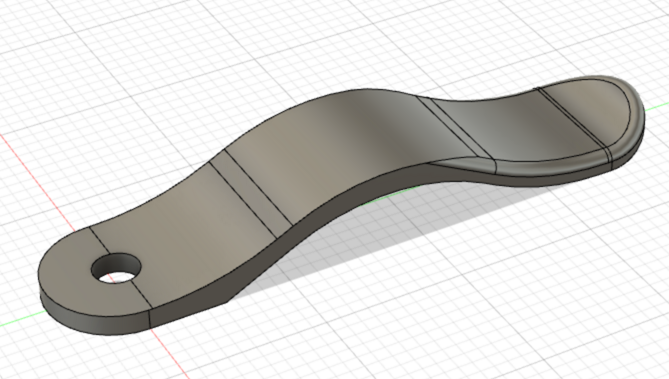
These are the parts I designed for the machine so far:
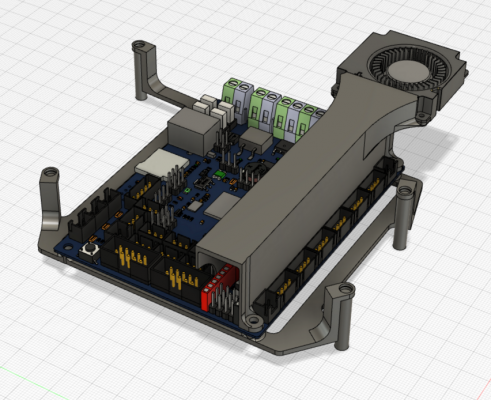
Fan shroud and SKR 1.4 mount
TFT panel mount
Hotend mount with inductive probe and cable mount
MOSFET mount (mounted around the two posts that the electronics cover screws onto, so the cover holds it on and it fits under the panel nicely)
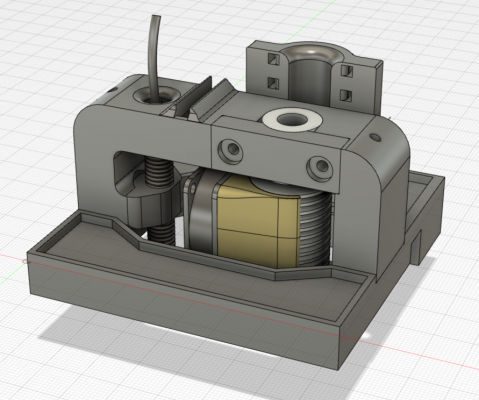
Extruder mount with cable mount
Cable clip for under the machine (some were snipped off my previous user)
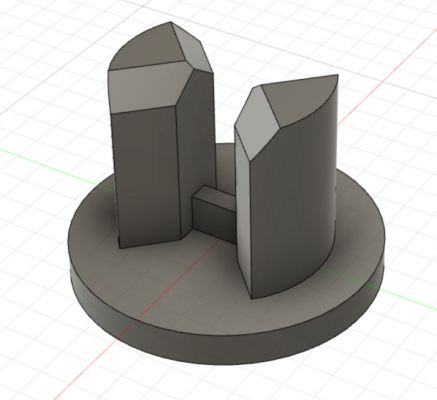
Window pane pushbuttons, these use the interlayer friction to get stuck in place, you need two and push them into each other from both sides, works really well. Most of the window pushbuttons were missing, so I decided to reverse-engineer the ones that were left
Edited 6 time(s). Last edit at 08/15/2020 04:32PM by Ohmarinus.
http://www.marinusdebeer.nl/
|
Re: Reviving a Makerbot Replicator 2X August 18, 2020 02:55AM |
Admin Registered: 11 years ago Posts: 3,096 |
I'm quite curious which material you used to print the X-carriage? I knew PLA was a bad choice for a machine with a heated chamber, sadly the X-carriage decided to melt prematurely, but I could get enough tests out of the machine to see if it works and it works really well.
Right now I've set my sights on PETG since that's the material I am still able to print with my other printers, but eventually I want to make the move to ABS for my 3D-printer parts, mainly for the one that's encased like the Replicator. The sole purpose of the Replicator for me is to be able to use higher-temperature materials like ABS, PET, ASA and maybe even Nylon and other specialty materials so that I can offer this to students of the art academy where I work. In the academy we are only able to print PLA and resin with two SLA printers. So it's very useful, not just for myself.
Oh, and other news, in the printer there is a 24v LED strip which cannot be used with the SKR 1.4 so I have started looking for a suitable 5v LED strip, which was kind of difficult to find, but I think I found something useful if you have the DCDC module:
[www.aliexpress.com]
I chose: 5V 30cm 18LEDs IP20
Not sure if this is going to work, but it has the same pins so I expect it to work wonderfully. BigTreeTech recommends to connect max 30 LED's so 18 should be fine. The best part is that the magnets will attach to the inside of the case and the original LED strip that came with the Replicator has the exact same specs.
Update:
Today also the Titanium heatbreak from Trianglelab came in, so I can finally start printing ABS with the correct high temp, along with other high-temp materials.
Image upload seems to be broken right now so I'll post a picture later.
Edited 3 time(s). Last edit at 08/18/2020 12:52PM by Ohmarinus.
http://www.marinusdebeer.nl/
|
Re: Reviving a Makerbot Replicator 2X August 18, 2020 04:07PM |
Registered: 3 years ago Posts: 16 |
I am back on my feet! Dismantled the the XY assembly and cleaned all the rods. Put the rods in my drill and spun them while polishing them up and down with scotchbrite pads. Then cleaned with alcohol. Definitely the brass sleeves are running smoothly and will slide on their own with a little slope. Machine is working with less drag. However, I dont think that was my issue. In my startup script, I had put a G1 move then a low-current stepper command. The low-current stepper command was executing before the G1 was finished thus steppers lost steps. Had to add a 5sec delay before turning down steppers. (I turn down steppers while heating the bed/extruders.) Same with bed levelling now, I set heating to 110, wait 5 mins, then do ABL, then issue wait-for-stabilize command.
FYI. With further testing using my sample gcode above I am getting smooth motion except for the circles are a *bit* chatty. After a long goose chase it comes down to my Jan 2020 Marlin release and arcs being interpolated as N linear moves. Apparently there has been a number of G2/3 arc improvements in the last 6 months. What fw version are you on?
I like the MOSFET and window pane pushbuttons. I will definitely use those, thanks! I was looking at the same MOSFET but wasnt sure it will make a difference. Glad to see it does. I also just designed a TFT35 holder lol. I will post mine here as well in a moment, I am reprinting a part now.
I am using ABS material and not having an issue with melting warping so far.
Our SKR supports any neopixel strips. I just ordered one coming this Thursday. I didnt order the BTT regulator but instead use an adjustable DROK. I am a big fan of the DROK stuff:
[www.amazon.com]
This one is also awesome for testing projects: [www.amazon.com]
|
Re: Reviving a Makerbot Replicator 2X August 18, 2020 04:41PM |
Admin Registered: 11 years ago Posts: 3,096 |
Quote
guru_florida
I am back on my feet! Dismantled the the XY assembly and cleaned all the rods. Put the rods in my drill and spun them while polishing them up and down with scotchbrite pads. Then cleaned with alcohol. Definitely the brass sleeves are running smoothly and will slide on their own with a little slope. Machine is working with less drag. However, I dont think that was my issue. In my startup script, I had put a G1 move then a low-current stepper command. The low-current stepper command was executing before the G1 was finished thus steppers lost steps. Had to add a 5sec delay before turning down steppers. (I turn down steppers while heating the bed/extruders.) Same with bed levelling now, I set heating to 110, wait 5 mins, then do ABL, then issue wait-for-stabilize command.
FYI. With further testing using my sample gcode above I am getting smooth motion except for the circles are a *bit* chatty. After a long goose chase it comes down to my Jan 2020 Marlin release and arcs being interpolated as N linear moves. Apparently there has been a number of G2/3 arc improvements in the last 6 months. What fw version are you on?
I like the MOSFET and window pane pushbuttons. I will definitely use those, thanks! I was looking at the same MOSFET but wasnt sure it will make a difference. Glad to see it does. I also just designed a TFT35 holder lol. I will post mine here as well in a moment, I am reprinting a part now.
I am using ABS material and not having an issue with melting warping so far.
Our SKR supports any neopixel strips. I just ordered one coming this Thursday. I didnt order the BTT regulator but instead use an adjustable DROK. I am a big fan of the DROK stuff:
[www.amazon.com]
This one is also awesome for testing projects: [www.amazon.com]
Wow that DROK stuff looks good. However, I am a fan of the cheaper buck converters that you just set once with a multimeter, then test them under load and adjust accordingly.
I forgot to put the STL files somewhere but I would like to make some kind of collection online that I can upload and maybe update files as I go. I was actually thinking; why not GitHub... Since iterating is great on there.
Btw, the Titanium heatbreak works incredibly well, I had not expected this but printing ABS with this heatbreak has actually improved the function of the hotend by a lot. Supersmooth prints now. The threads on the heatbreak are super sharp though and cut right into my thumb when turning it into the cooling part...
About the G2/G3 issue, did you know I was actually the one that opened up that issue on the Marlin GitHub? Someone else had also opened one and discovered a solution. Luckily it got fixed, I also had a lot of problems with these arcs because I made a pen plotter that used these commands to draw arcs. It just shot all over the place.
Just did my first succesful print, on, and added cork insulation underneath the heated bed. Holy moly, now the bed cools down so slow after a print, I literally have to wait ten minutes before I can remove the print.
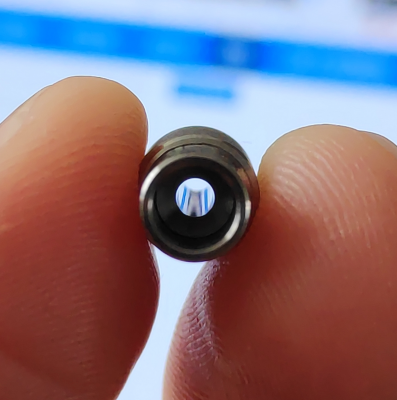
Btw, here's a photo of the titanium heatbreak and the shiny inside:
Ps, this is the mount I created today, the next X-carriage will be a complete overhaul with integrated E3D mount and a 40mm fan to cool the hotend down instead of the puny noisy 30mm fan:
[a360.co]
Update;
Everything worked find but all of a sudden the inductive probe works intermittently. I am going to rewire it to the probe/servo pins instead of z-min because I suspect the SKR 1.4's design being the issue. It hasn't given me trouble before and there is no wire nor cable issue. It probes just fine, EXCEPT after homing x and y while a print is started.
Update 2;
Probe died, put in a new one (luckily had two) and it all works again. Despite the frame being square and the belts being tight, I'm getting a lot of print speed artifacts. I'm thinking it probably needs both jerk and linear advance settings. I think it's strange because the artifacts seem to get worse yet I cannot see any more play developing in the system.
Edited 4 time(s). Last edit at 08/19/2020 06:39PM by Ohmarinus.
http://www.marinusdebeer.nl/
|
Re: Reviving a Makerbot Replicator 2X August 20, 2020 08:53PM |
Registered: 3 years ago Posts: 16 |
I just got my neopixels in today. Word of caution! The TFT module electrically connects the NPWR and on-board 5V pin of the SKR mainboard. Regardless of the NPWR jumper. The NPWR (I.e. the DC-DC power module) is wired to the TFT serial header (touchscreen mode comms) and the on-board 5V is wired to the EXP1 header on the mainboard. On the TFT side it is connected both of these to VCC. I suggest clipping the NPWR on the TF serial header. I opened an issue here:
[github.com]
Ironic! You being the guy reporting the arc precision then having someone suggest it back to you. I love that ROFL. I also get a good laugh when I google for an answer, find one, think that was a great answer, then see my own name as the poster. lol (how could I not remember my own answer?)
Sorry to hear about the dead probe and print artifacts. I am getting great results so I know you will get there. Maybe a teardown of the rails and polish? Also, I think I am printing slow. I am at 500 max feedrate and 500 max accell, what are you printing at?
Quote
Feedrate
M203 X500.00 Y500.00 Z10.00 E30.00
Maximum Acceleration (units/s2):
M201 X500.00 Y500.00 Z100.00 E5000.00
Acceleration (units/s2): P R T
M204 P3000.00 R3000.00 T3000.00
Advanced: B S T J
M205 B20000.00 S0.00 T0.00 J0.01
|
Re: Reviving a Makerbot Replicator 2X August 21, 2020 03:03AM |
Admin Registered: 11 years ago Posts: 3,096 |
#define DEFAULT_MAX_FEEDRATE { 300, 300, 5, 25 }
#define DEFAULT_MAX_ACCELERATION { 3000, 3000, 100, 10000 }
#define DEFAULT_ACCELERATION 3000 // X, Y, Z and E acceleration for printing moves
#define DEFAULT_RETRACT_ACCELERATION 3000 // E acceleration for retracts
#define DEFAULT_TRAVEL_ACCELERATION 3000 // X, Y, Z acceleration for travel (non printing) moves
#define DEFAULT_EJERK 5.0 // May be used by Linear Advance
Haven't used junction deviation but did enable #define S_CURVE_ACCELERATION
My prints are coming out worse and worse. It seems the closed chamber is not ideal for ABS but I read everywhere it is... After calibrating extrusion perfectly, both with flow and retraction calibration I'm running into these issues:
[youtu.be]
[youtu.be]
[youtu.be]
[youtu.be]
The first few prints were very good, but somehow it's not wanting to print right anymore. Single wall extrusion cube works really well, but any object with infill gets warped corners and stays soft during the print.
0.4mm nozzle
0.2mm layer height
0.385mm line width (because otherwise the lines in the model aren't touching, this is a common fix and most people lower their line width)
20% infill
240ºC nozzle
110ºC bed closed system
55mm/s print speed
27.5mm/s outer wall speed
120mm travel speed (high speeds are fine)
2.5mm retraction (this was perfect after calibration, even though I use a bowden system)
0 extra prime amount after retraction (so no messed up 'too high' extrusion)
I'm a bit lost now. The initial vase prints I did worked really well, but now I made a bigger vase mode print and the walls just stayed soft and warped all over the place. Was about to open a topic about this in Printing Issues. I've never had failure like this before trying to fix it for two full days.
Btw, already did a complete teardown and fixed everything.. The machine runs fine otherwise. I think the artifacts I'm getting are mostly down to tuning jerk or junction deviation.
http://www.marinusdebeer.nl/
|
Re: Reviving a Makerbot Replicator 2X August 23, 2020 02:37PM |
Registered: 3 years ago Posts: 16 |
Just from the videos that is a fast print speed!  Since you did the extrusion calibration, I can only surmise it might be just layers printing too fast. Maybe try a larger part? You seem to be more knowledgeable in printing than I am so take any my advice with a grain of salt. I've been doing 3D printing since ~2014 but not consistently. I have more CNC background, and lots of electronics/software bg so I learn quickly but I've learned more in the last month on Marlin and 3D printer tuning than the last 5 years. I had some of these issues and I taped a part cooling fan to the front of the carriage. Like fully-enclosed for ABS, I've heard you dont need a part cooling fan but I disagree - I think we do especially for small parts with little infill and fast layers. I dont think we need much cooling, just a bit. I am just doing my first PLA print and omg can I ever see the difference in material. The PLA hardens like candy apple and seems almost brittle. ABS is always soft, almost molten, for much of the current layer. I have my second extruder operating with PLA and I've carefully tuned their heights and trammed with a feeler gauge yet still any little over extrusion and the other nozzle makes a *crackling* sound as it runs over it. ABS would still be soft. So far it is working though...first time I've had dual extrusion working since I got the machine. I love how Makerbot called it the "Experimental" printer, I thought the marketing label meant 'I can experiment' only we later found out they literally meant this dual extrusion printer was an experiment of theirs. I.e. "we didnt know for sure if it would work". (Apparently this was no joke.)
Back to full enclosure. I think it is important, especially for ABS, but it means many other things have to be carefully tuned. I am having an issue where the enclosure temp get too high that the steppers cant cool enough, and the stepper heat eventually cause the filament to molten at the gear. I let the first few layers print then I raise the cover up 2 inches and open the door a crack for the rest...this is enough to keep the steppers <60degC. Not an issue with Bowdens. I've also seen where the enclosure is keeping the part from cooling down enough too though which is like what you are seeing. Possibly keep the door open a bit.
My PLA is printing with a new thin stepper and omg it is running so much cooler even though I am powering it at 700mA vs 500mA on the old one. I expected it to be hotter but would give me enough room to attach heatsinks and keep it cooler. Hoping these work good.
[www.amazon.com]
Colin
Edited 1 time(s). Last edit at 08/24/2020 12:08PM by guru_florida.
 Since you did the extrusion calibration, I can only surmise it might be just layers printing too fast. Maybe try a larger part? You seem to be more knowledgeable in printing than I am so take any my advice with a grain of salt. I've been doing 3D printing since ~2014 but not consistently. I have more CNC background, and lots of electronics/software bg so I learn quickly but I've learned more in the last month on Marlin and 3D printer tuning than the last 5 years. I had some of these issues and I taped a part cooling fan to the front of the carriage. Like fully-enclosed for ABS, I've heard you dont need a part cooling fan but I disagree - I think we do especially for small parts with little infill and fast layers. I dont think we need much cooling, just a bit. I am just doing my first PLA print and omg can I ever see the difference in material. The PLA hardens like candy apple and seems almost brittle. ABS is always soft, almost molten, for much of the current layer. I have my second extruder operating with PLA and I've carefully tuned their heights and trammed with a feeler gauge yet still any little over extrusion and the other nozzle makes a *crackling* sound as it runs over it. ABS would still be soft. So far it is working though...first time I've had dual extrusion working since I got the machine. I love how Makerbot called it the "Experimental" printer, I thought the marketing label meant 'I can experiment' only we later found out they literally meant this dual extrusion printer was an experiment of theirs. I.e. "we didnt know for sure if it would work". (Apparently this was no joke.)
Back to full enclosure. I think it is important, especially for ABS, but it means many other things have to be carefully tuned. I am having an issue where the enclosure temp get too high that the steppers cant cool enough, and the stepper heat eventually cause the filament to molten at the gear. I let the first few layers print then I raise the cover up 2 inches and open the door a crack for the rest...this is enough to keep the steppers <60degC. Not an issue with Bowdens. I've also seen where the enclosure is keeping the part from cooling down enough too though which is like what you are seeing. Possibly keep the door open a bit.
My PLA is printing with a new thin stepper and omg it is running so much cooler even though I am powering it at 700mA vs 500mA on the old one. I expected it to be hotter but would give me enough room to attach heatsinks and keep it cooler. Hoping these work good.
[www.amazon.com]
Colin
Edited 1 time(s). Last edit at 08/24/2020 12:08PM by guru_florida.
|
Re: Reviving a Makerbot Replicator 2X August 25, 2020 06:28AM |
Admin Registered: 11 years ago Posts: 3,096 |
Quote
guru_florida
Just from the videos that is a fast print speed!Since you did the extrusion calibration, I can only surmise it might be just layers printing too fast. Maybe try a larger part? You seem to be more knowledgeable in printing than I am so take any my advice with a grain of salt. I've been doing 3D printing since ~2014 but not consistently. I have more CNC background, and lots of electronics/software bg so I learn quickly but I've learned more in the last month on Marlin and 3D printer tuning than the last 5 years. I had some of these issues and I taped a part cooling fan to the front of the carriage. Like fully-enclosed for ABS, I've heard you dont need a part cooling fan but I disagree - I think we do especially for small parts with little infill and fast layers. I dont think we need much cooling, just a bit. I am just doing my first PLA print and omg can I ever see the difference in material. The PLA hardens like candy apple and seems almost brittle. ABS is always soft, almost molten, for much of the current layer. I have my second extruder operating with PLA and I've carefully tuned their heights and trammed with a feeler gauge yet still any little over extrusion and the other nozzle makes a *crackling* sound as it runs over it. ABS would still be soft. So far it is working though...first time I've had dual extrusion working since I got the machine. I love how Makerbot called it the "Experimental" printer, I thought the marketing label meant 'I can experiment' only we later found out they literally meant this dual extrusion printer was an experiment of theirs. I.e. "we didnt know for sure if it would work". (Apparently this was no joke.)
Back to full enclosure. I think it is important, especially for ABS, but it means many other things have to be carefully tuned. I am having an issue where the enclosure temp get too high that the steppers cant cool enough, and the stepper heat eventually cause the filament to molten at the gear. I let the first few layers print then I raise the cover up 2 inches and open the door a crack for the rest...this is enough to keep the steppers <60degC. Not an issue with Bowdens. I've also seen where the enclosure is keeping the part from cooling down enough too though which is like what you are seeing. Possibly keep the door open a bit.
My PLA is printing with a new thin stepper and omg it is running so much cooler even though I am powering it at 700mA vs 500mA on the old one. I expected it to be hotter but would give me enough room to attach heatsinks and keep it cooler. Hoping these work good.
[www.amazon.com]
Colin
Hi Colin,
Yeah, I realize that lowering the mA on the stepper motors was essential to make it safe to run. I had it up to the normal amounts for my other machines first around 800mA but it turned out that these motors run great at 550mA which is the perfect balance between power, speed and heat. Might even try to go lower 530-ish.
Very happy to be running a bowden-setup. I did however tune my current extruder to work really reliably, but I'm still going to replace it with a dual-gear extruder. I'll show it when it gets here.
Right now I'm printing the new X-carriage I designed with the new PETG filaments I just received last week. It took me lots of time to dial in my Delta printer to make it work with the new PETG filaments, but now that it's working I think I got it right. Just one little issue where there is under-extrusion after a lot of short extrusions. Gotta find a fix for that. But it works good enough now to print a large technically-difficult piece with bridges, overhangs, lots of support, etc. See a video of the X-carriage being printed here:
[www.youtube.com]
(the retraction noise is caused by a filament filter that rattles, gotta fix that)
Here is the part preview:
[a360.co]
There is also spare room to mount a print cooling fan system AND I have gotten rid of the 30mm hotend fan and changed it out for a more silent 40mm fan.
Above all the complete X-carriage is printed in one piece which makes it even lighter than it was before as it replaces everything with one printed piece.
When the new carriage is mounted I'm making sure that the Replicator's hotend will have the heat-block packaged in ceramic insulation tape to lower the heat radiation in hopes of being able to cool down the printed ABS a bit more by limiting the ambient heat. I somehow remember this worked great back in 2013 when I was using a 'Buddhaschnozzle' hotend or whatever it was called back then. Times are changing.
Edited 1 time(s). Last edit at 08/25/2020 06:33AM by Ohmarinus.
http://www.marinusdebeer.nl/
|
Re: Reviving a Makerbot Replicator 2X August 25, 2020 08:51PM |
Registered: 3 years ago Posts: 16 |
I didnt even realize in the youtube videos that there was no sock on your hotend! Yes, not having a sock was part of my issue a few months back. I didnt think it mattered *that* much but the hotend aluminum block was keeping the top of the part molten. I did a crappy job of wrapping mine in scraps of soft felt (whatever that stuff is called) and kapton and it looked like crap but definitely worked. lol. With the new hotends I have the full silicon sock which is awesome since no plastic sticks to them. The sheer amount of "process variables" that all need to be controlled is crazy in 3D printing. Also we need to control heat here, cool these over there, cool the part, but overall control ambient heat the interdependence are crazy. Thus my water-cooled experiment.
New mount looks great!
I got my dual extruders working good but I know the limitations of it....and I know long term I wont be happy lol. I am thinking of designing a dual printing head like this one and maybe a cross between a few other "dual head switching extruder" designs. I was thinking there must be a way to have the two extruders fixed together but slide one out of the way while the other slides in and sure enough lots of existing stuff out there. I'd also like it to share the same extruder motor to reduce weight so the switching of the head loosens tension on one filament while it engages the other. Long term project though, I'm good for now and except for a few tweaks I'm going to enjoy that I have a 3D printer again. I also have to get back on a humanoid robot project.
[www.youtube.com]
|
Re: Reviving a Makerbot Replicator 2X August 26, 2020 09:32AM |
Admin Registered: 11 years ago Posts: 3,096 |
Quote
guru_florida
I didnt even realize in the youtube videos that there was no sock on your hotend! Yes, not having a sock was part of my issue a few months back. I didnt think it mattered *that* much but the hotend aluminum block was keeping the top of the part molten. I did a crappy job of wrapping mine in scraps of soft felt (whatever that stuff is called) and kapton and it looked like crap but definitely worked. lol. With the new hotends I have the full silicon sock which is awesome since no plastic sticks to them. The sheer amount of "process variables" that all need to be controlled is crazy in 3D printing. Also we need to control heat here, cool these over there, cool the part, but overall control ambient heat the interdependence are crazy. Thus my water-cooled experiment.
New mount looks great!
I got my dual extruders working good but I know the limitations of it....and I know long term I wont be happy lol. I am thinking of designing a dual printing head like this one and maybe a cross between a few other "dual head switching extruder" designs. I was thinking there must be a way to have the two extruders fixed together but slide one out of the way while the other slides in and sure enough lots of existing stuff out there. I'd also like it to share the same extruder motor to reduce weight so the switching of the head loosens tension on one filament while it engages the other. Long term project though, I'm good for now and except for a few tweaks I'm going to enjoy that I have a 3D printer again. I also have to get back on a humanoid robot project.
[www.youtube.com]
Yeah, the silicone cover really only helps against sticky filament. I have now added a ceramic cover and used self-fusing silicone sock to cover the ceramic insulation to keep filament from sticking to it. Let's hope this works!
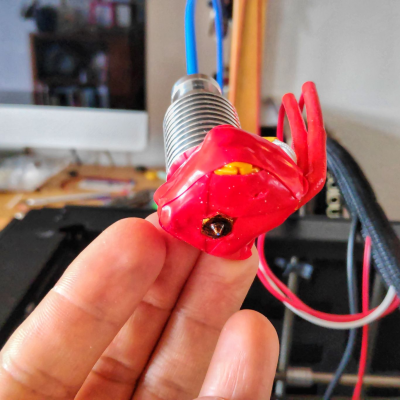
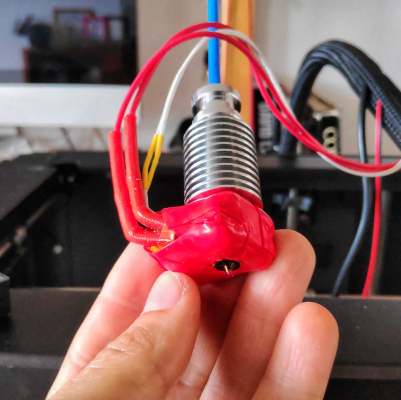
Some pictures:
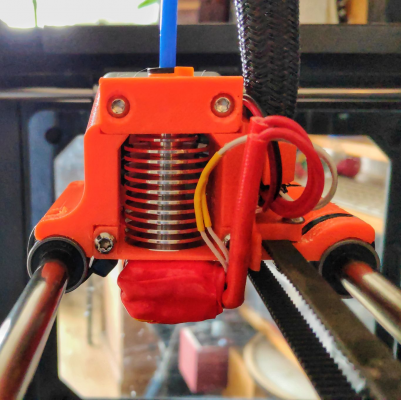
Self fusing silicone (red) wrapped around the ceramic insulation that is packed in kapton tape:
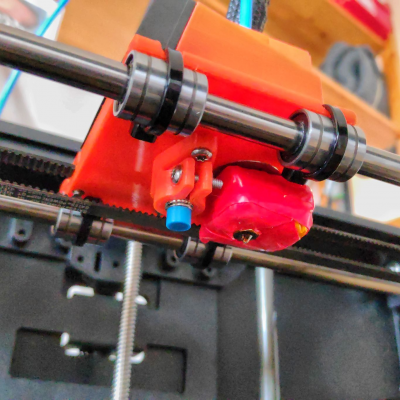
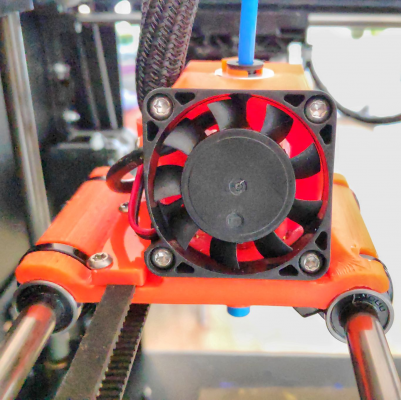
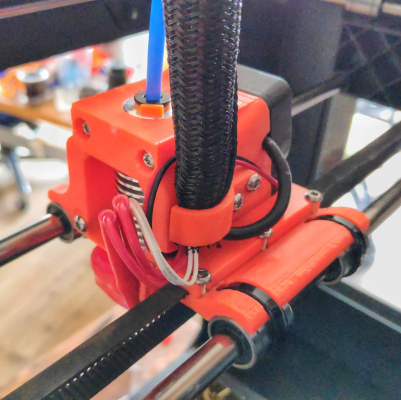
The sleekly designed x-carriage (I'm pretty proud of my minimalistic approach that also seemed to work in the first try):
If you look closely you can see the probe behind the cooling fan, the fan therefor also cools down the probe. I am afraid my previous probe died because it got too hot in the heated chamber. The new fan is quiet!! And moves so much air. It's a delight. I hope this keeps the cold-end cool enough, but also keeps the bottom clamp that clamps around the cooling fins from melting or deforming. I do expect a little deformation to be honest:
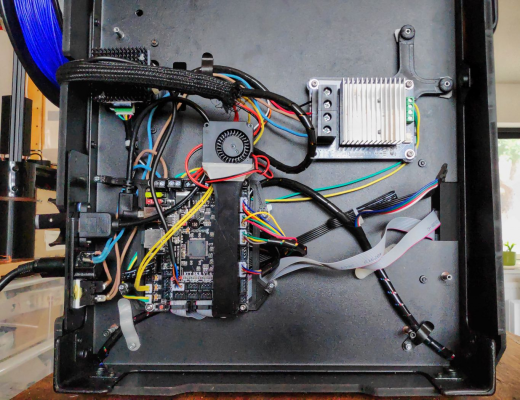
Bed MOSFET top-right:
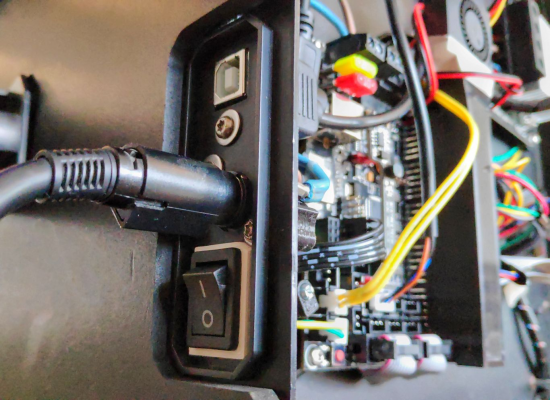
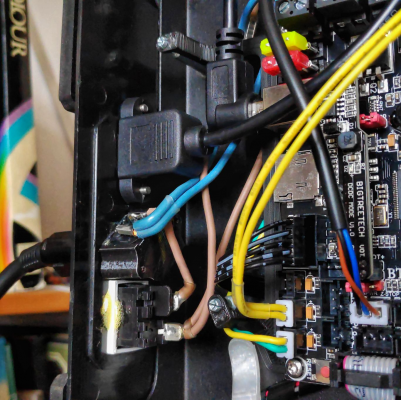
Managed to keep all connections on the interface panel on the back:
A 90-degree USB extender connects to the SKR 1.4 and the other end is mountable on the interface panel:
Edited 2 time(s). Last edit at 08/26/2020 11:25AM by Ohmarinus.
http://www.marinusdebeer.nl/
|
Re: Reviving a Makerbot Replicator 2X August 28, 2020 07:02AM |
Admin Registered: 11 years ago Posts: 3,096 |
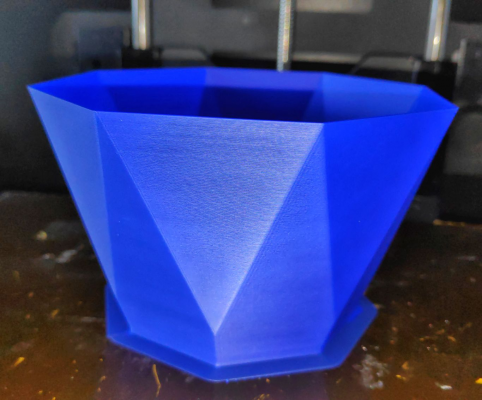
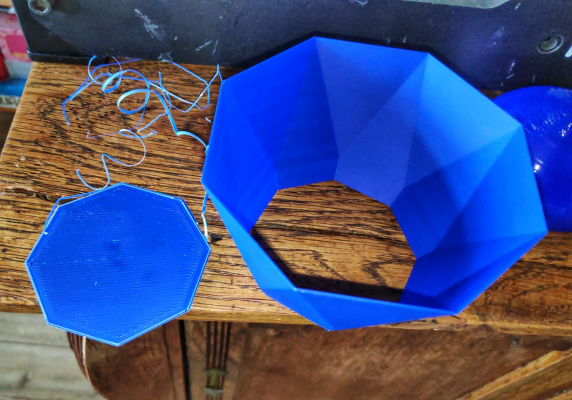
Okay, so the new hotend setup seems to work. I haven't been able to print everything I want, some parts still warp upwards due to the plastic staying too soft, but the problem with vase mode is now fixed. Sadly the interlayed adhesion isn't that great with this ABS and I'm running into the issue that the print sticks more to the bed than that the layers stick to each other.
Perfect layers
Sadly, the bottom sticks onto the kapton way too good, I ordered a magnetic base plate that can handle up to 140ºC so once that is installed I can start and print with a spring steel sheet and just pop off the prints with ease
http://www.marinusdebeer.nl/
Perfect layers
Sadly, the bottom sticks onto the kapton way too good, I ordered a magnetic base plate that can handle up to 140ºC so once that is installed I can start and print with a spring steel sheet and just pop off the prints with ease
http://www.marinusdebeer.nl/
|
Re: Reviving a Makerbot Replicator 2X September 05, 2020 03:24PM |
Admin Registered: 11 years ago Posts: 3,096 |
Okay, a small update on the machine, and a copy paste from the other topic in 'Printing issues':
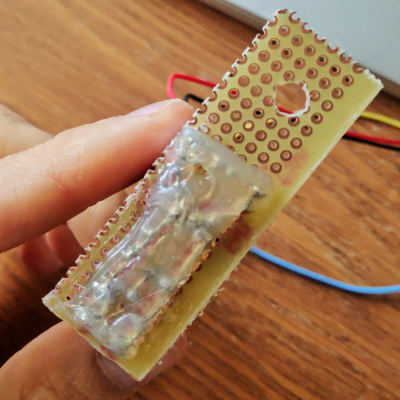
I have changed a lot of settings and the machine is performing really well now. I've also designed myself a PWM breakout module to run an extra fan with PWM because I use one PWM controlled fan to cool the hotend (though I run it on 255 anyway but might lower it again to make it more quiet again) and then I use another fan to cool down the stepper drivers.
This is it:
Couldn't find how many PWM fans could be run on the SKR 1.4 natively, but I decided on creating a breakout board as an exercise anyway. It was a lot of fun.
http://www.marinusdebeer.nl/
Quote
Ohmarinus
I think I've got it down almost completely now.
In contrary to what seems to be popular belief, on my machine I can print perfectly with a bed temperature of 80ºC and a hotend temperature of 235ºC. I read everywhere people suggest an even higher bed temperature when experiencing warping, but in my personal experience I experience no warping at all at 80ºC (first layer temp is 85ºC). Lowering the bed temp might be quite counter-intuitive to some people, but I realized that was the last thing to try that I could think of. Now the material solidifies enough to not warp, but it stays hot enough to still have good inter-layer adhesion. No issues with the part coming off the bed, I still have to use extreme force to get it off. I guess my blend of ABS juice is also exactly the right consistency. I see a lot of people smear on thick-ass layers of ABS juice, but you really only need a subtle film.
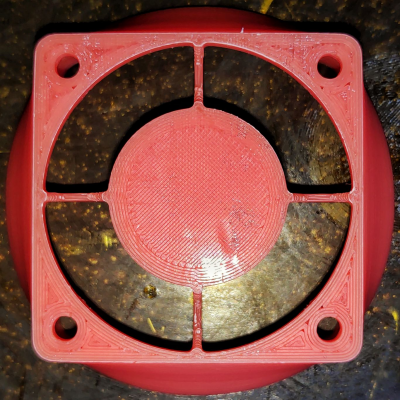
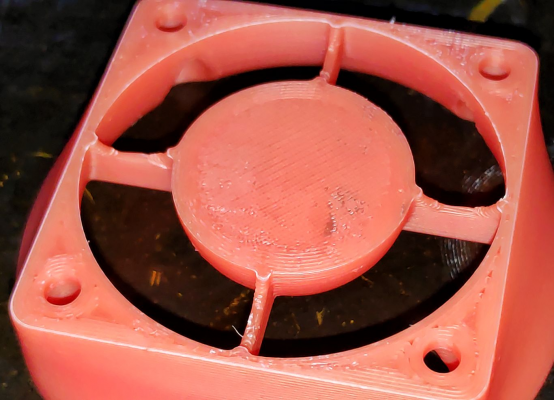
Also, I've added a fan duct that I printed with the Delta machine I've built as well. And am now in the process of vapor smoothing the part that I reprinted with the Replicator 2x which I now call Replicator 3x since it's been upgraded by me. This fan duct will also help with air flow being minimized over the part that's being printed as I did notice that even though my new X-carriage design works incredibly well **best I've ever designed so far**, there was still some turbulence being pulled under the carriage by the airflow that is sucked into the 40mm hotend cooling fan.
I used this design as I see it's the best one I could find with good flow characteristics. I don't understand why people use grate-type fan guards/ducts/inlets, they 'suck':
[www.thingiverse.com]
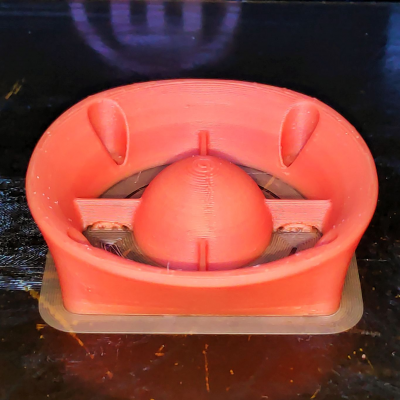
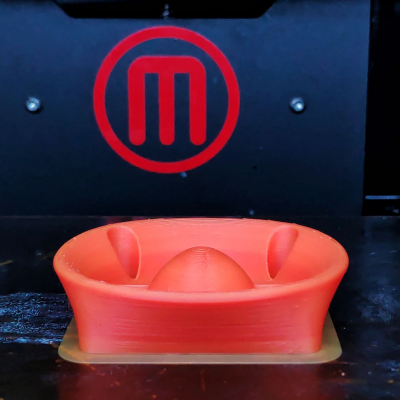
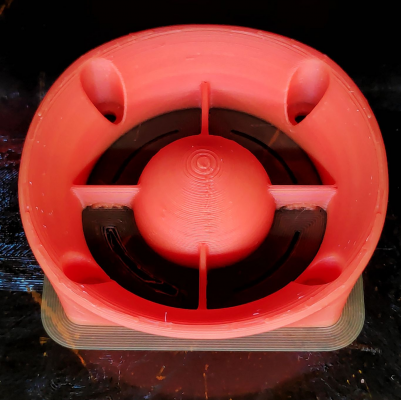
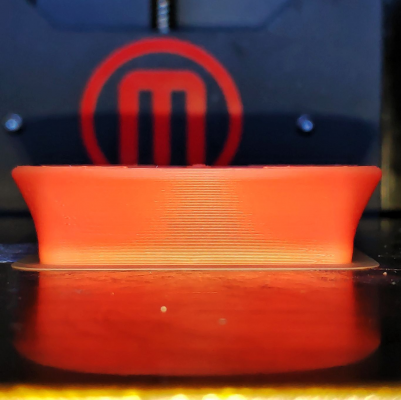
Some example images:
I have changed a lot of settings and the machine is performing really well now. I've also designed myself a PWM breakout module to run an extra fan with PWM because I use one PWM controlled fan to cool the hotend (though I run it on 255 anyway but might lower it again to make it more quiet again) and then I use another fan to cool down the stepper drivers.
This is it:
Couldn't find how many PWM fans could be run on the SKR 1.4 natively, but I decided on creating a breakout board as an exercise anyway. It was a lot of fun.
http://www.marinusdebeer.nl/
|
Re: Reviving a Makerbot Replicator 2X September 15, 2020 11:24PM |
Registered: 3 years ago Posts: 16 |
Haha @ Replicator 3X. I've called mine Zombibot Replicator (as in 2X brought back from the dead) but I think I like your 3X idea better.  Ours are both basically the same upgrade except for our extruder design...so you dont sue me I may have to use Replicator 3Z and Z is for Zombie.
You're so right on the PWM mod. The SKR 1.4 only supports 1, one, a yeah I PWM fan. wth!?!? I dont know any serious 3D printer that only uses 1 fan. They have some 3 other fan outputs that are basically just 12/24v direct. I am considering the same as you since I need 2 more PWM fans but was thinking about using an I2C to PWM controller. These chips are typically used to power the background white LEDs in LCD monitors but there are many breakouts on Adafruit or Sparkfun and I happen to have a few onhand. I'd have to hack Marlin though. I see some code in a forum where someone already did it, so I dont have to start from scratch but would have to patch none-the-less. It would consume 0 pins though since its i2c.
That is a sweet new intake grill! I think you have a good point regarding grate ones.
I've been spending a lot of time playing with "switching dual head" design. Not done yet, but making progress. I've also been test printing with various materials, carbon fiber, PLA for the first time and the printer is working great. Good wood PLA on order. I'm really surprised you are printing with the hotbed at 80. I am not surprised it reduces warping, I can see how our enclosed printer suffers from ABS not cooling down fast enough and hotbed definitely slows the cooling factor. I am just surprised it still sticks. I will have to try it. I am pretty sure the hotbed contributes to my hot steppers via ambient too. I put my cover up on stilts to let a little cool air in. So maybe 80deg would do me better too.
I've also been off on another project too. Instrumenting my pool with pH and ORP sensors for chemistry control. So I am a bit slow on the updates. This gave me the motivation to get the printer working tho so I could print the enclosures.
C
 Ours are both basically the same upgrade except for our extruder design...so you dont sue me I may have to use Replicator 3Z and Z is for Zombie.
You're so right on the PWM mod. The SKR 1.4 only supports 1, one, a yeah I PWM fan. wth!?!? I dont know any serious 3D printer that only uses 1 fan. They have some 3 other fan outputs that are basically just 12/24v direct. I am considering the same as you since I need 2 more PWM fans but was thinking about using an I2C to PWM controller. These chips are typically used to power the background white LEDs in LCD monitors but there are many breakouts on Adafruit or Sparkfun and I happen to have a few onhand. I'd have to hack Marlin though. I see some code in a forum where someone already did it, so I dont have to start from scratch but would have to patch none-the-less. It would consume 0 pins though since its i2c.
That is a sweet new intake grill! I think you have a good point regarding grate ones.
I've been spending a lot of time playing with "switching dual head" design. Not done yet, but making progress. I've also been test printing with various materials, carbon fiber, PLA for the first time and the printer is working great. Good wood PLA on order. I'm really surprised you are printing with the hotbed at 80. I am not surprised it reduces warping, I can see how our enclosed printer suffers from ABS not cooling down fast enough and hotbed definitely slows the cooling factor. I am just surprised it still sticks. I will have to try it. I am pretty sure the hotbed contributes to my hot steppers via ambient too. I put my cover up on stilts to let a little cool air in. So maybe 80deg would do me better too.
I've also been off on another project too. Instrumenting my pool with pH and ORP sensors for chemistry control. So I am a bit slow on the updates. This gave me the motivation to get the printer working tho so I could print the enclosures.
C
|
Re: Reviving a Makerbot Replicator 2X December 09, 2020 02:20AM |
Registered: 3 years ago Posts: 16 |
Hey Ohmarinus! How is the machine running now?
I am considering moving to single extruder and bowden-pusher instead of my extruder on the carriage. I just find dual extrusion such a pain to tune and 95% of the time I just want single head. Also, my glass plate cracked a bit (my own fault) and although it still works fine for now I am thinking PEI sheet is in order. What are you using for build plate?
I am considering moving to single extruder and bowden-pusher instead of my extruder on the carriage. I just find dual extrusion such a pain to tune and 95% of the time I just want single head. Also, my glass plate cracked a bit (my own fault) and although it still works fine for now I am thinking PEI sheet is in order. What are you using for build plate?
|
Re: Reviving a Makerbot Replicator 2X January 13, 2021 02:42PM |
Registered: 3 years ago Posts: 3 |
|
Re: Reviving a Makerbot Replicator 2X January 13, 2021 02:42PM |
Registered: 3 years ago Posts: 3 |
Quote
Ohmarinus
Okay, a small update on the machine, and a copy paste from the other topic in 'Printing issues':
Quote
Ohmarinus
I think I've got it down almost completely now.
In contrary to what seems to be popular belief, on my machine I can print perfectly with a bed temperature of 80ºC and a hotend temperature of 235ºC. I read everywhere people suggest an even higher bed temperature when experiencing warping, but in my personal experience I experience no warping at all at 80ºC (first layer temp is 85ºC). Lowering the bed temp might be quite counter-intuitive to some people, but I realized that was the last thing to try that I could think of. Now the material solidifies enough to not warp, but it stays hot enough to still have good inter-layer adhesion. No issues with the part coming off the bed, I still have to use extreme force to get it off. I guess my blend of ABS juice is also exactly the right consistency. I see a lot of people smear on thick-ass layers of ABS juice, but you really only need a subtle film.
Also, I've added a fan duct that I printed with the Delta machine I've built as well. And am now in the process of vapor smoothing the part that I reprinted with the Replicator 2x which I now call Replicator 3x since it's been upgraded by me. This fan duct will also help with air flow being minimized over the part that's being printed as I did notice that even though my new X-carriage design works incredibly well **best I've ever designed so far**, there was still some turbulence being pulled under the carriage by the airflow that is sucked into the 40mm hotend cooling fan.
I used this design as I see it's the best one I could find with good flow characteristics. I don't understand why people use grate-type fan guards/ducts/inlets, they 'suck':
[www.thingiverse.com]
Some example images:
I have changed a lot of settings and the machine is performing really well now. I've also designed myself a PWM breakout module to run an extra fan with PWM because I use one PWM controlled fan to cool the hotend (though I run it on 255 anyway but might lower it again to make it more quiet again) and then I use another fan to cool down the stepper drivers.
This is it:
Couldn't find how many PWM fans could be run on the SKR 1.4 natively, but I decided on creating a breakout board as an exercise anyway. It was a lot of fun.
Do you share the firmware settings somewhere? i am working on the same project.
|
Re: Reviving a Makerbot Replicator 2X January 13, 2021 02:43PM |
Registered: 3 years ago Posts: 3 |
Quote
guru_florida
Hey Ohmarinus! How is the machine running now?
I am considering moving to single extruder and bowden-pusher instead of my extruder on the carriage. I just find dual extrusion such a pain to tune and 95% of the time I just want single head. Also, my glass plate cracked a bit (my own fault) and although it still works fine for now I am thinking PEI sheet is in order. What are you using for build plate?
would you like to share the firmware somehow?
Sorry, only registered users may post in this forum.
