Heated chamber : heater placement
Posted by yet-another-average-joe
|
Heated chamber : heater placement November 26, 2022 05:11AM |
Registered: 4 years ago Posts: 90 |
Hello !
I decided to build a Voron 2.4. At this time I successfully printed two hotends : a Stealthburner for the Voron, and a Afterburner for the old, heavily modded Tevo Tornado that is making the parts.
In order to be able to print ABS, I built a ghetto chamber around the Tornado. But I can't get more than 35-40°C, and I'm facing some issues with the wife acceptance factor for this thing (currently squatting two rooms with my projects) !
The ghetto chamber is fine for smaller parts (heads), but not enough for larger ones, even with anti warping tabs, brims, and draft shields. Really nice parts. I've been afraid of using the ABS I purchased 4.5 years ago, and just started using it. Been struggling with PETG for a while. What a loss of tiime ! ABS is easier, by far.Only problem being warping.
I'm about to build a better heated chamber (CADing for now).
I will be using the heater element from a food dehydrator (250W, prefered solution) or from a old PTC heater (500/1000W). Regulated (Marlin + thermistor + SSR), or unregulated depending on the behaviour...
I'm wondering where to put the heating element. It seems to me that under the bed could be interesting to minimize the difference between top and bottom temperature (natural convection). It also would be far easier to build as the chamber panels are not rigid enough to support the heating element. No idea where to place the thermistor in case of a regulated chamber (I doubt I will need one if I use a 250W element). Also, will it be enough for circulating air, or will a fan be needed somewhere in the chamber ?
Some thoughts ?
Edited 1 time(s). Last edit at 11/26/2022 05:13AM by yet-another-average-joe.
|
Re: Heated chamber : heater placement November 26, 2022 10:47AM |
Registered: 11 years ago Posts: 5,780 |
You need the chamber to get up to about 50C (or higher) to prevent layer splitting and warping, but you don't want a lot of air movement as it will cause splitting and warping in spite of the temperature. If you use a PTC heater that limits its own temperature to a safe value, you can put it almost anywhere, but under the bed is probably the best place to keep it out of the way. Make sure there isn't anything under there that will be damaged by the heat. If you use a conventional resistive heater, it may get dangerously hot unless it has some air moving over it. In that case you'll need a fan to keep the air moving, but best if it doesn't blow on the print. At 50C the hot end cooling fan will do its job just fine. If you get much warmer than that you may have to pipe in/out room temperature air or use liquid cooling.
I have a tall printer, so I put a conventional 500W heater at the bottom of the machine along with a 220VAC fan. The fan is wired in parallel with the heater, so when the heater is on (117VAC applied via SSR), the fan spins slowly and quietly to keep air moving over the heater and keep its temperature down to a safe value. The fan also "helps" the convection a bit, but of course, most of the warm air ends up at the top of the machine where the print is (and there where it should be). I put a thermistor at about the middle of the chamber and it seems to keep the temperature reasonably well regulated.
Insulating the enclosure will help keep the chamber warm - PIR foam is good stuff for that because it won't burn if the machine should ever catch fire. Polystyrene foam will melt and burn, producing plenty of toxic fumes.
Ultra MegaMax Dominator 3D printer: [drmrehorst.blogspot.com]
|
Re: Heated chamber : heater placement November 26, 2022 01:42PM |
Registered: 4 years ago Posts: 90 |
Thanks for your answer. I've been reading most of your posts, and I'm familiar with your printer (and the other bot that draws in the sand)
Was 100% sure you'd be the first answering !
Yes, I'd like 50-60°C.
Meanwhile, some progress :
Searching the web I found only one example of a heated 3D printer using a food dehydrator. I was very disapointed there's no other examples !
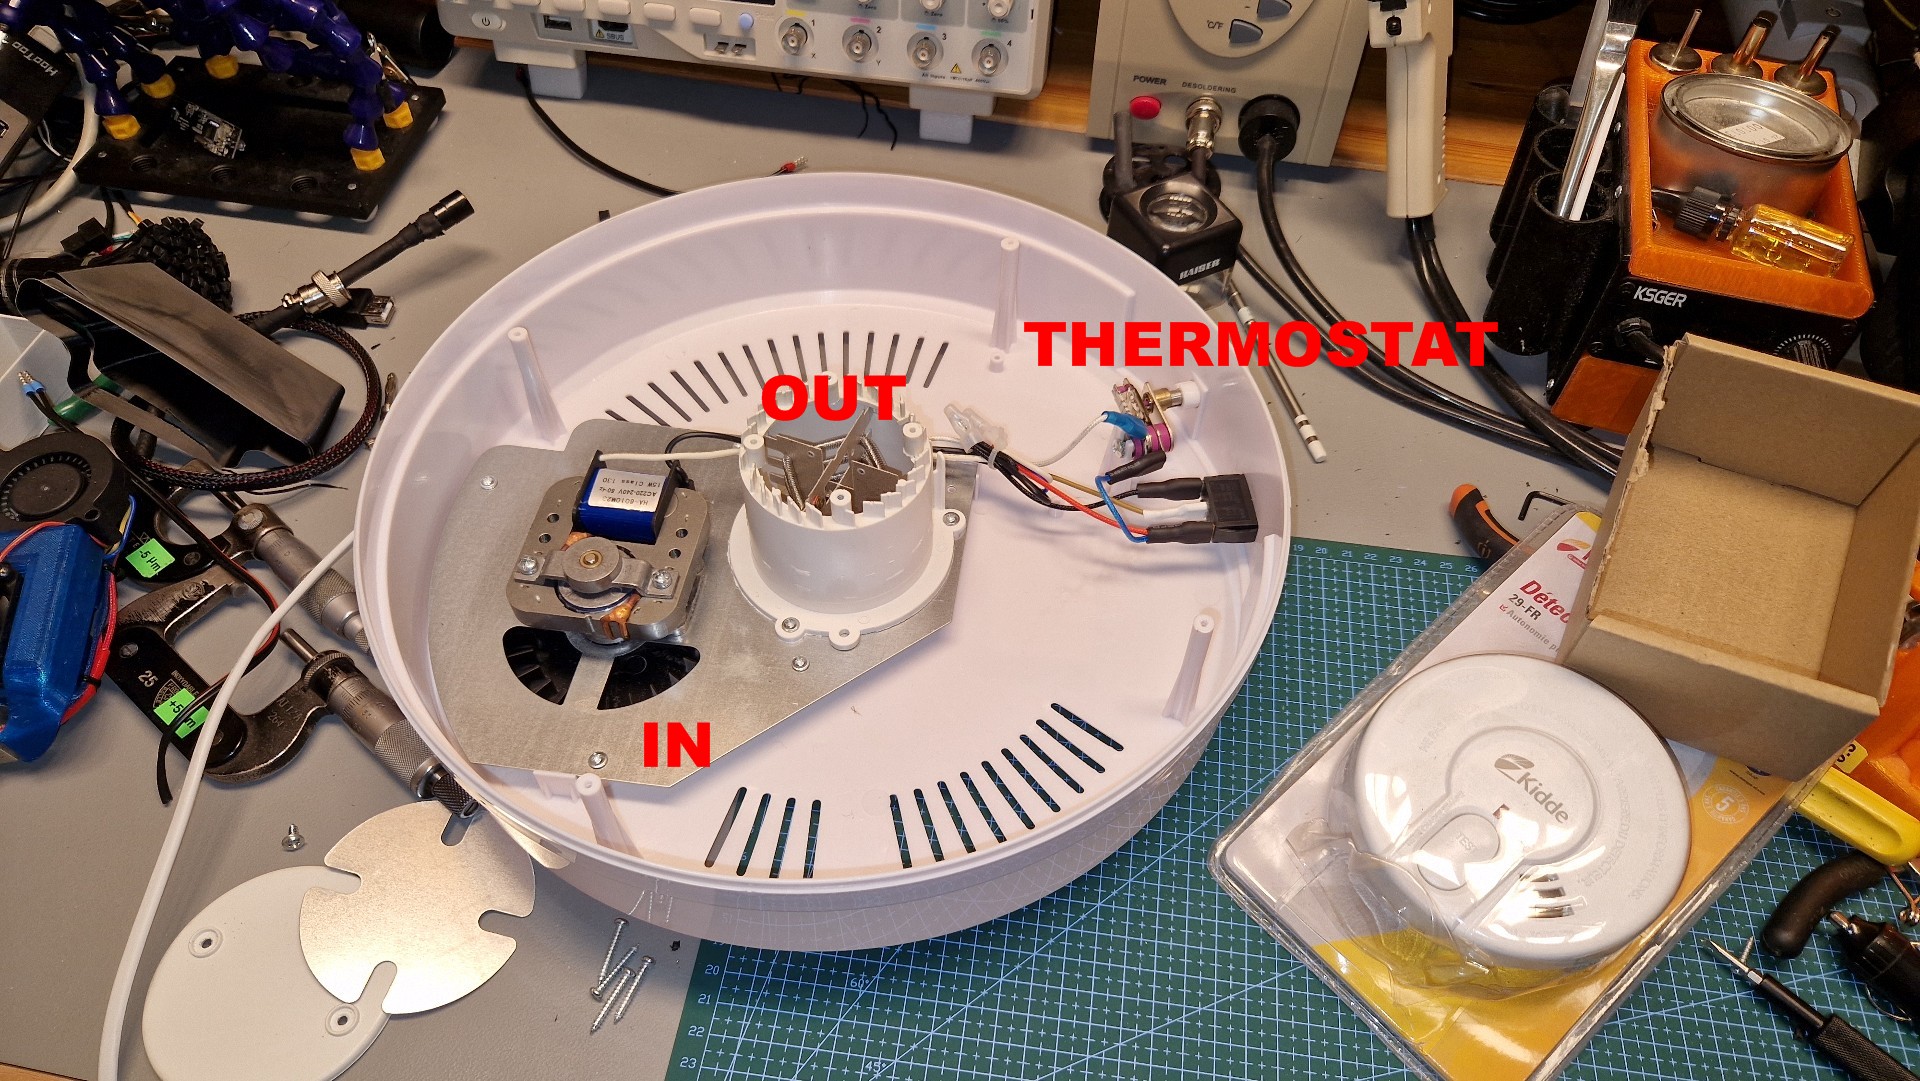
I took a pic from the food dehydrator I have by hand. The one I use for spools.
It's pretty simple.
The thing can heat up to 65°C (I verified with a thermocouple, it's pretty accurate !); the thermostat also is very basic (electromechanic, no electronics) : just fine ! (
It *DOES NOT* recycle air. Bummer ! The fan inlet takes air from outside, from the lower part of the enclosure, separated from the food, and blows it quietly.
The fan has a low speed asynch motor (with Frager loop, similar to those that can be found in old low end turntables : Teppaz and others).
This means that it heats *COLD* air up to 65°C.
But if it is modded for recirculating, the heating element and the fan will be turned off if the temperature is higher than the preset temp. So there's probably no need for Marlin firmware control. This thing seems to be able to wistand recirculation...
The thermostat being playing with 230V, there's no real choice. It has to stay in the dryer enclousure. It will *NOT* be removed and replaced with a SSR ; but a SSR could be added in series : it will at least be a safety feature ; I didn't find any thermal fuse or relay (we call them "Klixon" in France, it's a brand name),
The main question is : will 250W be enough ? Two dehydrators could be needed. I don't want to spend much money on this old printer, it will nevermove print ABS after it prints the Voron parts.
I got (for cheap) a few large car windscreen protectors. They are made of thin aluminized insulation material : probably not very "efficient", but at least will keep infrared inside. Plus duct tape and aluminium tape, and PVC tubing for the structure. Worth experimenting ?
I plan to connect the dryer under the bed, in the enclosure, and recirculating air. The heated bed has insulation material under the heating element (500W, 230V).
I have a smoke detectors all over the house ! Not playing with this kind of things, I was caught in a fire 30 years ago, and I know that within a couple of minutes (litterally), it's impossible to know where are the doors... anyways, the staircase was burning. I know exactly what a burning house is, from inside. According to the firemen, we had 5 minutes of life expectancy when they pulled us outside and sent us to the hospital. Because of a professional electrician.
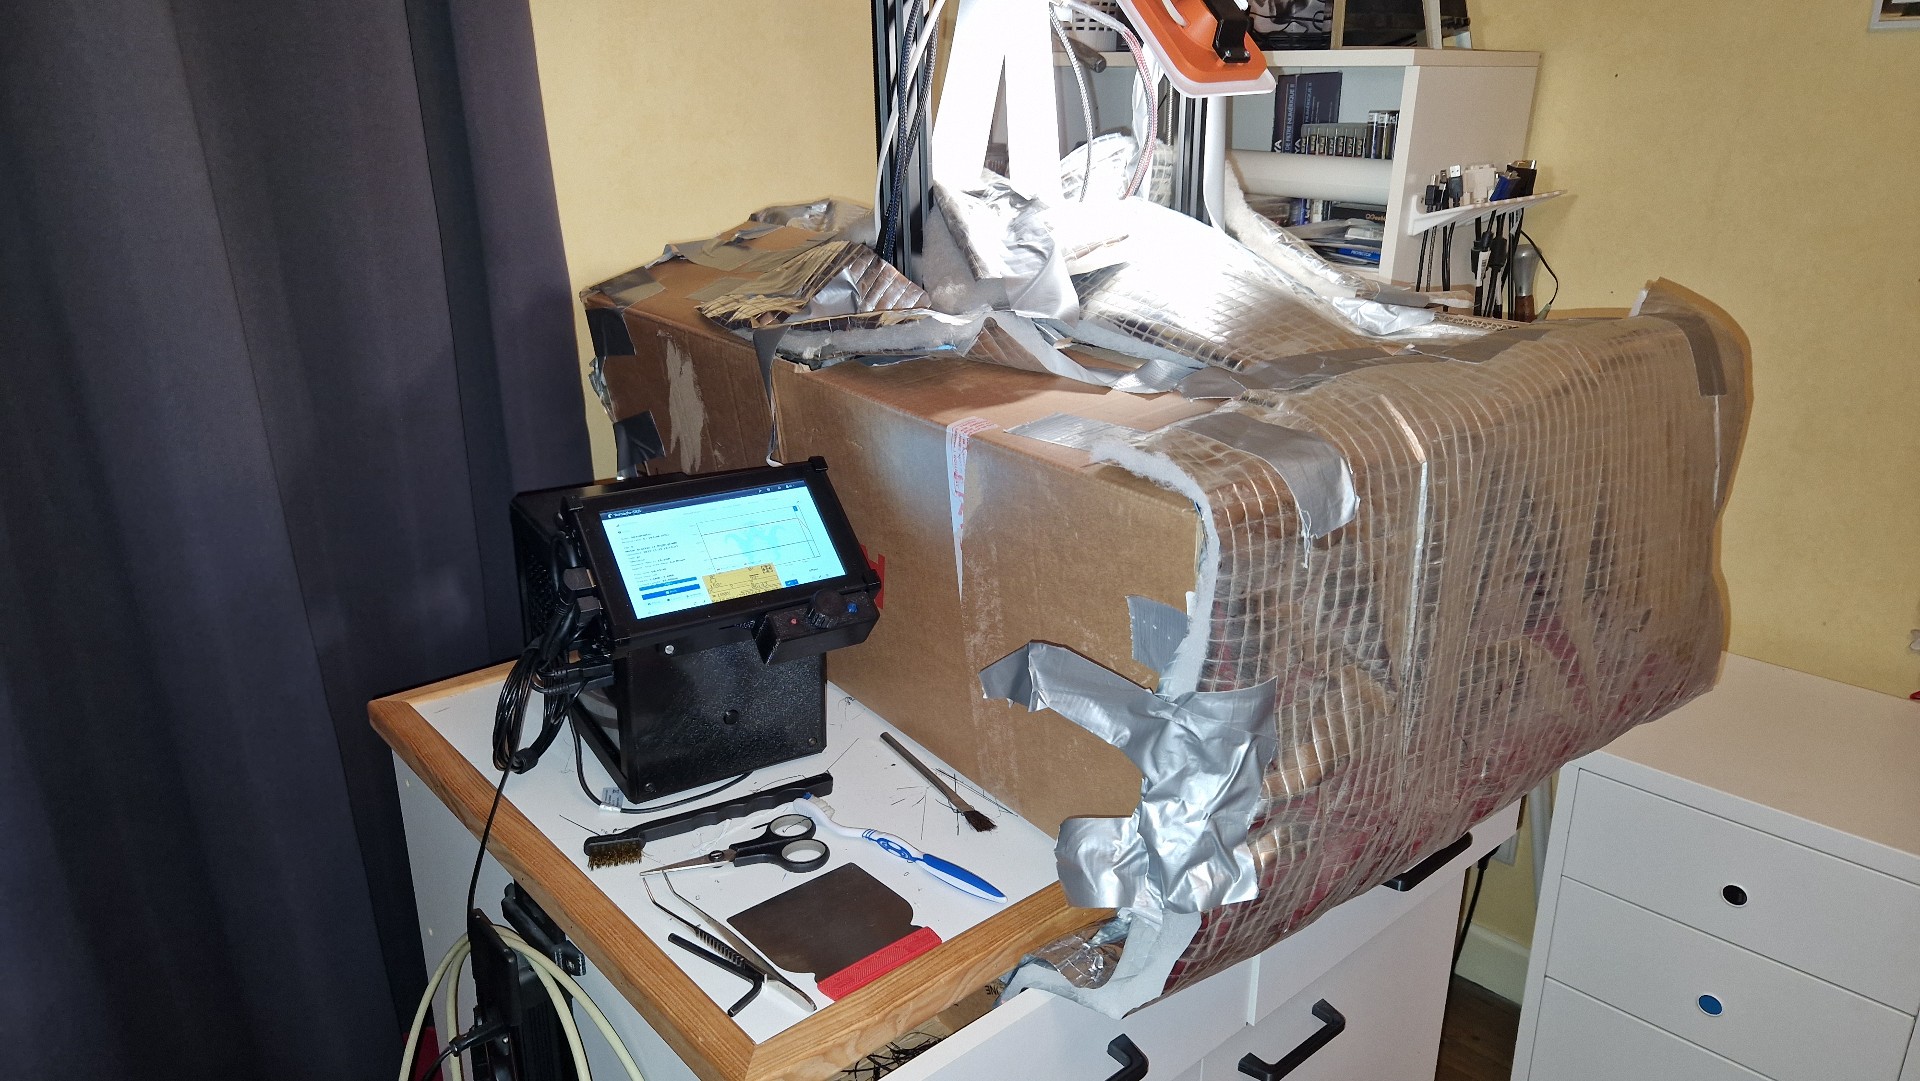
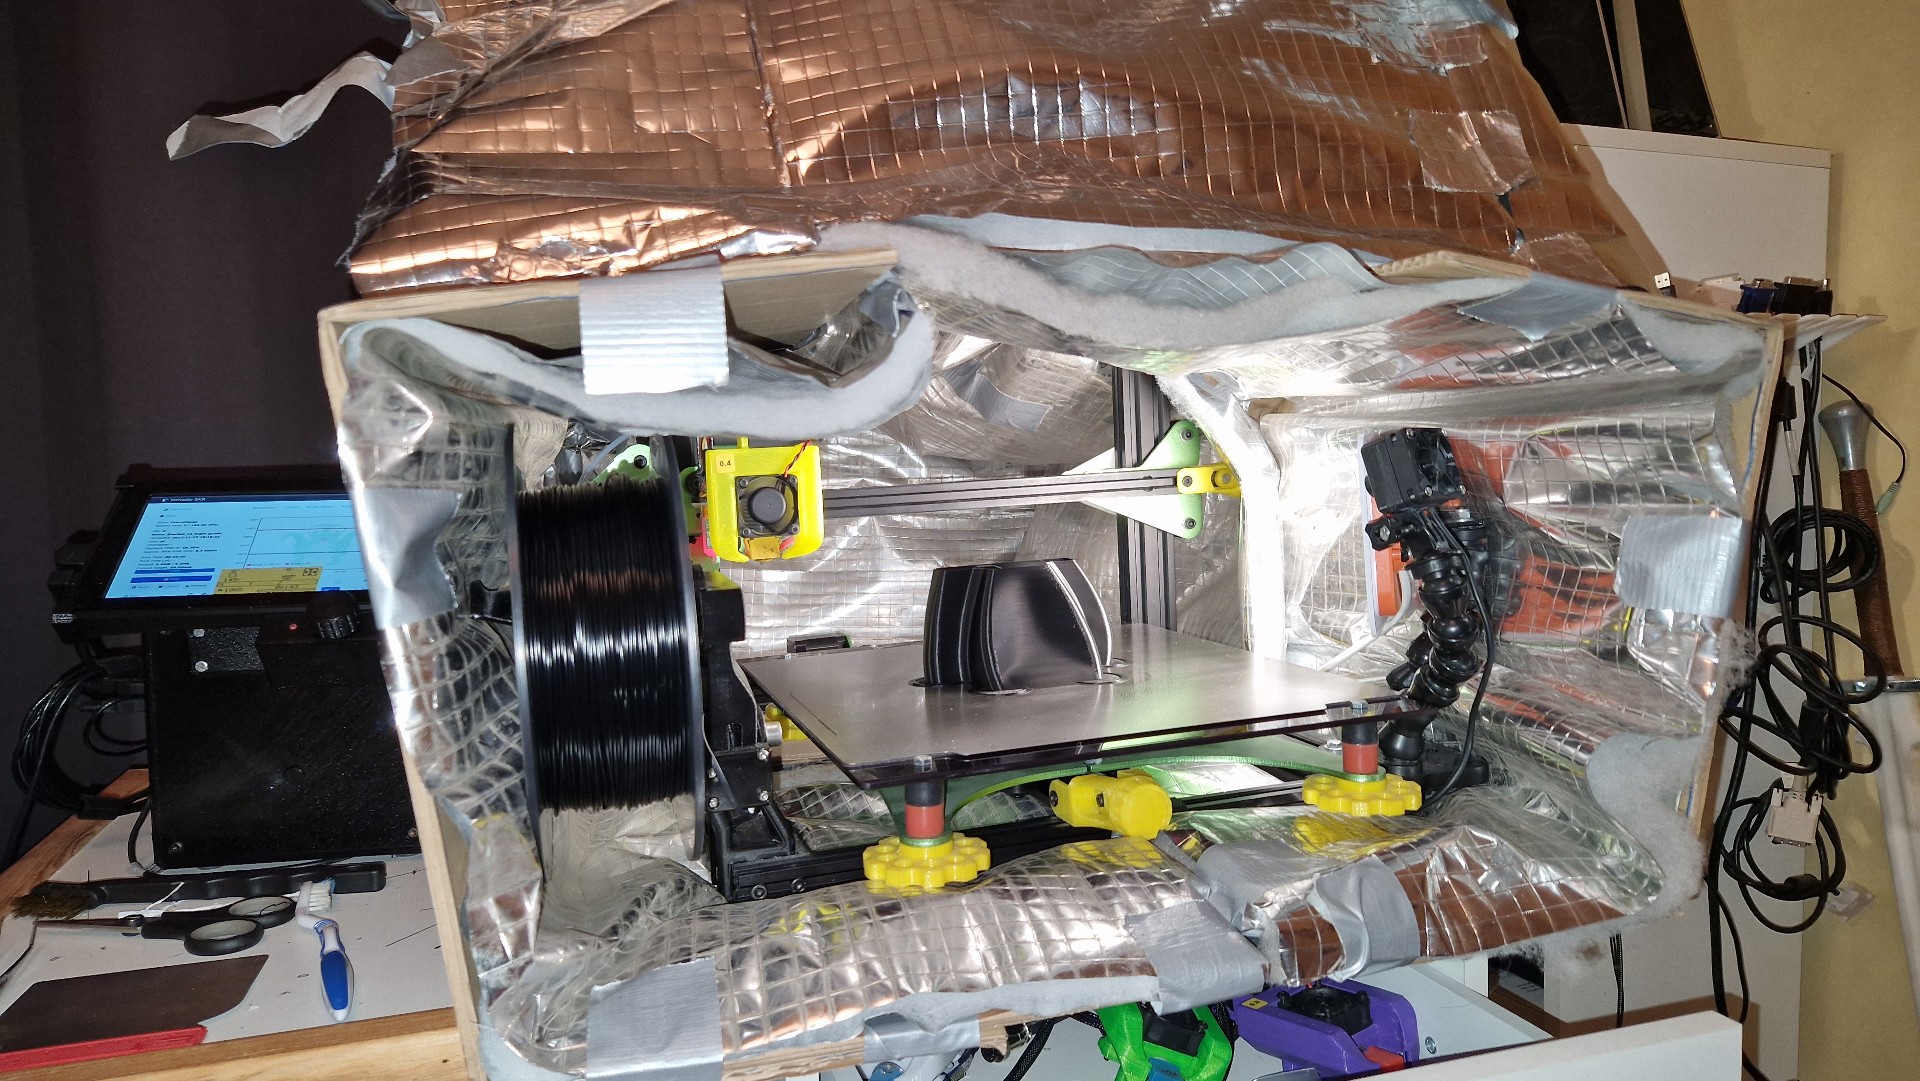
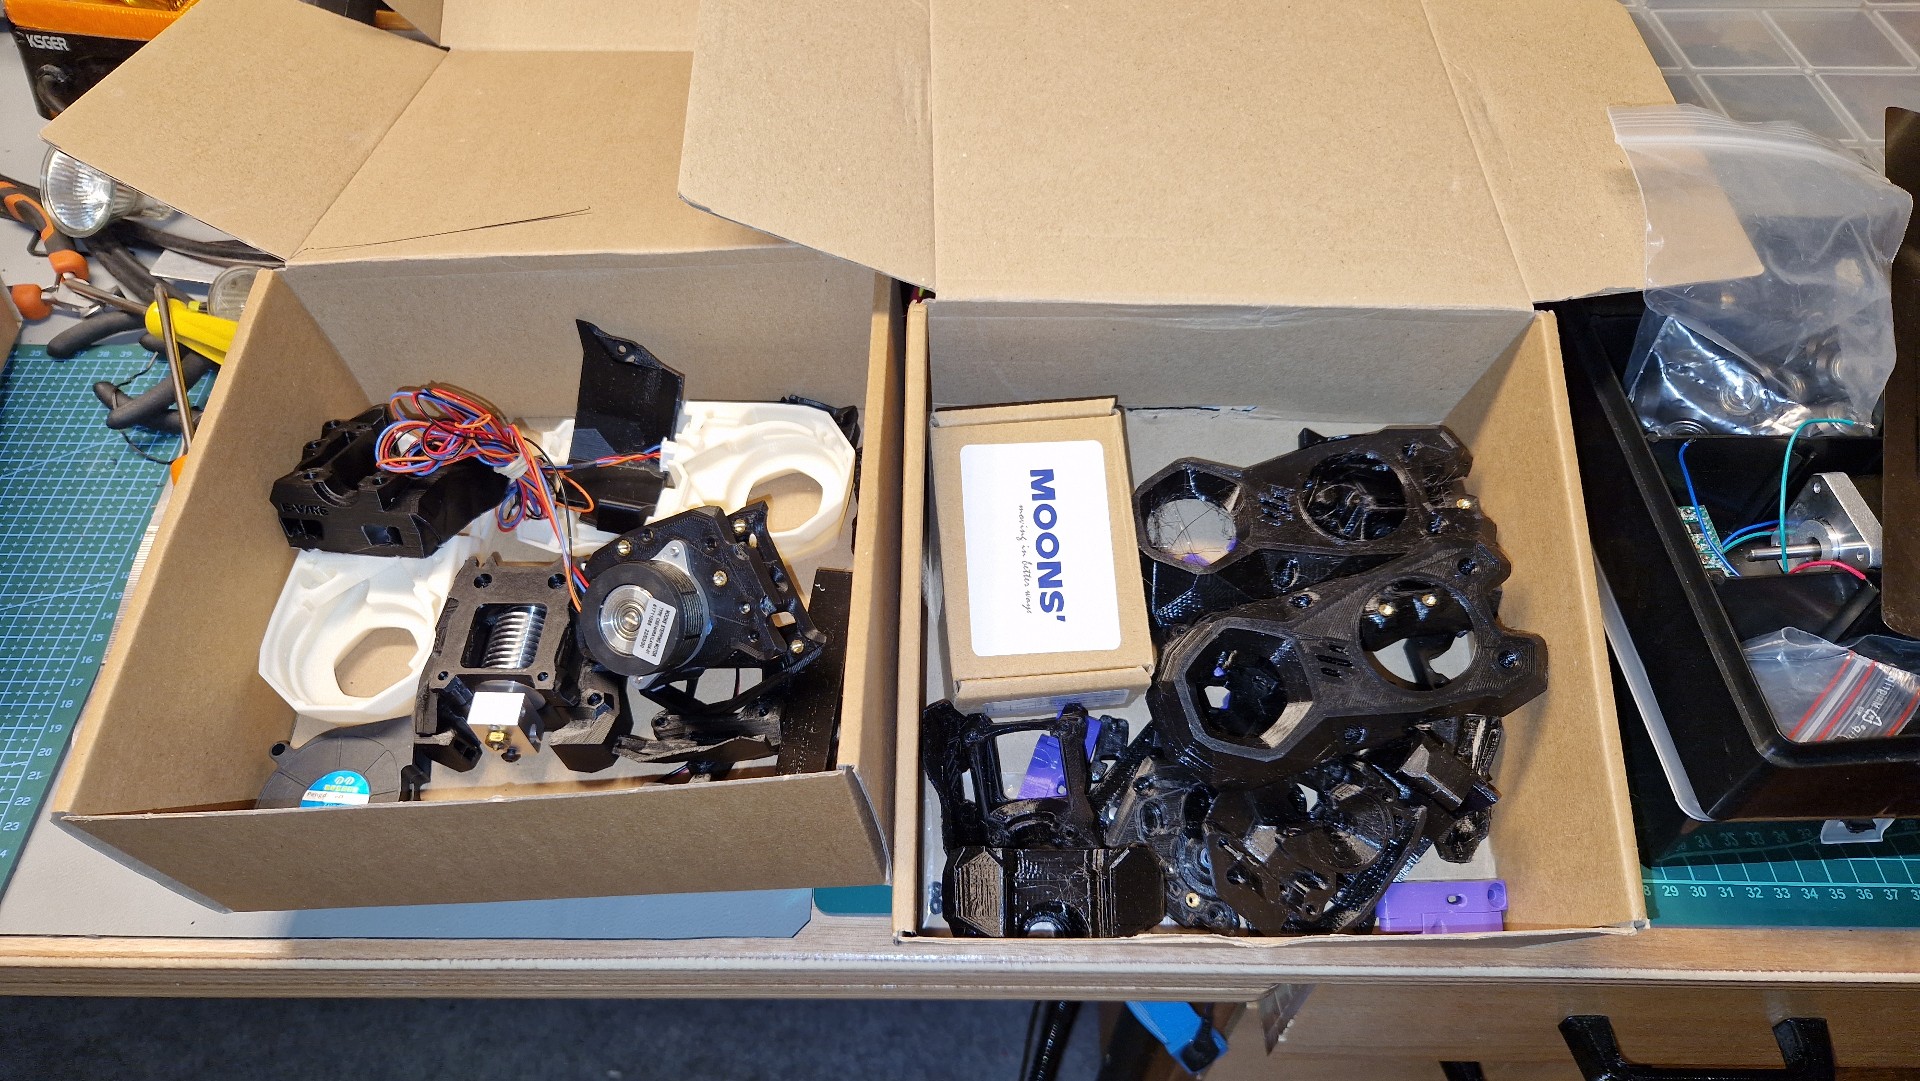
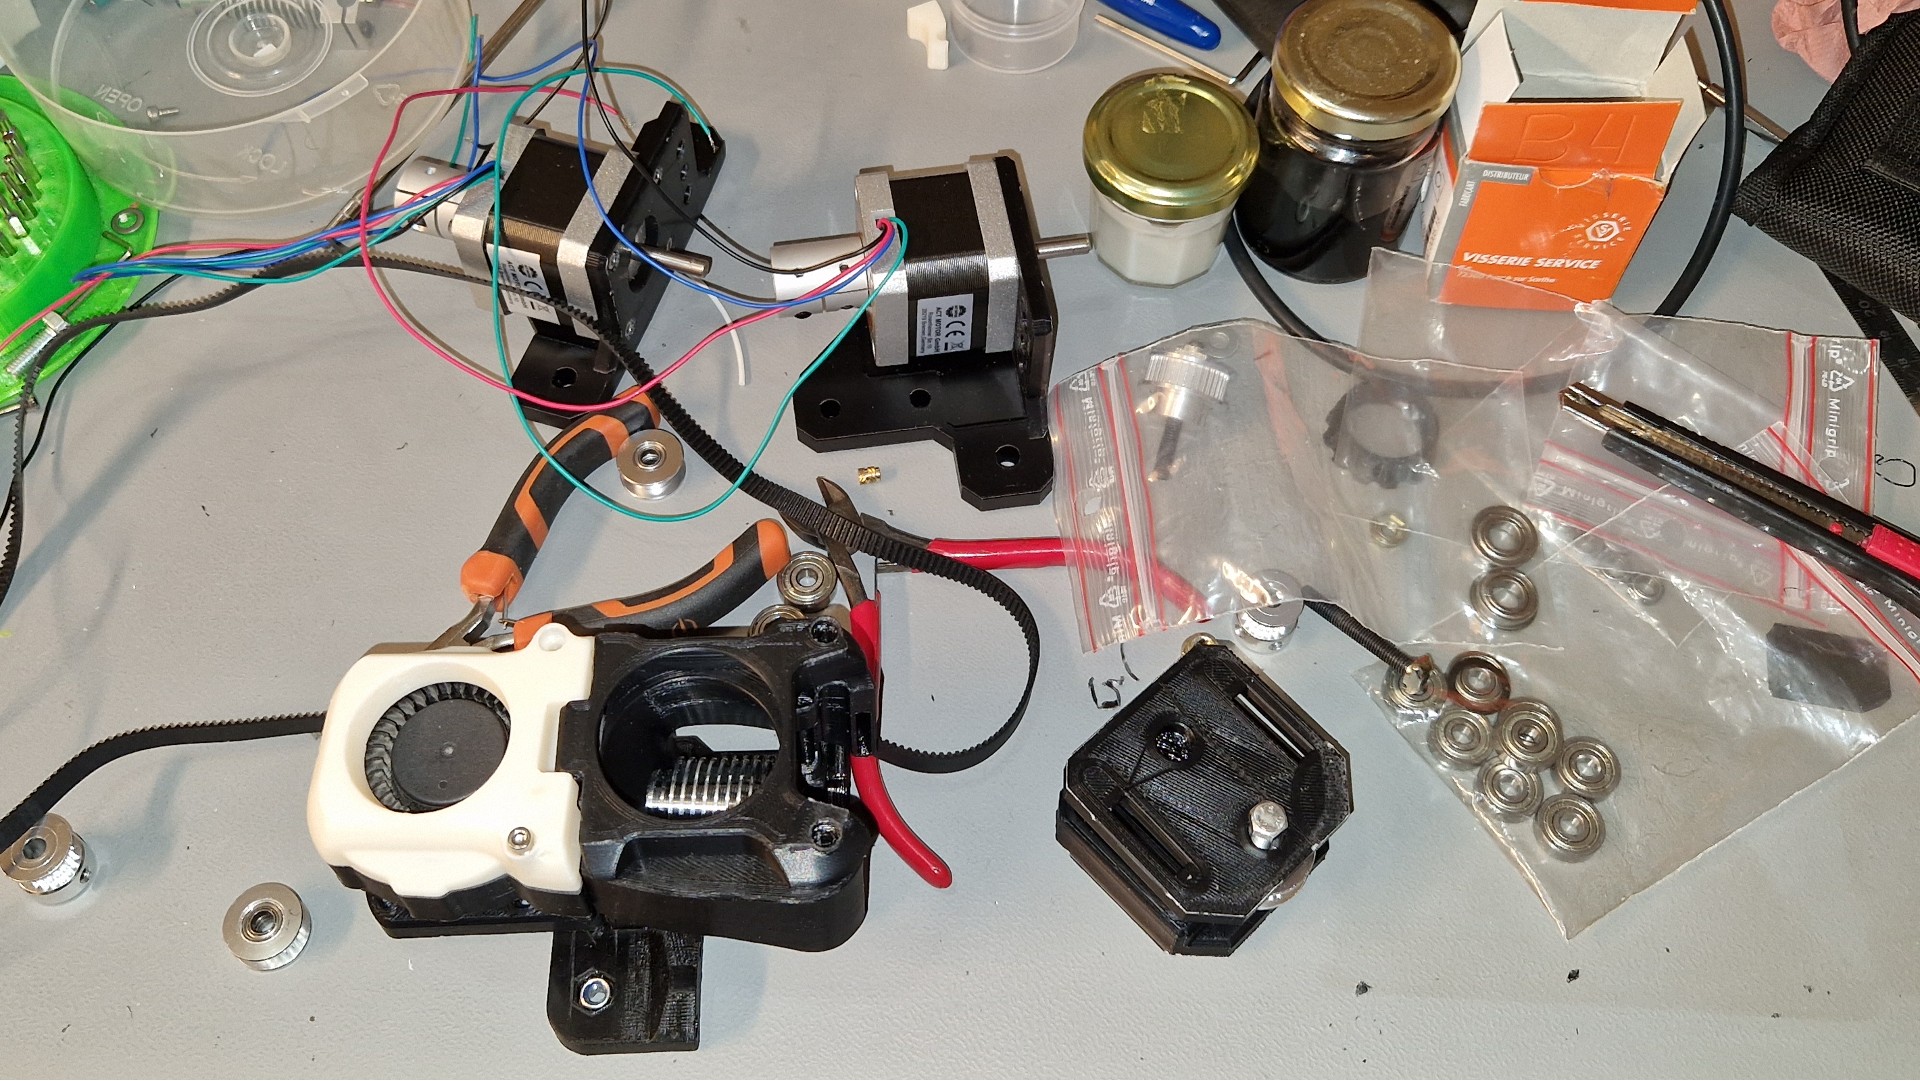
Some pics. In the printer, it's not some funky artwork. It's a custom draft shield around the real part. Playing with a PTC domestic heater in such a rig is probably not a good idea...
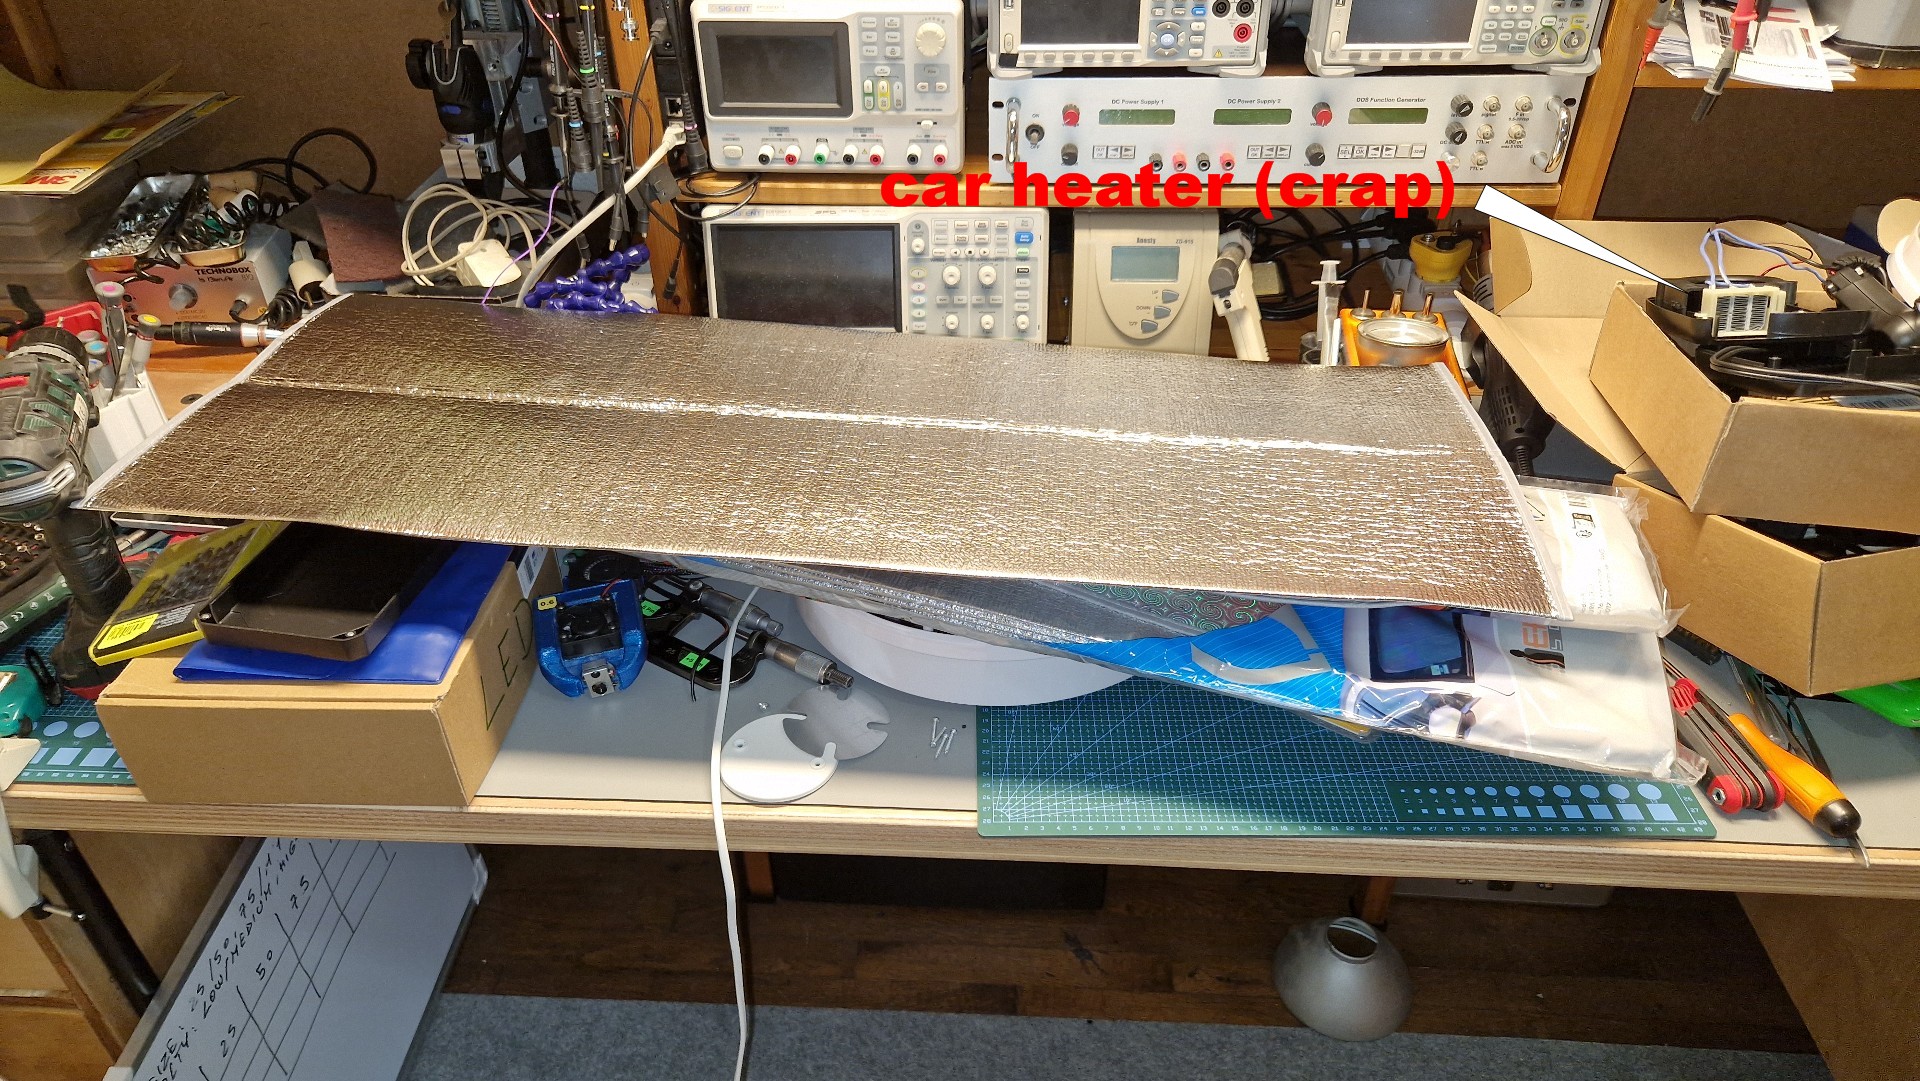
One pic shows a car heater. Many web specialists of heated 3D printers and "e-tinkerers" recommand such a thing. The heater element is tiny (like 1"x1"). They clain 250W, but the fuse is rated 15A. The math don't match... Even worse : the heating element is 3 ohm when cold, 7 ohm when hot : scam !!! It's only 30W with the standard 14.4V max car.Ctrl C - ctrl V all over the internets ! Got it for 20€ from a brick and mortar automotive parts shop, cheaper than from Amazon, but the only usefull thing is its large blower fan. Don't be as stupid as me, don't buy this crap.
Was 100% sure you'd be the first answering !
Yes, I'd like 50-60°C.
Meanwhile, some progress :
Searching the web I found only one example of a heated 3D printer using a food dehydrator. I was very disapointed there's no other examples !
I took a pic from the food dehydrator I have by hand. The one I use for spools.
It's pretty simple.
The thing can heat up to 65°C (I verified with a thermocouple, it's pretty accurate !); the thermostat also is very basic (electromechanic, no electronics) : just fine ! (
It *DOES NOT* recycle air. Bummer ! The fan inlet takes air from outside, from the lower part of the enclosure, separated from the food, and blows it quietly.
The fan has a low speed asynch motor (with Frager loop, similar to those that can be found in old low end turntables : Teppaz and others).
This means that it heats *COLD* air up to 65°C.
But if it is modded for recirculating, the heating element and the fan will be turned off if the temperature is higher than the preset temp. So there's probably no need for Marlin firmware control. This thing seems to be able to wistand recirculation...
The thermostat being playing with 230V, there's no real choice. It has to stay in the dryer enclousure. It will *NOT* be removed and replaced with a SSR ; but a SSR could be added in series : it will at least be a safety feature ; I didn't find any thermal fuse or relay (we call them "Klixon" in France, it's a brand name),
The main question is : will 250W be enough ? Two dehydrators could be needed. I don't want to spend much money on this old printer, it will nevermove print ABS after it prints the Voron parts.
I got (for cheap) a few large car windscreen protectors. They are made of thin aluminized insulation material : probably not very "efficient", but at least will keep infrared inside. Plus duct tape and aluminium tape, and PVC tubing for the structure. Worth experimenting ?
I plan to connect the dryer under the bed, in the enclosure, and recirculating air. The heated bed has insulation material under the heating element (500W, 230V).
I have a smoke detectors all over the house ! Not playing with this kind of things, I was caught in a fire 30 years ago, and I know that within a couple of minutes (litterally), it's impossible to know where are the doors... anyways, the staircase was burning. I know exactly what a burning house is, from inside. According to the firemen, we had 5 minutes of life expectancy when they pulled us outside and sent us to the hospital. Because of a professional electrician.
Some pics. In the printer, it's not some funky artwork. It's a custom draft shield around the real part. Playing with a PTC domestic heater in such a rig is probably not a good idea...
One pic shows a car heater. Many web specialists of heated 3D printers and "e-tinkerers" recommand such a thing. The heater element is tiny (like 1"x1"). They clain 250W, but the fuse is rated 15A. The math don't match... Even worse : the heating element is 3 ohm when cold, 7 ohm when hot : scam !!! It's only 30W with the standard 14.4V max car.Ctrl C - ctrl V all over the internets ! Got it for 20€ from a brick and mortar automotive parts shop, cheaper than from Amazon, but the only usefull thing is its large blower fan. Don't be as stupid as me, don't buy this crap.
|
Re: Heated chamber : heater placement November 27, 2022 10:13AM |
Registered: 11 years ago Posts: 5,780 |
I've seen a couple guys building high temperature printers over at the Duet forums. They are building them to print materials like PEEK, etc. That's a completely different build (an oven) compared to just getting things warm enough to print ABS.
My printer has a chamber volume of about 420 liters IRIC, and a 500W heater. It takes about 20 minutes for the chamber temperature to reach 50C, so I usually preheat the machine before starting a large ABS print. I haven't printed a lot of ABS recently- I find myself printing a lot of PETG. I use ABS for mechanical parts, like the motor and pulley mounts for Arrakis. I didn't insulate the underside of the print bed because the heat "lost" there helps warm the chamber, so it isn't really lost. I have a large clear polycarbonate door on the front of my printer that loses a lot of heat. It would be a good idea to cut a piece of foam to replace that door when I'm printing ABS. A lot of people insulate the underside of the bed because there is electronics under it that they want to protect from the heat or because the bed heater is underpowered and won't get to ABS print temperature (100C or so) without it.
One little known key to successful ABS printing is to let the print cool slowly when it is finished. I leave it in the machine until the bed temperature has dropped to about 40C which takes around 30 minutes or so (probably longer if the underside of the bed is insulated) depending on the room temperature. Forget about printing on glass plates and swapping them out so you can start the next print very quickly. If you take the print out of the machine as soon as it finishes, it may split.
You can use almost anything for the chamber insulation- even just a couple layers of corrugated cardboard.
It doesn't look like your printer has a very large volume, so I would think that the 250W food dehydrator would be sufficient to heat it.
Ultra MegaMax Dominator 3D printer: [drmrehorst.blogspot.com]
|
Re: Heated chamber : heater placement November 27, 2022 01:35PM |
Registered: 4 years ago Posts: 90 |
Quote
the_digital_dentist
...I didn't insulate the underside of the print bed because the heat "lost" there helps warm the chamber, so it isn't really lost.
This a *GREAT* advice !!!
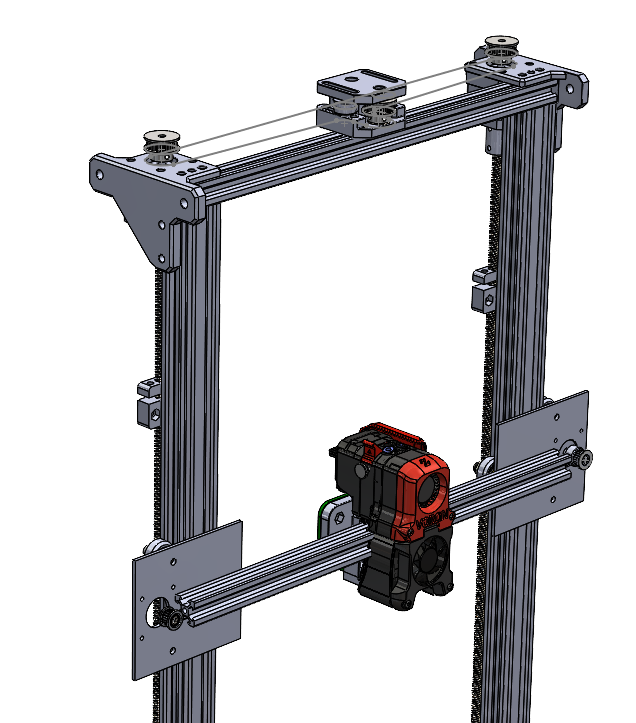
No, I will not have a large volume ; as you can see, I didn't insulate the whole machine. I was even considering trimming the two vertical extrusions (I have a Bridgeport under steroids that can do this easily and properly). The tallest thing I ever printed is 100mm (enclosure for electronics). But, I'm modifying the machine so that two motors are on top, and the leadscrews hanging free, with a sync belt of course (dual Z / 1 motor was the first design for the Tornado and drasticaly improved the print quality). The taller, the most inverted pendulum effect due to the increased mass. On the other hand, the shortest, the more hyperstatic...
The reinforcements will be part of the insulation structure. CADing 18 hours a day !
All electronics is outside (I built a controller with a embeded Raspi).
Any information is valuable.
Not some teen's dream, it's a real project. Meaning youre not losing your time answering to me.
[EDIT] Always been waiting for the bed to be under 50°C before opening the printer. Never experienced a split. But warping : yes ! It could be interesting to develop some "warping detector" (the hype is collaborative/clouded/AI spaghetti detectors"...). No idea where to begin.
Edited 1 time(s). Last edit at 11/27/2022 01:54PM by yet-another-average-joe.
|
Re: Heated chamber : heater placement November 28, 2022 08:47AM |
Registered: 11 years ago Posts: 5,780 |
The single motor Z axis is such a simple thing but there's a lot of resistance to doing it, probably because everyone has seen cool youtube videos of machines autoleveling a bed that starts 45 degrees away from level. I think it's better to keep the system trammed than to let it get out and bring it back.
A warp detector is sort of like a filament run-out detector. It's best not to let it happen rather than detect it after it does. I haven't had any warping problems since I learned about enclosing the printer and keeping it warm. For filament run-out I just weigh the filament spool before I start a print that might use all the remaining filament. I haven't had a run-out occur in at least 5 years. Spaghetti is a symptom of a tuning problem. It's best to fix the problem instead of detecting it after it occurs.
So many people devote so much energy to detecting symptoms rather than solving the problem....
Edited 1 time(s). Last edit at 11/28/2022 09:27AM by the_digital_dentist.
Ultra MegaMax Dominator 3D printer: [drmrehorst.blogspot.com]
|
Re: Heated chamber : heater placement November 28, 2022 01:50PM |
Registered: 4 years ago Posts: 90 |
Filament run-out detectors are usefull, but not those that can be purchased (they are just crap)... I designed my own, and it allows using the very end of a spool : [github.com] ; use it all the time and it makes me really happy ! But it has to be made, so "makers" will never make it. They prefer downloading baby Groots and printing figurines...
Currently printing raisers for the frame, with PET, and having layer adhesion problems (large nozzle, "high" speed)
Currently printing raisers for the frame, with PET, and having layer adhesion problems (large nozzle, "high" speed)
|
Re: Heated chamber : heater placement November 28, 2022 02:25PM |
Registered: 11 years ago Posts: 5,780 |
I often print PETG at 240C with a 1 mm nozzle, typically 1.2 mm line width, 0.5 mm layers, at 30 mm/sec (18 mm^3/sec) on 70C bed. No issues with first layer sticking. No chamber heat- just room temp.
Edited 1 time(s). Last edit at 11/28/2022 02:26PM by the_digital_dentist.
Ultra MegaMax Dominator 3D printer: [drmrehorst.blogspot.com]
Edited 1 time(s). Last edit at 11/28/2022 02:26PM by the_digital_dentist.
Ultra MegaMax Dominator 3D printer: [drmrehorst.blogspot.com]
|
Re: Heated chamber : heater placement November 28, 2022 05:33PM |
Registered: 4 years ago Posts: 90 |
It is PET, not PETG... the problem was interlayer adhesion, not bed adhesion (printing on stainless steel, no PEI, and sprayed with adhesive similar to hairspray : stick as hell). Got a beautifull but useless matte part... Also not oriented properly on the bed. Bad work.
Temperature was to low ! (forgot to change it after printing ABS). Removed the ghetto chamber, all needed ABS parts being printed for the mods. Hope the chamber will be operational in the end of the week. Some parts will be machined (conventional, not CNC), could take some more time.
Printing with a 0.6 nozzle, 0.7mm width, 0.32 height, 60mm/s, agessive accel/jerk, high motor currents (1000/12 are agressive for this machine). Not really nice, but it does not have to ! Tired with this slow bed slinger.
All sorts of problems with this PET if printed with a E3D Volcano and 1.0 or 1.2mm nozzles. Bubbles. Printing foam from freshly dried filament. Even lowering the temperature. Gave up with Volcano and larger nozzles for this PET, couldn't get the sweet spot. But no problems when I was printing PLA with 1.2mm nozzle + 0.6 height.
|
Re: Heated chamber : heater placement November 28, 2022 06:05PM |
Registered: 11 years ago Posts: 5,780 |
I have found that if the PETG sits in the heater block too long it gets bubbly and prints "frosted". I have taken advantage of it by printing objects with horizontal stripes by speeding up and slowing down the print at 10 mm Z intervals. The result is a single walled vase that has alternating bands of clear/shiny and frosted appearance. I'll post a picture when I get a chance.
I haven't tried printing with PET. I don't think I've ever seen that filament for sale anywhere that I usually buy filament (amazon, coex3d, and Keene Village Plastics).
Ultra MegaMax Dominator 3D printer: [drmrehorst.blogspot.com]
I haven't tried printing with PET. I don't think I've ever seen that filament for sale anywhere that I usually buy filament (amazon, coex3d, and Keene Village Plastics).
Ultra MegaMax Dominator 3D printer: [drmrehorst.blogspot.com]
|
Re: Heated chamber : heater placement December 01, 2022 08:30AM |
Registered: 4 years ago Posts: 90 |
Quote
the_digital_dentist
I have found that if the PETG sits in the heater block too long it gets bubbly.
I had the same conclusion, but wasn't sure... Thanks for the confirmation.
I don't understand the problem with inter layer adhesion. I've been using this PET brand for a long time (10kg or so) with no problems, printing strong parts. It is a new spool, first time I purchase a 2.3 kg one. Came sealed, with silicagel, and I always store filaments in sealed bags with silicagel. Same profiles, only difference : unlike what I do with all 1 kg spool, I didn't dry it before using it because the food dehydrator is too small, and the kitchen oven is too hot. I'll need the enclosure to dry it... Slowing down has no effect.
Bad batch ?
Moisture ? (no symptoms like bubbling or popping, except with Volcano hotend)
It seems layer adhesion is a common issue, but didn't face it until now... Last project was the all in one printer controller enclosure, with large parts, and all came out just perfect.
For now I can't test further : took the printer apart. Drawing the Z carriage parts for machining.
Anyways, the best parts I ever printed were the two Voron heads, with ABS. Reason why I want a ABS-able machine. First pototyped a Stealthburner with PETG : not bad, but much heavier and not so nice because of stringing. And parts didn't fit so well, despite the slicer adjustments. And a lot more flexible. And removing brims is a dream with ABS.
|
Re: Heated chamber : heater placement December 01, 2022 02:38PM |
Registered: 11 years ago Posts: 5,780 |
Horizontally striped transparent PETG print- low print speed (15 mm/sec?) in frosted sections, faster (30 mm/sec?) in clear sections:
The filament is "edge glow glass" PETG from Keene Village Plastics. I buy the stuff in 5 lb spools.
Edited 1 time(s). Last edit at 12/01/2022 02:39PM by the_digital_dentist.
Ultra MegaMax Dominator 3D printer: [drmrehorst.blogspot.com]

The filament is "edge glow glass" PETG from Keene Village Plastics. I buy the stuff in 5 lb spools.
Edited 1 time(s). Last edit at 12/01/2022 02:39PM by the_digital_dentist.
Ultra MegaMax Dominator 3D printer: [drmrehorst.blogspot.com]
|
Re: Heated chamber : heater placement December 01, 2022 04:14PM |
Registered: 4 years ago Posts: 90 |
|
Re: Heated chamber : heater placement December 01, 2022 06:01PM |
Registered: 11 years ago Posts: 5,780 |
I made that vase print (a bread box) about 8 or 9 months ago, I think...
Ultra MegaMax Dominator 3D printer: [drmrehorst.blogspot.com]
Ultra MegaMax Dominator 3D printer: [drmrehorst.blogspot.com]
|
Re: Heated chamber : heater placement December 02, 2022 01:06PM |
Registered: 4 years ago Posts: 90 |
You forgot to link your make (the transparent bread box) !
(currently building the enclosure. Hope I will be able to do some thermal testings tomorrow ; polishing CAD for the mods : draw twice, machine once ; of course, forgot to print some parts before the printer was taken apart !)
Discovered something about PET : when tapping, it heats up a lot (all plastics do, FFF or not). I used a machine tap and a power tool. Two fast passes, in and out, so it really heats the material up. Thought it will fuse the layers and make threads toughter. Does not work. It's weak. Learnig from errors...
Edited 2 time(s). Last edit at 12/02/2022 01:17PM by yet-another-average-joe.
|
Re: Heated chamber : heater placement December 03, 2022 12:35PM |
Registered: 4 years ago Posts: 90 |
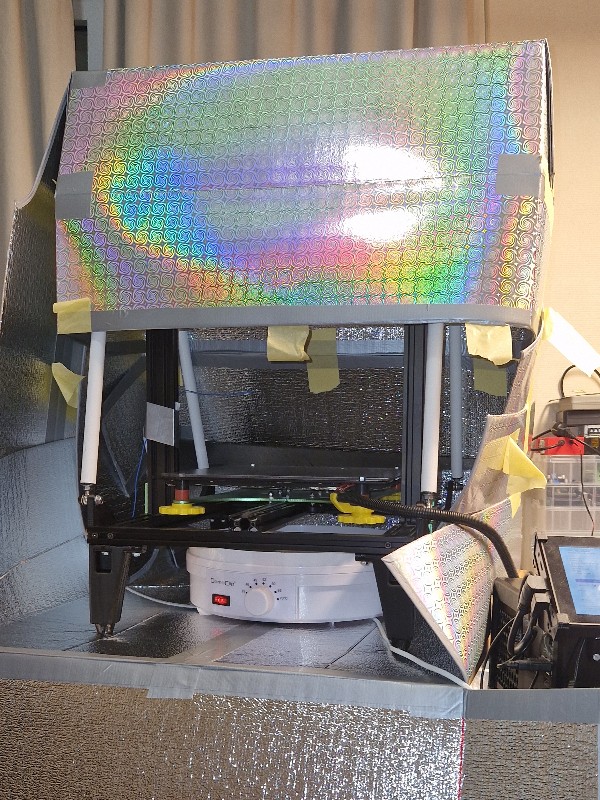
Couldn't wait, did some experimentation, with the folding windsreen shields.
Folding windsreen shields : made of 4 layers : alumin(i)um, cardboard, styrofoam, aluminium, total = 1.5mm
The printer is naked : no motors, no hotend, not printing, just the bed @ 100°C.
The enclosure is not completed : not really airtight, larger than it will be. Holds with painter's tape.
The dehydrator is enclosed, under the bed.
The bed insulation was not removed (risk of damaging the heater element : cooked adhesive - 5000 hour/year, 4.5 years old...).
Measurements : a thermocouple, 120mm above the bed center.
Bed only : 20°C -> 43°C = 1 hour, 42°C after 45mn ; better than the temperature I got with the first enclosure (just a bit better).
Bed + dehydrator (not waiting for the bed to cool down !) : 50°C = 30mn, 53°C after 45mn
The dehydrator was set to 60°C (knob) ; previously, I verified the air temperature from the dehydrator, free air : 60°C -> 60°C (!)
During the experiment, the bimetallic thermostat was ticking every 5 sec or so. Didn't measure the duty cycle ; could be 50% or so.
Conclusion : it is a viable solution ; higher temps are expected with an airtight enclosure, the motors running, and the hotend adding some more heat. Should do it for Vioron parts. This far better than the crappy tents sold by chinese printer manufacturers, and much less expensive. It also helps the bed temperature : this can be seen on Marlin display ; reduced duty cycle for the bed SSR. Very little risk of thermal runaway, the regulation being electromechanical. Could be used as an adjustable safety feature, the dehydrator being fed by the printer controller and driven by firmware.
The only example I found : [www.youmagine.com]
The dehydrator is not recycling air.
Edited 1 time(s). Last edit at 12/03/2022 12:39PM by yet-another-average-joe.
Sorry, only registered users may post in this forum.