Project: Teacup Firmware
Posted by Triffid_Hunter
|
Re: Project: Teacup Firmware March 10, 2016 11:55AM |
Registered: 8 years ago Posts: 75 |
One more thing:
I added upload flags option in Configtool. Should have no problem uploading to Arduino board now.
I added upload flags option in Configtool. Should have no problem uploading to Arduino board now.

|
Re: Project: Teacup Firmware March 12, 2016 07:39AM |
Registered: 8 years ago Posts: 75 |
I'm currently testing the movement, almost everything looks good, except some issues when homing:
I'm using ramping acceleration with 200mm/s^2 acceleration, lookahead enabled. Tweaked acceleration value and maximum feedrate to various value, nothing effective. Precision endstop searching works fine though.
Edited 1 time(s). Last edit at 03/12/2016 07:48AM by rollingdice.
- There is some "overshoot" when the carriages are moving upward, despite defining endstop clearance variables to a lower value.
- When homing, sometimes the Z carriage moves slightly slower than other carriage. Leftover codes from cartesian movement?
I'm using ramping acceleration with 200mm/s^2 acceleration, lookahead enabled. Tweaked acceleration value and maximum feedrate to various value, nothing effective. Precision endstop searching works fine though.
Edited 1 time(s). Last edit at 03/12/2016 07:48AM by rollingdice.
|
Re: Project: Teacup Firmware March 12, 2016 07:48AM |
Registered: 13 years ago Posts: 7,616 |
Quote
rollingdice
There is some "overshoot" when the carriages are moving upward, despite defining endstop clearance variables to a lower value.
This is by design. Teacup doesn't try to break laws of physics and decelerates properly after an endstop hit. After doing so it should move back slowly for high accuracy. This "overshoot" can be controlled by ENDSTOP_CLEARANCE_{XYZ} in the printer configuration. The larger, the better (faster homing movements). Higher acceleration also means higher homing velocities.
Quote
rollingdice
When homing, sometimes the Z carriage moves slightly slower than other carriage. Leftover codes from cartesian movement?
No idea on this one.
| Generation 7 Electronics | Teacup Firmware | RepRap DIY |
|
Re: Project: Teacup Firmware March 12, 2016 08:18AM |
Registered: 9 years ago Posts: 4,977 |
Maybe, because on any move it enable and disable the z-motor. Any other motor is on by default.
That is one thing i would change. My z-axis is too heavy for the spindle and will move downwards while motor is disabled.
Here and in some other lines of dda.c.
That is one thing i would change. My z-axis is too heavy for the spindle and will move downwards while motor is disabled.
Here and in some other lines of dda.c.
| Triffid Hunter's Calibration Guide | --> X <-- Drill for new Monitor | Most important Gcode. |
|
Re: Project: Teacup Firmware March 12, 2016 08:18AM |
Registered: 8 years ago Posts: 75 |
Alright, I think I'm gonna lower the clearance more. Current value is 100, going to try 25 or less.Quote
Traumflug
Quote
rollingdice
There is some "overshoot" when the carriages are moving upward, despite defining endstop clearance variables to a lower value.
This is by design. Teacup doesn't try to break laws of physics and decelerates properly after an endstop hit. After doing so it should move back slowly for high accuracy. This "overshoot" can be controlled by ENDSTOP_CLEARANCE_{XYZ} in the printer configuration. The larger, the better (faster homing movements). Higher acceleration also means higher homing velocities.
Edit: I also got rippling on my print result, especially on curved surface. There is stuttering when the effector moves with curved path. Any idea on how to solve this?
Edited 1 time(s). Last edit at 03/12/2016 08:30AM by rollingdice.
|
Re: Project: Teacup Firmware March 12, 2016 08:38AM |
Registered: 13 years ago Posts: 7,616 |
Quote
rollingdice
Alright, I think I'm gonna lower the clearance more. Current value is 100, going to try 25 or less.
That's in micrometers, so 100 is just 0.1 mm. Even to touch-probe metal surfaces with a milling bit I can use 100 without leaving a scratch. Microswitches without lever should allow 500, ones with lever a lot more.
No idea on the stuttering. Tests to find the cause could include to move very slowly to make sure processing speed isn't exhausted.
| Generation 7 Electronics | Teacup Firmware | RepRap DIY |
|
Re: Project: Teacup Firmware March 13, 2016 01:32AM |
Registered: 8 years ago Posts: 75 |
|
Re: Project: Teacup Firmware March 13, 2016 03:10AM |
Registered: 13 years ago Posts: 7,616 |
As computations in dda_step() are unchanged for deltas, yes, trying to simplify computations in dda_clock() is probably the way to go.
| Generation 7 Electronics | Teacup Firmware | RepRap DIY |
|
Re: Project: Teacup Firmware March 13, 2016 05:41PM |
Registered: 8 years ago Posts: 14 |
long time no see
I got somewhat distracted by real lifetm on my task to fix my cupcake. I fixed the heater initialization bug with the mainboard/extruder, though that code is not in releasable form.
Still, I have some patches that can be used right now:
- negativ floats regex: the regex only allowed for positive floats, which prevents printers with an origin on the center of the build envelope to use the full space
fix: allow negative floats
- EWMA range fix: found while looking for places that use the float regex; the EWMA tooltip says the valid range is 0.001 - 1.0, the code only allows 0.1 - 1.0
fix: allow the full range 0.001 - 1.0
-tx/rx enable: a fix for the fix for issue 179; reading the tx/rx enable pins in for the mainboard/extruder coms was fixed, printing them out uncommented did not work -> saving such aconfig was broken
fix: allow writing tx/rx enable lines out
-psu always on: probably the most useful/interesting patch; I added a checkbox to the board/pinout page to keep the power supply turned on. I therefore added a flag PS_ALWAYS_ON. When checked the power_off() function will not turn off the power supply. It will still disable the stepper motors though. I have therefore not touched the timeout counters and access. My assumption here is that it is ok if the power_on() function rewrites the ps pin value and does not cause a intermediate drop.
cheers,
Benj
|
Re: Project: Teacup Firmware March 14, 2016 06:49AM |
Registered: 8 years ago Posts: 75 |
Thanks, I switched to Reprap accel and no stuttering occurs. Homing is not a problem anymore. Acceleration value is too high though. Is the acceleration value customizable?Quote
Traumflug
As computations in dda_step() are unchanged for deltas, yes, trying to simplify computations in dda_clock() is probably the way to go.
Edited 1 time(s). Last edit at 03/14/2016 06:50AM by rollingdice.
|
Re: Project: Teacup Firmware March 14, 2016 09:49AM |
Registered: 13 years ago Posts: 7,616 |
The #define is, well, "ACCELERATION" in the printer config.
| Generation 7 Electronics | Teacup Firmware | RepRap DIY |
|
Re: Project: Teacup Firmware March 15, 2016 01:04AM |
Registered: 8 years ago Posts: 75 |
|
Re: Project: Teacup Firmware March 15, 2016 06:48AM |
Registered: 13 years ago Posts: 7,616 |
Looks like the algorithm for deltas isn't perfect, yet. I hope you can find the cause.
| Generation 7 Electronics | Teacup Firmware | RepRap DIY |
|
Re: Project: Teacup Firmware March 18, 2016 11:54PM |
Registered: 8 years ago Posts: 75 |
|
Re: Project: Teacup Firmware April 08, 2016 04:30PM |
Registered: 8 years ago Posts: 1 |
I'm building a 3d printer with build platform moving in Z axis and printhead moving in X and Y. Something similar to ultimaker. I'm almost finshed but I have a problem with Z homing. I have single endstop at Z max (build platform at the bottom) but no endstop at Z min. How can I home Z in such setup? I would expect Z homing to move Z to max (down) and then move the platform up by constant hardcoded/configured/sent_by_host so it ends up just below the nozzle. Does Teacup support such setup at all? Thanks in advance for any advice.
|
Re: Project: Teacup Firmware April 08, 2016 04:46PM |
Registered: 13 years ago Posts: 7,616 |
Quote
wsowa
I would expect Z homing to move Z to max (down) and then move the platform up by constant hardcoded/configured/sent_by_host so it ends up just below the nozzle. Does Teacup support such setup at all?
Yes, such a setup is supported. Define a Z Max endstop instead of a Z Min endstop (not both) and set Z_MAX to the height of your build envelope.
| Generation 7 Electronics | Teacup Firmware | RepRap DIY |
|
Re: Project: Teacup Firmware May 05, 2016 06:50AM |
Registered: 11 years ago Posts: 364 |
hi,
i just finished my core xy and tried to use teacup with it.. i got it uploaded and jogged the axis and extruder , everything worked fine. Then i tried a print. the print start at center of the plate , first layer perfect, the next layer is printed shifted both in x and y by 50mm , and the next is also shifted , and finally the head crashed the printer frame...
what stupid mistake am i making..
i am using slic3r 1.1.7
thanks
|
Re: Project: Teacup Firmware May 06, 2016 08:46AM |
Registered: 13 years ago Posts: 7,616 |
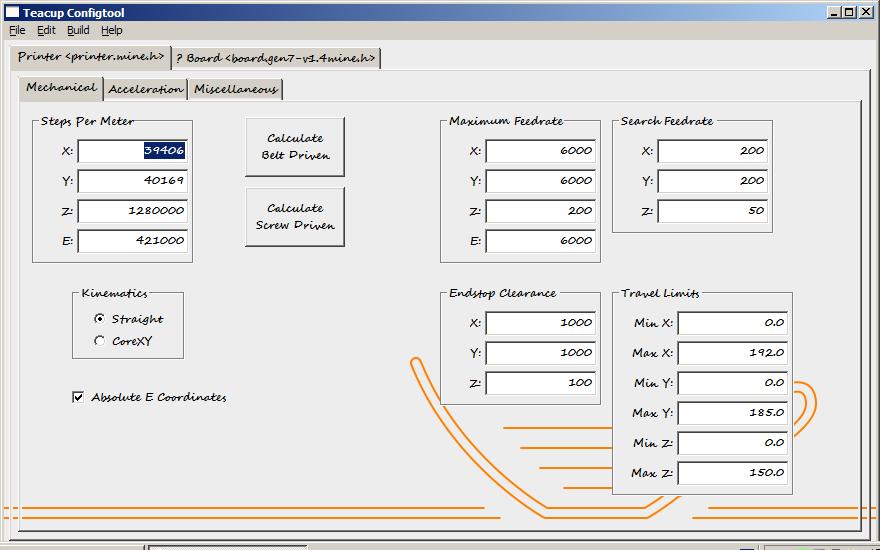
Is it possible you G-code has G0 commands inside?Then having a proper Maximum Feedrate is crucial, see tab Printer, sub-tab mechanical in Configtool.
| Generation 7 Electronics | Teacup Firmware | RepRap DIY |
|
Now full fledged display support May 30, 2016 01:55PM |
Registered: 13 years ago Posts: 7,616 |
Display support was a bit vague for a long time, now it's well tested and integrated into Configtool:

| Generation 7 Electronics | Teacup Firmware | RepRap DIY |
|
Re: Project: Teacup Firmware June 26, 2016 05:32AM |
Registered: 11 years ago Posts: 290 |
Hi Traumflug,
I just clone the git master branch and am struggling to find out the Display configuration like shown above. Also, I got this error when building with ACCEL REPRAP:
"/Applications/Arduino-1.0.5.app/Contents/Resources/Java/hardware/tools/avr/bin/avr-gcc" -c -DF_CPU=16000000UL -mmcu=atmega2560 -Wall -Wstrict-prototypes -std=gnu99 -funsigned-char -funsigned-bitfields -fpack-struct -fshort-enums -Winline -fno-move-loop-invariants -fno-tree-scev-cprop -Os -ffunction-sections -finline-functions-called-once -mcall-prologues -Wa,-adhlns="/Developments/Teacup_Firmware/build/dda.al" -save-temps -o "/Developments/Teacup_Firmware/build/dda.o" "/Developments/Teacup_Firmware/dda.c"
/Developments/Teacup_Firmware/dda.c: In function 'dda_create':
/Developments/Teacup_Firmware/dda.c:378: error: 'DDA' has no member named 'n'
/Developments/Teacup_Firmware/dda.c:384: error: 'DDA' has no member named 'n'
/Developments/Teacup_Firmware/dda.c:390: error: 'DDA' has no member named 'n'
/Developments/Teacup_Firmware/dda.c:394: error: 'DDA' has no member named 'n'
/Developments/Teacup_Firmware/dda.c: In function 'dda_step':
/Developments/Teacup_Firmware/dda.c:599: error: 'DDA' has no member named 'n'
/Developments/Teacup_Firmware/dda.c:600: error: 'DDA' has no member named 'n'
/Developments/Teacup_Firmware/dda.c:603: error: 'DDA' has no member named 'n'
/Developments/Teacup_Firmware/dda.c:608: error: 'DDA' has no member named 'n'
/Developments/Teacup_Firmware/dda.c:609: error: 'DDA' has no member named 'n'
/Developments/Teacup_Firmware/dda.c:612: error: 'DDA' has no member named 'n'
/Developments/Teacup_Firmware/dda.c: In function 'dda_clock':
/Developments/Teacup_Firmware/dda.c:766: warning: unused variable 'current_id'
RC = 1 - Build terminated
Build terminated abnormally.
I have to modify the dda. add this int32_t n; under #ifdef ACCELERATION_REPRAP on line 122 to make this work. It looks like this dda->n also calculated under ACCELERATION_REPRAP
|
Re: Project: Teacup Firmware June 26, 2016 05:52AM |
Registered: 13 years ago Posts: 7,616 |
Hah, this was fixed just 3 days ago [github.com] :-)
Try branch experimental, the commit is there.
That said, ACCELERATION_REPRAP is rarely used, because it requires a different slicer, so you might run into additional issues. The only slicers supporting this kind of G-code I'm aware of is RepRap Host [www.reprap.org] of 2009 and maybe Skeinforge of similar vintage. If you get this working, all the better!
| Generation 7 Electronics | Teacup Firmware | RepRap DIY |
|
Re: Project: Teacup Firmware August 06, 2016 01:01PM |
Registered: 11 years ago Posts: 119 |
Hello ,,i made some tests and i notice that steps per meter for x and y are not right. So i made some tests and found that steps per meter are different for x and y axis. So, when i build i receive the error
#error "Look-ahead requires steps per m to be identical on the X and Y axis (for now)"
i try temporal acceleration but it is like choosing none acceleration ,there is too much stress on the printer. With ramping was working very good, how can i fix it
#error "Look-ahead requires steps per m to be identical on the X and Y axis (for now)"
i try temporal acceleration but it is like choosing none acceleration ,there is too much stress on the printer. With ramping was working very good, how can i fix it
|
Re: Project: Teacup Firmware August 06, 2016 02:06PM |
Registered: 9 years ago Posts: 4,977 |
You could try this branch. [github.com]
It's close to the current experimental and should be independent in x and y for ramping with lookahead.
Edited 1 time(s). Last edit at 08/06/2016 02:06PM by Wurstnase.
It's close to the current experimental and should be independent in x and y for ramping with lookahead.
Edited 1 time(s). Last edit at 08/06/2016 02:06PM by Wurstnase.
| Triffid Hunter's Calibration Guide | --> X <-- Drill for new Monitor | Most important Gcode. |
|
Re: Project: Teacup Firmware August 09, 2016 11:12AM |
Registered: 11 years ago Posts: 119 |
hi, i try this but now feedrate is verrry slow. it is like maximun feedrate is adjusteed very low and i cannot try print
edit: i try (dda.c: take same calculation for move duration in ramping from temporal ) there is normal speed fedrate , but it is slow feddrate for homing axis
edit:i canot find a combination for search feedrate and endstop clearence. And on z in ponteraface when i press 0.1 is very quick ,when i press1 is medium and when i press 10 is very slow feddrate
Edited 2 time(s). Last edit at 08/09/2016 01:02PM by alfadex.
|
Re: Project: Teacup Firmware August 09, 2016 01:40PM |
Registered: 13 years ago Posts: 7,616 |
Quote
alfadex
i canot find a combination for search feedrate and endstop clearence.
Search feedrates for the long movement are calculated automatically, no need to set it. The faster acceleration and the larger the endstop clearance is, the faster homing will happen. Still limited to maximum feedrate of each axis, of course.
The search feedrate one can set is for this short movement after the endstop hit, when it moves slowly back out of the endstop to do a precision measurement.
Regarding this refusal to compile with different steps/m for X and Y: if these values are similar, simply remove this test. It's line 21 in dda_lookahead.h. Looks like this other branch needs some additional testing.
| Generation 7 Electronics | Teacup Firmware | RepRap DIY |
|
Re: Project: Teacup Firmware August 15, 2016 11:26PM |
Registered: 7 years ago Posts: 6 |
Hi,
I have built a 3D printer that is model of PRUSA I3 with RAPMS1.4 and Arduino ATMEGA2560(R3) control driver board. It is workable with Marlin FW perfectly.
Now I want to use TeaCup FW on it. But I got trouble in connection with Pronterface printing control AP. It seems that RS232 connection fail between PC and ATMEGA2560.
I follow the installation guild web page "http://reprap.org/wiki/Teacup_Firmware". Get the TeaCup FW from "https://github.com/Traumflug/Teacup_Firmware".
Now I can compiler and upload FW by configtool.py. If I use configtool.py to upload Marlin FW, printer can get connection with Pronterface, but can't with TeaCup FW.
I try many settings by using configtool, still can't get connection until now. Here I attached my setting files. board.ramps-v1.4.h printer.prusai3.h
I need help to give me the hint of debugging this issue. If anyone can, I will be appreciated.
|
Re: Project: Teacup Firmware August 16, 2016 01:52AM |
Registered: 9 years ago Posts: 4,977 |
Marlin standard setup has a baudrate of 250000. So changing the baudrate in Pronterface to 115200 for Teacup or setting up the baudrate in configtool to 250000.
#define BAUD 115200
| Triffid Hunter's Calibration Guide | --> X <-- Drill for new Monitor | Most important Gcode. |
|
Re: Project: Teacup Firmware August 16, 2016 02:40AM |
Registered: 7 years ago Posts: 6 |
|
Re: Project: Teacup Firmware August 16, 2016 06:19AM |
Registered: 9 years ago Posts: 4,977 |
COM Port also checked?
| Triffid Hunter's Calibration Guide | --> X <-- Drill for new Monitor | Most important Gcode. |
|
Re: Project: Teacup Firmware August 16, 2016 06:24AM |
Registered: 13 years ago Posts: 7,616 |
Baud rate of the firmware and baud rate of the bootloader are two different things. For uploading, bootloader baud rate has to be right. AFAIK, most bootloaders use 115200 baud. Bootloader baud rate is set in Menu -> Edit -> Settings -> Upload speed.
If you get timeout errors, changing "AVR programmer" from 'stk500v2' to 'wiring" should help. This additionally toggles the reset pin. Pressing and releasing the reset button shortly before uploading helps, too.
If all this doesn't fit, please copy the messages from the window popping up into here.
If you get timeout errors, changing "AVR programmer" from 'stk500v2' to 'wiring" should help. This additionally toggles the reset pin. Pressing and releasing the reset button shortly before uploading helps, too.
If all this doesn't fit, please copy the messages from the window popping up into here.
| Generation 7 Electronics | Teacup Firmware | RepRap DIY |


Sorry, only registered users may post in this forum.