Project: Teacup Firmware
Posted by Triffid_Hunter
|
Re: Project: Teacup Firmware June 18, 2011 07:23AM |
Registered: 16 years ago Posts: 900 |
|
Re: Out of sequence G-code June 20, 2011 02:30PM |
Registered: 16 years ago Posts: 900 |
OK
Put in the patch etc, and that is much better, I can see perhaps now why my M109 is not returning. Thanks triffid.
M109 waits for all the items to come up to temp not just the extruder (Is this correct or have I missed something) I have no heated bed but have configured it. As there is no thermistor, it is reading a temp of 4864.0 for the bed and this will be no where near what the firmware is waiting for.
To fix this I will dummy off the thermistor input with a 100k (21 degree) resistor. and set the bed temp with the appropriate M command.
The Z axis is still reading the wrong value when the M command interrogates the position.
I commanded a synchronized move to X10.0 Y10.0 Z20.0.
The reported position is X10.0 Y10.0 Z15.0
I am confident now though that for these commands (See the Gcode I posted earlier) execution is happening in the right sequence with he patches and the preserve order definition.
Given all the above then, most excellent good progress. I ran the above tests a number of times and got consistent results which is also good.
The Z axis not appearing to know where it is although it has just moved there is a worrier.
Given we are doing absolute measurements will this actually make any difference (I guess it might if the Z axis is loosing steps in the firmware and doesn't care).
Or is the Z axis position reporting dodgy but will move to the correct Z position whilst not actually knowing really where it is . Interesting questions that I don't have ready answers for I am afraid just yet.
All in all thanks for the patches they do as needed, got to be worth adding to master I think. Even if it is only a start and some of the other M codes etc need similar buffer wait instructions to be added later. I guess these can be looked at on an as needed basis.
Necessity hopefully becomes the absentee parent of successfully invented children.
|
Re: Out of sequence G-code June 20, 2011 06:18PM |
Registered: 16 years ago Posts: 1,094 |
M114 is known to be inaccurate. Be assured however that your Z axis is moving to the correct position- only the back-conversion from steps to mm is inaccurate, not the forward conversion or steps actually taken.
-----------------------------------------------
Wooden Mendel
Teacup Firmware
-----------------------------------------------
Wooden Mendel
Teacup Firmware
|
Re: Project: Teacup Firmware June 20, 2011 06:59PM |
Registered: 13 years ago Posts: 155 |
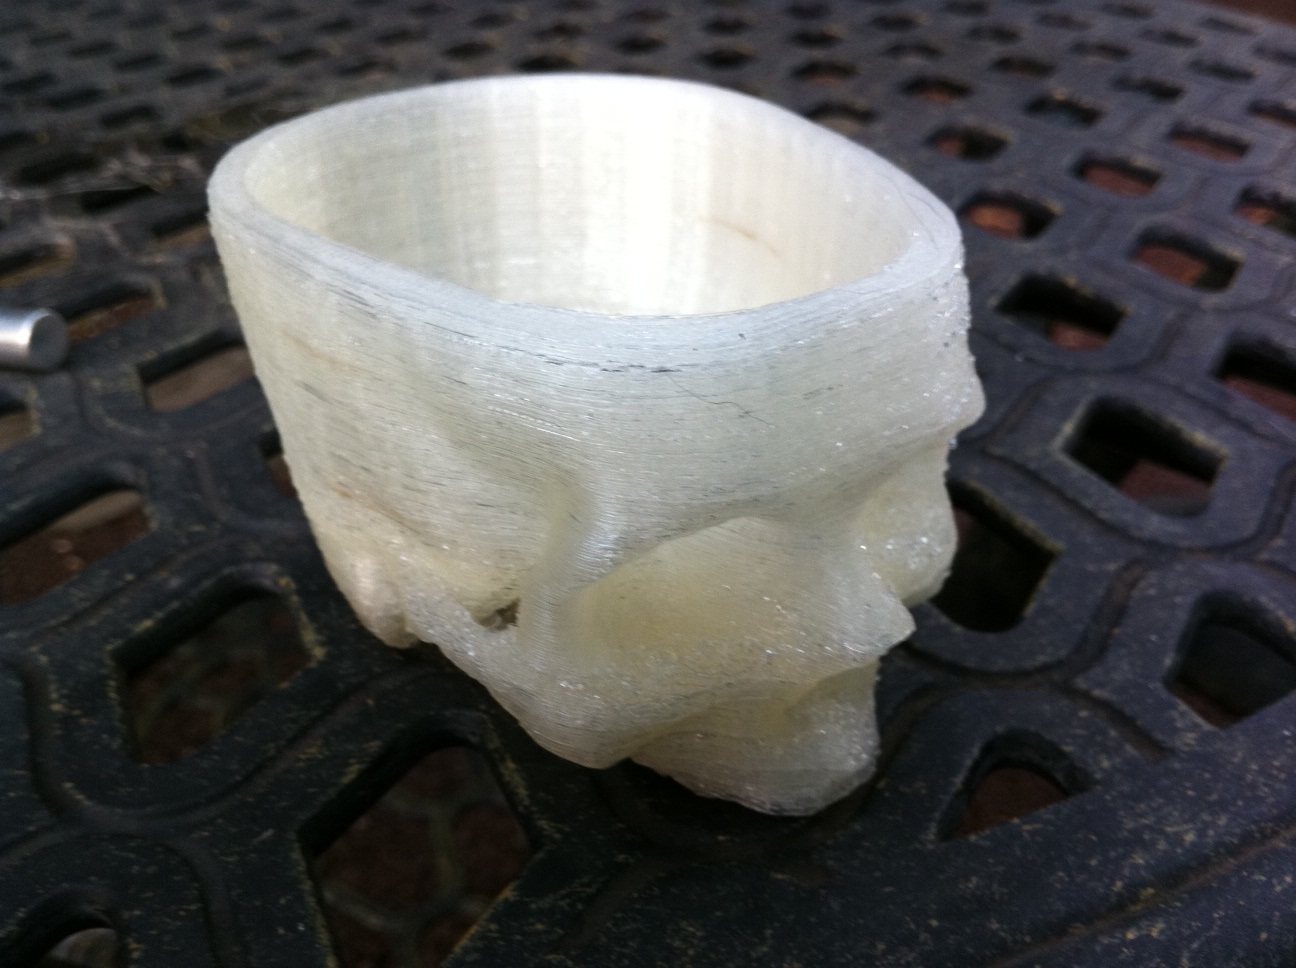
Just a quick update: this was my longest print using teacup todate. i didn't expect it to take as long but o'well it came out well. 19hrs 25 min straight printing no issues or hiccups. want to hand it to you guys, my base code is about 2 months old but it is quite stable. now i just need to gett a better handling on bridges in skeinforge.
anyways cheers all!
-TROUT
anyways cheers all!
-TROUT
|
Re: Out of sequence G-code June 20, 2011 07:05PM |
Registered: 16 years ago Posts: 1,094 |

|
Re: Out of sequence G-code June 21, 2011 02:14PM |
Registered: 16 years ago Posts: 900 |
|
Re: Project: Teacup Firmware June 21, 2011 03:43PM |
Registered: 13 years ago Posts: 52 |
|
Re: Project: Teacup Firmware June 21, 2011 03:58PM |
Registered: 16 years ago Posts: 900 |
Yup the M109 problem was that I haven't got a heated bed and needed to put in a dummy 100k resistor and then set the temp of the bed to what ever the 100K resistor read out at. The M109 for the extruder temp exited after not too long and at the right temperature. Verified by the M105 before attempting to print.
A bunch easier to see and fix when the temperature command returned sensible values in the right places etc.
Just need to fine tune the extrusion rates and see if I can increase the Z stepping from single step to half or quarter step.
My Minimug didn't but we are nearly there I think.
Necessity hopefully becomes the absentee parent of successfully invented children.
|
Re: Project: Teacup Firmware June 21, 2011 09:29PM |
Registered: 16 years ago Posts: 1,094 |
aka47 Wrote:
-------------------------------------------------------
> Yup the M109 problem was that I haven't got a
> heated bed and needed to put in a dummy 100k
> resistor and then set the temp of the bed to what
> ever the 100K resistor read out at.
Why not just remove the definition until you do have a bed?
-----------------------------------------------
Wooden Mendel
Teacup Firmware
|
Re: Project: Teacup Firmware June 22, 2011 01:12PM |
Registered: 13 years ago Posts: 2,947 |
Architect Wrote:
-------------------------------------------------------
> i didn't expect it to take as
> long but o'well it came out well. 19hrs 25 min
> straight printing no issues or hiccups.
How big did you print it?
I printed the original at %80 and it took 8hrs and after hollowing it out, it printed in about 6hrs. @50mm/s
| FFF Settings Calculator | Gcode post processors | Geometric Object Deposition Tool Blog |
| Tantillus.org | Mini Printable Lathe | How NOT to install a Pololu driver |
|
Re: Project: Teacup Firmware June 22, 2011 04:09PM |
Registered: 16 years ago Posts: 900 |
Because making the heated print bed is a parallel-ish task.
I want the firmware compiled with it in.
I guess it is parrallel-ish because it is taking most of the spare time I haven't got, working through the commissioning. Everything else is effectively either on hold or progressing so slowly that it might as well be.
Just one of those things, at least by working through it and discussing issues here, there is a knowledge trail for other would be teacup users to follow.
If not the odd fix.
Necessity hopefully becomes the absentee parent of successfully invented children.
|
Re: Project: Teacup Firmware June 23, 2011 08:13PM |
Registered: 14 years ago Posts: 71 |
Just some feedback about the m104 oddity when using p1 I commented about earlier. Its seems m104 p0 sorts things out until the next m104 p1 is used. Also m105 p1 suffers from the same issue. This output illustrates it better/faster than I could explain. I have the extruder heater disconnected for testing but the LED still turns on and off.
m105
ok
T:30.0 B:48.0
m104 p0 s50
ok (extruder LED turns on)
m105
ok
T:30.25 B:46.75
m104 p1 s60
ok (heated bed turns on)
m105
ok
T:42.0 B:42.0
m105
ok
T:44.50 B:44.50
m104 p0 s30
ok
m105
ok
T:30.25 B:50.25
m105 p0
ok
T:31.0 B:56.50
m105 p1
ok
T:55.50 B:55.50
m105 p0
ok
T:32.0 B:59.75
m105 p1
ok
T:62.25 B:62.25
m104 s0 (heated bed turns off)
ok
m105
ok
T:60.75 B:60.75
m105 p0
ok
T:31.75 B:58.50
m105
ok
T:31.0 B:55.50
Is anyone else seeing anything like this and/or successfully using BANG_BANG on both extruder and heated bed?
P.S.
aka47 Wrote:
-------------------------------------------------------
> before taking the screen shots (GTKTerm does'nt script or cut/paste)
To cut from GTKTerm highlight then use ctrl+ins. Shift+ins will paste.
m105
ok
T:30.0 B:48.0
m104 p0 s50
ok (extruder LED turns on)
m105
ok
T:30.25 B:46.75
m104 p1 s60
ok (heated bed turns on)
m105
ok
T:42.0 B:42.0
m105
ok
T:44.50 B:44.50
m104 p0 s30
ok
m105
ok
T:30.25 B:50.25
m105 p0
ok
T:31.0 B:56.50
m105 p1
ok
T:55.50 B:55.50
m105 p0
ok
T:32.0 B:59.75
m105 p1
ok
T:62.25 B:62.25
m104 s0 (heated bed turns off)
ok
m105
ok
T:60.75 B:60.75
m105 p0
ok
T:31.75 B:58.50
m105
ok
T:31.0 B:55.50
Is anyone else seeing anything like this and/or successfully using BANG_BANG on both extruder and heated bed?
P.S.
aka47 Wrote:
-------------------------------------------------------
> before taking the screen shots (GTKTerm does'nt script or cut/paste)
To cut from GTKTerm highlight then use ctrl+ins. Shift+ins will paste.
|
Re: Project: Teacup Firmware June 23, 2011 08:43PM |
Registered: 16 years ago Posts: 900 |
|
Re: Project: Teacup Firmware June 23, 2011 11:25PM |
Registered: 16 years ago Posts: 1,094 |
spaztik Wrote:
-------------------------------------------------------
> Just some feedback about the m104 oddity when
> using p1 I commented about earlier. Its seems m104
> p0 sorts things out until the next m104 p1 is
> used.
Yep, it uses previous P until a new one is specified, just like F. Apparently not intuitive behaviour.
commit 57c08486f in multi-extruder branch changes this to what you expect, I'll cherry-pick it into master for you.
-----------------------------------------------
Wooden Mendel
Teacup Firmware
|
Re: Project: Teacup Firmware June 24, 2011 09:51AM |
Registered: 16 years ago Posts: 900 |
OK Triffid.
I think having had a read through the G-Code processor that some more of the commands need the buffer empty bit first in them.
First of not really critical unless changing units etc mid print (So could stay as is, I mention it cos I noticed)
G20
G21
G90
G91
If someone does try to change these mid print the symptoms will be interestingly apparently random loss of print scaling and quality. Why someone would want to do this is not clear, unless they are cutting and pasting G-code sections done in different units and are bodging a match to what they have cut and pasted to......
Secondly an ugly set.
M2
M101
M103
Doing M2 whilst there are still items in the buffer could lead to a bunch of fun if it then trys to print what is left in the buffer. (M2 could alternatively dump the buffer rather than waiting for it to empty, but again you would miss bits of print or post print purge)
M101 and M103
Are interesting in that they invoke the firmware filament reverse, if enabled. If these don't wait for the buffer to empty first the extruder will be doing the reversing/un-reversing thing mid line sequence and will create blobbing and missed bits in the print.
More of quality issue and getting the reverse/un-reverse working correctly than a major show stopper then.
Whether you want to do these as "preserve order" optionals or as essential un-optional parts of the code I dunno. They are certainly worth having though in one form or other. Personally I feel they are non optional if the code is to make sense.
The M101, M103 thing may have been contributing to some of the issues that were reported here earlier, with the firmware reverse/un-reverse and blobbing. I think the fix in that case was to not use firmware bowden compensation, shame really as it is arguably a good place to have it, G-code is better and more portable the less it has to know about the machine it is printing from.
Necessity hopefully becomes the absentee parent of successfully invented children.
|
Re: Project: Teacup Firmware June 24, 2011 10:04AM |
Registered: 16 years ago Posts: 1,094 |
aka47 Wrote:
-------------------------------------------------------
> I think having had a read through the G-Code
> processor that some more of the commands need the
> buffer empty bit first in them.
I hope you enjoyed it, it was fun to write
> First of not really critical unless changing units
> etc mid print (So could stay as is, I mention it
> cos I noticed)
>
> G20
> G21
> G90
> G91
Any commands in the queue have already had relative/absolute and inches/millimeters applied since the queue stores everything in native units. Therefore, these can't possibly affect anything already in the queue. These only affect the unit conversions that the parser does before finding a newline, and whether or not to add to XYZEF immediately after finding a newline.
Since these only affect subsequent commands and not items in the queue, they don't need a queue wait.
> M2
>
> Doing M2 whilst there are still items in the
> buffer could lead to a bunch of fun if it then
> trys to print what is left in the buffer. (M2
> could alternatively dump the buffer rather than
> waiting for it to empty, but again you would miss
> bits of print or post print purge)
yes I noticed that M2 needed a queue_wait. Got a commit locally somewhere that adds a queue wait to M2 and moves M112 to just underneath as an emergency stop, which also removes some duplicate code.
> M101 and M103
>
> Are interesting in that they invoke the firmware
> filament reverse, if enabled. If these don't wait
> for the buffer to empty first the extruder will be
> doing the reversing/un-reversing thing mid line
> sequence and will create blobbing and missed bits
> in the print.
>
> More of quality issue and getting the
> reverse/un-reverse working correctly than a major
> show stopper then.
The reversal is added to the queue as a regular move, so correct order is already preserved with these too.
-----------------------------------------------
Wooden Mendel
Teacup Firmware
|
Re: Project: Teacup Firmware June 24, 2011 10:25AM |
Registered: 16 years ago Posts: 900 |
> I hope you enjoyed it, it was fun to write
Yes it is'nt too difficult to follow. I guess it requires a certain knowledge of the context, ie what is happening that is'nt stated explicitly to fully understand what the effects of each instruction actually do. For example it is not immediately clear (see your discussion of the M101/M103) which commands are buffered and which are not. The queue wait though clearly show which are waiting for the queue to empty first.
I am keen to understand it as I mentioned a bit back about extending the G-Code to include more of the standard set of commands. In some cases this will be not possible or undesirable, in others it could be quite easy. It is a case of understanding whats happening, so as to work out which case is which.
> Any commands in the queue have already had
> relative/absolute and inches/millimeters applied
> since the queue stores everything in native units.
Cool, that ones sorted then.
> yes I noticed that M2 needed a queue_wait. Got a
> commit locally somewhere that adds a queue wait to
> M2 and moves M112 to just underneath as an
> emergency stop, which also removes some duplicate
> code.
Ummm I think Emergency Stop is actually one that doesn't want to wait for the buffer contents at all. If there is enough of an emergency to issue a stop it should be as immediate as possible. Emergency stops that don't are likely to be terminal either for machine or operator. Or am I perhaps misreading your intent.
> The reversal is added to the queue as a regular
> move, so correct order is already preserved with
> these too.
Excellent. that one is sorted too.
All in all I wasn't clear whether the buffer was "as from host" or was partially preprocessed, or was a move buffer to go.
Necessity hopefully becomes the absentee parent of successfully invented children.
|
Re: Project: Teacup Firmware June 24, 2011 05:03PM |
Registered: 14 years ago Posts: 71 |
Triffid_Hunter Wrote:
-------------------------------------------------------
> Yep, it uses previous P until a new one is
> specified, just like F. Apparently not intuitive
> behaviour.
Ah, of course it works in a manner consistent with other values such as F. That only makes sense. I should have realized that, I guess I'm a little rusty after spending so much time away from the firmware while constructing my heated bed. I would say don't change it just because I didn't get how the command works, change it if you feel it is better and/or truer to the standard G-code implementation.
The thing that concerns me more is that after m104 p1 or m105 p1 then m105 starts returning the same value for both T: and B: which seems to be the temperature of the heated bed.
|
Re: Project: Teacup Firmware June 24, 2011 10:13PM |
Registered: 16 years ago Posts: 1,094 |
aka47 Wrote:
-------------------------------------------------------
> Emergency stops that don't are likely to be
> terminal either for machine or operator. Or am I
> perhaps misreading your intent.
Yes, what I mean is this:
albeit with a few more things in the actual stop code.
> All in all I wasn't clear whether the buffer was
> "as from host" or was partially preprocessed, or
> was a move buffer to go.
definitely "move buffer to go".
The gcode parser does unit conversions as soon as a non-digit is received, then the processor runs when we receive a newline. we don't grab another serial character until the processor is finished, so it either delays saying ok until it's done, or queues things.
The queue has provision for moves (including feedrate change only), and waiting for temperature (triggered by enqueue(NULL); ).
The temp sensor and heater stuff runs via the clock stuff from main loop (same loop where we pull serial characters from the buffer and feed them to the parser), so whenever the timer asserts the clock flag, we run temperature sensor stuff, which in turn triggers heater stuff. State is maintained via global variables, with some interface functions that gcode_process hooks into for instant actions.
spaztik Wrote:
-------------------------------------------------------
> The thing that concerns me more is that after
> m104 p1 or m105 p1 then m105 starts returning
> the same value for both T: and B: which seems
> to be the temperature of the heated bed.
Only if HEATER_BED == 1. It is a little counter-intuitive that T: returns the value of the currently selected (by P) sensor, and B: returns the value of whichever sensor HEATER_BED selects, especially when P == HEATER_BED.
Perhaps we should give the standard T: B: R: display when P is not specified, but only give T: when P is specified? I think that would be closest to what hostwares expect and other firmwares do while retaining the ability to read arbitrary sensors
-----------------------------------------------
Wooden Mendel
Teacup Firmware
-------------------------------------------------------
> Emergency stops that don't are likely to be
> terminal either for machine or operator. Or am I
> perhaps misreading your intent.
Yes, what I mean is this:
// M2 - end program
case 2:
  queue_wait();
  // no break- fall through to stop code below when queue is empty
// M0, M112 - emergency stop
case 0:
case 112:
  power_off()
  cli();
  for (;; );
  break;
albeit with a few more things in the actual stop code.
> All in all I wasn't clear whether the buffer was
> "as from host" or was partially preprocessed, or
> was a move buffer to go.
definitely "move buffer to go".
The gcode parser does unit conversions as soon as a non-digit is received, then the processor runs when we receive a newline. we don't grab another serial character until the processor is finished, so it either delays saying ok until it's done, or queues things.
The queue has provision for moves (including feedrate change only), and waiting for temperature (triggered by enqueue(NULL); ).
The temp sensor and heater stuff runs via the clock stuff from main loop (same loop where we pull serial characters from the buffer and feed them to the parser), so whenever the timer asserts the clock flag, we run temperature sensor stuff, which in turn triggers heater stuff. State is maintained via global variables, with some interface functions that gcode_process hooks into for instant actions.
spaztik Wrote:
-------------------------------------------------------
> The thing that concerns me more is that after
> m104 p1 or m105 p1 then m105 starts returning
> the same value for both T: and B: which seems
> to be the temperature of the heated bed.
Only if HEATER_BED == 1. It is a little counter-intuitive that T: returns the value of the currently selected (by P) sensor, and B: returns the value of whichever sensor HEATER_BED selects, especially when P == HEATER_BED.
Perhaps we should give the standard T: B: R: display when P is not specified, but only give T: when P is specified? I think that would be closest to what hostwares expect and other firmwares do while retaining the ability to read arbitrary sensors
-----------------------------------------------
Wooden Mendel
Teacup Firmware
Guys
I have been making some major progress but am still commissioning. I now have a line of Mini-Mugs in various states of print quality as I work through adjusting config.h for my hardware.
Using the preserve order #define and the settings in the spreadsheet available from my blog
It is interesting to note now much the print quality can be affected by the E steps per mm and as I am using a bowden tube feed arrangement the number of steps to retract the filament between line sections.
I have been noticing some discoloration of the filament, in discussions about this Nophead suggested that where I had clipped my temperature sensor whilst manually building a thermistor table can give a disparity of up to 20 Deg C. SO I will probably need to revisit this.
Overall though far more promising progress than it has been for a while. Firmware is the Master branch of Teacup 12/07/2011. Slicing done by Skeinforge41 G-code download by GTKTerm. I have given up with the usual graphical hostwares for now and will resume development on Textual Teacup, when my machine is working well enough for me to be confident that problems I find are likely to be in the code I write.
Other than the above I have been watching the printing sessions closely, my config.h is set up for ramping acceleration.
And it does seem to do this for just about every move. (But I could be missing some sequence of small ones that have chained seamlessly)
There is perhaps a suggestion that the acceleration does'nt need to ramp down to a stop between every move (it drags the print job out a bit, ie it could perhaps run quicker) It only really needs to ramp to a stop where there is no move to made for that axis during the next move or the move for the axis is in the opposite direction from the last move. At all other times the speed needs to ramp to that for the next move (if at all).
This is perhaps most noticeable when circles are being laid down. The mini-mug is a good case in point. The motion around the periphery of the mini-mug as it prints the sides of the circle is not very smooth and a lot of time is wasted stopping and starting. I guess using a Bowden Feed assembly these starts and stops may also translate in to the state of the build quality too.
Maybe I have got the wrong idea here and should be using a different acceleration method. I can see though that the Ramping method could perhaps be improved a little.
All in all though as ever great work. Teacup is good.
Necessity hopefully becomes the absentee parent of successfully invented children.
|
Re: Progress July 13, 2011 05:39PM |
Registered: 13 years ago Posts: 581 |
|
Re: Progress July 13, 2011 08:27PM |
Registered: 16 years ago Posts: 1,094 |
The math for start/stop speed is available here: generate stepper motor speed profiles in real time, specifically equation 16 and dda.c:364.
A single-axis move blender here: trapezoidal velocity profile trajectory planner which would need to be expanded to 4-axis and have per-axis speed and acceleration limits implemented.
I'll probably have a crack at these when my printer is actually printing, but while that will hopefully be soon I can't guarantee anything.
I'd love a pull request!
-----------------------------------------------
Wooden Mendel
Teacup Firmware
|
Re: Progress July 14, 2011 02:17PM |
Registered: 16 years ago Posts: 900 |
|
Re: Progress July 17, 2011 01:06PM |
Registered: 13 years ago Posts: 2,947 |
I have been thinking about the bumps around corners caused by the ramping acceleration and it seems like they are caused at the end of each move because the pressure in the extruder does not drop off at the same rate the axis slows down at. Then I realised this is a lot like the problems of a DC extruder and to solve it they created oozebane which slows the extruder down before the end of the line. We can't use oozebane but could we implement something like that in the firmware, where we would drop steps from the end of the E moves after all the acceleration calculations are done. Something in the lines of:
Moves less than 5 steps are left unchanged
Moves of 6 to 35 steps drop 3 steps (variable)
Moves greater than 36 steps drop 6 steps (variable)
This would allow the pressure in the extruder to finish the line being made. Especially those of us with bowden cables.
Please keep in mind that I am not a programmer and do not know how hard this would be to implement.
Edited 1 time(s). Last edit at 07/17/2011 01:41PM by Sublime.
| FFF Settings Calculator | Gcode post processors | Geometric Object Deposition Tool Blog |
| Tantillus.org | Mini Printable Lathe | How NOT to install a Pololu driver |
|
Re: Progress July 17, 2011 08:49PM |
Registered: 13 years ago Posts: 64 |
The firmware shouldn't drop steps since the E steps are calculated to be a precise amount of plastic for that move. A better approach, which someone did do an experimental firmware on, would be to offset the E axis into the future so that E is ramping up faster at the start and down faster before the end of a line segment. This is all under the theory that an E step has a delay, based on some constant spring compression of the filament, from when the stepper turns and the plastic actually comes out. So if the firmware knew this offset, it could move the E before the other axis to keep x/y movement in lock step with the plastic coming out and not the E driving it.
I have thought about this issue a lot and have not come up with a workable solution to doing this E offset into the future with the way firmwares process moves in discreet units at specific per move timer rates out of a queue.
The best I have come up with is to minimize the issue by slowing down as little as possible using a GRBL-like "junction jerk" concept instead of going to zero speed between line segments. We know that a Mendel can print at 20 mm/s without any acceleration, which means the steppers could be transitioning from +20mm/s to -20mm/s on an axis "instantly" without loosing steps. Knowing this, there shouldn't be a reason to slow down to less that 20mm/s at any point, allowing the acceleration to kick in for the straightaways.
Jeremy
|
Re: Progress July 17, 2011 08:59PM |
Registered: 16 years ago Posts: 1,094 |
oozebane is fine for dc extruders because they don't do acceleration. We need something a little more complex.
Extrudate flowrate is proportional to melt chamber pressure, and melt chamber pressure is proportional to filament in minus extrudate out, so we end up with E needing to lead the toolhead by a distance related to velocity. this will mean exponential curves and even reversals in E's velocity, while locking the feedrate to whatever mathematical function predicts how much extrudate we're getting out. I simply haven't had the headspace to tackle this one just yet
It does open up the possibility of putting a rotary encoder on the idler in your extruder, and locking axes to the amount actually fed rather than what we're telling the motor.
Check out Mattroberts' Firmware for an example implementation.
-----------------------------------------------
Wooden Mendel
Teacup Firmware
|
Re: Progress July 20, 2011 10:03AM |
Registered: 13 years ago Posts: 52 |
I gave this some thought too. I fully agree with Triffid_Hunter.
The speed of the extrudate (volume flow) coming out of the nozzle must be the same as the as the speed at which the nozzle moves over the bed. For infinitely long lines at constant speed we don't have a problem, but unfortunately our print-heads do start and stop!
The volume flow of extrudate should be influenced by two main factors:
a) Viscosity of the medium in the chamber
b) Pressure difference across the nozzle
I don't expect either of these dependencies to be linear, but they just may be close enough to linear within a reasonably broad operating range.
The main influences on a) are:
- Extrudate temperature
- Material properties
We can assume the material properties to be constant and we're trying to keep the melting chamber temperature constant which should keep the temperature of the extrudate reasonably constant - ignoring influences that are hopefully too small to really contribute like heat transfer from chamber to material.
Now what we're left with as the main influence on volume flow of extrudate is b) - the pressure differential across the nozzle.
There are two influences on b)
- Pressure in the chamber
- Pressure at the tip of the nozzle
If we assume that the nozzle is not partially blocked by being too close to the print-bed the only real influence we're left with is the pressure in the chamber. In a perfect world we should be able to control this. Good, easy to implement ways of directly measuring the pressure in the chamber don't come to mind immediately, so we'll probably have to settle for indirect measurements.
The force with which the filament is pushed into the melting chamber should be a great indication of the pressure in the chamber (p = F/A or pressure = force/area),
The relation between the current going through a DC motor, especially at lower speeds, and the torque exerted by the motor is fairly linear. So when using a DC motor with current control we should be getting pretty close to what we actually need!
This means that we neglect smaller influences like inertia of the material with acceleration and deceleration, all kinds of friction and hysteresis, but even without any proof I think this approach is reasonable. Experiments may prove me wrong of course!
So the question for our fearless programmers is:
Would you be willing to work on a branch that sets an analog output at a proportional value to print head velocity during the moves? I' sure I can come up with a hardware setup to take advantage of this.
Of course the encoder disc on the DC motor would be nice in order to verify that we are actually achieving the volume flow required. But the speed recorded would be lagging behind the volume flow. We could then gather the data and run comparisons.
ST
|
Re: Progress July 20, 2011 11:24AM |
Admin Registered: 17 years ago Posts: 7,879 |
Quote
If we assume that the nozzle is not partially blocked by being too close to the print-bed the only real influence we're left with is the pressure in the chamber.
Not a good assumption. When the last filament of an infill is being injected into the remaining trench it does require more pressure than the first outline. Also unless the bed is absolutely level the pressure during the first layer will vary. When spanning a bridge it will be less also.
Quote
The force with which the filament is pushed into the melting chamber should be a great indication of the pressure in the chamber (p = F/A or pressure = force/area),
Again not true. Most of the force is pushing the very viscous, only slightly molten, plug at the transition zone of the extruder. And I believe there is a negative slope region where faster flow reduces the size of the plug and requires less force.
[www.hydraraptor.blogspot.com]
|
Re: Progress July 20, 2011 01:09PM |
Registered: 13 years ago Posts: 52 |
Quote
nophead
Not a good assumption. When the last filament of an infill is being injected into the remaining trench it does require more pressure than the first outline. Also unless the bed is absolutely level the pressure during the first layer will vary. When spanning a bridge it will be less also.
I would agree with the infill injected into the last trench requiring more pressure. Ignoring this would mean that the last infill may be somewhat thinner than the previous infills. This may be a problem that's not as bad as what we're trying to fix. So I would say let's risk it and see how bad it is.
With the bed not being level, the difference in pressure could then work in our advantage. Where the bed has a low spot we would get less resistance and hence more feed-rate. This would potentially be a desired trait because we fill low spots.
The bridge filling could be counter-acted in Skeinforge by reducing the bridge fill-rate.
Quote
nophead
Again not true. Most of the force is pushing the very viscous, only slightly molten, plug at the transition zone of the extruder. And I believe there is a negative slope region where faster flow reduces the size of the plug and requires less force.
Now there's a potential show-stopper for the whole current-control idea. If we don't have a reliable correlation between the torque exerted by the motor and the pressure in the chamber, we would need some other way to determine pressure in the chamber and no good ideas to achieve this come to mind.
If the force required to overcome the friction of the molten plug is constant, we could deal with it by just adding a constant current; essentially making it a base current. But if there is an area of negative slope in the correlation or even an area that approaches horizontal we're dead in the water.
nophead: I do remember reading something about the extrusion force / molten plug etc.in your blog a while ago, but can't for the life of me find it at this point. Do you have a link? Do you know of anybody who may have done some studies on the correlation between extrusion force and volume flow?
Any ideas on an easy setup to measure the correlation?
|
Re: Progress July 20, 2011 03:01PM |
Admin Registered: 17 years ago Posts: 7,879 |
The article you are probably thinking about is this one: [hydraraptor.blogspot.com].
While I was doing these experiments: [hydraraptor.blogspot.com] I observed that with a constant force provided by gravity the flow rate was far from constant and would start slow and accelerate slowly. This wasn't due to inertia, but due to the fact that faster flow reduces the size of the plug and hence the friction, so it gets faster still.
I have recently bought a force meter with an RS232 output and I will soon do some more experiments where I run an extruder at a defined flow rate and measure the force rather than using a defined force and measure the flow rate. I intend to find the effect of different hot ends styles on the force required and the maximum flow rate.
I have no idea how to measure the pressure just behind the tip. It isn't a nice environment for a sensor. I also don't think it is necessary, commercial machines don't seem to need it. I think the transfer characteristic of the extruder is a simple exponential function which is the solution to a first order differential equation that comes from flow rate is proportional to pressure and pressure is proportional the difference between how much plastic has been fed in minus how much has flowed out.
The tricky bit is finding the constants of proportionality, which will depends on the hot end design, the plastic and the temperature. I have some ideas of how to do this but I am struggling to find time to experiment these days as you can see from the reduction in my blog posts.
[www.hydraraptor.blogspot.com]


Sorry, only registered users may post in this forum.