Prusa X-carriage strength?
Posted by Lsutehall
|
Prusa X-carriage strength? September 20, 2011 02:41PM |
Registered: 12 years ago Posts: 35 |
I'm thinking about how to mount the hot end to my prusa.
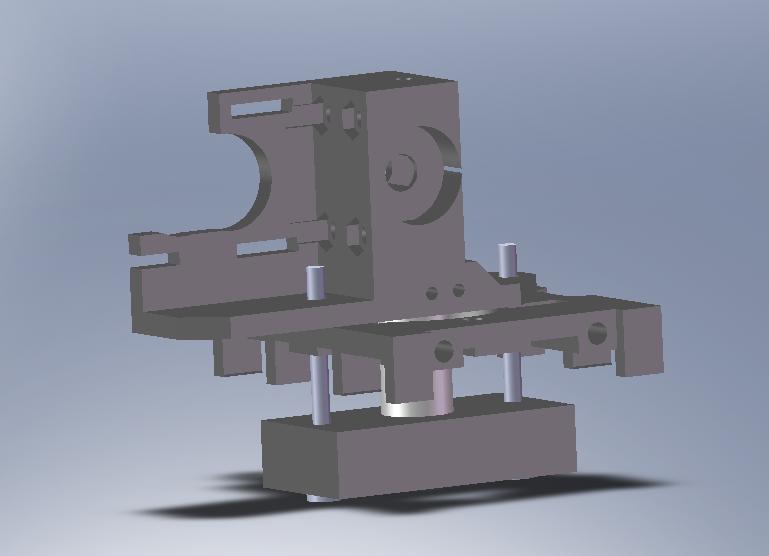
It is my own design, but based on seemingly the most common design of hot end out there at the moment. It has a PTFE barrier joined to a nozzle via a PEEK part. The assembly is held together by bolts running through the PEEK, and then up through the x-carriage and then the extruder mounting holes (see attached render)
I am slightly worried that this arrangement will snap my X-carriage (ABS, a Nophead print), as it will have the extrusion force coupled directly to it. I was wondering anyone has tried this arrangement before, and how well it worked? Has anyone ever snapped a carriage, and how much force did it take?
|
Re: Prusa X-carriage strength? September 20, 2011 03:21PM |
Admin Registered: 17 years ago Posts: 7,879 |
I haven't done that with a plastic carriage but I did it with a metal heatsink and the end of the extruder base snapped. I got round that by using large penny washers to spread the load but I am pretty sure it would snap the carriage. I print extruders with 100% infill but the carriage is only 25%.
You could add a metal plate to take the force.
[www.hydraraptor.blogspot.com]
You could add a metal plate to take the force.
[www.hydraraptor.blogspot.com]
|
Re: Prusa X-carriage strength? September 20, 2011 04:48PM |
Registered: 13 years ago Posts: 226 |
I've used a similar setup to what's shown in your image and had no problems. More recently i've used this adaptor to match the hot-end with either a wade's or greg's extruder: http://www.thingiverse.com/thing:8095 Perhaps this helps spread the load a bit. I've had this running on my machine since about May.
------------------------------------------
garyhodgson.com/reprap | reprap.development-tracker.info | thingtracker.net
------------------------------------------
garyhodgson.com/reprap | reprap.development-tracker.info | thingtracker.net
|
Re: Prusa X-carriage strength? September 21, 2011 03:50AM |
Registered: 13 years ago Posts: 226 |
I realised this morning that mentioning the adaptor might be a bit of a red herring because it moves the posts holding the hot-end closer to the thermal barrier, and out of the holes for the extruder and carriage. Therefore this will remove some pressure from the extruder and carriage holes.
Regardless, I still had on occasion the exact setup shown in the original image and it worked fine, albeit a little tricky to put together and take apart on a frequent basis.
Cheers,
Gary
------------------------------------------
garyhodgson.com/reprap | reprap.development-tracker.info | thingtracker.net
Sorry, only registered users may post in this forum.