Here is my Prusa i3 !
Posted by franck
|
Here is my Prusa i3 ! July 05, 2013 06:38PM |
Registered: 10 years ago Posts: 13 |
Hello!
Here are a few pictures of my newly built Prusa i3. I configured it and buit it from the sources on the Github repository (https://github.com/josefprusa/Prusa3). I am amazed how everything did fit together! The only part which I had to modify is the support of the X idler which was to short when using a 608ZZ bearing. Anyway, I will be changing the idler pulleys when I get smaller bearings.
A big thanks to the community for sharing the design!
Here is a vidéo of it printing: [www.youtube.com]
I have not yet mounted the heated bed and I have only been printing PLA on blue (or actually purple) tape. I am already impressed by the quality of the prints!
Cheers!
Franck
Here are a few pictures of my newly built Prusa i3. I configured it and buit it from the sources on the Github repository (https://github.com/josefprusa/Prusa3). I am amazed how everything did fit together! The only part which I had to modify is the support of the X idler which was to short when using a 608ZZ bearing. Anyway, I will be changing the idler pulleys when I get smaller bearings.
A big thanks to the community for sharing the design!


Here is a vidéo of it printing: [www.youtube.com]
I have not yet mounted the heated bed and I have only been printing PLA on blue (or actually purple) tape. I am already impressed by the quality of the prints!
Cheers!
Franck
|
Re: Here is my Prusa i3 ! July 05, 2013 06:51PM |
Registered: 10 years ago Posts: 13 |
|
Re: Here is my Prusa i3 ! July 06, 2013 03:52AM |
Registered: 10 years ago Posts: 46 |
like the yellow on black, looks good.
what bearings are you getting ? the 624 doubled up are much better (I think so anyway) than 608's, belts stay nice and central, no need for those horrid bearing guides. I haven't tried the 623's. Although the belts do seem to wander a bit more if you twist the belt onto its smooth side for the idlers.
What size long Y-axis rods did you use ? I used the y-axis sizes listed on the wiki for the box frame. I found when mounting the y-axis with the motor end at the back (as in the pictorial build guide) the hotend was a few mm's short of reaching the back limits of the heated bed (the y-axis was moved forward as much as possible, with only a tiny gap between the frame base and the y-axis motor).
Have a look at complete-printer.scad, you'll see that the motor end is now mounted at the front, which eliminates the above problem. I would prefer the y-axis idler at the front though (like yours) makes it much easier to tension the belt.
Edit :
just watched the vid, looks to be printing really nicely .
.
Altough I did wonder how you got a double nut on the back of your hobbed bolt, mine hits the top x-carriage bearing holder. Mounting the x-carriage upside down, sneaky, I like it, doesn't seem to be affecting the prints, I may give that a go.
Edited 1 time(s). Last edit at 07/06/2013 04:07AM by Masnachu.
what bearings are you getting ? the 624 doubled up are much better (I think so anyway) than 608's, belts stay nice and central, no need for those horrid bearing guides. I haven't tried the 623's. Although the belts do seem to wander a bit more if you twist the belt onto its smooth side for the idlers.
What size long Y-axis rods did you use ? I used the y-axis sizes listed on the wiki for the box frame. I found when mounting the y-axis with the motor end at the back (as in the pictorial build guide) the hotend was a few mm's short of reaching the back limits of the heated bed (the y-axis was moved forward as much as possible, with only a tiny gap between the frame base and the y-axis motor).
Have a look at complete-printer.scad, you'll see that the motor end is now mounted at the front, which eliminates the above problem. I would prefer the y-axis idler at the front though (like yours) makes it much easier to tension the belt.
Edit :
just watched the vid, looks to be printing really nicely
. Altough I did wonder how you got a double nut on the back of your hobbed bolt, mine hits the top x-carriage bearing holder. Mounting the x-carriage upside down, sneaky, I like it,
doesn't seem to be affecting the prints, I may give that a go.Edited 1 time(s). Last edit at 07/06/2013 04:07AM by Masnachu.
|
Re: Here is my Prusa i3 ! July 06, 2013 04:37AM |
Registered: 10 years ago Posts: 13 |
Hello!
For the idlers I am thinking about 2 options:
1/ getting either some 624 or 623 since they seem to be the best choices. At this point I have not ordered any yet, not sure where to buy.
2/ I have 4 small 3x8x3 ball bearings (spare parts for an RC helicopter) which I was thinking of using together with a small 3mm axle and a printed pulley. Since the outer ring of the bearing is 8mm they should fit (or almost fit) into the holes of the prusa i3 idler holders and I can print a pulley which matches the size of the motor pulley in order to have a nice parallel belt. Do you think this could work?
For the smooth rods, they are all 500mm, This is how I bought them and I did not bother to cut them to length at this point. For X and Y it is fine and I am happy about having the extra length on the Y axis, I can easily reach both sides of the print bed and I was even thinking that I might make a slightly larger print bed (just for PLA and non heated).
For the Z axis I should probably cut both the smooth and threaded rods to length to make it look better but I could also change the top support of the Z rods to make it able to go higher...
Cheers!
|
Re: Here is my Prusa i3 ! July 06, 2013 05:10AM |
Registered: 10 years ago Posts: 46 |
1) I got my 624's from ebay (I live in the uk), they're a little bit more expensive than the 608's.
2) I've got no experience of printed pulleys so I cant really answer that. Sounds like it would work, but I've no idea if it would have an effect on your print quality. Best thing to do is search the forum for threads on printed pulleys see what they say.
Edit: Although thinking a little more about it, I think if you can get hold of 623 or 624's , it's probably less hassle to just print yourself a new y-axis idler bearing holder for the 623/624's ?
Ah, using a longer Y-axis, that explains it.
I hadn't noticed the extra length on the z-axis. Personally I'd leave them longer, as you say it allows you to experiment with a larger build volume.
looks like you'll almost be able to challenge a rostock/kossell for z-height there
Edited 2 time(s). Last edit at 07/06/2013 05:22AM by Masnachu.
|
Re: Here is my Prusa i3 ! July 11, 2013 02:02AM |
Registered: 10 years ago Posts: 75 |
Thx for the photos ...
I really enjoyed looking over your build. I'm just finishing up on my first Prusa i3 last night I fired it up for the first time...
I used 2 x 624zz bearings for each pulley axis. I found one bearing was not wide enough to accommodate the belt's width ... & am worried the belt could easily slip off into the bearings plastic mount. I guess some users might simply place washers either side of the bearing but I feel this will still result in the bearing being too narrow and pinching the belt.
note: I'm a newbie (my first build) & am sure there are other alternatives to get around the pulley axis issue.
Edited 1 time(s). Last edit at 07/12/2013 07:35AM by Mickman.
|
Re: Here is my Prusa i3 ! July 16, 2013 08:08AM |
Registered: 10 years ago Posts: 13 |
|
Re: Here is my Prusa i3 ! July 17, 2013 03:15PM |
Registered: 10 years ago Posts: 35 |
|
Re: Here is my Prusa i3 ! August 13, 2013 07:27PM |
Registered: 10 years ago Posts: 18 |
|
Re: Here is my Prusa i3 ! August 14, 2013 07:06AM |
Registered: 10 years ago Posts: 35 |
We are using the i3 extruder and a j-head mkv hotend from hotends.com
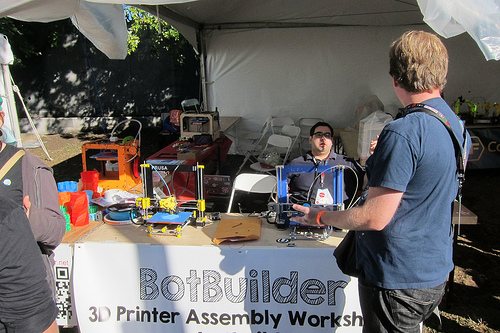
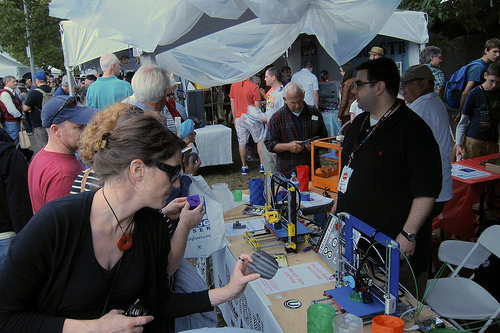
We have been building printers and giving demonstrations at schools, libraries, conferences and Maker Faires since 2010.
My son and I will be giving classes on building a Prusa i3 in Philadelphia and other areas soon. One weekend class and you will have a working/printing Prusa i3. Visit www.botbuilder.net for details.
|
Re: Here is my Prusa i3 ! August 16, 2013 02:09PM |
Registered: 12 years ago Posts: 26 |
|
Now with dual extrusion! September 21, 2013 12:29PM |
Registered: 10 years ago Posts: 13 |
Hello!
Here is an update on my Prusa i3.
The main modifications are:
* Changed the idler bearings to 624Z bearings. It looks nicer and works better than with the 608Z and plastic guides.
* Added a heat bed to ease the adhesion. I am very happy with it, the first layers are much cleaner than with blue tape.
* Replaced the J-Head hot-end by a couple of E3D all metal hot-end. I can now print high temperature materials without problems.
* Designed my own direct drive extruder to be able to fit 2 extruders on the standard 80mm Prusa i3 carriage. Can be found at http://www.thingiverse.com/thing:147705.
Here is how the extruders look:
And here is a 2 colors print:
Overall, I am now quite happy with the setup.
Here is a video of the dual extrusion in action: [www.youtube.com]
Cheers,
Franck
Here is an update on my Prusa i3.

The main modifications are:
* Changed the idler bearings to 624Z bearings. It looks nicer and works better than with the 608Z and plastic guides.
* Added a heat bed to ease the adhesion. I am very happy with it, the first layers are much cleaner than with blue tape.
* Replaced the J-Head hot-end by a couple of E3D all metal hot-end. I can now print high temperature materials without problems.
* Designed my own direct drive extruder to be able to fit 2 extruders on the standard 80mm Prusa i3 carriage. Can be found at http://www.thingiverse.com/thing:147705.
Here is how the extruders look:

And here is a 2 colors print:

Overall, I am now quite happy with the setup.
Here is a video of the dual extrusion in action: [www.youtube.com]
Cheers,
Franck
|
Re: Here is my Prusa i3 ! September 21, 2013 09:12PM |
Registered: 10 years ago Posts: 35 |
|
Re: Here is my Prusa i3 ! September 23, 2013 06:37PM |
Registered: 10 years ago Posts: 35 |
Went to the NY Maker Faire this weekend. I was surprised with how many Prusa i3 printers were there. We were printing with our 2 for 10 to 12 hours each day. Many 8" high prints! We have some pictures on our flickr site here:
botbuilder flickr pictures
botbuilder flickr pictures

|
Re: Here is my Prusa i3 ! September 27, 2013 04:10PM |
Registered: 10 years ago Posts: 35 |
Franck -- A few questions.....
Trying to get my BOM together for a Single Plate Prusa i3.
1. Modified Idler bearings
On your modifications, you said - -
608 bearing is 8mm x 22mm x 7mm
624 bearing is 4 x 13 x 5
I can't tell from your picture, did you have to reprint some parts? How does a 4mm bearing work with an 8mm X axis?
2. On your direct drive extruder. I was thinking about having someone print that for me when I order my Printed Parts.
I am in the US and I cannot seem to find a 5x10x5 bearing (or even a 5x11x5) anywhere online. 5x10x4 does not seem to be a problem.
So would the 5x10x4 work?
Or if I wanted to change to a more standard US size, would it be just a matter of changing the bearing shaft diameter and overall cavity on your idler arm in your thingiverse model or what would you recommend?
I am not a 3D cad expert, so I don't know how difficult that would be for me to modify prior to printing.
3. Looks like you are using the Mk2 bed from reprap.me. Did you consider the mk3 since a glass top is not required? I am wondering which route to go. Based on reprap.me pricing MK2 bed is $14 + boro glass is $25 (lulzbot) = $39, while mk3 bed is $50 and requires no glass.
I can't find much discussion on the mk3 with the prusa i3. I don't know if it is brand new or there is a reason not to use it? I like the idea of 24 volt input on a bed, as I build industrial control panels and have a bunch of 24 vdc power supplies available.
I realize one advantage of having the glass would be a 2nd piece of glass would allow you to print another item while the first one cools, but other than that are the other reasons to use glass over an MK3 bed?
thanks!
Trying to get my BOM together for a Single Plate Prusa i3.
1. Modified Idler bearings
On your modifications, you said - -
Quote
Changed the idler bearings to 624Z bearings. It looks nicer and works better than with the 608Z and plastic guides.
608 bearing is 8mm x 22mm x 7mm
624 bearing is 4 x 13 x 5
I can't tell from your picture, did you have to reprint some parts? How does a 4mm bearing work with an 8mm X axis?
2. On your direct drive extruder. I was thinking about having someone print that for me when I order my Printed Parts.
I am in the US and I cannot seem to find a 5x10x5 bearing (or even a 5x11x5) anywhere online. 5x10x4 does not seem to be a problem.
So would the 5x10x4 work?
Or if I wanted to change to a more standard US size, would it be just a matter of changing the bearing shaft diameter and overall cavity on your idler arm in your thingiverse model or what would you recommend?
I am not a 3D cad expert, so I don't know how difficult that would be for me to modify prior to printing.
3. Looks like you are using the Mk2 bed from reprap.me. Did you consider the mk3 since a glass top is not required? I am wondering which route to go. Based on reprap.me pricing MK2 bed is $14 + boro glass is $25 (lulzbot) = $39, while mk3 bed is $50 and requires no glass.
I can't find much discussion on the mk3 with the prusa i3. I don't know if it is brand new or there is a reason not to use it? I like the idea of 24 volt input on a bed, as I build industrial control panels and have a bunch of 24 vdc power supplies available.
I realize one advantage of having the glass would be a 2nd piece of glass would allow you to print another item while the first one cools, but other than that are the other reasons to use glass over an MK3 bed?
thanks!
|
Re: Here is my Prusa i3 ! September 29, 2013 12:10AM |
Registered: 10 years ago Posts: 9 |
This build of your is not only amazing in general, is it also a very beautiful piece of machinery. It is art in motion! I am just starting in on building my first 3D-P, I can only hope it comes out so nice.
Now I do have a question. Can you tell me more about the dual extruder setup? Why did you choose to go with E3D all metal hot-ends? And what Extruder is that? Was the setup very different? Are you losing build volume with that setup?
Cheers!
Kirk
Now I do have a question. Can you tell me more about the dual extruder setup? Why did you choose to go with E3D all metal hot-ends? And what Extruder is that? Was the setup very different? Are you losing build volume with that setup?
Cheers!
Kirk
|
Re: Here is my Prusa i3 ! September 29, 2013 03:40AM |
Registered: 10 years ago Posts: 13 |
Hello mattmc,
> 1. Modified Idler bearings
> I can't tell from your picture, did you have to
> reprint some parts? How does a 4mm bearing work
> with an 8mm X axis?
I had to re-print the idler holders for X and Y. The X one is the black plastic part which slides into the x-end. I think that the x-end for 624 bearings is also a bit different if you get it for 624 idler bearings but it worked with my original 608 x-end so I did not re-print it.
> 2. On your direct drive extruder. I was thinking
> about having someone print that for me when I
> order my Printed Parts.
>
> I am in the US and I cannot seem to find a 5x10x5
> bearing (or even a 5x11x5) anywhere online. 5x10x4
> does not seem to be a problem.
>
> So would the 5x10x4 work?
Yes, actually, it was a mistake in my description, I am using a 5x10x4.
> Or if I wanted to change to a more standard US
> size, would it be just a matter of changing the
> bearing shaft diameter and overall cavity on your
> idler arm in your thingiverse model or what would
> you recommend?
If the outer diameter of the idler is different, you should not only change the diameter but also move the center of the idler bearing to make sure that when the filament is loaded the center of the gears and center of the bearing are "horizontal". This way the contact with the filament squeezes it vertically down the hot-end.
> I am not a 3D cad expert, so I don't know how
> difficult that would be for me to modify prior to
> printing.
I am not an expert either, but with some patience it should not be difficult.
> 3. Looks like you are using the Mk2 bed from
> reprap.me. Did you consider the mk3 since a glass
> top is not required? I am wondering which route
> to go. Based on reprap.me pricing MK2 bed is $14 +
> boro glass is $25 (lulzbot) = $39, while mk3 bed
> is $50 and requires no glass.
I actually got my Mk2 from a local supplier and I did not know about the alu mk3 bed, it looks like a good option.
> I can't find much discussion on the mk3 with the
> prusa i3. I don't know if it is brand new or there
> is a reason not to use it? I like the idea of 24
> volt input on a bed, as I build industrial control
> panels and have a bunch of 24 vdc power supplies
> available.
I mostly print with PLA so I only heat my bed to 60°C which is no problem with 12V but whan printing with ABS, it takes about 10-15 min to heat the bed to 110°C. If you are planning to work a lot with ABS, I think that 24V is beneficial.
> I realize one advantage of having the glass would
> be a 2nd piece of glass would allow you to print
> another item while the first one cools, but other
> than that are the other reasons to use glass over
> an MK3 bed?
Well, it is not only to be able to have a second piece of glass. It is actually quite convenient to be able to easily remove the built plate to remove the print, clean the plate, put some kapton tape on it, etc. I think that I would go with the alu mk3 bed since it give you all the options but if you are trying to minimize cost, the mk2 + glass is a well proven solution.
Cheers!
Franck
|
Re: Here is my Prusa i3 ! September 29, 2013 03:53AM |
Registered: 10 years ago Posts: 13 |
Hello Cybermastif,
Thanks for your message.
> Now I do have a question. Can you tell me more
> about the dual extruder setup? Why did you choose
> to go with E3D all metal hot-ends? And what
> Extruder is that? Was the setup very different?
> Are you losing build volume with that setup?
Well, I was looking for an all metal hot-end to be able to print at any temperature and the E3D seemed like a good choice to me. I am no expert and I have not compared it to other metal hot-end but so far I can say that it is very well machined, it looks quite good and I never had a problem with it.
The extruder is my own design, it is available on Thingiverse, you can find more details about it on the Thingiverse page. The point of this extruder is to be compact and to have tight filament guides in order to be able to print flexible materials.
For the dual extruder setup, I am using the "standard" 80mm Prusa i3 x-carriage and I am not loosing any build volume compared to the single extruder version. The Prusa i3 box version is quite big so the is some spare room on the x axis. I am not sure about other versions.
Cheers,
Franck
|
Re: Here is my Prusa i3 ! September 29, 2013 07:05AM |
Registered: 10 years ago Posts: 35 |
For those who are about to build their own i3, my son and I are giving a class next weekend in Wilmington and will have 10 builders making their own printers in one weekend. We will post our BOM and manual after the class in case you are looking for a current list. We have built several ourselved to work out the kinks and they were printing all weekend at Maker Faire. The print quality from our Ultimaker and Prusas were identicle! We were printing tall/large prints all weekend out in the open with no problems! Even Joe Prusa himself was there and checked us out! He gave us a big "ThumbsUp" on our prints!
|
Re: Here is my Prusa i3 ! September 29, 2013 10:22AM |
Registered: 10 years ago Posts: 35 |
Franck,
608 bearing is 8mm x 22mm x 7mm
624 bearing is 4 x 13 x 5
So can you explain why a 624 bearing is better than the 608?
Based on this picture (see attached) it does not appear the x idler bearing is adjustable like the y idler.
Are you just replacing the idler bearing with a smaller one or what does the change actually do? Sorry that I am not understanding why the change is needed. I am going to most likely have to get someone to do a custom print job for my printed parts since I am doing the Einstein variant with 10mm Y Axis, so if I need a new X axis, I might as well get the improved one printed.
yeah, 5x10x4 is easy to find and I would rather stick with your tested extruder instead of trying to modify, thanks for clarifying....
Are you using boro glass or something else? I am not against using the glass as I agree it would be nice to be able to clean and you can always replace broken glass much cheaper than the mk3. Maybe I need to find a new source for glass, but for $10 more for the mk3 vs mk2 + boro glass, it seems like a good deal to have 24 vdc option as well.
Also, do you have an insulator between your heated bed and y axis plate?
Yes, please post those and please let us know if this is a variant or where you are getting your RP from the prusa main branch or somewhere else.
Additionally, do have a source for the i3 single aluminum frame here in the US?
I have a guy I do business with that has a laser cutter, but he is really busy, and may or may not print it for me. So I am looking for an alternate source.
Thanks guys!
Quote
I had to re-print the idler holders for X and Y. The X one is the black plastic part which slides into the x-end. I think that the x-end for 624 bearings is also a bit different if you get it for 624 idler bearings but it worked with my original 608 x-end so I did not re-print it.
608 bearing is 8mm x 22mm x 7mm
624 bearing is 4 x 13 x 5
So can you explain why a 624 bearing is better than the 608?
Based on this picture (see attached) it does not appear the x idler bearing is adjustable like the y idler.
Are you just replacing the idler bearing with a smaller one or what does the change actually do? Sorry that I am not understanding why the change is needed. I am going to most likely have to get someone to do a custom print job for my printed parts since I am doing the Einstein variant with 10mm Y Axis, so if I need a new X axis, I might as well get the improved one printed.
Quote
2. On your direct drive extruder.
> I am in the US and I cannot seem to find a 5x10x5
> bearing (or even a 5x11x5) anywhere online. 5x10x4
Yes, actually, it was a mistake in my description, I am using a 5x10x4.
yeah, 5x10x4 is easy to find and I would rather stick with your tested extruder instead of trying to modify, thanks for clarifying....
Quote
Well, it is not only to be able to have a second piece of glass. It is actually quite convenient to be able to easily remove the built plate to remove the print, clean the plate, put some kapton tape on it, etc. I think that I would go with the alu mk3 bed since it give you all the options but if you are trying to minimize cost, the mk2 + glass is a well proven solution.
Are you using boro glass or something else? I am not against using the glass as I agree it would be nice to be able to clean and you can always replace broken glass much cheaper than the mk3. Maybe I need to find a new source for glass, but for $10 more for the mk3 vs mk2 + boro glass, it seems like a good deal to have 24 vdc option as well.
Also, do you have an insulator between your heated bed and y axis plate?
Quote
johna
We will post our BOM and manual after the class in case you are looking for a current list.
Yes, please post those and please let us know if this is a variant or where you are getting your RP from the prusa main branch or somewhere else.
Additionally, do have a source for the i3 single aluminum frame here in the US?
I have a guy I do business with that has a laser cutter, but he is really busy, and may or may not print it for me. So I am looking for an alternate source.
Thanks guys!
|
Re: Here is my Prusa i3 ! September 29, 2013 12:03PM |
Registered: 10 years ago Posts: 35 |
There are several vendors around here with the frames. Sometimes on these knockoffs the holes are not threaded or may not line up with standard electronics boards.
For our classes, we went right to Joe Prusa for our frames, we had them all in less than a week and we know everything is right. Practically everything else we sources locally, but again, we went for quality stuff! You can spend anywhere from ~500.00 to 800.00 in parts to build an awesome i3. We know the stuff we use is all top shelf!
For our classes, we went right to Joe Prusa for our frames, we had them all in less than a week and we know everything is right. Practically everything else we sources locally, but again, we went for quality stuff! You can spend anywhere from ~500.00 to 800.00 in parts to build an awesome i3. We know the stuff we use is all top shelf!
|
Re: Here is my Prusa i3 ! September 29, 2013 05:41PM |
Registered: 11 years ago Posts: 661 |
johna136 Wrote:
-------------------------------------------------------
> There are several vendors around
> here with the frames. Sometimes on these
> knockoffs the holes are not threaded or may not
> line up with standard electronics boards.
If you use the .dxf in Prusa's Github the dims are spot on. The only issue with those drawings is that they have the holes at 3 mm diameter and to properly tap an M3-.5 thread the hole needs to be 2.5 mm. The big holes will tap but the tolerance is loose. The smaller hole is much better. I've used about half a dozen for my printers and have sold another couple hundred. The first batches I didn't finish the surface or tap them to keep the costs low though I was been tapping the holes on request for an extra charge. Unfinished and untapped saves US$40-50 for those that can do it themselves. The parts are cut on a Flow Mach 3 XD out of 6061-T6 .250 aluminum. I'll offer finished pieces for right around US$100 on the next batch as well as the current DIY piece. I'm seeing more people that want a printer but aren't fully into the maker scene yet who prefer a finished piece and would like to do as minimal assembly as possible to be able to print.
The CO2 lasers that most hobby users have won't cut 1/4" (6mm) AL. These days there are plenty of sources for parts so unless someone is having several cut it probably makes more sense to get one already cut and at least drilled.
|
Re: Here is my Prusa i3 ! September 29, 2013 06:49PM |
Registered: 10 years ago Posts: 35 |
|
Re: Here is my Prusa i3 ! September 29, 2013 06:55PM |
Registered: 10 years ago Posts: 35 |
So unfinished means non-anodized or something else?
Tapping is not a problem as we do it at work everyday.
This is definitely not a hobby printer! My vendor has a $250,000+ laser table that will cut 1/2" steel and takes up 500+ sq feet of shop space. He can definitely handle the job, he just may not be willing to since he is really busy. It is quite a sight to see in action. Wish I had one.
Your pricing for finished and tapped is $100, unfinished and untapped for $50 or $60?
What would shipping be to the US? Not sure where you are located.
|
Re: Here is my Prusa i3 ! September 30, 2013 02:18PM |
Registered: 11 years ago Posts: 661 |
Mattmc I sent you a PM with a link and my email.
I didn't mean to threadjack Franck's thread for his good looking printer. Nice job. I wanted to share a bit on what it takes to make an aluminum single plate frame. Many have asked why it costs what it does. The answer is volume. One needs to be buying enough to get the cost down. I commit to a certain amount and have them shipped in batches. It's less expensive than getting small batches individually but not quite as inexpensive as getting the whole lot at once. Some are using Dibond which is a fantastic material and depending on where one is getting it cut, offers a less expensive alternative to aluminum. In the US if you are near an industrial supplier or have a larger contractor 1/4" AL can be less expensive per sq ft than Dibond.
As for the cutting there are many places that will do low power CO2 laser, some with machines big enough to do Dibond but as a rule they don't cut anything with metal. (like Pollolu for example). I started selling the plate kits back in Jan after having sold rods and hardware since about this time last year (and still do). My intent was to see about using a hi def air or oxy plasma and upgrade my current facility from handheld plasma to a Torchmate or Plasmacam table as I do other fab work as well, primarily motorsports fabrication. My contact at Hypertherm, my current plasma equipment vendor, showed me what it took to cut AL and the machinery required was beyond air/oxy plasma and beyond my means. That meant waterjet. Expensive in small batch but once you get going in quantity it becomes more reasonable. On every quote commercial laser was more expensive than some of the waterjet contractors.
If you are on a budget or simply wish to spend as little as possible a box frame like Franck made or one of the inexpensive sgraber wooden plate frames is a great way to go.
|
Re: Here is my Prusa i3 ! September 30, 2013 03:26PM |
Registered: 10 years ago Posts: 35 |
Vegas...
Well I asked the questions, so I am the one that started the hijacking. Hopefully Franck doesn't mind too much. I put it on this thread, because I like his extruder design and plan to use it and the e3d extruder, so I thought he would be a good source for info; and to keep it all in one place for future 3d enthusiasts getting started.
Anyway, do you recommend changing all the 3mm holes in the Prusa i3 frame and y carriage to 2.5mm or just some of them?
|
Re: Here is my Prusa i3 ! September 30, 2013 03:43PM |
Registered: 13 years ago Posts: 118 |
|
Re: Here is my Prusa i3 ! September 30, 2013 03:56PM |
Registered: 10 years ago Posts: 35 |
Thanks for the reply....
Yes, I know I need to make the threaded holes to 2.5mm for threading, but in looking at the build pictures it is hard to tell what is and is not threaded.
I know the two Z ends (top and bottom on each side) should be threaded.
I know that the Ramps mounting holes should be threaded.
On the Y carriage,, I know that 2 holes on each side of the oblong hole (where the LM8UUs mount) DO NOT have to be threaded as they are for zip ties.
On the Y carriage, I would assume the 4 holes in the four corners are for mounting the heated bed, I would assume those would be threaded.
On the Y carriage, I would assume the Y belt holder is NOT threaded as there are nuts on the underside of the picture I am looking at.
So that just leaves just the 4 holes running along the bottom edge of the main frame, (between the two z motors) what are those for and do they need to be threaded?
Please let me know if any of the assumptions above are wrong!
thanks.
|
Re: Here is my Prusa i3 ! September 30, 2013 05:53PM |
Registered: 10 years ago Posts: 35 |
4 Holes on Y axis in the corner should NOT be threaded on the latest version. This makes it easier to level the bed. Our first one is threaded and has springs between the HBP and plate, the new one just sits the corner bolts in the holes. (I know this sounds wrong but it is not).
The bottom frame holes are not threaded and we use those for Zip Ties for wiring.
Holes along the side of the linear bearing mounts are for Zip Ties like you noted.
The bottom frame holes are not threaded and we use those for Zip Ties for wiring.
Holes along the side of the linear bearing mounts are for Zip Ties like you noted.
|
Re: Here is my Prusa i3 ! September 30, 2013 06:03PM |
Registered: 10 years ago Posts: 35 |

Sorry, only registered users may post in this forum.