My outrageous X carriage (MK1)
Posted by deckingman
|
My outrageous X carriage (MK1) July 03, 2016 05:29PM |
Registered: 8 years ago Posts: 622 |
This is the MK1 X carriage to go with the Y carriages I've already posted. Again, it was printed on my ageing creaking Mendel variant so please don't give me too hard a time over the print quality.
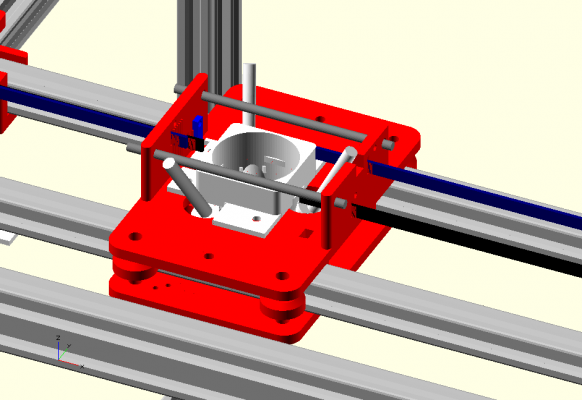
This is how it was planned in Open Scad.
It consists of an upper carriage and a lower carriage printed as separate parts. The white lump in the middle is the Diamond hot end assembly with cylinders representing the Bowden tubes. If it works, it'll run on a pair of Open Builds V slot rails using Open Builds twin bearing Delrin wheels. The belts attach by going through slots in the upright parts, then bent over serrated sections and clamped in place. The two horizontal grey cylinders are 6mm threaded rods with Nyloc nuts on either end to take the strain of the belts and equalise the tension (which is set elsewhere).
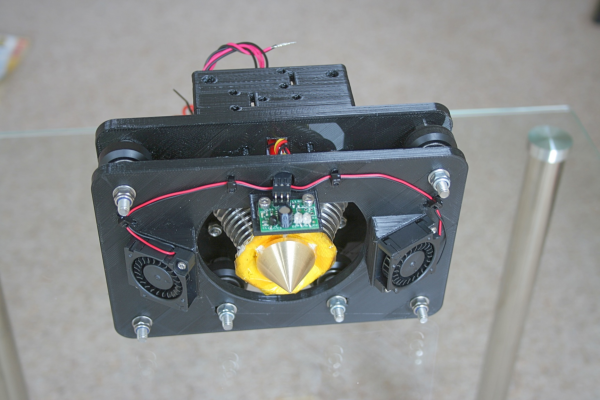
Here is beast in real life.
That's the bottom of it. The gold thing in the middle is the Diamond hot end with it's 3 layers of fire blanket insulation which I've wrapped in Kapton Tape to stop it fraying (we have a plan for something better). Either side of that are a a pair of 30mm radial blowers for print cooling. They are angled away from the nozzle but I may still need to sort out some sort of ducting. The circuit board in the middle is one of DC42's IR probe which can be adjusted vertically because the bolts go through slotted holes.
You'll notice there are 6 wheels. The plan is that the outer pairs will be the main guides. One side is fixed, the other side are on eccentric spacers so that I can pre-load them on the rails. When I did a trial fit, I found that it was quite easy to flex the rails by squeezing them together in the centre. So I added another pair of wheels in slotted holes which will run in the inside v slot. The plan is to use the outer wheels to set the guides correctly, then once that's done, slide the inner wheels out and lock them to prevent any inward deflection of the rails. In real life, it may not be necessary but I like to have a contingency. Getting the rails parallel with the correct pre-loading on the wheels is going to be a challenge but I think I can do it with shims in the rails housings - we'll see.
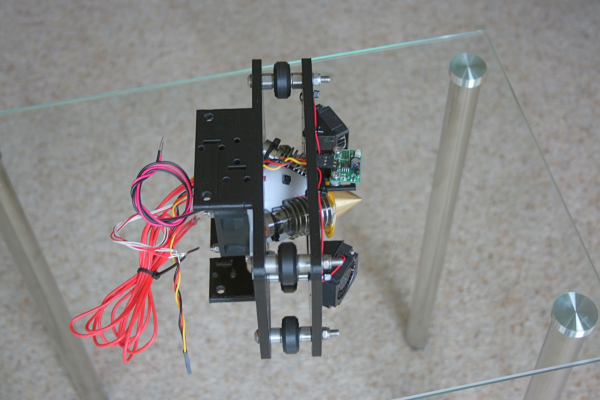
This is the side view
You can see the fixed spacers on the front pair of wheels and the eccentric spacers on the rear pair.
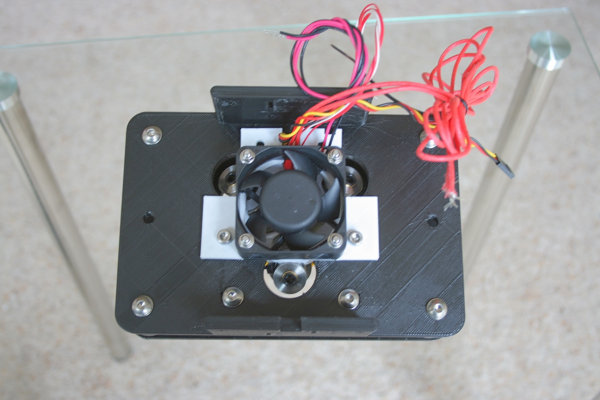
This is the top.
The white part is the Diamond Mount. It just drops in as a complete assembly from the top (I'll fit the Bowden tubes before I drop it in when I start the build proper). Currently it''s held in with 4 bolts and Nyloc nuts but I might design a quick release mount of some sort because I have a 0.9mm nozzle to play with as well as the standard one. The fan is a very high flow rate, about 50% higher than RepRap.Me recommend. I'm a bit concerned about air flow around the heat sinks once this beast is fitted to the rails. The thin red and white wires are a 4 wire PT100 that I'm planning to use instead of a thermistor.
It weighs in at 570 gms of which about 250 gms is the diamond hot end with heat sinks.
Sorry, only registered users may post in this forum.


