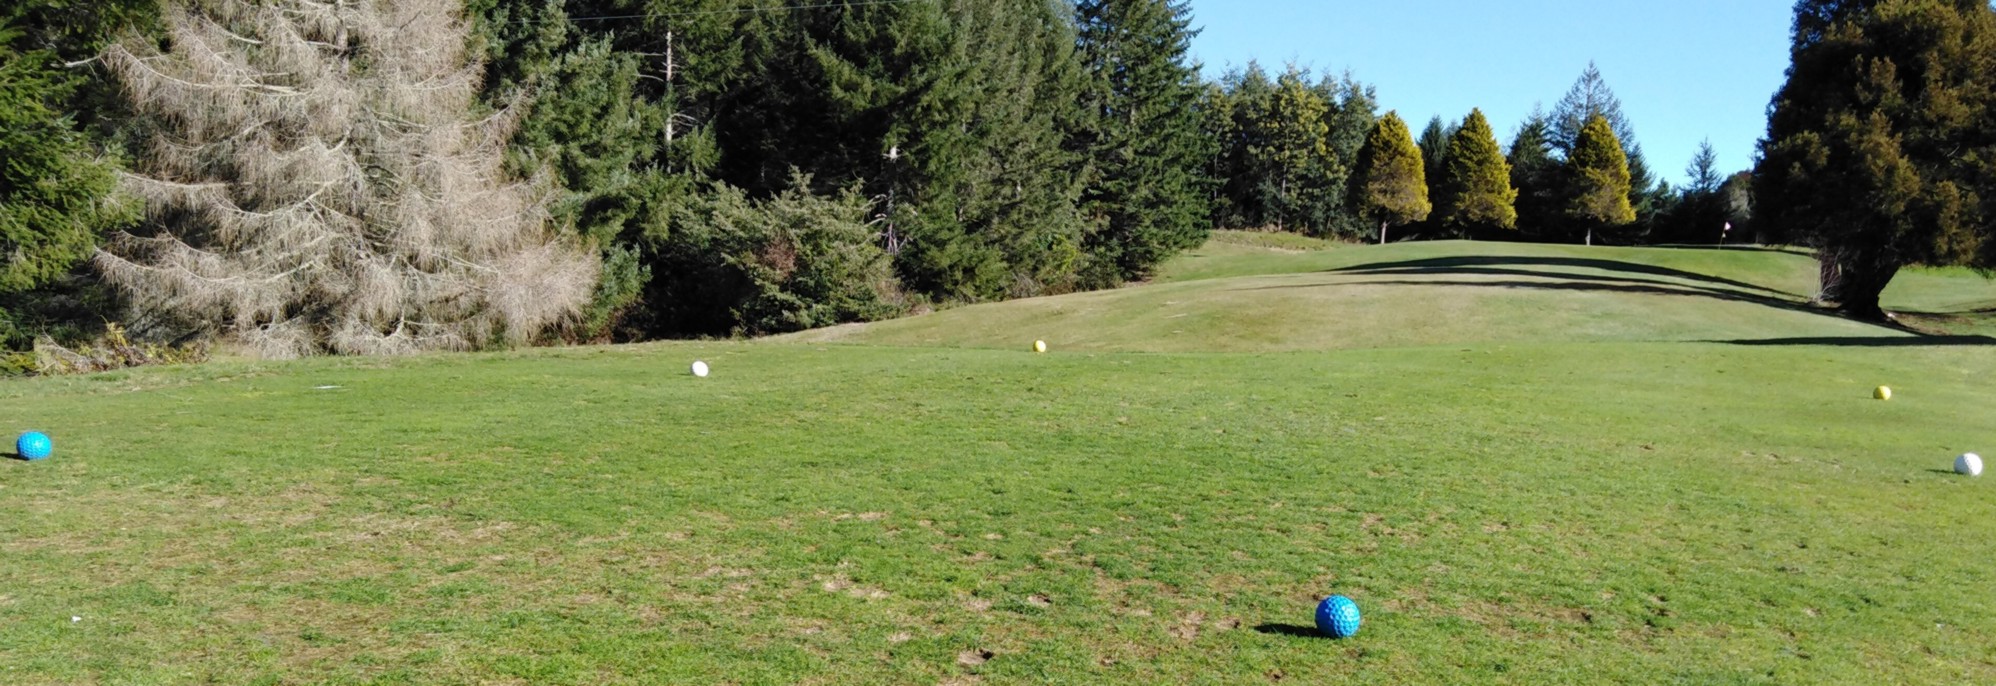
I made some large concrete golf balls for use as tee markers at a local golf club.
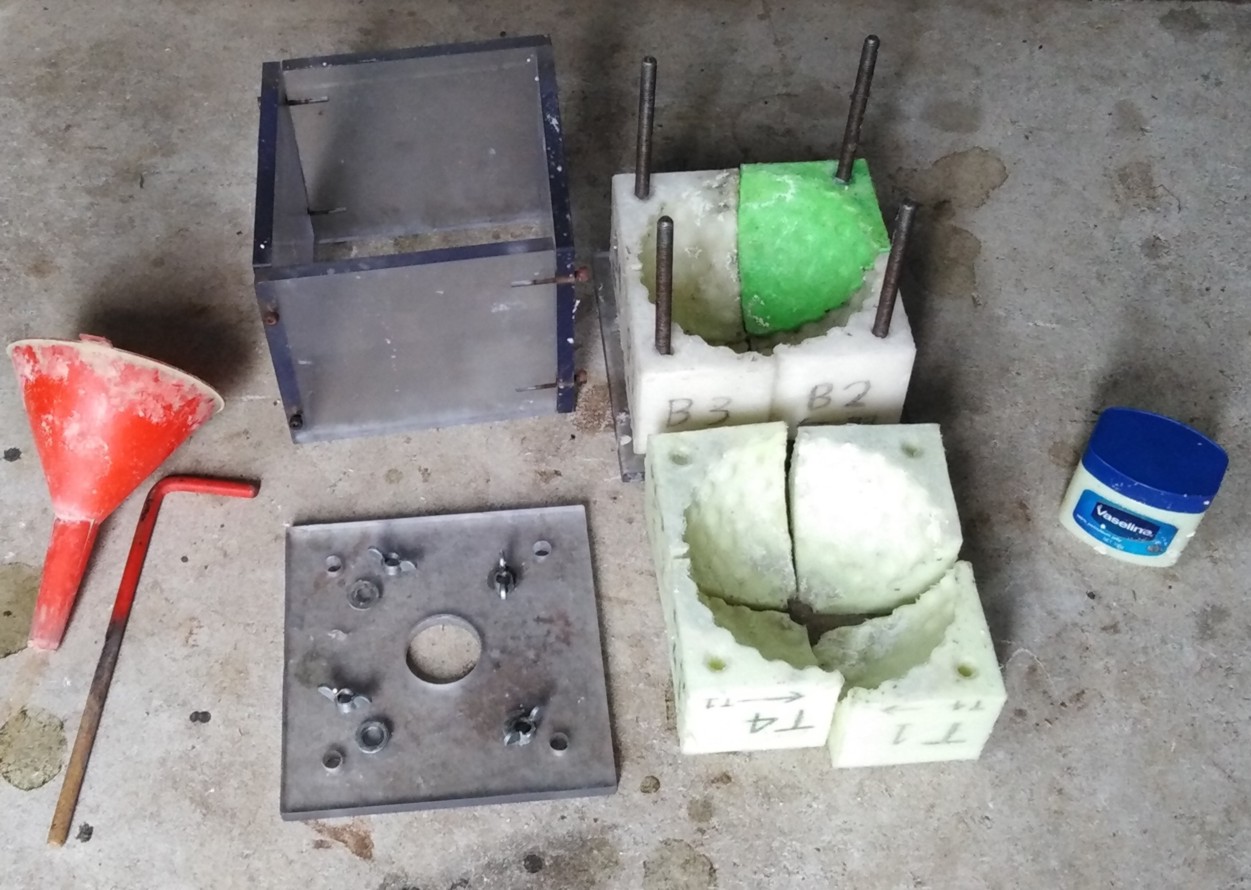
To do this, I made a mould with my 3D printer using ABS plastic filament.
Each concrete golf ball marker is 120mm in diameter (4 ¾ inches).
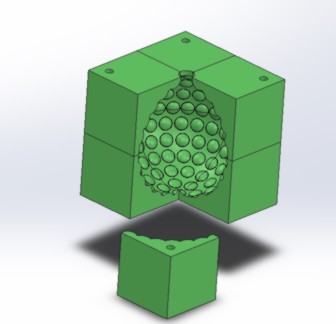
The 3D printed mould I made consists of eight 3D printed parts which I hold together in a polycarbonate box when filling.
The top 4 molded parts have a small hole which I use a funnel to push down a mix of cement and sand.
Once the cement mix has harden but not solid, I remove the ball from the mould and smooth off the area where it was filled. Once fully harden they are painted.
As golf balls have dimples I had to make the mould with 8 pieces rather than two to be able to remove the concrete ball from the mould. I made the dimples larger to make them stand out more.
One issue I had was the sticking of the cement mix to the mould which can easy destroy the mould pieces.
I tried a number of different products but found using Vaseline cream to be good.
Each tee area required 6 balls to be made; Ladies, Men’s & Pro’s (Play off is between and behind two balls) and with being an 18 hole course, 108 balls had to be made.
Each ball took an hour for mixing and filling the mould and removal and cleaning up the mould for reuse.
The course green keepers like them as they can move them easily without getting off their ride on lawnmowers. Also they have a small resting footprint which is good for the grass they sit on.
Being concrete they don’t blow away with the wind and people don’t try and hit them with their clubs.
Edited 3 time(s). Last edit at 08/26/2021 10:26PM by RepRot.

