Replacing the printbed on a Taz 3 printer
Posted by the_digital_dentist
|
Replacing the printbed on a Taz 3 printer April 24, 2016 08:47PM |
Registered: 11 years ago Posts: 5,780 |
Someone at the Makerspace broke the glass print bed on our Taz 3 printer. We were able to get the heater peeled off the glass shards, so I set about replacing the bed and making some improvements in the process.
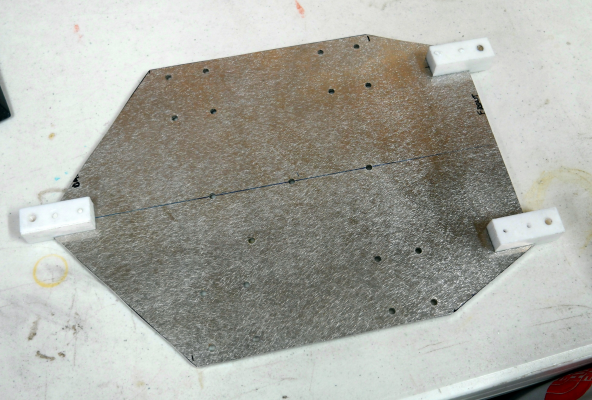
The original bed had a 4 point undercarriage and bed plate bending system instead of a leveling system, so I converted it to a 3 point leveling system.
The original bed was glass and it did what glass does- it broke. I decided to prevent that from happening ever again by replacing it with a piece of cast aluminum tooling plate.
That also fixes the uneven heating seen with the glass plate.
I used the original undercarriage and cut it down to reduce the mass- the new bed plate is about 2x as heavy as the glass plate so reducing moving mass is a good idea.
The white pieces are teflon blocks that I cut/milled to fit. The bed leveling screws turn into the teflon blocks which hold them without letting them wobble. Adjusting the bed will have to be done using a screw driver, but the new scheme should not require frequent adjustment.
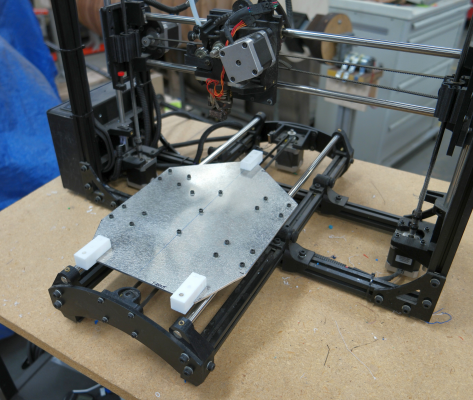
Here's the modified undercarriage plate mounted on the machine. The crappy plastic bushings will be the next thing replaced with proper ball bushings. I'll spread them out on the guide rails to make the whole thing more stable, and install longer, hardened guide rails, too.
I mounted the new bed plate and powered it up to see if it would reach ABS print temperature. It took a bit longer than the old glass plate, but it got to 110C in about 16 minutes. Since the printer is open framed we aren't likely to be printing much ABS with it anyway, so the slow heat-up really won't matter. The extra mass of the plate means I'll have to rerun the PID autotune and reduce acceleration. The new system stands about 1 cm higher than the old bed plate so I had to print an extension for the Z=0 screw to allow it to close the switch higher up.
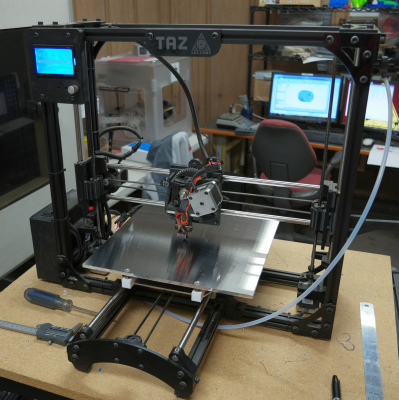
Here it is with the bed plate installed:
Ultra MegaMax Dominator 3D printer: [drmrehorst.blogspot.com]
|
Re: Replacing the printbed on a Taz 3 printer April 24, 2016 08:52PM |
Registered: 9 years ago Posts: 705 |
|
Re: Replacing the printbed on a Taz 3 printer April 24, 2016 10:46PM |
Registered: 9 years ago Posts: 19 |
Nice job, especially getting rid of the excess mass! I'm surprised at you using Teflon, PTFE (Teflon) has terrible creep properties so you can expect the screws to loosen. If you have / had some UHMW or POM available, that would have been a lot better choice in this situation. I'm sure you will get it all fixed up.
|
Re: Replacing the printbed on a Taz 3 printer April 24, 2016 11:47PM |
Registered: 11 years ago Posts: 5,780 |
I've been using teflon blocks for the same purpose in my printer for about 3 years with no creep and no loosening of screws. The screws pass though the heated bed plate. Teflon doesn't care. UHMW will melt or soften as the screws heat up.
Ultra MegaMax Dominator 3D printer: [drmrehorst.blogspot.com]
Ultra MegaMax Dominator 3D printer: [drmrehorst.blogspot.com]
|
More photos of the replacement April 26, 2016 09:17AM |
Registered: 11 years ago Posts: 5,780 |
Almost finished- I wasn't pleased with the loose fit of the plastic bushings (this is a $2k printer!) on the Y axis and had to shim a couple of them to stabilize the whole Y axis carriage/bed plate assembly. I leveled everything and zeroed the bed and ran it back and forth a few times and everything seemed to be stable.
I'll try to change the acceleration and run the PID autotune today, and should be able to run some test prints.
The teflon blocks are about 15 mm thick where the leveling screws go in, and 12 mm thick where the #6 mounting screws go in. They are about 15 mm wide.
I cut down the original undercarriage plate and ultimately reduced it's mass by about 50%. The aluminum bed plate weighs about 2X what the glass did. We'll see if that leads to any problems soon enough.
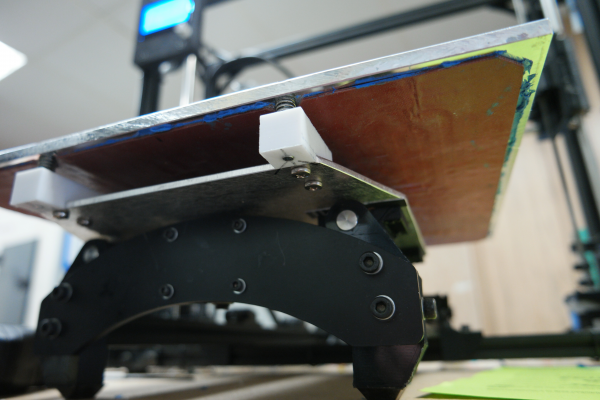
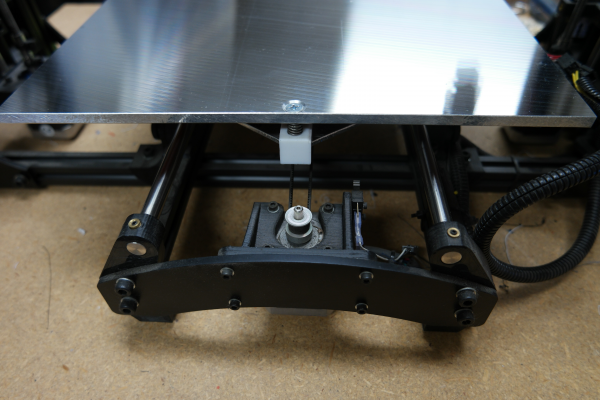
Front edge view of the underside of the bed showing the undercarriage, teflon blocks, and the heater glued to the underside of the bed plate.
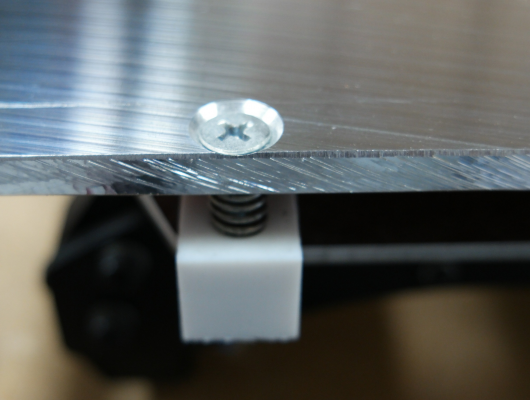
Countersunk leveling screw on front left edge of the bed plate.
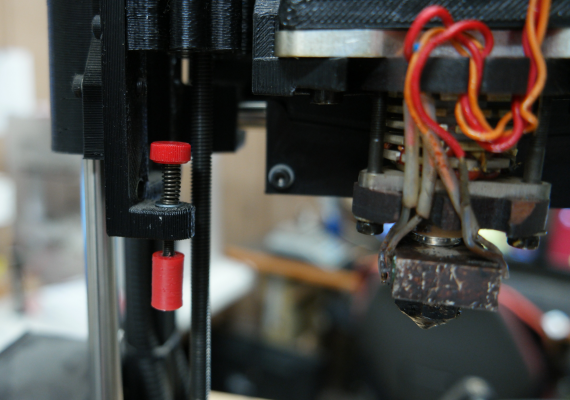
Extension added to the Z=0 screw. The extension compensates for the higher print bed surface.
The rear edge of the bed plate with a single leveling screw.
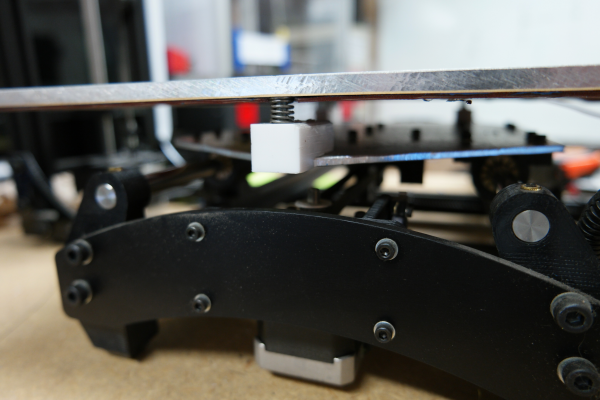
Rear edge showing clearance of leveling screw/support above the Y axis motor and the machine's frame.
Edited 1 time(s). Last edit at 04/26/2016 09:47AM by the_digital_dentist.
Ultra MegaMax Dominator 3D printer: [drmrehorst.blogspot.com]
|
Re: Replacing the printbed on a Taz 3 printer April 27, 2016 01:59AM |
Registered: 11 years ago Posts: 5,780 |
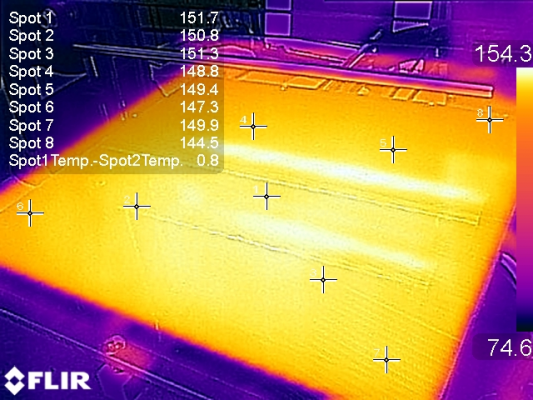
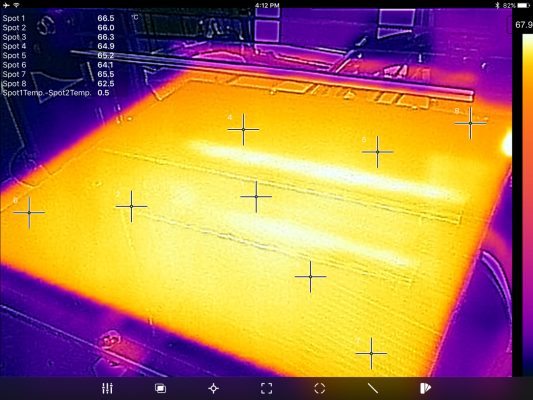
I was not able to make changes to the firmware yet, but I did run a test print using HIPS filament. After the bed had heated to 70C, one of the Makerspace members who has a FLIR camera for their phone took a picture of the bed plate. We had previously looked at the glass bed plate on the Taz and found 20C variation across the surface including a cool spot at the center of the bed. The new aluminum plate behaves exactly as expected- even heating with small variation across the surface and lowest temperatures at the corners of the bed.
The temperatures shown are degrees F- the bed was heated to 70C according to the Taz LCD control panel.
The two bright bars are the IR reflections of the X axis guide rails.
Ultra MegaMax Dominator 3D printer: [drmrehorst.blogspot.com]
The temperatures shown are degrees F- the bed was heated to 70C according to the Taz LCD control panel.
The two bright bars are the IR reflections of the X axis guide rails.
Ultra MegaMax Dominator 3D printer: [drmrehorst.blogspot.com]
|
Re: Replacing the printbed on a Taz 3 printer April 28, 2016 07:31PM |
Registered: 11 years ago Posts: 5,780 |
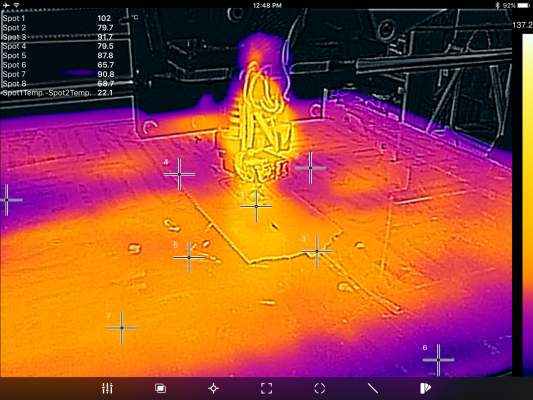
The guy with the FLIR camera just sent me the old pictures of the TAZ with the original glass bed. Taken from a different angle, and the extruder blocks some of the image, but you can see how great glass is as a print bed compared to the new aluminum plate.
Here is the original thermal image of the TAZ with the glass bed (it looks like the temperature was set to 105C):
And here's the aluminum thermal image in degrees C (temperature set to 70C)
Ultra MegaMax Dominator 3D printer: [drmrehorst.blogspot.com]
Here is the original thermal image of the TAZ with the glass bed (it looks like the temperature was set to 105C):
And here's the aluminum thermal image in degrees C (temperature set to 70C)
Ultra MegaMax Dominator 3D printer: [drmrehorst.blogspot.com]
|
Re: Replacing the printbed on a Taz 3 printer May 04, 2016 06:50PM |
Registered: 9 years ago Posts: 705 |
|
Re: Replacing the printbed on a Taz 3 printer May 04, 2016 07:59PM |
Registered: 11 years ago Posts: 5,780 |
I ran the PID autotune and updated the firmware with the new coefficients and it heats from 23C to 100C in 9 minutes, not too bad.
Ultra MegaMax Dominator 3D printer: [drmrehorst.blogspot.com]
Ultra MegaMax Dominator 3D printer: [drmrehorst.blogspot.com]
Sorry, only registered users may post in this forum.
