MendelMax 1.5 Marinus - My build
Posted by Ohmarinus
|
Re: MendelMax 1.5 Marinus - My build December 26, 2013 02:57PM |
Registered: 11 years ago Posts: 730 |
Quote
Ohmarinus
Are you able do draw them yourself?
Of course! I am a long time CAD user.
 I also contribute to the FreeCAD project (not as a programmer, but I help out in the forums and contribute to the wiki)
Quote
Ohmarinus
How does your heatbed look atm? Wish me luck!
My heatbed is mounted on spring loaded screws on an aluminum plate, which itself is mounted on standoffs on another aluminum plate. So my print surface is much higher than yours. I'll try to take a picture that shows the Y assembly.
Good luck!

|
Re: MendelMax 1.5 Marinus - My build December 27, 2013 06:32PM |
Admin Registered: 11 years ago Posts: 3,096 |
Hi Normand 
Okay, so I have not slept much lately but I did manage to finish the printer, calibrate it and get it running today!
Here's a video of the first run: [youtu.be]
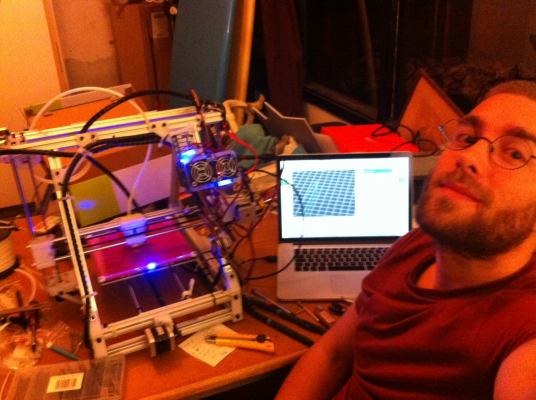
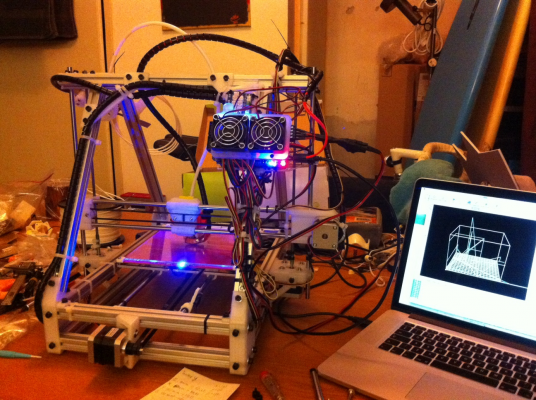
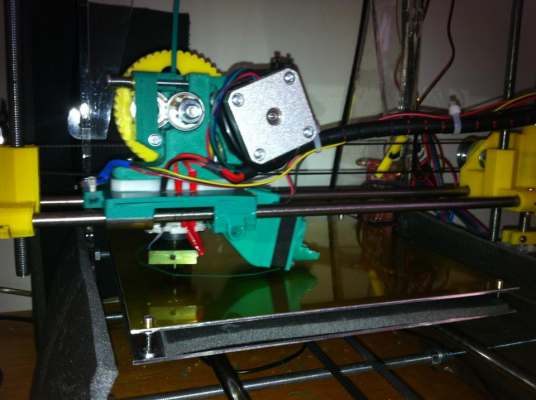
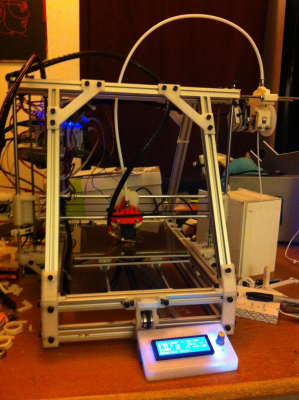
And here some images of the machine and setup for now. In all the pictures and video, the machine is turned backwards so I could immediately intervene if there would be an electrical problem. It also made it easier to see if there were things that go wrong.
Tomorrow I will redo the heatbed, create better corners, lower profile so the hotend isn't bothered by them. This should yield me a 190x190mm print surface, and probably even 195x195mm if I set it all sharp.
Also, the springs will be a bit longer, because I noticed the current springs and screws don't have enough travel when I'm setting the Z-height correctly. Also I need to create a better clamp for my Z-endstop.
I broke one endstop when attaching it, and the opto-endstop I had didn't work! What a piece of sh*t! It would trip itself when there is a vibration, how can that be? So I am now thinking of trying out two new things. First would be reed relais, I don't know if they are accurate enough, but it sounds like fun. And then the other would be to buy better optical endstops, because I still think they look pretty awesome.
Now that I know everything works I will also loosen all the wiring next week and make it a bit better organized because it's a bit of a mess now...
Me being happy, tired and lunatic
For those who can't stand my face
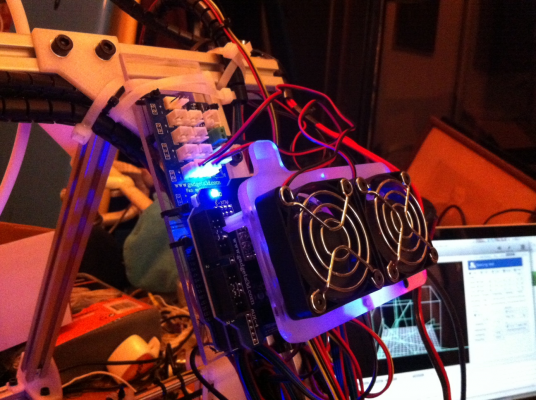
Cooling plate for Ramps and above that the fan splitter on which the electronics 2x 50mm fans are hooked up to and the fan that cools the PTFE part of the hotend
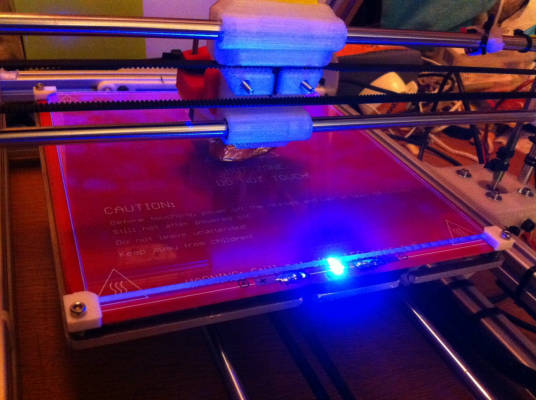
Blue light and dirty fingers (on the bottom side of the glass)
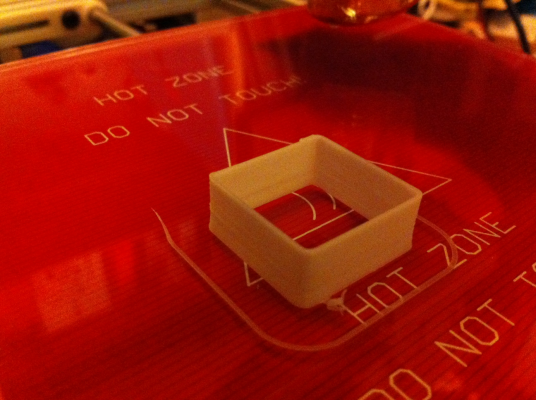
First print!! Immediately went right! Well, kinda
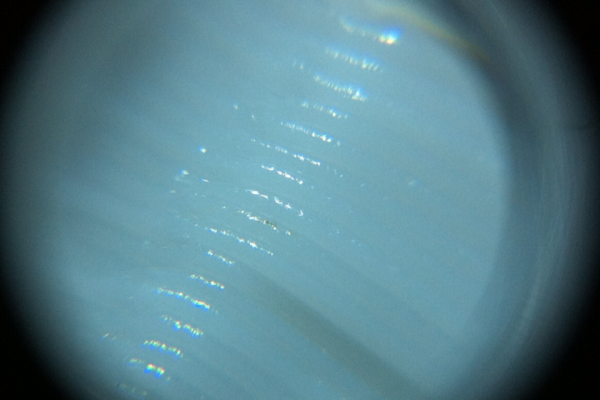
Close-up of the layers
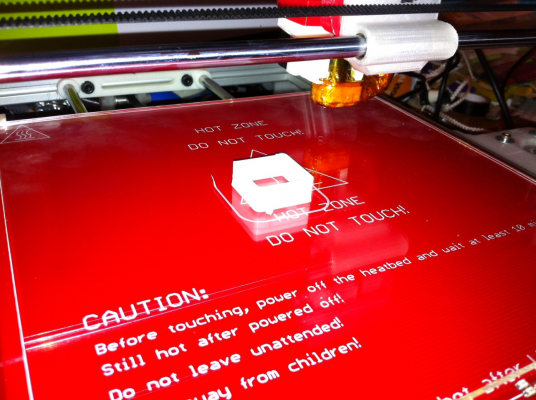
Wider angle
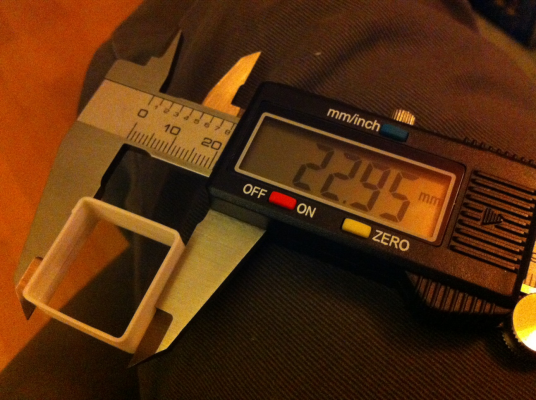
Dimensions are not completely right yet
And height
Oh yeah I'm so happy the machine works and nothing is shorted and it just all is working exactly like I had in mind! Double testing, triple checking, measuring electronics, speeding up the Z, slowing it down again because it got stuck from being too speedy, lubricating the whole machine with tef-spray. The bearings are PTFE-lined bushings, the rods are hard-chromed, so teflon spray is about the best lubricant the machine could wish for
The Bowden tube needs a LOT of force for the 3mm filament to be pushed through, I might rebuild the machine for 1.75mm filament at a later stage. This creates more flexibility for the Bowden system, but for now I think it's working as intended and only needs small adjustments to become a good printer. Like a cooling fan that blows on the printed filament. However, this is a small problem because I have not been able to come up with a good cooling solution yet.
Inspiration is relaxing in the background, will be back later this week I think.
My Reprap Air 2 has the same kind of heated bed as you do I think, you can see it here:
Edited 1 time(s). Last edit at 12/27/2013 06:52PM by Ohmarinus.

Okay, so I have not slept much lately but I did manage to finish the printer, calibrate it and get it running today!
Here's a video of the first run: [youtu.be]
And here some images of the machine and setup for now. In all the pictures and video, the machine is turned backwards so I could immediately intervene if there would be an electrical problem. It also made it easier to see if there were things that go wrong.
Tomorrow I will redo the heatbed, create better corners, lower profile so the hotend isn't bothered by them. This should yield me a 190x190mm print surface, and probably even 195x195mm if I set it all sharp.
Also, the springs will be a bit longer, because I noticed the current springs and screws don't have enough travel when I'm setting the Z-height correctly. Also I need to create a better clamp for my Z-endstop.
I broke one endstop when attaching it, and the opto-endstop I had didn't work! What a piece of sh*t! It would trip itself when there is a vibration, how can that be? So I am now thinking of trying out two new things. First would be reed relais, I don't know if they are accurate enough, but it sounds like fun. And then the other would be to buy better optical endstops, because I still think they look pretty awesome.
Now that I know everything works I will also loosen all the wiring next week and make it a bit better organized because it's a bit of a mess now...
Me being happy, tired and lunatic
For those who can't stand my face
Cooling plate for Ramps and above that the fan splitter on which the electronics 2x 50mm fans are hooked up to and the fan that cools the PTFE part of the hotend
Blue light and dirty fingers (on the bottom side of the glass)
First print!! Immediately went right! Well, kinda

Close-up of the layers
Wider angle
Dimensions are not completely right yet
And height
Oh yeah I'm so happy the machine works and nothing is shorted and it just all is working exactly like I had in mind!
 Double testing, triple checking, measuring electronics, speeding up the Z, slowing it down again because it got stuck from being too speedy, lubricating the whole machine with tef-spray. The bearings are PTFE-lined bushings, the rods are hard-chromed, so teflon spray is about the best lubricant the machine could wish for
The Bowden tube needs a LOT of force for the 3mm filament to be pushed through, I might rebuild the machine for 1.75mm filament at a later stage. This creates more flexibility for the Bowden system, but for now I think it's working as intended and only needs small adjustments to become a good printer. Like a cooling fan that blows on the printed filament. However, this is a small problem because I have not been able to come up with a good cooling solution yet.
Inspiration is relaxing in the background, will be back later this week I think.
My Reprap Air 2 has the same kind of heated bed as you do I think, you can see it here:
Edited 1 time(s). Last edit at 12/27/2013 06:52PM by Ohmarinus.
|
Re: MendelMax 1.5 Marinus - My build December 30, 2013 04:55PM |
Admin Registered: 11 years ago Posts: 3,096 |
So, I've worked on the machine a bit more, printed a new extruder, designed a coupling system for the Bowden-system. Now the extruder is mounted to the side of the MendelMax wth 2x M5 rods that are screwed in the centers of the top-extrusions on the right side. I tapped the centers of those beams with M5 taps and created a clamp that clamps onto the M5 rods and has holes where the Bowden coupler and the extruder mount onto.
The filament reel is standing right underneath the extruder, so the filament goes straight up from the roll into the extruder with minimal effort.
Lubed the bowden tube on the inside with corn oil.
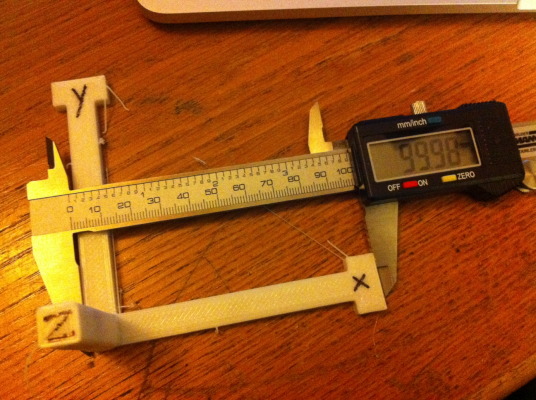
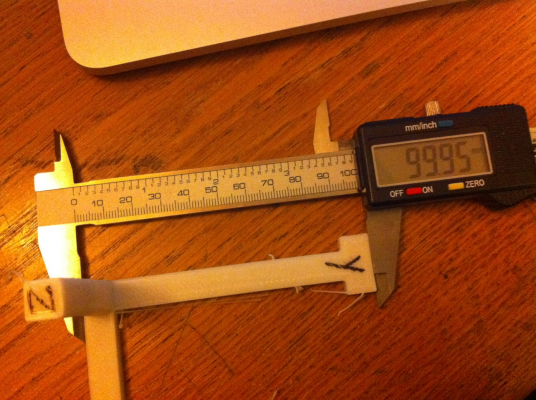
Did 1 calibration test, the results can be found in the images and are stunningly correct. Before I checked the X, Y and Z I ran a little E-steps/mm correction round because I was not getting correct layer bonding and the prints would delaminate.
Printing temperature had to go up to 205º coming from 185º and layers bond well together now and make a nice and solid connection between each PLA layer.
Decided to ditch the effing borosilicate glass pane, it was a waste of money, it's not even flat completely and it was too much of a pain to get it leveled well. The aluminum plate I had laying around that I had CNC'ed out works a 100x better Oh, and for whoever says Kapton tape doesn't work just has cheap Kapton or something, it works magic, however with PLA you need to clean it more often.
However, a better Y-axis is something I still can improve on. Also the hotend is positioned too much toward the front of the machine, this causes the printbed to have to move too much to the front to reach the full printbed surface. It is not a 'real' scenario ofcourse to get full 200x200mm prints, but still, making the best out of it should be a priority during the next year.
Here are the pictures, I hope it's interesting to someone.
- Marinus
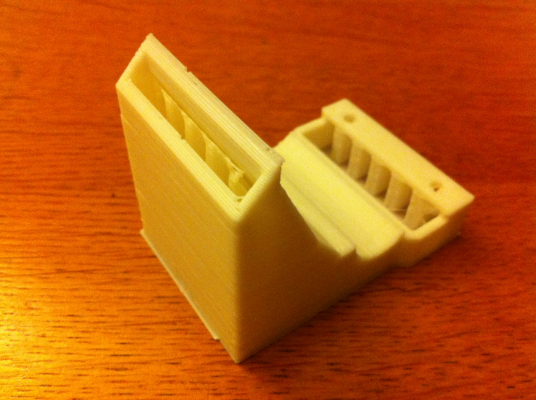
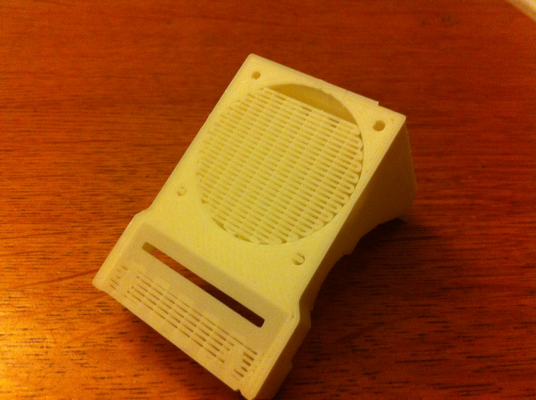
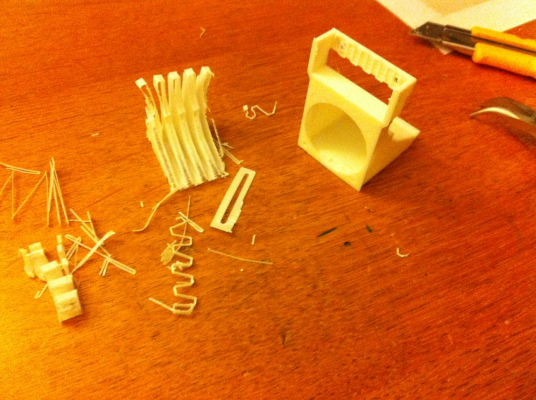
Print-cooling funnel in ABS with support material, first time working with support material
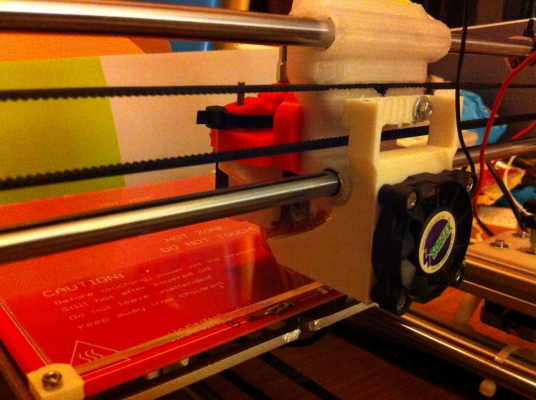
Mounted the funnel
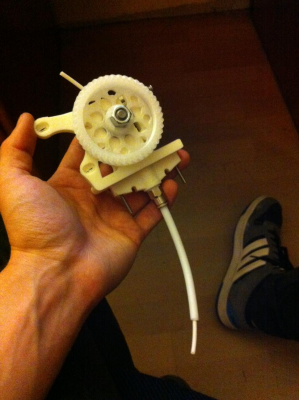
Extruder and Bowden pneufit mount, there is a missing part in the picture, the mount that goes in between both
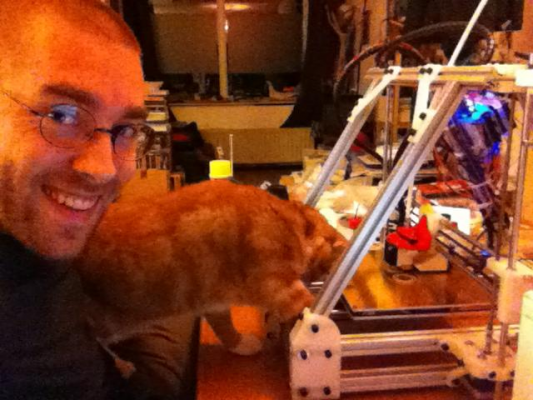
Here my cat almost gets his paw cut off by the machine while I smile for the camera...
The reason why I show this picture is because he is super-afraid to go near my Reprap Air 2 because it's so noisy. The A4988 stepper drivers in the MendelMax make it so nice and quiet that he doesn't even really notice the whole machine being so busy with printing! Crazy cat (by the way, he was trying to reach for a piece of curled-up extruder PLA that came out of the nozzle when I was testing the E-steps/mm)
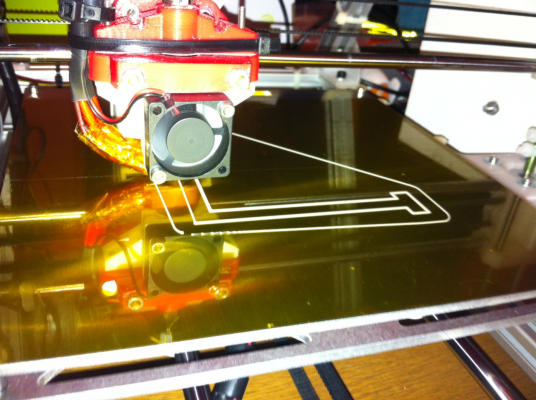
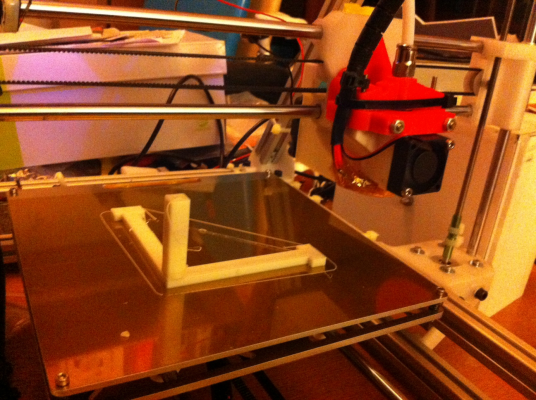
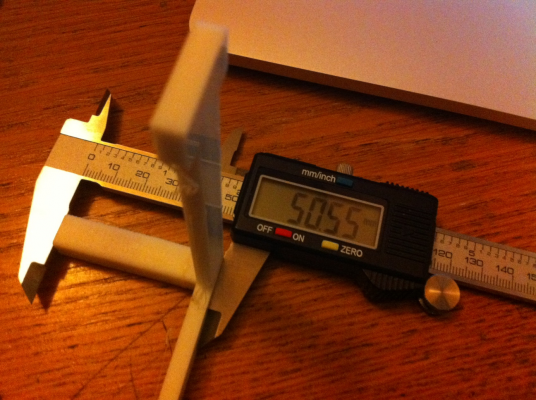
Printing a test-piece for X, Y and Z. First try, immediately went well! The layers are also consistent, no Z-wobble whatsoever!
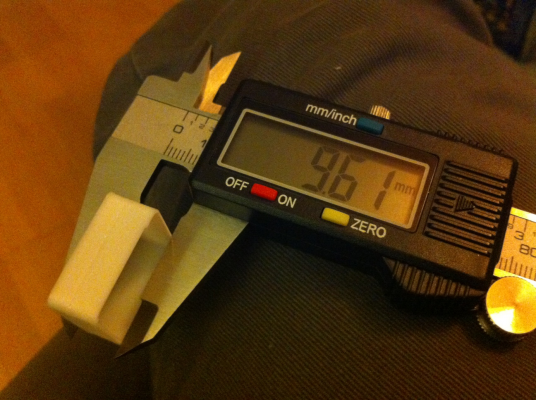
Should be 100mm... ohwell, nobody will notice this
And here should be 50, I think this can/should/will be improved (notice the glossy finish on the bottom of the print where you see the reflection of the caliper!)
All in all a very good experience and besides printing stupid calibration stuff, it's time to try out some model from thingiverse, however I really like to just design my own stuff for daily life, it's a good benchmark to occasionally print a nice model from thingiverse.
The only thing I'm still havig a bit of trouble with is, you guessed, retraction. This is because of the hysteresis in the bowden tube. Flexibility, stretch and compression of the filament en tube and kinetic energy of the entire moving piece of filament.
And when you see this, please comment on the machine and prints. I know the cables can be a lot tidier, and they will be, but first finish the machines printing quality and create a more stable filament-reel-roller
Edited 2 time(s). Last edit at 12/30/2013 05:00PM by Ohmarinus.
The filament reel is standing right underneath the extruder, so the filament goes straight up from the roll into the extruder with minimal effort.
Lubed the bowden tube on the inside with corn oil.
Did 1 calibration test, the results can be found in the images and are stunningly correct. Before I checked the X, Y and Z I ran a little E-steps/mm correction round because I was not getting correct layer bonding and the prints would delaminate.
Printing temperature had to go up to 205º coming from 185º and layers bond well together now and make a nice and solid connection between each PLA layer.
Decided to ditch the effing borosilicate glass pane, it was a waste of money, it's not even flat completely and it was too much of a pain to get it leveled well. The aluminum plate I had laying around that I had CNC'ed out works a 100x better
 Oh, and for whoever says Kapton tape doesn't work just has cheap Kapton or something, it works magic, however with PLA you need to clean it more often.
However, a better Y-axis is something I still can improve on. Also the hotend is positioned too much toward the front of the machine, this causes the printbed to have to move too much to the front to reach the full printbed surface. It is not a 'real' scenario ofcourse to get full 200x200mm prints, but still, making the best out of it should be a priority during the next year.
Here are the pictures, I hope it's interesting to someone.
- Marinus
Print-cooling funnel in ABS with support material, first time working with support material
Mounted the funnel
Extruder and Bowden pneufit mount, there is a missing part in the picture, the mount that goes in between both
Here my cat almost gets his paw cut off by the machine while I smile for the camera...
The reason why I show this picture is because he is super-afraid to go near my Reprap Air 2 because it's so noisy. The A4988 stepper drivers in the MendelMax make it so nice and quiet that he doesn't even really notice the whole machine being so busy with printing! Crazy cat
 (by the way, he was trying to reach for a piece of curled-up extruder PLA that came out of the nozzle when I was testing the E-steps/mm)
Printing a test-piece for X, Y and Z. First try, immediately went well! The layers are also consistent, no Z-wobble whatsoever!
Should be 100mm... ohwell, nobody will notice this
And here should be 50, I think this can/should/will be improved (notice the glossy finish on the bottom of the print where you see the reflection of the caliper!)
All in all a very good experience and besides printing stupid calibration stuff, it's time to try out some model from thingiverse, however I really like to just design my own stuff for daily life, it's a good benchmark to occasionally print a nice model from thingiverse.
The only thing I'm still havig a bit of trouble with is, you guessed, retraction. This is because of the hysteresis in the bowden tube. Flexibility, stretch and compression of the filament en tube and kinetic energy of the entire moving piece of filament.
And when you see this, please comment on the machine and prints. I know the cables can be a lot tidier, and they will be, but first finish the machines printing quality and create a more stable filament-reel-roller

Edited 2 time(s). Last edit at 12/30/2013 05:00PM by Ohmarinus.
|
Re: MendelMax 1.5 Marinus - My build December 30, 2013 05:17PM |
Registered: 12 years ago Posts: 199 |
Hi Marinus,
Congratulations on the good results. The calibration parts look very promising. Looks like a very nice machine. Did you print the funnel on the mendelmax as wel, or did you print it on your Air?
The retractions are a problem on a bowden system, but I am sure you will be able to solve it. I still do not understand why you choose for a bowden extruder. Does not realy make sense on a moving bed machine, unless you are prepairing for a multi color setup?
|
Re: MendelMax 1.5 Marinus - My build December 30, 2013 05:53PM |
Admin Registered: 11 years ago Posts: 3,096 |
Hi Jan, to be honest... I just think it looks cool, I've read about it and I like the idea of a light print head. Also, the linear bushings I'm using have a very low tolerance, and I want to minimize the chance of banding.
Experimenting with PTFE lubricant and these PTFE-lined bushings together with the hardchromed rods have just been a bit of an exploration for me.
Ofcourse the Prusa i3 X-ends and carriage etc are maybe not completely in place in a MendelMax.
I might change it all back some day, because the X-axis system of two rods next to eachother instead of above eachother also seems more stable, at least, on the Air 2 that I have it's more stable.
The funnel was printed on the Air 2 as well in ABS plastic, but I will re-print it on the MendelMax. But after I have installed the control panel on the machine because my computer goes into sleep mode all the time and then the printer just freezes mid-print and stays heated but doesn't move anymore which can cause serious harm to the machine!
|
Re: MendelMax 1.5 Marinus - My build December 30, 2013 06:07PM |
Registered: 12 years ago Posts: 199 |
|
Re: MendelMax 1.5 Marinus - My build December 30, 2013 06:37PM |
Admin Registered: 11 years ago Posts: 3,096 |
Yeah, the vertical and bowden were mostly aesthetic, but also just explorational goals.
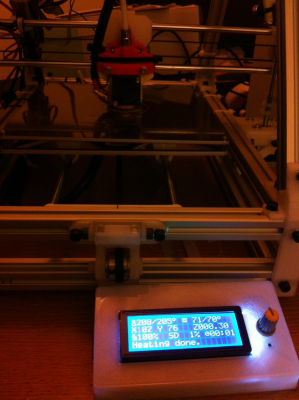
Oh, by the way, just installed the G3D LCD Panel and I have to say, up until now, it all works flawlessly! Printing the first thing now with it, without having my computer hooked up Yay!
Yay!
Here's the bowden-setup clearly visible
Here's a view of the G3D Panel
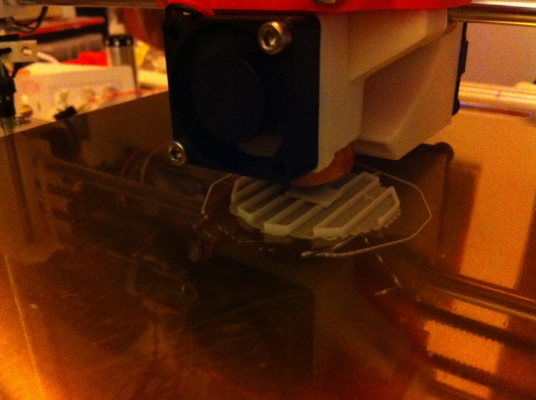
And here is a view of a buckyball (praise Buckminster Fuller) being printed with support material in PLA layer height 0.3mm
Oh, by the way, just installed the G3D LCD Panel and I have to say, up until now, it all works flawlessly! Printing the first thing now with it, without having my computer hooked up
 Yay!
Yay!Here's the bowden-setup clearly visible
Here's a view of the G3D Panel
And here is a view of a buckyball (praise Buckminster Fuller) being printed with support material in PLA layer height 0.3mm
|
Re: MendelMax 1.5 Marinus - My build January 23, 2014 09:44AM |
Admin Registered: 11 years ago Posts: 3,096 |
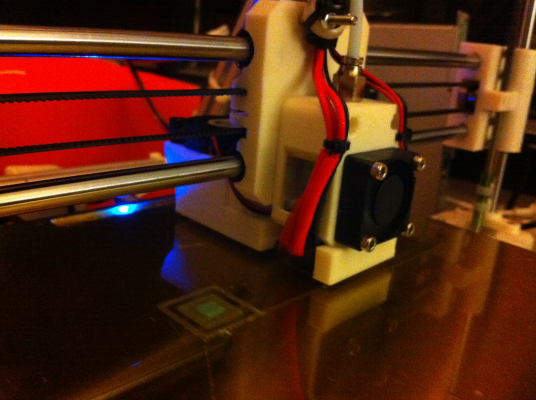
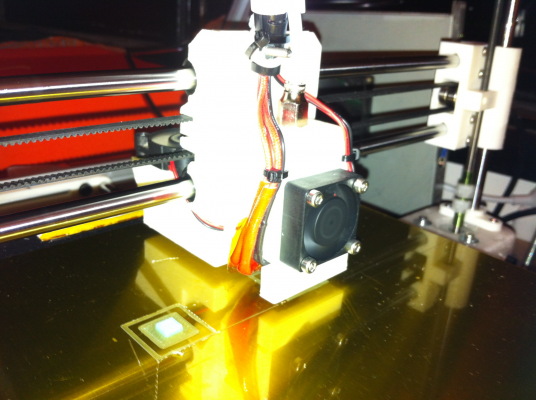
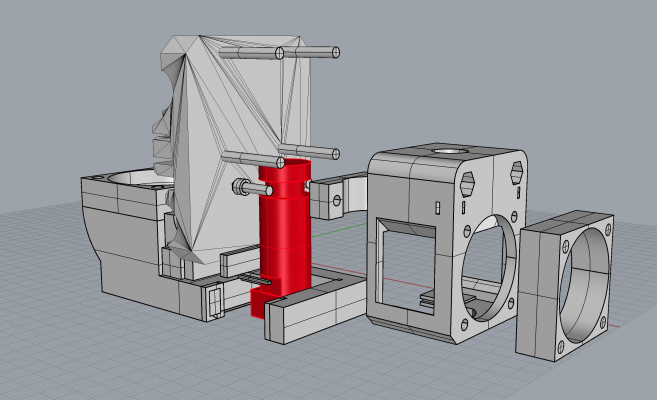
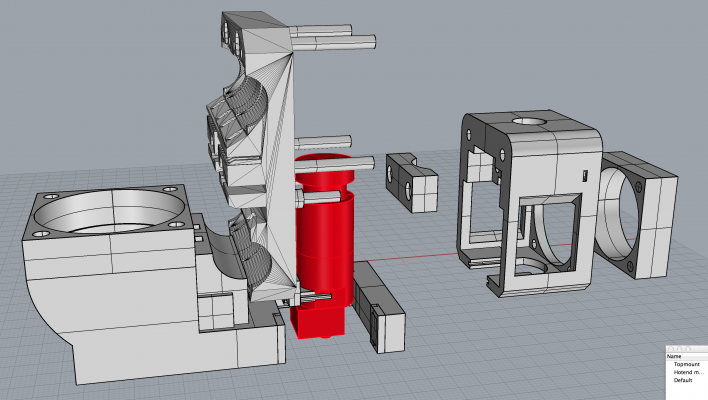
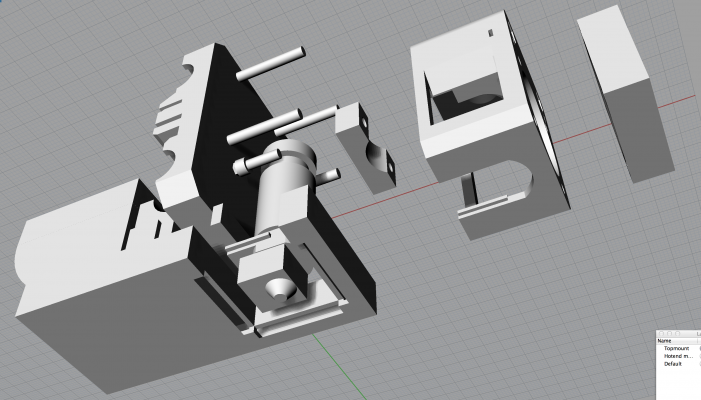
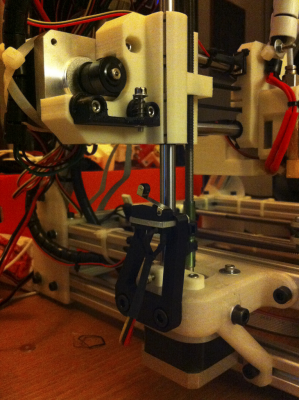
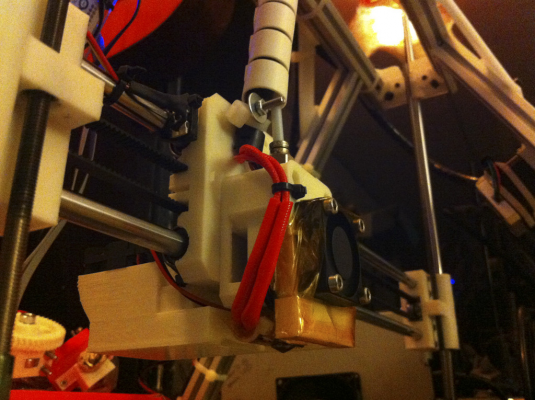
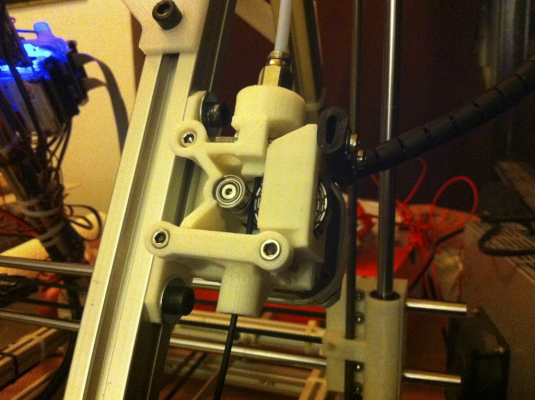
Yesterday installed a new X-carriage, with new X-ends, that fit better. Replaced the bushings with LM8UU (wich are more noisy sad enough..), and designed a new system for the J-head and cooling.
The images aren't that clear, but the render will tell a lot more:
I also converted the bowden system to a Direct Drive extruder for 1.75mm filament with an MK8 drive gear.
The images aren't that clear, but the render will tell a lot more:
I also converted the bowden system to a Direct Drive extruder for 1.75mm filament with an MK8 drive gear.
|
Re: MendelMax 1.5 Marinus - My build January 23, 2014 06:39PM |
Registered: 11 years ago Posts: 730 |
|
Re: MendelMax 1.5 Marinus - My build January 23, 2014 07:16PM |
Admin Registered: 11 years ago Posts: 3,096 |
Only one problem... When extruding, after a retract, when it starts pushing out filament again, the filament hits a 'bump' somewhere inside the hotend I guess, and then it grinds the filament.
Then it doesn't extrude much anymore, just a little, and then it moves to the next part, retracts and starts pushing out filament again and then the filament gets stuck again....
Don't know why, I haven't had this happening to my 3mm J-head. I believe it is due to the fact that the PTFE-tube is slightly larger in diameter and that the brass part has a flat topside, so the filament hits the bump after retracting?
Will open it up tomorrow to see. I've filmed it for others to watch the horror (at 0:20 the horror show starts):
[youtu.be]
So I have to open it all up again and untie the whole carriage and all cables... Argh.
This is what torture is like.
Edit:
I have re-adjusted the J-head's internal organ, the PTFE tube, however, it doesn't make any change.
When I was testing it, I noticed that the heat would still travel up much more than with the 3mm J-head, I have no idea why this is, but it might have to do with the Brass nozzle-part having more material? 2mm id is ofcourse more material than a 3.18 id when both the tubes have the same OD.
I don't know how to fix this, because I am having active cooling on the hotend with a fan.
The only thing I can think of, is to re-design the fan-mount so that the air-flow area is smaller, so more air is forced directly past the j-heads PEEK part.
Also I will re-package the nozzle part with the ceramic insulation band again to see if that helps any.
Then heating up the hotend, and pushing the filament through by hand, it goes very easy in the beginning, but then, later on, after 30 seconds of extruding or so, it becomes very hard to push the filament through. I have found out that the molten filament inside the hotend, is molten beyond 1/2 of the length of the internal PTFE tube. This might cause extreme friction inside. I have no idea how I can fix this... I never had this problem with the 3mm filament.
Edited 1 time(s). Last edit at 01/24/2014 09:00AM by Ohmarinus.
|
Re: MendelMax 1.5 Marinus - My build January 25, 2014 07:14AM |
Admin Registered: 11 years ago Posts: 3,096 |
Okay, I can't fix it.
The filament keeps jamming in the hotend. I've tried everything I can and only managed to improve it just a little bit.
Situation:
It works fine for about 20 minutes now, printing a Yoda statue just to test if the hotend works correctly now, and then after around 20 minutes the filament starts getting stuck in the hotend somehow. Retract works fine, but when it returns to extrusion, after just a slight turn of the gear, it occasionally just can't push the filament through. The gear slips on the filament, and when I help pushing it by hand, it doesn't work either, only when I grab it with two hands and force it through, it goes on again.
I feel that the heat inside the hotend is somehow too much. The temperature might be too high.
Also, the light of the D10 on the ramps board is flickering, but the temperature on the hotend is a constant around 205º, rarely overshoots while printing, only sometimes drops to 204º, but it's very stable so I don't know what I can change.
The nozzle/heated cartridge part, and all the brass is insulated with ceramic tape and I have a 30mm fan blowing on the PEEK part non-stop, with a fan mount and air-guide, however, the PEEK gets as hot so it kind of hurts your finger when you touch it for more than 5 seconds.
Wish I had stayed with 3mm filament how haha. I have to print a project for next monday for school and I don't feel it's going to work with this strange performance.
Edit:
Somehow, after a few minutes of helping the filament get through, it suddenly started working again. The printer finished the print very well and I have to admit, this print turned out very well somehow. Except for the outer layer not being completely consistent. When one sees the print, it might look like I have extruder problems, but to be true, I think it's a hotend problem.
Edited 1 time(s). Last edit at 01/25/2014 07:38AM by Ohmarinus.
|
Re: MendelMax 1.5 Marinus - My build January 25, 2014 01:25PM |
Registered: 11 years ago Posts: 40 |
Hi Ohmarinus,
Looking at your kit and reading about the problem with printing, I feel the fan is the likely cause of the problem your having.
I think at best, you are only getting a light breeze from the fan which is far short of what you need to keep the PEEK temperature down; I'm thinking the fan is about 40mm x 40mm from the pictures.
You could print a reducer pipe to fit a larger fan as a quick fix.
Blog - [airtripper.com]
Extrude Filament Force Sensor - [airtripper.com]
Looking at your kit and reading about the problem with printing, I feel the fan is the likely cause of the problem your having.
I think at best, you are only getting a light breeze from the fan which is far short of what you need to keep the PEEK temperature down; I'm thinking the fan is about 40mm x 40mm from the pictures.
You could print a reducer pipe to fit a larger fan as a quick fix.
Quote
Ohmarinus
Okay, I can't fix it.
The filament keeps jamming in the hotend. I've tried everything I can and only managed to improve it just a little bit.
Situation:
It works fine for about 20 minutes now, printing a Yoda statue just to test if the hotend works correctly now, and then after around 20 minutes the filament starts getting stuck in the hotend somehow. Retract works fine, but when it returns to extrusion, after just a slight turn of the gear, it occasionally just can't push the filament through. The gear slips on the filament, and when I help pushing it by hand, it doesn't work either, only when I grab it with two hands and force it through, it goes on again.
I feel that the heat inside the hotend is somehow too much. The temperature might be too high.
Also, the light of the D10 on the ramps board is flickering, but the temperature on the hotend is a constant around 205º, rarely overshoots while printing, only sometimes drops to 204º, but it's very stable so I don't know what I can change.
The nozzle/heated cartridge part, and all the brass is insulated with ceramic tape and I have a 30mm fan blowing on the PEEK part non-stop, with a fan mount and air-guide, however, the PEEK gets as hot so it kind of hurts your finger when you touch it for more than 5 seconds.
Wish I had stayed with 3mm filament how haha. I have to print a project for next monday for school and I don't feel it's going to work with this strange performance.
Edit:
Somehow, after a few minutes of helping the filament get through, it suddenly started working again. The printer finished the print very well and I have to admit, this print turned out very well somehow. Except for the outer layer not being completely consistent. When one sees the print, it might look like I have extruder problems, but to be true, I think it's a hotend problem.
Blog - [airtripper.com]
Extrude Filament Force Sensor - [airtripper.com]
|
Re: MendelMax 1.5 Marinus - My build January 25, 2014 01:36PM |
Admin Registered: 11 years ago Posts: 3,096 |
Aha, so you think that it needs to be bigger? I am currently sporting a 30x30 fan. Which was more than enough on the 3mm filament J-head.
Currently printing a new shield that holds the J-head and fan, it has a new air-flow system that acts more as a funnel instead of just a pipe and direct all the air around the J-head as much as possible with only little space between the walls of the funnel and the J-head.
If that doesn't work, I might redo the whole design with a 40x40 fan. I cannot imagine having to go bigger? I do have a 50x50 and a 60x60 laying around, but I've never seen anyone use that before to cool the J-head, so it should be doable with a smaller one if I just engineer my flow well
However, if I become desperate after this attempt, I might just put the 120x120 fan on it hahaha ;D
Currently printing a new shield that holds the J-head and fan, it has a new air-flow system that acts more as a funnel instead of just a pipe and direct all the air around the J-head as much as possible with only little space between the walls of the funnel and the J-head.
If that doesn't work, I might redo the whole design with a 40x40 fan. I cannot imagine having to go bigger? I do have a 50x50 and a 60x60 laying around, but I've never seen anyone use that before to cool the J-head, so it should be doable with a smaller one if I just engineer my flow well

However, if I become desperate after this attempt, I might just put the 120x120 fan on it hahaha ;D
|
Re: MendelMax 1.5 Marinus - My build January 25, 2014 07:20PM |
Admin Registered: 11 years ago Posts: 3,096 |
Okay!
So, I'm totally not sober anymore, but here's a video of the hotend and extruder working:
[youtu.be]
Ha! Not completely doing well and I've printed two items so far that don't require much retracting, but tomorrow I'll try another print thats more difficult to see whats happening.
Things I've changed:
- replaced the idler-axle with a full metal one, cut a short piece of smooth rod for it
- turned the print temp down from 205º to 200º
- replaced the cooling set with a new funnel type one, still a 30x30mm fan
- upped the extruder power with a 1/8th turn of the stepper screw and loosened the idler slightly because the motor was stalling, this went away when I loosened up the idler, more power and less friction = nice filament driving
- redid the brass block packaging with 2 layers of ceramic tape this time and added two extra layers of kapton that I locked with a wrapped around kapton piece (hard to explain)
The makerbot 'nut & bolt' model has printed well in the first try also, and the screw fits together, great! I haven't even had to calibrate anything lol, getting the best prints I've ever had!
Edited 1 time(s). Last edit at 01/25/2014 07:23PM by Ohmarinus.
So, I'm totally not sober anymore, but here's a video of the hotend and extruder working:
[youtu.be]
Ha! Not completely doing well and I've printed two items so far that don't require much retracting, but tomorrow I'll try another print thats more difficult to see whats happening.
Things I've changed:
- replaced the idler-axle with a full metal one, cut a short piece of smooth rod for it
- turned the print temp down from 205º to 200º
- replaced the cooling set with a new funnel type one, still a 30x30mm fan
- upped the extruder power with a 1/8th turn of the stepper screw and loosened the idler slightly because the motor was stalling, this went away when I loosened up the idler, more power and less friction = nice filament driving
- redid the brass block packaging with 2 layers of ceramic tape this time and added two extra layers of kapton that I locked with a wrapped around kapton piece (hard to explain)
The makerbot 'nut & bolt' model has printed well in the first try also, and the screw fits together, great! I haven't even had to calibrate anything
 lol, getting the best prints I've ever had!
Edited 1 time(s). Last edit at 01/25/2014 07:23PM by Ohmarinus.
|
Re: MendelMax 1.5 Marinus - My build January 25, 2014 08:17PM |
Registered: 11 years ago Posts: 40 |
It was a smart move to improve the extruder idler tension and stepper torque, since those parts of the extruder is key to properly assessing the hot end condition.
Now that the filament is flowing consistently, jamming may now be less of an issue.
Happy to know that you are having better success with the printing now.
Blog - [airtripper.com]
Extrude Filament Force Sensor - [airtripper.com]
Now that the filament is flowing consistently, jamming may now be less of an issue.
Happy to know that you are having better success with the printing now.
Blog - [airtripper.com]
Extrude Filament Force Sensor - [airtripper.com]
|
Re: MendelMax 1.5 Marinus - My build January 26, 2014 05:53AM |
Admin Registered: 11 years ago Posts: 3,096 |
Yeah, it's doing pretty well, however the extruder was not the problem 
The extruder underperformed because of the problem with the hotend. If the hotend didn't have this jamming, the extruder would've already worked fine. I tested the pull force and it was already fenomenal! That MK8 gear is great. Thanks for pointing that out to us.
I feel like it now, together with better heat-management, it will simply push the filament through even if it's catching inside of the hotend. My expectations are that extrusion will also become less difficult when the machine is used more, but meanwhile I'm thinking of a way to make a better hotend cooler. I've found out that the fan will spin slower when the heatbed and hotend are heating. They heat incredibly fast so I might even lower the power on them. The heatbed uses bangbang and the hotend is configured with PID, however it still overshoots a lot when heating up, but when it's on core target temp, it stays at core target temp. I've also made sure the thermal ceramic insulation has two layers over the thermistor hole to keep all the heat in there for a more stable temperature and better, more realistic measurement.
|
Re: MendelMax 1.5 Marinus - My build January 28, 2014 06:17PM |
Admin Registered: 11 years ago Posts: 3,096 |
Okay, so far the redesign I did on the fan-guide is still paying off. Having zero issues with printing and still using the 30mm fan! 
Right now I will not change the setup of the hotend holder, and extrusion is going pretty well.
I'm printing with 1.75mm black PLA from Repraper and it behaves MUCH better than the 3mm white PLA I was using before. It is stronger, has better layer adhesion, and the layer finish on the sides looks much better. This might also have to do partially with the whole redesign of the X-system and hotend system, but I feel like it's also just the filament thats better.
The black PLA also keeps the kapton print surface much cleaner than the white PLA did. Now I don't have to clean it every three prints, so that really is an improvement.
Also, I've designed a new Z-height calibration tool that I have clamped on the old Z-rod clamp that I don't use anymore, because the X-end system is taken from a Prusa i3 and on a Prusa the Z-rod is resting on top of the Z-motors. Thus it is closer to the threaded rod, this renders the Z-clamp on the side of the Z-motor holder useless. However, the Z-leveling system I've made, perfectly uses this obsolete area.
Below some images of prints done with the new setup and improvements I've made:
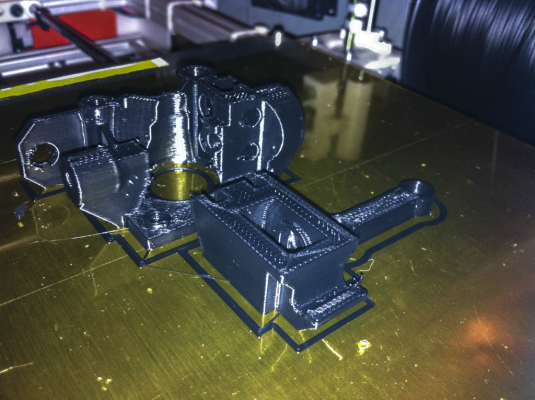
Endstop_Z-height setting
Hotend carriage
Airtrippers beautiful extruder
A print of the extruder in black PLA (yes the retraction settings have still to be done!)
Edited 1 time(s). Last edit at 01/28/2014 06:19PM by Ohmarinus.
|
Re: MendelMax 1.5 Marinus - My build February 07, 2014 03:28PM |
Admin Registered: 11 years ago Posts: 3,096 |
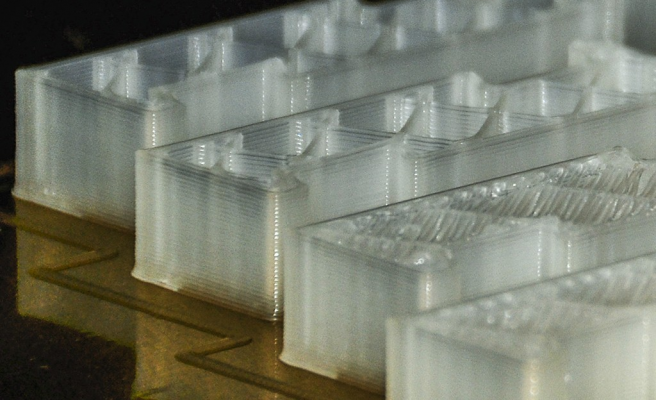
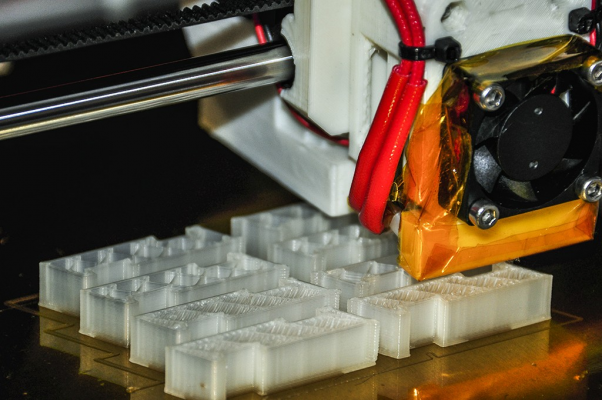
Okay, I've been working on the machine again, printed a new extruder again, same design as before, but it was printed a bit more precise, which causes my new prints to be more precise too.
As can be seen in the following images of a print, one overview picture and one zoomed-in photo of the line consistency and quality The only thing that wasn't right, was the initial bed leveling, as can be seen, the bottom layers are wider than intended.
Zoom-in:
Overview:
As can be seen in the following images of a print, one overview picture and one zoomed-in photo of the line consistency and quality
 The only thing that wasn't right, was the initial bed leveling, as can be seen, the bottom layers are wider than intended.
Zoom-in:
Overview:
|
Re: MendelMax 1.5 Marinus - My build March 08, 2014 08:50AM |
Admin Registered: 11 years ago Posts: 3,096 |
The hotend has functioned well for a month now, but I tried to print something big today and after an hour of printing, the PLA started jamming again and the extruder started skipping steps.
I tried to keep it printing as I could, but after a while it was clear to me the layers are not bonding well enough to go on.
The first part of the print is literally FLAWLESS, but then suddenly it just started going weird after an hour. I am so done with these parts going wrong.
For now I am going to replace the 30mm fan with a 40mm fan or maybe even bigger (50mm or 60mm), I have designed a step-up ring so I can keep my current J-head cooling device and only increase the airflow.
I will very unprofessionally cut the wires and put on a connector so it's easier to switch and try-out different fans.
If even that fails, I am going to give up on printing with 1.75mm. I've spend a big amount of money on converting from 3mm to 1.75mm because I wanted to try it out, but now it's clear to me that it's not everything.
|
Re: MendelMax 1.5 Marinus - My build April 20, 2015 02:13PM |
Registered: 11 years ago Posts: 25 |
Ohmarinus,
Curious How did you end up adapting a the i3 Z carriage assembly onto your MM1.5?
What parts did you choose and can/could/would you provide Pics and or links.
Looking to change my Z assembly from the typical MM style to the i3 style . Which looks like you accomplished.
Which implies the Z carrage can now be selected from the i3 family.
TIA.
Sam
SamR
MendelMax... (A build for ever in process... ... ... will it/ Is it ever done!?) yea, Its done alright its sitting collecting dust!
Moved onto a Creality CR-10
|
Re: MendelMax 1.5 Marinus - My build April 23, 2015 08:32PM |
Registered: 8 years ago Posts: 3 |
|
Re: MendelMax 1.5 Marinus - My build June 07, 2019 03:51PM |
Admin Registered: 11 years ago Posts: 3,096 |
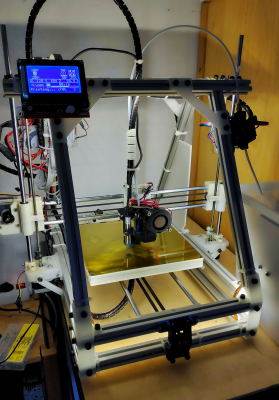
After years I'm back to printing with my MendelMax 1.6 (yeah, no 1.5 anymore). It's running so smooth and I've changed a lot! (after having it break down on me many a times after moving to another home and not using it for over two years);
In short:
- E3D v6 hotend (the Merlin crapped out on me and never really performed that good honestly)
- Fully covered bed with kapton, also replaced the PTFE bushings for LM8UU's
- New Hotend carriage with a new print cooler
- TMC2208 UART drivers for the X and Y axes
- Filament spool drybox with bowden feedtube
- Fixed heated bed instead of spring loaded, because;
- Inductive proximity sensor for ABL (9 points), because;
- Full aluminium printbed surface with kapton on it
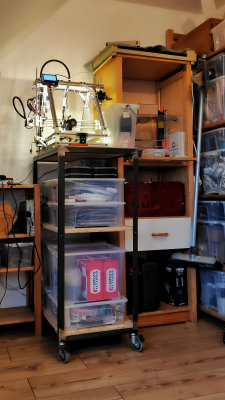
- Full metal printer cabinet with wheels (still have to add subdivisions and put all my materials in the cabinet)
- LED lighting in the extrusions
- Full graphical LCD
- Probably a lot more that I forgot
Here it is:
Edited 1 time(s). Last edit at 06/07/2019 03:52PM by Ohmarinus.
http://www.marinusdebeer.nl/
|
Re: MendelMax 1.5 Marinus - My build June 11, 2019 06:03AM |
Admin Registered: 11 years ago Posts: 3,096 |
Meanwhile I've been testing the print quality and must say it's looking really good so far with al the new changes. I've also built a 3D-print cabinet to hold all the boxes related to 3D-printing, parts for new machines and I'm finally back to finishing the partially selfbuilt Prusa MK2S. I still want to put the filament drybox in this cabinet and have the filament run through the plate that the printer is standing on. Also, I want LED lighting in the cabinet and the PSU of the printer needs to be hidden in the cabinet as well.
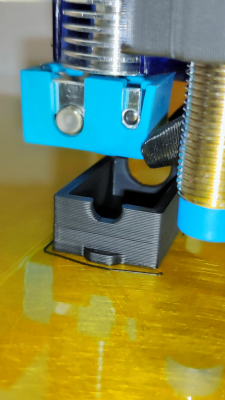
Closeup of print
Cabinet
http://www.marinusdebeer.nl/
Closeup of print
Cabinet
http://www.marinusdebeer.nl/
Sorry, only registered users may post in this forum.
