MechaBits KraftWerk'r
Posted by MechaBits
|
Re: MechaBits KraftWerk'r March 02, 2019 11:02AM |
Registered: 8 years ago Posts: 1,671 |


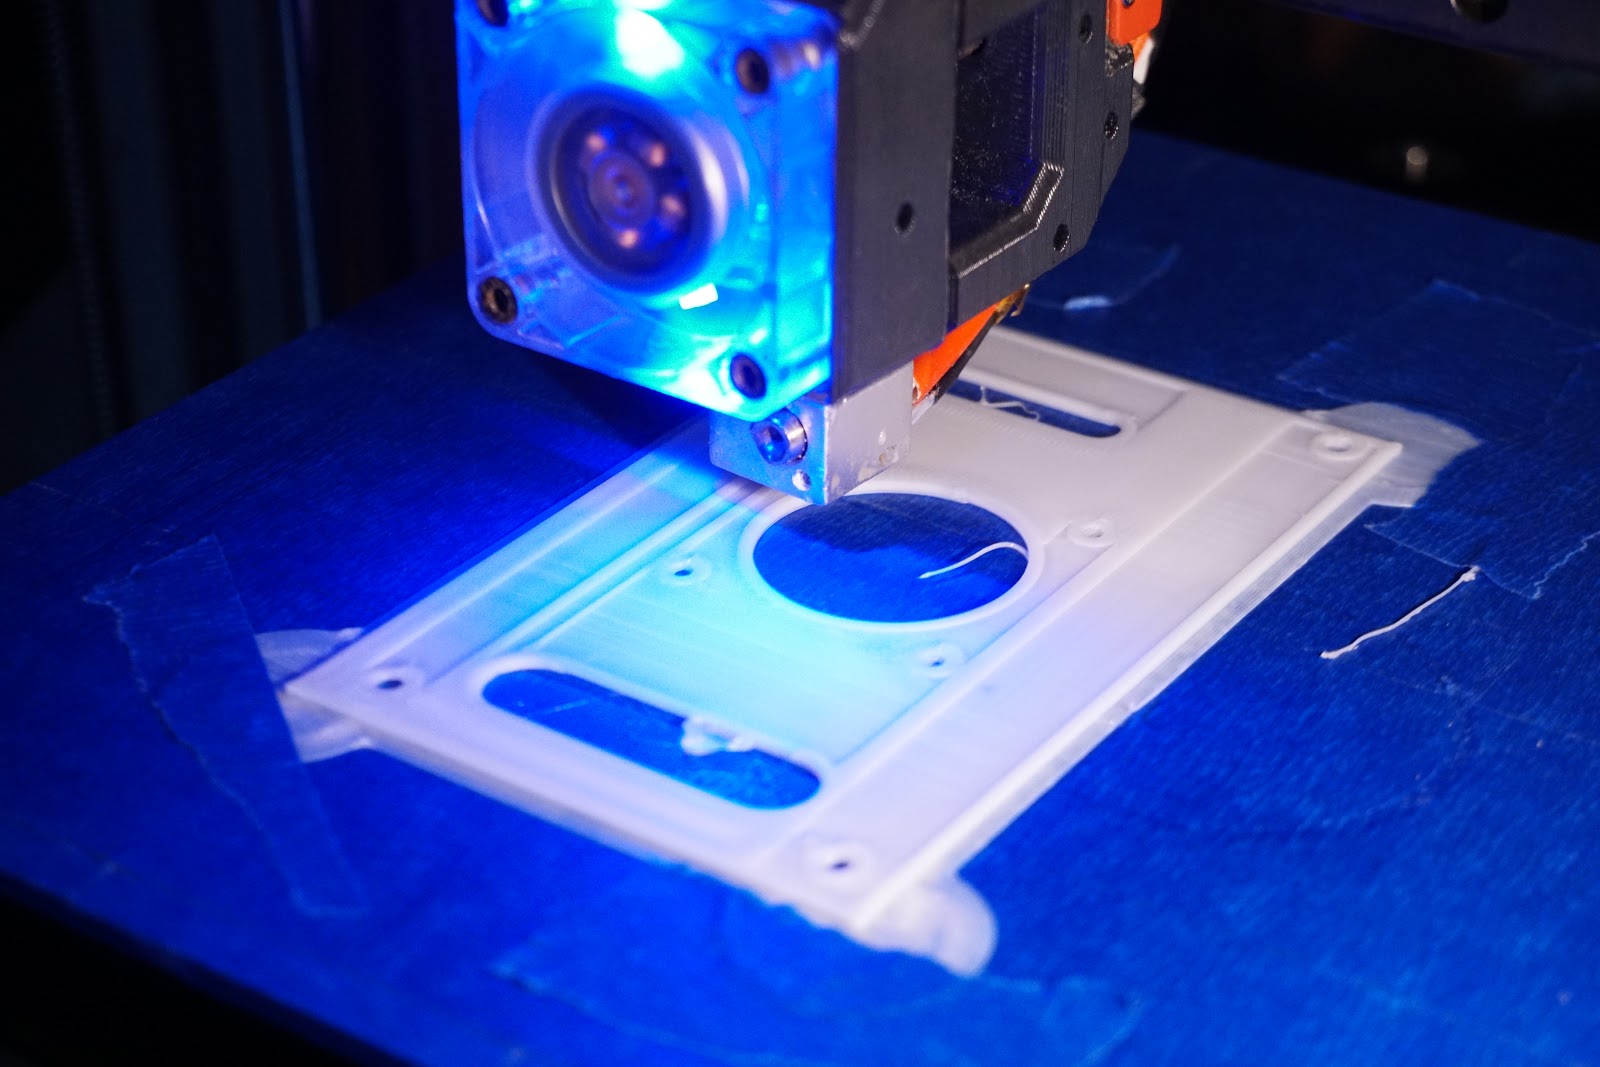


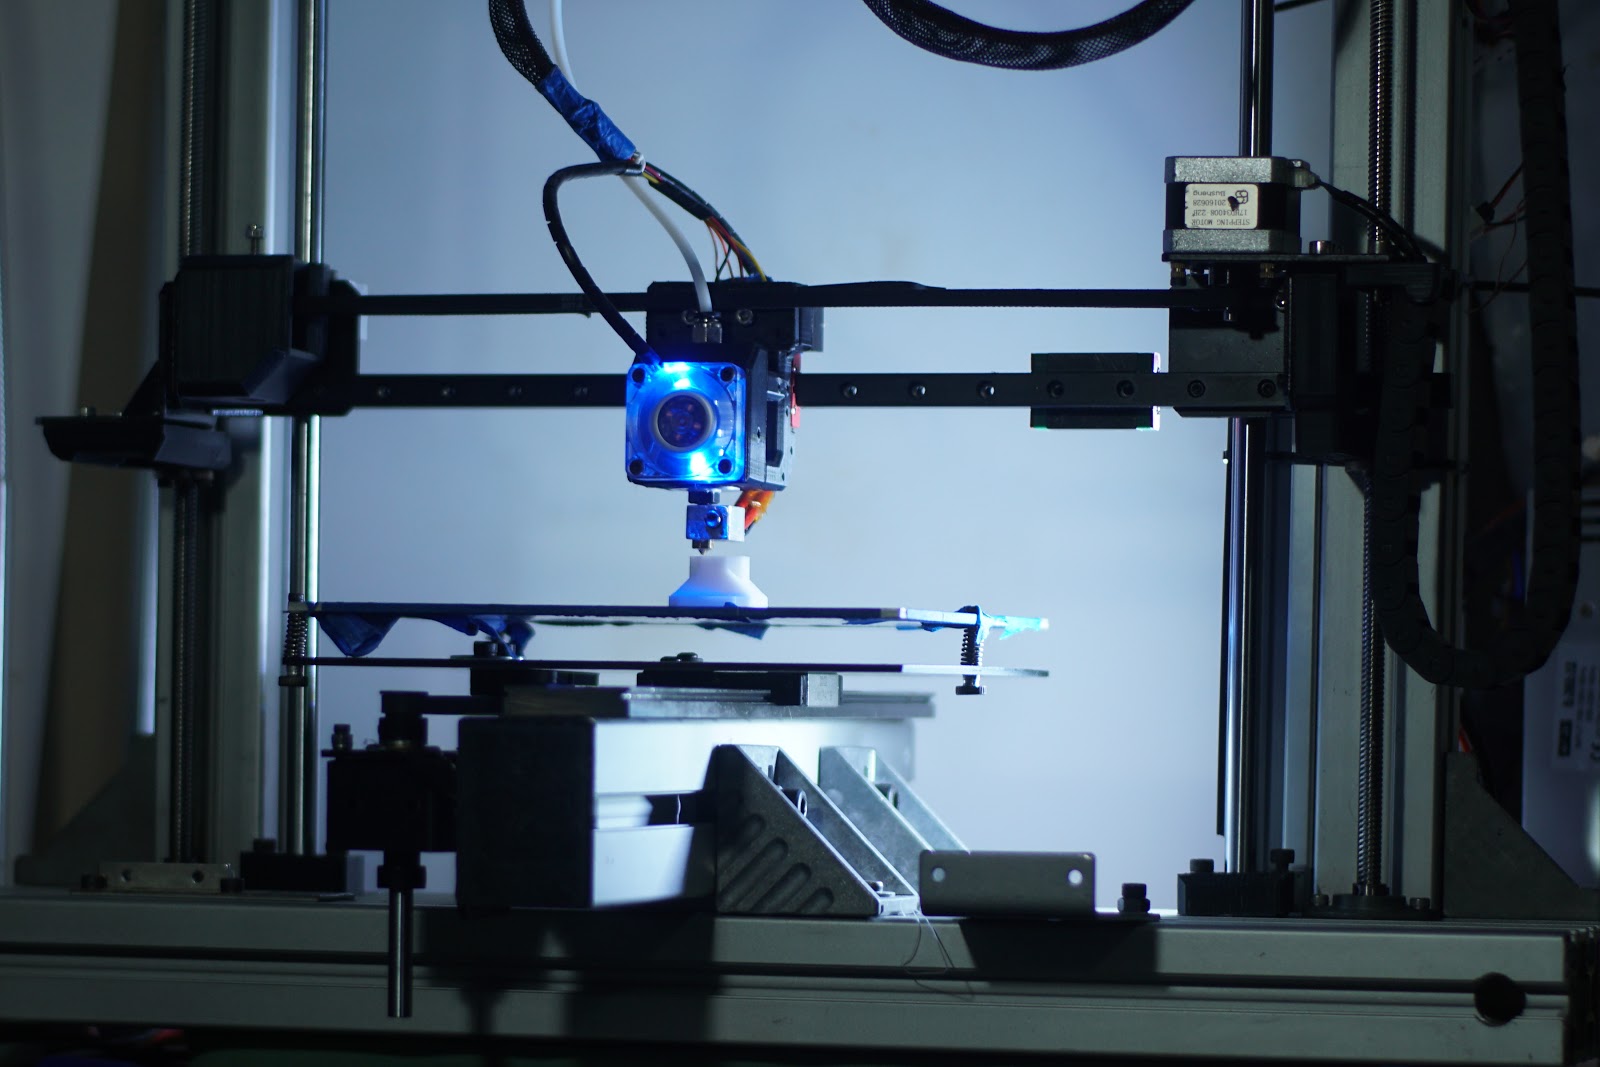
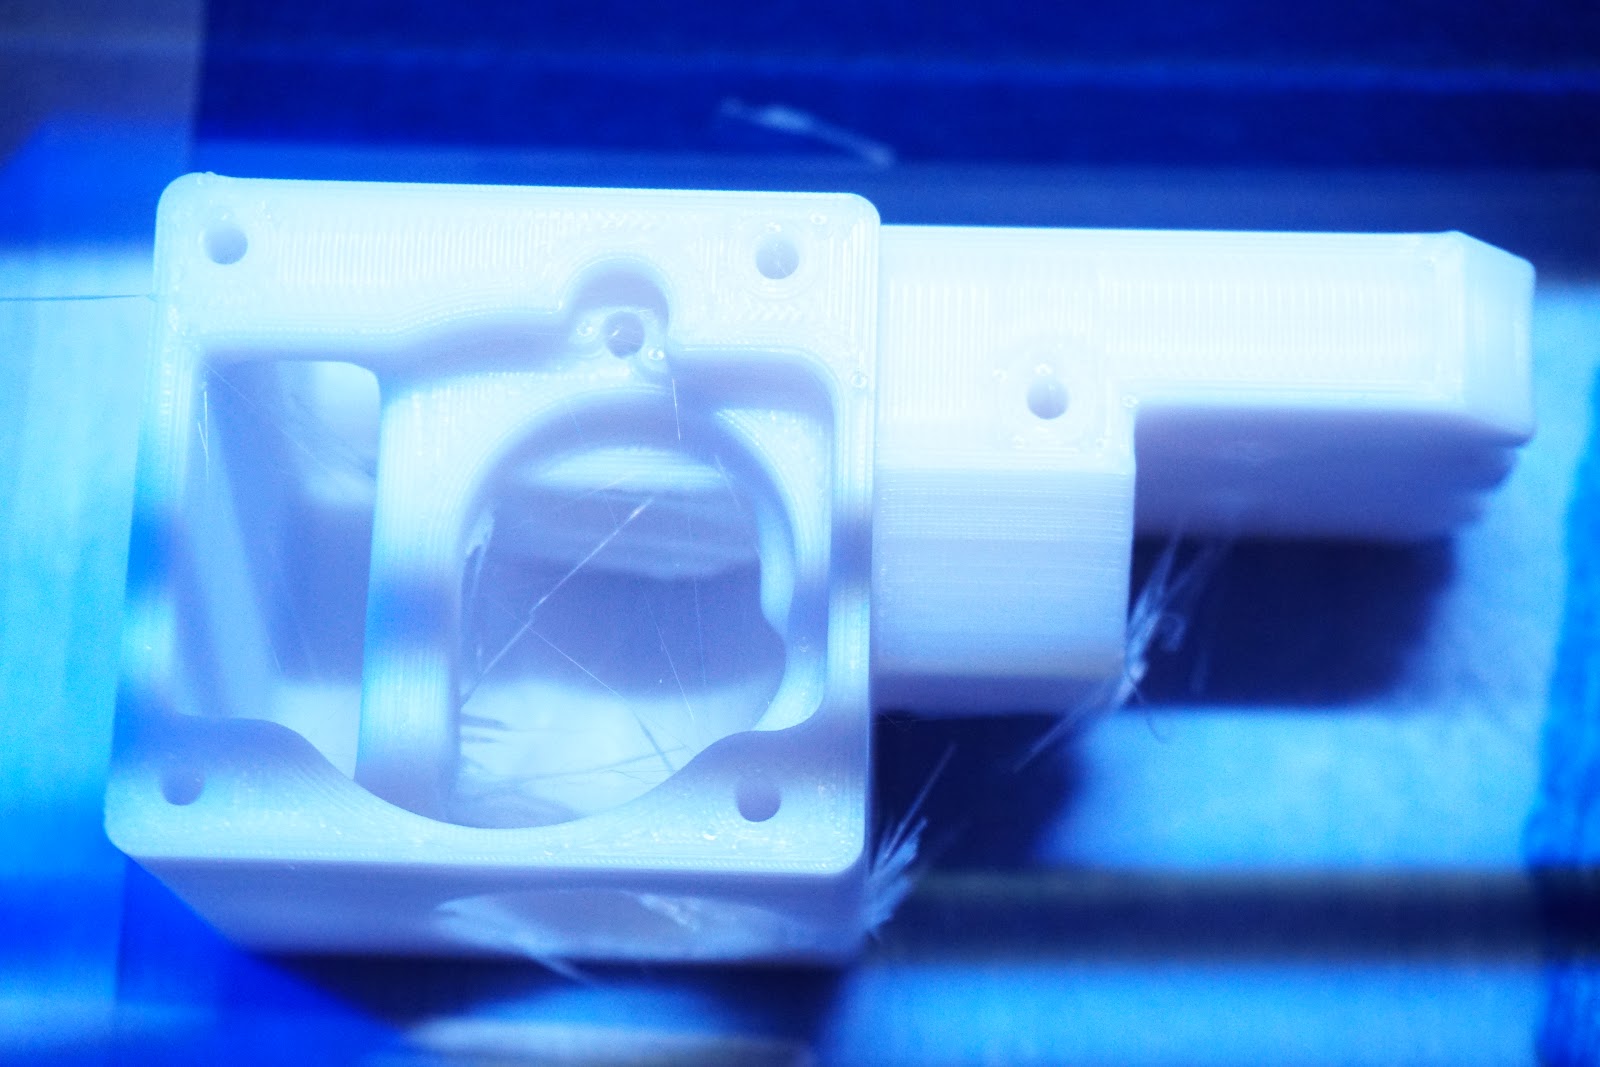
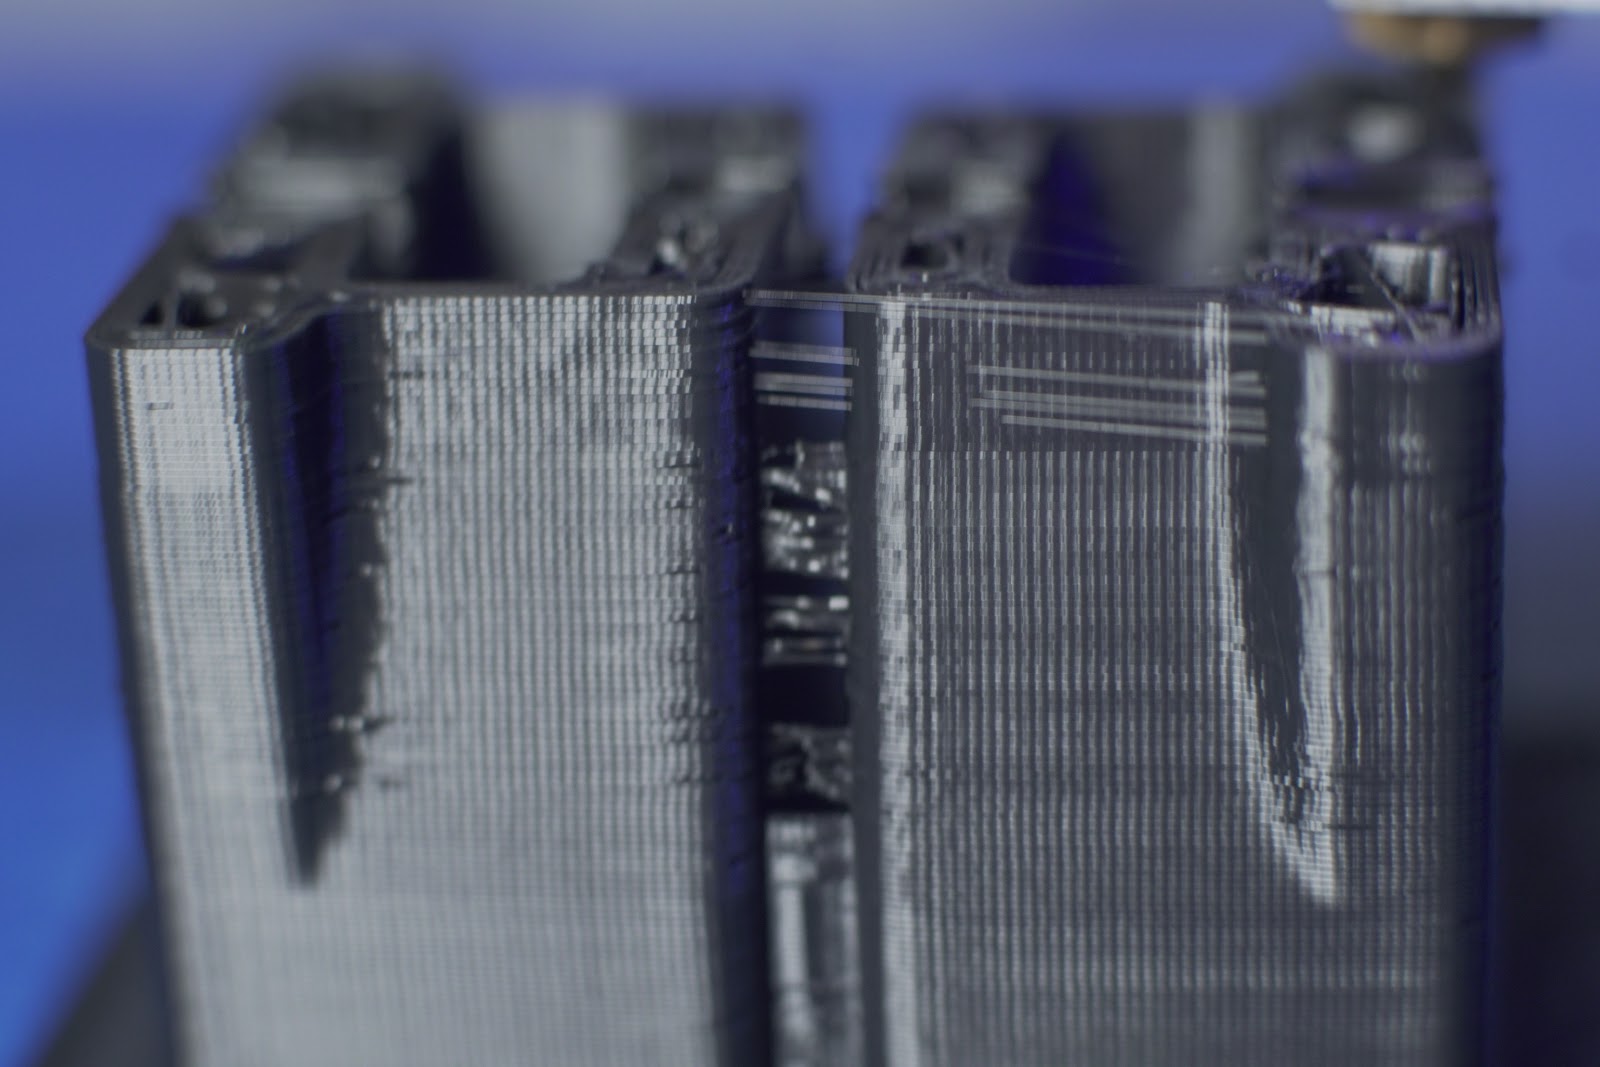
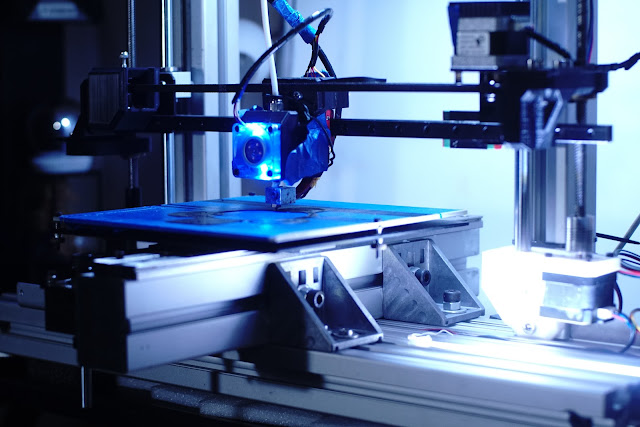
Finally get the printer dialed in for this white material, it's like nylon fishing wire, printing at 210, but I have a feeling it needs a little more heat, i'll be happier when it's all gone, thought it might be good for some arty pieces with moody lighting but the time it takes to print something big means I must really want the object/item...and so far that must have item eludes me...


|
Re: MechaBits KraftWerk'r March 02, 2019 12:35PM |
Registered: 6 years ago Posts: 1,007 |
|
Re: MechaBits KraftWerk'r March 02, 2019 01:37PM |
Registered: 8 years ago Posts: 1,671 |
havent got a clue, bought it cheap on a similar reel to excelvan but when it came with no airtight bag I knew it was dodgy and it's been waiting for a use for a few months in no airtight container, have had a similar type of duff roll before in grey, like fudge, but doesnt seem to have any stickyness,, but on the last print I didnt need big feet, used a little extra tape incase...but think it would have been fine without, was having a problem with the small 3mm holes on first layer, and blob buildup but that was sorted on recent print.
|
Re: MechaBits KraftWerk'r March 28, 2019 02:54PM |
Registered: 8 years ago Posts: 1,671 |


Edited 2 time(s). Last edit at 03/28/2019 08:57PM by MechaBits.
|
Re: MechaBits KraftWerk'r April 05, 2019 08:14PM |
Registered: 8 years ago Posts: 1,671 |


Bad 3DPrinter Blames Bad Filament...and while I still believe this stuff aint perfect and won't be buying it again(unless in error) at least now towards the end of the roll I'm getting some useful prints. The Ramps box had a severe warp despite trying to minimize it, but in the end everything still fitted and the lid/design helps hold it all together better, a little better than the last case, roll on new roll of stuff.
|
Re: MechaBits KraftWerk'r April 10, 2019 10:59PM |
Registered: 8 years ago Posts: 1,671 |


|
Re: MechaBits KraftWerk'r April 11, 2019 10:04AM |
Registered: 6 years ago Posts: 60 |

|
Re: MechaBits KraftWerk'r April 11, 2019 10:45AM |
Registered: 8 years ago Posts: 1,671 |
first layer was far too close and i was adjusting on the fly, but the rest was 1.02 on the extrusion, I find the .2 layers need a little extra but normally 1.01 but I wasnt watching when it got to the 10mm & 15mm layer height so a little over there.
Edited 1 time(s). Last edit at 04/12/2019 07:32AM by MechaBits.
Edited 1 time(s). Last edit at 04/12/2019 07:32AM by MechaBits.
|
Re: MechaBits KraftWerk'r April 29, 2019 10:06AM |
Registered: 8 years ago Posts: 1,671 |
Makes a change to print some things not printer related, and after a long gap without printing anything I manage 2 new projects projects in a week...well old projects just resurrected, need to finish the roll before the summer arrives
Edited 1 time(s). Last edit at 04/30/2019 06:33AM by MechaBits.
|
Re: MechaBits KraftWerk'r July 03, 2019 01:13AM |
Registered: 8 years ago Posts: 1,671 |
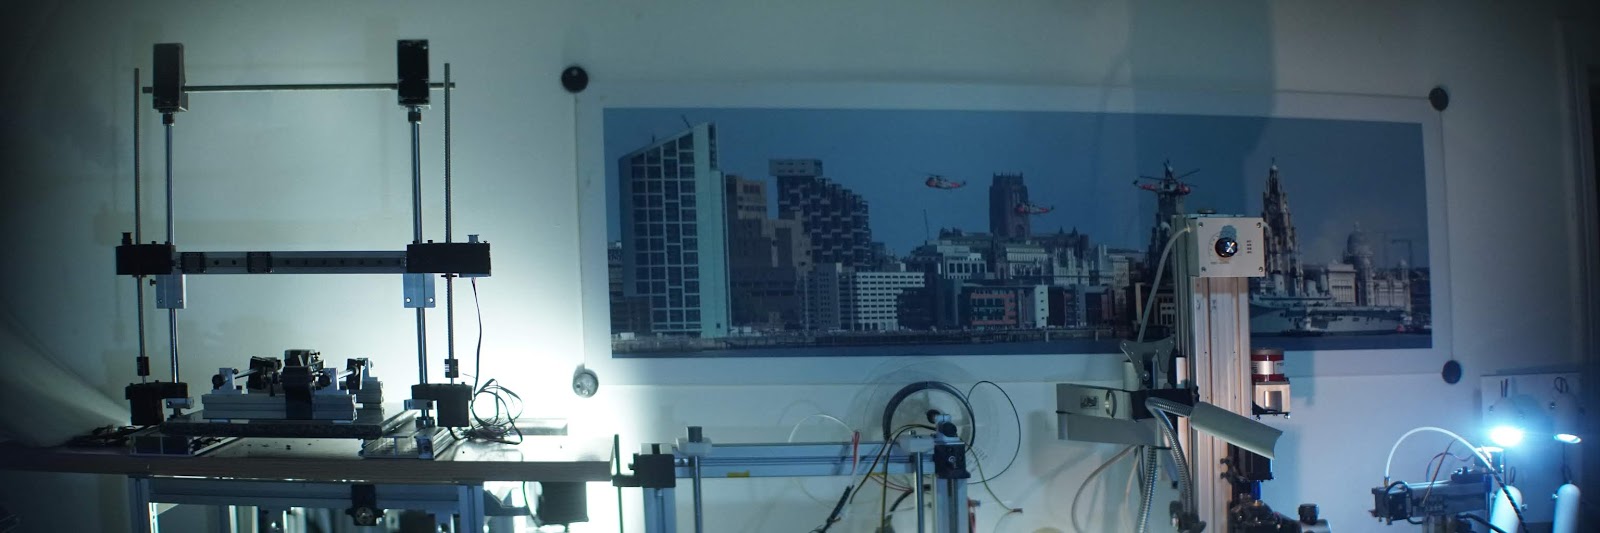

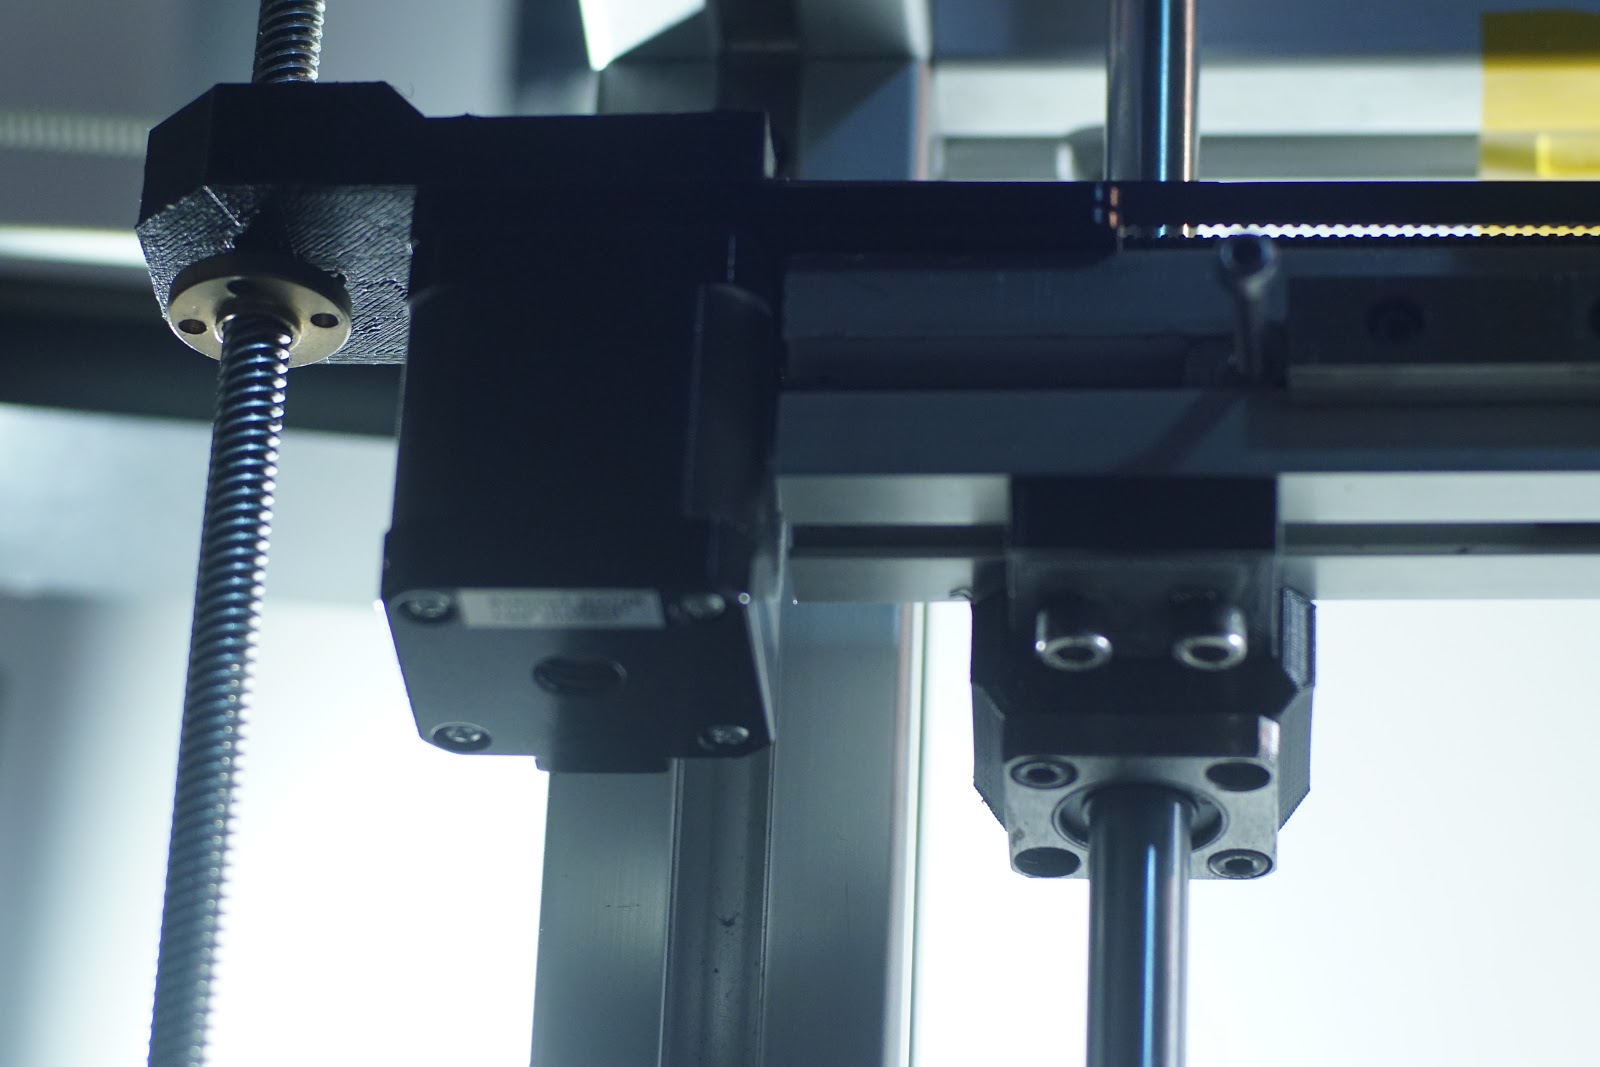
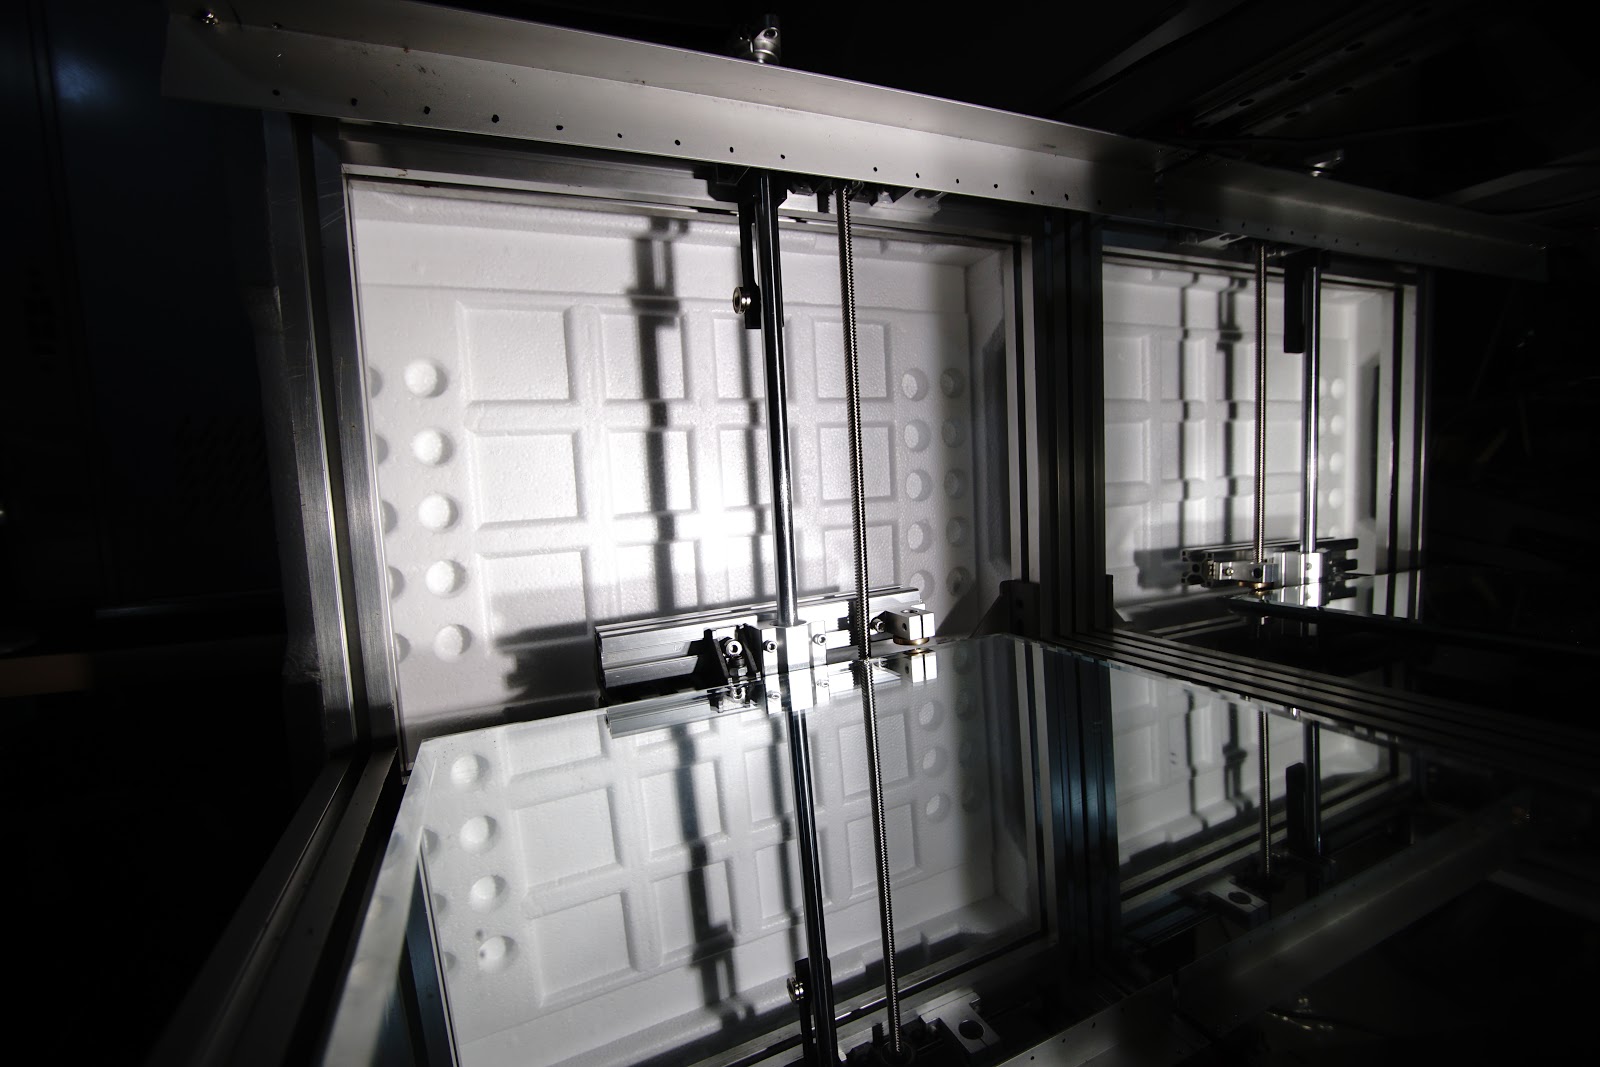
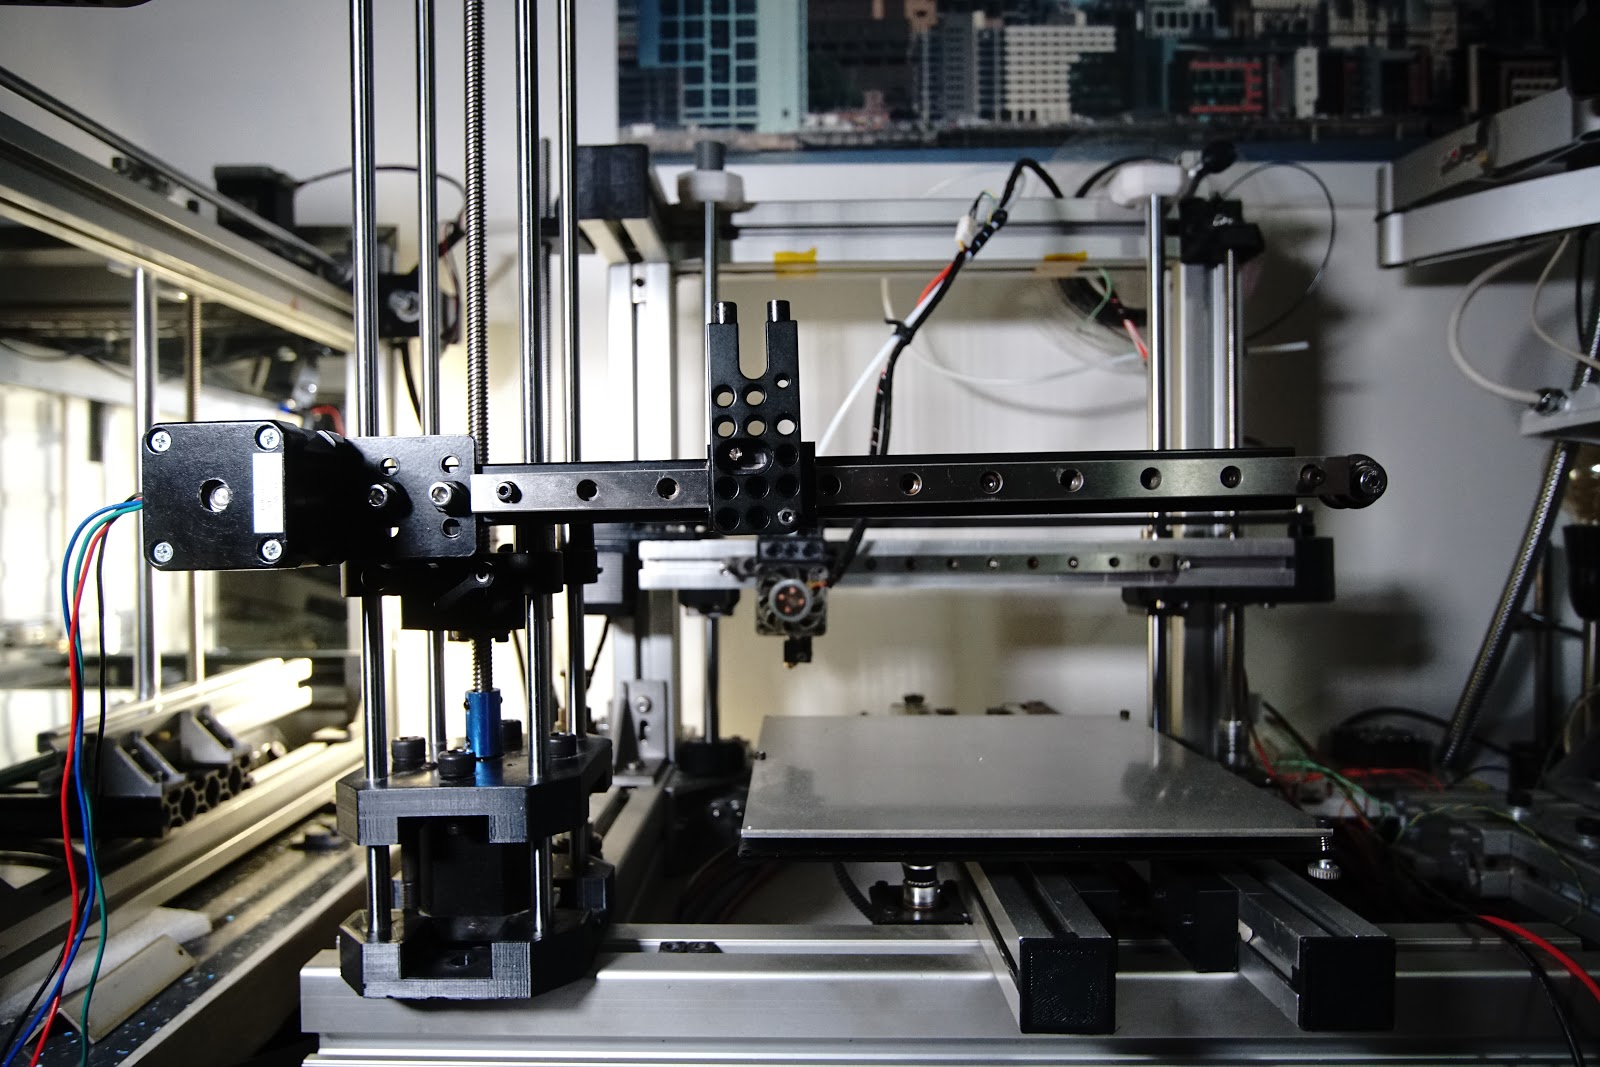
What we have here is what could go into that black frame, but I decided to build it out side of the cube to see how it went together. Ideally I wanted the 12mm rods sunk into a 50mm or so worktop thats sitting at the bottom of the cube, and I would use the 12mm rod ends to tidy & strengthen that. But the way it is here in the pictures it is surprisingly sturdy. If it goes into the black tube cube then obviously i'll make something to hold the top of the Z Rods, I've done a few ideas but still putting that on hold till new ideas come or I decide what I want.
For an even more minimal look i'd rather have the rodends for the bed also bolted straight to the worksurface/base rather than to the profile, though the profile Z is on could be also bolted to the base, and the profile the beds on could bolt to that profile, I think I wold prefer to see it without all those extras. The parts are a bit warped but seem to do the job, maybe get a heatgun on them, I've revised the X & Y ends for alternate material(metal) and alternate Z Base units where designed to bolt to the base but print time for those was more than i could be bothered with so cut them down in size.
I could add some buttressing to the profile to stop them from turning if I need to(though I wish the motors where also embedded into the worksurface). I decided to just rotate the left over rod support on the Z to stop motor rotation. Final part needed is the hotend and I have no idea which hotend to put up there, maybe another hex hotend?, so no idea yet on the mount. Will it ever make it into the BlackCube?
Edited 3 time(s). Last edit at 07/04/2019 04:15PM by MechaBits.
|
Re: MechaBits KraftWerk'r August 13, 2019 05:19AM |
Registered: 8 years ago Posts: 1,671 |


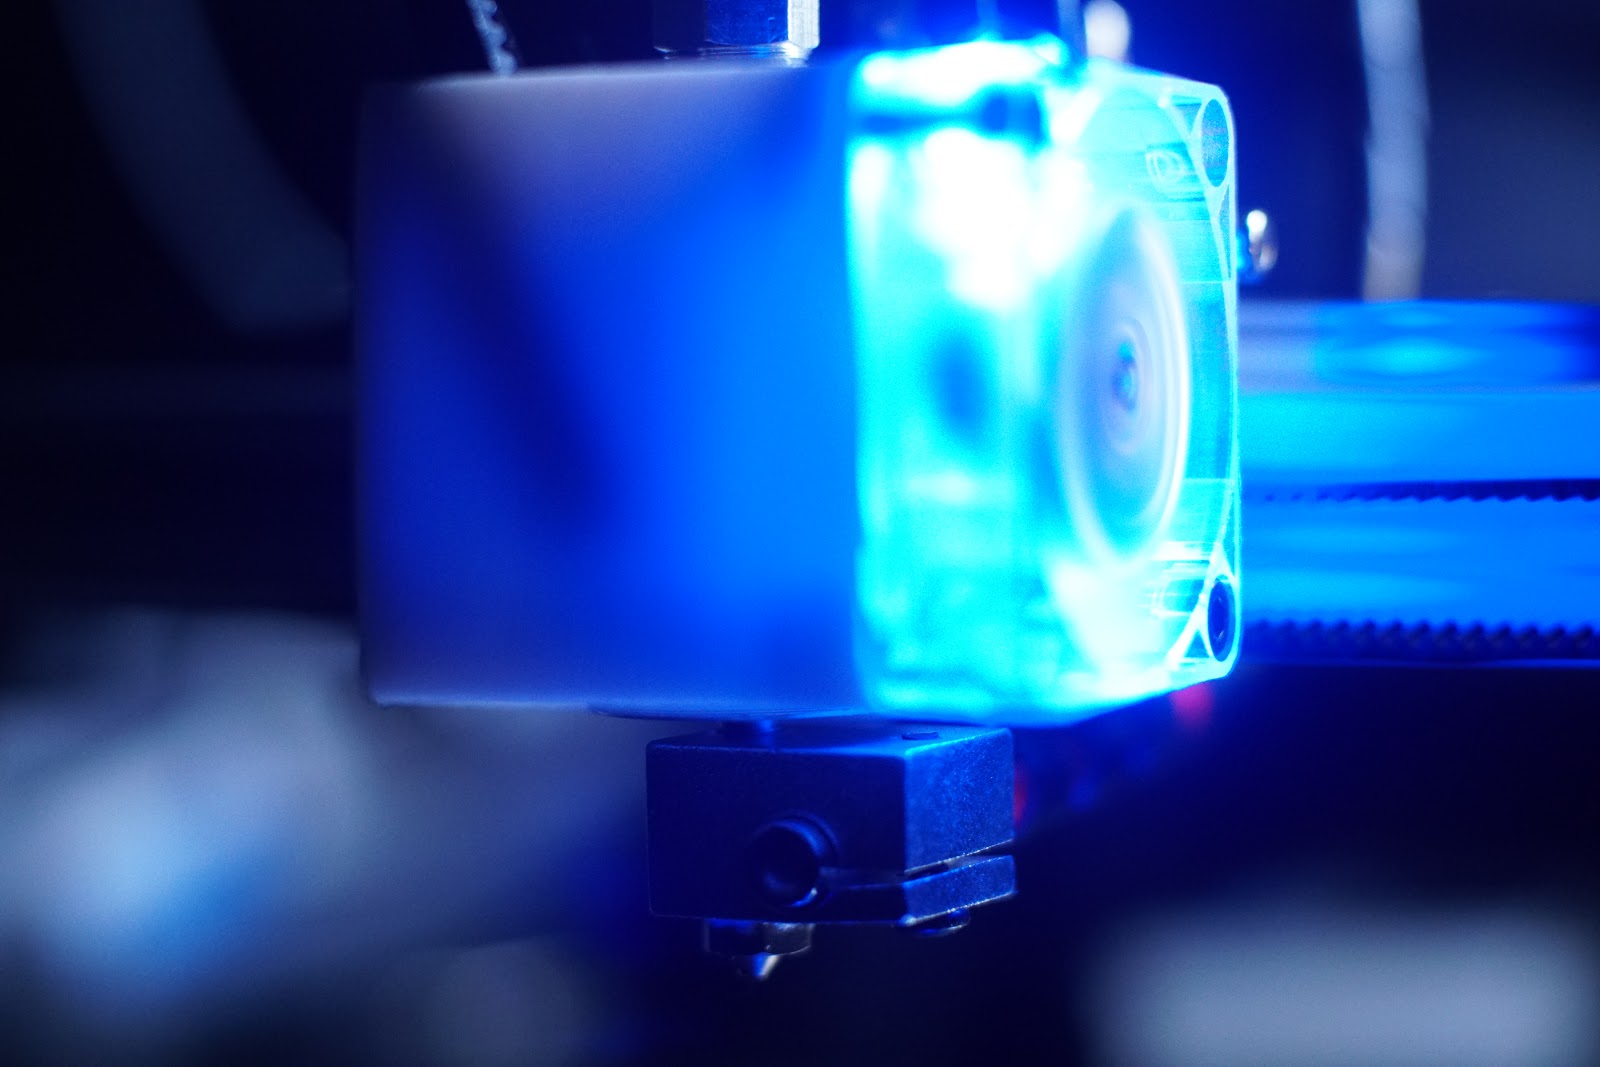
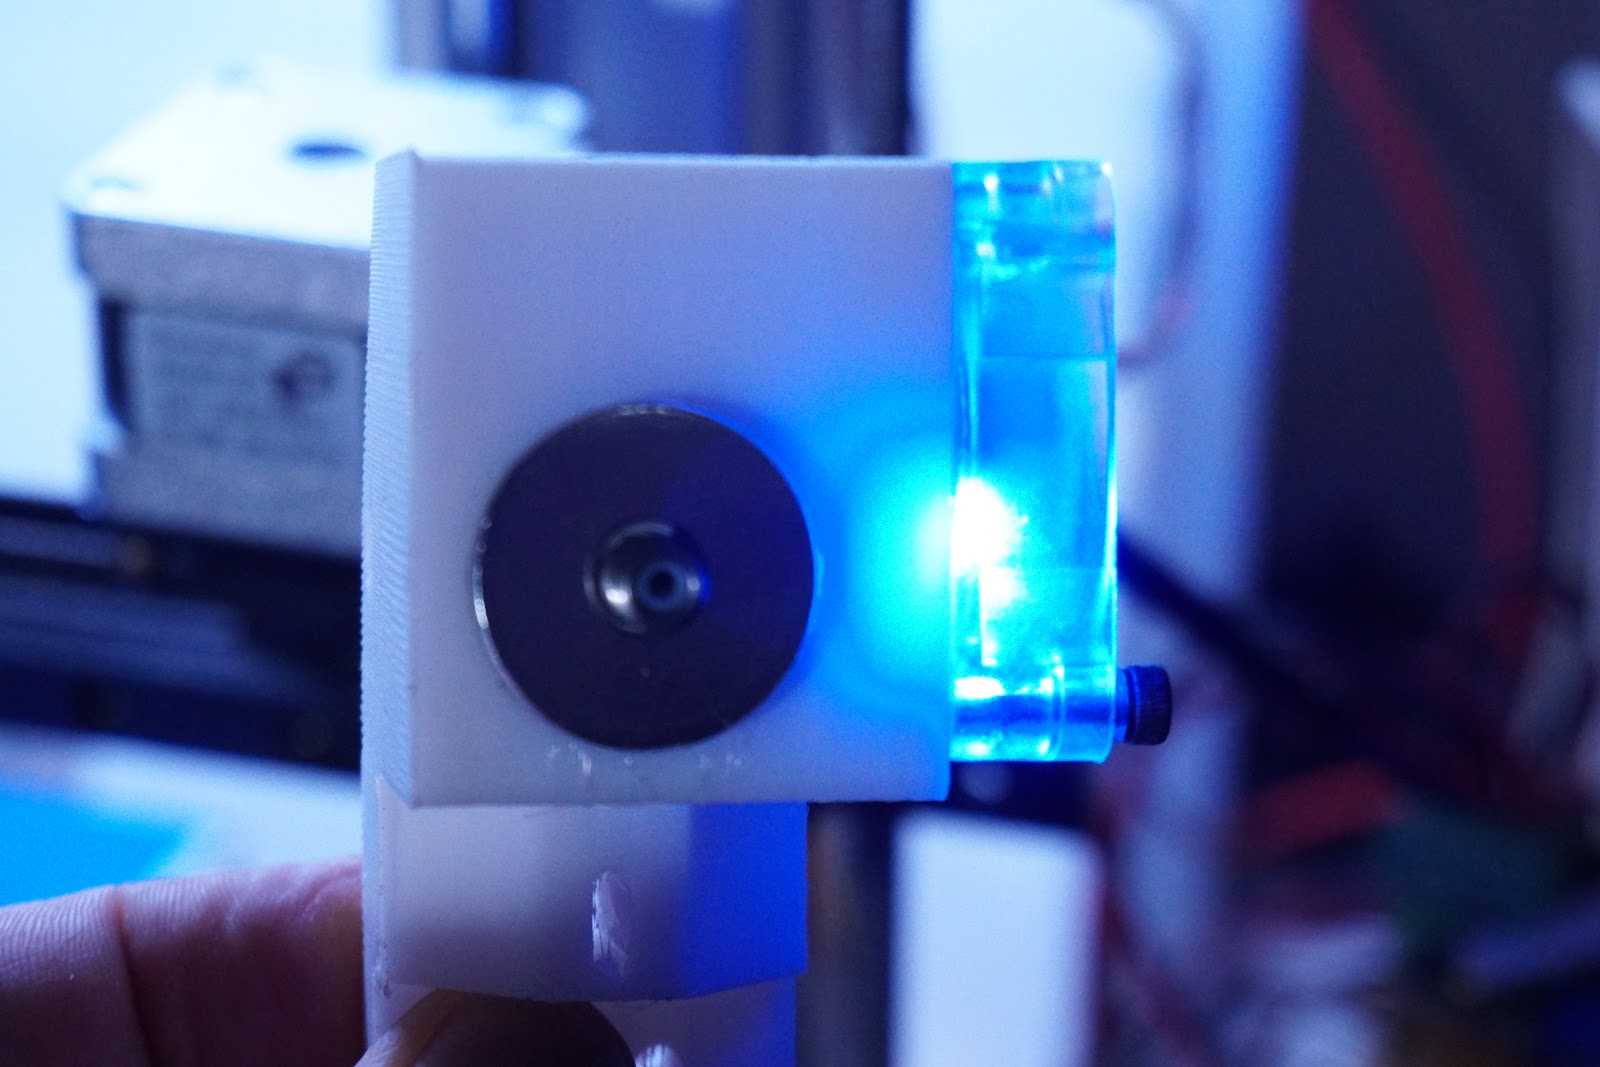
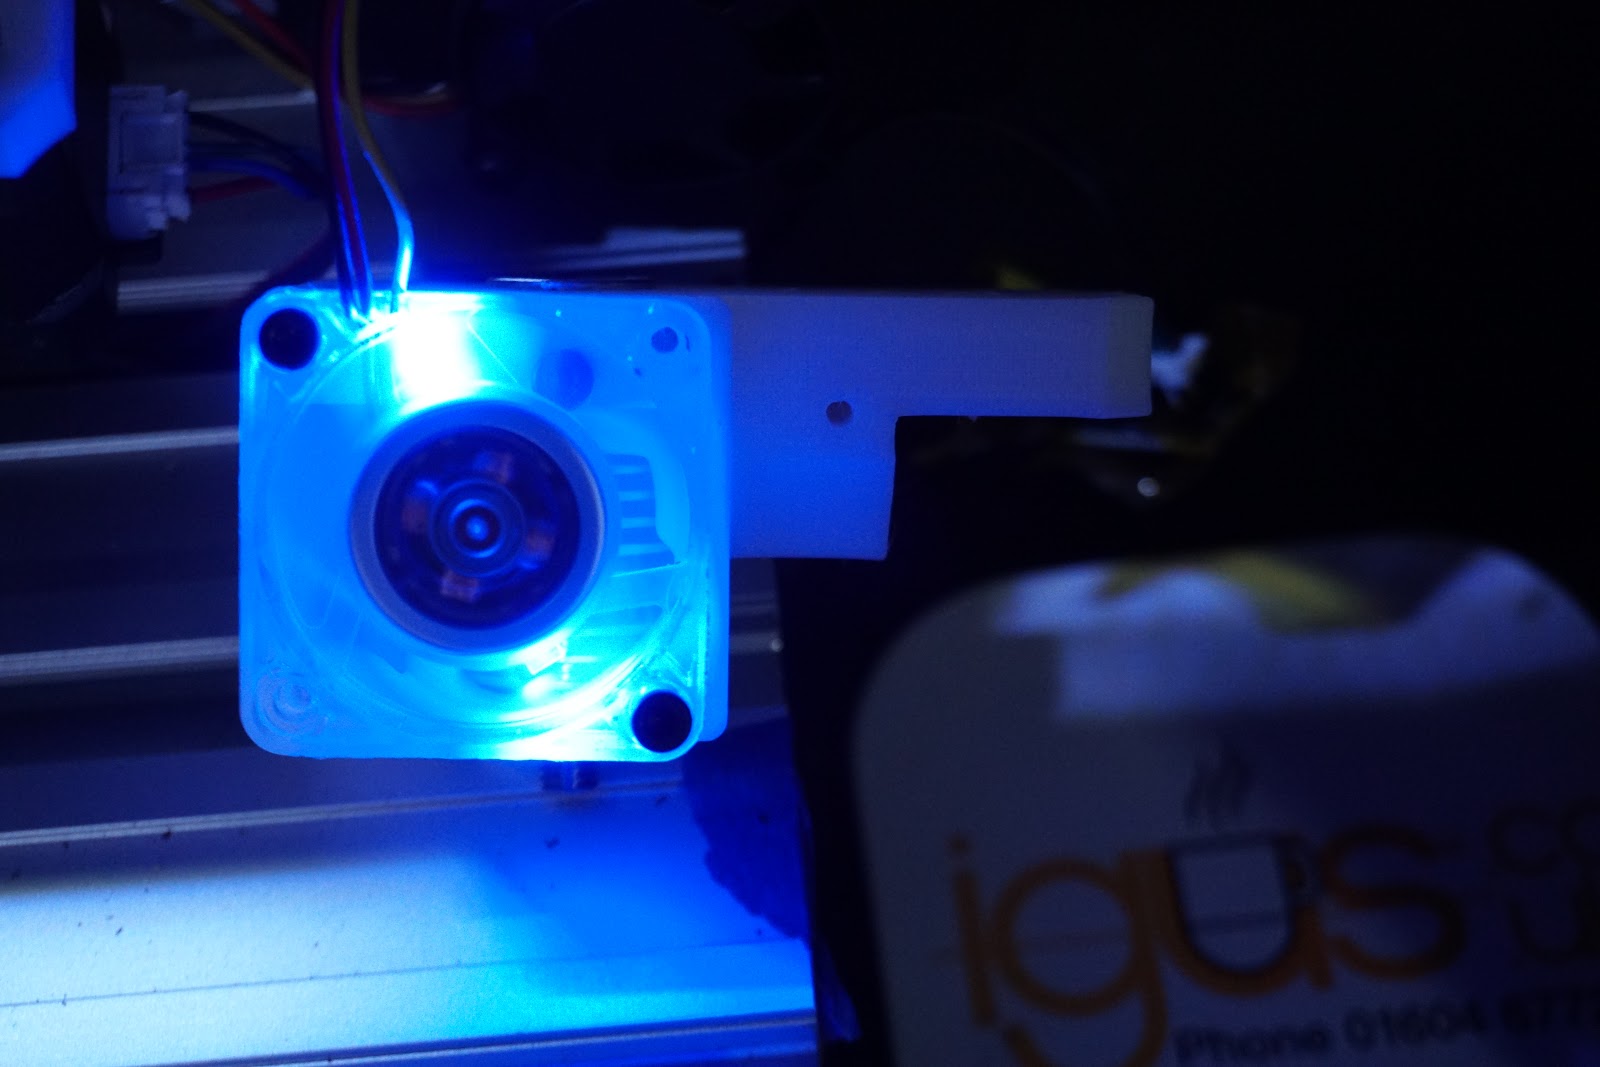
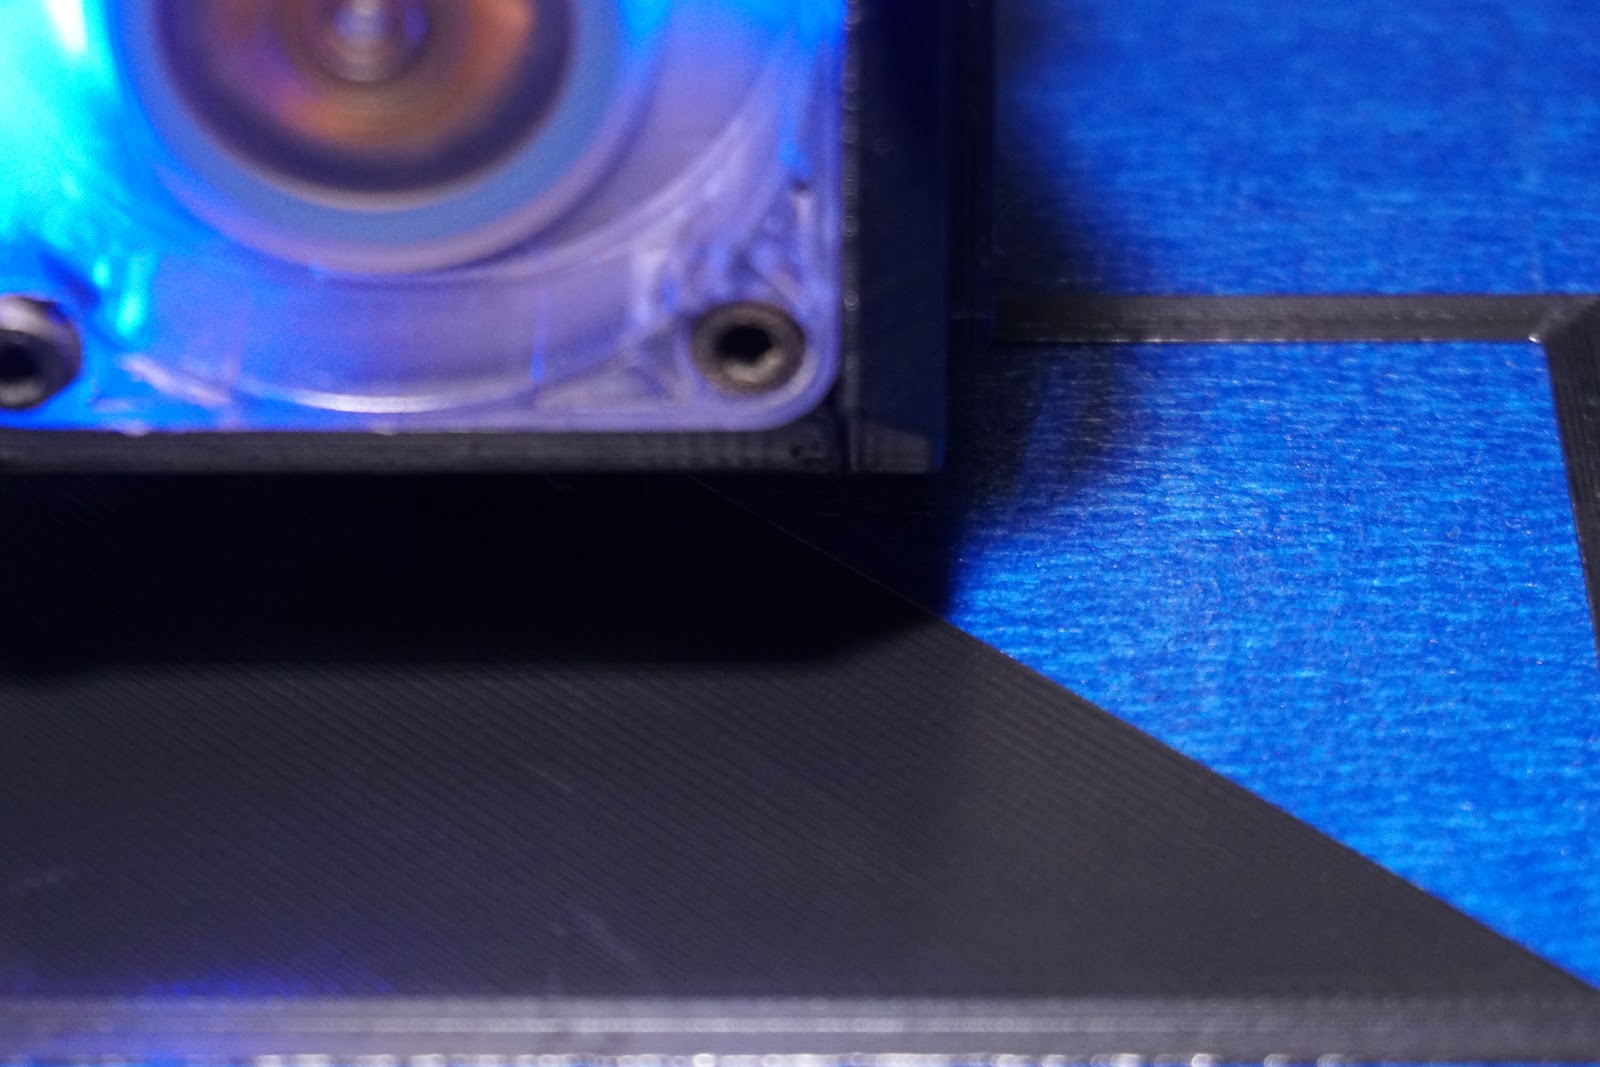
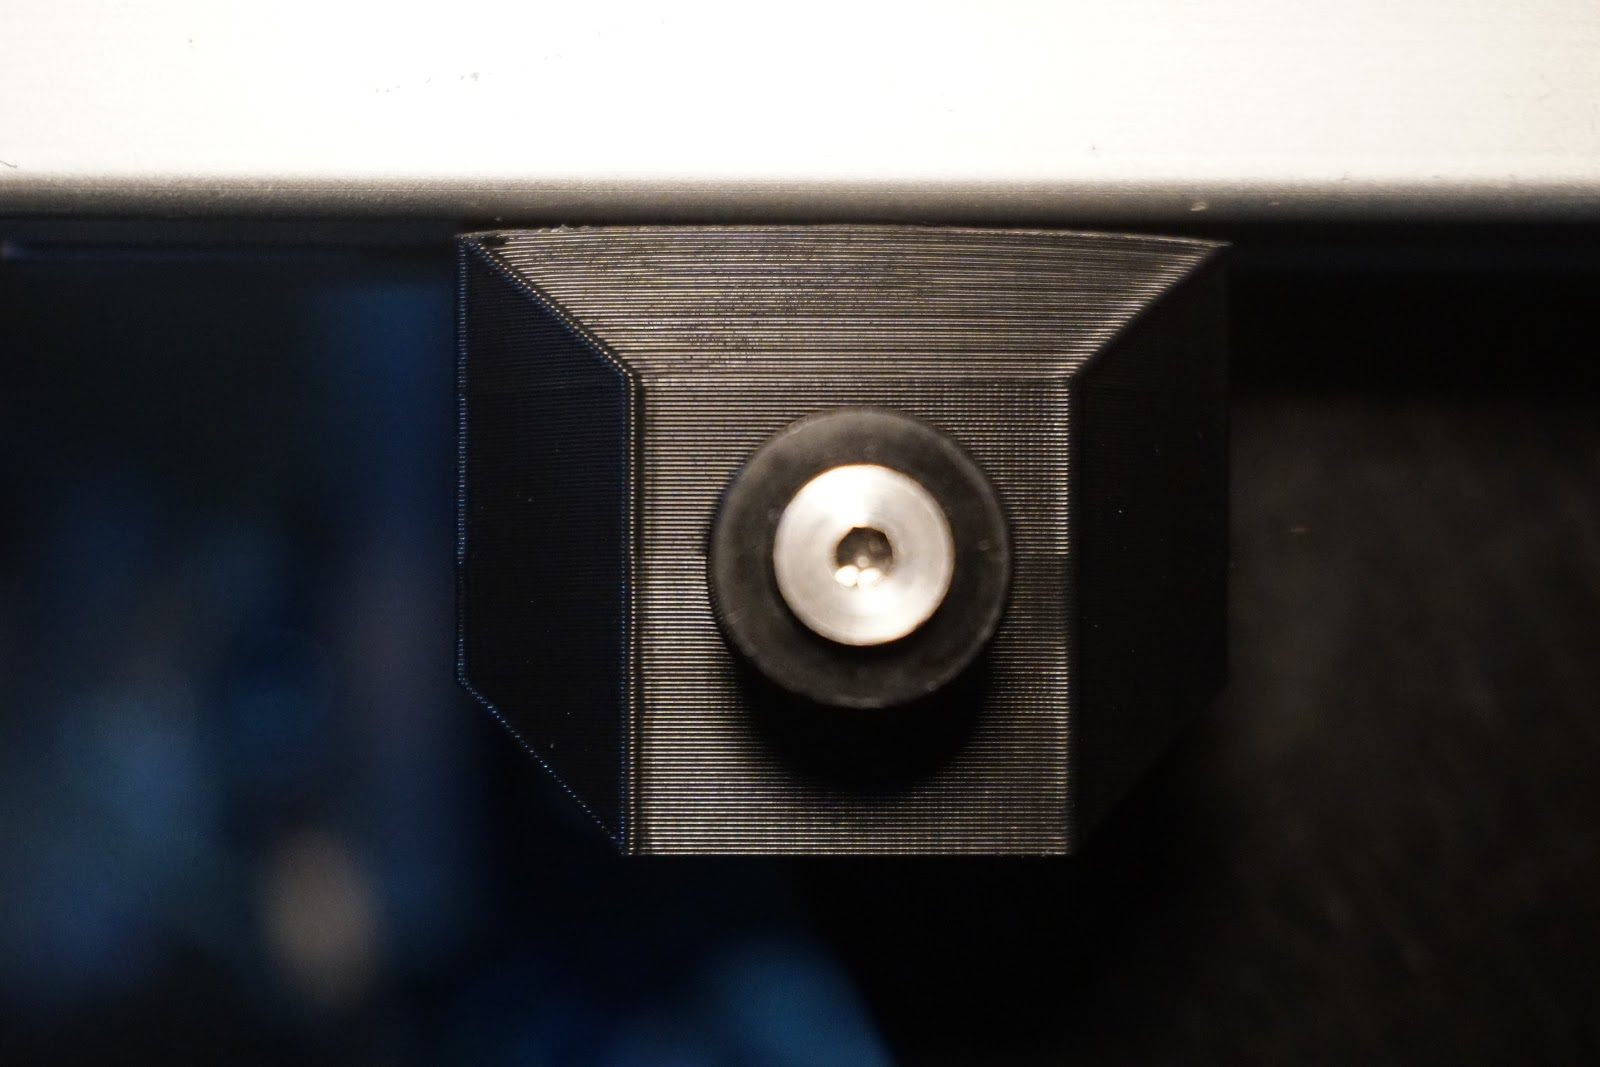
So you have to try & put the neglected toy to work every now & then, just to be sure it will behave when you really need it. Testing my new LED Video Light in Macro which lights up the part with a nice even light(hand held macro is tricky), if only I had this light 15 years ago, life woulda been so much simpler and the footage much better.
Edited 1 time(s). Last edit at 08/13/2019 12:03PM by MechaBits.
|
Re: MechaBits KraftWerk'r September 05, 2019 01:39AM |
Registered: 8 years ago Posts: 1,671 |
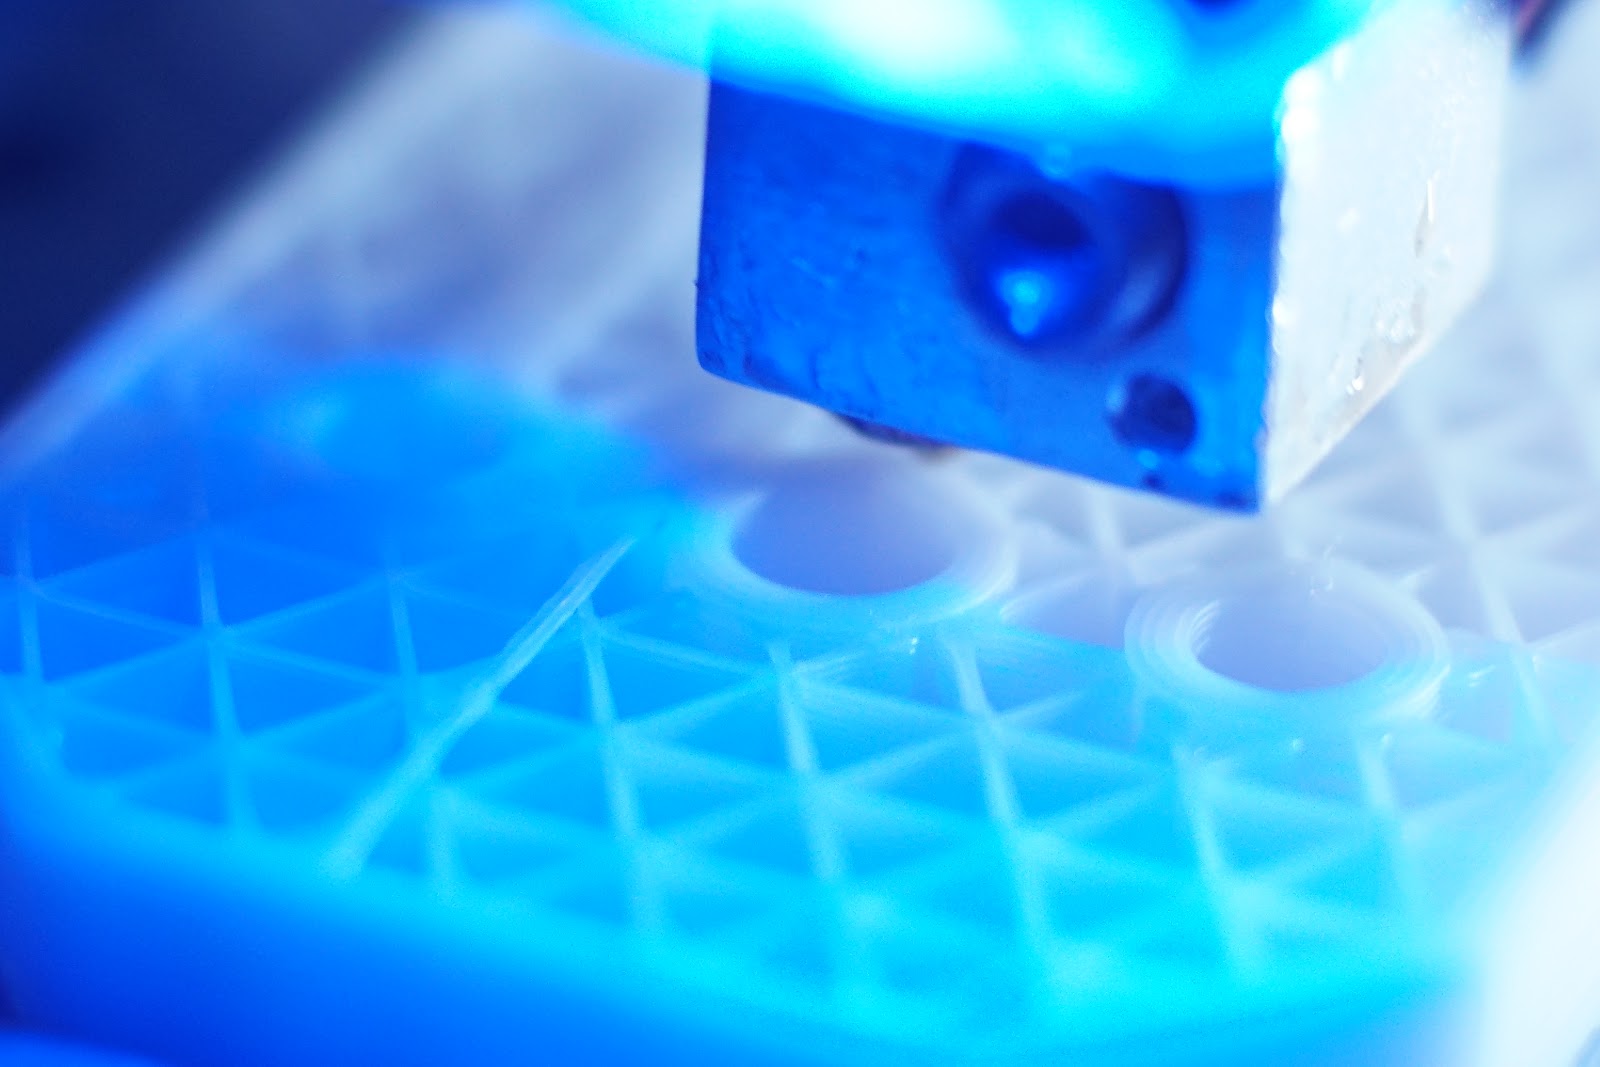
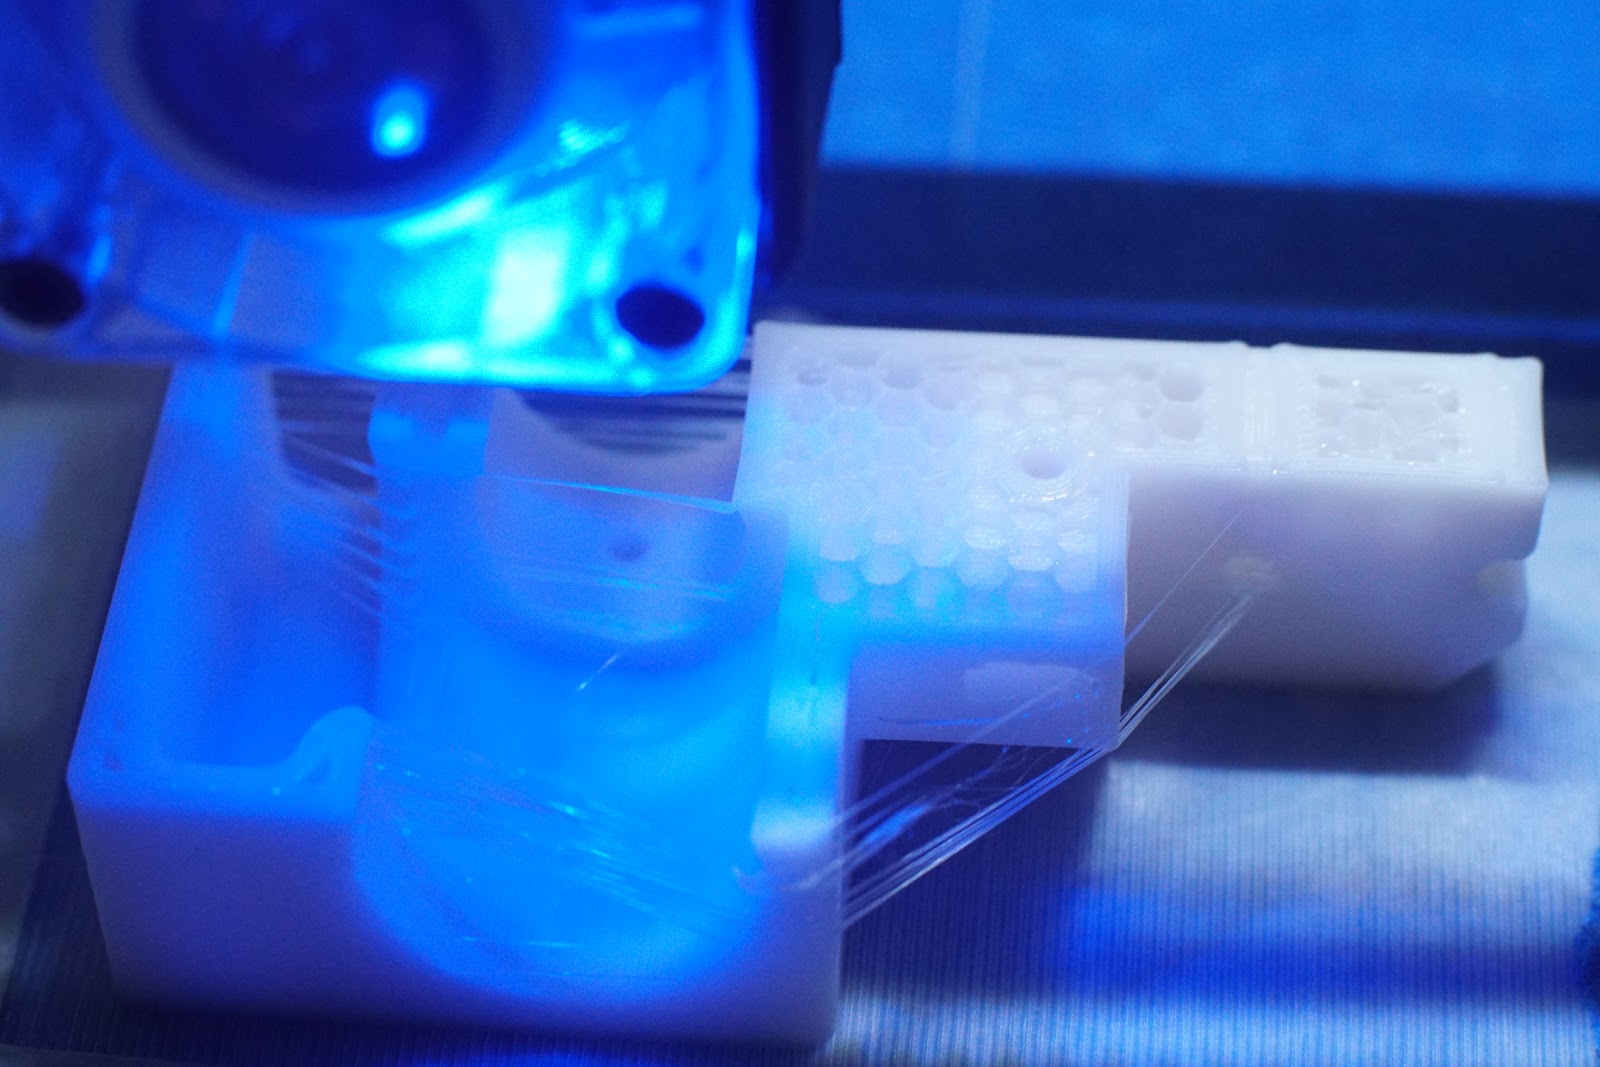
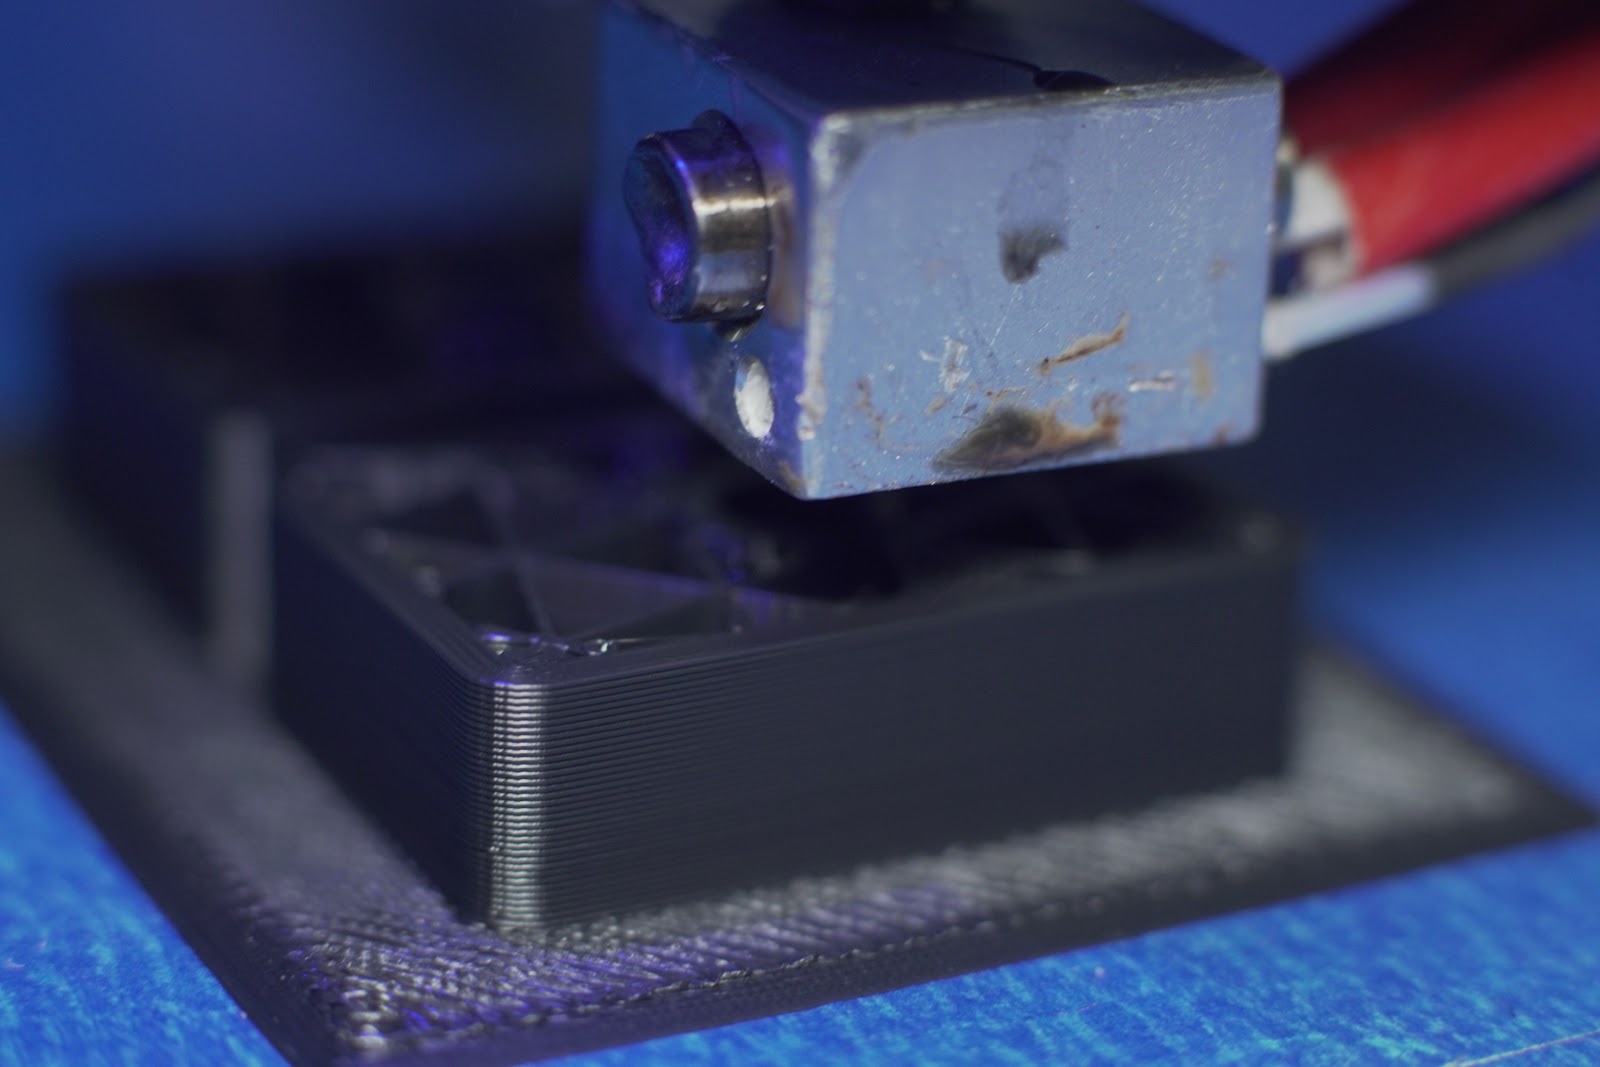
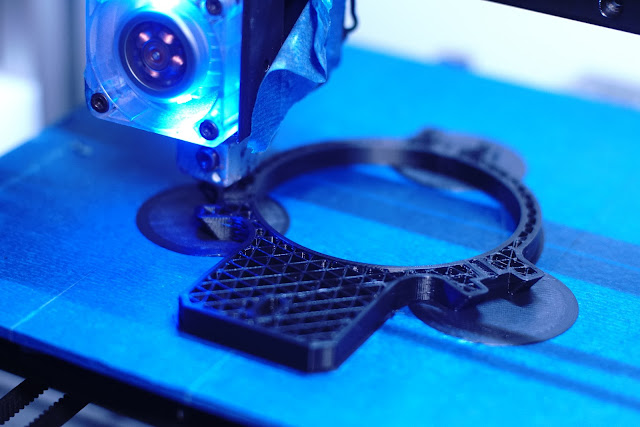
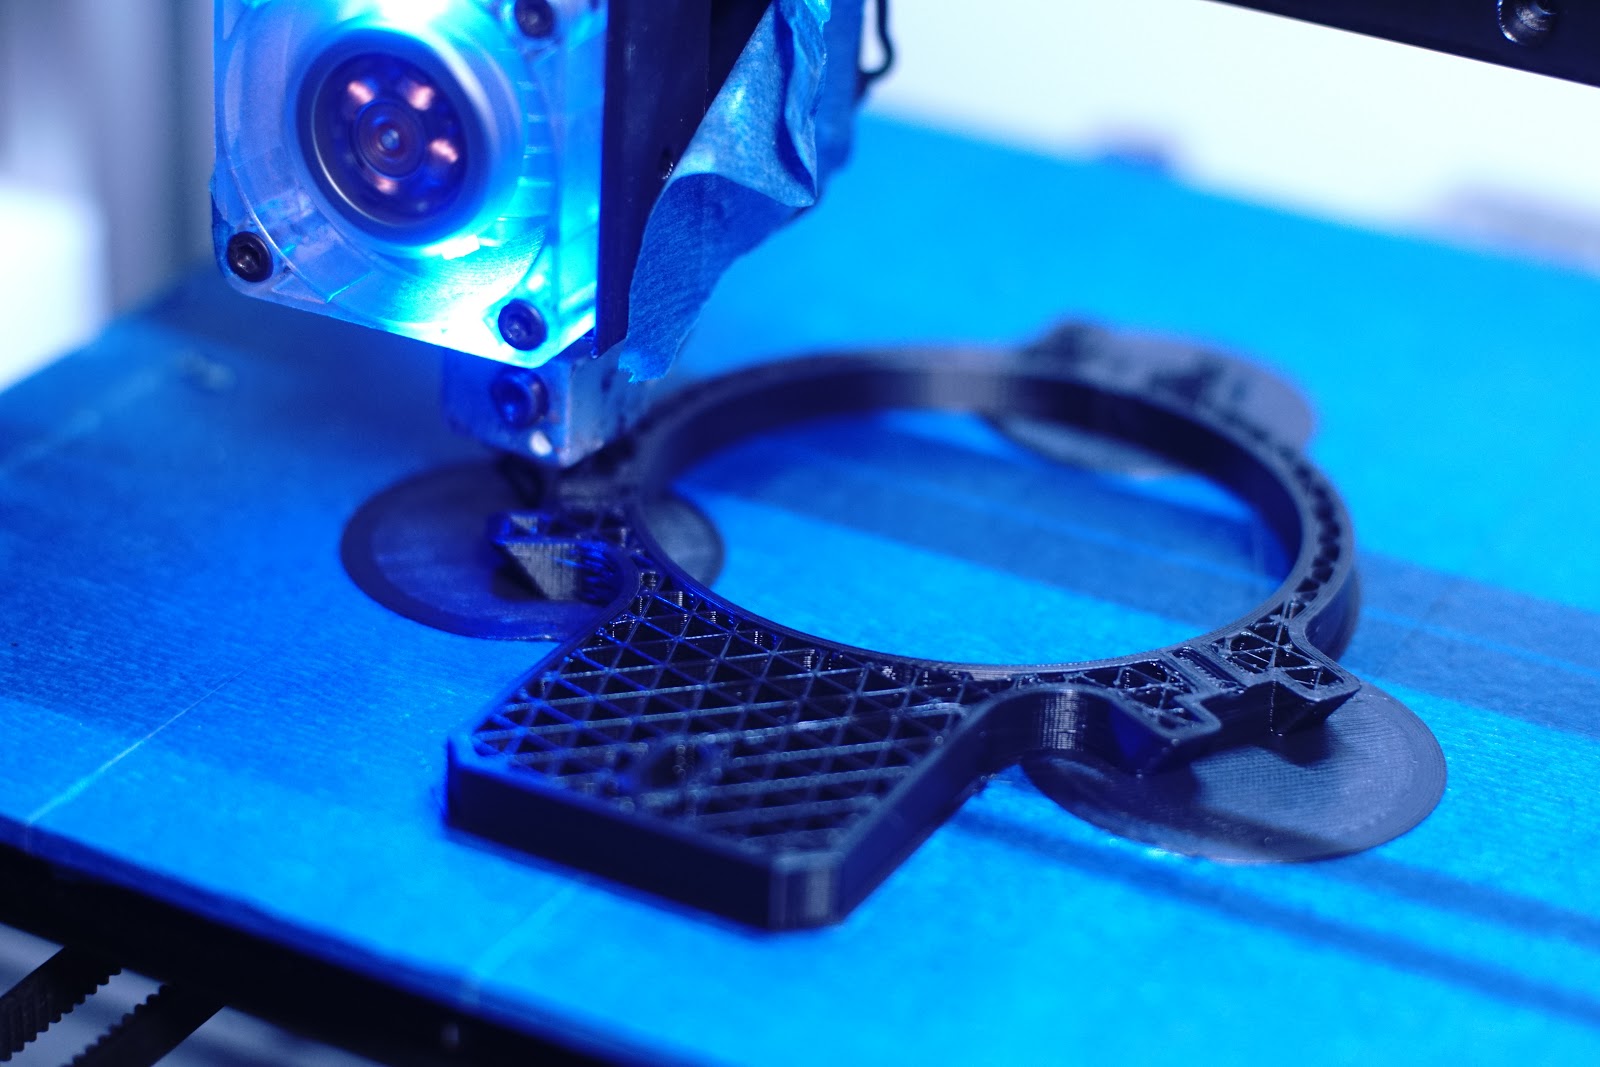
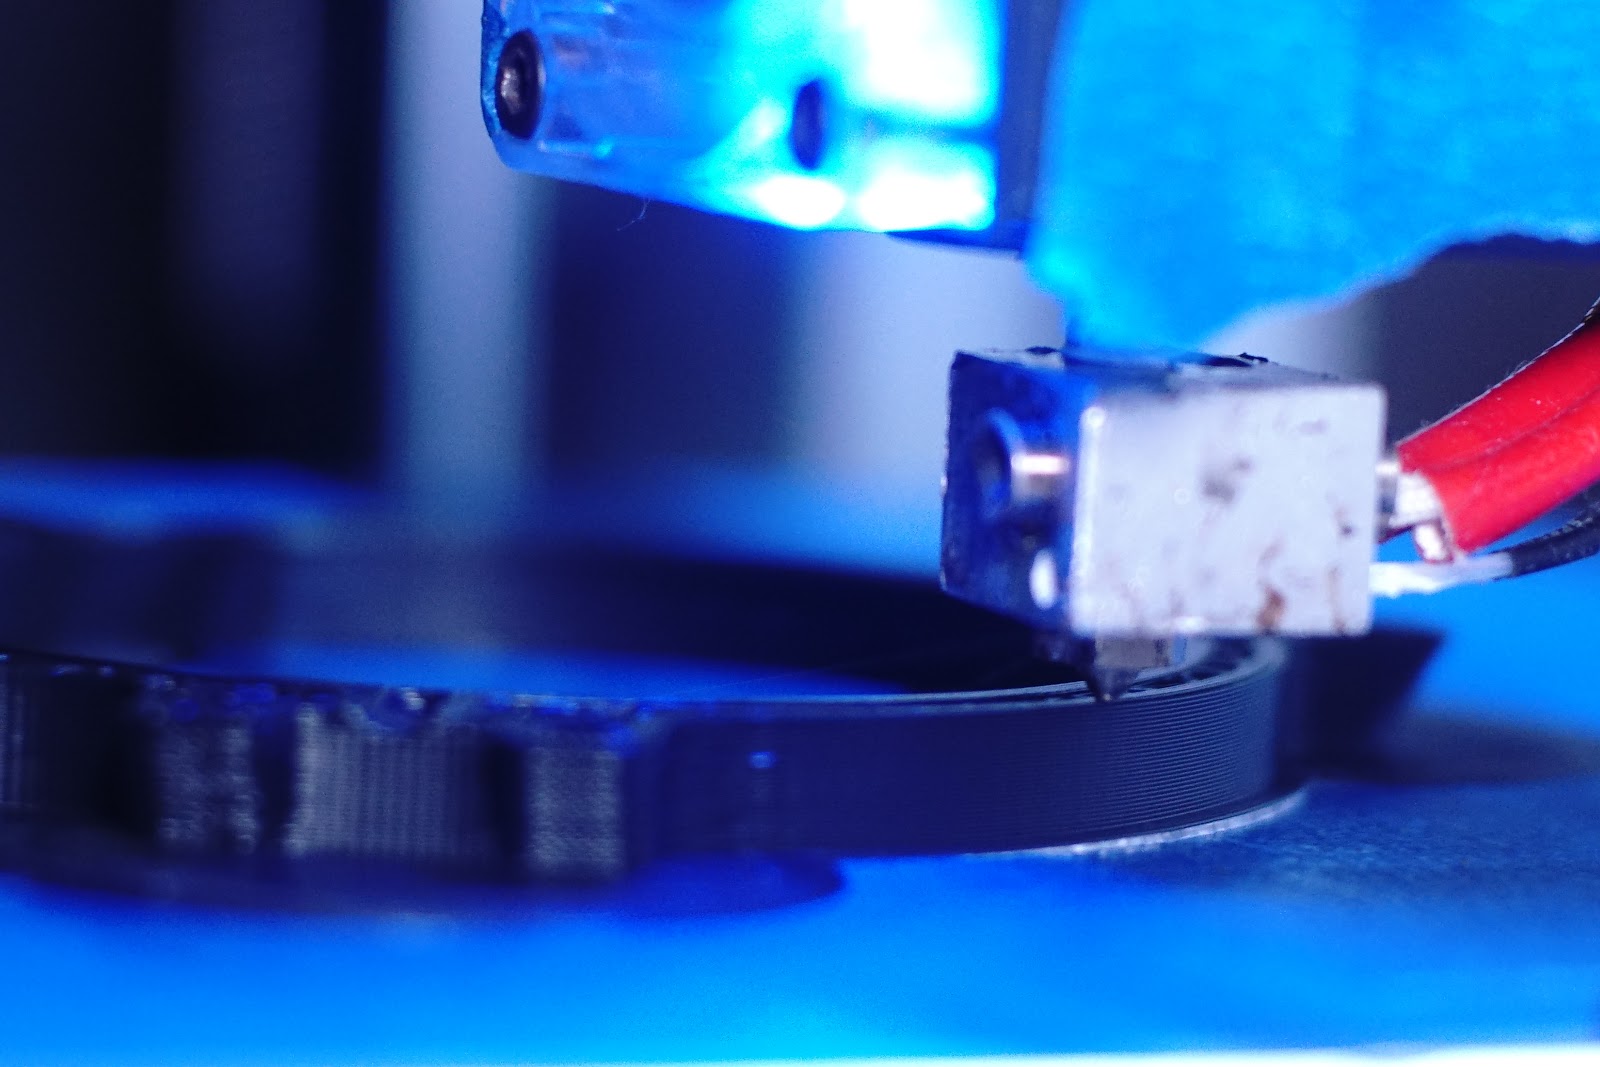
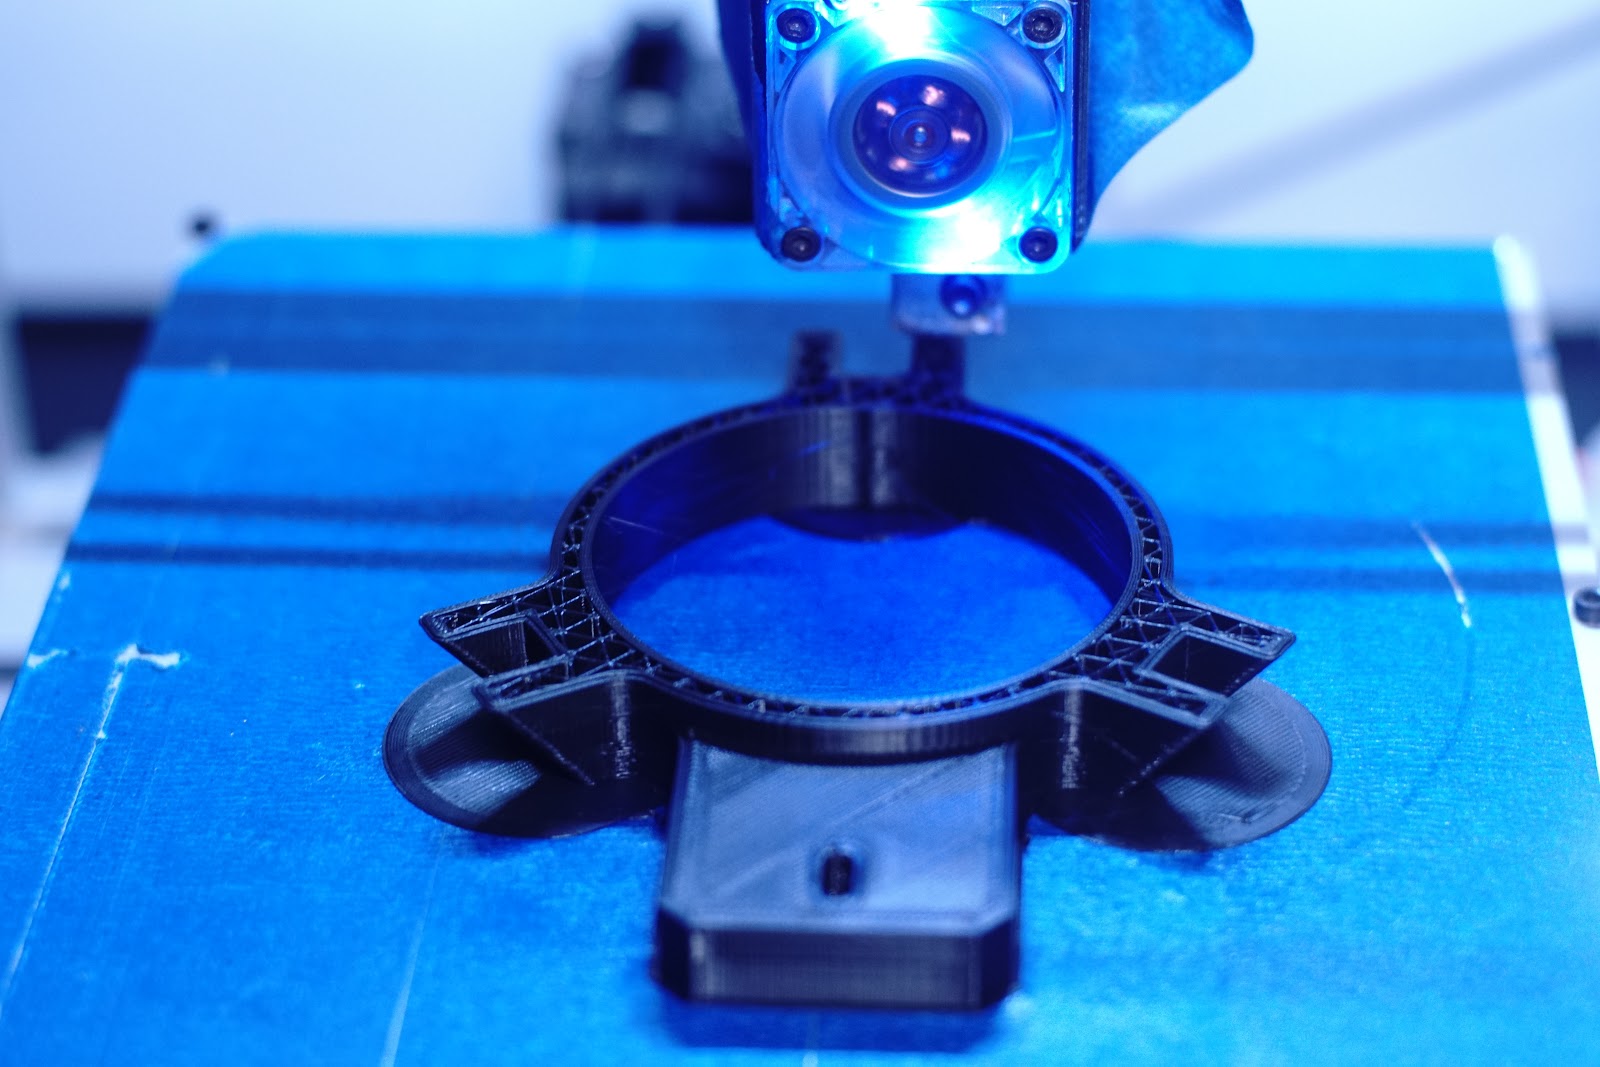
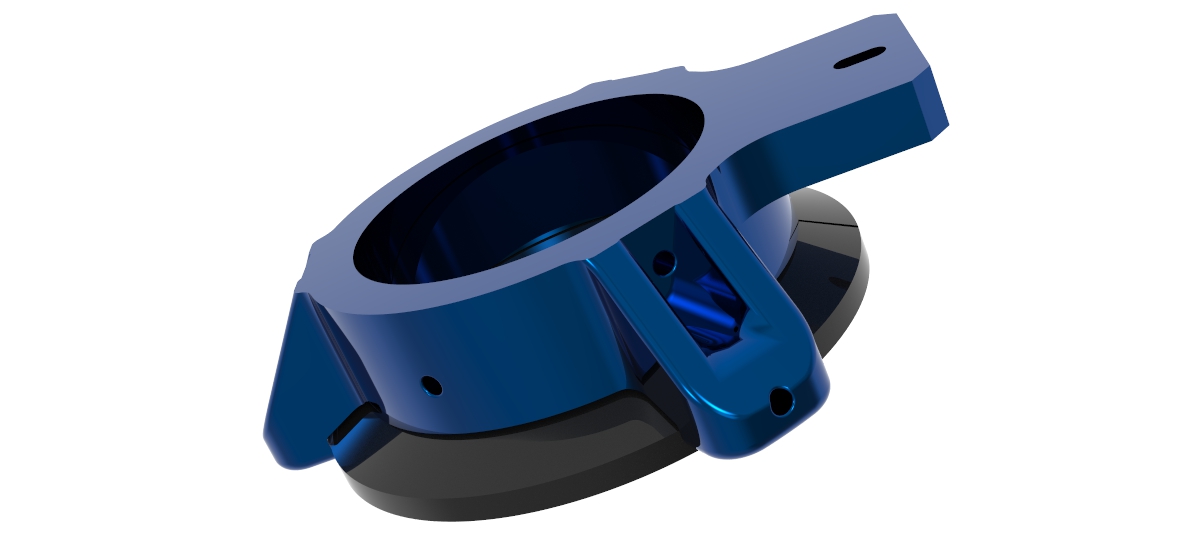
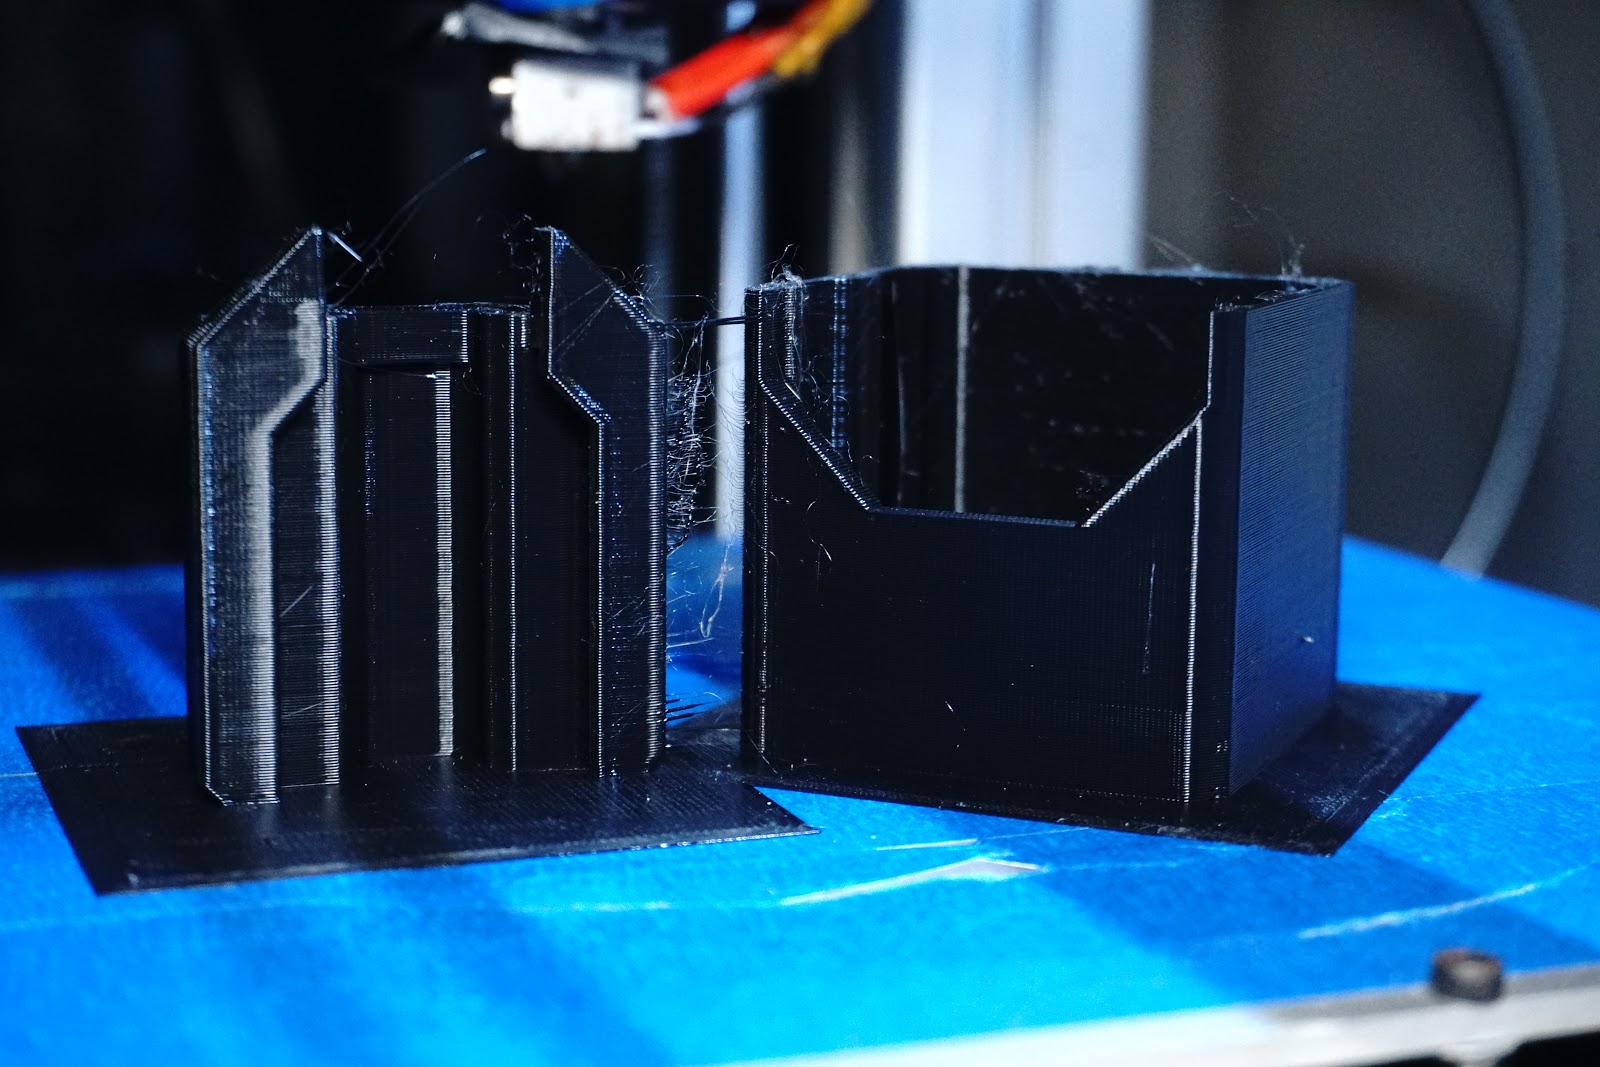
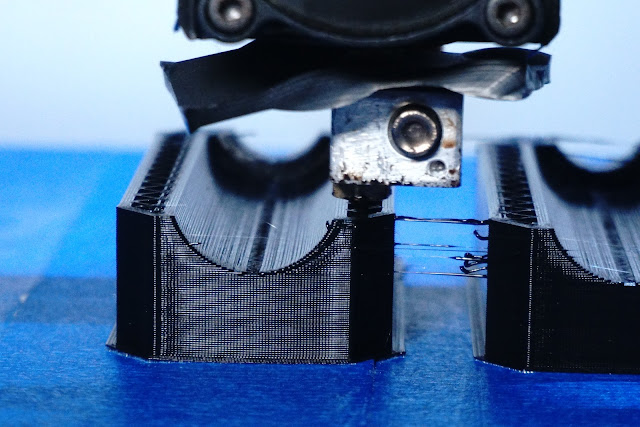
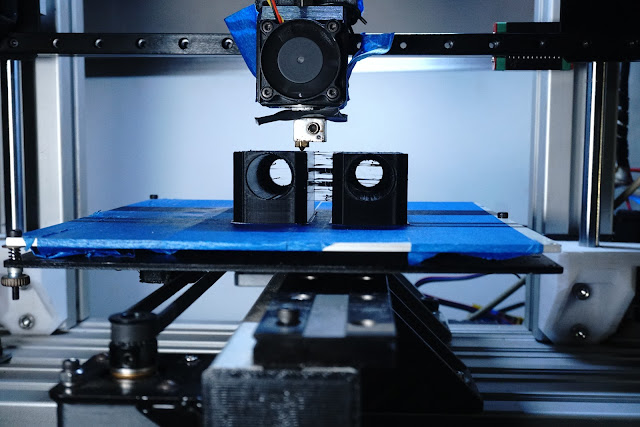
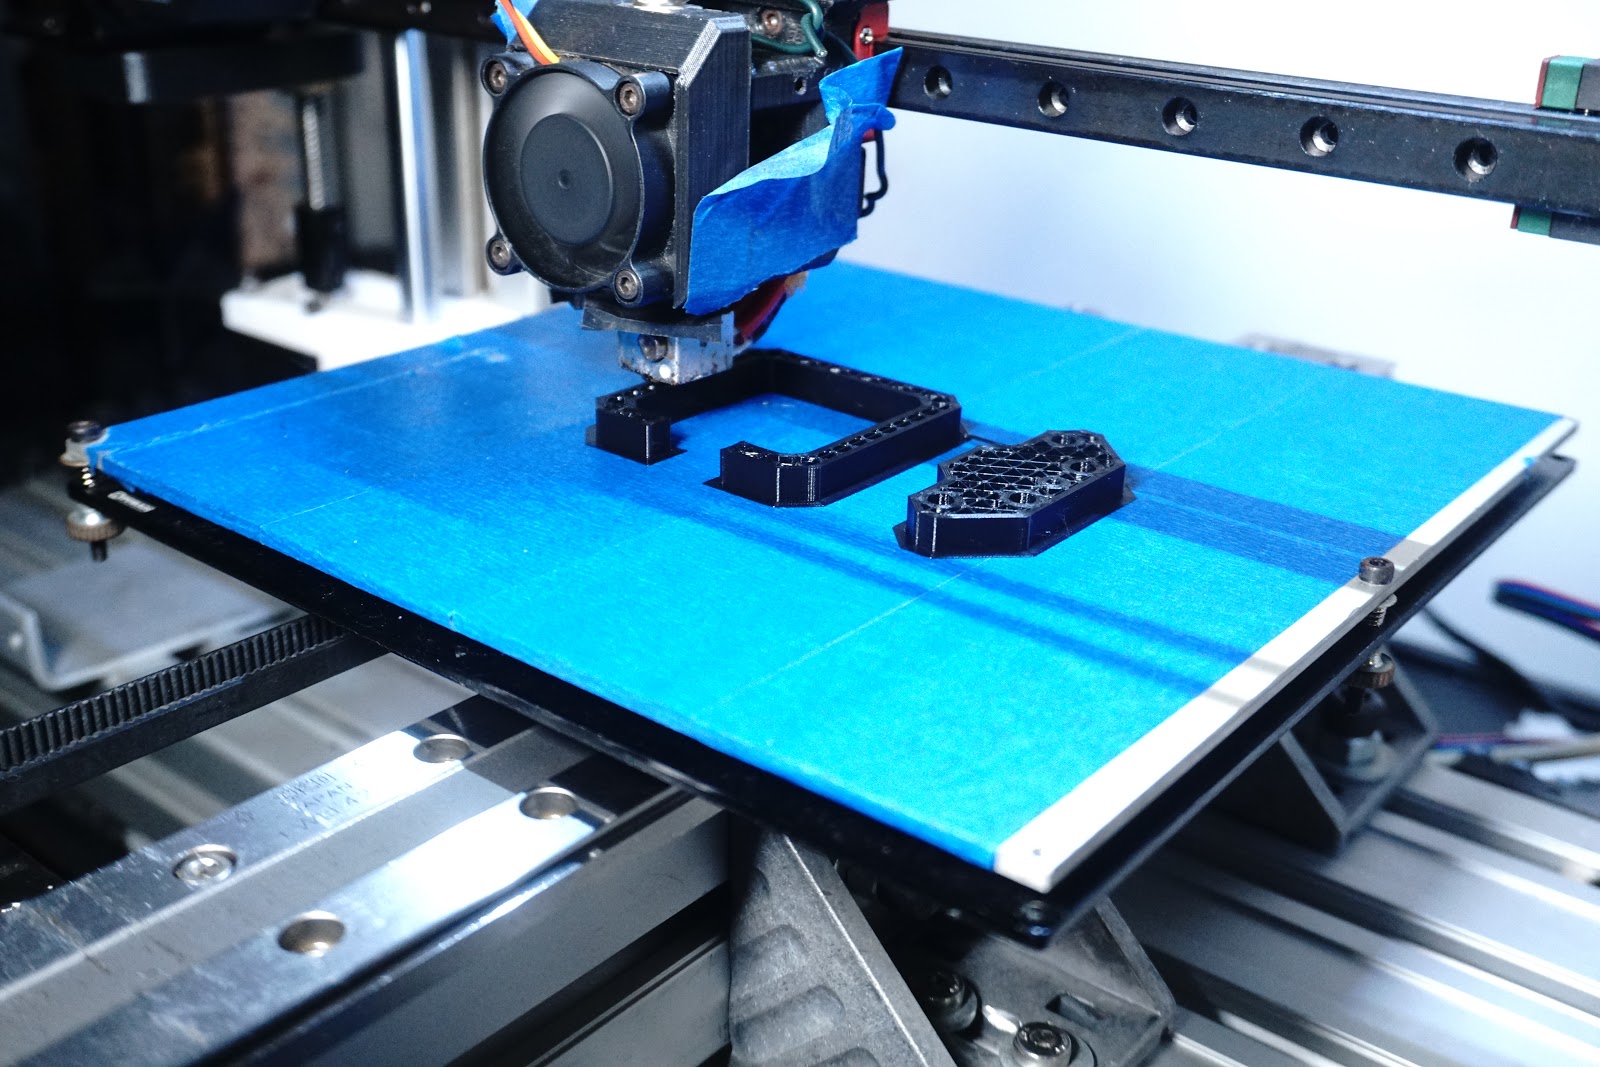
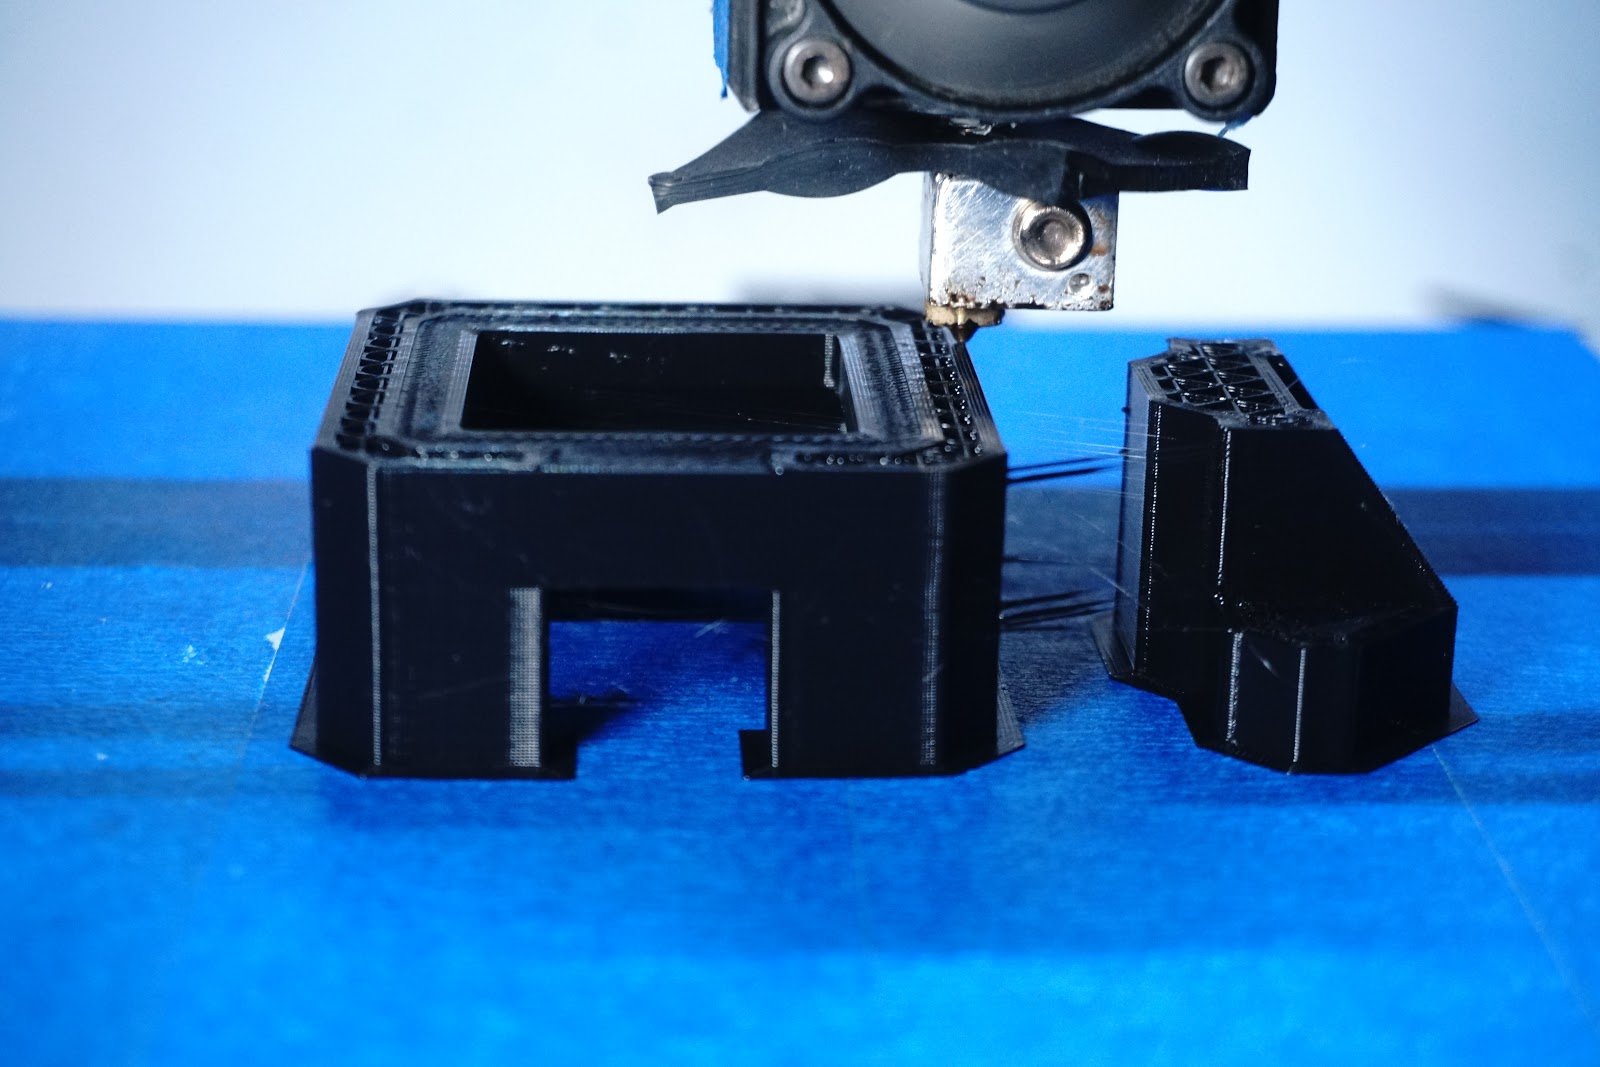
Another exciting day 3D Printing...not! It only takes something small to throw a spanner in the worx.
A little blob throws the paths out, start again, and again & again. Decided to change out nozzle & throat as I'd started to get some seepage after messing around with hotend, things must have loosened.
Slicer seems to be playing up, first layer speed seemed to be going much faster than 20mm/s so had to slow it down extra? Many times in prep with my hotend 10mm above the bed at temp the slicer would crash, meaning i had to manually bring it down twice, the brim or skirt is set but doesnt seem to be there either so I only have the part area holding things down. Now that isnt a problem as things have been sticking nice lately, and I wanted to try without my additional base.
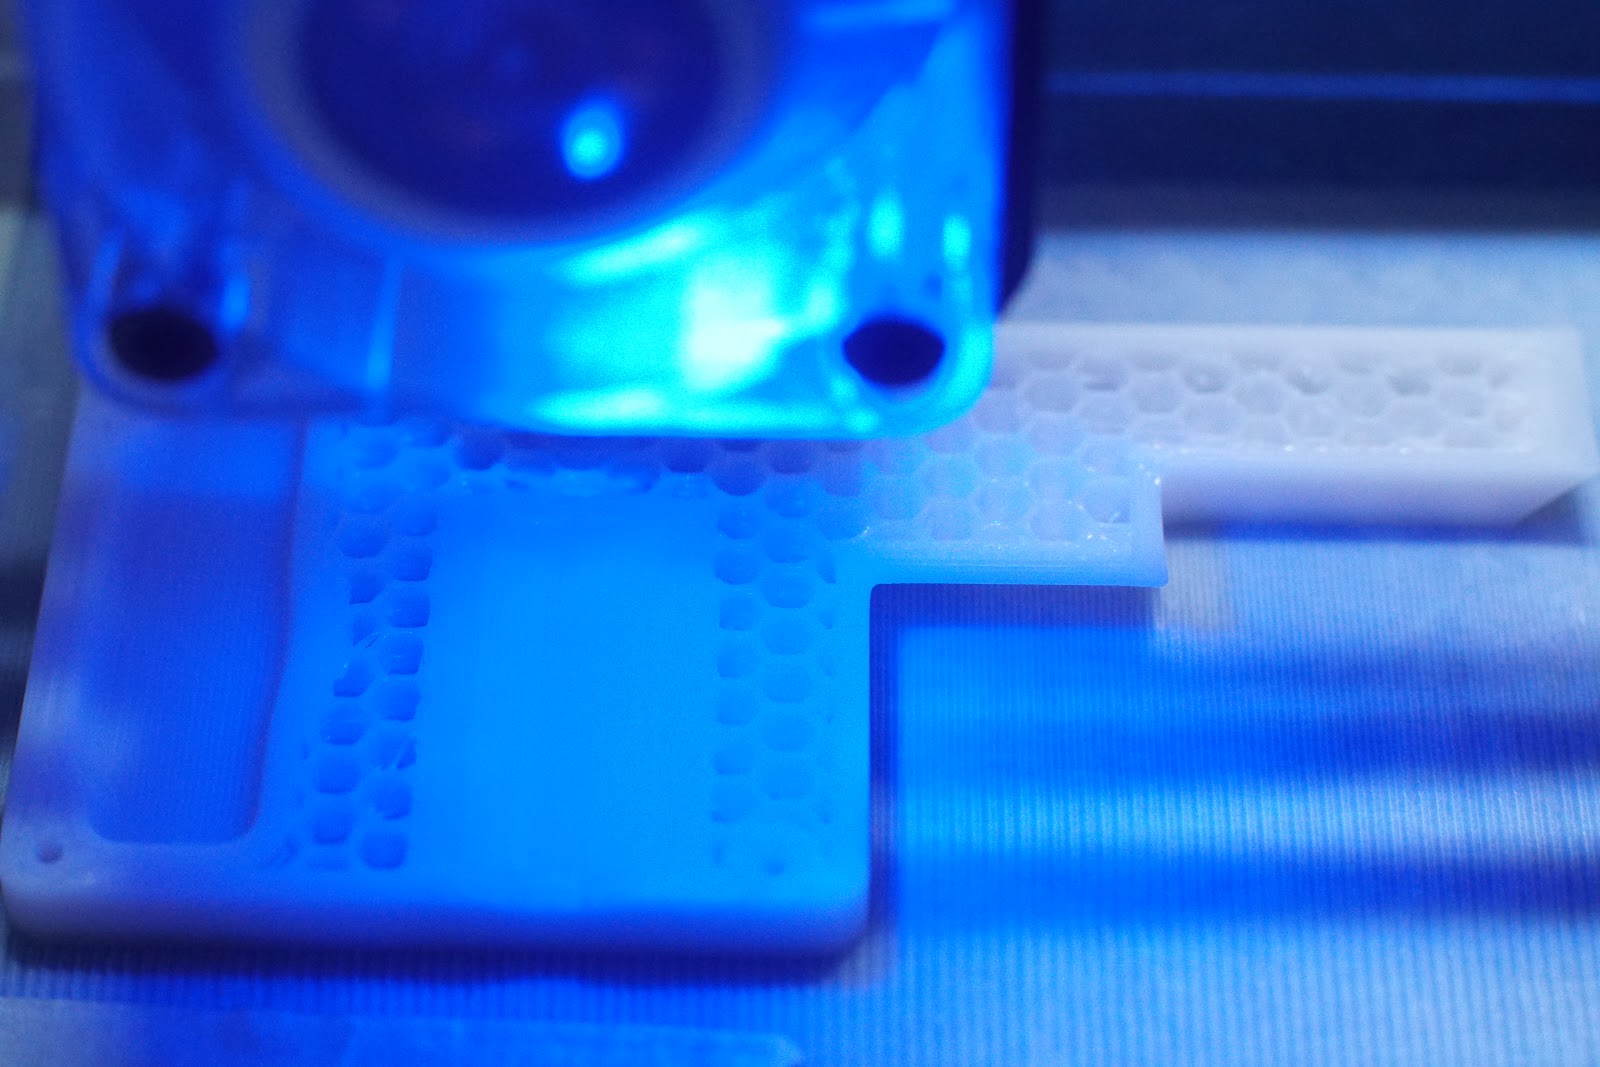
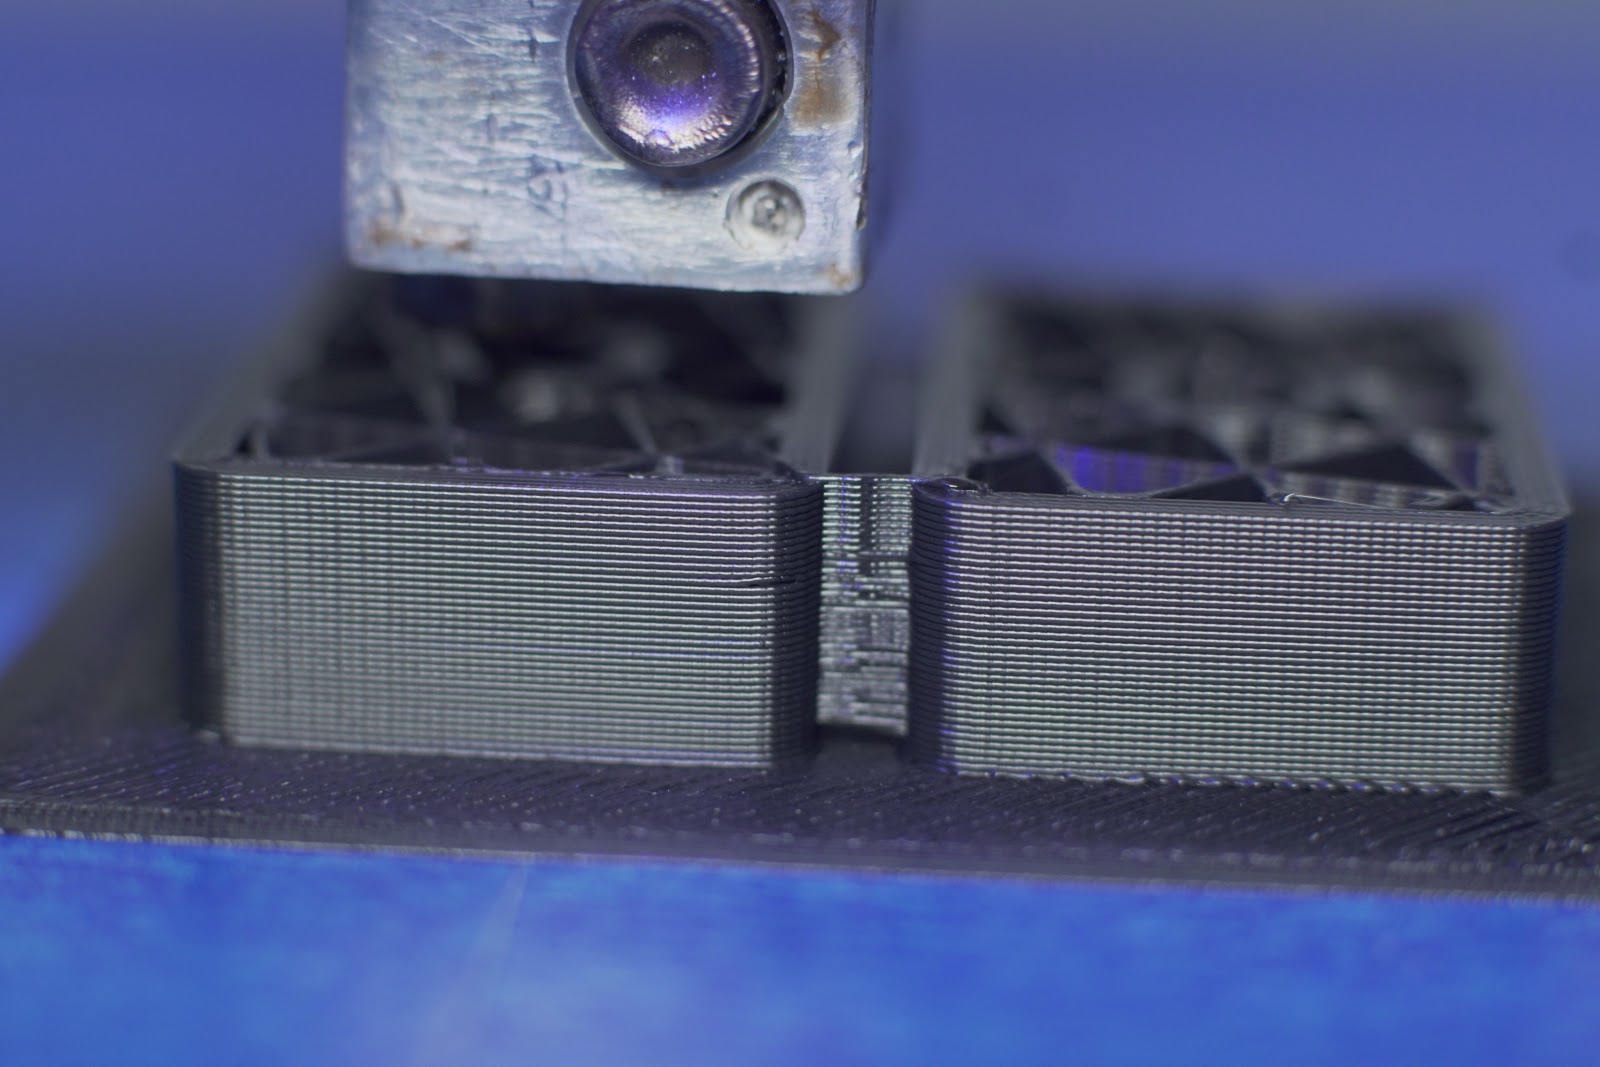
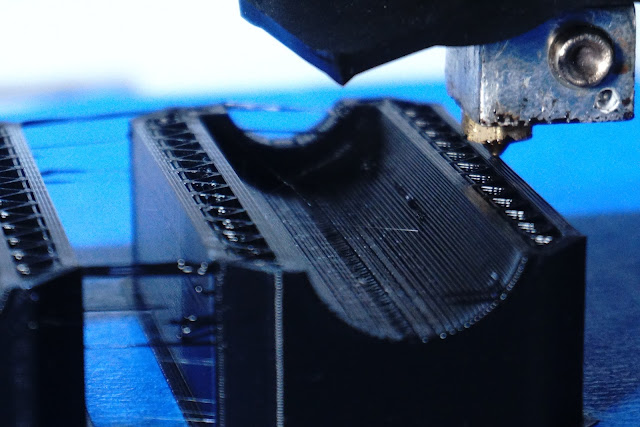
But on this part I need the extra stick, as the 45 deg slope on thin outer parts means more curling(decided to reduce that angle on the second print), I couldnt be bothered to add another part or two, to help avoid this curl. So I tried adding some frogs feet under just those parts and the slicer had the feet on first layer and the part on second layer??? couldnt solve it so went ahead without, I got some curling but hopefully I can still use the part(if only to check its dimensions are correct). 10mm out on the Radius bugger thank god I didnt do the bigger version.
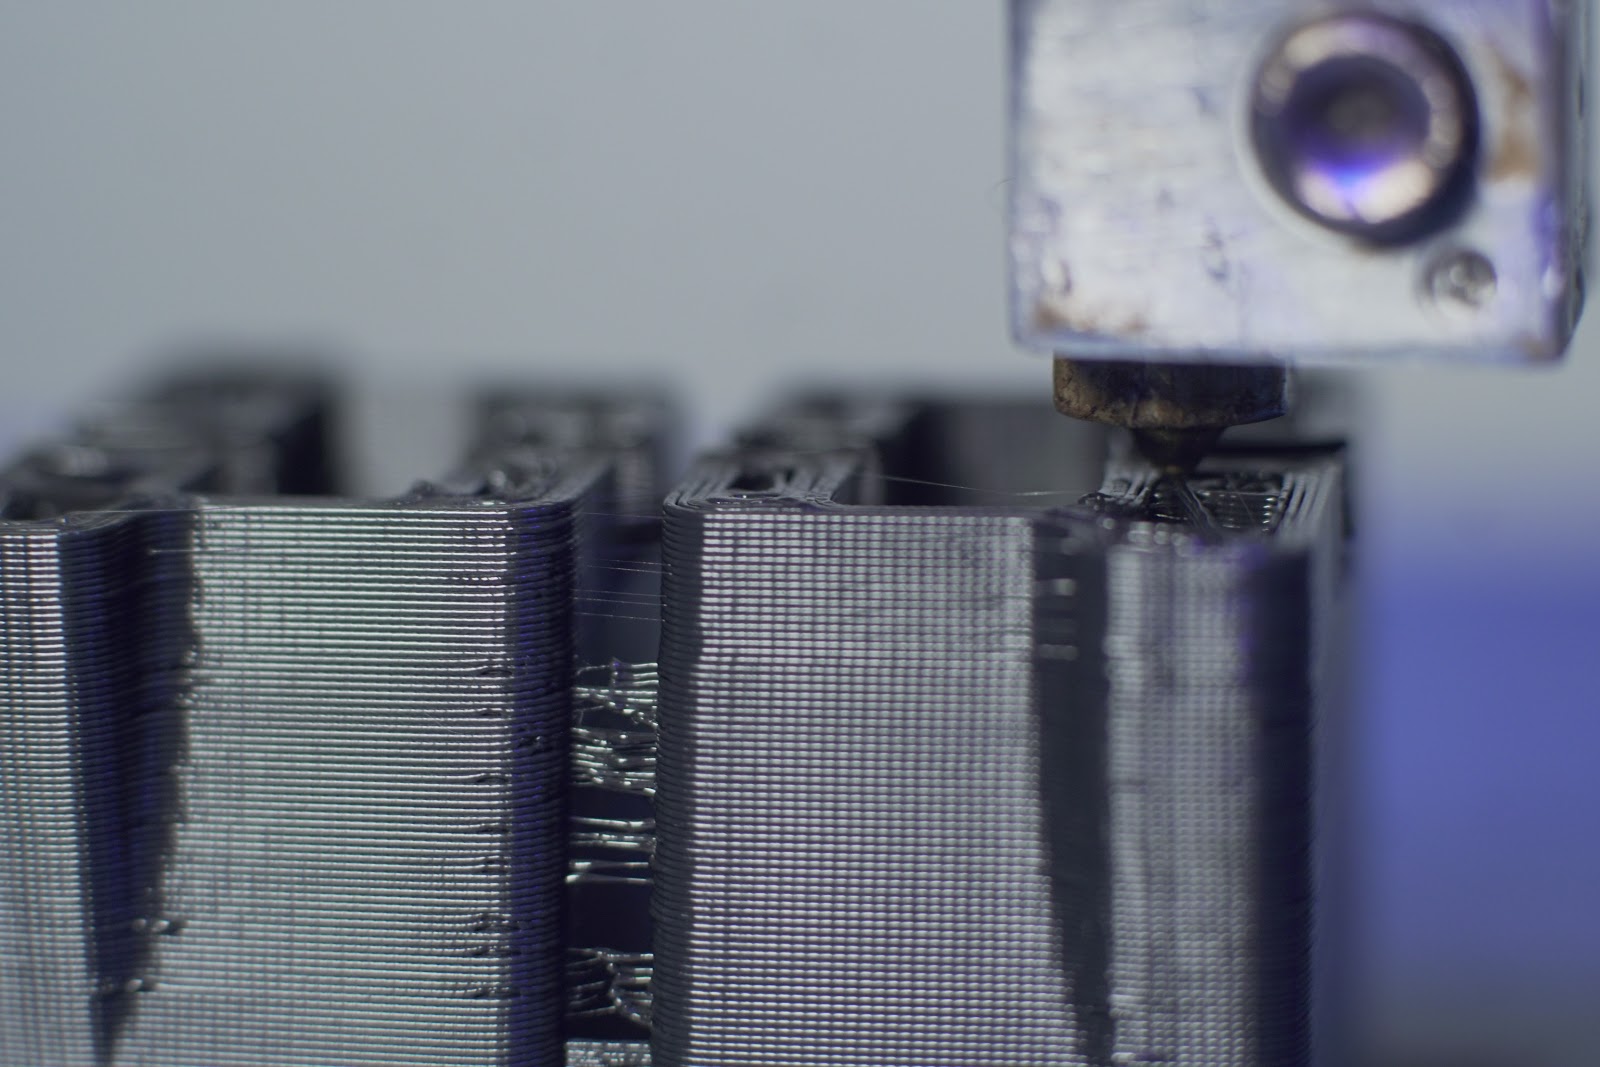
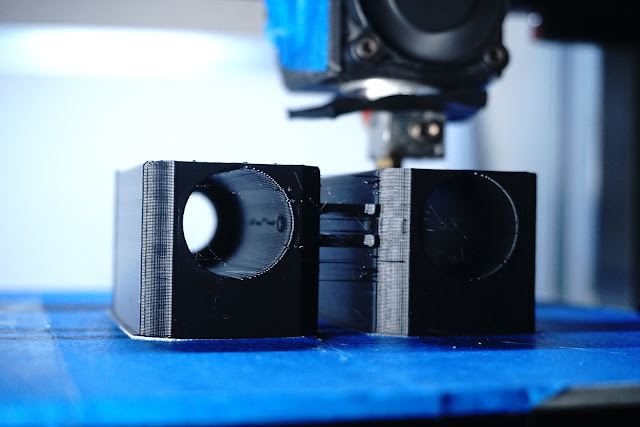
Which is what I ended up printing next, slicer back to normal, frogs feet & all, flat as a pancake, going to let this cool down before removing dont want to spoil it.


Edited 3 time(s). Last edit at 09/05/2019 11:46PM by MechaBits.
A little blob throws the paths out, start again, and again & again. Decided to change out nozzle & throat as I'd started to get some seepage after messing around with hotend, things must have loosened.
Slicer seems to be playing up, first layer speed seemed to be going much faster than 20mm/s so had to slow it down extra? Many times in prep with my hotend 10mm above the bed at temp the slicer would crash, meaning i had to manually bring it down twice, the brim or skirt is set but doesnt seem to be there either so I only have the part area holding things down. Now that isnt a problem as things have been sticking nice lately, and I wanted to try without my additional base.
But on this part I need the extra stick, as the 45 deg slope on thin outer parts means more curling(decided to reduce that angle on the second print), I couldnt be bothered to add another part or two, to help avoid this curl. So I tried adding some frogs feet under just those parts and the slicer had the feet on first layer and the part on second layer??? couldnt solve it so went ahead without, I got some curling but hopefully I can still use the part(if only to check its dimensions are correct). 10mm out on the Radius
bugger thank god I didnt do the bigger version.Which is what I ended up printing next, slicer back to normal, frogs feet & all, flat as a pancake, going to let this cool down before removing dont want to spoil it.


Edited 3 time(s). Last edit at 09/05/2019 11:46PM by MechaBits.
|
Re: MechaBits KraftWerk'r November 12, 2019 07:20PM |
Registered: 8 years ago Posts: 1,671 |
Winter is here, what else to do when not hibernating...print some stuff...holding back till design is closer to completion, the cube has been in need of some attention, saving the best till last, or the hardest till last?
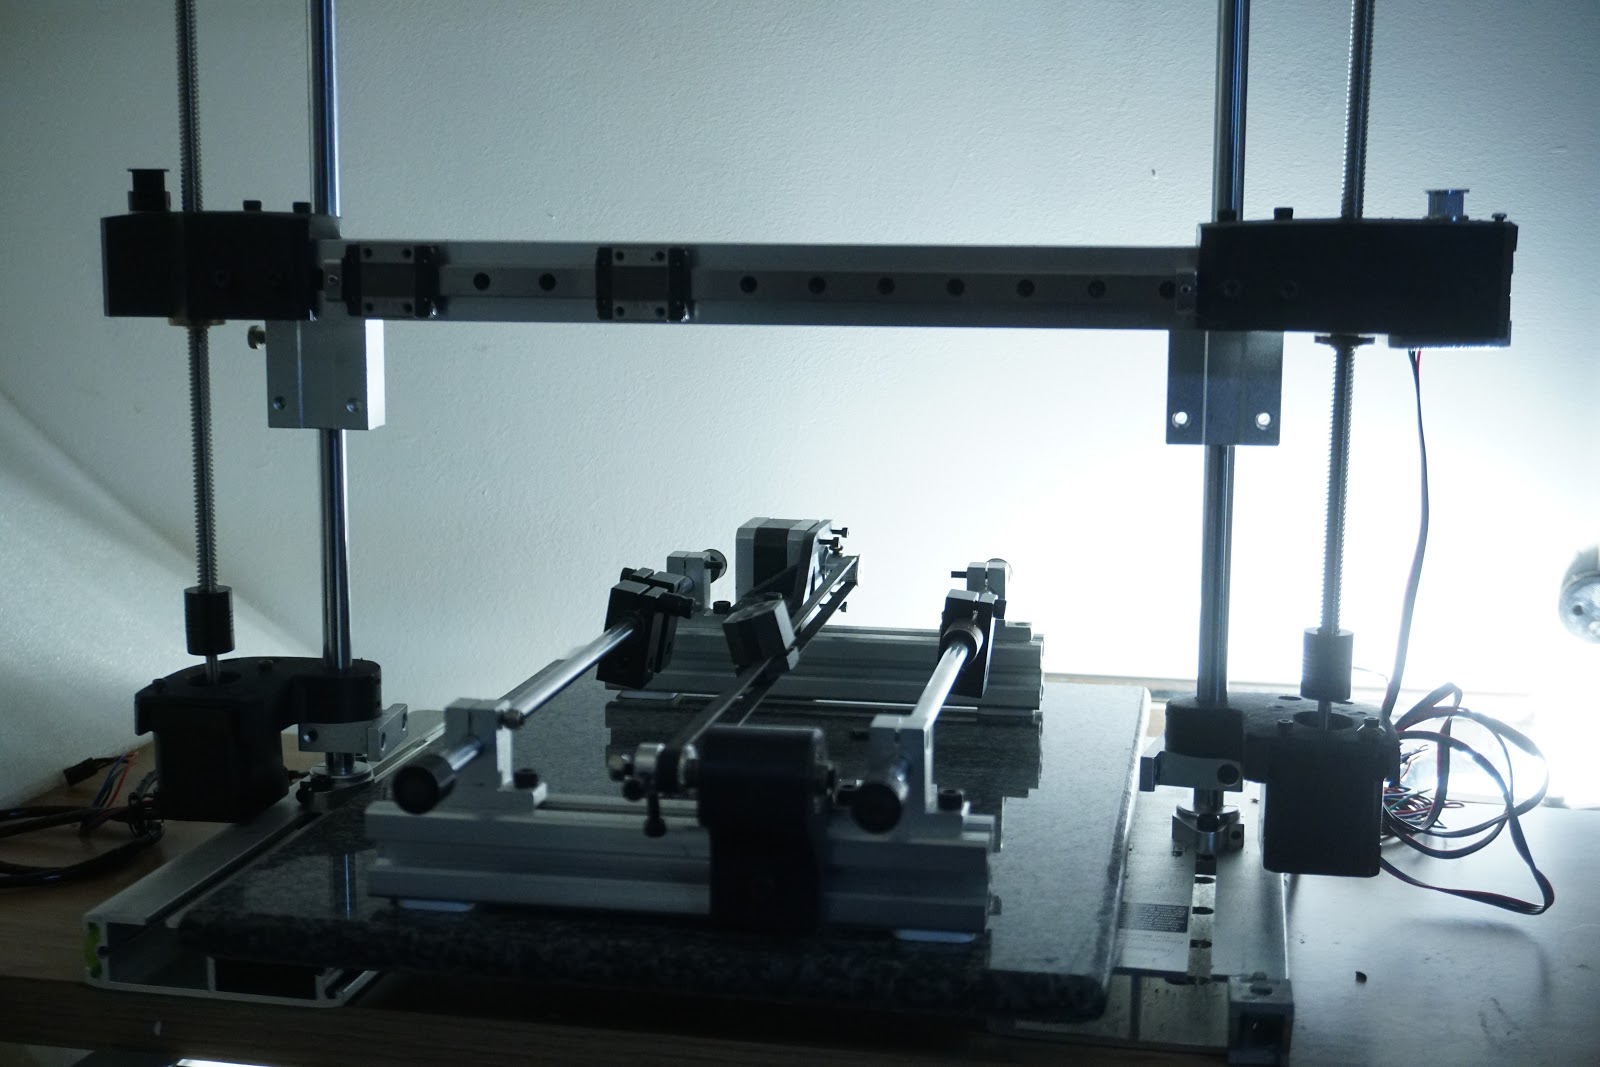
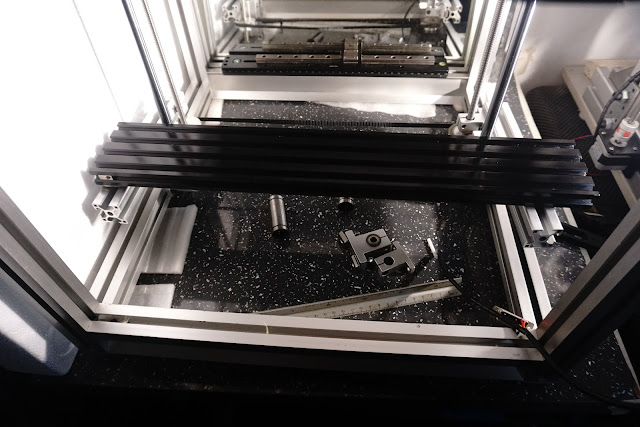
With a limited amount of spare parts i've started to commit to a layout I fancy having a go at.
I think i've decided on a simple arrangement and trying to figure a way to assemble & keep plastic parts out of the chamber area, though a couple of things could change, like position of Z.
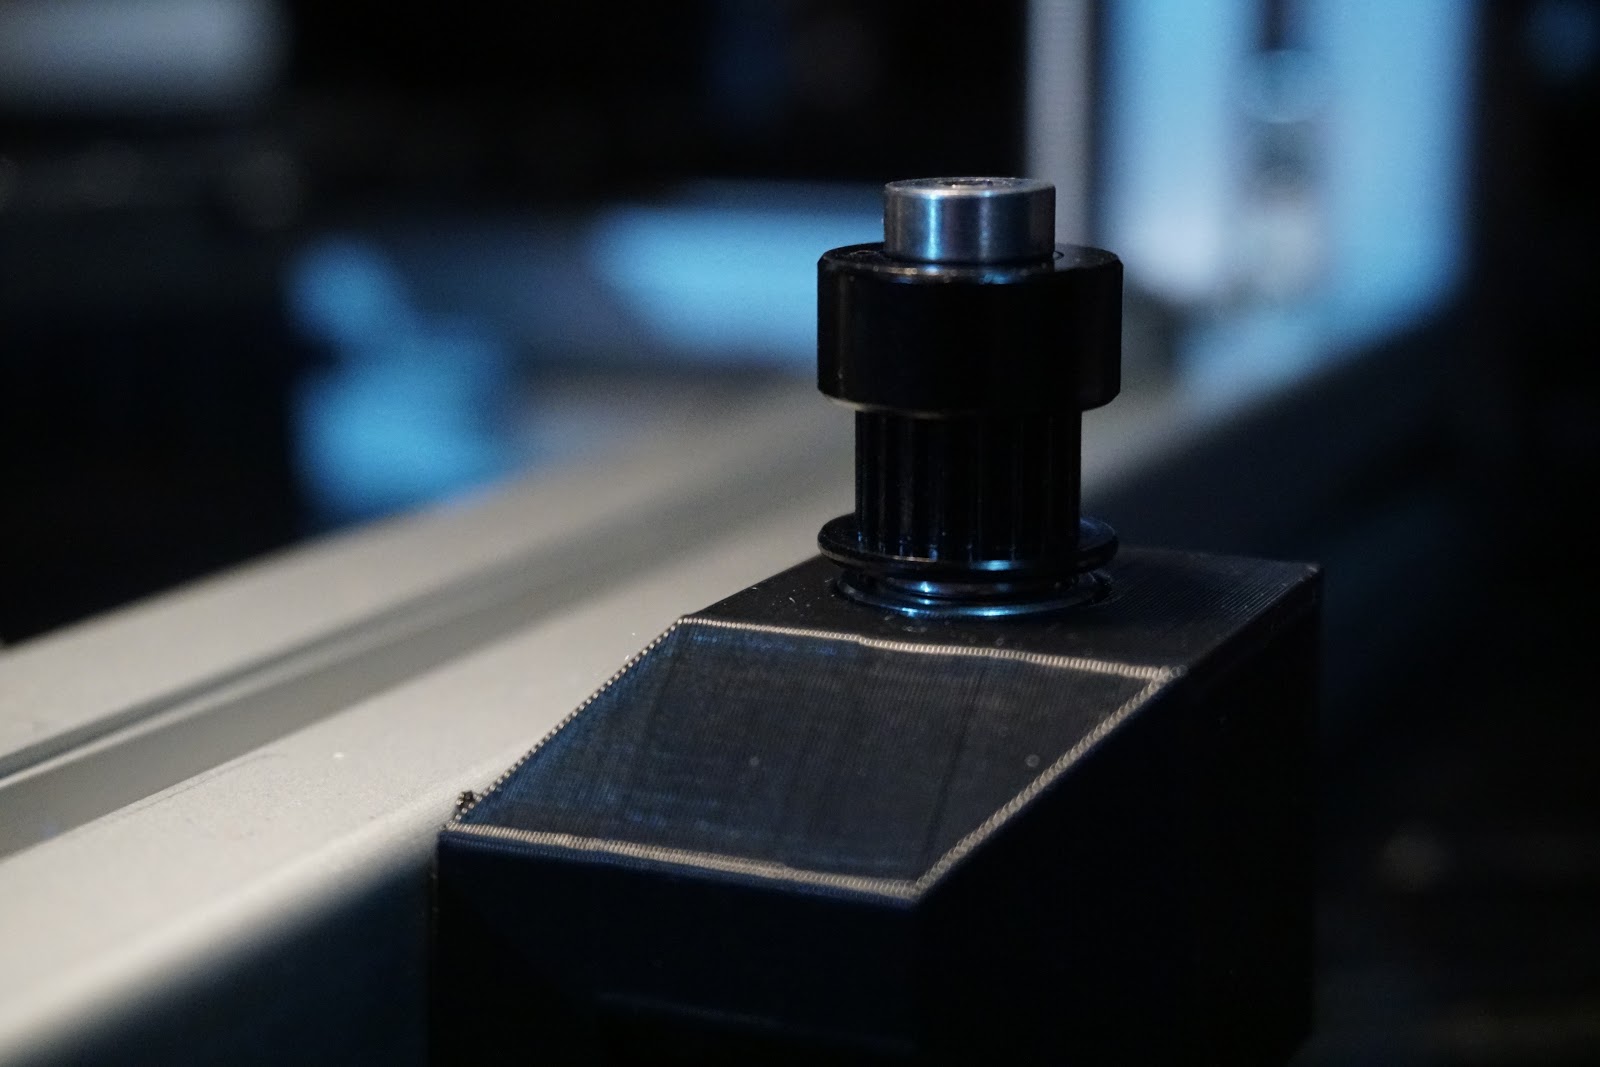
Waiting on some pieces of 2040 as crossbars, one for X one for Z, I plan on drilling the 2040 to fit the carriages on X (maybe later find a way to decouple one end, if I ever heat this thing up ), i'll be mounting x motor on the axis, I'm hoping to keep both ends in sync with the belts though I have to design some idler/tensioners, for Y & Z, lucky I had the 2 closed loop belts as it gets me part of the way but had to use the large pulleys which works ok, didnt have any other 8mm spare, hence the odd 32 or 36 tooth pulley , but I need 2x longer ones for the Y about 460mm.
The short piece of 3030 is all I have to hand to try to cobble together some platform, but because the bearing and the leadscrew nut clamp have different centers, then the 3030 sits at a little bit of an angle, so will have to see if it stays put together this way. it sits in the area where a panel maybe...ideally I wanted both Z risers outside the cube, but because of thee length of the loop belt and the rest of the available parts it made sense to do it this way for now. I have a piece of 2080 to straddle the 2x3030 but joining them up is tricky, I'll probably try it between the 2 Z bearings without the 3030,until the 2040 arrives, hoping it will be adequate.
the 2040 & the 2080 I have are 500mm long cube is 460, pity 50mm or so longer and I could have put the Z rods outside the cube, which then messes with covering those sides and takes you down the route of a cantelever bed from one end.
the rods belts & pulleys for Y could be rearranged so the rails where ontop instead of underslung I might get a little extra height but I thought this way I might be able to get a lid on the box, So far no PLA has been harmed in the build process.


Edited 4 time(s). Last edit at 11/13/2019 03:37AM by MechaBits.
With a limited amount of spare parts i've started to commit to a layout I fancy having a go at.
I think i've decided on a simple arrangement and trying to figure a way to assemble & keep plastic parts out of the chamber area, though a couple of things could change, like position of Z.
Waiting on some pieces of 2040 as crossbars, one for X one for Z, I plan on drilling the 2040 to fit the carriages on X (maybe later find a way to decouple one end, if I ever heat this thing up
), i'll be mounting x motor on the axis, I'm hoping to keep both ends in sync with the belts though I have to design some idler/tensioners, for Y & Z, lucky I had the 2 closed loop belts as it gets me part of the way but had to use the large pulleys which works ok, didnt have any other 8mm spare, hence the odd 32 or 36 tooth pulley , but I need 2x longer ones for the Y about 460mm.The short piece of 3030 is all I have to hand to try to cobble together some platform, but because the bearing and the leadscrew nut clamp have different centers, then the 3030 sits at a little bit of an angle, so will have to see if it stays put together this way. it sits in the area where a panel maybe...ideally I wanted both Z risers outside the cube, but because of thee length of the loop belt and the rest of the available parts it made sense to do it this way for now. I have a piece of 2080 to straddle the 2x3030 but joining them up is tricky, I'll probably try it between the 2 Z bearings without the 3030,until the 2040 arrives, hoping it will be adequate.
the 2040 & the 2080 I have are 500mm long cube is 460, pity 50mm or so longer and I could have put the Z rods outside the cube, which then messes with covering those sides and takes you down the route of a cantelever bed from one end.
the rods belts & pulleys for Y could be rearranged so the rails where ontop instead of underslung I might get a little extra height but I thought this way I might be able to get a lid on the box, So far no PLA has been harmed in the build process.


Edited 4 time(s). Last edit at 11/13/2019 03:37AM by MechaBits.
|
Re: MechaBits KraftWerk'r November 13, 2019 03:28AM |
Registered: 8 years ago Posts: 1,671 |
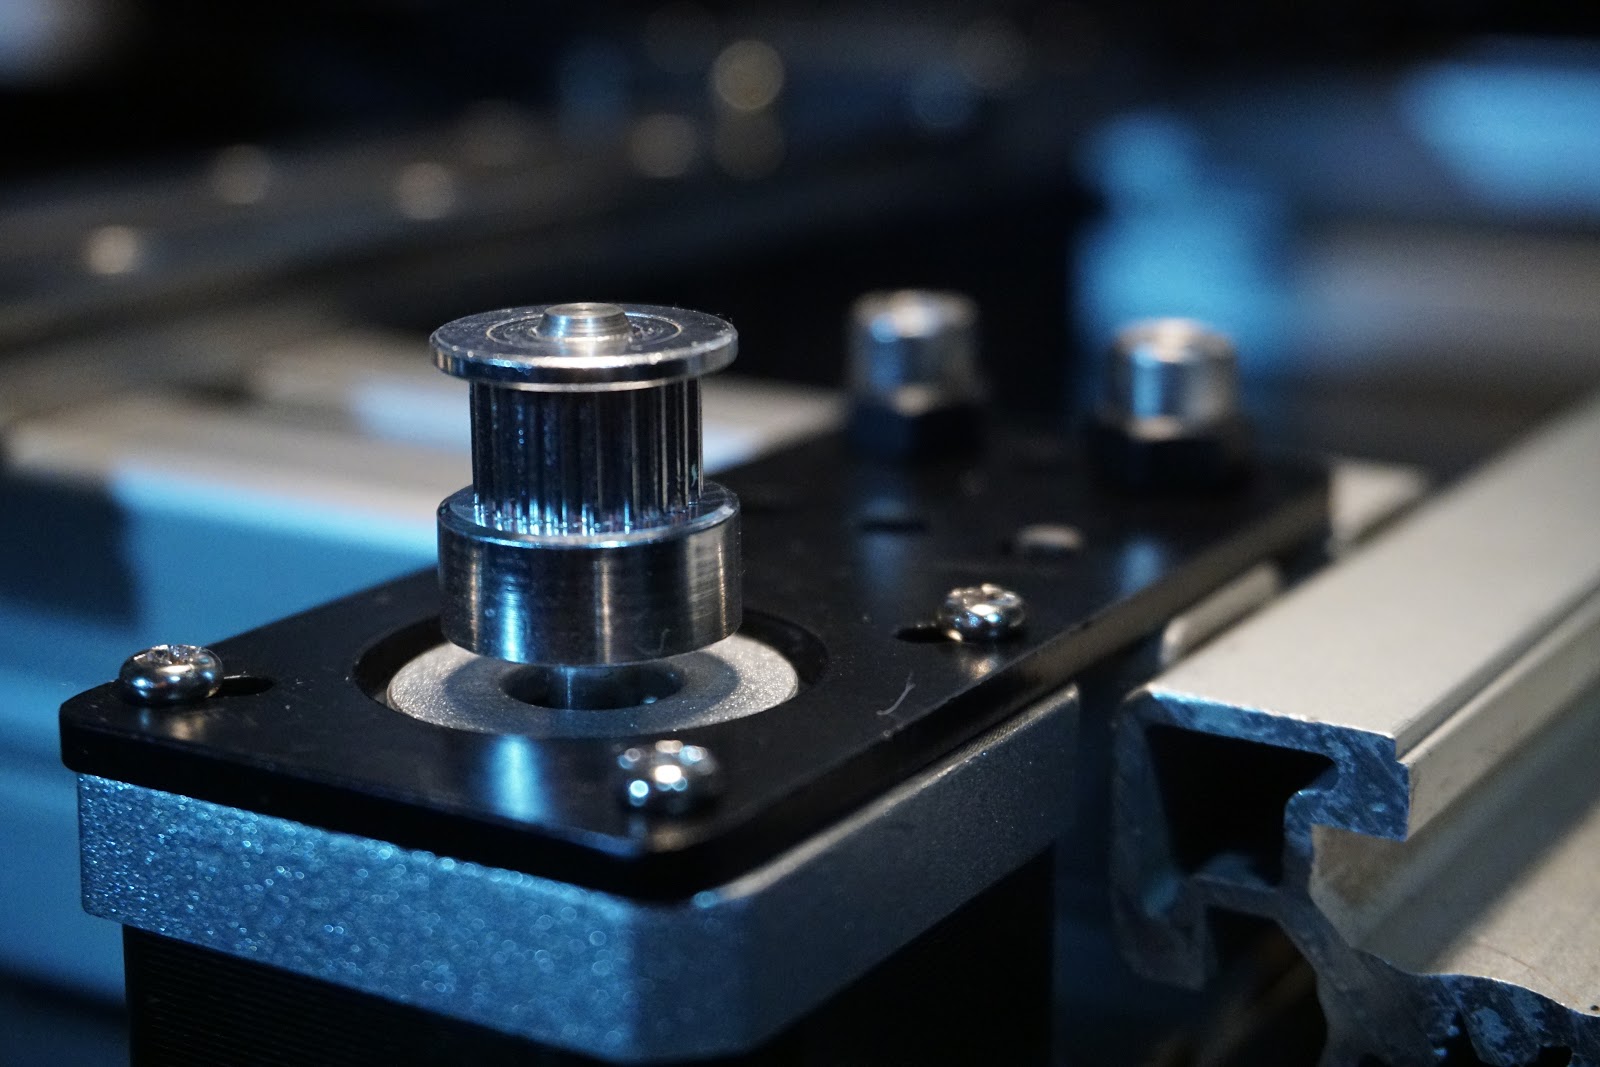
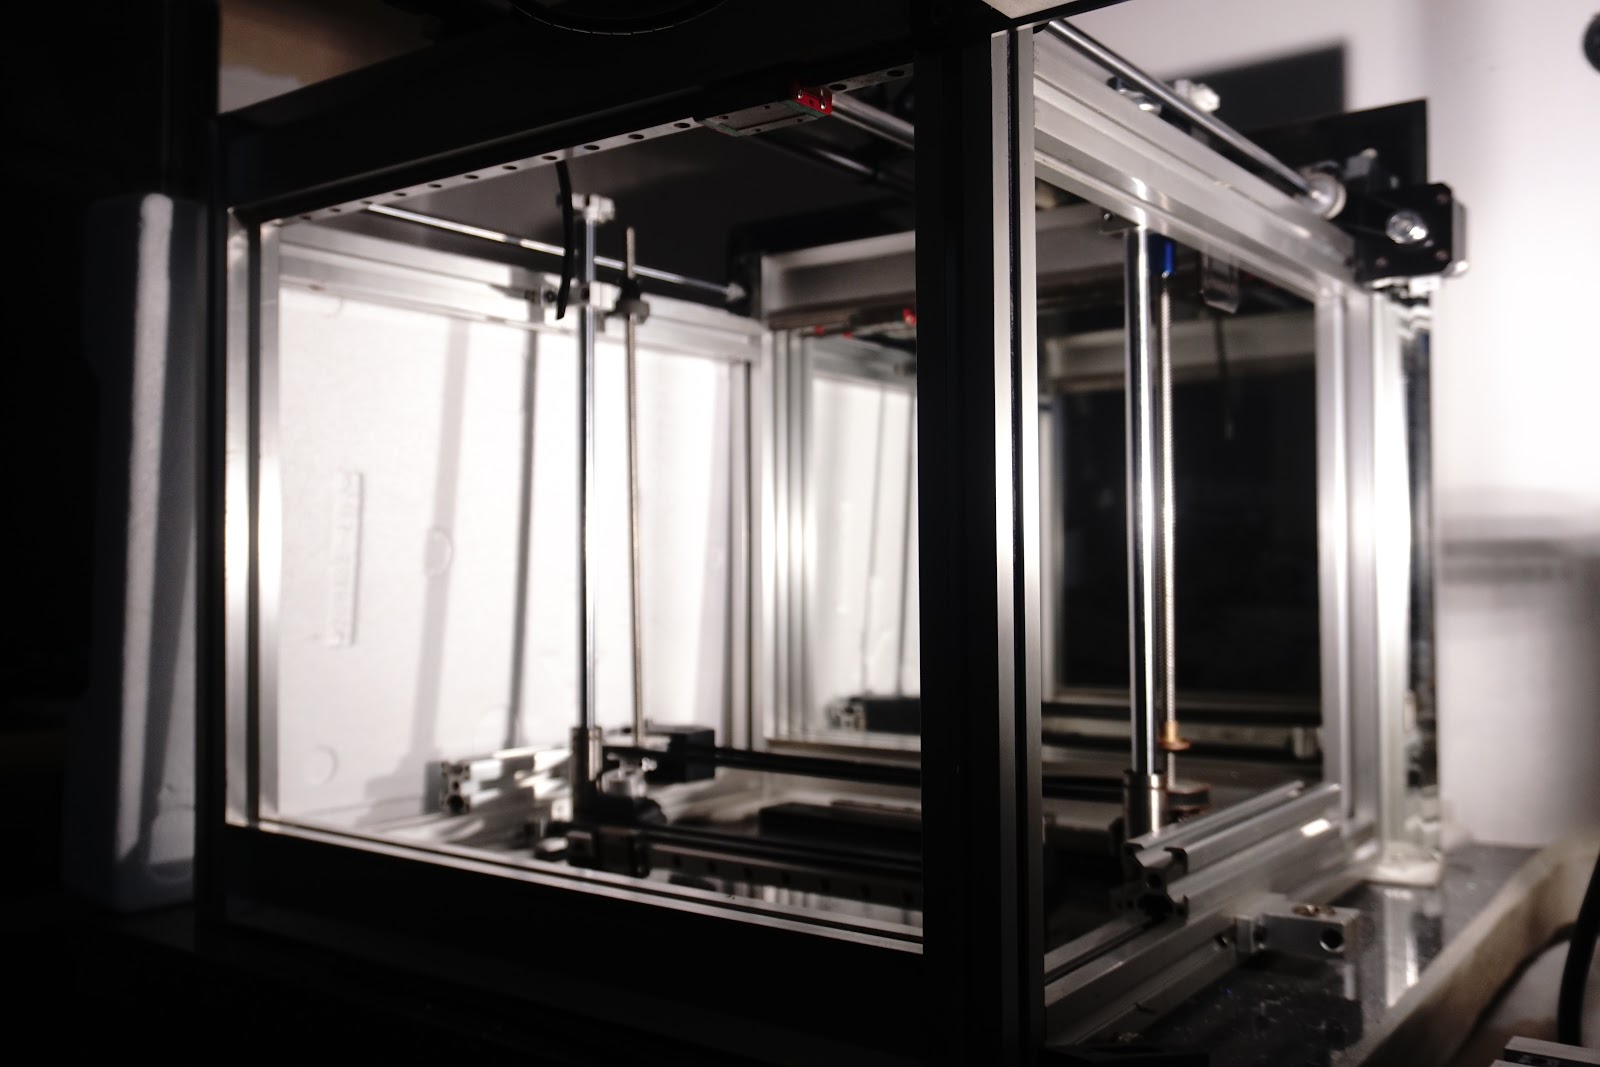
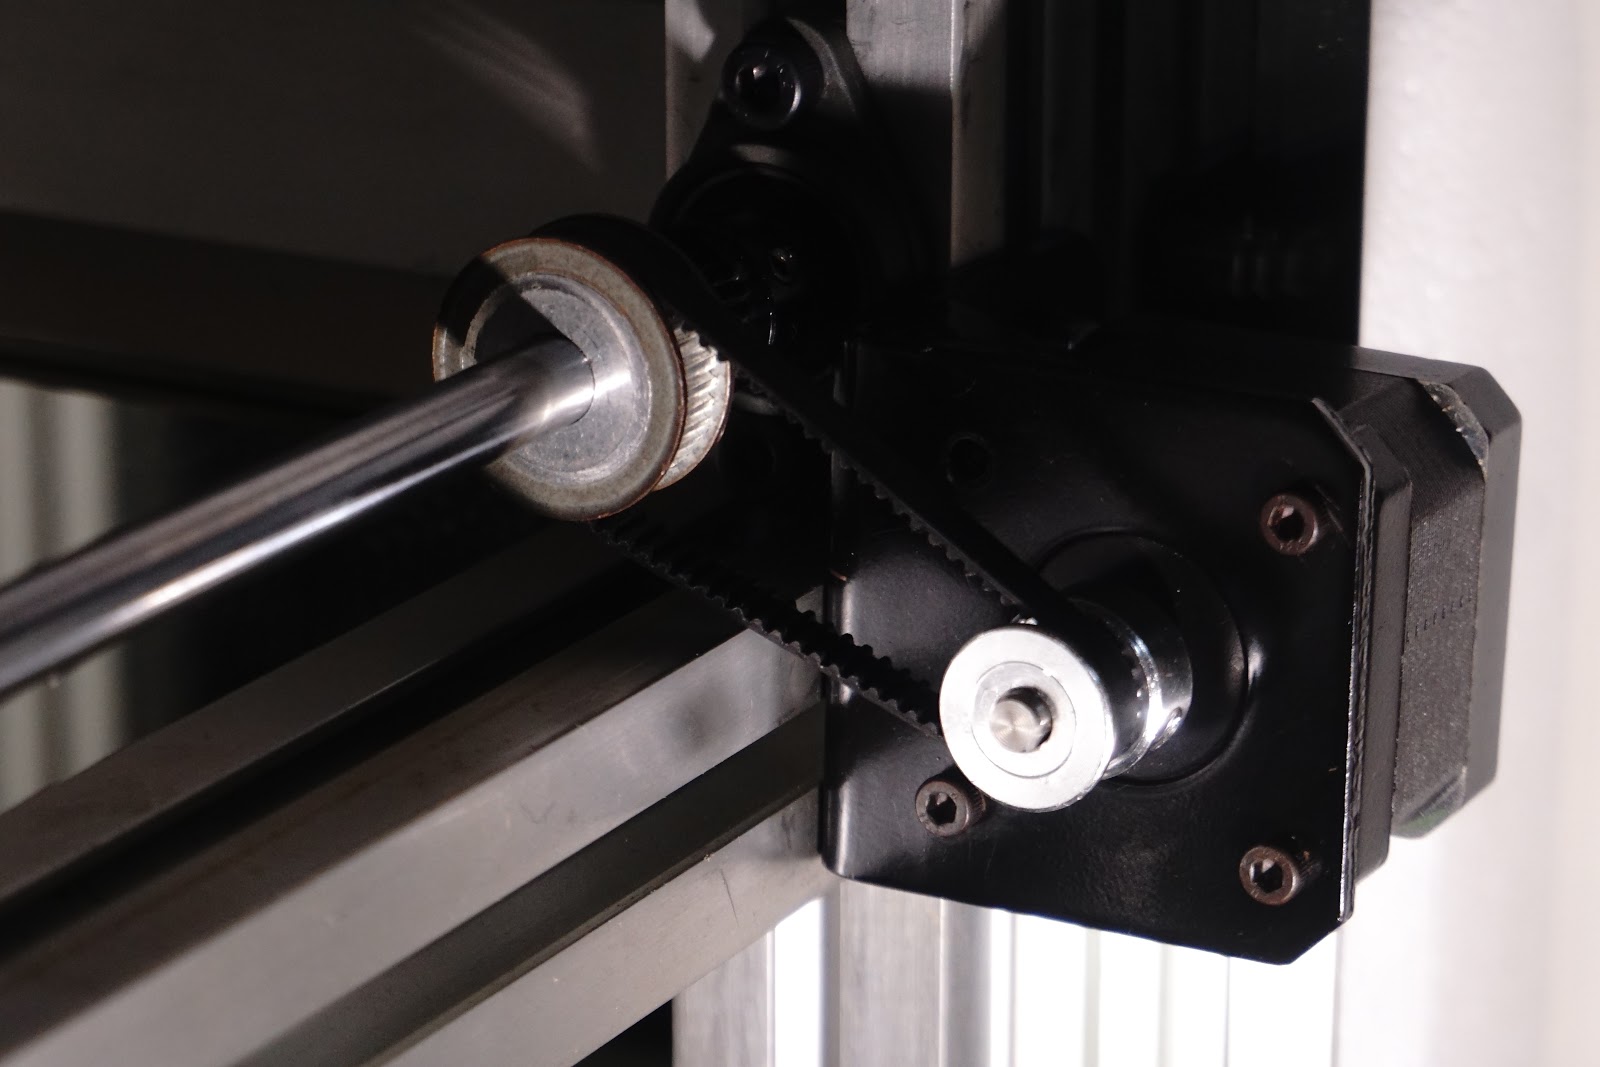
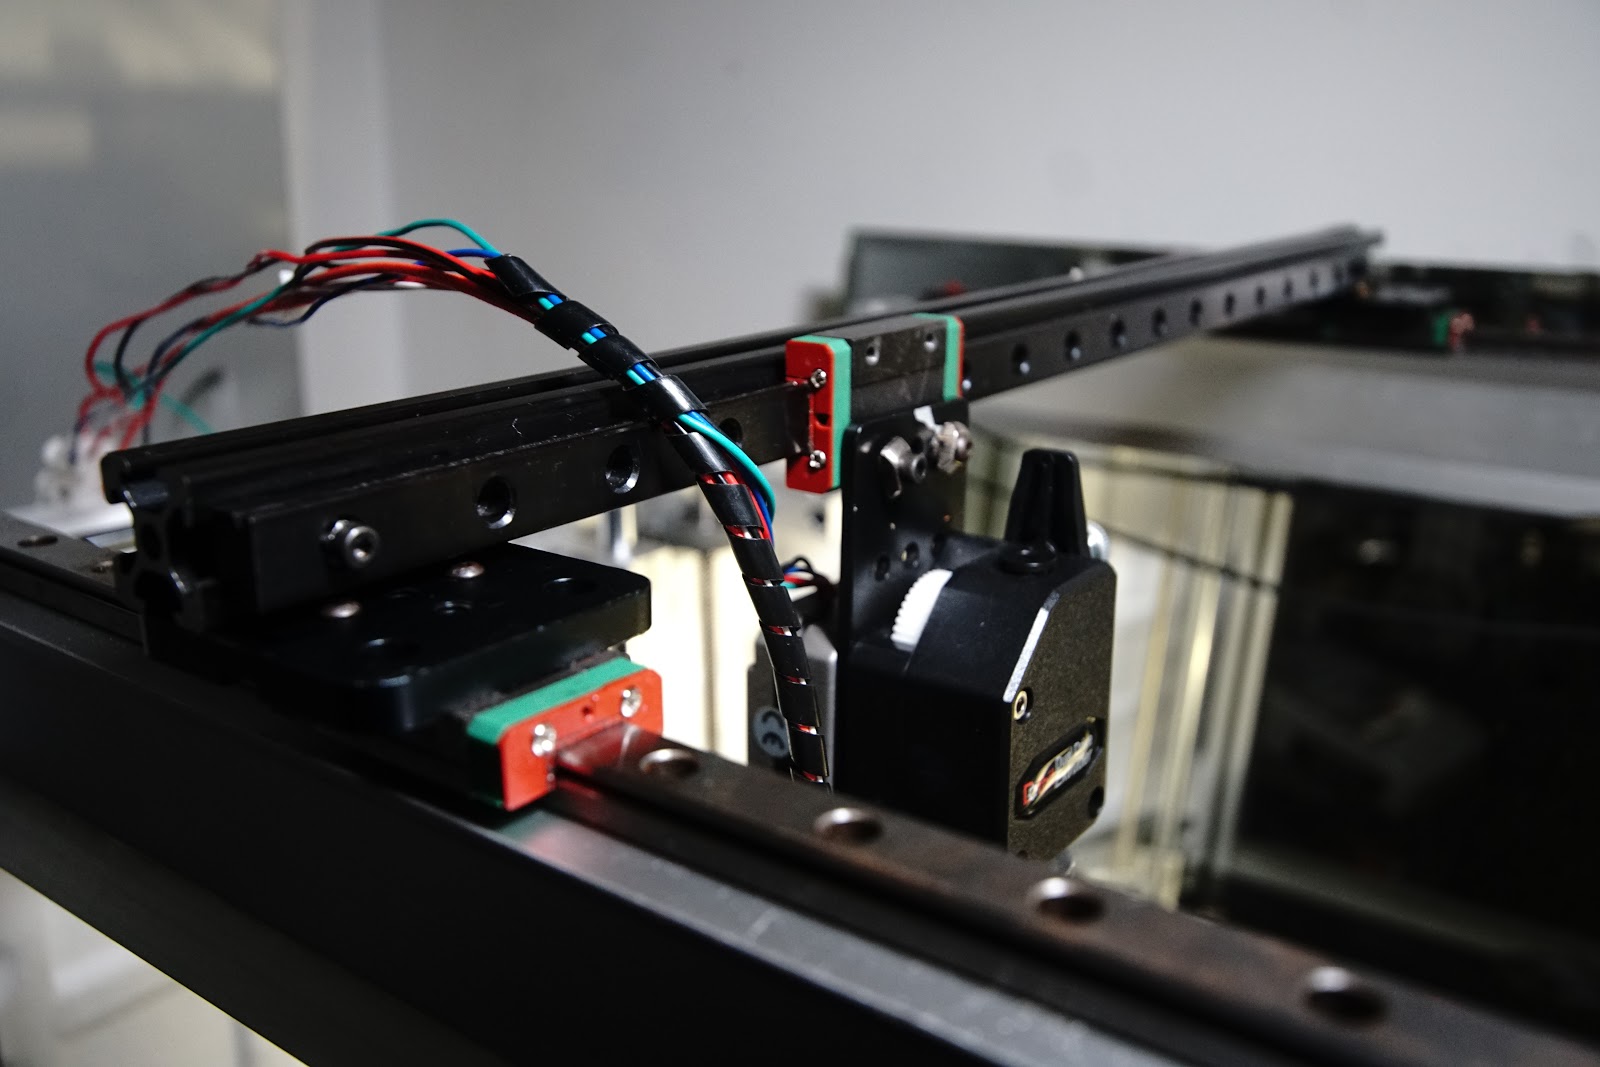
and a few quick changes, altering Z anchors/bearings the slack from the belt is removed without tensioner the belt maybe a little too tight now, might have to mess with the steps per mm as i think i'm stretching it...Now i'd like to mimic the arrangement to the other side, because the 3030 seems to line up perfect like this, but I might be out of 16mm rod ends, with a bit of luck i'll find 2 more..this will also slacken the belt 10mm...each side...i'd like to use smaller pulleys for sync so they could sit lower, I thought I could ride the pulleys on the radial bearings but they interfere with the frame, smaller pulleys would slacken belt too much. Thought I might also mount the Z motor back on the outside and drive with belt, but it was far easier to keep it on the inside & slide for tension, if I find a slightly longer loop I might put it outside later on. Starting to lean towards rails on the top, if I use the awkward bmg clone.


I really should clean off that dried blood, no fingers lost yet.
Digging out my large multicoloured piece of glass(once again), it dawns on me that more changes are needed, I need to move the Z cross bar to the center so the glass balances without extra struts, something it wouldnt do on 2040, though I could add 2 of, if I hang the black profile from the 3030 I gain a little height, wondering if any bed leveling will be needed or if I can level one axis with the screws and hope the other is true???
Edited 5 time(s). Last edit at 11/13/2019 08:26AM by MechaBits.
|
Re: MechaBits KraftWerk'r November 13, 2019 07:19AM |
Registered: 11 years ago Posts: 5,780 |
|
Re: MechaBits KraftWerk'r November 13, 2019 07:55AM |
Registered: 8 years ago Posts: 1,671 |
|
Re: MechaBits KraftWerk'r November 13, 2019 05:38PM |
Registered: 11 years ago Posts: 5,780 |
I saw a post that said you were looking for a name, and considering Godzilla. Mothra was superior to Godzilla in several ways, but especially because it had its own theme song, sung by the Peanuts. if you're going to name a printer after a Kaiju, shouldn't it have its own theme song?
Ultra MegaMax Dominator 3D printer: [drmrehorst.blogspot.com]
Ultra MegaMax Dominator 3D printer: [drmrehorst.blogspot.com]
|
Re: MechaBits KraftWerk'r November 13, 2019 10:55PM |
Registered: 8 years ago Posts: 1,671 |
|
Re: MechaBits KraftWerk'r November 28, 2019 06:40PM |
Registered: 8 years ago Posts: 1,671 |
Some new parts trickling through in the mail, but probably cant finish till January. Found a nice Idler [www.ebay.co.uk] but it looks heavier than it needs to be, no listing of weight so will figure out another way.
there are also 2 other lighter ones(inline & offset) as used on ender that would help to keep things looking neat & keep plastic out, but I am leaning towards openbuilds idler plates, I snagged 2 for a fiver, though in future something similar but only 20 or 30mm wide.... 2040 for X cross bar, would look so much neater but sadly I think it best not to waste time down that road and go with 2020 or just the rail. though one drawback of not using a support for the rail could mean rail getting bent if things mess up.
The 2x closed loop belts for the Y arrived, I could have got the next size down but would rather take up the slack than buy the wrong ones, they dont really need to be closed loop as I still have to tie to the Y ends.
with 2020 or without?
while waiting for the 2020 i've used a piece of L profile I had laying around, it's quite thin but seems strong enough really light and is actually easier to fit that the 2020. Still contemplating moving the 2xY rails higher by placing on the top of the profile. The hotend would sit a little higher than in the pics, its touch & go as to if the bed will go high enough, if I ditch the direct I can seat hotend low enough to meet bed.
I will be using 2x2040 as the cross braces for the bed, there was another config that crossed my mind for the bed. If I flipped the 3030 180 so its on the inside of the rails, the piece of glass would probably sit right in the slots, would be cool to get that working to save on parts but not so good when it comes to trying to remove prints....scratch that go traditional route.
Unfortunately though with the design changing it's probably not going to make it onto the machine,
I thought I was going to use 2040 for the X, just because of the ease of drilling some holes to mount to carriage, and because of the motor mount have 20mm hole spacing,
but you know i'll probably be then trying to figure out how to reduce weight at some point might as well be now, while waiting for the extra bits.
Found these items off the Ender, which would make a nice addition but possibly throw all my dimensions out, unfortunately they dont list the center distance, I wonder if its 30mm [www.ebay.co.uk]
These black plates are heavier than needed, but sexier than my pigs ears, and I knew the holes would work for some things but not as intended, I could get more out of them by rotating 45 degrees, I knew it would be tricky to move things around just so I could use the belt attachment points, but i'll have to figure out some other way to link to the belt, but I also now have an idea on how low the hotend hangs...if I used that extruder and really I should as it's really the only machine that could handle it, but probably better to use as bowden, rails need to go to the alt position...


as I move parts around I dismantled 2 printers for some bits, but started another build, as soon as I pull out the large profile I have the start of a new base for my mini metal machine,

Just ordered openbuilds anti backlash znut for one side of Z, not for the backlash properties but because of the way the closed loop belt is nice & snug at the moment and I dont really want to alter it, but the Z screw on one side is nearer to the 3030 profile, its 2 or 3mm and the znut has 2mm of material so if its slightly out I can pad it 1mm...far easier than having to introduce a tensioner, though I wonder how long the belt will remain tight.
Edited 7 time(s). Last edit at 11/30/2019 10:30AM by MechaBits.
|
Re: MechaBits KraftWerk'r December 01, 2019 05:26PM |
Registered: 8 years ago Posts: 1,671 |


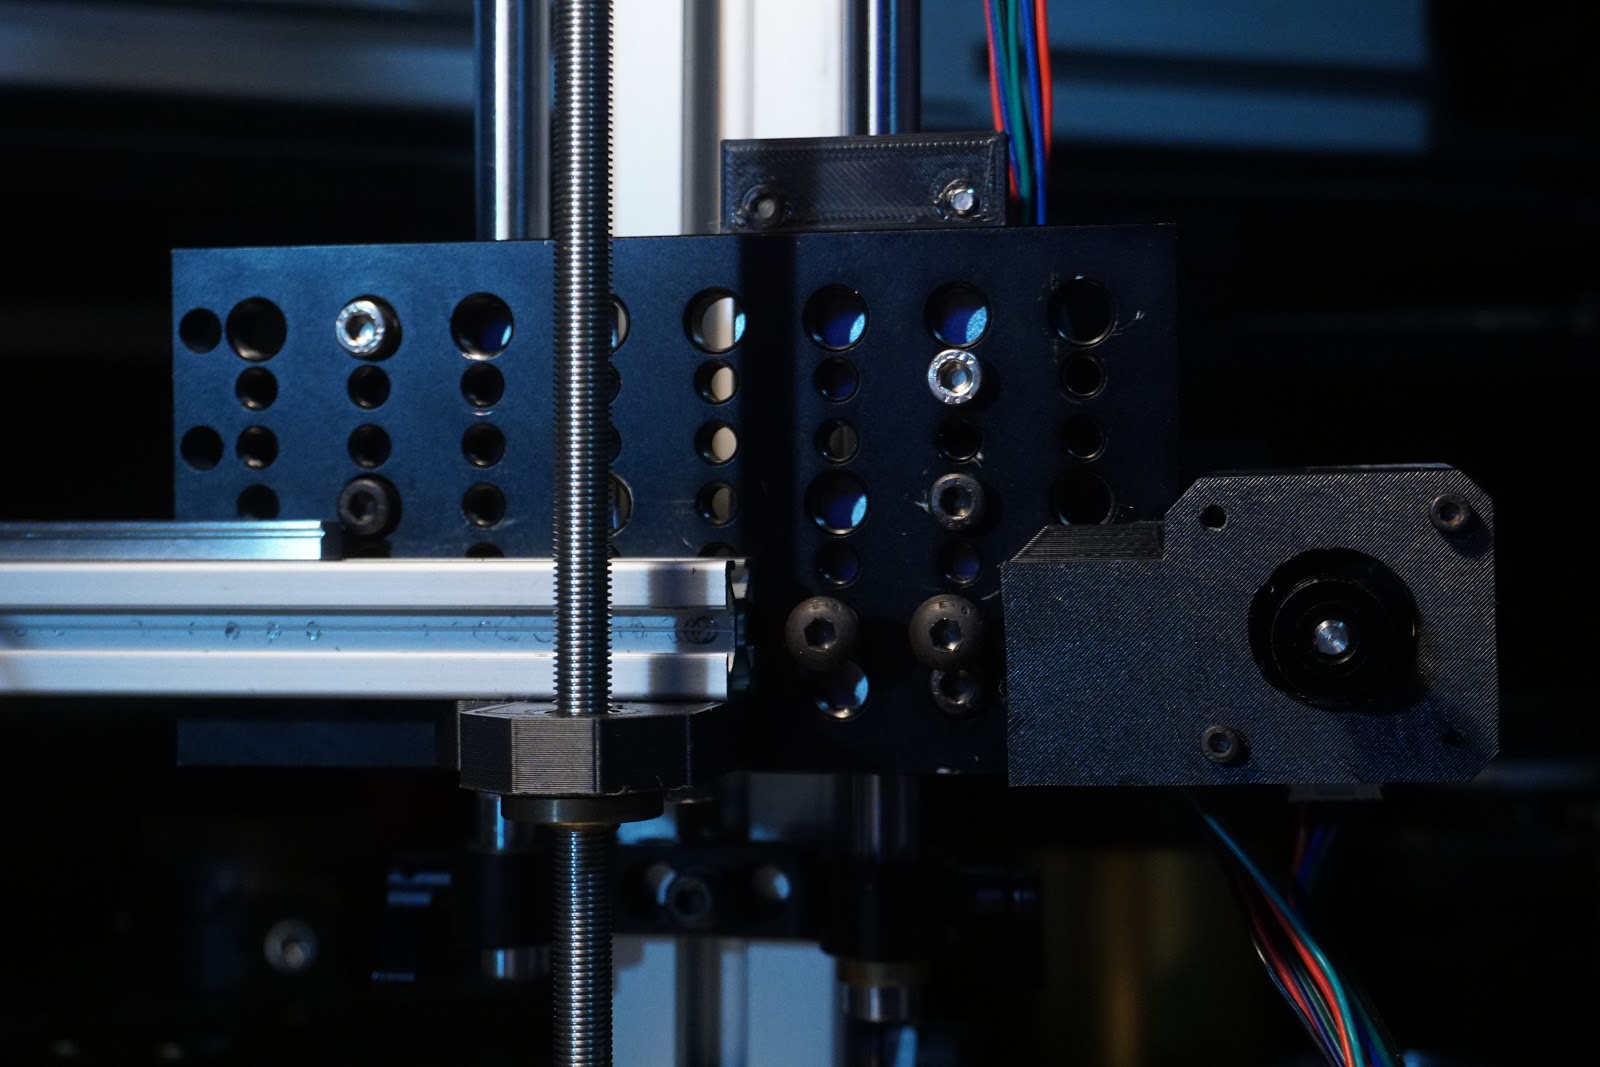
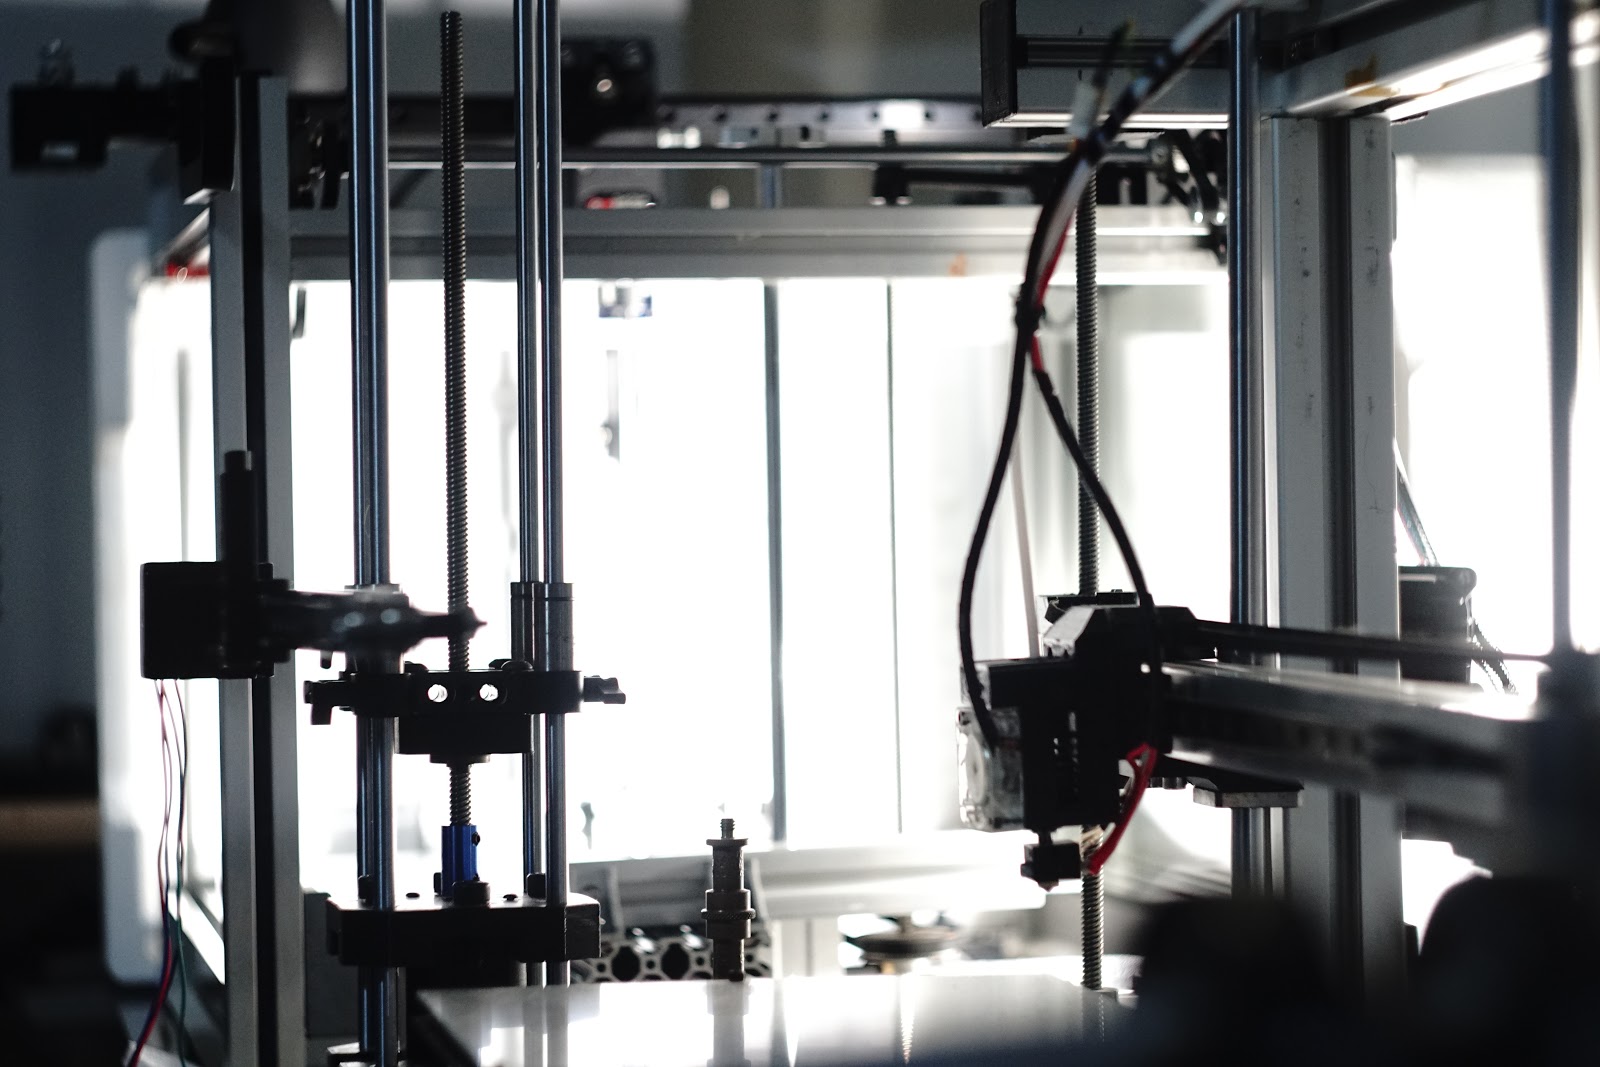
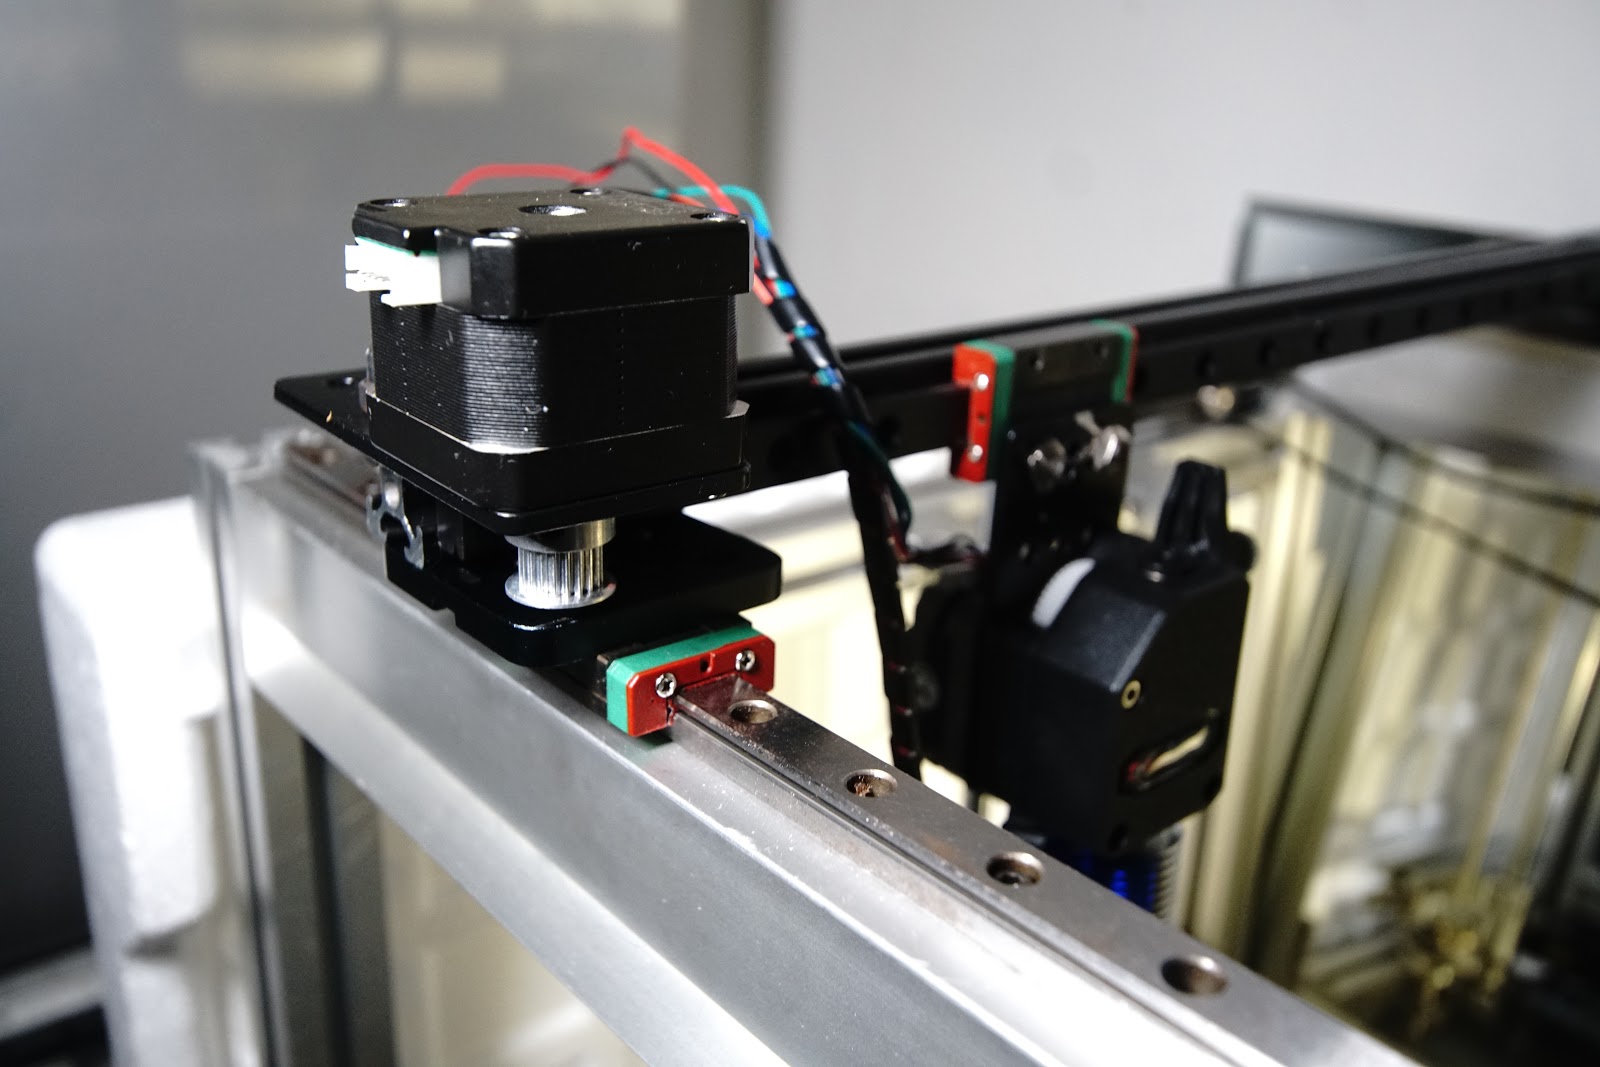
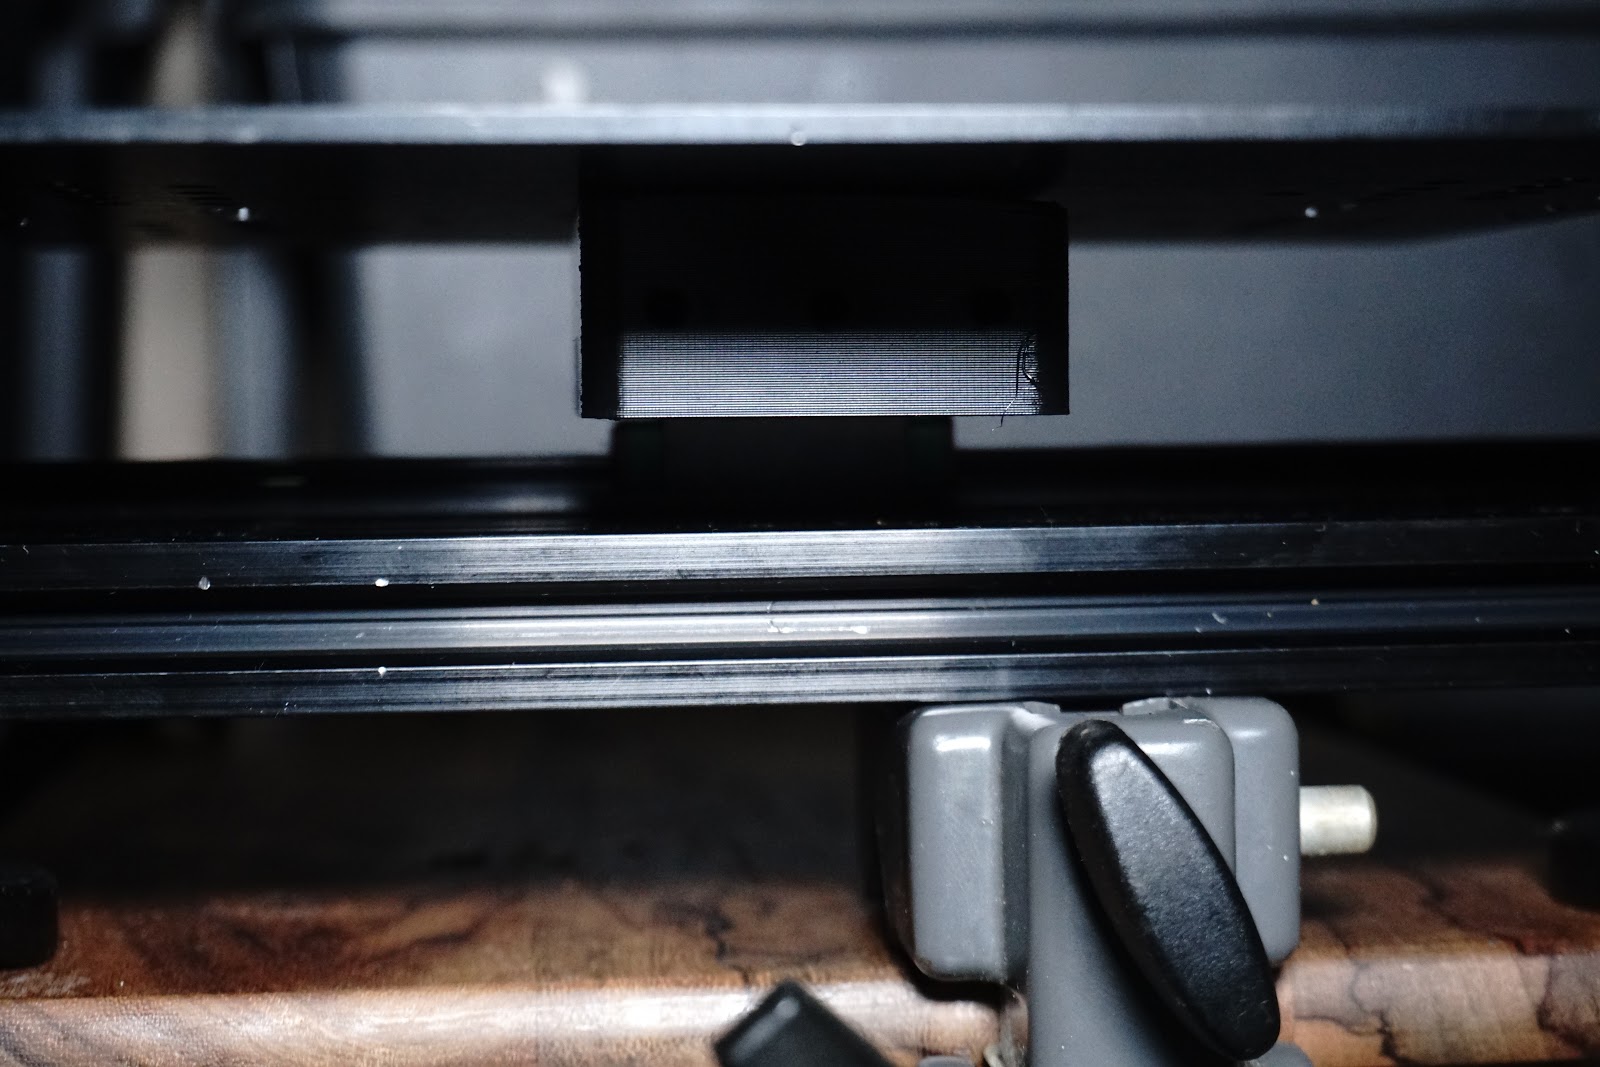
With the X rail in the top position & the hotend slung as low as it can go without additional mods, the X motor just clears the closed loop belts for Y, the tip of the nozzle is almost exactly as high as the bed could go (though if I flip the 3030 ends holding the bed 180 i could get an extra 30mm in Z travel), black mark on 12mm rod, which is 30mm shy of the end of Z travel because of the position of the 3030 holding the bed. So it's looking possible, based on how high the bed ends up off its support, 15mm should get me where I need to be. The rear of the X rail is uncluttered so i'll flip axis 180 so the hotend can't hit the Z motor. I don't think the motor on the extruder is upto the job, no idea of the specs, so may need the 40mm black one I have spare, I like the way the motor fits snug under the rail, the whole thing feels like a nice balance.
To do it justice it would be time for 32bit control & 24v power, another £60+ I really dont fancy spending out on the BTT board & finding issues, doubt i'd want to push speed above 100 anyway. Hotbed, & a few more fittings & 24v parts will probably break the £100 mark, more if I went for multiple filaments (but sod that). I think I just spent £50 ish on the recent parts, though cant remember if they where all for this machine, plus the frame & bits that are already on the machine, say £150 though I might be forgetting to factor in linear rails...must be around 400 Squid & the precious time we spent together....I wonder what would I rather have with 400 quid? & my time back... would I have even started it if I knew the cost? but you kinda get sucked into it slowly, not sure if I saw this in a shop window with a 400 quid price tag...i'd probably think what the hell do I need another printer for, it's more fun to build than print or buy.
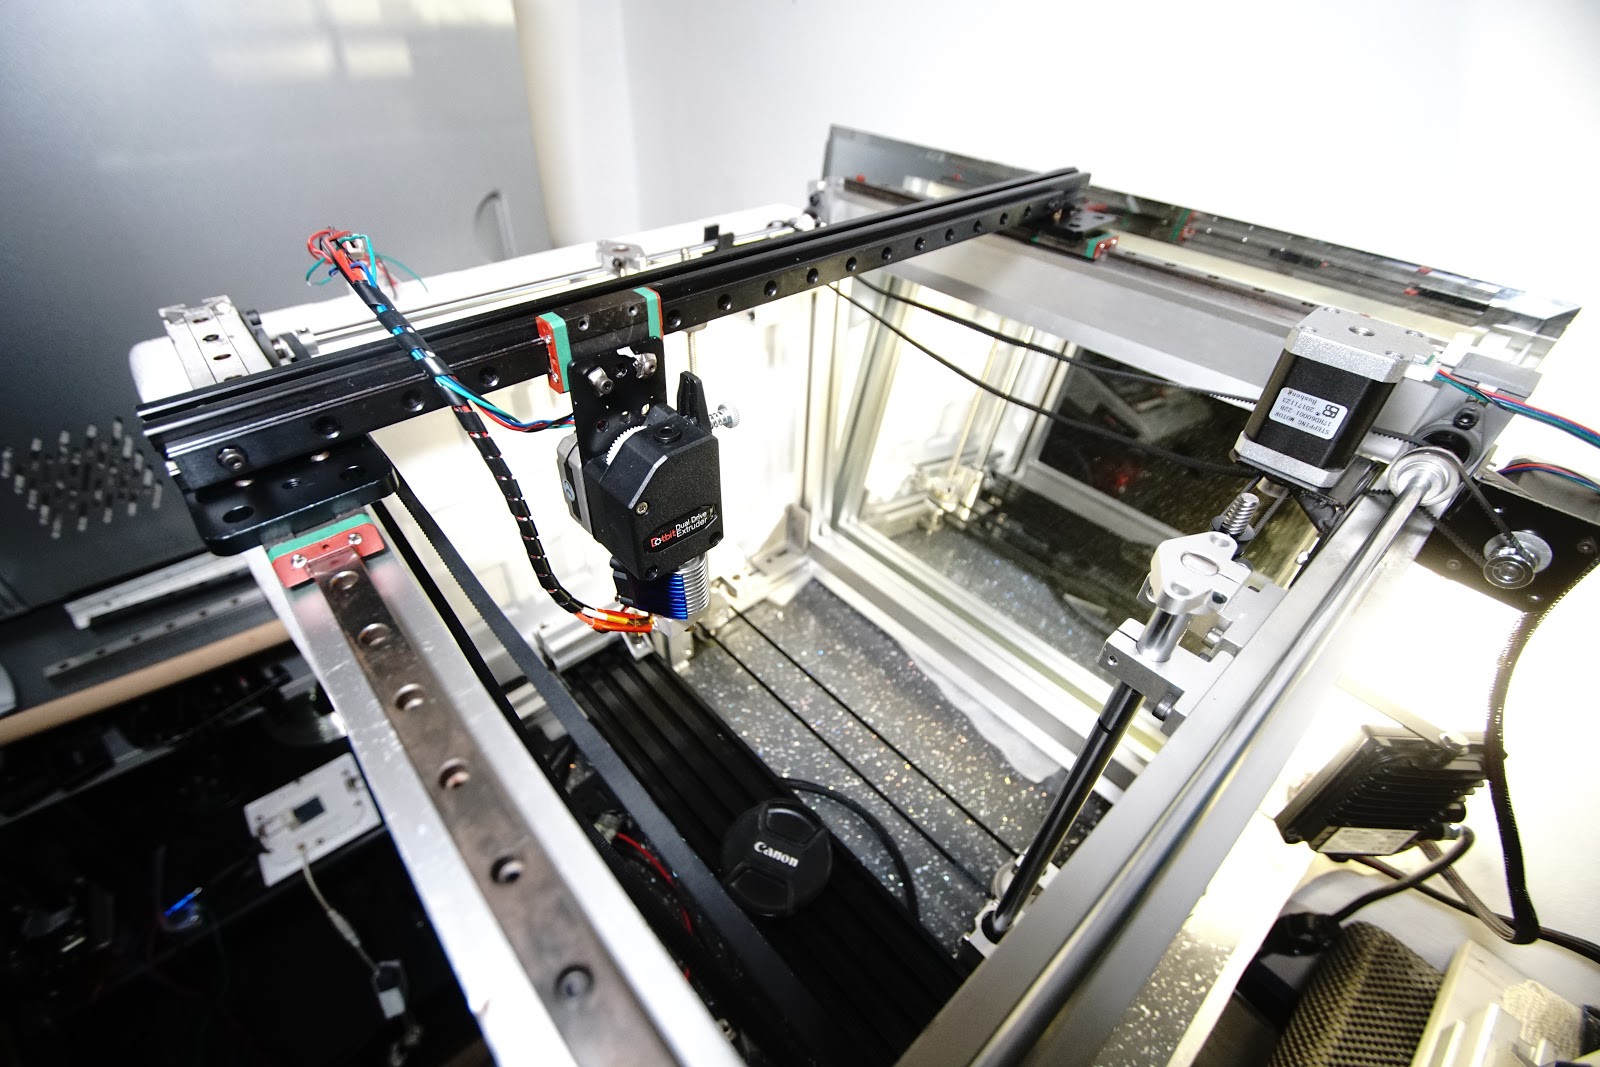
...no sooner is the ink dry and the other 50mm openbuilds plate arrives, I decide its wasted as the cart for the hotend and better off as the plates to support the X rail, which is held with 2xM5 + sliding ball nuts..and one at the other end so it could allow angle without breaking anything....it feels secure and I think Y could be powered just one side as it doesnt seem to want to rack. I knew I wouldnt be able to resist making it all black and so much neater. Also decided on a better belt path, clearance is tight but clearance is clearance.
Edited 2 time(s). Last edit at 12/02/2019 09:10PM by MechaBits.
|
Re: MechaBits KraftWerk'r December 30, 2019 12:09PM |
Registered: 8 years ago Posts: 1,671 |

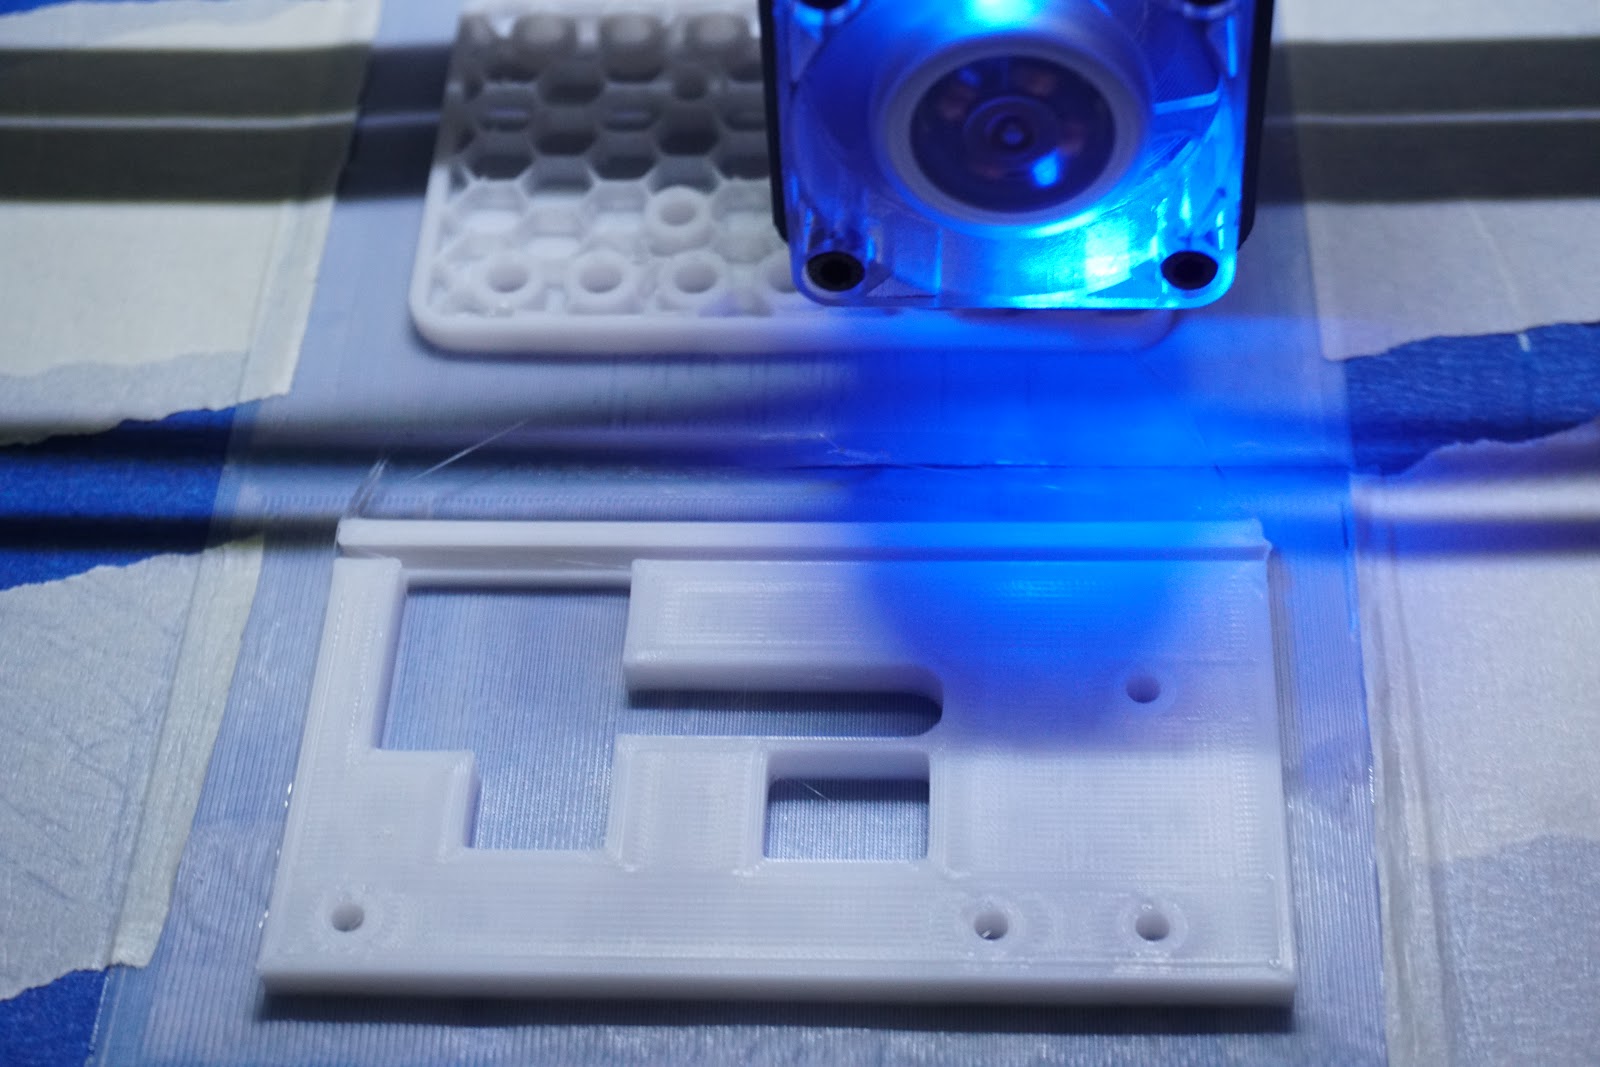
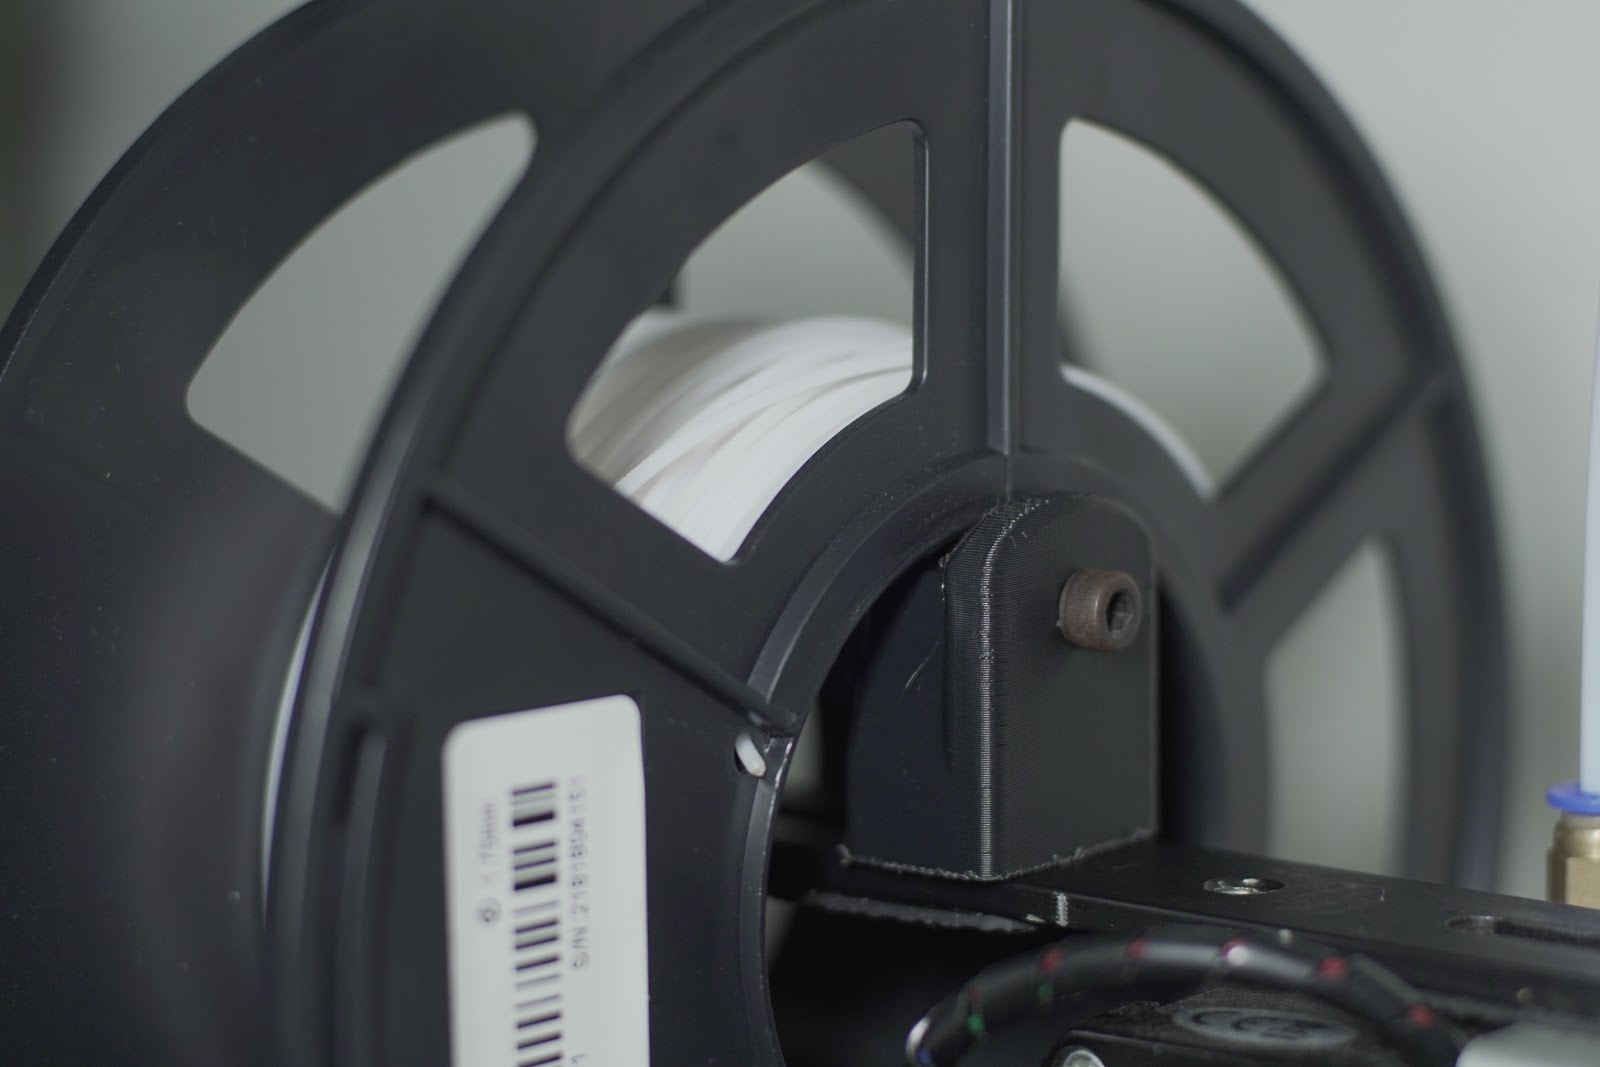
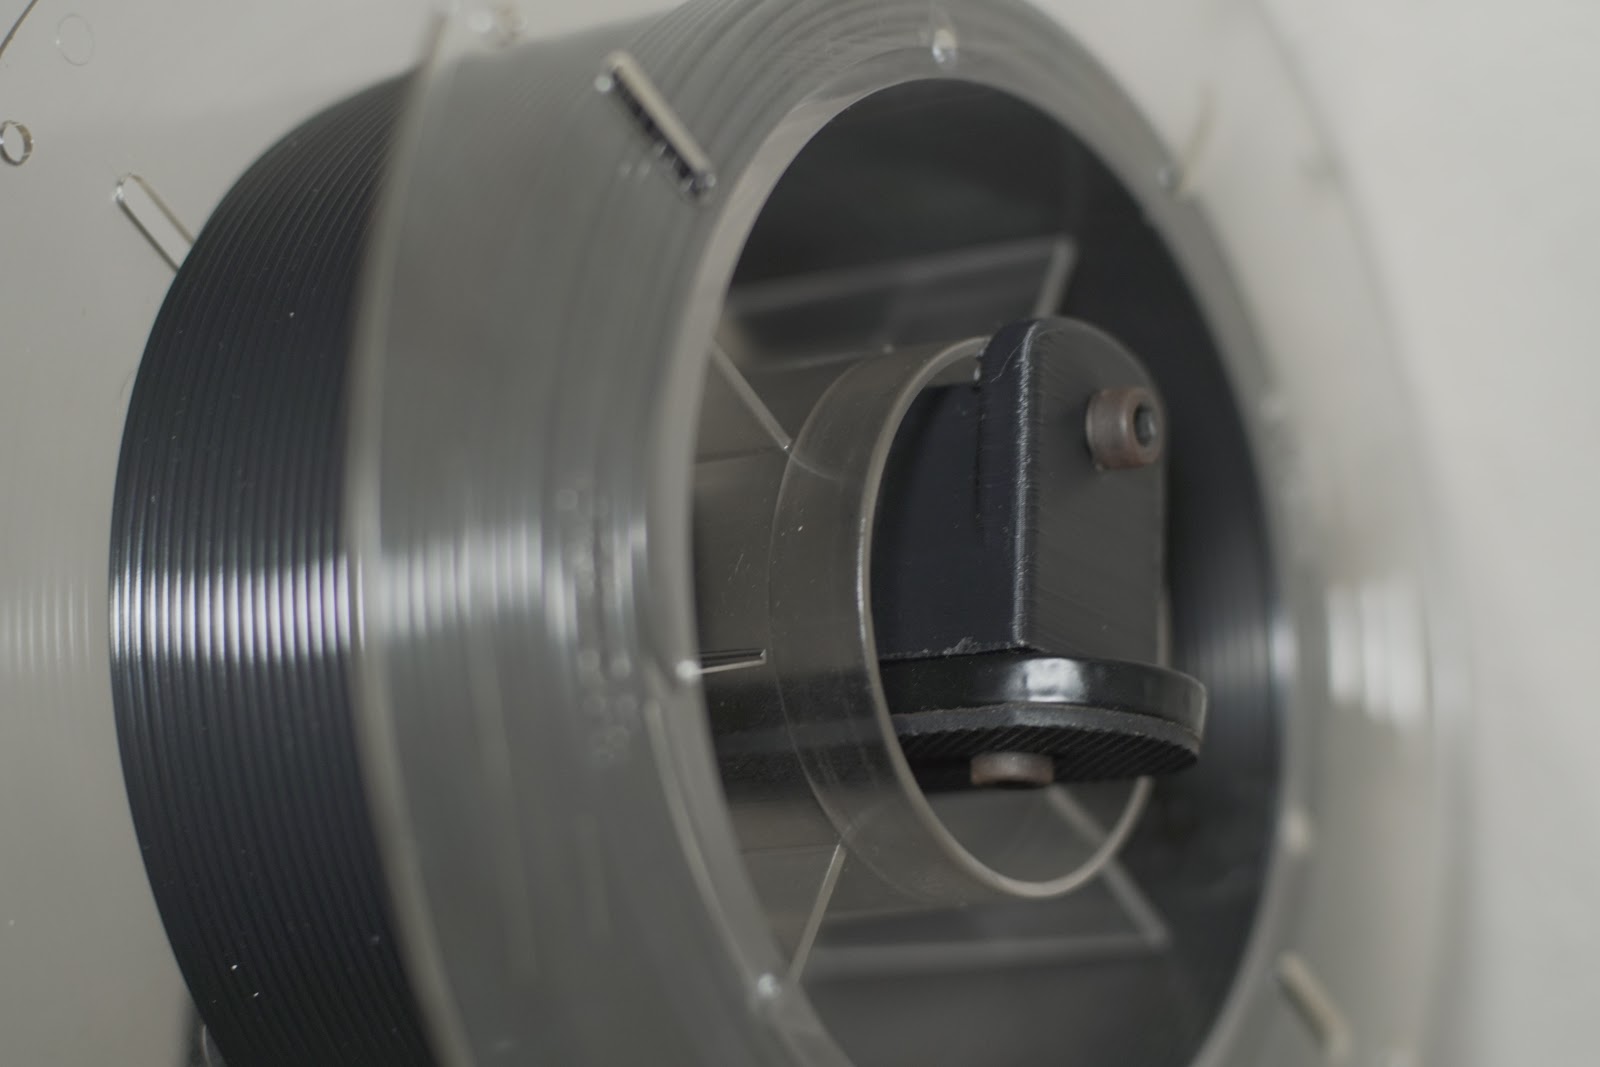
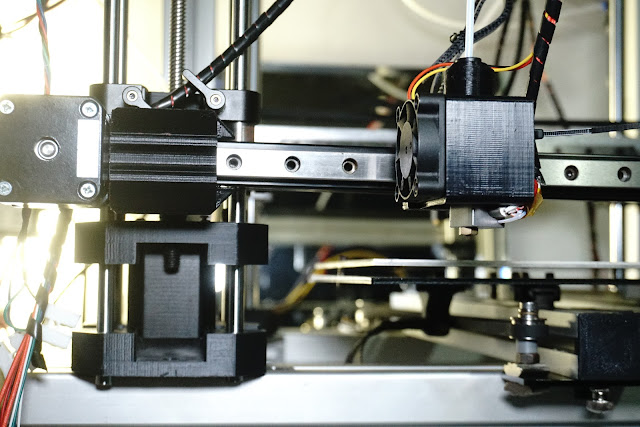
Hotend / Fan Shroud for the Mini Machine, new Filament Roll (YS) so all those larger parts I've been putting off for months might see the light of day. Haven't bothered adjusting anything since the last roll and didnt want to open another until the printing mood came back, it's taken a while, and it will still probably last a few months


And a couple of little parts for the cube, no other way at the moment to fix the belts obviously I wanted to keep things metal, but it will be a while before I bother with a heated bed/chamber. I printed a mount for the extruder plate, but overlooked the fact that the clearance is not the same on the front of the metal plate due to the extruder housing, so the plate wouldnt work as intended, ie to sandwich the metal plate to the carriage, so I had to flip it, which is why the filament path is a little out.(maybe print another in the future)

Edited 4 time(s). Last edit at 12/30/2019 10:31PM by MechaBits.
|
Re: MechaBits KraftWerk'r January 24, 2020 10:12PM |
Registered: 8 years ago Posts: 1,671 |

Now ideally I need 4 holes in the corners of the board so I dont have to use the manfrotto parts...I only need the feet for clearance for the Z bolts. I need 4 more 8mm holes for the Z Base the lowest the hotend can go is about 60/70mm from the board(unless motor was under the board it would look really cool like that & how I imagined in CAD but never had the part). So I needed to build the bed up to that height & the clamp does this easy, but I will replace that with a quick release plate, neater lower, making it easy to be used elsewhere & keeping holes in the board to a minimum, 3 for the bed, should be easy enough to keep things lined up. With room underneath for the gubbins.
If Z motor was under the board I could loose the riser on the bed, lower profile & more minimal look, at the moment there's just one black rail but the riser was made for 2, though it seems to be good enough with one, i'll add another just for the symmetry, I had some 2040 on order before xmas and they ballsed up the order so until I order more I wont be able to do what I had in mind for them...they where silver maybe i'll go black next time...maybe I dont even need them now.
|
Re: MechaBits KraftWerk'r January 25, 2020 01:10PM |
Registered: 8 years ago Posts: 1,671 |


thats better, ideally I want the clamp on the board because it looks neater, but if I put the clamp on the bed profile, all I need to swap it between machines is plates rather than more clamps...so guess I wont be adding it to the board, but there only 3 holes in the clamp, but I could put many more in the plate.
|
Re: MechaBits KraftWerk'r January 27, 2020 10:03PM |
Registered: 8 years ago Posts: 1,671 |


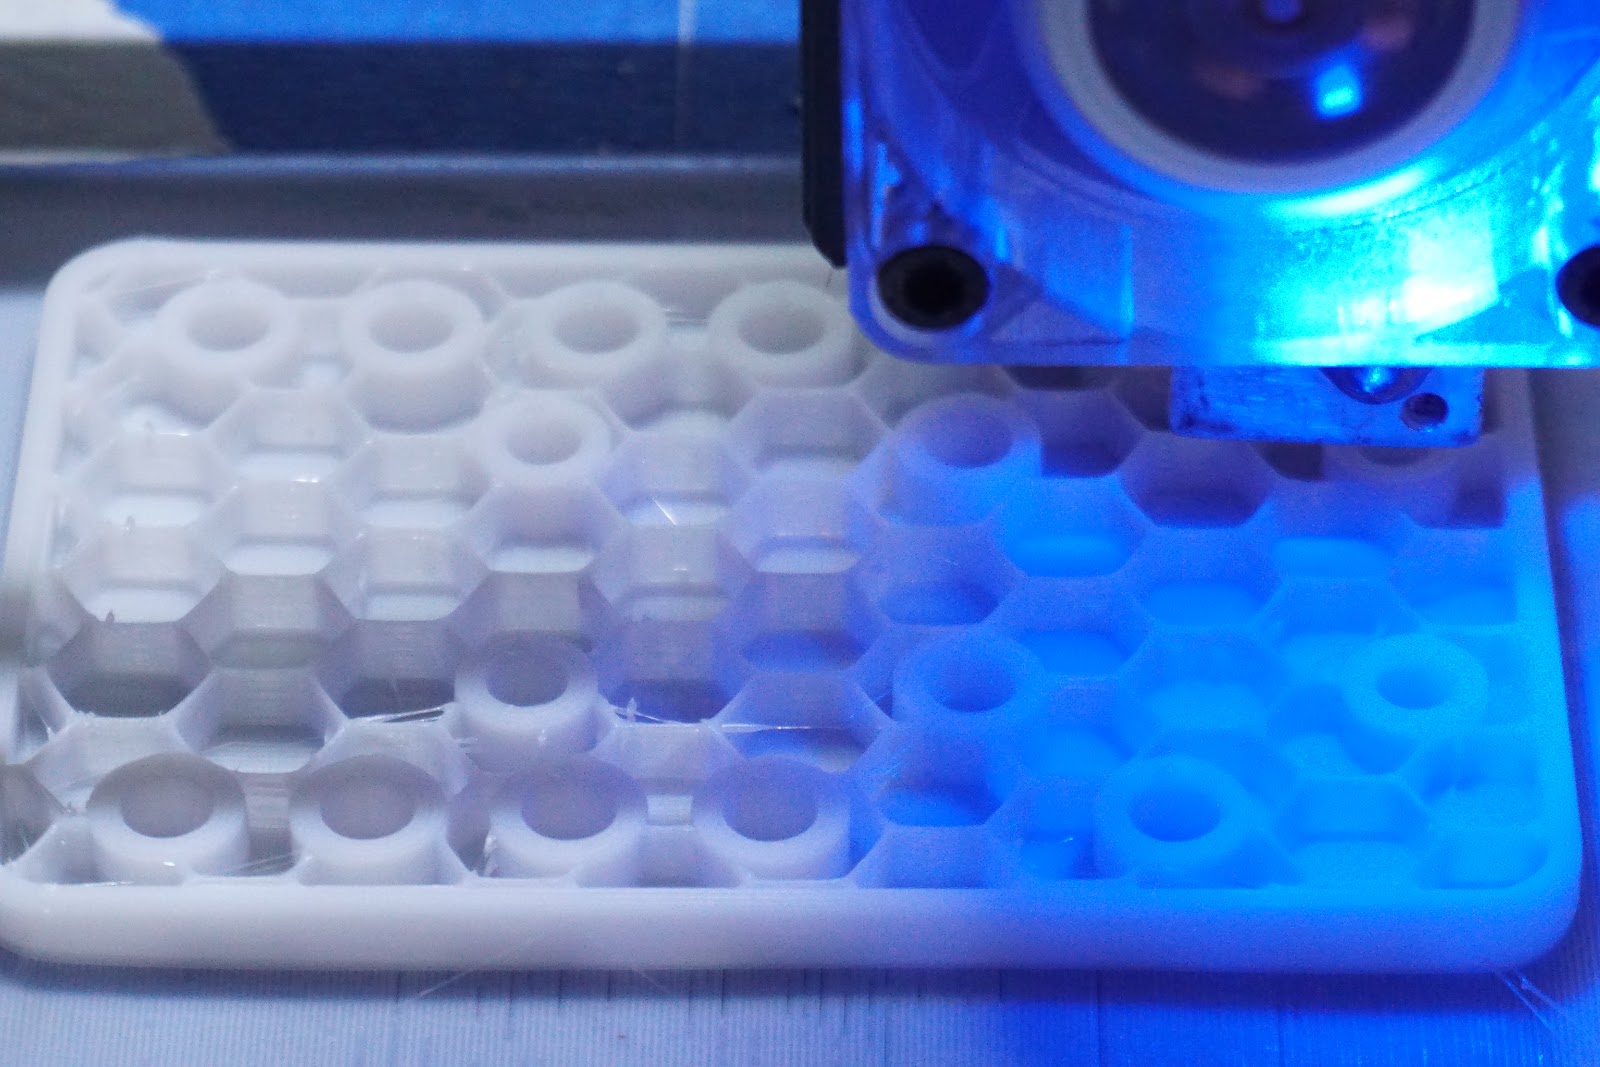
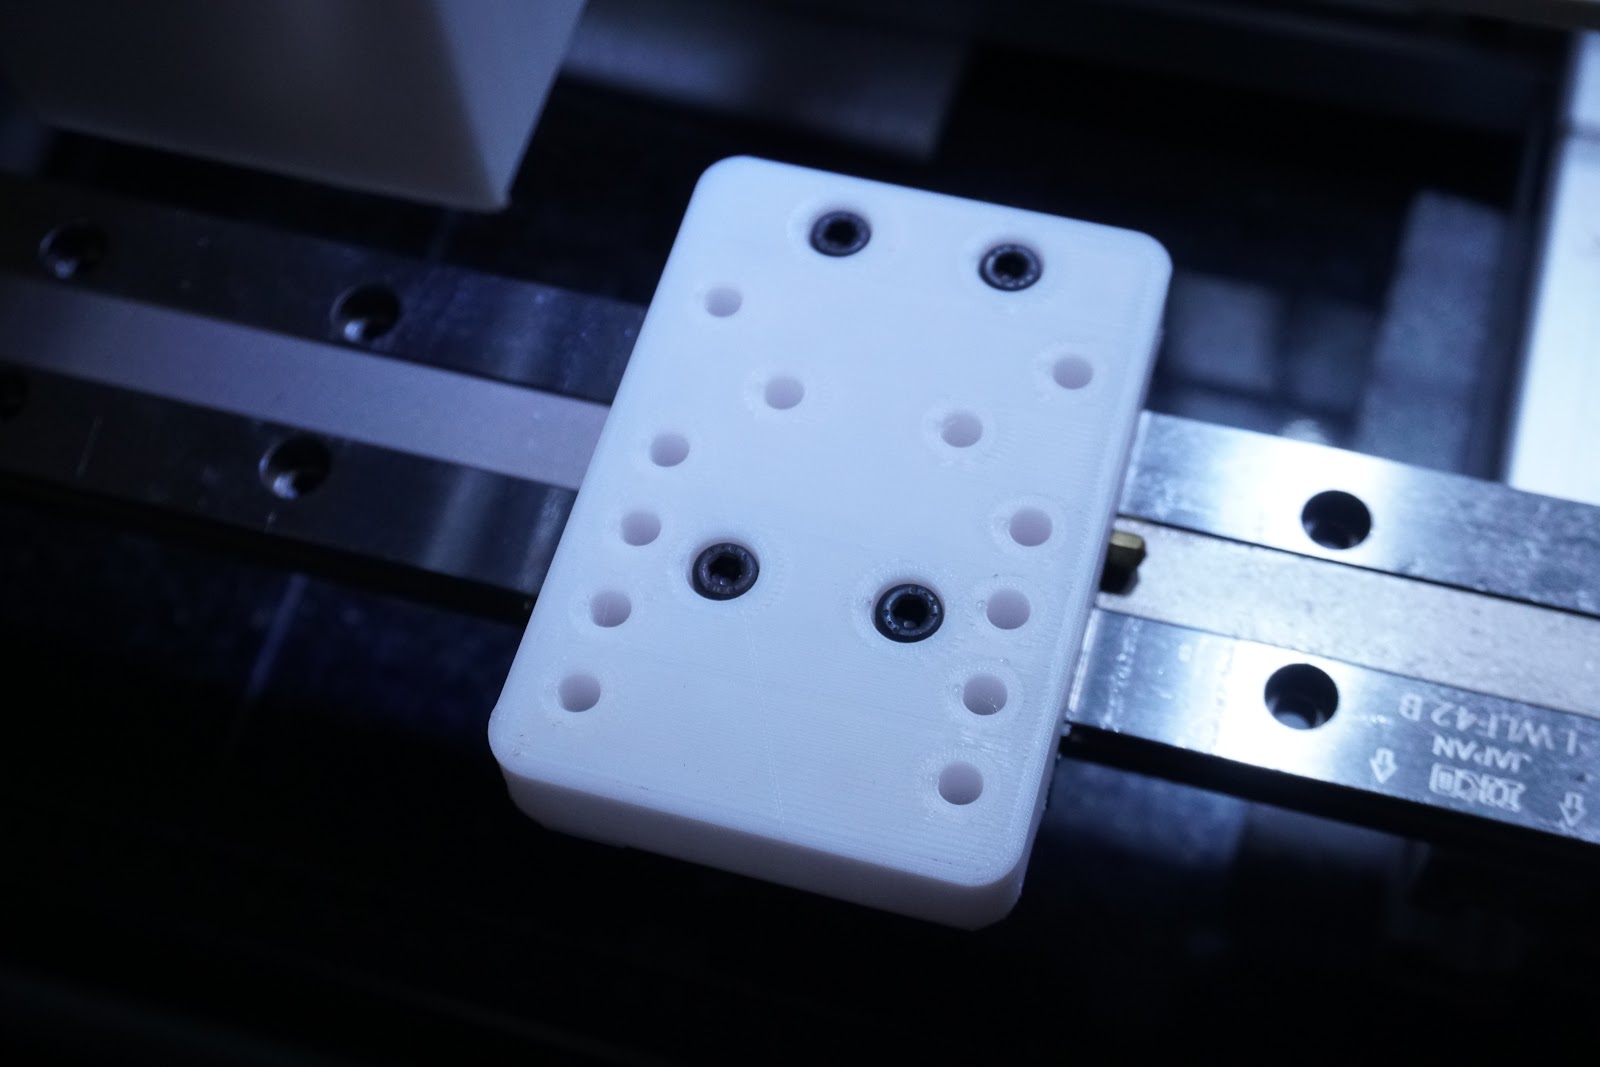
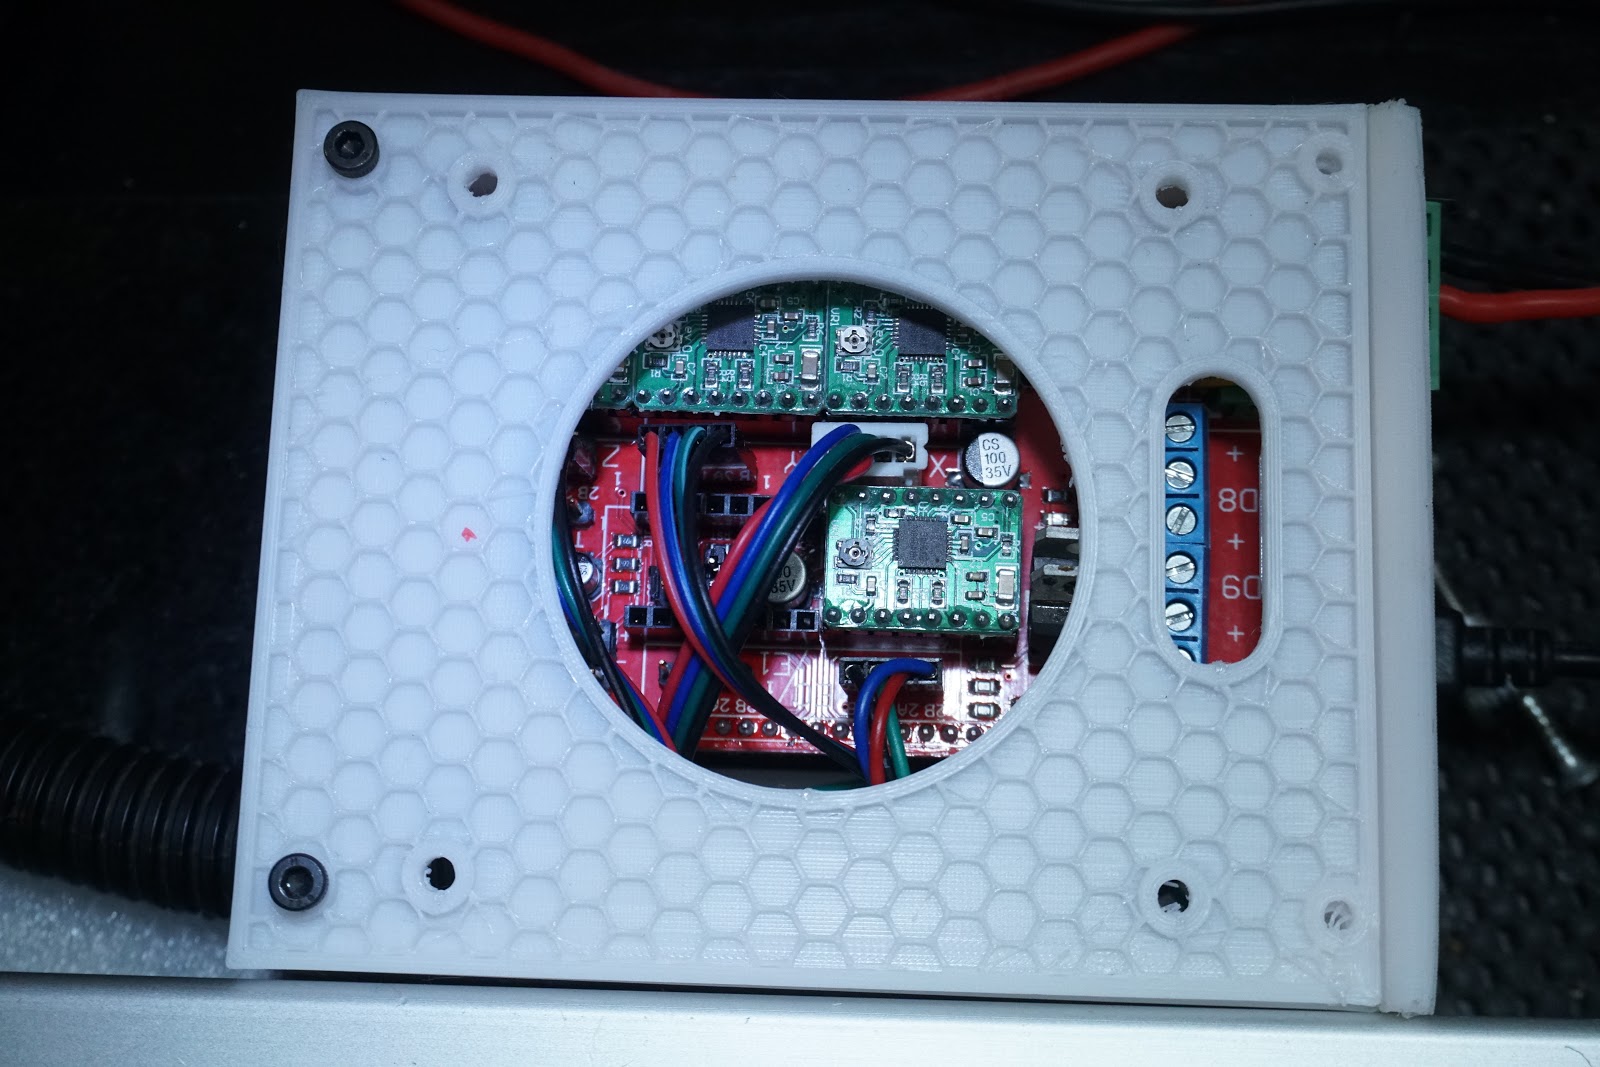
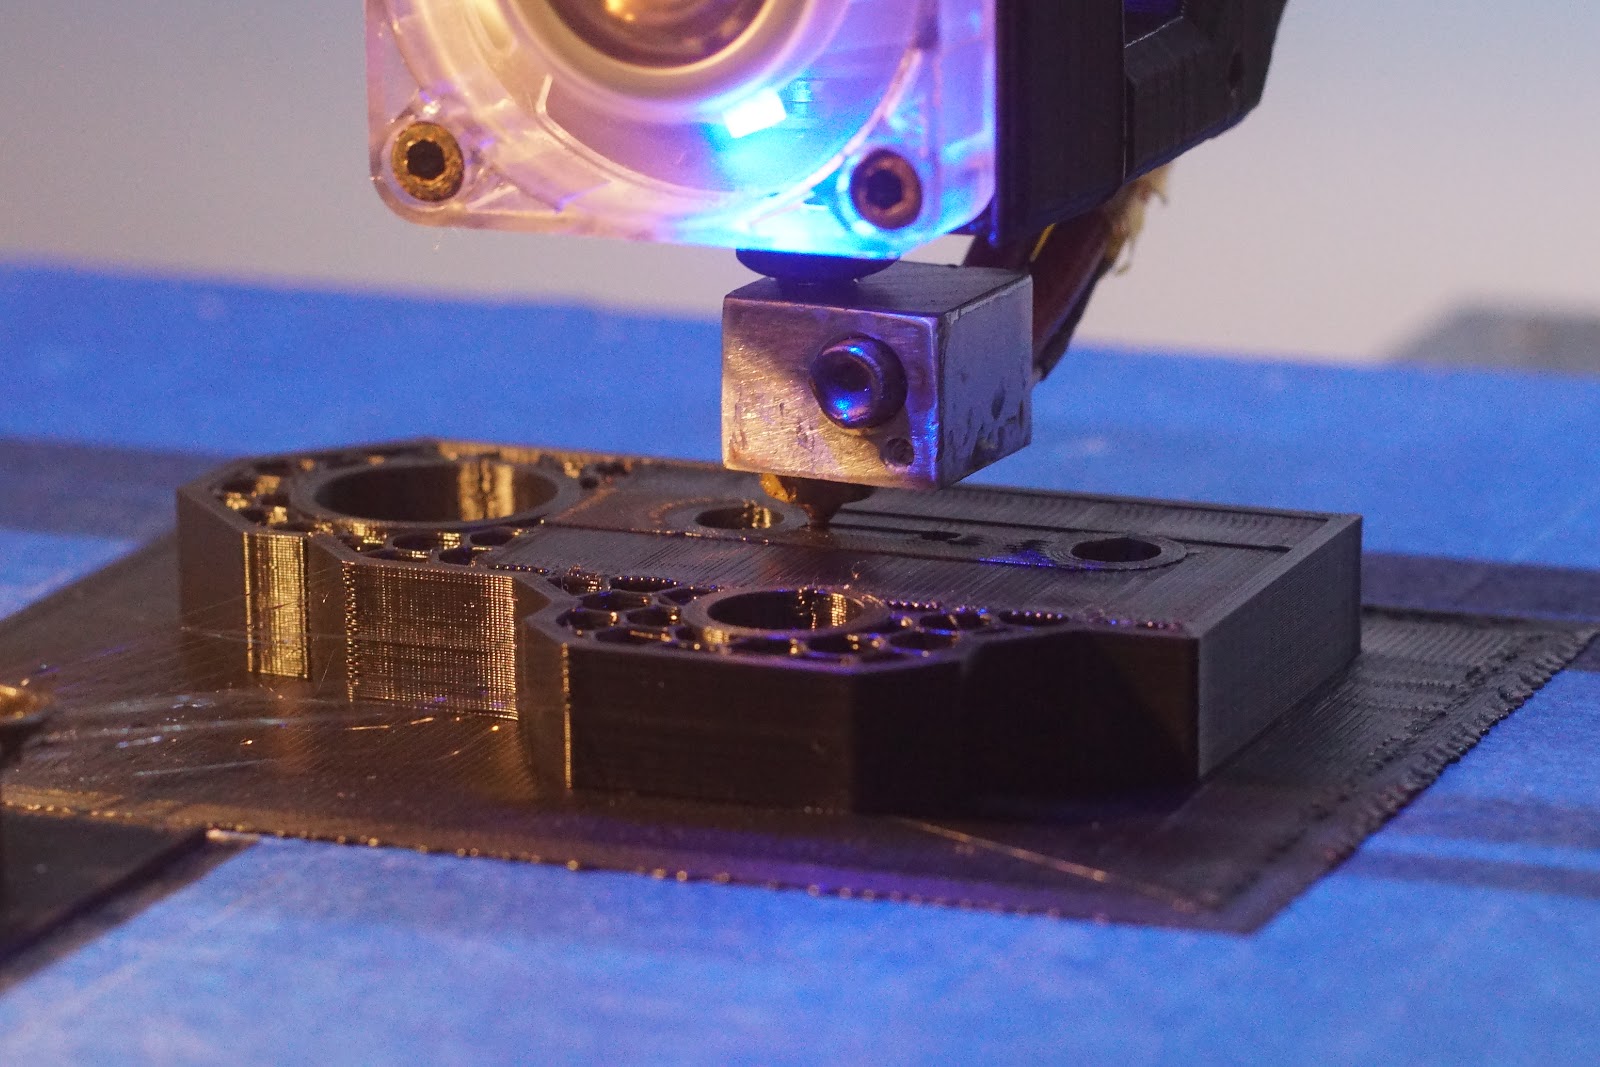
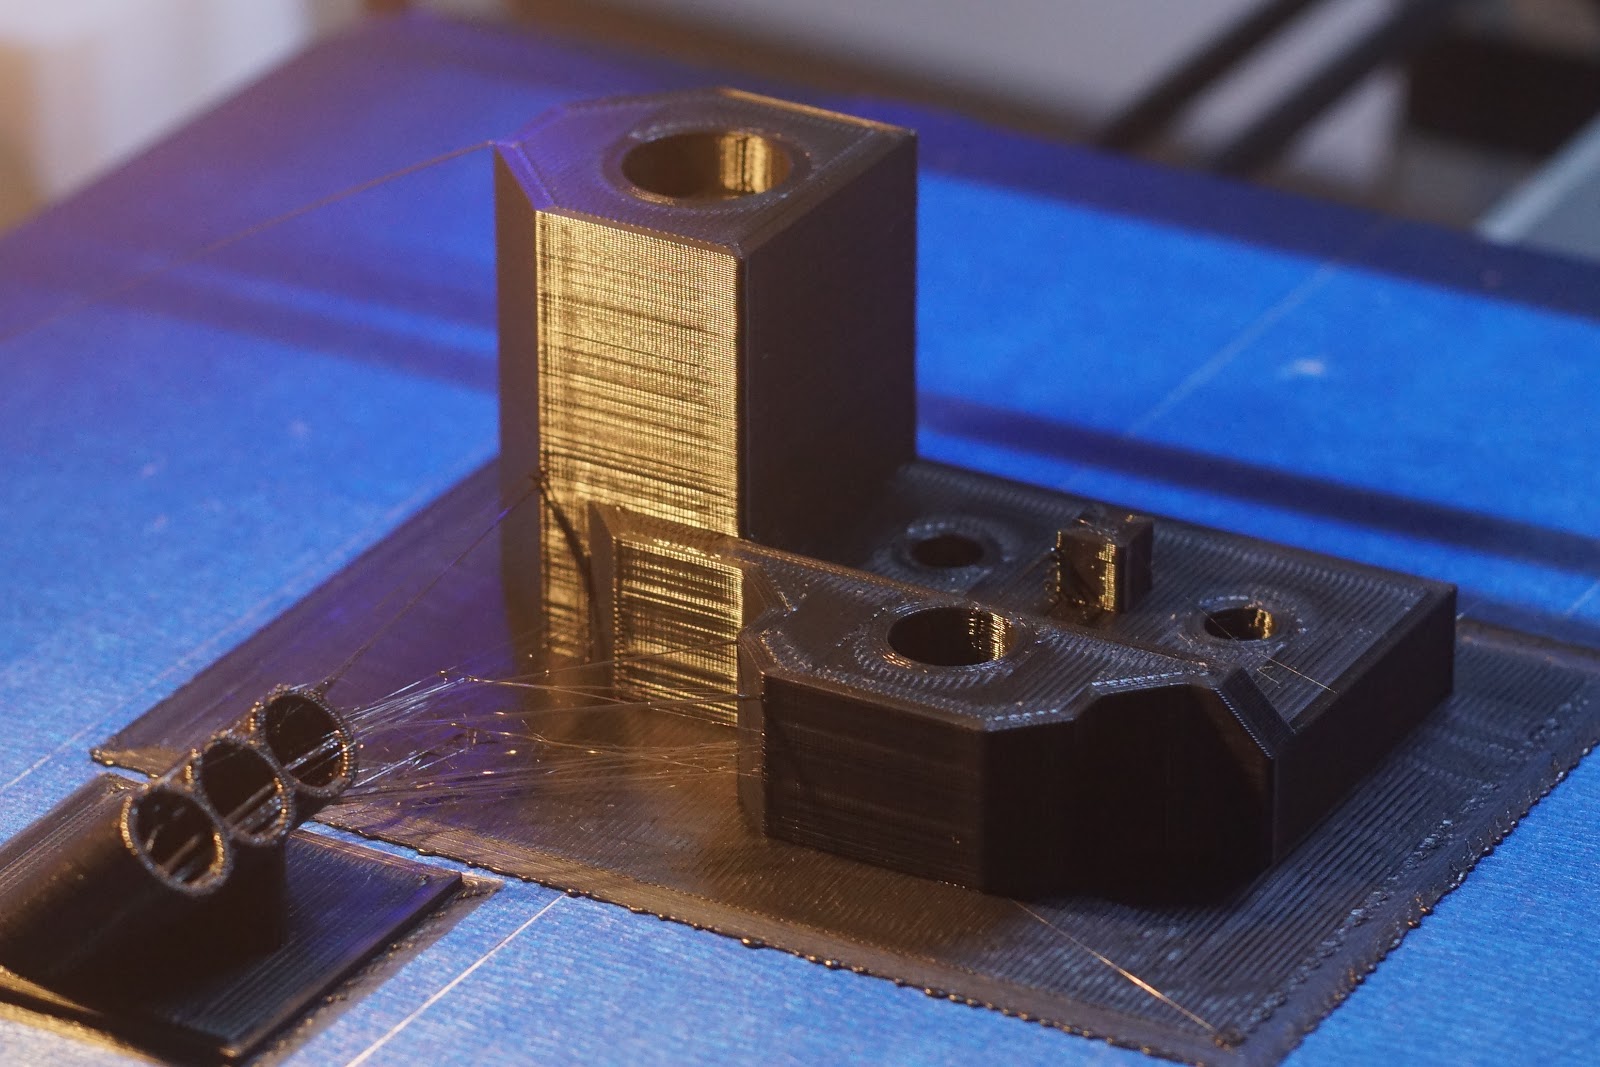
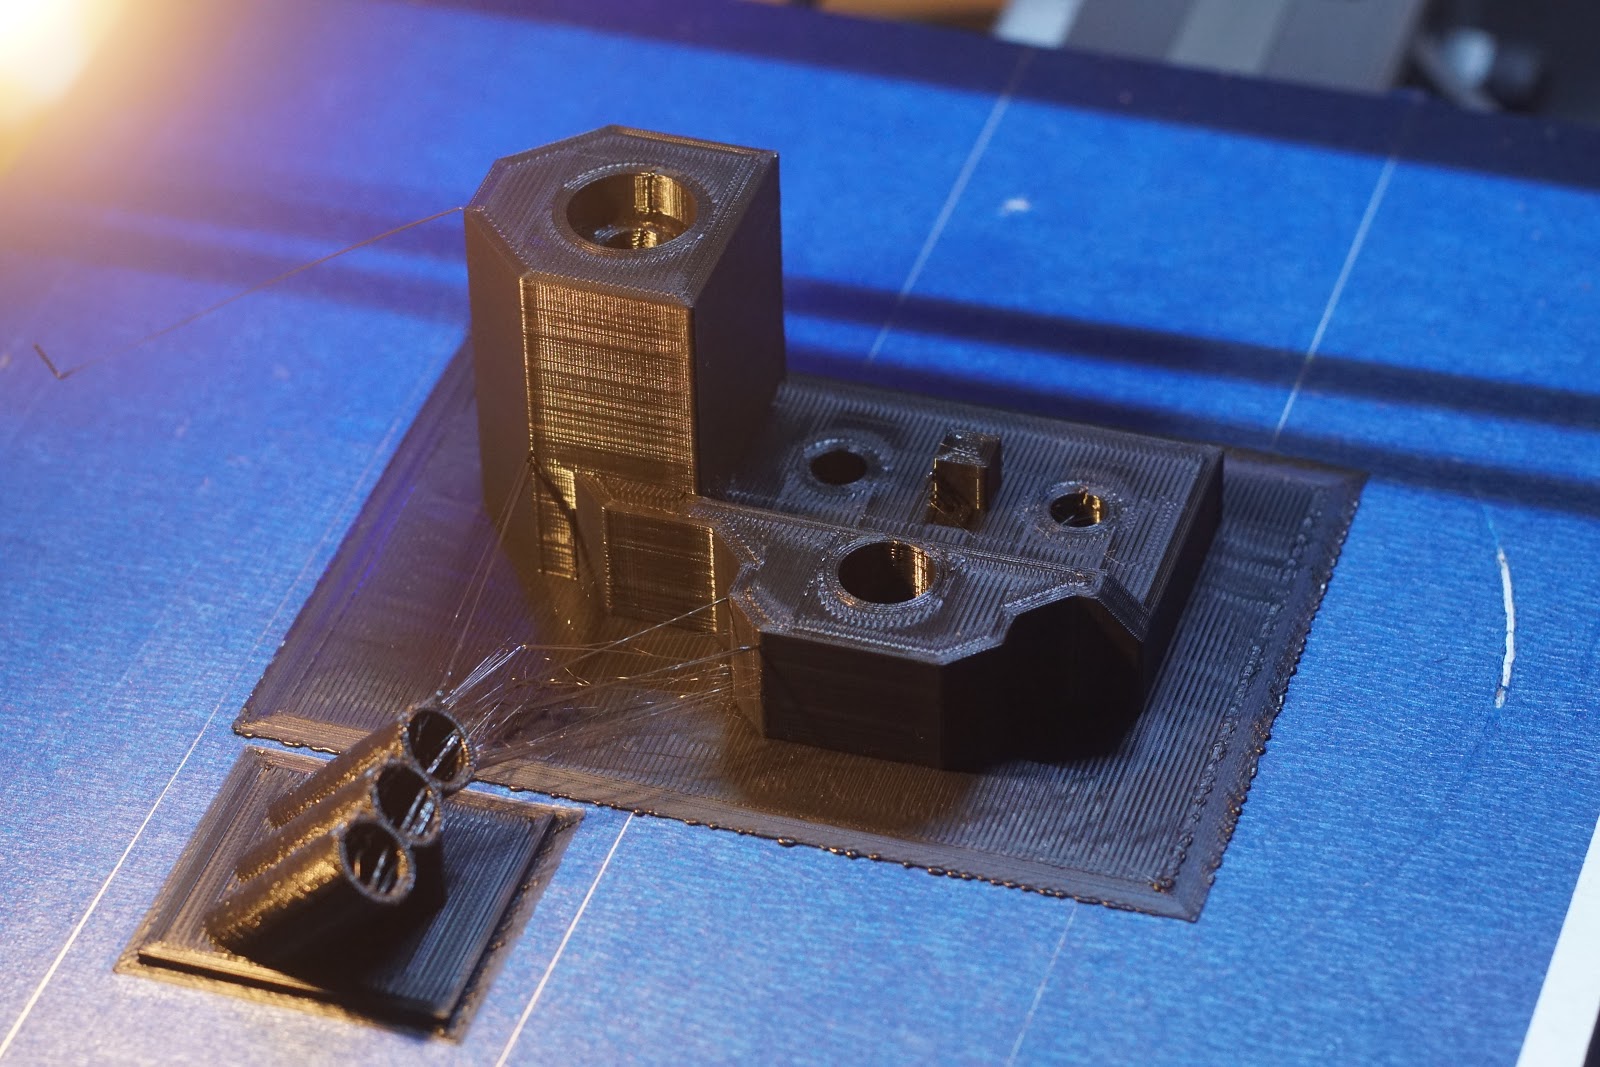
If my profile had arrived I would have had a few parts to print, but without I'm printing things I dont really need, except to tidy up things for pictures. 2 ramps boxes down and ideally another 2, but I put them on hold while trying to figure out something else, not essential, purely for decoration of a stepper...and the joint to the 2020, creating some kind of elbow skin for the cantilever....now I must be crazy to hide the pure metal with a printed skin with layer lines..not sure I'll use it, will have to see the pics to see if it adds anything, but now i'm on the hunt for something else, half a roll left dont want it sitting there too long.
|
Re: MechaBits KraftWerk'r January 28, 2020 09:16AM |
Registered: 11 years ago Posts: 5,780 |
As always, beautiful prints, beautifully photographed. You make 3D printing sexy!
Ultra MegaMax Dominator 3D printer: [drmrehorst.blogspot.com]
Ultra MegaMax Dominator 3D printer: [drmrehorst.blogspot.com]
|
Re: MechaBits KraftWerk'r January 28, 2020 08:53PM |
Registered: 8 years ago Posts: 1,671 |
Thanks Mark(DD) Nice to know someone likes em, to be honest I used to spend a lot more time on them in Lightroom cropping & rotating & final colour tweeks, exporting renaming keywords etc...but past couple of years not bothered, focus is out quite a lot of the time these days as well, one of these days maybe i'll get a tidy room product shot but I dont really have the space.
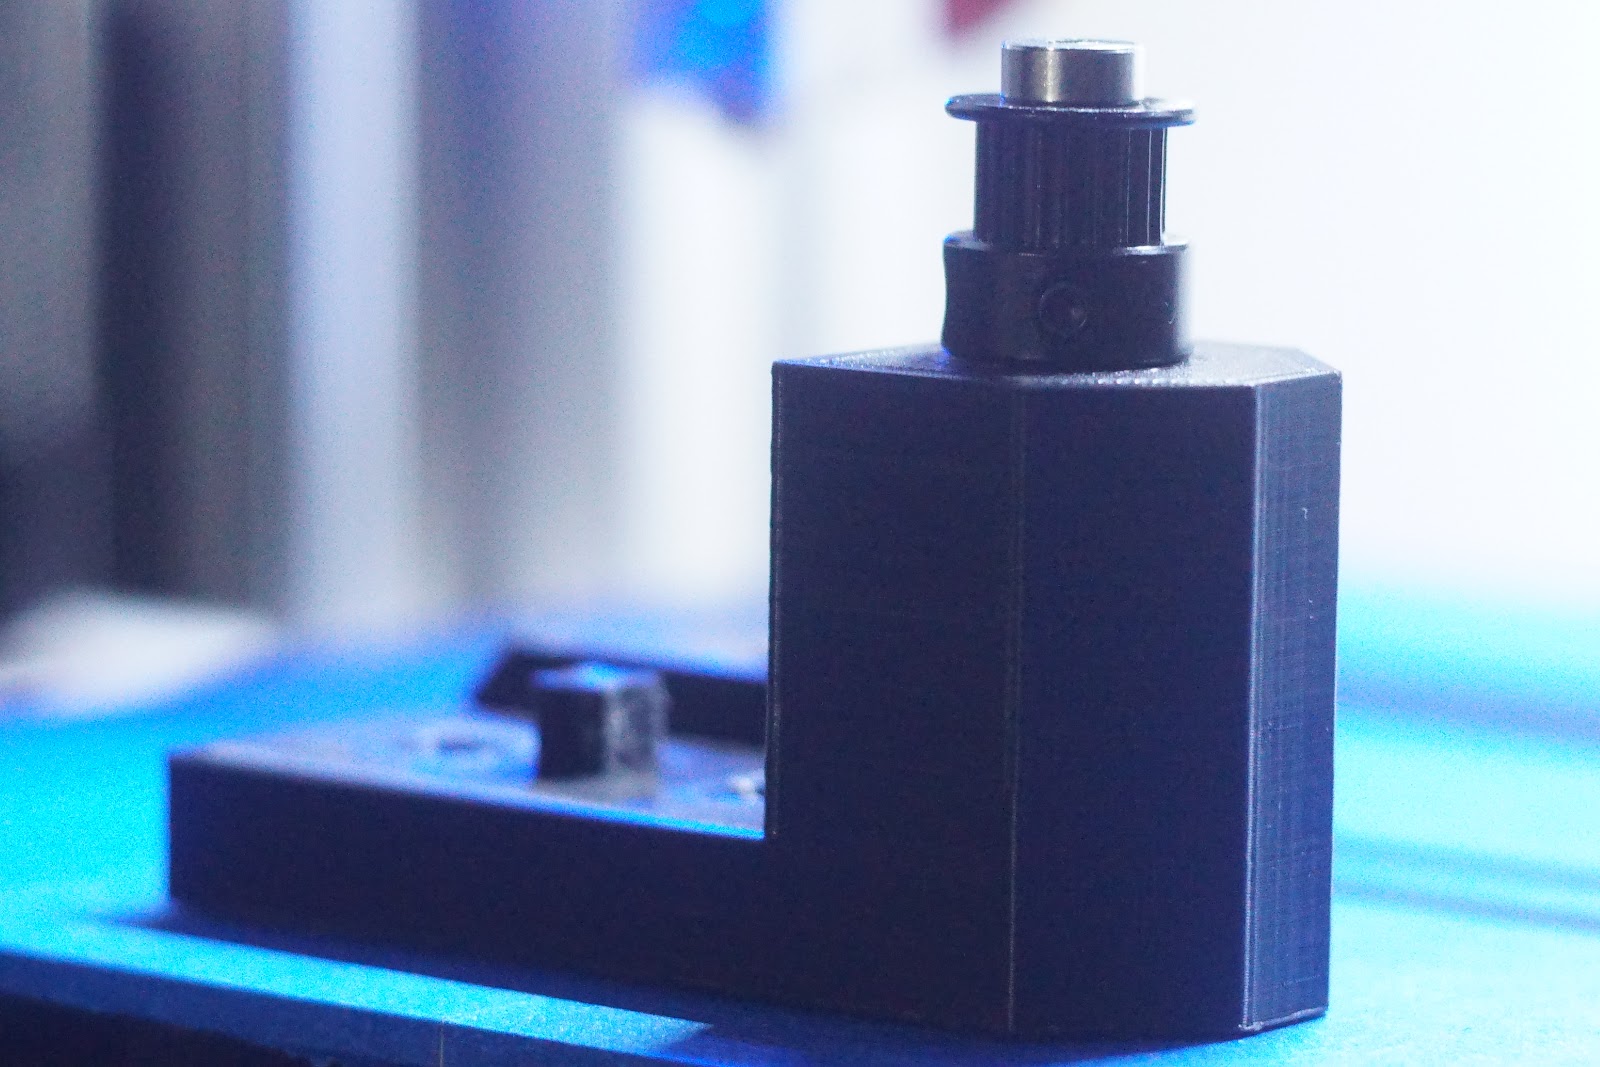
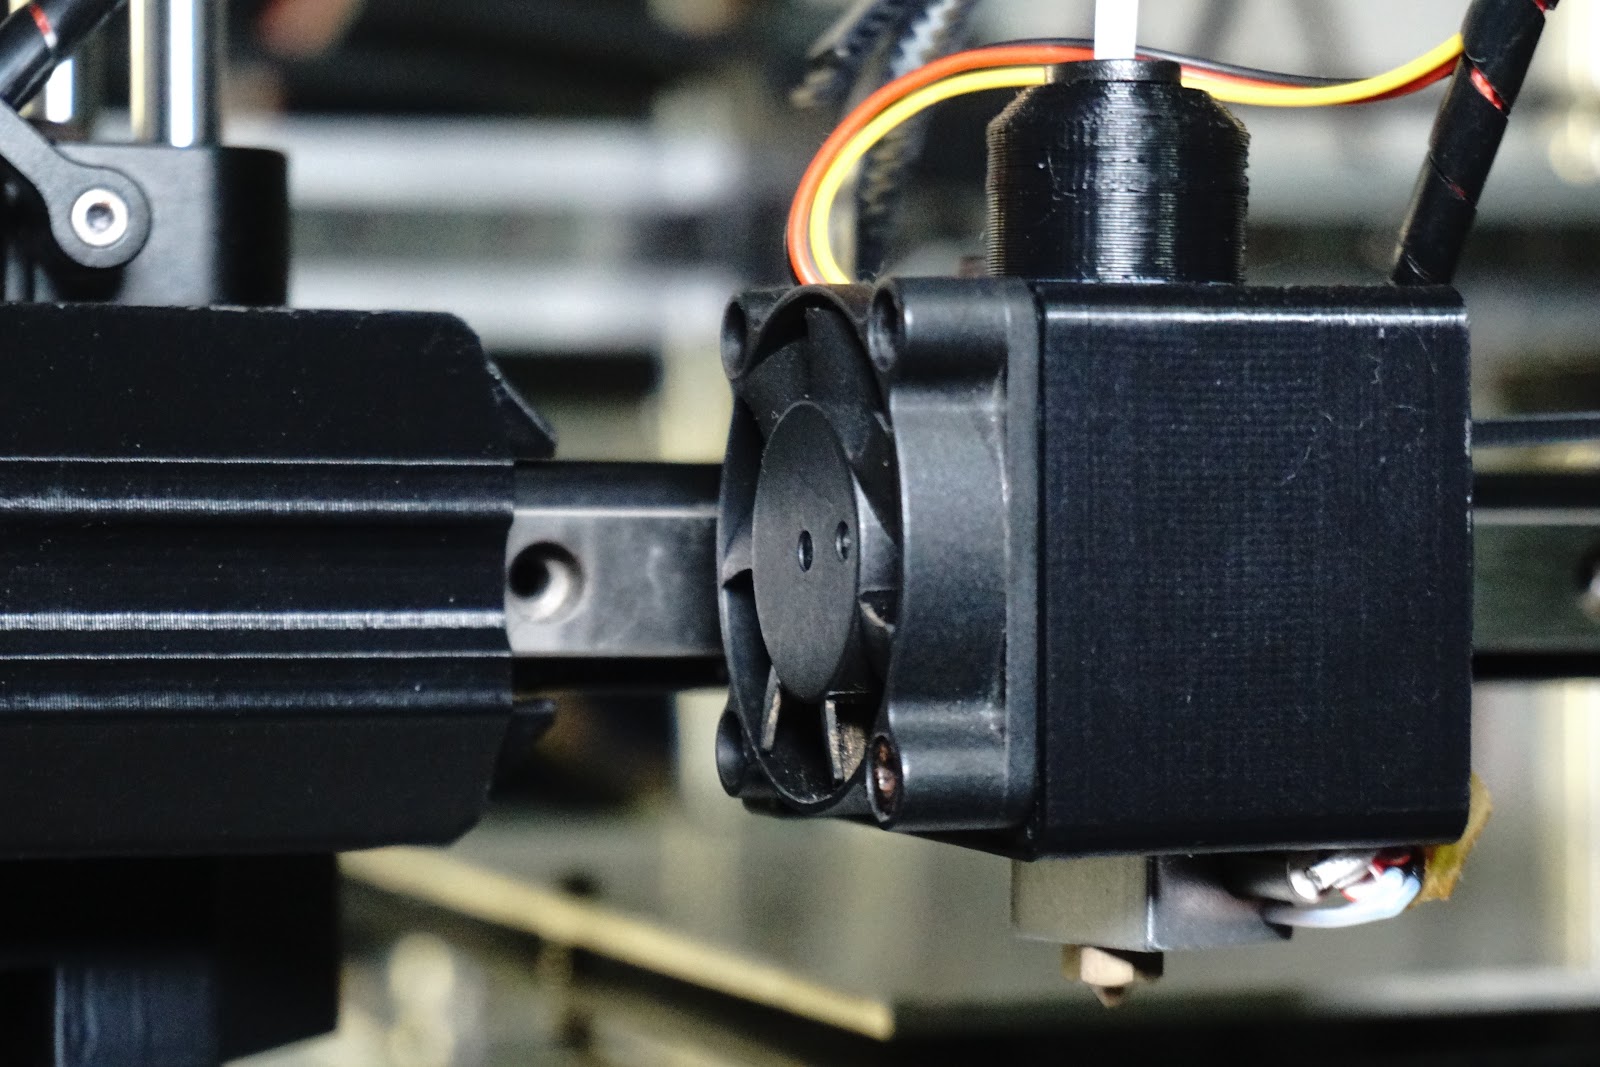
added the elbow cover, it fits, could have made it a little snugger where it meets the 2020 as I can see light coming through, but the motor part needs a little alt' no channel inside for the wires, I thought the hole was enough, it fits nice & snug but squashes the wires as the last 10mm goes on, I think I can solve it with a file or a quick melt, one of those things I wanted to alter while it was printing...I thought it would be better to move the wall in the trough for the wire so it became roof of wire guide, enclosing the cable rather than having the bend in the cable showing.


Edited 1 time(s). Last edit at 01/29/2020 03:37AM by MechaBits.
added the elbow cover, it fits, could have made it a little snugger where it meets the 2020 as I can see light coming through, but the motor part needs a little alt' no channel inside for the wires, I thought the hole was enough, it fits nice & snug but squashes the wires as the last 10mm goes on, I think I can solve it with a file or a quick melt, one of those things I wanted to alter while it was printing...I thought it would be better to move the wall in the trough for the wire so it became roof of wire guide, enclosing the cable rather than having the bend in the cable showing.

Edited 1 time(s). Last edit at 01/29/2020 03:37AM by MechaBits.
|
Re: MechaBits KraftWerk'r January 31, 2020 01:00AM |
Registered: 8 years ago Posts: 1,671 |


[youtu.be]
the cube is moving, though far from complete because the 2040 never came. I dont think it was the ideal for standard size bed mount points, needs some more customization & an eagle eye for the right bits, something to mull over for a few months, Z rises great, in sync. I had no idea what the pulley was on the Y, assumed 32 or 36, was kinda hoping it was 32 as my 16 arrived, to replace the 20 I had on there, dont really fancy pulling things to bits to replace the larger pulley with a 20 as I dont think i'll be able to move the motor much further. Anyway I ended up with 180 steps mm, seems to move correct. No speed demon, with the 8bit & the small motors...they get warm on the X on my other printer so I dont drive it too hard. Though I need to go over the jerk & accel settings as they are quite low I think, wonder what I can get away with? Maybe one day the drive rods will get some flats on them or some superglue.
|
Re: MechaBits KraftWerk'r February 03, 2020 06:58PM |
Registered: 8 years ago Posts: 1,671 |
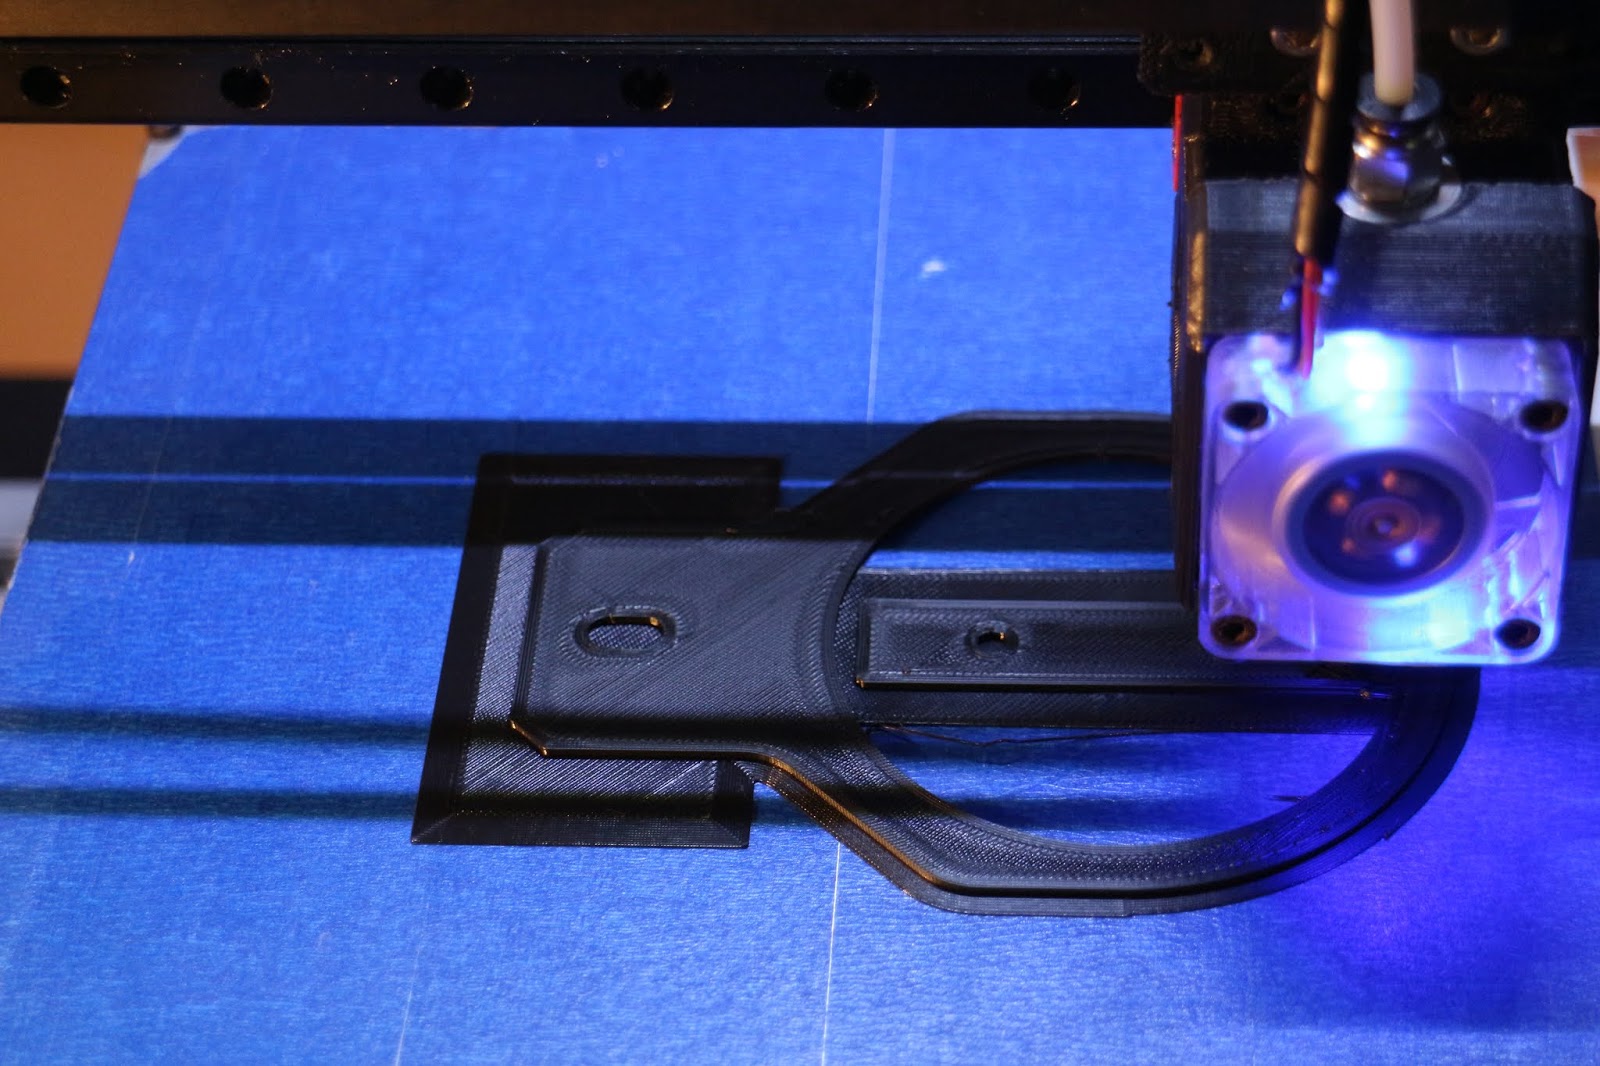
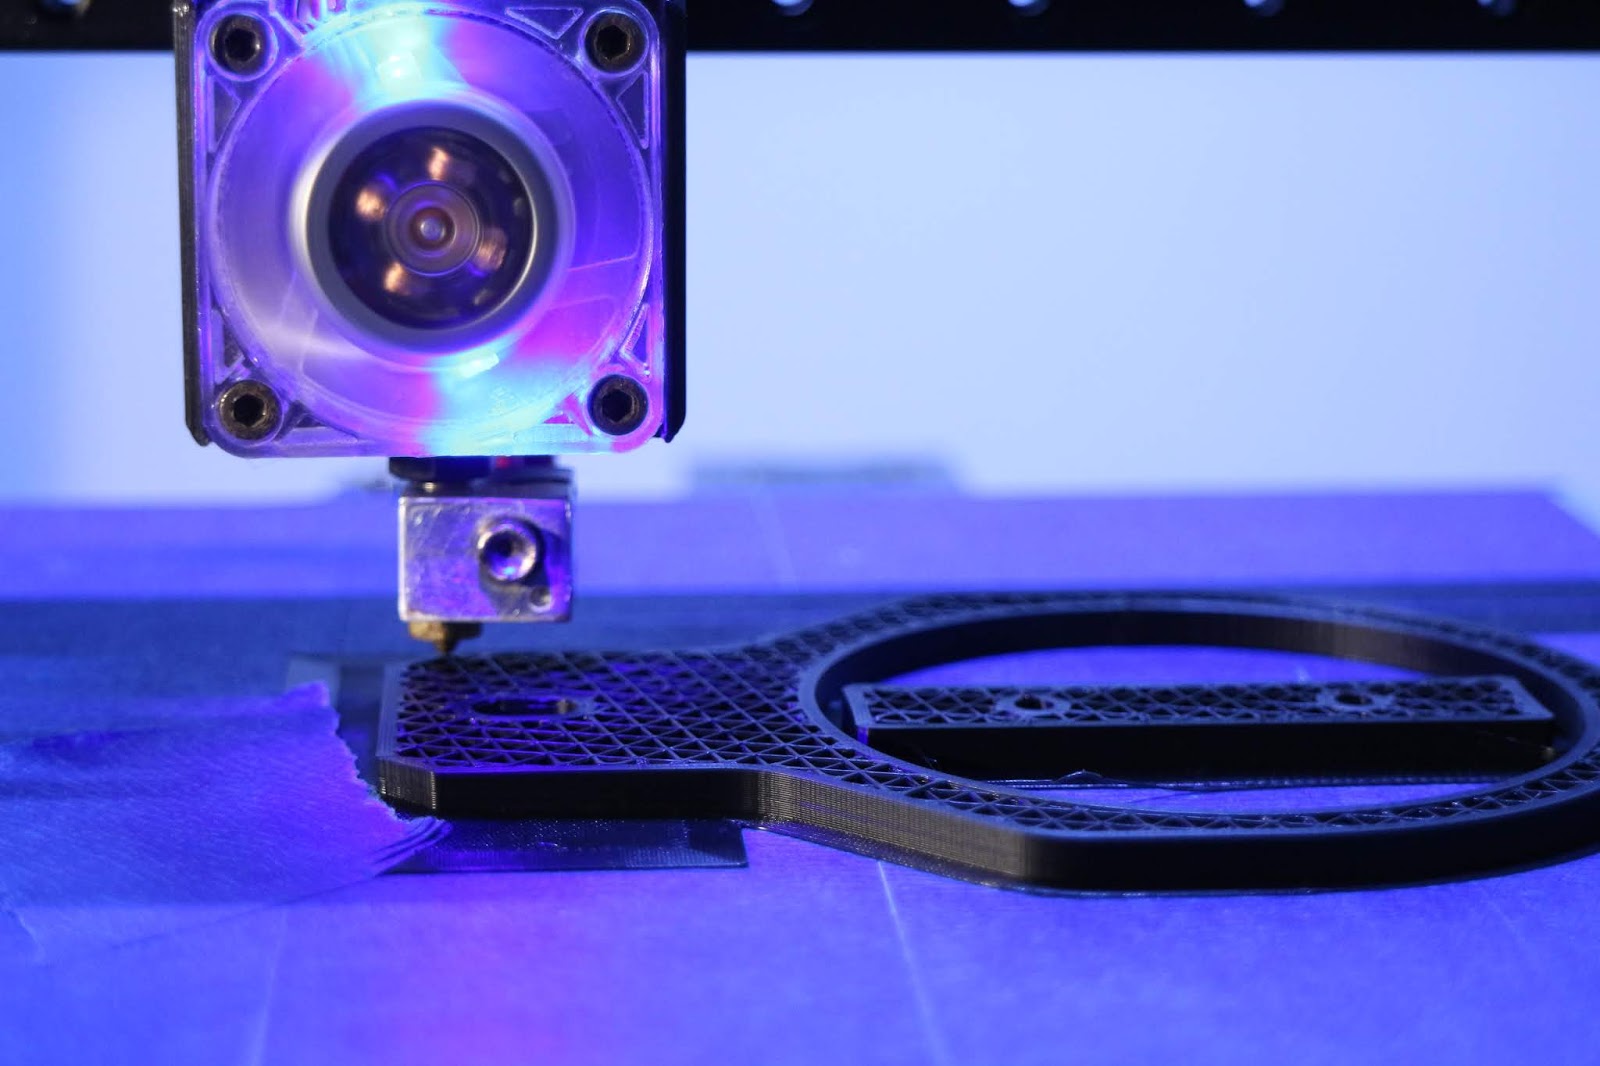
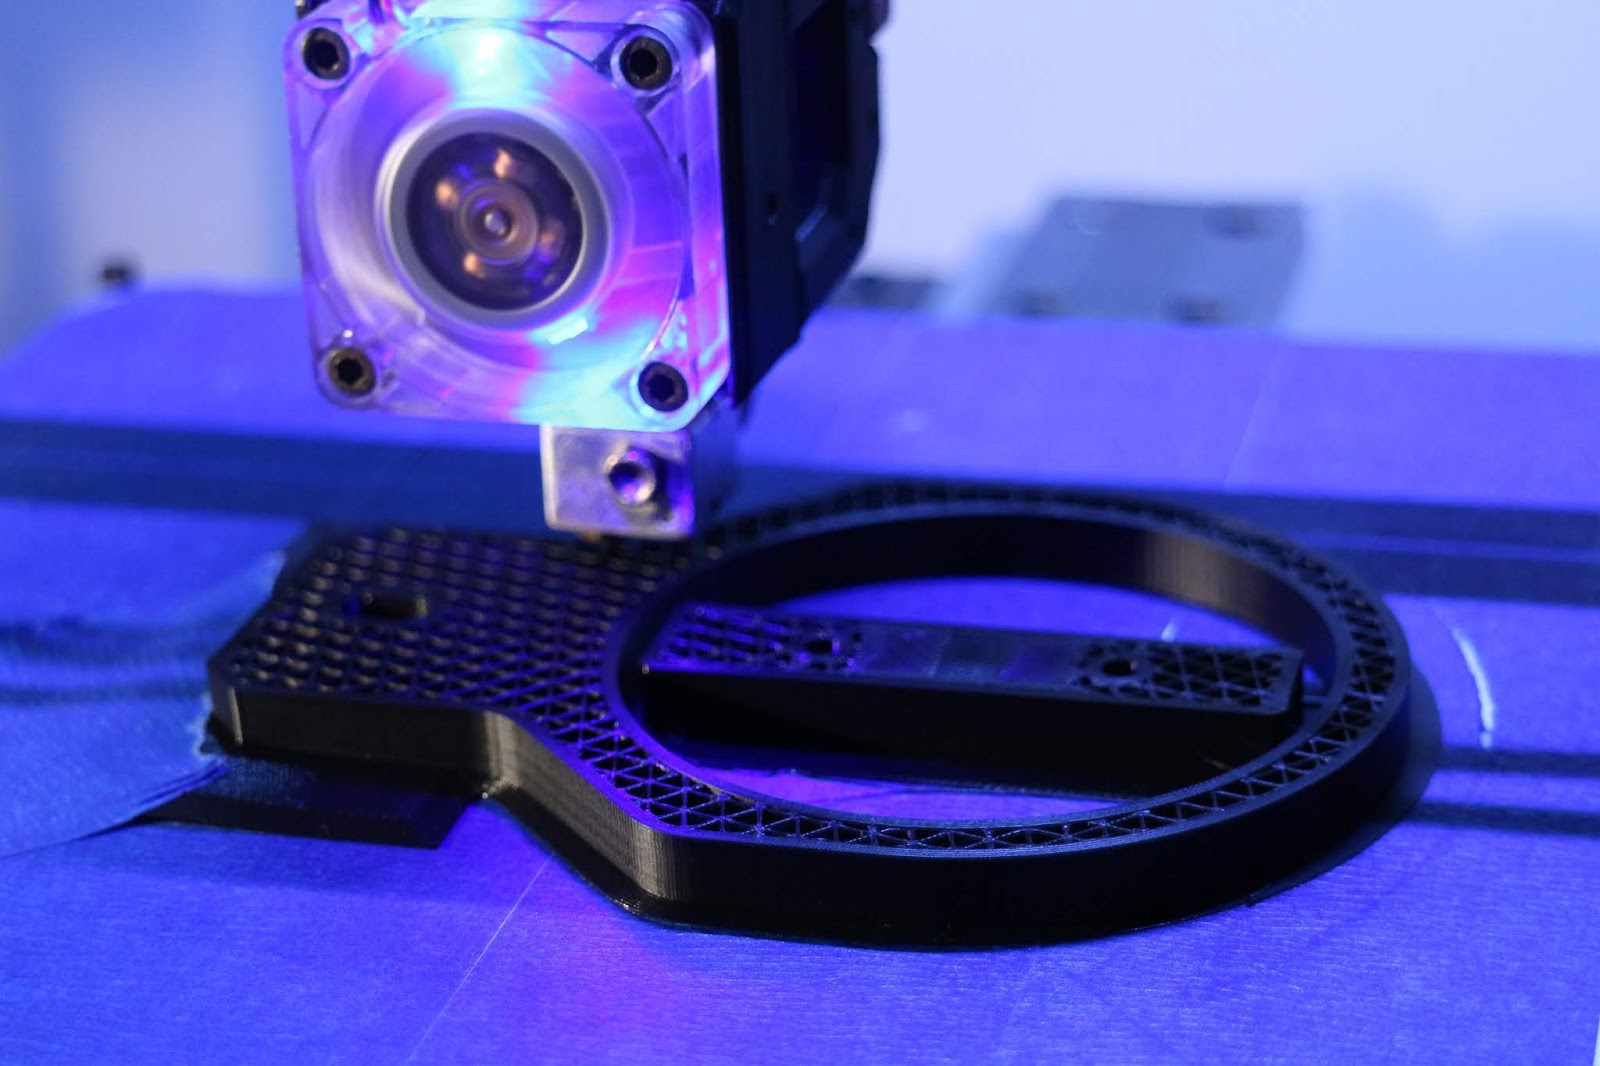
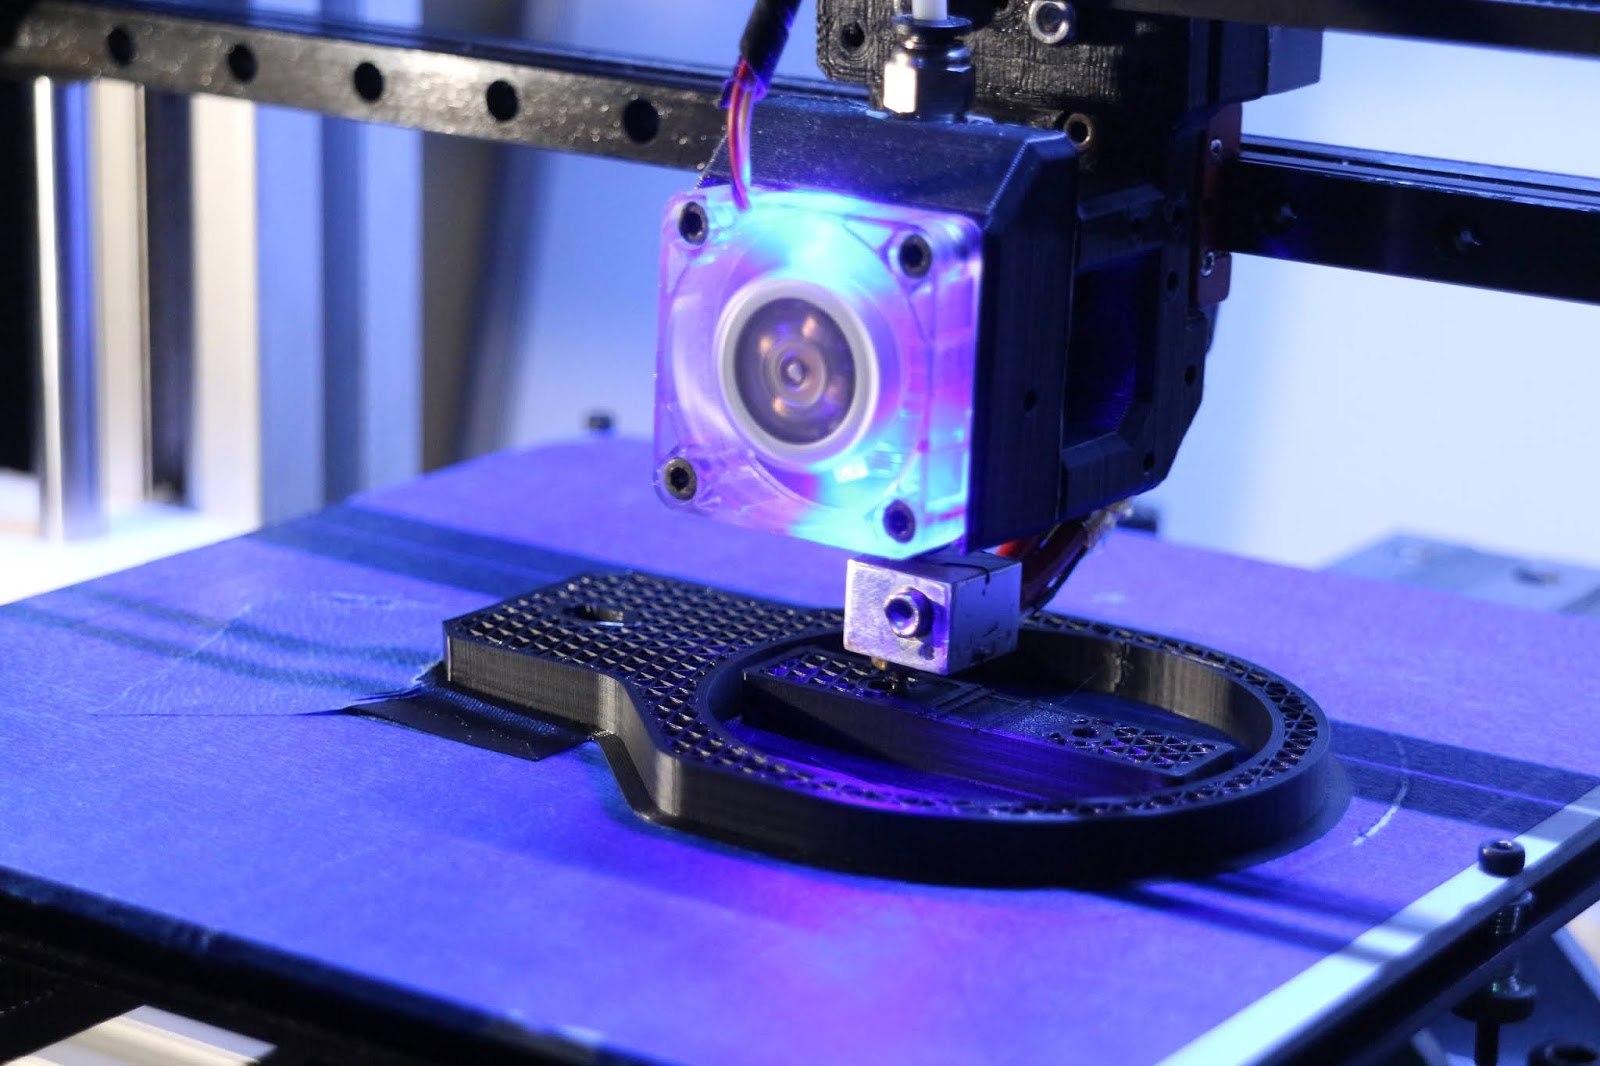
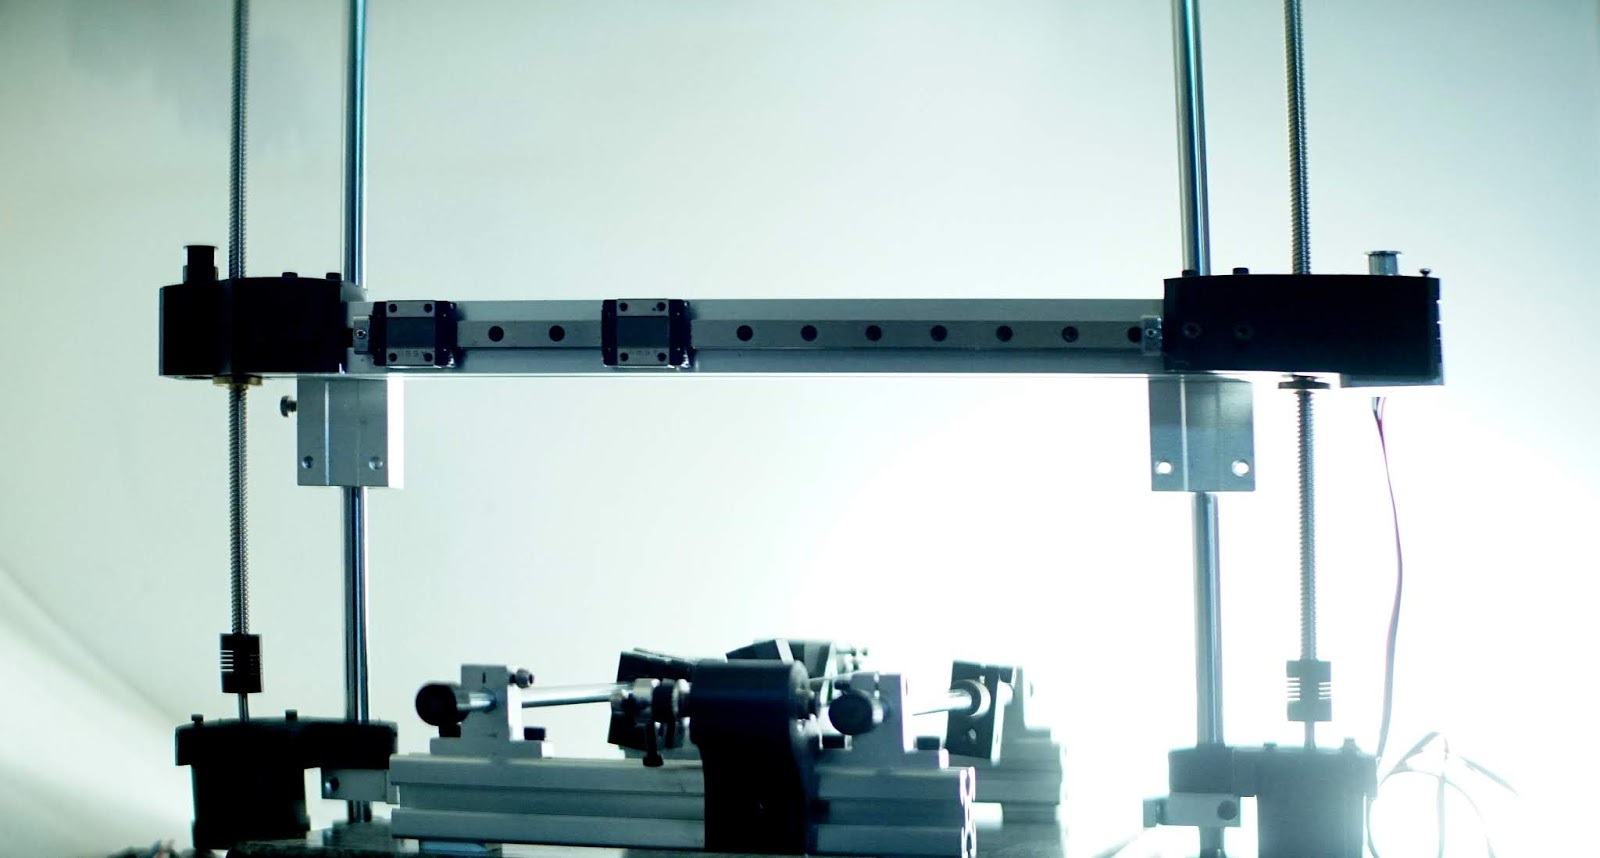
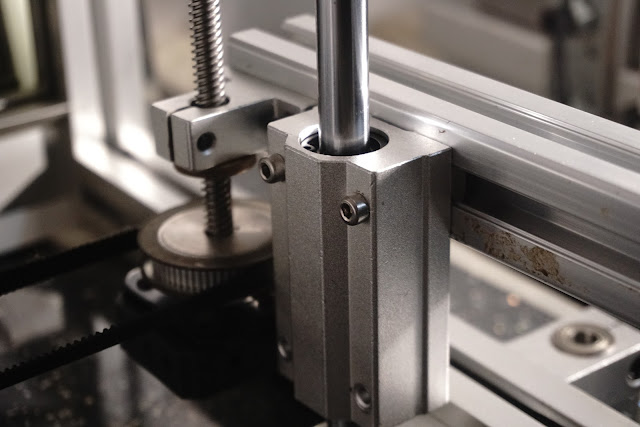
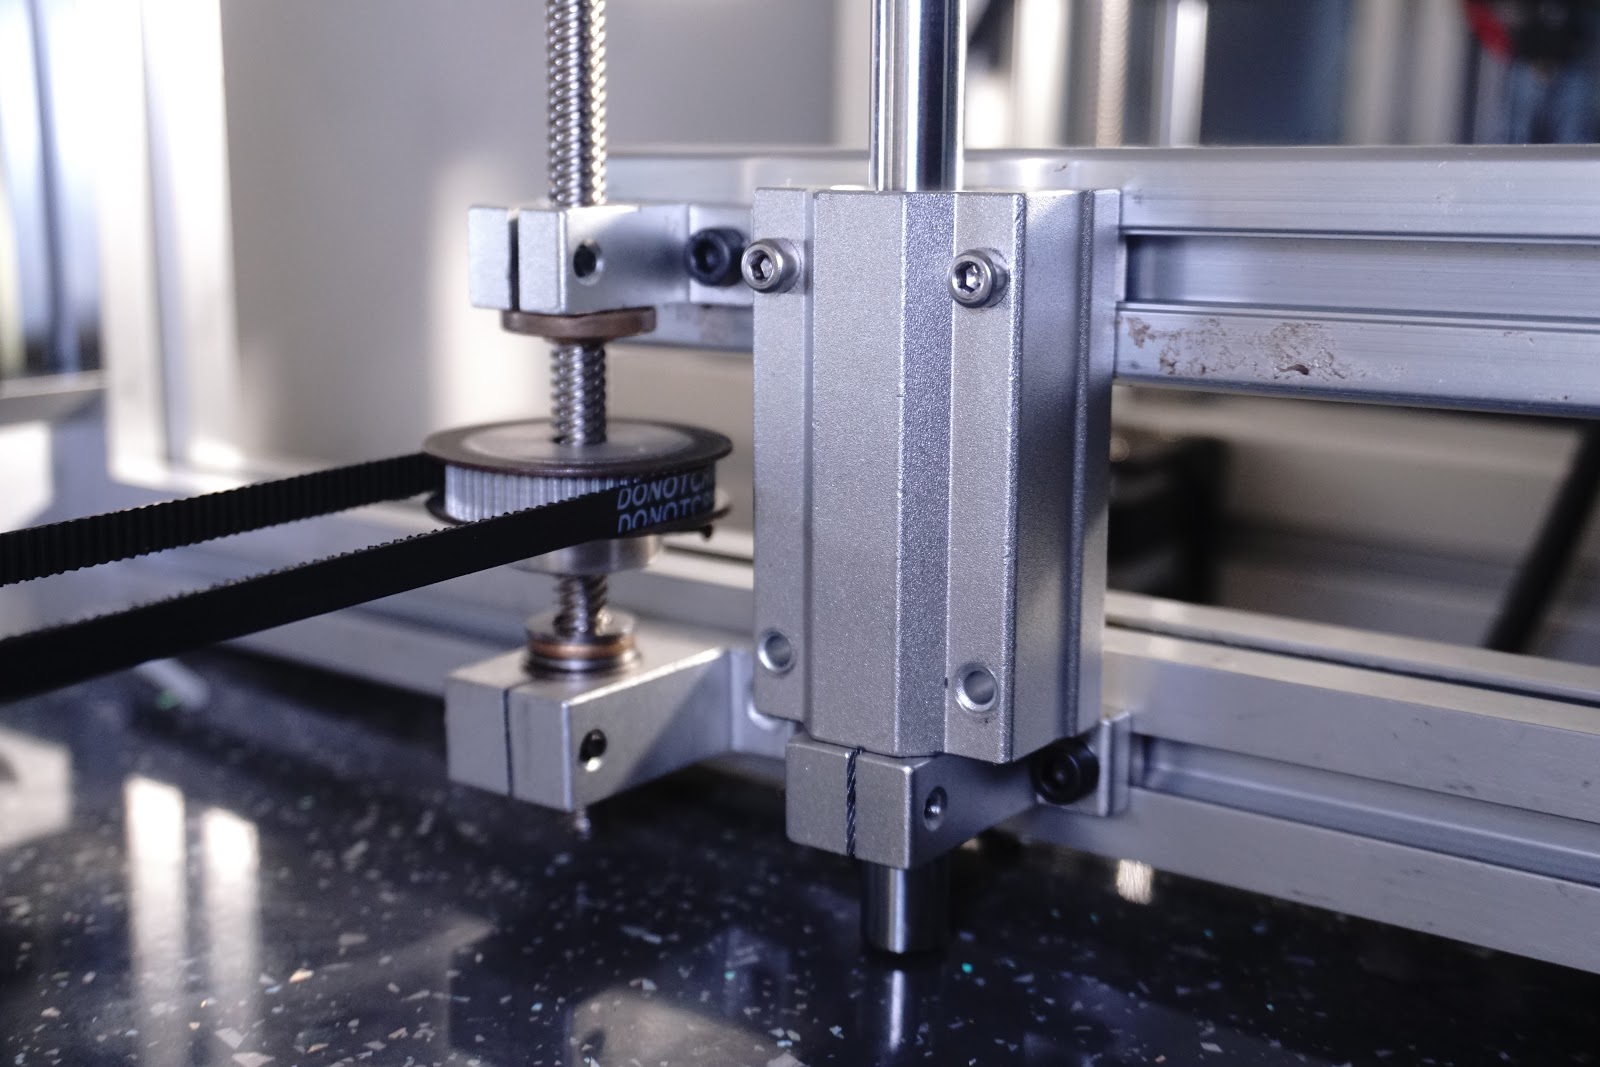
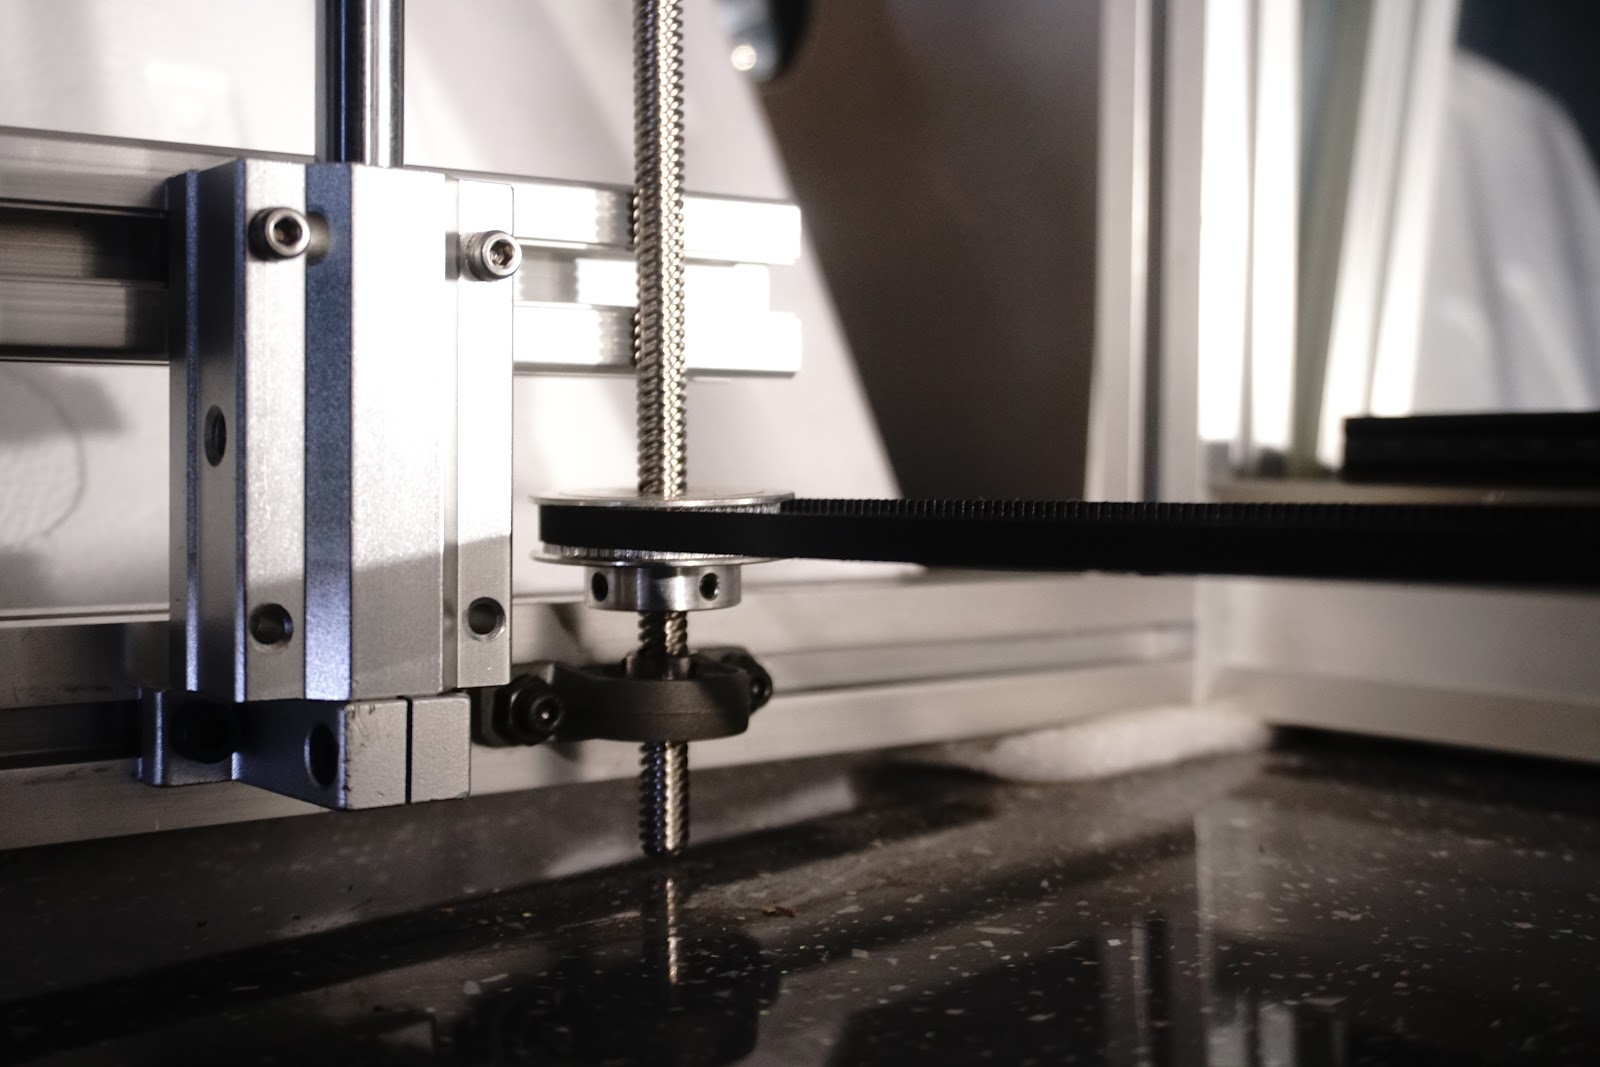
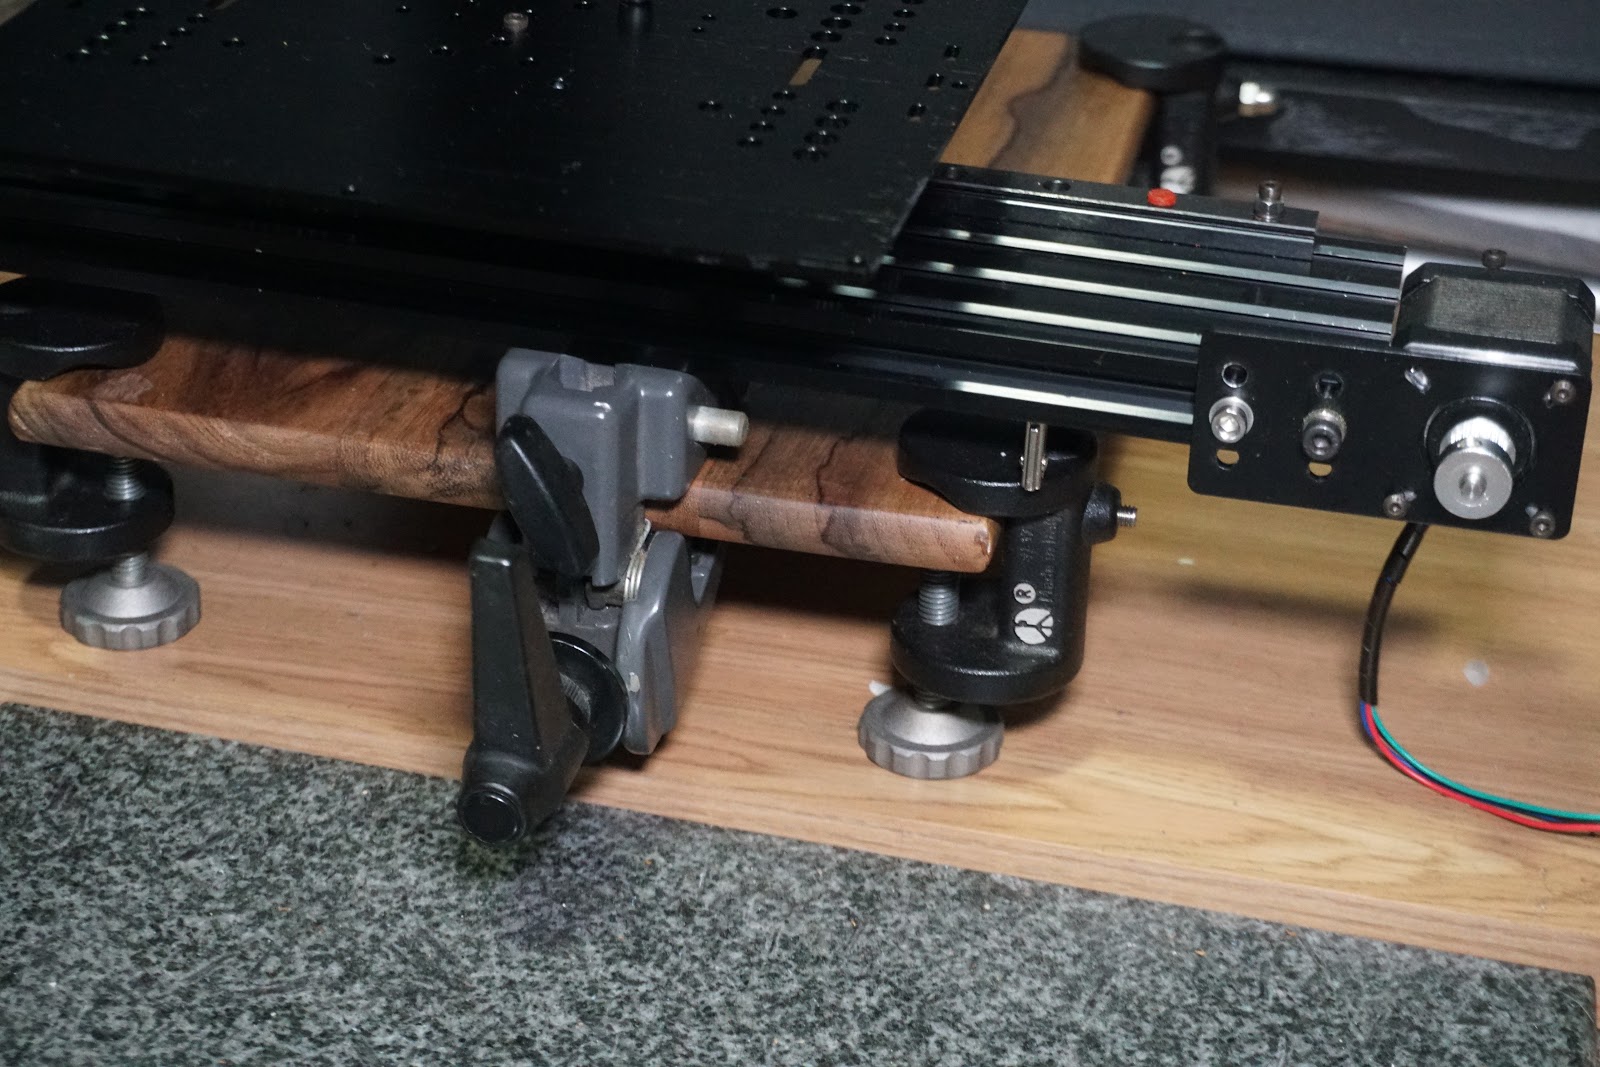
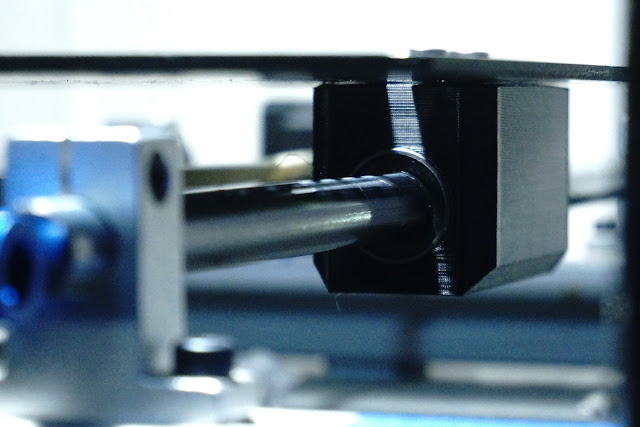
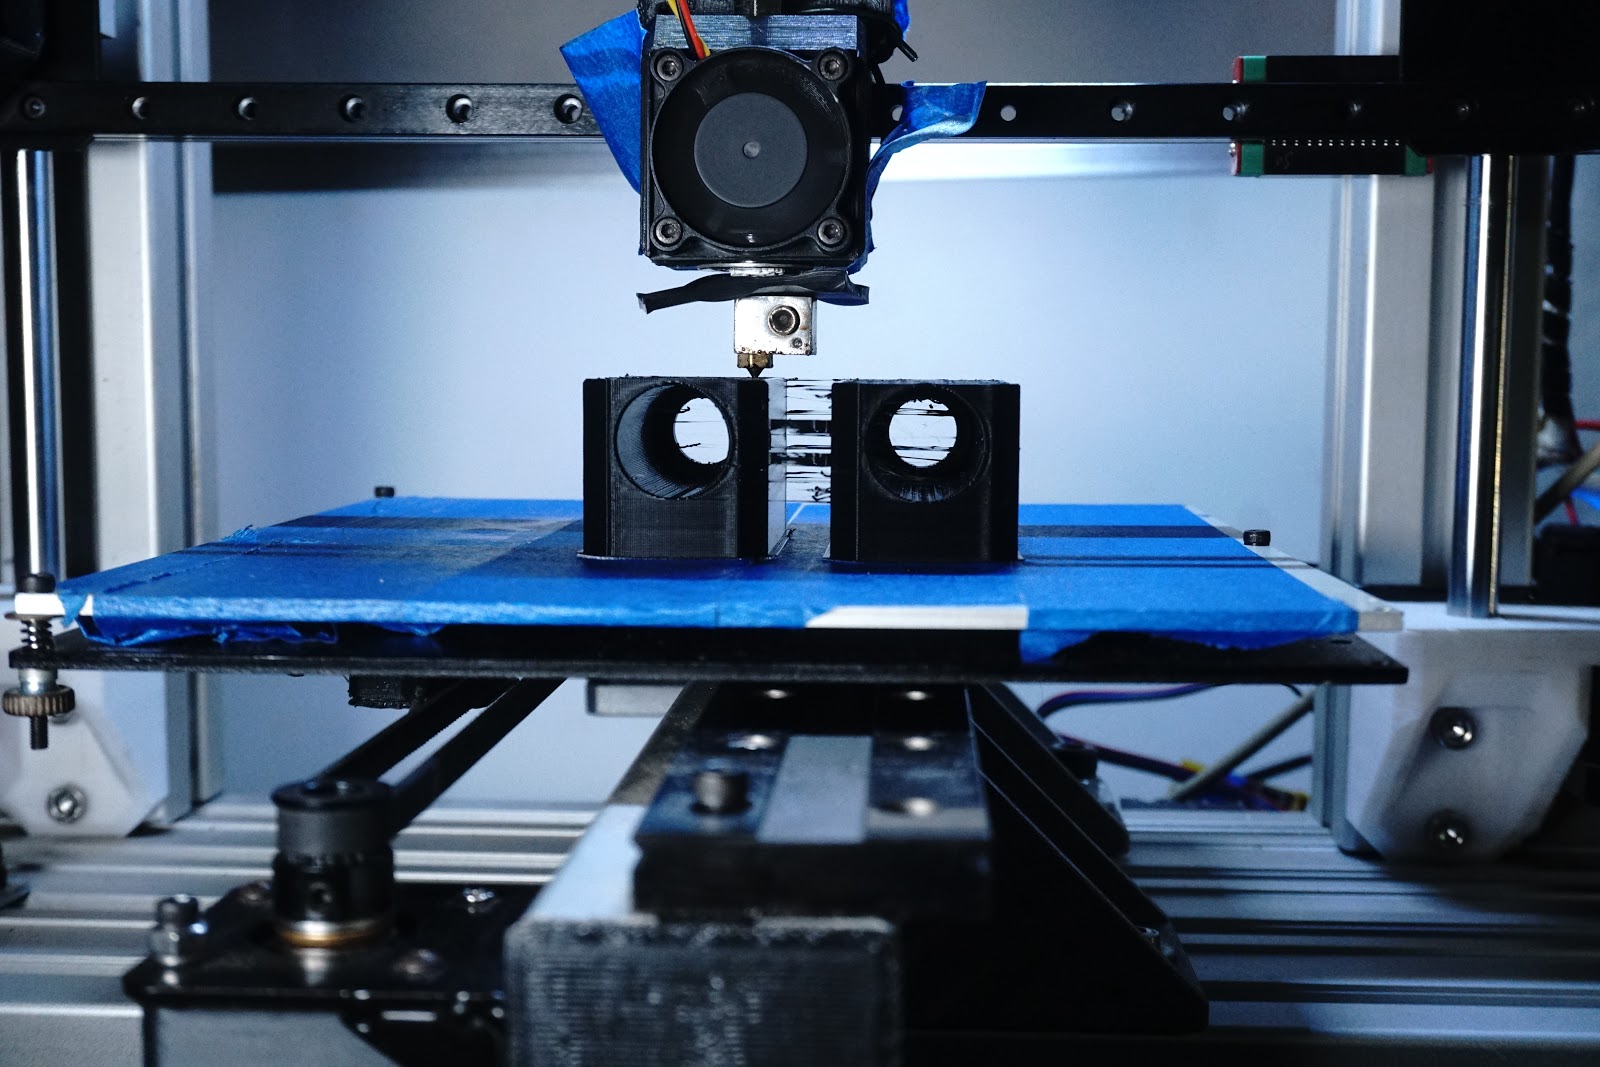
First Printer Bed has the 12mm rods, and while it's performed great the way it is, I always knew i'd like it tidier. As discussed before, it sits too high from the table surface, because its on a movable piece of wood with 3030 profile to mount the rod supports, and like the new low profile bed, I wanted to regain some height from the initial design layout, and mount the bed rails directly onto the sparkly countertop, even though it's more useful as a movable bed, it never really gets moved. So time to tie it down...reconfigure & lower it....I dont want to tear it down, especially when I already have another better lower portable bed, I should just swap it out for that...but when you need to dump some filament on something, something to shake things up...well this is the first of the bits to enable reconfig of old bed.
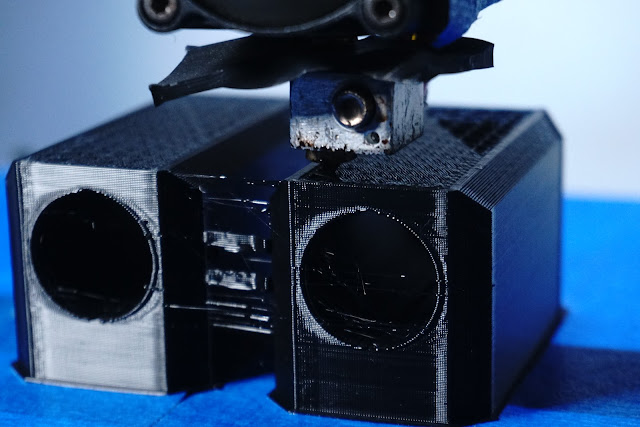
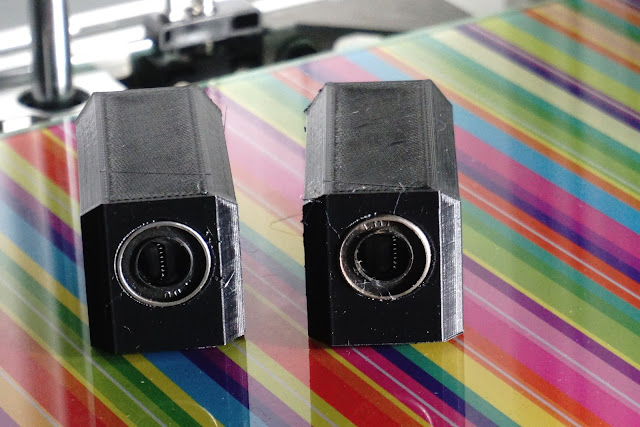
Using the long 12mm bearings in these housings(for the openbuilds plate), instead of the metal housed bearings should save 200g from my current setup, maybe only 100g, so not much of a change from the current metal parts, and not so good for a heatbed setup, so lets hope it's not been a total waste of time & filament, and it improves things a tad, if only for the benefit of more pleasing pictures.
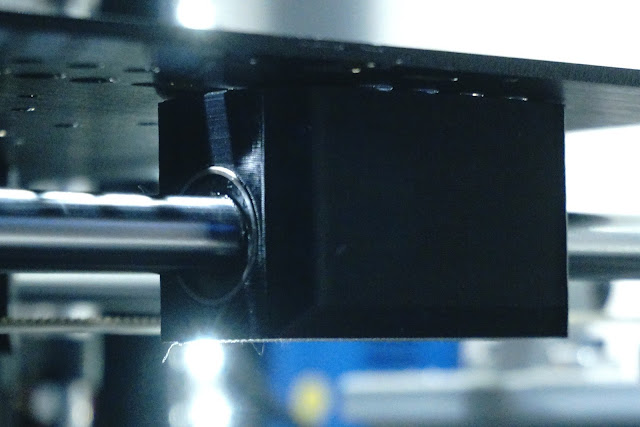
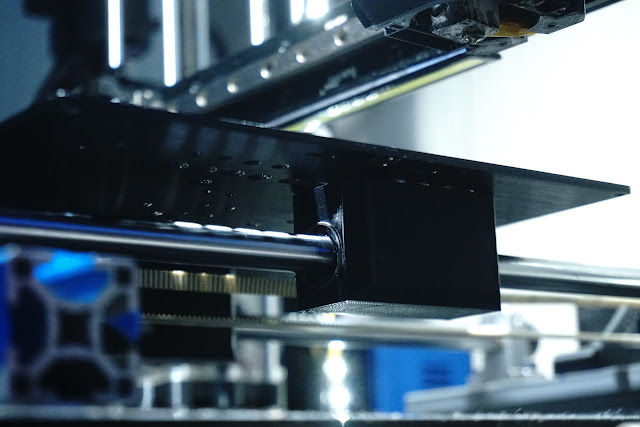
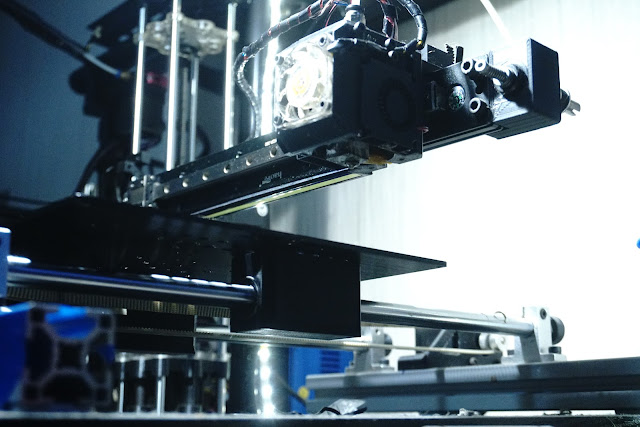
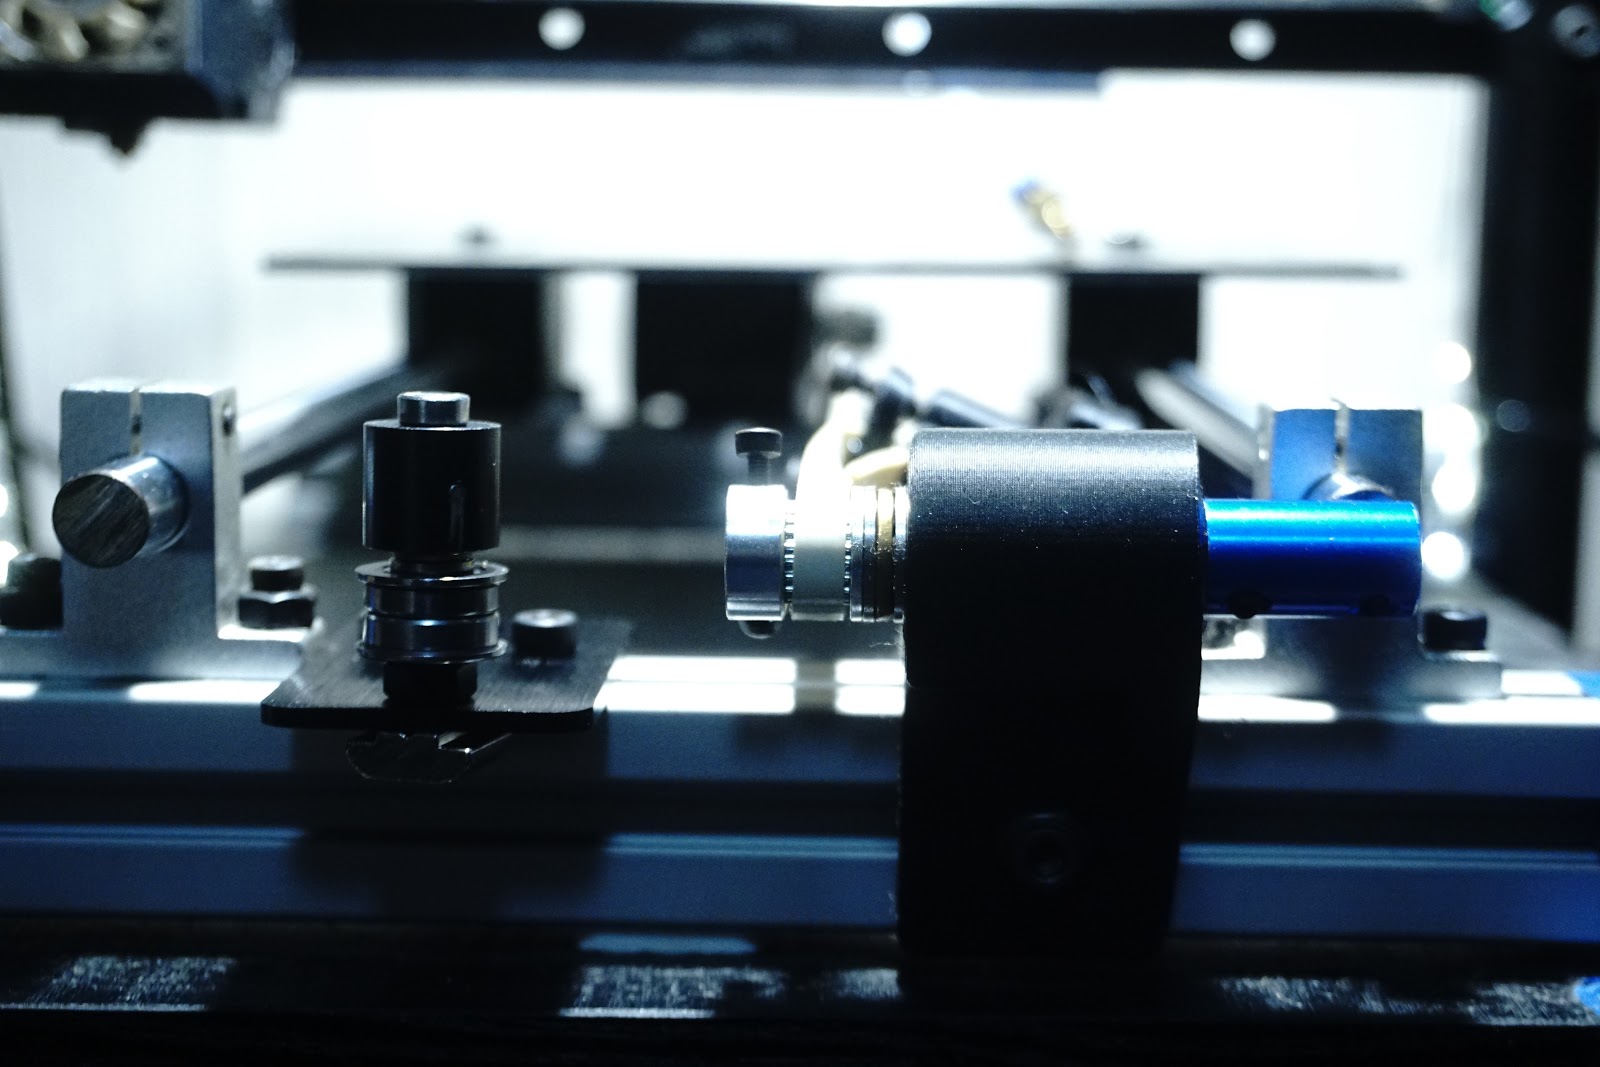
Printed @ .28 layers, 4 laps & 30% infill, perhaps I should re-think the Z orientation on the bed for parts like this in the future, while I finished with a nice flat top layer....it then became a bottom that would never be seen. Now I have the lower belt clamp to print, but two or 3 different ways I'm thinking of changing the motor/idler mounts to metal plates attached to the work surface rather than the 3030, but the M5 wood inserts are putting me off that direction, I found 20mm long ones but the work surface is much thicker, and i'd need to accurately drill all pilot holes from underneath...so not possible without full teardown. Easiest way forward is to keep the 3030, but also thinking of changing the printed mounts for the metal plates, which changes the orientation of the motor/belt from horizontal to vertical.
Edited 2 time(s). Last edit at 02/04/2020 03:36PM by MechaBits.


Using the long 12mm bearings in these housings(for the openbuilds plate), instead of the metal housed bearings should save 200g from my current setup, maybe only 100g, so not much of a change from the current metal parts, and not so good for a heatbed setup, so lets hope it's not been a total waste of time & filament, and it improves things a tad, if only for the benefit of more pleasing pictures.


Printed @ .28 layers, 4 laps & 30% infill, perhaps I should re-think the Z orientation on the bed for parts like this in the future, while I finished with a nice flat top layer....it then became a bottom that would never be seen. Now I have the lower belt clamp to print, but two or 3 different ways I'm thinking of changing the motor/idler mounts to metal plates attached to the work surface rather than the 3030, but the M5 wood inserts are putting me off that direction, I found 20mm long ones but the work surface is much thicker, and i'd need to accurately drill all pilot holes from underneath...so not possible without full teardown. Easiest way forward is to keep the 3030, but also thinking of changing the printed mounts for the metal plates, which changes the orientation of the motor/belt from horizontal to vertical.
Edited 2 time(s). Last edit at 02/04/2020 03:36PM by MechaBits.
|
Re: MechaBits KraftWerk'r February 05, 2020 11:55AM |
Registered: 8 years ago Posts: 1,671 |


|
Re: MechaBits KraftWerk'r February 05, 2020 07:33PM |
Registered: 8 years ago Posts: 1,671 |


Sorry, only registered users may post in this forum.