Deltoid - homebrew delta struggles
Posted by Ohmarinus
|
Deltoid - homebrew delta struggles December 25, 2019 06:26AM |
Admin Registered: 11 years ago Posts: 3,096 |
Hi all, since years I've been fascinated by Delta printers and their cool looks and mechanics.
I've been reading about them for days on end and eventually decided to buy some crappy 2nd hand butchered Delta that I saw on the web. It cost me €100 inc shipping but I thought it was worth it since there was a frame, motors, linear rails and some other specific parts. In the end it was kind of a cat in a sack (is this an English expression?). There turned out to be everything wrong with it.
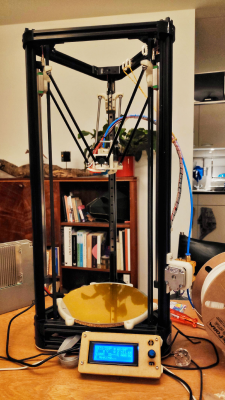
This is how it started:
As you can probably see (I missed this):
- the arms are too short
- it's held together by crappy bits
- it's less than basic
- it's put together by someone without attention to detail and lack of knowledge
- it's never really been used
When the printer arrived I saw the shipping label and started to google a bit, I discovered that it used to be a machine that a shop owner tried to build, they own a shop selling 3D-printer parts but apparently don't know how to even build/use a 3D printer!! Amazing. That's why they didn't sell it in their own shop but on an anonymous account of the shop owner to keep the name of the shop out of the listing.
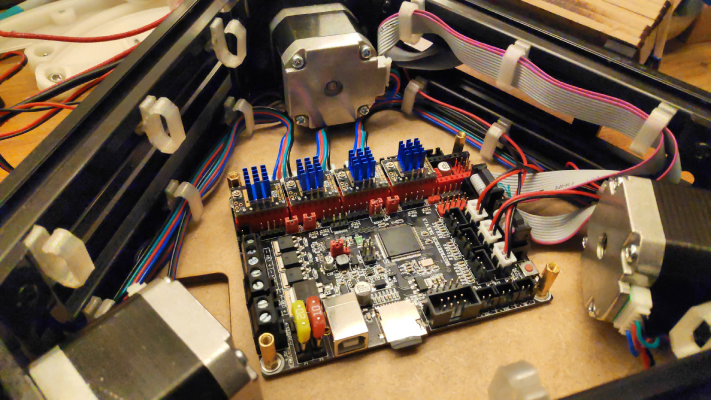
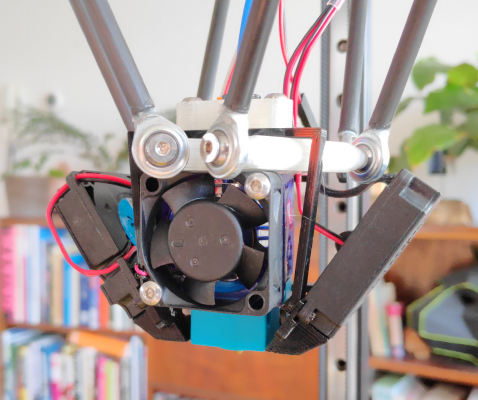
Anyway, I had plans so I ordered magnetic effector parts and designed a new effector and completely rebuilt the machine with new MGN12 carriages and an E3D hotend. Added an SKR 1.3 and TMC2208's. Oh and an inductive proximity sensor to finish it up:
View of the entire machine with the magnetic system:
With this system the dimensional accuracy was spot on in every direction. However I noticed it had some difficulties and I wanted to make it faster and sturdier. The magnets would loosen up from time to time but the max print speed was only 50mm/s. So I went back to ball joints and wanted to use a FSR instead of an inductive proximity sensor so I could measure from the hotend tip.
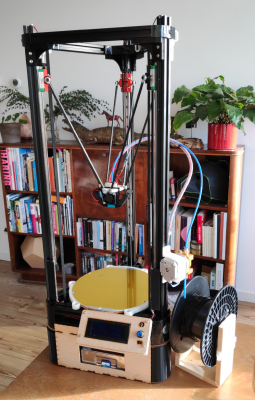
Now it's been another few weeks and, with great care I have put together this amazing machine that runs really well, but there is only one issue. The X and Y dimensions are not equal. The X-dimensions are too long and the Y-dimensions are too short. It's even noticeable on small parts. A cube that should be 20x20mm is 20.1mm by 19.9mm. Note that I didn't have this issue back when I used the magnetic system. I have printer a couple of nice models that were press-fit and everything snapped together while the parts were randomly oriented on the build platform so all dimensions were spot on.
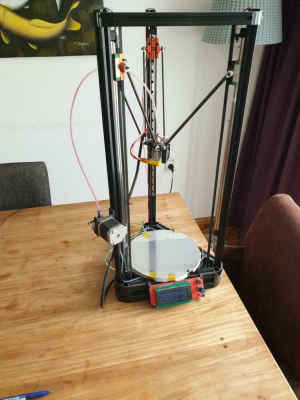
This is what the machine currently looks like:
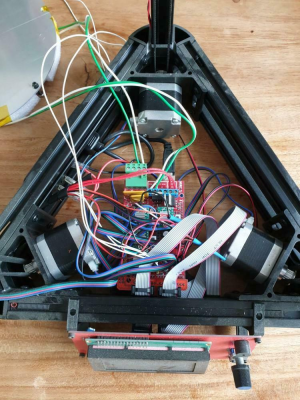
Electronics:
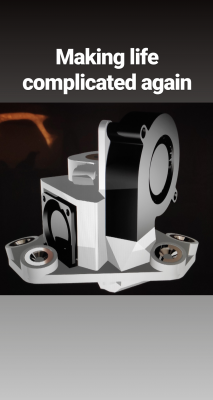
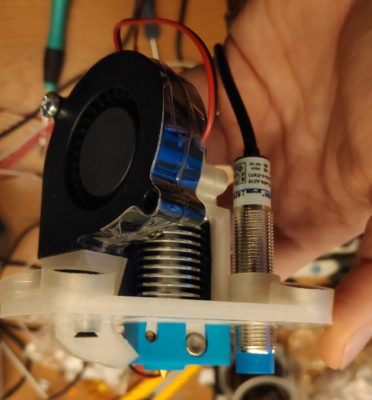
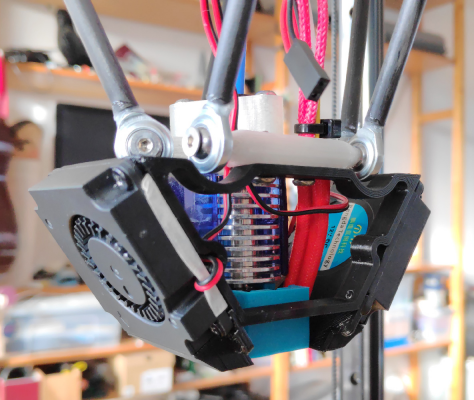
Effector:
I have double triple checked everything:
- rod lengths are equal and precisely set in the firmware
- machine is square in every dimension
- endstop height is close to perfect on each column in relation to the heated bed
- after manually configuring UBL the machine prints precisely flat on the entire bed (G29 L1 is in startup gcode)
- distance between rod joints is equal across the board
- belt tension is equal, checked by the sound they make when played like a bass snare and the tension buildup when deflected
- Z-height is spot on
- flow is calibrated perfectly 2 walls of 0.48mm combine into 0.96mm thick walls in each dimension
- effector bolts have no play because I added spacers around the M3 bolts to make a tight fit
- calibrated steps/mm by having the printer move in the Z-height, this works perfectly
Stats (rounded values, not rounded in firmware):
Machine height - 800mm
Print height - 213mm
Diagonal rod length - 267mm
Radius - 109mm
Print radius - 80mm
Bed size - 220mm
I'm really curious if there is anyone that has some advice for me to see what I can try out to get the dimensions correct. I didn't just build the machine to print figurines but also for printing mechanical parts for things I design. As you can see in the effector design I really like to micromanage stuff to make specific one-off parts.
Kind of lost about what I can still try.
Edit;
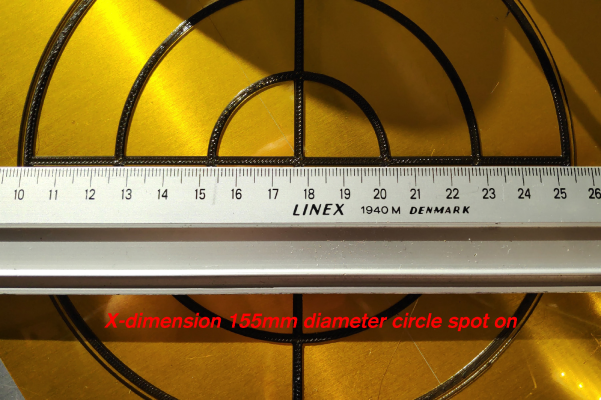
Just printed a large cicle to test the bed after UBL, and it turns out the measurements are almost spot on when printing a circle that is 155mm in diameter:
Sadly 10 images max in this message, but the Y-dimension turned out to be around 154mm's. So the dimensional error doesn't enlarge towards the edges which 100% confirms the steps/mm are set correctly. Smaller objects actually have more inaccuracy than this huge parts.
Edited 6 time(s). Last edit at 12/25/2019 07:11AM by Ohmarinus.
http://www.marinusdebeer.nl/
|
Re: Deltoid - homebrew delta struggles December 25, 2019 02:57PM |
Registered: 10 years ago Posts: 732 |
If your bed bed is "perfectly" levelled (without using grid based linear compensation of z-errors) and you are still getting wrong XY dimension then there are rotations of your platform. Mount a Bull's Eye Surface Level instead of an hotend on the platform and move the head to different XY positions to verify that the platform is always perfectly horizontal.
There are only two options:
Edited 1 time(s). Last edit at 12/25/2019 03:28PM by hercek.
There are only two options:
- You will find that the platform is not always perfectly horizontal. In such a case the line connecting rod ends on a tower is not parallel to the line connecting the corresponding rod ends on the platform. Or some of these lines is not parallel to the bed. There may be more reasons for this:
- rods ends going to one tower do not have the same distance
- carriage slightly rotated around its horizontal axe
- tower or carriage slightly rotated around their vertical axe
- tower radially moved and this move is not compensated by carriage rotation or platform mount point rotations
- angular position of the platform mounting points is not the same as the angular position of the corresponding towers
- distance between rod end is not the same at the platform and the corresponding carriage
- Platform is always perfectly horizontal. In such a case you may have only somewhat wrong tower positions, diagonal rods, endstops or maybe a towers leaning a bit. These errors will lead to imperfect z-height levelling and probing can help identify the problem e.g. with the help of this. Or get a RepRap firmware and 32bit electronics where most of it is in the firmware.
Edited 1 time(s). Last edit at 12/25/2019 03:28PM by hercek.
|
Re: Deltoid - homebrew delta struggles December 25, 2019 05:17PM |
Admin Registered: 11 years ago Posts: 3,096 |
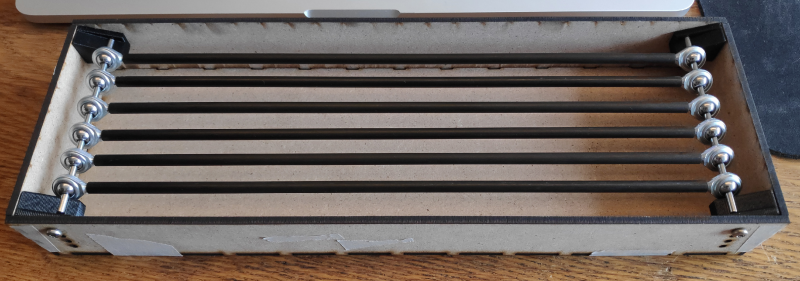
Okay, so I have made the rods with a specialized laser-cut jig with MDF plates and ground down precision linear shafts that are exactly 3mm and fit in the rod ends without play. These rods were mounted in the jig exactly squared and all of the six rods were glued in while mounted next to each other.
The bed is definitely flat, it's a 3mm aluminium heated bed.
I will try to see if I can spot any variation in the rods but do not believe there is any.
The next thing I'll do is see if I can find out if the carriage tilts. This is going to be a very time consuming thing I guess hahaha. What did I get myself into... Thanks for your advice Hercek. I will look into the wxMaxima software.
Update:
I have switched around some arms to make sure they are 100% percent exactly the same, centric and length etc. After that I did a G33 P10 to make sure the G33 command took as much probing points as possible. This took a long time but I noticed that the bed deflected on the unsupported spots. The heatbed is fastened in three points and supported in these places by a plastic part that is about the size of a quarter.
Now I will have to redesign some kind of new support I think to make sure that the bed is supported fully and doesn't deflect. However, with UBL I still managed to get it right and better, so the deflection shouldn't really be an issue anyway.
What I wonder is; does the UBL mesh use any of the G33 generated data?
Still, I do not believe this has any consequences for the dimensions being off, but it might be wise to support the heated bed anyway. Sadly I can't get to my workshop at work because of the holidays. So making a stronger base with the lasercutter will be impossible for the coming two weeks. It's going to take some time before I'll be able to make a nice strong base. Meanwhile I'll cut a plate out of MDF that I can then place underneath the heated bed to support it a bit more.
Edited 1 time(s). Last edit at 12/26/2019 05:09AM by Ohmarinus.
http://www.marinusdebeer.nl/
|
Re: Deltoid - homebrew delta struggles December 29, 2019 04:18PM |
Admin Registered: 11 years ago Posts: 3,096 |
I'm starting to wonder if maybe other factors are in play in my machine. Could it be that increasing the distance between the rods will increase it's precision?
The distance is now 40mm's which isn't very wide, I am in the process of designing 'yet another' (yes...) effector in which the hotend's tip is mounted nearly flush with the effector's bottom side. Second of all I want the mounting points on the cart higher up to add Z-height. Right now the rods mount to the middle of the cart causing the machine to lose valuable Z-height.
Would for instance making the rod distance 60mm's increase the accuracy? Or what other influence would this have? Making the rod distance larger will also make it easier for me to fit all the parts onto the effector. So it's a win win situation anyway.
http://www.marinusdebeer.nl/
|
Re: Deltoid - homebrew delta struggles December 29, 2019 04:47PM |
Registered: 10 years ago Posts: 732 |
|
Re: Deltoid - homebrew delta struggles December 30, 2019 04:52AM |
Admin Registered: 11 years ago Posts: 3,096 |
Quote
hercek
Increasing distance between rods will make it less sensitive to errors in diagonal rod length. Increase the distance if possible.
Okay, I will redesign the part later this week. However, I did check the accuracy of all parts and there is nothing that tells me there should be anything wrong. The towers are all squared in three dimensions, the rod distance is equal an both the cart and the effector, the effector is equally wide in all dimensions and the rod lengths are all equal. The bolts have thin spacers to remove all possible play on both ends and the hotend is fixed straight down as well. I'm wondering if my machine has another issue. I also redesigned the endstops last week because the Anycubic endstop holders that came with the machine were all rubbish with those M4 bolts and square nuts.
I have now ordered new Torx M4 bolts and extrusion locknuts to rebuild the machine with because the Anycubic bolts all have stripped heads. The bolts are very soft and the previous owner has messed them up pretty badly.
Gotta get it right eventually

http://www.marinusdebeer.nl/
Sorry, only registered users may post in this forum.
