Rostock Build with modfied traxxas parts
Posted by stratmaster458
|
Rostock Build with modfied traxxas parts July 07, 2013 01:03AM |
Registered: 12 years ago Posts: 45 |
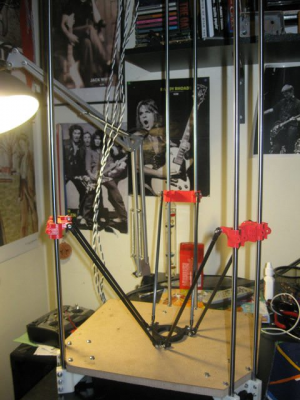
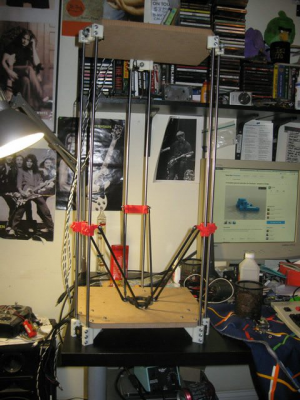
Over the past week I have been assembling my Rostock based on the parts found in my collection:
[www.thingiverse.com]
I chose to go with the traxxas rod end modified parts because the printed universal joints were extremely hard to assembly and very inconsistent despite the fact that they were printed on a friend's well build Mendle90. Originally I was building a Mini but after comparing the parts of the original Rostock with the miini and some of the modified parts out there I found that all the aprts are interchangeable between variants excluding the max and the enlarged rostock (12mm rods instead of 8mm).
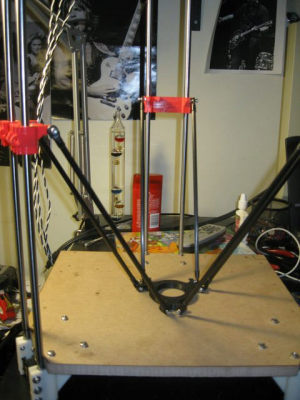
As of yet I have the printer's mechanical systems almost completely assembled by that I mean:
- frame and rods fully assembled
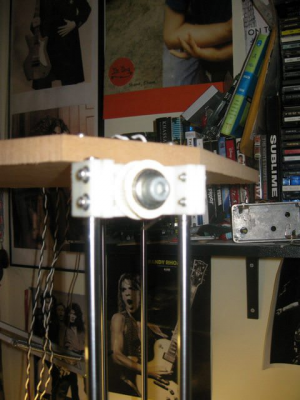
- motors in place with pulley's
- endstops wired and bolted in
- carriages and bearings installed
- traxxas rod ends and carbon fiber tube assembled and attached
- platform attached to carriages via arms.
What needs to be done to get a moving platform:
- install belts
- tension belts
- wire motors to printrbot board
- wire endstops to printrbot board
- calibrate (should be easy JK lol)
In the interest of not breaking anything I have a few questions before I move forward with installing the belts and wiring up the printrbot board and giving it a go.
1. What is the best way to install the belts? I tried putting them on by hand but it was very hard, do I have to losen the clamp on the rods on the idler ends to get the belt on and tension it?
2. As far as endstop switches go, should I remove the thin metal lever on them ?
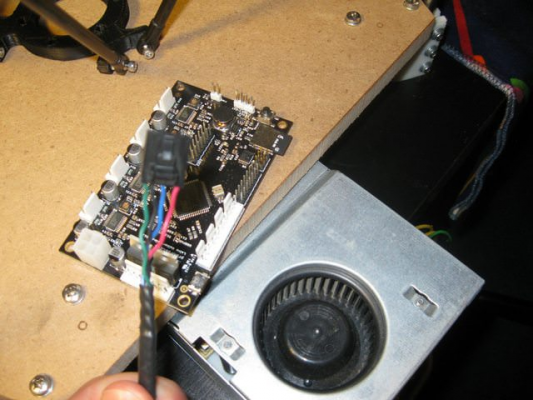
3. The motors I have are linea engineering NEMA 17 bipolar stepper motors that I salvaged from liquid handler machines at a local electronics recycling warehouse (got 4 for 20 bucks ) they have the red, black, blue, and green wires like steppers I have seen on other RepRaps/RepStraps but I'm unsure what they correspond to internally on the motors. The part number on the steppers doesn't correlate directly to one on the Linear Engineering web page, I was told they were custom wound for the machines I salvaged them from. What should I do to figure out what wire means what on my steppers?
4. For my idlers I just used 608ZZ bearings with a 40 tooth GT2 idler ring I printed out to go over them, should I glue these to the bearings or is friction and the force of the belt tension enough to keep them on?
5. My rods are the exact length (I bought them from a supplier precut and ends faced with a CNC) but despite my best efforts to make them flush with the idler and motor ends one of the rods sticks up higher on each of the three axis. I think this might be because the bed of the AO-100 I printed on was not completely level. Are the rods even supposed to be flush with the tops of the idler ends? Or did Johan design it such that there is extra length to tension the belts?
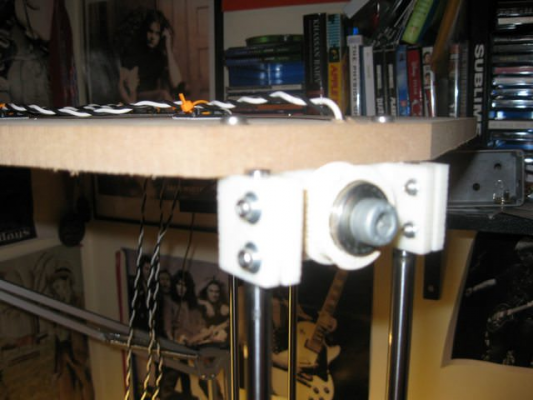
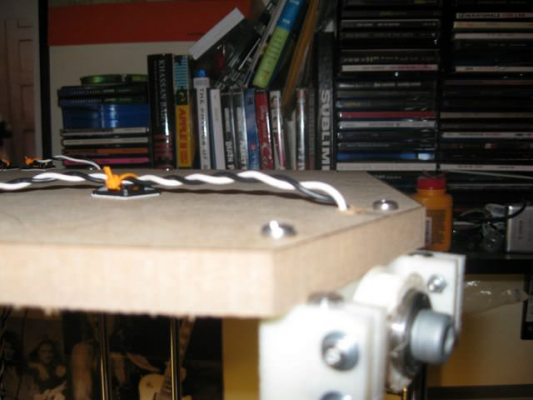
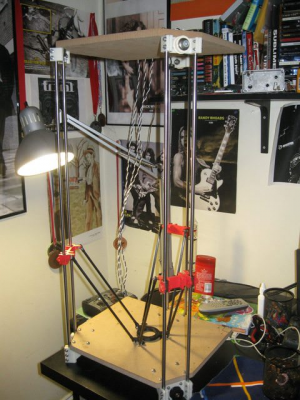
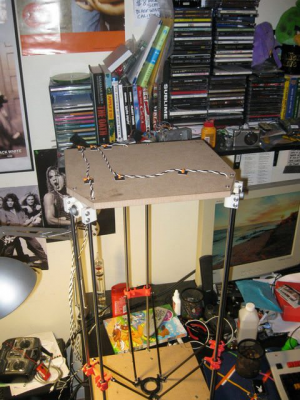
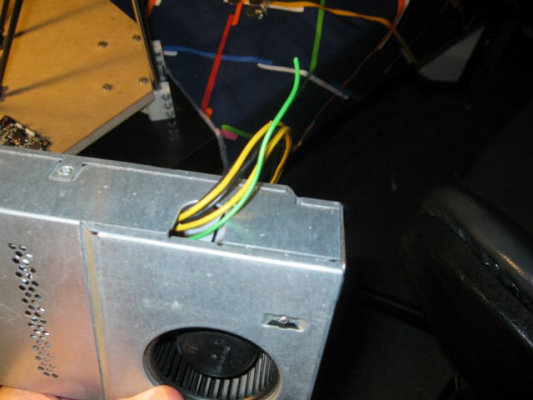
Also obligatory pictures of the build:
Edited 1 time(s). Last edit at 07/07/2013 01:06AM by stratmaster458.
[www.thingiverse.com]
I chose to go with the traxxas rod end modified parts because the printed universal joints were extremely hard to assembly and very inconsistent despite the fact that they were printed on a friend's well build Mendle90. Originally I was building a Mini but after comparing the parts of the original Rostock with the miini and some of the modified parts out there I found that all the aprts are interchangeable between variants excluding the max and the enlarged rostock (12mm rods instead of 8mm).
As of yet I have the printer's mechanical systems almost completely assembled by that I mean:
- frame and rods fully assembled
- motors in place with pulley's
- endstops wired and bolted in
- carriages and bearings installed
- traxxas rod ends and carbon fiber tube assembled and attached
- platform attached to carriages via arms.
What needs to be done to get a moving platform:
- install belts
- tension belts
- wire motors to printrbot board
- wire endstops to printrbot board
- calibrate (should be easy JK lol)
In the interest of not breaking anything I have a few questions before I move forward with installing the belts and wiring up the printrbot board and giving it a go.
1. What is the best way to install the belts? I tried putting them on by hand but it was very hard, do I have to losen the clamp on the rods on the idler ends to get the belt on and tension it?
2. As far as endstop switches go, should I remove the thin metal lever on them ?
3. The motors I have are linea engineering NEMA 17 bipolar stepper motors that I salvaged from liquid handler machines at a local electronics recycling warehouse (got 4 for 20 bucks
 ) they have the red, black, blue, and green wires like steppers I have seen on other RepRaps/RepStraps but I'm unsure what they correspond to internally on the motors. The part number on the steppers doesn't correlate directly to one on the Linear Engineering web page, I was told they were custom wound for the machines I salvaged them from. What should I do to figure out what wire means what on my steppers?
4. For my idlers I just used 608ZZ bearings with a 40 tooth GT2 idler ring I printed out to go over them, should I glue these to the bearings or is friction and the force of the belt tension enough to keep them on?
5. My rods are the exact length (I bought them from a supplier precut and ends faced with a CNC) but despite my best efforts to make them flush with the idler and motor ends one of the rods sticks up higher on each of the three axis. I think this might be because the bed of the AO-100 I printed on was not completely level. Are the rods even supposed to be flush with the tops of the idler ends? Or did Johan design it such that there is extra length to tension the belts?
Also obligatory pictures of the build:
Edited 1 time(s). Last edit at 07/07/2013 01:06AM by stratmaster458.
|
Re: Rostock Build with modfied traxxas parts August 01, 2013 02:50AM |
Registered: 10 years ago Posts: 17 |
|
Re: Rostock Build with modfied traxxas parts August 04, 2013 02:58PM |
Registered: 12 years ago Posts: 45 |
evamvid Wrote:
-------------------------------------------------------
> I would glue the idlers...
I have since made changes. I got rid of the idlers for flanged bearings, they work much betterm they are quiet and they don't spread the belts on each axis wider than the 40 Tooth pulley. Also I reprinted all my carriages because the red ones melted in the car. I have also since added MDF sides for support and as means to mount the extruder and filament reel. The last thing I did was add an aluminum build plate (spring loaded) to the platform. I don't plan to use a heated bed with PLA but should I still get glass for my print bed?
As far as firmware goes, I have Marlin pretty much figured out. Printrboard and Delta kinematics are now supported in the main branch also the main branch of marlin includes example configuration files for Delta kinematics. I was able to find all the confi info on Johan's Rostock wiki. From what I can tell my Marlin firmware is configured correctly and everything is working fine. The thing I am having the most challenge with now is making the slic3r config. Whenever I slice something and load it into pronterface the object is not centered on the bet and the Rock platform just crashed into the bed (I shut it off from the power supply before it does), what is wrong with my slic3r config? Where is a good guide for making a slic3r config for Delta's? All my steps/mm and Z height are correctly configured in Marlin so IDK why it would want to crash like it is.
|
Re: Rostock Build with modfied traxxas parts August 05, 2013 03:59PM |
Registered: 10 years ago Posts: 732 |
stratmaster458 Wrote:
-------------------------------------------------------
> evamvid Wrote:
> --------------------------------------------------
> The thing I am having the most challenge with now is
> making the slic3r config. Whenever I slice
> something and load it into pronterface the object
> is not centered on the bet and the Rock platform
> just crashed into the bed (I shut it off from the
> power supply before it does), what is wrong with
> my slic3r config? Where is a good guide for making
> a slic3r config for Delta's?
Object not centered in pronterface:
Go to Setting - Pritner settings, and set Width (to 200), Depth (to 200), X offset (to -100), Y offset (to -100), or some nubmers like that (dimensions are in mm). Also check bed_size and print_center slicer options.
Example slicer.ini for rostock:
[github.com]
Head crashing to bed:
Make sure you do not use G3 and G4 commands (arc moves). Marlin does not support them for delta printers.
|
Re: Rostock Build with modfied traxxas parts August 10, 2013 03:38AM |
Registered: 12 years ago Posts: 45 |
hercek Wrote:
-------------------------------------------------------
> stratmaster458 Wrote:
> --------------------------------------------------
> -----
> > evamvid Wrote:
> >
> --------------------------------------------------
>
>
> > The thing I am having the most challenge with
> now is
> > making the slic3r config. Whenever I slice
> > something and load it into pronterface the
> object
> > is not centered on the bet and the Rock
> platform
> > just crashed into the bed (I shut it off from
> the
> > power supply before it does), what is wrong
> with
> > my slic3r config? Where is a good guide for
> making
> > a slic3r config for Delta's?
>
> Object not centered in pronterface:
> Go to Setting - Pritner settings, and set Width
> (to 200), Depth (to 200), X offset (to -100), Y
> offset (to -100), or some nubmers like that
> (dimensions are in mm). Also check bed_size and
> print_center slicer options.
>
> Example slicer.ini for rostock:
> [github.com]
> slic3r.ini
>
> Head crashing to bed:
> Make sure you do not use G3 and G4 commands (arc
> moves). Marlin does not support them for delta
> printers.
The coordinate change for the origin was correct, I forget yet again that delta's think in polar coordinates and that the origin is the center not the corner of the build plate. I'm not sure on the G code commands but my ini was created using Johan's example, strangely his does not include the coordinate fix with the -100 offsets.
My latest update is that I have the machine entirely assembled and I have begun debuggin the hardware. As far as controlled motion from pronterface goes, I think I'm all set, everything moves as fast as it should and moves consitently in all directions. Weirdly the positive and negative directions for the x and why axis are inverted relative to the buttons on the pronterface gui, the left X moves the printer to the right same goes for the Y, the Z translation works as desired and the homing routine completes without issue.
Earlier today I finished assembling my hotend and extruder, I can reliable set the temp of the hot end with calibrated PID to the range of temps for PLA printing consistently and accurately. Worked out of the box which was nice, because hardly anything ever does when one is engineering My next step was to test extrusion which didn't end up working. I am using 1.75mm filament with a 36mm barrrel makergear hotend with .25mm nozzel. My extruder is a gregs accesible extruder with the bowden clamps that convert it for bowden extrusion. Despite the hotend being up to temp (185C) the extruder can't seem to push the PLA through the hotend. I was told by makergear (after I received my kit and assembled) that bowden cable extrusion with a 0.25mm nozzle would be very difficult and problematic, the neglected to state why any ideas? SHould I try extruding at 200C instead? SHould I get a new nozzle? What is the smallest I can use with a bowden system?
-------------------------------------------------------
> stratmaster458 Wrote:
> --------------------------------------------------
> -----
> > evamvid Wrote:
> >
> --------------------------------------------------
>
>
> > The thing I am having the most challenge with
> now is
> > making the slic3r config. Whenever I slice
> > something and load it into pronterface the
> object
> > is not centered on the bet and the Rock
> platform
> > just crashed into the bed (I shut it off from
> the
> > power supply before it does), what is wrong
> with
> > my slic3r config? Where is a good guide for
> making
> > a slic3r config for Delta's?
>
> Object not centered in pronterface:
> Go to Setting - Pritner settings, and set Width
> (to 200), Depth (to 200), X offset (to -100), Y
> offset (to -100), or some nubmers like that
> (dimensions are in mm). Also check bed_size and
> print_center slicer options.
>
> Example slicer.ini for rostock:
> [github.com]
> slic3r.ini
>
> Head crashing to bed:
> Make sure you do not use G3 and G4 commands (arc
> moves). Marlin does not support them for delta
> printers.
The coordinate change for the origin was correct, I forget yet again that delta's think in polar coordinates and that the origin is the center not the corner of the build plate. I'm not sure on the G code commands but my ini was created using Johan's example, strangely his does not include the coordinate fix with the -100 offsets.
My latest update is that I have the machine entirely assembled and I have begun debuggin the hardware. As far as controlled motion from pronterface goes, I think I'm all set, everything moves as fast as it should and moves consitently in all directions. Weirdly the positive and negative directions for the x and why axis are inverted relative to the buttons on the pronterface gui, the left X moves the printer to the right same goes for the Y, the Z translation works as desired and the homing routine completes without issue.
Earlier today I finished assembling my hotend and extruder, I can reliable set the temp of the hot end with calibrated PID to the range of temps for PLA printing consistently and accurately. Worked out of the box which was nice, because hardly anything ever does when one is engineering
 My next step was to test extrusion which didn't end up working. I am using 1.75mm filament with a 36mm barrrel makergear hotend with .25mm nozzel. My extruder is a gregs accesible extruder with the bowden clamps that convert it for bowden extrusion. Despite the hotend being up to temp (185C) the extruder can't seem to push the PLA through the hotend. I was told by makergear (after I received my kit and assembled) that bowden cable extrusion with a 0.25mm nozzle would be very difficult and problematic, the neglected to state why any ideas? SHould I try extruding at 200C instead? SHould I get a new nozzle? What is the smallest I can use with a bowden system?
|
Re: Rostock Build with modfied traxxas parts August 10, 2013 09:34AM |
Registered: 10 years ago Posts: 732 |
stratmaster458 Wrote:
-------------------------------------------------------
>
> The coordinate change for the origin was correct,
> I forget yet again that delta's think in polar
> coordinates and that the origin is the center not
> the corner of the build plate. I'm not sure on the
> G code commands but my ini was created using
> Johan's example, strangely his does not include
> the coordinate fix with the -100 offsets.
-100 offsets are fixed in slicer using options:
bed_size = 200,200
print_center = 0,0
From these two it is clear the ranges are [-100 ,+100].
If your slicer options do contain
gcode_arcs = 0
then slicer will not generate G3 and G4 commands .... and I do not have an idea why your head would crash to your bed.
>
> Weirdly the positive and
> negative directions for the x and why axis are
> inverted relative to the buttons on the
> pronterface gui, the left X moves the printer to
> the right same goes for the Y, the Z translation
> works as desired and the homing routine completes
> without issue.
Interesting, if homing works well then you have correct directions on the towers 1,2, and 3. One can invert the direction of X axe by swaping connectors for motors on tower 1 and 2 (by connecting motor on tower 1 to connector for tower 2, and motor on tower 2 to connector on tower 1). But I do not know how one could invert direction of Y axe.
> Despite the hotend being up to temp
> (185C) the extruder can't seem to push the PLA
> through the hotend. I was told by makergear (after
> I received my kit and assembled) that bowden cable
> extrusion with a 0.25mm nozzle would be very
> difficult and problematic, the neglected to state
> why any ideas? SHould I try extruding at 200C
> instead? SHould I get a new nozzle? What is the
> smallest I can use with a bowden system?
Check whether you can push filament by hand through the nozzle when it is hot (at 185°C). Disconnect bowden from the hotend and just try to push a piece of filament thorugh it. It should go easily. If it does not go then your nozzle is clogged. If it goes easily your temperature is ok as it is.
Check whether the extruder pushes filament when hotend is not connected to the bowden.
Check whether your termistor is reading tempereture correctly.
The smaller nozzle the harder it is to push filament and the bigger slack will happen in the bowden. This will require quicker and bigger filament retrace to prevent oozing. And maybe you will not be able to prevent it at all. To mitigate bowden issues you can:
* use tigheter bowden for you filament: e.g. 1.8 mm (instead of 2 mm) internal diameter for 1.75 mm filament
* use shorter bowden (if possible)
* bigger (and quicker) retrace and slower print speed.
I do not know what is the smallest usable nozzle with a bowden system. I know some use 0.35 mm and it works well enough.
|
Re: Rostock Build with modfied traxxas parts August 10, 2013 02:57PM |
Registered: 12 years ago Posts: 45 |
Thanks for getting back to me! I will try the motor swapping for the X/Y direction fix but first I will try simulating a print to see if its a problem.
I'll do all the test with the extruder, I don't know if I can shorten the bowden cable and I'm not sure how to test if my thermister is reading the temperature correctly, how do I check?
Anyways thanks again I'll report back once I try everything!
I'll do all the test with the extruder, I don't know if I can shorten the bowden cable and I'm not sure how to test if my thermister is reading the temperature correctly, how do I check?
Anyways thanks again I'll report back once I try everything!
|
Re: Rostock Build with modfied traxxas parts August 10, 2013 05:10PM |
Registered: 12 years ago Posts: 45 |
Yup My hotend is clogged. I have no idea how that happened, Its a brand new MakerGear hotend kit I assembled and everything went together just fine when I assembled it. Any idea how to fix it?
EDIT:
Fixed it, teflon tape was clogging the insulator and barrel. I tried extruding and my Bowden clamp came apart. I don't think .25mm nozzel bowden extrusion is going to work too well, I'll have to order a .35mm nozzel ASAP.
Also when I send an extrude 5mm command it moves up in the Z direction like 6 inches before actuating the extruder, what is this?
Edited 1 time(s). Last edit at 08/10/2013 07:38PM by stratmaster458.
|
Re: Rostock Build with modfied traxxas parts August 11, 2013 07:56AM |
Registered: 10 years ago Posts: 732 |
stratmaster458 Wrote:
-------------------------------------------------------
> Also when I send an extrude 5mm command it moves
> up in the Z direction like 6 inches before
> actuating the extruder, what is this?
Extrusion is a movement command (G0, G1), if you did not home your printer first (G28) it tries to home to get an idea about head position.
As for as checking head temperatrue: The easiest is to use an infrared thermometer. It is not precise but it gives you an idea whether temperature is as high as expected. And if it is not then you probably do not have selected the correct temperature sensing element in Configuration.h.
Sorry, only registered users may post in this forum.
