Cherry Pi III Is Available
Posted by AndyCart
|
Re: Cherry Pi III Is Available July 01, 2014 08:55AM |
Registered: 9 years ago Posts: 113 |
|
Re: Cherry Pi III Is Available July 01, 2014 04:23PM |
Registered: 11 years ago Posts: 408 |
Arf je l avais sous les yeux...
------------------------------------------------------------------------------------------------------------
Blog de GeeK: [www.zem.fr]
Reprap Prusa Mendel V2 pour 500€: [www.zem.fr]
------------------------------------------------------------------------------------------------------------
Blog de GeeK: [www.zem.fr]
Reprap Prusa Mendel V2 pour 500€: [www.zem.fr]
|
Re: Cherry Pi III Is Available July 01, 2014 09:20PM |
Registered: 9 years ago Posts: 113 |
Andy,
I'll be moving to the E3D v6. Could you send me the effector Sketchup so I can modify it to fit the E3D (or, if you already have it, it's even better!).
(yeah, I dont even have it yet that I do upgrade... lol... I got all the parts now and should receive the printer parts the week.. I'm looking at a Heatbed solution).
Regards,
Edited 1 time(s). Last edit at 07/01/2014 09:21PM by nka.
- Sebastien Plante (nka)
|
Re: Cherry Pi III Is Available July 01, 2014 11:46PM |
Registered: 10 years ago Posts: 515 |
Quote
nka
Andy,
I'll be moving to the E3D v6. Could you send me the effector Sketchup so I can modify it to fit the E3D (or, if you already have it, it's even better!).
(yeah, I dont even have it yet that I do upgrade... lol... I got all the parts now and should receive the printer parts the week.. I'm looking at a Heatbed solution).
Regards,
Hi Sebastien
I'm away from home until next week with no access to my files. I can send it when I'm back. Which effector file do you need? The e3D mk6 is superb. I have one in a core xy machine I built. It's a direct replacement for a j head.. If you fit the cooling fan as per your previous posts you shouldn't need to change anything.
|
Re: Cherry Pi III Is Available July 02, 2014 12:12AM |
Registered: 9 years ago Posts: 113 |
|
Re: Cherry Pi III Is Available July 08, 2014 06:30PM |
Registered: 10 years ago Posts: 92 |
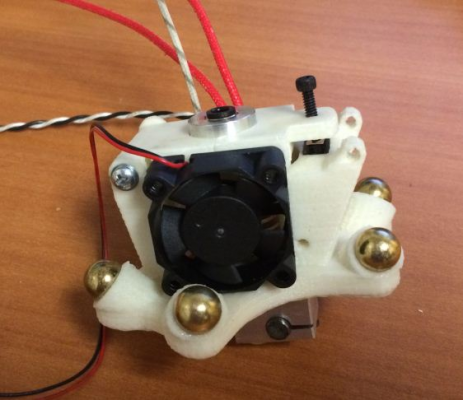
@nka, I picked up an E3D v6 hotend as well, and am looking at how I plan to fit the fan. It does look like it could fit where you suggested, but that would cover one of the screw holes for a spring on that side. It would be necessary to find a new anchor for the spring.
Here's a picture of how it would fit:
Have you given any more thought to how you're going to make it fit? I'd be interested in your solution if you have one.
I can also confirm that the fan will work when it's that close to the magnet. Spins like a dream!
Here's a picture of how it would fit:
Have you given any more thought to how you're going to make it fit? I'd be interested in your solution if you have one.
I can also confirm that the fan will work when it's that close to the magnet. Spins like a dream!
|
Re: Cherry Pi III Is Available July 08, 2014 06:49PM |
Registered: 10 years ago Posts: 515 |
I have that exact setup with a JHead. It works fine. You will find one decent spring on the other side is sufficient, or, alternatively, a rubber 'O' ring works great too!
To save wires you can run the hotend cooler fan from the +VE side of the part cooling fan and the -VE side of the thermistor. That gives a permanent 12V whilst the RAMPS board is powered.
Andy
To save wires you can run the hotend cooler fan from the +VE side of the part cooling fan and the -VE side of the thermistor. That gives a permanent 12V whilst the RAMPS board is powered.
Andy
|
Re: Cherry Pi III Is Available July 10, 2014 11:46AM |
Registered: 10 years ago Posts: 92 |
Thanks for your quick responses Andy.
I was very reassured to hear that you made it work with the fan like that, and that may be what I end up doing.
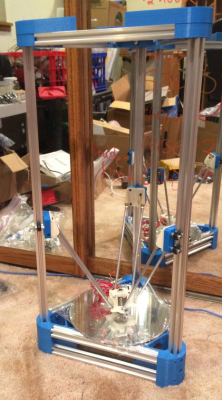
I've been filing & fitting t-nuts and assembling as I go, but I placed the frame parts all together last night just to see what it would look like. Thought you might enjoy seeing it:
It's got the ridiculous Nema23 motor mounts on it.
Unfortunately, the very next thing I did was over-tighten a screw and snap a piece off that big central nozzle holder. So I'll be re-printing that, and may notch out a special square for the fan, like nka outlined originally, before printing. We'll see.
Any ideas for a graceful way to unstick magnets that have been glued by CA?
Update: Google says acetone will work. I'll try that when I can.
Edited 1 time(s). Last edit at 07/10/2014 11:52AM by maso.
|
Re: Cherry Pi III Is Available July 10, 2014 11:59AM |
Registered: 9 years ago Posts: 113 |
|
Re: Cherry Pi III Is Available July 10, 2014 06:37PM |
Registered: 10 years ago Posts: 515 |
|
Re: Cherry Pi III Is Available July 10, 2014 09:01PM |
Registered: 12 years ago Posts: 11 |
It lives 
Made a few modifications. I have changed the way the springs are mounted for the auto levelling to be more robust and allow a cooling fan to fit and am using Airtrippers direct drive extruder
Still some calibration and tidying up to do and I think add a heated bed
[www.youtube.com]
Edited 2 time(s). Last edit at 07/10/2014 09:17PM by KtB.
|
Re: Cherry Pi III Is Available July 11, 2014 03:37AM |
Registered: 10 years ago Posts: 515 |
|
Re: Cherry Pi III Is Available July 11, 2014 10:27PM |
Registered: 9 years ago Posts: 113 |
weird, I connected a 4mm ID / M5 thread PTC into the hole of the extruder, and my filament is blocking (into the PTC thread... if I'm lucky it goes trough and its working)... I was looking, maybe I could use 4mm ID / M10 (I dont have those) or make an adapter?
EDIT: Yeah... seems this is what I need to do. People on RichRap are using 1/8 OD, 4mm ID... but I'm a little confused, since the hole is about 9.5mm and 1/8" is ~3.17mm. Plus, the most I've seen dont have any bevel inside... so it can still kick the wall?
I need a printer to make an adapteur for my printer!
EDIT 2: Or maybe I could try to bevel my M5 entry... but I doubt it.
Edited 5 time(s). Last edit at 07/11/2014 11:03PM by nka.
- Sebastien Plante (nka)
EDIT: Yeah... seems this is what I need to do. People on RichRap are using 1/8 OD, 4mm ID... but I'm a little confused, since the hole is about 9.5mm and 1/8" is ~3.17mm. Plus, the most I've seen dont have any bevel inside... so it can still kick the wall?
I need a printer to make an adapteur for my printer!

EDIT 2: Or maybe I could try to bevel my M5 entry... but I doubt it.
Edited 5 time(s). Last edit at 07/11/2014 11:03PM by nka.
- Sebastien Plante (nka)
|
Re: Cherry Pi III Is Available July 12, 2014 06:29PM |
Registered: 10 years ago Posts: 515 |
|
Re: Cherry Pi III Is Available July 15, 2014 09:33AM |
Registered: 12 years ago Posts: 153 |
|
Re: Cherry Pi III Is Available July 15, 2014 10:09AM |
Registered: 9 years ago Posts: 113 |
Oh, nice to know, thanks!
I managed to make my M5 PTC work very fine by make a bevel to the entry point (using a drill bit).
Almost all finish... I only have the endstop with some wiring and the carriage wheels to install. I got a one week child, so I dont have a lot of time !
- Sebastien Plante (nka)
I managed to make my M5 PTC work very fine by make a bevel to the entry point (using a drill bit).
Almost all finish... I only have the endstop with some wiring and the carriage wheels to install. I got a one week child, so I dont have a lot of time !

- Sebastien Plante (nka)
|
Re: Cherry Pi III Is Available July 18, 2014 08:55PM |
Registered: 9 years ago Posts: 113 |
Woohoo... almost done.
But I'm having two problemes;
G30 work, but it "slam" into the bed... so much that a motor may skip steps, so when it begin calibration, he's not in the middle.
Speaking of calibration... I need to lower the "BED_DIAMETER" to 40, else my arms are disconnecting. What wrong I did ? The magnet hold pretty strong, they seems to disconnect at angle (when one axis is moving to far).
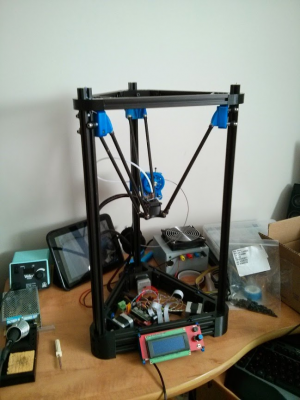
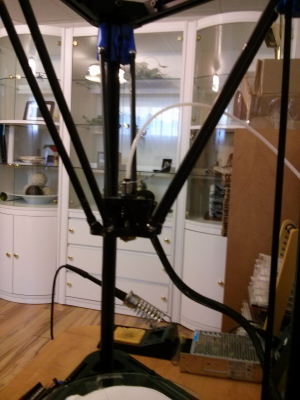
Picture btw...
Edited 6 time(s). Last edit at 07/18/2014 10:57PM by nka.
- Sebastien Plante (nka)
|
Re: Cherry Pi III Is Available July 19, 2014 01:33AM |
Registered: 10 years ago Posts: 515 |
Hi Sebastien
Looks great. If you are having arms disconnecting it may be that the delta rods are not exactly the same length. Check them. Another reason could be the bowden/cable loom is too tight and causing a twisting moment. Remove the hot end from the effector and check the motion again to test for this. Also check that the effector is flat. If it warped slightly during printing it has the same effect as the rods not being of equal length.
Andy
|
Re: Cherry Pi III Is Available July 19, 2014 08:19AM |
Registered: 10 years ago Posts: 903 |
Is that a webOS HP TouchPad in the background? I was wondering who bought the other one.....

|
Re: Cherry Pi III Is Available July 19, 2014 09:01AM |
Registered: 9 years ago Posts: 113 |
yes its a webOS TouchPad, but its running Android, I got it on sales for 99$ when HP discontinued them. It's used as a baby monitor now.
I've checked the arms, they are all the same, but I think the some magnet might not be fully push. I'll try to re-glue them.
Got an idea for the slamming into the bed before the calibration?
- Sebastien Plante (nka)
I've checked the arms, they are all the same, but I think the some magnet might not be fully push. I'll try to re-glue them.
Got an idea for the slamming into the bed before the calibration?
- Sebastien Plante (nka)
|
Re: Cherry Pi III Is Available July 19, 2014 10:57AM |
Registered: 10 years ago Posts: 903 |
If it slams into the bed during a G30 probe, then it sounds like the Z-min endstop switch is either not working or possibly that the spring(s) on the hinged plate are too tight. A few M119 commands while triggering the switch will eliminate wiring and firmware problems from the possible list of causes.....
|
Re: Cherry Pi III Is Available July 19, 2014 11:33AM |
Registered: 9 years ago Posts: 113 |
The endstop work, as it's "open" when not touching and if I "push it" a little it does "triggered". Also, after the slam, it goes up and goes down slowly and then do the calibration. I'll try to follow this : [www.builda3dprinter.eu]
It's like he's trying to go "too low" after hitting the endstop.
btw, I found one of the magnet was very weak... I tried to remove it to replace it, but was I was expecting happened.... the part snapped. Did I tell you it's my first (non-fonctionnal) printer ? Hope CA glue will hold the part!
Edited 1 time(s). Last edit at 07/19/2014 11:35AM by nka.
- Sebastien Plante (nka)
It's like he's trying to go "too low" after hitting the endstop.
btw, I found one of the magnet was very weak... I tried to remove it to replace it, but was I was expecting happened.... the part snapped. Did I tell you it's my first (non-fonctionnal) printer ? Hope CA glue will hold the part!

Edited 1 time(s). Last edit at 07/19/2014 11:35AM by nka.
- Sebastien Plante (nka)
|
Re: Cherry Pi III Is Available July 19, 2014 05:09PM |
Registered: 9 years ago Posts: 113 |
I fixed the "slaming" issue. I can now autocalibrate
Seems the CA glue hold strong. I replaced two weak magnet and 3 that wasnt proprely seated. Still having the same issue...
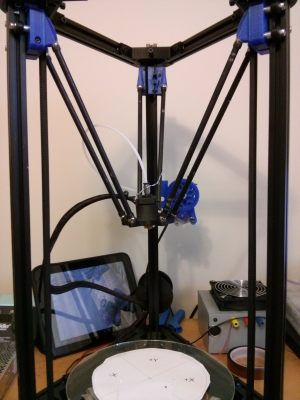
I dont know where to look... All my tower are at the exact same height, if I push all the Carriage to the top, the effector is not even. All my rods are the exact same size (if I move them to another place, it still uneven in the same way).
(Hope you can see on the pics, it's lowering toward the X motor)
maybe I aimed too far by trying to build a Delta "DIY" without having my own printer. :'(
- Sebastien Plante (nka)
|
Re: Cherry Pi III Is Available July 19, 2014 06:42PM |
Registered: 10 years ago Posts: 515 |
Hi Sebastien
It certainly looks like the arms are unequal, this would include the magnets and the possible warping of the effector. It may also be a carriage that isn't square to the tower. Check the top of each carriage is at 90 degrees to the tower side. I've just finished my 10th Cherry Pi build and not had this issue so far.
Andy
|
Re: Cherry Pi III Is Available July 19, 2014 07:20PM |
Registered: 9 years ago Posts: 113 |
I'll look at the carriage, seems straight but maybe it's not.
Since I've swapped the arms from one side to the others and its stay the same way, the carriage is the only thing left to look. I also tried to rotate the effector, still down on the X axis (Or "up" in other one?).
Your in the UK Andy? If I do not figure it out, how much (if you agree) for the carriage (without wheels), effector and arm assembled/tested with milled bolt and magnet? I'm in Canada.
The problems is that I have little time to trouble shooting with kids (even more with the newborn) and jobs, so eliminating those would help.
- Sebastien Plante (nka)
|
Re: Cherry Pi III Is Available July 19, 2014 07:56PM |
Registered: 10 years ago Posts: 903 |
Do not feel like you have failed, nka. There are plenty of people here every day who never made it as far as you did!
Speaking of tilted effector plates, this was my first 3D printer -- a RepStrap delta built with NO printed parts:
Yes, that is a large kitchen pot full of water being used as the bed and a vibration damper. The effector plate is a triangular head from a Bosch cutting tool, and the rods are attached to electrical crimp-on ring connectors. It is printing HoloPed's switched effector plate, which Andy evolved into the CP-III effector that you are using. It took from February until May to print enough CP-I parts to build a real printer, and I *still* do not have the new one printing reliably as of today.....

|
Re: Cherry Pi III Is Available July 19, 2014 08:37PM |
Registered: 9 years ago Posts: 113 |
|
Re: Cherry Pi III Is Available July 20, 2014 09:45PM |
Registered: 10 years ago Posts: 903 |
Quote
nka
btw, your printer is amazing, amazed it was able to print too :p
Necessity is a mother, as they say.
 I imagine that you know all about that for the past week of parenting duties.
On the bright side, I finally have My CP mashup (polite word for mutt) working well enough where it finished 5 parts in a row today without a failure. One of the last things that I printed before my old RepStrap's PLA effector plate melted down was Johann's recirculating ball carriages (resized for 2020 extrusions). I was reluctantly forced to use them, and my gut feeling about them was correct. They are extremely fickle to keep the correct tension, and developed enough wobble to gouge two of my aluminum extrusions after becoming loose in the middle of a print. Who would think that a light ABS scraping could wear aluminum that quickly?!?!?
 Anyway, I spent the day printing CP-III mini-V carriages and a new set of rod holders. Now, I just need to re-work the CP-III's effector plate design (or should it be called un-work?) so that it can accommodate an E3D v5 with the cooling fan again. I am hoping that the extrusions hold up for a few more prints, so that I can ditch those carriages and everything else that I had to cobble together to get printing again.....
|
Re: Cherry Pi III Is Available July 20, 2014 11:07PM |
Registered: 9 years ago Posts: 113 |
haha thanks for sharing the fact that it's not always working as it should.
Got the printer to work (It's working if I stay into the little 50mm radius).
[youtu.be]
The shape is right (true circle) but the size is not (36mm instant of 32mm), plus I had problems with the jhead gloged (guess the E3D v6 with fan will be better).
Still need to calibrate, I'm not sure how to calibrate the size... I guess it's the mm per step (I'm at 80)?
At least, this small print make me smile. Hope I'll fix it to get full size!
Edited 1 time(s). Last edit at 07/20/2014 11:08PM by nka.
- Sebastien Plante (nka)
|
Re: Cherry Pi III Is Available July 21, 2014 06:25AM |
Registered: 10 years ago Posts: 903 |
Home your carriages. Mark the bottom of one on the extrusion. In Pronterface or another host program, tell the printer to go down (Z) 100mm. Measure the distance that the carriage actually traveled. Adjust your steps/mm until you get 100mm.
I really could not tell from the video, but it looked like your extruder was over-extruding. If you have not done it yet, mark the filament and repeat the above steps with the extruder.....
I really could not tell from the video, but it looked like your extruder was over-extruding. If you have not done it yet, mark the filament and repeat the above steps with the extruder.....
Sorry, only registered users may post in this forum.
