Cherry Pi III Is Available
Posted by AndyCart
|
Re: Cherry Pi III Is Available January 03, 2015 08:26AM |
Registered: 10 years ago Posts: 327 |
Quote
AndyCart
Hi Les
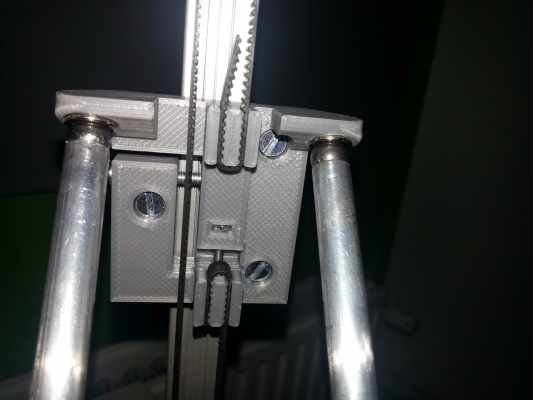
The KJN profile that ships isn't the same as the diagram on the website! The image below shows the KJN profile on the right and the Open Builds V slot on the left :-
[attachment 46290 20140920_092711.jpg] [attachment 46291 20150103_124846.jpg]
If you use a different V wheel than the OpenBuilds Mini them the spacing on the tower carriages may be incorrect!
Regards
Andy
Edit: Added a better image of the KJN profile. The step is actually there but the reality is that it is much less pronounced than the CAD drawing would lead you to believe.
Thanks Andy, I saw the first picture which wasn't clear to me the second picture looks the same as my profile.
Quote
AndyCart
Hi Guys
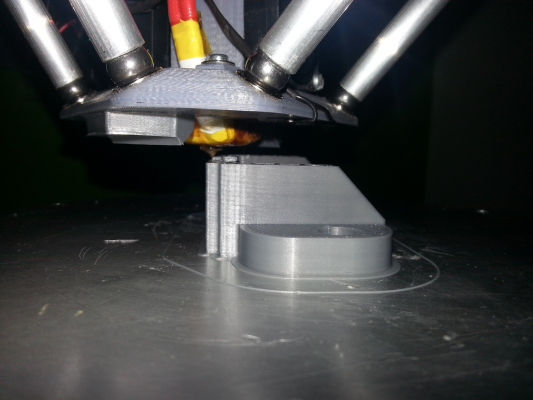
I just printed this as a test print for my new effector and Chinese E3D V5 hot end clone. It came out great. It's Adalina the singing dragon from Thingiverse at 50% scale
[attachment 46292 20150103_125630.jpg]
Printed at 0.3mm layer height with a 0.4mm nozzle, 2 perimeters, 10% in fill. 80mm/s print speed.
Andy
That looks awesome, I hope that's the printer you are using to print my parts.

Regards,
Les
Pointy's Things
Pointy's Blog
|
Re: Cherry Pi III Is Available January 03, 2015 09:20AM |
Registered: 10 years ago Posts: 515 |
Actually I print all of my Cherry Pi parts on a core xy printer I designed that has a 300mm x 300mm heated bed. I can get all of the parts required for a complete build in 4 print runs. Whilst the Cherry Pi conforms to the RepRap requirement that it can print it's own parts it would take me too long to print a full set for each machine to make it viable commercially. My own Cherry Pi is used for my personal 3D printing and has pride of place on the desk in my office.
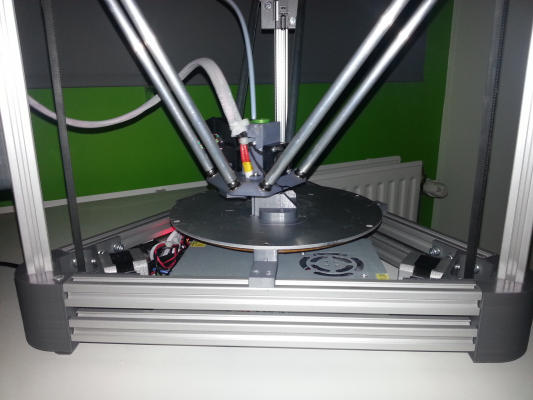
I've just upgraded it with a clone E3D V6 (I'm very impressed with this BTW). It's much easier to maintain than my original JHead and seems able to print faster too as there isn't as much back pressure on the filament so it allows the extuder to push more plastic. I get 120mm/s quite easily now (9000 on the acceleration settings in Marlin). For anyone who is interested I've attached the .stl files for the new effector. It's held together with 3 x 50mm M3 bolts and three 30mm long 6mm OD, 4mm ID aluminium tubes (actually the waste I get when I cut my delta rods from a 1m length of tubing).
I've also fitted a 220mm diameter 4mm aluminium heated bed with the heating PCB bonded to one side. These beds only require about 5A so work great for PLA. They easily get to 70 degrees C. In 22C ambient temperatures I have had the bed to 85C so ABS may be possible too but it takes a while to heat to that level. For normal PLA prints I run at 57C and it reaches that in about 4 minutes.
I got them here [www.aliexpress.com]
The hot end is from here [www.aliexpress.com]
Andy
Edited 1 time(s). Last edit at 01/03/2015 09:23AM by AndyCart.
|
Re: Cherry Pi III Is Available January 03, 2015 10:03AM |
Registered: 10 years ago Posts: 903 |
|
Re: Cherry Pi III Is Available January 03, 2015 10:05AM |
Registered: 10 years ago Posts: 515 |
|
Re: Cherry Pi III Is Available January 03, 2015 04:11PM |
Registered: 10 years ago Posts: 903 |
My feelings exactly! I haven't felt the need to re-calibrate in months. I printed a set of interesting-looking FSR mounts that I found on Thingiverse last week, but am hesitant to take the bed off and risk the current stable calibration. (My prior attempts to get the FSRs to perform a repeatable calibration were not successful, but I was thinking about giving it one last try.) Just noticed that your latest effector was missing the hinge/switch, and was curious if you were trying something else or just abandoning auto-calibration altogether.....
|
Re: Cherry Pi III Is Available January 04, 2015 05:58AM |
Registered: 10 years ago Posts: 515 |
Hi Guys
I've uploaded a video of Cherry Pi IIIS Metal printing at 120mm/s [www.youtube.com]
I've also put together a calibration guide (attached) hopefully you will find it useful for setting up your machines.
Andy
I've uploaded a video of Cherry Pi IIIS Metal printing at 120mm/s [www.youtube.com]
I've also put together a calibration guide (attached) hopefully you will find it useful for setting up your machines.
Andy
|
Re: Cherry Pi III Is Available January 04, 2015 08:41AM |
Registered: 9 years ago Posts: 1,159 |
Quote
AndyCart
Hi Guys
I've uploaded a video of Cherry Pi IIIS Metal printing at 120mm/s [www.youtube.com]
I've also put together a calibration guide (attached) hopefully you will find it useful for setting up your machines.
Andy
Excellent guide saves me asking for one
Thanks
Doug
|
Re: Cherry Pi III Is Available January 04, 2015 09:16AM |
Registered: 9 years ago Posts: 113 |
|
Re: Cherry Pi III Is Available January 04, 2015 10:05AM |
Registered: 10 years ago Posts: 327 |
Quote
AndyCart
Hi Guys
I've uploaded a video of Cherry Pi IIIS Metal printing at 120mm/s [www.youtube.com]
I've also put together a calibration guide (attached) hopefully you will find it useful for setting up your machines.
Andy
Nice guide, thanks Andy and that printing looks insane, it just needs the Benny Hill music.

Regards,
Les
Pointy's Things
Pointy's Blog
|
Re: Cherry Pi III Is Available January 04, 2015 02:52PM |
Registered: 10 years ago Posts: 515 |
Quote
nka
Andy, would you print directly on the aluminium?
I got a cheap mirror right now I need to change cause it's not flat, I would get this even without using the heated but wish I could use glue like I do now.
Hi Sebastien
I wouldn't try to print directly to aluminium. I use a kapton tape layer.
Andy
|
Re: Cherry Pi III Is Available January 04, 2015 08:56PM |
Registered: 10 years ago Posts: 44 |
|
Re: Cherry Pi III Is Available January 05, 2015 05:06AM |
Registered: 10 years ago Posts: 515 |
Quote
Zzyzxx71
Anyone have any recommendations for sourcing 8mm threaded balls and 4mm id/6mm od aluminum tubing in the states?
I can't seem to find them at my typical sources - I'm also willing to buy direct if someone sells them as a kit.
It's the only hardware I can't find from my normal sources.
I get mine from here [www.ebay.co.uk]?
The tubing is from a local hardware chain (B&Q) but they don't offer it on their mail order/online service. Any 4mm ID tubing will do. Carbon fibre would be fine.
Andy
|
Re: Cherry Pi III Is Available January 05, 2015 11:19PM |
Registered: 10 years ago Posts: 44 |
For those of you in the states - I did some research and ran across these.
www.ebay.com
2 sets shipped in the states comes out to about $16.
It appears these have a M6 threaded shaft, and an 8mm ball.
I've ordered 2 sets and will report my findings when I receive them.
Edited 1 time(s). Last edit at 01/05/2015 11:22PM by Zzyzxx71.
www.ebay.com
2 sets shipped in the states comes out to about $16.
It appears these have a M6 threaded shaft, and an 8mm ball.
I've ordered 2 sets and will report my findings when I receive them.
Edited 1 time(s). Last edit at 01/05/2015 11:22PM by Zzyzxx71.
|
Re: Cherry Pi III Is Available January 23, 2015 05:04AM |
Registered: 10 years ago Posts: 327 |
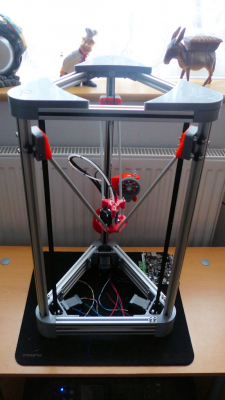
I finally got all the required parts this week and begun the assembly of my CPIII. Here's where we are at....
I just have the electronics to finish off, which includes making some mounting brackets for the Smoothieboard. Here are some notes on the build so far
I will post some better pics and files for my tweaks/additions once everything is up and running.
Regards,
Les
Pointy's Things
Pointy's Blog
I just have the electronics to finish off, which includes making some mounting brackets for the Smoothieboard. Here are some notes on the build so far
- The Motedis aluminium profile looks exactly the same as the parts supplied with my Ormerod and the carriages appear to run nicely.
- I am using a genuine E3D V6 hotend and tweaked Andy's mount and effector design to suit.
- I am using 50lb stainless trace wire with crimps and a couple of small split rings to attach the springs.
- I have 40mm adjustable feet screwed in to the bottom of each tower. (this made it a little more awkward to run the endstop wires)
I will post some better pics and files for my tweaks/additions once everything is up and running.
Regards,
Les
Pointy's Things
Pointy's Blog
|
Re: Cherry Pi III Is Available January 23, 2015 05:41AM |
Registered: 9 years ago Posts: 1,159 |
Quote
Pointy
I finally got all the required parts this week and begun the assembly of my CPIII. Here's where we are at....
[attachment 47703 delta1.jpg]
I just have the electronics to finish off, which includes making some mounting brackets for the Smoothieboard. Here are some notes on the build so far
- The Motedis aluminium profile looks exactly the same as the parts supplied with my Ormerod and the carriages appear to run nicely.
- I am using a genuine E3D V6 hotend and tweaked Andy's mount and effector design to suit.
- I am using 50lb stainless trace wire with crimps and a couple of small split rings to attach the springs.
- I have 40mm adjustable feet screwed in to the bottom of each tower. (this made it a little more awkward to run the endstop wires)
I will post some better pics and files for my tweaks/additions once everything is up and running.
Regards,
Les
Looking good there Les I have got all the printed parts needed for my Bigger Slice of Pi now (Except for the heatbed but that's all on order and I have started assembling the frame so I will do the same.
Is that slot cap strips I see in the extrusions? think I should have ordered some of them and some feet as well?
Doug
|
Re: Cherry Pi III Is Available January 23, 2015 06:07AM |
Registered: 10 years ago Posts: 327 |
Quote
dougal1957
Is that slot cap strips I see in the extrusions? think I should have ordered some of them and some feet as well?
Yes it's the cover and reduction profile. I forgot to say I am also using some dampers on the axis motors.
Regards,
Les
Pointy's Things
Pointy's Blog
|
Re: Cherry Pi III Is Available January 23, 2015 09:27AM |
Registered: 9 years ago Posts: 113 |
|
Re: Cherry Pi III Is Available January 23, 2015 10:54AM |
Registered: 10 years ago Posts: 515 |
|
Re: Cherry Pi III Is Available January 23, 2015 10:58AM |
Registered: 10 years ago Posts: 515 |
I don't fit feet to my designs as it does make wiring the endstops more difficult. I just stick two 20mm diameter felt pads to the base of each stepper mount. The mount has a 10mm 'foot' designed in to give clearance for either the on board PSU for non heated bed builds and/or the RAMPS board.
|
Re: Cherry Pi III Is Available January 23, 2015 02:05PM |
Registered: 10 years ago Posts: 327 |
Quote
AndyCart
I don't fit feet to my designs as it does make wiring the endstops more difficult. I just stick two 20mm diameter felt pads to the base of each stepper mount. The mount has a 10mm 'foot' designed in to give clearance for either the on board PSU for non heated bed builds and/or the RAMPS board.
Yes it made it a tad awkward, I had to drill a small hole just under the top T-Nut and pass the wires through from the back and then down the inside channel.
I have attached a Sketchup file for the base frame, which includes some very simple Smoothieboard mounts, in case others find it useful. I printed out a set of the mounts and they seem to support the board nicely.
Regards,
Les
Pointy's Things
Pointy's Blog
|
Re: Cherry Pi III Is Available January 24, 2015 09:26AM |
Registered: 10 years ago Posts: 327 |
Well that was a bit of a failure.
First off the brackets are no good, there isn't enough room to get the USB cable in, so I am currently printing mark 2.
Next up, all of my end switches were broken, so I had to replace them. I was trying to keep things neat with heatshrink, but the heatshrink obviously didn't want to bend when I put the caps on and damaged the switches instead. (Really glad I put connectors at the top end so I didn't have to rewire the whole lot)
After testing the new switches, I managed a quick hotend test and it all seemed to work as expected. While I wait for the new mounts to print I shall start wiring up the motors.
Regards,
Les
Pointy's Things
Pointy's Blog
|
Re: Cherry Pi III Is Available January 24, 2015 01:32PM |
Registered: 9 years ago Posts: 1,159 |
Quote
Pointy
Well that was a bit of a failure.
First off the brackets are no good, there isn't enough room to get the USB cable in, so I am currently printing mark 2.
Next up, all of my end switches were broken, so I had to replace them. I was trying to keep things neat with heatshrink, but the heatshrink obviously didn't want to bend when I put the caps on and damaged the switches instead. (Really glad I put connectors at the top end so I didn't have to rewire the whole lot)
After testing the new switches, I managed a quick hotend test and it all seemed to work as expected. While I wait for the new mounts to print I shall start wiring up the motors.
Regards,
Les
Eh thanks for that Tip Les I'll not heatshrink mine then (Or at least not with long bits of tube) Mine will have plenty of room as I am using 450mm extrusion's on the triangular bits and a 400mm dia bed will have loads of room just need to kepp it insulated!
I Am tempted to get some feet so that I can raise the whole thing up a little and put a ally plate under the bottom extrusion and mount all the electronics underneath.
Well that the idea anyway.
Got my vertical together with the carriage slide and done the springs and effector now as well so with a bit of luck should get it together tomorrow at least to a stage to test the motors extruder etc.
Doug
PS. will post picks when at a suitable stage to do so.
|
Re: Cherry Pi III Is Available January 24, 2015 03:45PM |
Registered: 10 years ago Posts: 327 |
Glad yours is coming along Doug.
I have made some more progress...
The new board mounts worked much better and are now in 2 pieces rather than 4, which makes it a bit stronger. I got everything wired up, extruder calibrated, and then got stupidly brave and hit the home button in Pronterface, without having my finger on the switch. The carriers moved the wrong way and rods went flying everywhere. I think I was really lucky they didn't short out the board, as I didn't have the mirror plate on top. After a quick tweak of the config, it is now homing and moving in the right directions.
So just the fun part of calibrating tomorrow, and then we might be ready to print!
Regards,
Les
Pointy's Things
Pointy's Blog
I have made some more progress...
The new board mounts worked much better and are now in 2 pieces rather than 4, which makes it a bit stronger. I got everything wired up, extruder calibrated, and then got stupidly brave and hit the home button in Pronterface, without having my finger on the switch. The carriers moved the wrong way and rods went flying everywhere.
 I think I was really lucky they didn't short out the board, as I didn't have the mirror plate on top. After a quick tweak of the config, it is now homing and moving in the right directions.
So just the fun part of calibrating tomorrow, and then we might be ready to print!
Regards,
Les
Pointy's Things
Pointy's Blog
|
Re: Cherry Pi III Is Available January 25, 2015 04:45PM |
Registered: 10 years ago Posts: 327 |
I didn't get as far as printing, in fact I didn't even get it calibrated to my satisfaction. I spent a few hours tweaking values, homing, checking without reaching the desired results.
I am a little puzzled why the endstop trim values vary so much.
How much is this warping of the rod carriers going to affect things?
I am going to double check everything tomorrow, but any suggestions on things to look at would be welcome.
Regards,
Les
Pointy's Things
Pointy's Blog
I am a little puzzled why the endstop trim values vary so much.
alpha_trim                                   -4.350                 	# software trim for alpha stepper endstop (in mm)
beta_trim                                    -5.800                 	# software trim for beta stepper endstop (in mm)
gamma_trim                                   -6.250                	# software trim for gamma stepper endstop (in mm)
How much is this warping of the rod carriers going to affect things?
I am going to double check everything tomorrow, but any suggestions on things to look at would be welcome.
Regards,
Les
Pointy's Things
Pointy's Blog
|
Re: Cherry Pi III Is Available January 26, 2015 07:04AM |
Registered: 10 years ago Posts: 199 |
I stopped following the project a bit, but there is some great progress here! Great work Andy!
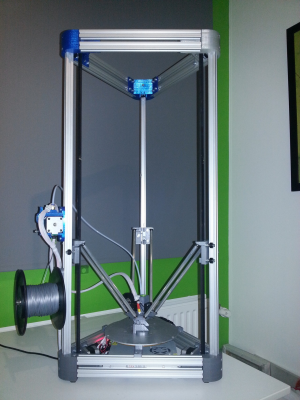
My (second) printer based on the Cherry Pi I is a bit of a long project, over a year now. I used profiles from Motedis, with the Openbuilds V wheels. Tough the profiles don't have a V shape, the movement on the profile works great. I designed / edited custom carriages and effector for my printer, based on the materials I already had or where easy to get. Tough I started building the printer before the Cherry Pi II was out, I had the idea to use wheels and a blower on the printer. That's why this printer does have the V wheels and a blower, but still uses the magnet system.
I was using a round heated mirror as build plate, but the prints where full of big lines. It took me weeks to find out that it was the mirror warping when heating (3mm when going to 100 degrees!). Using a better PID solved the problems with the lines in the print, but changing from PLA to ABS was almost impossible. So I was searching for an alu buildplate and round heatplate, when I found the round MK3 alu heatbed (from the same seller Andy posted). I received the heatbed in December and installed it right away, it reaches 100 degrees Celsius pretty fast. The printer is in use for a month now and working great.
The vertical extrusions are 900mm and the vertical extrusions are 330mm. The maximum build height is 415mm and the printable diameter is 230mm. Because of the size the top is build with double extrusions. The extruder uses a lock / unlock mechanism so the filament can be changed quickly, its an edited version of [www.thingiverse.com]. Under the effector is a custom fan duct to direct the blowers airflow. The hotend is an E3D V5 converted into a V6 with a bit of drilling and tapping.
|
Re: Cherry Pi III Is Available January 26, 2015 09:36AM |
Registered: 10 years ago Posts: 327 |
Nice build P4tje.
I am still puzzled by the variation in my end stops. I check the tower heights and they all measure the same from the top of the bottom bracket to the underside of the top bracket, the switches all protrude by the same amount from the top brackets, I even tried another piece of glass. So what else would cause such a variation?
I have ordered a set of 300mm digital callipers so I can check the rods, and I will get a new set of rod carriers to rule them out.
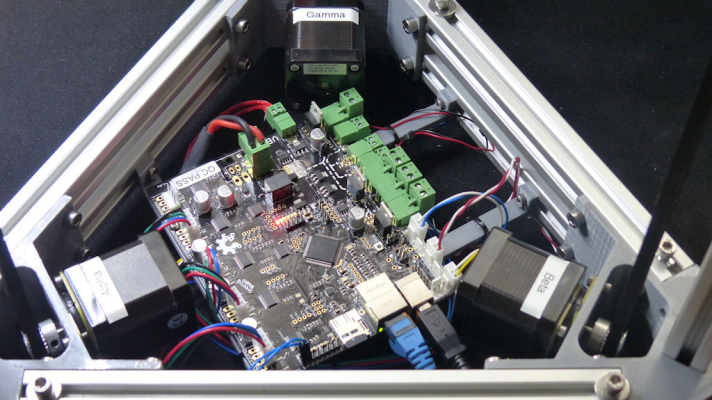
Anyway, here's a pic of the electronics
Regards,
Les
Pointy's Things
Pointy's Blog
|
Re: Cherry Pi III Is Available January 31, 2015 03:45PM |
Registered: 10 years ago Posts: 327 |
I have finally got my CP printing, but it needs some work/tweaking. I modified the rod carriers and carriages slightly, so that there are 2 fixing holes on the bottom edge, and the single fixing at the top. I then double checked everything was secure and then ran through the calibration. Finally tonight i got brave enough to print something, while it did actually print first time, that quality was no so good. I am sure a lot of it is down to the settings, so does anyone care to share their Silc3r settings?
Regards,
Les
Pointy's Things
Pointy's Blog
Regards,
Les
Pointy's Things
Pointy's Blog
|
Re: Cherry Pi III Is Available February 01, 2015 08:25AM |
Registered: 9 years ago Posts: 113 |
If print is bad, its not releated to the slicer, but more to the calibration. (Hard to tell without the part).
If you think the calibration is good, then try to lower the speed to somewhere 40-50 mm/s with perimeter around 30 and travel at 60-70. If you don't get a nice print with that, there's a problems on the hardware and/or calibration.
- Sebastien Plante (nka)
If you think the calibration is good, then try to lower the speed to somewhere 40-50 mm/s with perimeter around 30 and travel at 60-70. If you don't get a nice print with that, there's a problems on the hardware and/or calibration.
- Sebastien Plante (nka)
|
Re: Cherry Pi III Is Available February 01, 2015 08:58AM |
Registered: 10 years ago Posts: 327 |
Quote
nka
If print is bad, its not releated to the slicer, but more to the calibration. (Hard to tell without the part).
If you think the calibration is good, then try to lower the speed to somewhere 40-50 mm/s with perimeter around 30 and travel at 60-70. If you don't get a nice print with that, there's a problems on the hardware and/or calibration.
Thanks for the reply, and I am sure you are correct. I have made some progress but I am still having some issues.
The first problem was the extruder, which I have now sorted out and I am able to print much better (It was skipping/under extruding). I am just printing a small 20mm cube and tweaking the rod length to get the dimensions correct. The biggest issue I have at the moment is the constant freezing of the Smoothieboard part way through a print. This only seems to happen when using Pronterface over USB., I have printed several test pieces via the web interface so far and I have not had a freeze yet, so I it's either the USB, Pronterface or 5V power..
Regards,
Les
Pointy's Things
Pointy's Blog
|
Re: Cherry Pi III Is Available February 02, 2015 01:59AM |
Registered: 10 years ago Posts: 515 |
Hi Les
I use Cura for slicing and Repetier Host for the host. I always drop my G code onto an SD card to print. I don't know if you have that option on a Smoothie Board. I assume you do. I once ruined a 5 hour print because of an issue on my PC that caused it, and hence my print, to freeze.
The settings I use in Cura are for PLA
Layer 0.3mm
Speed 1st layer 50mm/s
Speed 80mm/s
Infill 33%
Retract speed 20mm/s
Retract distance 3.5mm
Z Hop 0.075mm
Bed 60C
Nozzle 210C
Fan off for first two layers
Andy
Sorry, only registered users may post in this forum.
