Cherry Pi III Is Available
Posted by AndyCart
|
Re: Cherry Pi III Is Available February 09, 2015 12:25PM |
Registered: 10 years ago Posts: 903 |

|
Re: Cherry Pi III Is Available February 09, 2015 11:32PM |
Registered: 9 years ago Posts: 32 |

|
Re: Cherry Pi III Is Available February 09, 2015 11:35PM |
Registered: 9 years ago Posts: 32 |
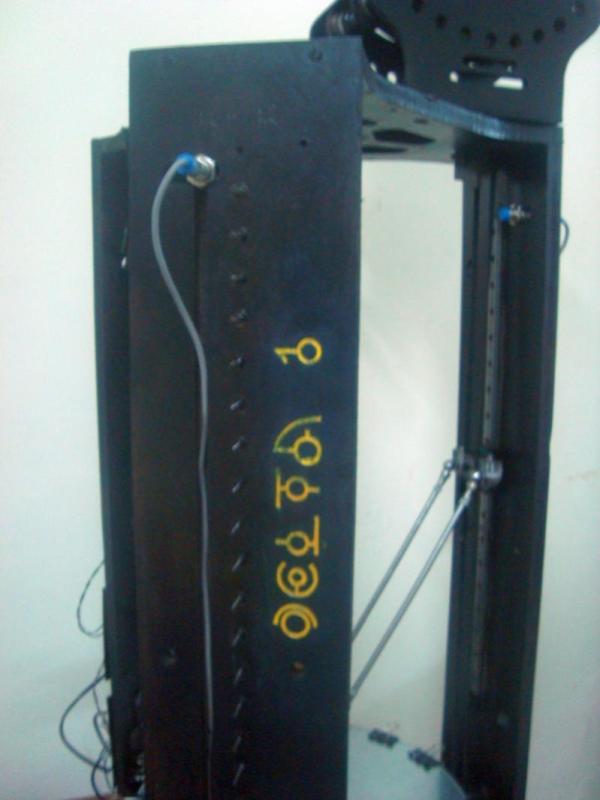
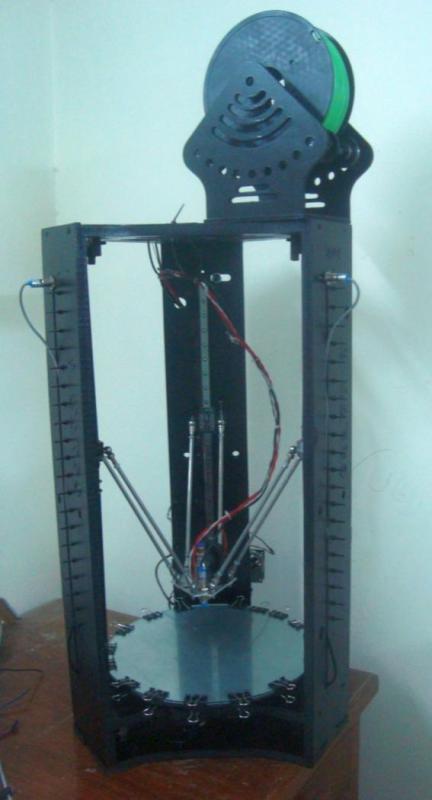
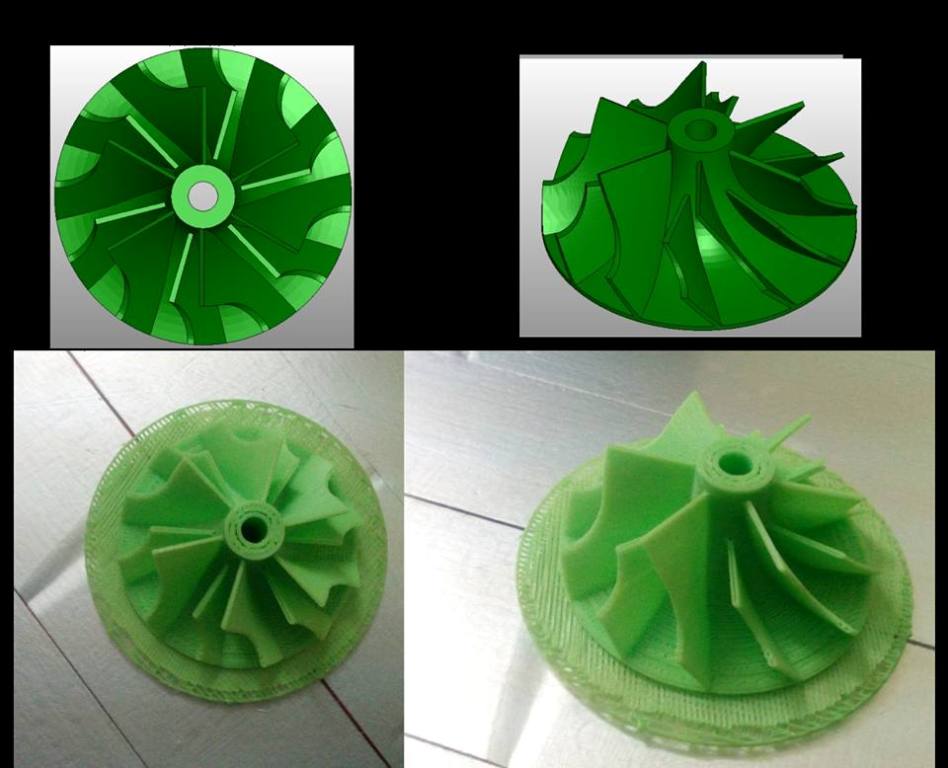
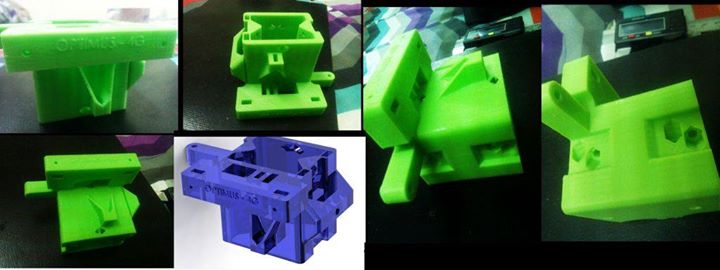
and the result
Attachments:
open | download - 994108_10203662668876100_3558261914634445656_n.jpg (68.2 KB)
open | download - 10987395_10203783500376812_6674107773181550569_o.jpg (23.8 KB)
open | download - 1272280_10203770165843457_1631490166599108017_o.jpg (32.5 KB)
open | download - 10923622_10203670121182403_7844970259577059779_n.jpg (44.8 KB)
|
Re: Cherry Pi III Is Available February 10, 2015 03:48AM |
Registered: 10 years ago Posts: 327 |
Quote
maso
For what it's worth, I've made a design that does exactly that.
Thanks maso.
I started tweaking my design to have the rod holders at the top and it made me curious about a couple of things.
- What effect does raising the ball sockets from the carrier have if any? (I had to raise them up 5mm, so the spring wire hole clears the belt guide)
- What is the optimum angle for the sockets? (mine are currently at 45 degrees, the same as the effector)
Regards,
Les
Pointy's Things
Pointy's Blog
|
Re: Cherry Pi III Is Available February 10, 2015 11:36AM |
Registered: 10 years ago Posts: 92 |
Quote
Pointy
- What effect does raising the ball sockets from the carrier have if any? (I had to raise them up 5mm, so the spring wire hole clears the belt guide)
- What is the optimum angle for the sockets? (mine are currently at 45 degrees, the same as the effector)
I'm far from an expert on these things, but here's my thoughts:
- I'm not entirely sure how raising the balls away from the carrier impacts performance. I was going to say it gets worse, because as the head approaches the outside rail the arm gets closer to vertical. But that just means the far arms need to travel more to get a given amount of lateral motion, so it might actually have better resolution out there. I think it really comes down to the math of the firmware and how good it is at adjusting for calibration, because closer pivot points means greater distortion, but I kinda think everyone writing firmware has this stuff figured out by now.
- There's no reason for the sockets to be at any angle different from the effector. Considering that the effector will always be horizontal, and that the rods are straight, any angle the sockets need to accommodate is the same for both ends. The best angle depends on your specific geometry, but all it comes down to is making sure the arm can swivel at any angle it will need without running into the socket itself. As well as keeping the socket deep enough that the ball will never pop out due to the spring tension. I chose 35 degrees for my effector and rod carrier experimentally, by swinging the existing Cherry Pi effector around and looking at where the rod and ball went, but realistically I don't think the rods sweep across enough of an angle to be much of an issue.
Really, I don't think either of these things are of much concern in the scheme of what we're trying to do. As long as your design has sane values for rod length and rail separation, the angles the arms go through is relatively small and predictable.
Of course, this is just off the cuff. I'd love to be educated if anyone has better info.
Edited 1 time(s). Last edit at 02/10/2015 11:37AM by maso.
|
Re: Cherry Pi III Is Available February 10, 2015 03:28PM |
Registered: 10 years ago Posts: 327 |
Thanks again for the reply maso.
I printed out a set of my redesigned rod carriers with the sockets at the top, but I haven't had a chance to fit them yet. I got away with just flipping the carriages and everything lined up nicely. Hopefully the last few screws I am waiting for, should be here tomorrow so I can actually fit and test these soon.
Regards,
Les
Pointy's Things
Pointy's Blog
|
Re: Cherry Pi III Is Available February 11, 2015 11:16AM |
Registered: 9 years ago Posts: 1,159 |
Quote
Pointy
Quote
maso
For what it's worth, I've made a design that does exactly that.
Thanks maso.
I started tweaking my design to have the rod holders at the top and it made me curious about a couple of things.
- What effect does raising the ball sockets from the carrier have if any? (I had to raise them up 5mm, so the spring wire hole clears the belt guide)
- What is the optimum angle for the sockets? (mine are currently at 45 degrees, the same as the effector)
Regards,
Les
Les
Don't suppose you are ready to release the STL's are you (Not bothered wether the carrier's have the cups at bottom or top to be honest extra 30mm of Z height is neither here or there as I have around 500mm of build height already.
(Could you Email them to me you know the address)
Would love to try them out.
All printed parts on mine are in ABS as I intend to enclose it all once it is commissioned.
Doug
|
Re: Cherry Pi III Is Available February 11, 2015 01:47PM |
Registered: 9 years ago Posts: 1,159 |
|
Re: Cherry Pi III Is Available February 11, 2015 02:19PM |
Registered: 9 years ago Posts: 1,159 |
Eh guys
I have designed a Jig to set the lengths of the Rods to be the same
These attach to a length of 20x40 extrusion (or 2 off 20x20 extrusion)
You set the distances to what you want (making sure they are square) then you can pop the balls in and length will be set. I use some epoxy to glue them all together (M4 Grubscrews in the balls and then into the tubes).
Hope this helps some builders?
Doug
|
Re: Cherry Pi III Is Available February 11, 2015 02:56PM |
Registered: 9 years ago Posts: 111 |
Received my new E3D clone today,All together just got to install it in my printer and calibrate.

|
Re: Cherry Pi III Is Available February 11, 2015 03:08PM |
Registered: 9 years ago Posts: 67 |
|
Re: Cherry Pi III Is Available February 11, 2015 07:51PM |
Registered: 10 years ago Posts: 903 |
Quote
mrorange26
Received my new E3D clone today,All together just got to install it in my printer and calibrate.
Where's the cooling fan? Most clone manufacturers forget to copy E3D's cooling fan, and the result is a hotend that jams as the heat rises in the finned heat sink.....
|
Re: Cherry Pi III Is Available February 12, 2015 02:19AM |
Registered: 10 years ago Posts: 515 |

|
Re: Cherry Pi III Is Available February 12, 2015 07:00AM |
Registered: 10 years ago Posts: 903 |
Quote
AndyCart
The 30 x 30 x 10 cooling fan fits to the topside of the effector between two of the metal spacers. It's held n place with a dab of Cherry Pi 'secret sauce'
Speaking of the CP not-so-secret sauce,
 has anyone tried to attach un-tapped steel bearings directly to the rods (CF or aluminum) on the non-magnetic spring setup using CA? Just curious how it would work, since I have a hundred 5/16" (7.93mm) balls left over from my attempt at Johann's recirculating ball carriages. I was thinking that an automotive brake line flaring tool might be able to create a decent contact area for the ball to be glued.....
|
Re: Cherry Pi III Is Available February 12, 2015 12:37PM |
Registered: 10 years ago Posts: 515 |
Quote
vreihen
Speaking of the CP not-so-secret sauce,
It maybe that all that is required is a tube with a larger, maybe 6mm, ID. As everything is held in tension by the spring the end of the tube may be a suitable 'housing' for the ball
|
Re: Cherry Pi III Is Available February 12, 2015 12:44PM |
Registered: 10 years ago Posts: 92 |
Quote
AndyCart
Quote
vreihen
Speaking of the CP not-so-secret sauce,
It maybe that all that is required is a tube with a larger, maybe 6mm, ID. As everything is held in tension by the spring the end of the tube may be a suitable 'housing' for the ball
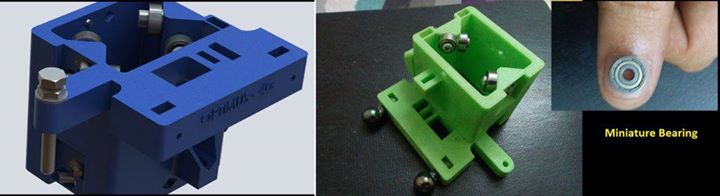
Andy, vreihen, I can say that I've got my printer working great with ball bearings, but using the original method of ball-end-milling Socket Head Cap Screws on the end of the rods to the appropriate diameter. You can glue the balls into the plastic sockets and let the rods pivot on the bearings.
Maybe the milled screws aren't necessary any more, now that there's nothing magnetic to attach to, but I can attest to at least that method working quite well. I'm using 10mm ones though, since I already had the 10mm rod setup. That's the main reason I did my own effector design: to fit 10mm bearings and still have the spring/string approach.
|
Re: Cherry Pi III Is Available February 13, 2015 03:48AM |
Registered: 9 years ago Posts: 32 |
|
Re: Cherry Pi III Is Available February 13, 2015 01:13PM |
Registered: 9 years ago Posts: 111 |
|
Re: Cherry Pi III Is Available February 13, 2015 01:41PM |
Registered: 10 years ago Posts: 327 |
The new carriages work, and I have gained 30mm with the flipped design. I also seem to be able to print via USB now, thanks to a new cable. (should always try the obvious things first)
The carriage is designed for Bosch Rexroth/Motedis aluminium extrusion, but could be tweaked for other makes. I am using the following fittings with mine....
M3 x25mm Socket Head Cap Screw & M3 Nut (Wheel tension adjustment)
M3 x 20mm Hex Head Screw & M3 Nut (Belt adjustment, If you don't have a M3 hex bolt, a normal SHCS will probably work if you glue it in place.)
4 x No 4 x 1/2" Pozi Flanged Self Tappering Screws (Fixings for rod carrier/carriage)
3 x M5 30mm Socket Low Head Cap Screw (to replace the M5 screws supplied with the mini v wheel kit)
2 x M2 x 6mm Socket Head Cap Screw (to hold the belt loops in place)
Regards,
Les
Pointy's Things
Pointy's Blog
|
Re: Cherry Pi III Is Available February 13, 2015 02:27PM |
Registered: 10 years ago Posts: 515 |
Quote
mrorange26
Just received my 12v mk3 heated bed.I was going to use a xbox 360 power supply to power it,Do I just connect the xbox supply on the second lot of power input connections and leave my existing 6a power supply still connected.
If you use a 17A Xbox One PSU you can dispense with the 6A one. There is a part on my Thingiverse page for a fitting that takes a 2.5mm power socket. Just fit a 2.5mm plug on the 12v wires in the Xbox supply. You need to permanently short the other two to enable the 12V. You will also need a thermistor for the bed and a tweak to the firmware to enable it
|
Re: Cherry Pi III Is Available February 13, 2015 03:19PM |
Registered: 9 years ago Posts: 111 |
|
Re: Cherry Pi III Is Available February 13, 2015 03:43PM |
Registered: 10 years ago Posts: 327 |
Quote
AndyCart
You will also need a thermistor for the bed and a tweak to the firmware to enable it
Is there a hole for the thermistor? I couldn't see one on the pictures.
Regards,
Les
Pointy's Things
Pointy's Blog
|
Re: Cherry Pi III Is Available February 13, 2015 03:45PM |
Registered: 9 years ago Posts: 111 |
|
Re: Cherry Pi III Is Available February 13, 2015 04:52PM |
Registered: 9 years ago Posts: 111 |
|
Re: Cherry Pi III Is Available February 13, 2015 07:20PM |
Registered: 10 years ago Posts: 515 |
Look for this line in your Marlin configuration.h file
#define TEMP_SENSOR_BED 0
Change the 0 to the correct number for your particular thermistor and then re upload using the Arduino IDE.
When correctly uploaded you will get a bed display on your LCD and be able to control bed temps via g code
#define TEMP_SENSOR_BED 0
Change the 0 to the correct number for your particular thermistor and then re upload using the Arduino IDE.
When correctly uploaded you will get a bed display on your LCD and be able to control bed temps via g code
|
Re: Cherry Pi III Is Available February 13, 2015 07:23PM |
Registered: 9 years ago Posts: 111 |
|
Re: Cherry Pi III Is Available February 13, 2015 07:29PM |
Registered: 10 years ago Posts: 515 |
Copy the firmware folder from the SD to your PC and open Marlin.ino with the Arduino IDE. Select the correct board (mega 265) and serial port. Change the setting in config.h and save. Upload to your board. You shouldn't have to re calibrate as the bed thermistor setting isn't held in EEPROM. It's a good idea anyway to save the result of M501 and M666 L to a text file somewhere. You can then re input the values should you change firmware in the future
|
Re: Cherry Pi III Is Available February 13, 2015 07:39PM |
Registered: 9 years ago Posts: 111 |
|
Re: Cherry Pi III Is Available February 14, 2015 12:24PM |
Registered: 9 years ago Posts: 111 |
New head installed,Heated bed installed and working,Seems to be printing well,Thanks andy for help.

|
Re: Cherry Pi III Is Available February 14, 2015 09:19PM |
Registered: 9 years ago Posts: 113 |
Quote
Pointy
The new carriages work, and I have gained 30mm with the flipped design. I also seem to be able to print via USB now, thanks to a new cable. (should always try the obvious things first)
The carriage is designed for Bosch Rexroth/Motedis aluminium extrusion, but could be tweaked for other makes. I am using the following fittings with mine....
M3 x25mm Socket Head Cap Screw & M3 Nut (Wheel tension adjustment)
M3 x 20mm Hex Head Screw & M3 Nut (Belt adjustment, If you don't have a M3 hex bolt, a normal SHCS will probably work if you glue it in place.)
4 x No 4 x 1/2" Pozi Flanged Self Tappering Screws (Fixings for rod carrier/carriage)
3 x M5 30mm Socket Low Head Cap Screw (to replace the M5 screws supplied with the mini v wheel kit)
2 x M2 x 6mm Socket Head Cap Screw (to hold the belt loops in place)
Regards,
Les
Oh, I might try this someday... I always wished to have a mechanical way to apply force the the belt instant of using my arm

I also need to use this new effector... if I can find a way to print ABS without heatbed and/or have my new printer !
Edited 1 time(s). Last edit at 02/14/2015 09:20PM by nka.
- Sebastien Plante (nka)


Sorry, only registered users may post in this forum.