Cherry Pi III Is Available
Posted by AndyCart
|
Re: Cherry Pi III Is Available March 04, 2015 06:00PM |
Registered: 9 years ago Posts: 111 |
|
Re: Cherry Pi III Is Available March 04, 2015 06:02PM |
Registered: 10 years ago Posts: 92 |
|
Re: Cherry Pi III Is Available March 04, 2015 06:09PM |
Registered: 9 years ago Posts: 111 |
|
Re: Cherry Pi III Is Available March 04, 2015 06:18PM |
Registered: 10 years ago Posts: 92 |
@mrorange26,
I sent a shot-in-the-dark idea for you a little while ago, but it doesn't look like the post made it in.
In a nutshell, I had a similar problem with a specific STL file at one point, and rotating it on the table by 15 degrees or so before slicing seemed to improve it. I guess it changed all the math the slicer was calculating enough to remove some error that showed up.
So if you run out of ideas and want to give it a shot, it might help.
|
Re: Cherry Pi III Is Available March 05, 2015 07:10AM |
Registered: 9 years ago Posts: 164 |
|
Re: Cherry Pi III Is Available March 05, 2015 09:44AM |
Registered: 9 years ago Posts: 68 |
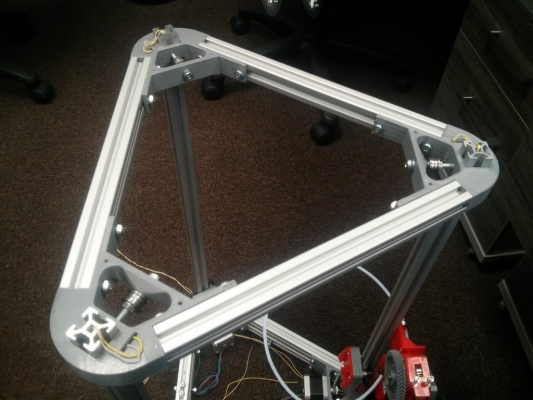
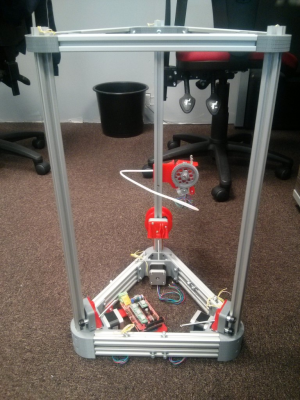
Day 9
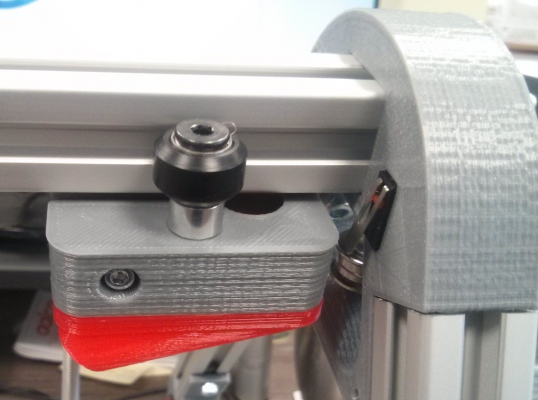
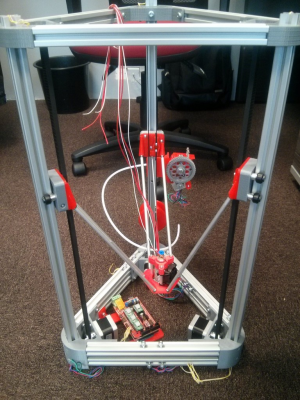
Good session today. It's really starting to look like a delta 3d printer. The re-soldered micro switches are attached with the "magic sauce" and their cables run. Before bonding, I checked the micro-switches were the correct way round to be activated by the carriages. I had five minutes to spare so fixed the RAMPS board as well.
One quick question, what are the t-nuts for on the outside of bars C & D?
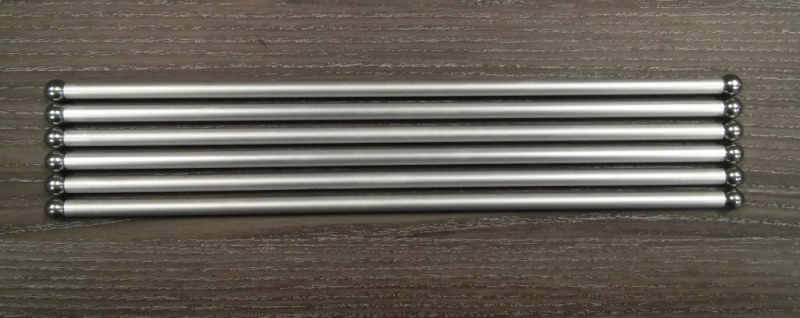
There will be no building tomorrow as I have an opticians appointment, but I'll take the effector arms home to get the balls attached. The M4 grub screws look to work well for this.
Edited 1 time(s). Last edit at 03/05/2015 09:44AM by gowen.
|
Re: Cherry Pi III Is Available March 05, 2015 10:32AM |
Registered: 9 years ago Posts: 1,159 |
Looking good that Gary!
Where are you by the way
Doug

Where are you by the way
Doug
Quote
gowen
Day 9
Good session today. It's really starting to look like a delta 3d printer. The re-soldered micro switches are attached with the "magic sauce" and their cables run. Before bonding, I checked the micro-switches were the correct way round to be activated by the carriages. I had five minutes to spare so fixed the RAMPS board as well.
[attachment 50478 IMG_20150305_134406.jpg] [attachment 50479 IMG_20150305_135552.jpg]
[attachment 50480 IMG_20150305_135634.jpg] [attachment 50481 IMG_20150305_135646.jpg]
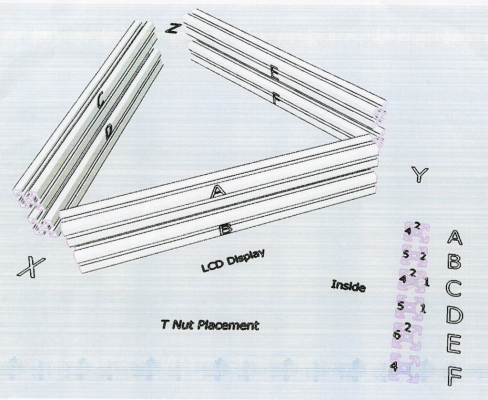
One quick question, what are the t-nuts for on the outside of bars C & D?
[attachment 50482 T-Nut_Placement.jpg]
There will be no building tomorrow as I have an opticians appointment, but I'll take the effector arms home to get the balls attached. The M4 grub screws look to work well for this.
|
Re: Cherry Pi III Is Available March 05, 2015 10:38AM |
Registered: 10 years ago Posts: 327 |
Making some good progress Gary.
I can't help you with the nuts as I am using a different electronic setup. For that and any other accessories I am using the M4 T-Slot Nuts that just slot in and rotate.
Regards,
Les
Pointy's Things
Pointy's Blog
I can't help you with the nuts as I am using a different electronic setup. For that and any other accessories I am using the M4 T-Slot Nuts that just slot in and rotate.
Regards,
Les
Pointy's Things
Pointy's Blog
|
Re: Cherry Pi III Is Available March 05, 2015 10:55AM |
Registered: 9 years ago Posts: 68 |
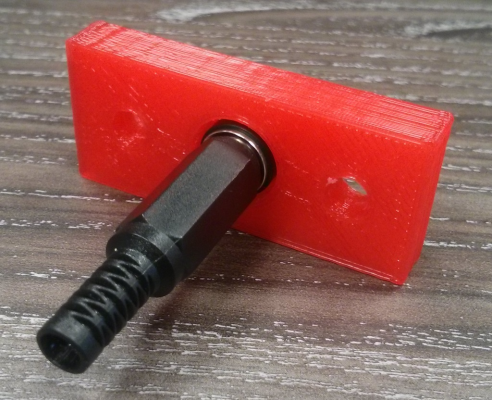
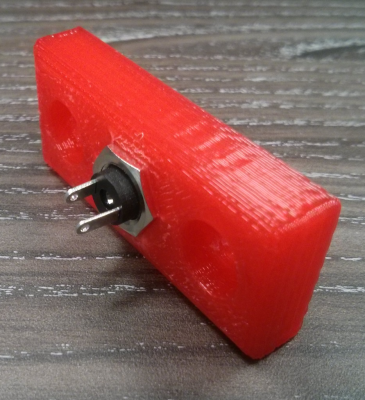
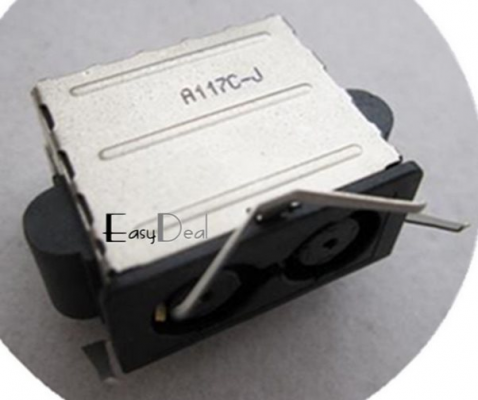
I think I found what goes on the mystery screws. I'd forgotten about this power connector in my small parts box. I'm wondering why the counter bores are on the socket side though. I assume I need to take the socket out and put it back the other way after soldering on the connections.
Edited 2 time(s). Last edit at 03/05/2015 10:58AM by gowen.
I'm near Taunton in Somerset, UKQuote
dougal1957
Where are you by the way
Edited 2 time(s). Last edit at 03/05/2015 10:58AM by gowen.
|
Re: Cherry Pi III Is Available March 05, 2015 11:15AM |
Registered: 9 years ago Posts: 1,159 |
Ah I remember now memory like a sieve me at times lol
Quote
gowen
I think I found what goes on the mystery screws. I'd forgotten about this power connector in my small parts box. I'm wondering why the counter bores are on the socket side though. I assume I need to take the socket out and put it back the other way after soldering on the connections.
[attachment 50484 IMG_20150305_152955.jpg] [attachment 50485 IMG_20150305_153037.jpg]
I'm near Taunton in Somerset, UKQuote
dougal1957
Where are you by the way
|
Re: Cherry Pi III Is Available March 05, 2015 12:43PM |
Registered: 9 years ago Posts: 111 |
|
Re: Cherry Pi III Is Available March 05, 2015 02:01PM |
Registered: 10 years ago Posts: 515 |
Quote
pugzor
Hey Andy, is it just me or are the wrong top brackets loaded to the Thingiverse page for the CPIII? I've just tried fitting mine and the microswitches seem set too far away from the carriages, so much so that the microswitches don't even touch the carriages at max height.
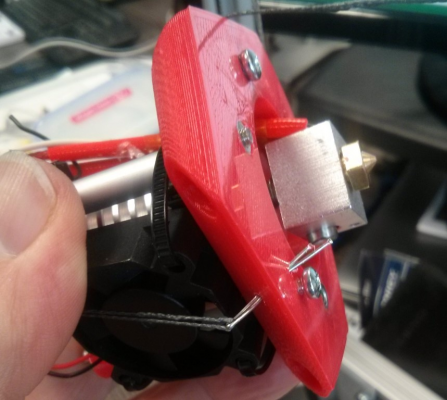
They may be. I did change them a while ago. Did you download from the newer CP IIIS page? You can still use them. Drill a 2.5mm hole on the rear of the carriage where the switch lever would touch if it was longer. Then screw an M3 SHCS into the hole. The head should engage the switch lever. I'll upload the newer design to TV when I get a chance. The problem stems from my first batch of switches having longer levers!
|
Re: Cherry Pi III Is Available March 05, 2015 02:04PM |
Registered: 10 years ago Posts: 515 |
|
Re: Cherry Pi III Is Available March 05, 2015 06:38PM |
Registered: 9 years ago Posts: 164 |
Quote
AndyCart
Quote
pugzor
Hey Andy, is it just me or are the wrong top brackets loaded to the Thingiverse page for the CPIII? I've just tried fitting mine and the microswitches seem set too far away from the carriages, so much so that the microswitches don't even touch the carriages at max height.
They may be. I did change them a while ago. Did you download from the newer CP IIIS page? You can still use them. Drill a 2.5mm hole on the rear of the carriage where the switch lever would touch if it was longer. Then screw an M3 SHCS into the hole. The head should engage the switch lever. I'll upload the newer design to TV when I get a chance. The problem stems from my first batch of switches having longer levers!
Damn. At least it's an easy fix.
 Maybe I should just use secret sauce to glue some match sticks to the microswitch levers haha.
|
Re: Cherry Pi III Is Available March 06, 2015 05:36AM |
Registered: 10 years ago Posts: 515 |
Hey Guys
Pugzor dropped me a PM to ask about the possibility of an effector design for Cherry Pi that would allow the use of the new Cyclops hot end from E3D. I've tweaked the effector design this morning and attached the .stl. Please feel free to use it for a dual extrusion Cherry Pi. I look forward to the ingenious ways you will come up with for attaching the second extruder. I've been using a Cyclops for a few weeks on a new core XY design I've been working on. It's a terrific piece of kit. It's amazingly small and light and, as you would expect from E3D, the engineering is superb. For anyone who hasn't seem it take a look at the E3D website.
[e3d-online.com]
EffectorForE3DCyclopsHotEndV2.stl
Regards
Andy
|
Re: Cherry Pi III Is Available March 06, 2015 08:33AM |
Registered: 9 years ago Posts: 1,159 |
Quote
AndyCart
Hey Guys
Pugzor dropped me a PM to ask about the possibility of an effector design for Cherry Pi that would allow the use of the new Cyclops hot end from E3D. I've tweaked the effector design this morning and attached the .stl. Please feel free to use it for a dual extrusion Cherry Pi. I look forward to the ingenious ways you will come up with for attaching the second extruder. I've been using a Cyclops for a few weeks on a new core XY design I've been working on. It's a terrific piece of kit. It's amazingly small and light and, as you would expect from E3D, the engineering is superb. For anyone who hasn't seem it take a look at the E3D website.
[e3d-online.com]
[attachment 50543 EffectorForE3DCyclopsHotEndV2.stl]
Regards
Andy
That looks good Andy.
This is going to cost me even more cash now unless of course you would like to do one for a Kraken (I Have one sitting in a draw upstairs that I was going to put on a Core XY Machine)
Doug
|
Re: Cherry Pi III Is Available March 07, 2015 05:11AM |
Registered: 9 years ago Posts: 11 |
I'll start by prefacing that I'm an absolute newbie at this whole thing. I really want to build a delta and have been looking at a few kits now but some of the cheaper kits out there scare me a bit. A kit has the advantage that I don't have to find all the parts. But I'm not to keen on sourcing everything. Can someone give a bit of advice on what someone in NA might pay on average for the BOM (total)?
|
Re: Cherry Pi III Is Available March 07, 2015 06:21AM |
Registered: 9 years ago Posts: 164 |
|
Re: Cherry Pi III Is Available March 07, 2015 06:26AM |
Registered: 9 years ago Posts: 111 |
|
Re: Cherry Pi III Is Available March 07, 2015 11:36AM |
Registered: 10 years ago Posts: 903 |
Quote
Mylation
I'll start by prefacing that I'm an absolute newbie at this whole thing. I really want to build a delta and have been looking at a few kits now but some of the cheaper kits out there scare me a bit. A kit has the advantage that I don't have to find all the parts. But I'm not to keen on sourcing everything. Can someone give a bit of advice on what someone in NA might pay on average for the BOM (total)?
Do you want quality parts from reputable vendors, or the cheapest crap that China can pump out? For example, the price for an E3D hotend (great reputation) is $80 from an authorized reseller, but AliExpress.com has a clone listed for $6.00 that may or may not be a faithful reproduction but most certainly needs an added fan plus a printed fan shroud. You can buy a single-extruder 32-bit Smoothieboard to run the printer for $135, or find a China-vendor 8-bit RAMPS/Mega2560 package on Amazon for $37 with a 21-28 day shipping time.
Another question is if you currently have access to a working 3D printer? Since there are many printed parts in most designs, the price can vary from a spool of filament if you have a printer up to a couple hundred bucks to have a local 3D printer "job shop" print your parts.
Also, I have to add that for many people there is a fine line between "hobby" and "mental illness" when it comes to 3D printers.
 I have already spent over $500 in 2015 on printer parts for my next build, and don't even have electronics for it yet! (I'm waiting for the Google Deltabots group Smoothieboard special purchase to start shipping, because it is selling a $170 dual-extruder board for $123 or so.....)
|
Re: Cherry Pi III Is Available March 07, 2015 03:59PM |
Registered: 9 years ago Posts: 164 |
Haha, not yet mrorange26, but will do today. Maybe.
Mylation, I think vreihen is right. About the mental illness thing and also parts costs. There are some tricks to getting cheaper parts but probably the biggest determining factor is time. Slowboat stuff from China is the cheapest for sure and for most part will do the same job as anything sourced domestically. There were some parts that I found were 75% cheaper going through China even with shipping included (I'm in Australia). Given you're in North America I'd say you're looking at a minimum of maybe USD $400 but it could easily be $700. If you have any setbacks and need replacement parts (I did, because I'm inexperienced too) it might be a few hundred more.
If you have access to a 3D printer already that will save you cash. AndyCart is here and will provide a good, compatible set of parts (there have been many versions!), but having a mate with a printer will be cheaper for sure.
|
Re: Cherry Pi III Is Available March 07, 2015 05:15PM |
Registered: 9 years ago Posts: 164 |
Hmm. Attempted my first print, and I came across the same issue I had last time... Filament isn't being pushed through the bowden. I released the hinge that keeps the filament between the bearing and the bolt and tried pushing through the filament manually during a print, and couldn't. Are these symptoms of a clogged nozzle? It was heated to 220°C, sliced and printed by slic3r within Repetier Host.
If this is likely to be a blocked nozzle...
a) What are the steps to removing the nozzle from the hot end?
b) Does anyone have a good guide to cleaning them?
For b) I've seen a combo of soaking in acetone, heating it with a butane torch and then sicking copper wire through the nozzle to clear out anything.
I know it seems unlikely that this is the cause but I'm a lot happier with my build this time and an issue with the hotend would make sense.
|
Re: Cherry Pi III Is Available March 08, 2015 03:41AM |
Registered: 9 years ago Posts: 164 |
(Professor Farnsworth voice) Good news everyone!
It really looks like it wasn't an issue with my bowden. Further more it wasn't my nozzle being clogged either. It was in the hot end though! The sleeve between the plumbing fitting and the nozzle was clogged with filament (some had melted and completely filled it). The filament had even kinked just on the other side of the plumbing fitting.
Anyway, I cleared it out. Will calibrate it later and see how it goes.
Is it possible it's trying to feed in filament too fast?
Edited 1 time(s). Last edit at 03/08/2015 05:49AM by pugzor.
|
Re: Cherry Pi III Is Available March 08, 2015 07:26AM |
Registered: 10 years ago Posts: 515 |
Quote
pugzor
(Professor Farnsworth voice) Good news everyone!
It really looks like it wasn't an issue with my bowden. Further more it wasn't my nozzle being clogged either. It was in the hot end though! The sleeve between the plumbing fitting and the nozzle was clogged with filament (some had melted and completely filled it). The filament had even kinked just on the other side of the plumbing fitting.
Anyway, I cleared it out. Will calibrate it later and see how it goes.
Is it possible it's trying to feed in filament too fast?
Well done. Feeding filament too fast is possible. Measure 100mm from where the filament enters the extruder and mark the filament there. Use RH or
Pronterface to extrude 50mm of filament. Check the measurement to see how close to 50mm it was. Use M92 E to adjust your extruder steps per mm up or down to suit.
|
Re: Cherry Pi III Is Available March 09, 2015 10:35AM |
Registered: 9 years ago Posts: 68 |
Day 10
I finished bonding the effector struts this morning and they appear pretty even in length. I used M4 grub screws which had just the right amount of bite into the tube to screw them in with a thin coat of epoxy. Some of the balls wanted to lift due to the compressed air inside, but removing and then replacing them was generally enough to cure that.
I used the rest of today's time to git the drive belts, ready to fit the effector tomorrow.
I found a seller on eBay of XBox 360 slim power supply sockets which I'm tempted to use. As I see it, it would save me having to chop up the PSU cable, the socket is rated to the full 13A of the supply and it gives me a 5V supply to run a Raspberry Pi should I want to add Octoprint at a later date.
Xbox Power Socket
|
Re: Cherry Pi III Is Available March 09, 2015 12:14PM |
Registered: 10 years ago Posts: 515 |
|
Re: Cherry Pi III Is Available March 10, 2015 11:15AM |
Registered: 9 years ago Posts: 68 |
Day 11
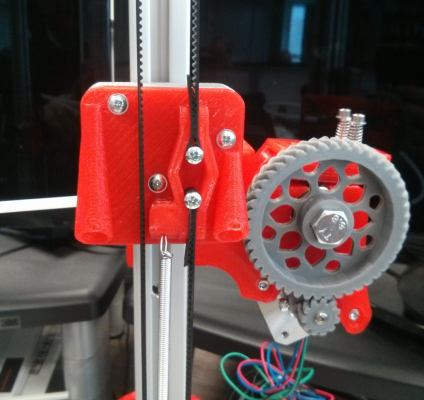
I didn't have a full hour today, but I got the spectra line loops (130mm) attached to the springs and the effector mounted.
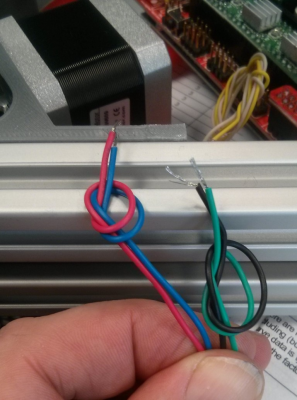
I also checked the stepper motor wire pairing by shorting to two together and seeing if the carriage became harder to move. For my motors the pairing turned out to be black with green and red with blue.
Tomorrow I start the electrical assembly.
|
Re: Cherry Pi III Is Available March 10, 2015 02:06PM |
Registered: 10 years ago Posts: 515 |
Looks like you are nearly there. If you want to make use of the auto calibration routine in the Rich Cattell Marlin firmware make up a flying lead with the normal 2 pin RAMPS limit switch connector on one end and two croc clips on the other end. Clip one to your hot end and one to your aluminium bed and plug, temporarily, into Z Min. As the nozzle touches the bed it closes the circuit and allows the auto calibration to function. Or just follow my calibration guide and do it manually.
|
Re: Cherry Pi III Is Available March 10, 2015 02:10PM |
Registered: 10 years ago Posts: 515 |
|
Re: Cherry Pi III Is Available March 10, 2015 05:41PM |
Registered: 9 years ago Posts: 111 |
Should my printer be moving on the wheel like this video link attached.
[www.youtube.com]
[www.youtube.com]
Sorry, only registered users may post in this forum.
