My first build, all metal delta "The Imp"
Posted by GroupB
|
My first build, all metal delta "The Imp" February 10, 2016 05:34PM |
Registered: 8 years ago Posts: 356 |
Hello,
This is my first post by I follow the forum since 2013, after month and month of waiting I can finally start to build my delta. I start the design of my printer in feb 2014 spend a year researching and building many cad model to allow a easy build with adjustment all around. After my design was locked in feb 2015 I start to build the frame, its all made of aluminum angle and V-slot that require only a few tool , drill press and a table saw with a metal cutting blade.
I finish the frame in March but I had to send some part to a machinist to get precise part and that where the nightmare start... So I contact a friend of a friend who is machinist and he told me he can do the parts after the summer holiday, because I had a reduce price and not the full shop per hour price I decide to wait till the summer and get my part done. I send him the material needed for the part in august and then he start to tell me it will be done in 2 week, 2 week later another 2 week and its was like this for a while! Can you believe I just receive my part this week! Took him 6 month! not counting April till august for a less than 8 hour job! I don't have to say that I will NEVER EVER do business with him again and the worst is the parts he send me half of it is off specs so I have to do mod in my design to fit them now.
So now I can start my build, a delta printer kind of large, printing area will be 13 inch diameter X 16 inch high, adjustable magnetic join, heat enclosure
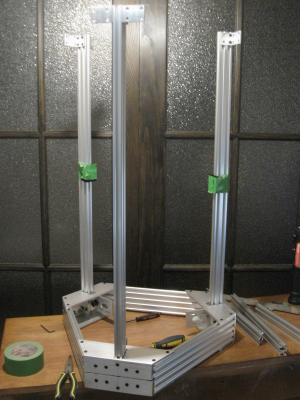
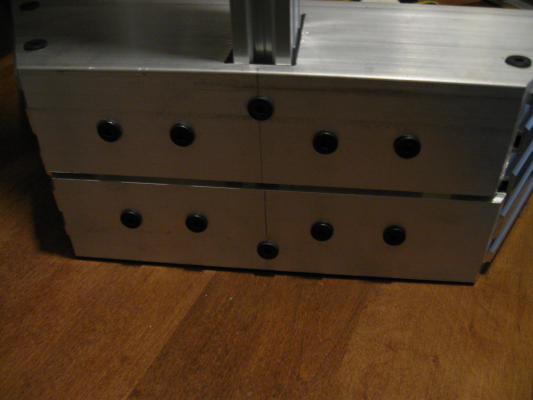
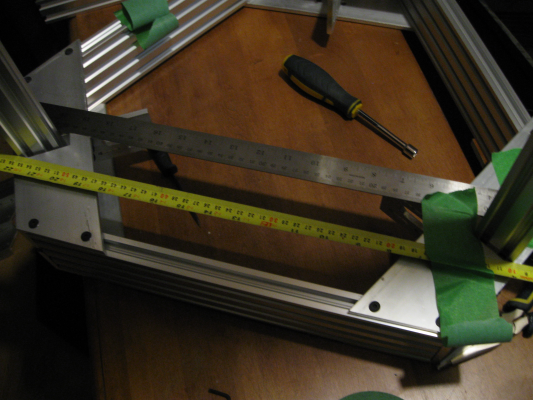
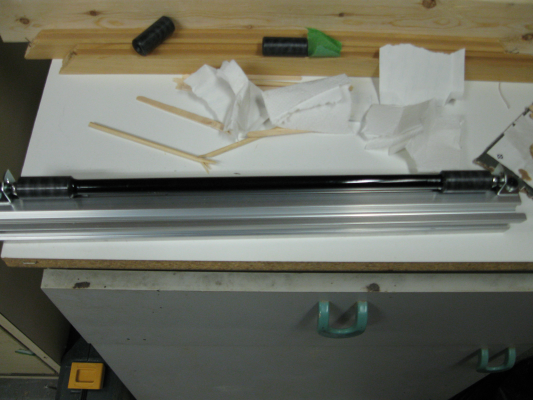
So yesterday I start assemble my frame and made it square and do the tower alignement :
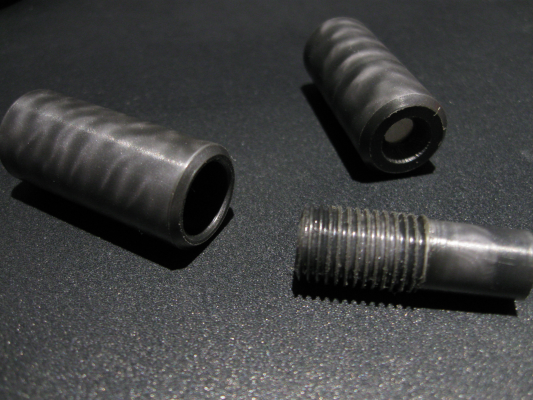
The magnetic Cup, made from high temperature nylon :
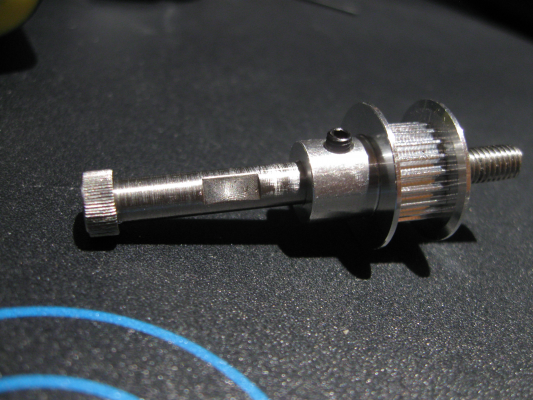
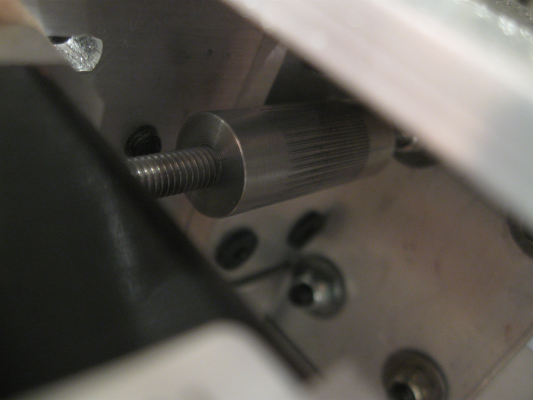
The custom made shaft for the belts :
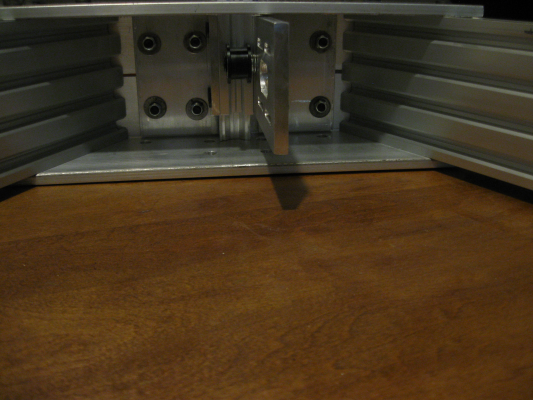
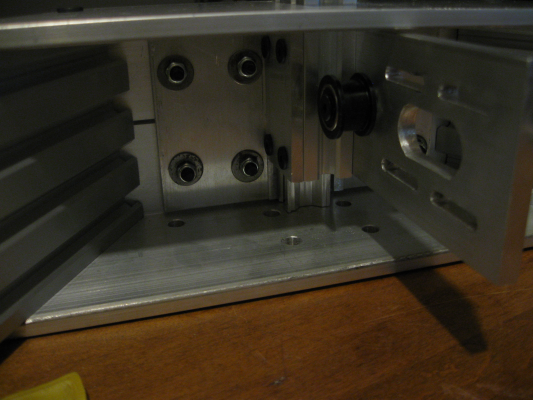
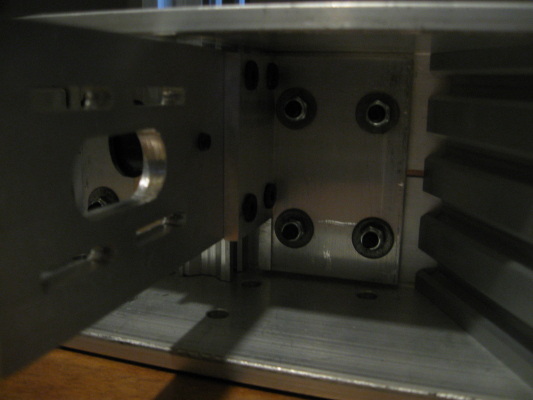
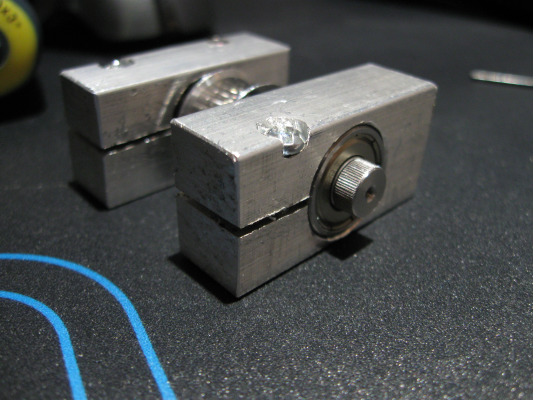
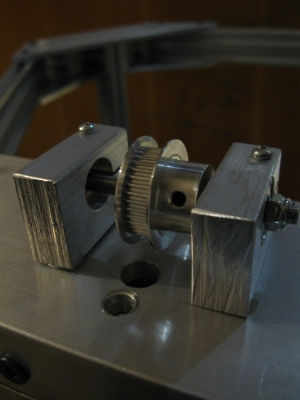
The homemade bearing housing, kind of ugly but its doing the job :
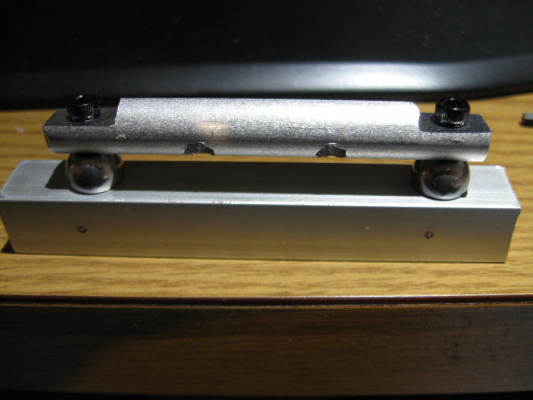
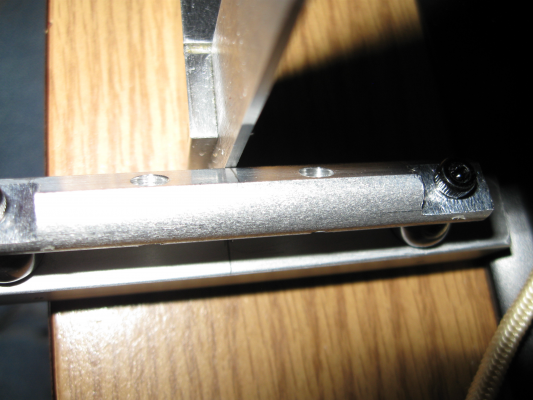
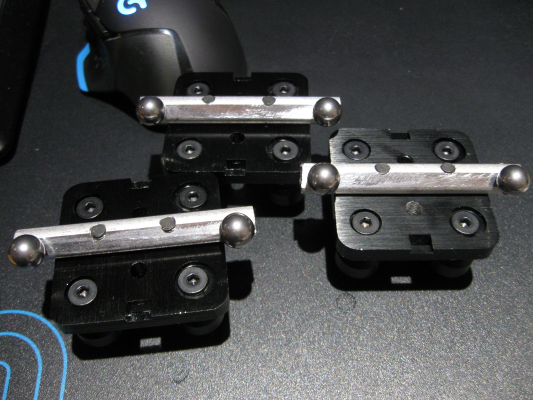
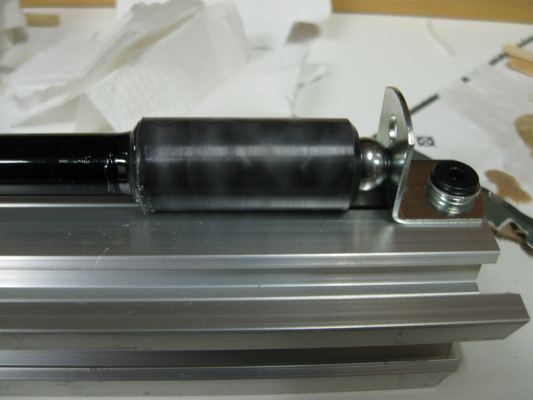
I made a jig to help me with my ball's alignement :
Ball's Alignement :
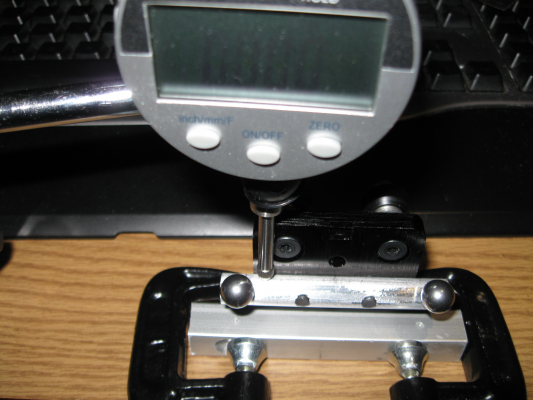
I finish the alignment, Look pretty good 0.001 to 0.0005 difference between all carrier :
To be Continued...
Edited 1 time(s). Last edit at 02/11/2016 12:54AM by GroupB.
|
Re: My first build, all metal delta "The Imp" February 10, 2016 08:26PM |
Registered: 8 years ago Posts: 356 |
Its really hard to align the ball's perfectly, I nail the distance between the 2 with my jig but the UP/DOWN adjustment is really hard, not only align one set on one carrier but to align all carrier the same.
what happen is one ball is lower than the other ? is this something the software can take care off ? or maybe I can pick up the difference with my adjustment on the arm...
I did my best but I think im 0.002 inch difference
what happen is one ball is lower than the other ? is this something the software can take care off ? or maybe I can pick up the difference with my adjustment on the arm...
I did my best but I think im 0.002 inch difference
|
Re: My first build, all metal delta "The Imp" February 10, 2016 11:22PM |
Registered: 8 years ago Posts: 356 |
Took me a couple hour but I manage with my dial to place all ball's of all my carrier to a 0.0005 difference ( the resolution of my dial ), dead center on the carrier, same height same distance between ball's.
This build gonna take my a while im kind of obsess with precision... I guess is a good think while doing a delta
Better take my time and make sure everything is align and precise than rush it , after month of waiting for parts , a week is not gonna kill me.
This build gonna take my a while im kind of obsess with precision... I guess is a good think while doing a delta

Better take my time and make sure everything is align and precise than rush it , after month of waiting for parts , a week is not gonna kill me.
|
Re: My first build, all metal delta "The Imp" February 11, 2016 01:25AM |
Registered: 8 years ago Posts: 916 |
|
Re: My first build, all metal delta "The Imp" February 11, 2016 02:59AM |
Registered: 8 years ago Posts: 356 |
The round linear were out of question because of the space and they not really good for the price they asking... if I have to spend that kind of money its gonna be the flat one ( the real thing)
There was no cheap linear from china when I start to gather my parts 2 year ago and the price of those in North america were too high to consider ( talking about one meter rail here don't forget ) and roller carrier are lighter so can enable faster speed. But nothing stop me from adding linear rail later if I find the roller is not doing the job it will cost me a little print size but I can afford to lose some. The goal here was to get it running then do some upgrade,spread the cost a little bit, I already spend quite a bit for the aluminum as you can imagine ( yeah I know I went little bit overboard with .250 angle but it will be a solid frame and more when it gonna be enclose.
First make it run , them upgrade to heat chamber and dual water cooling head, then fix and upgrade some part to make it better.
I know rail are more precise but a least I have the best roller "the V-Slot".
|
Re: My first build, all metal delta "The Imp" February 11, 2016 10:49PM |
Registered: 8 years ago Posts: 356 |
Today I finish installing the top frame and top bearing are in place, now im trying to install the bottom bearing and that where the fun start... because of the off specs bottom shaft with too long thread at the end (.375" and suppose to be .3 " ), I have to find a way to shorten my bearing housing , I cannot just move them closer because there is the 20X40 between the 2 housing and in my original design they both touch the beam on each side. Drilling deeper to move the bearing look like a good solution but because I slot them I don't know if it gonna work, if its not working I will make 3 new housing I guess.
Tomorrow Im gonna make the carbon arms, any advice on cutting those ? metal handsaw ? dremel cutting disk ? I know its a heath issue and I dont have a large enough container to cut them submerge in water so im gonna cut them outside with glove a mask.
is carbon fiber become brittle in cold weather ? like - 20 celcius
|
Re: My first build, all metal delta "The Imp" February 11, 2016 11:25PM |
Registered: 8 years ago Posts: 916 |
Quote
GroupB
Today I finish installing the top frame and top bearing are in place, now im trying to install the bottom bearing and that where the fun start... because of the off specs bottom shaft with too long thread at the end (.375" and suppose to be .3 " ), I have to find a way to shorten my bearing housing , I cannot just move them closer because there is the 20X40 between the 2 housing and in my original design they both touch the beam on each side. Drilling deeper to move the bearing look like a good solution but because I slot them I don't know if it gonna work, if its not working I will make 3 new housing I guess.
Is the issue that the shaft itself is too long? I'd just throw it on a grinder to shave off the excess. Or if the thread has been cut too deep then it doesn't really matter so long as the uncut shaft touches the inner race of the bearing. Hard to tell from your description.
Quote
GroupB
Tomorrow Im gonna make the carbon arms, any advice on cutting those ? metal handsaw ? dremel cutting disk ? I know its a heath issue and I dont have a large enough container to cut them submerge in water so im gonna cut them outside with glove a mask.
is carbon fiber become brittle in cold weather ? like - 20 celcius
Now for something I do have experience with: cutting carbon. The easiest way I've found is to drown the piece in oil, and add more liberally while cutting. You want to go slowly so you don't throw oil around everywhere (or cut inside a bucket). If you keep the cut well oiled then the dust doesn't become airborne and it's relatively easy to clean up.
I don't have experience with such low temperatures, but I wouldn't think that it would become brittle, carbon fibre is pretty stable stuff.
|
Re: My first build, all metal delta "The Imp" February 11, 2016 11:29PM |
Registered: 13 years ago Posts: 268 |
I've had good luck with diamond tile cutting blades, but I ran that at relatively low speed. Maybe only 1500rpm on a 3in blade. I think dremel might have some diamond coated disks. Wrap the cut area in masking tape tightly, helps to lower splintering and breakout. A diamond file can do a decent job of smoothing out ends too. I got a cheap one from a local home improvement store that I use for glass or carbon fiber stuff.
When I got the arms for my current machine I took the easy route and had the place that made the tube cut it to length. Nice clean straight cuts, all pieces very very close in length. Well worth the extra cost to me, I hate cutting cf myself.
When I got the arms for my current machine I took the easy route and had the place that made the tube cut it to length. Nice clean straight cuts, all pieces very very close in length. Well worth the extra cost to me, I hate cutting cf myself.
|
Re: My first build, all metal delta "The Imp" February 12, 2016 12:24AM |
Registered: 8 years ago Posts: 356 |
The shaft thread are too deep, and the bearing dont touch the inner cylinder but sit on the thread because of that, so move the bearing deeper or do new housing.
The guy who did that is a professional machinist and did that on his job site.. My guess is he did not want to do it at all and he butcher the job after month and month of me putting some pressure on him. Like instead of 1 flat per shaft he put like 2 per shaft because he mistake the 2 different shaft so now all my 5 mm shaft have 2 flat on them ... way to make that more fragile, I hope the belt tension will not bend them, they are made from Stainless steel. Lucky me I ask him to do more than 12 cup but 15 cup , turn out 3 of them have the tap so badly angle they cannot be use , on all 15 cup , 3 are perfert the other are SO-SO , I just hope they gonna turn OK when I screw them to the arms or I will have to forget the screw thing and glue directly... that mean no re calibration of the magnet when the nylon get used, that why I made my cup like that Arm--> Glue nylon screw---> screw in Cup
The guy who did that is a professional machinist and did that on his job site.. My guess is he did not want to do it at all and he butcher the job after month and month of me putting some pressure on him. Like instead of 1 flat per shaft he put like 2 per shaft because he mistake the 2 different shaft so now all my 5 mm shaft have 2 flat on them ... way to make that more fragile, I hope the belt tension will not bend them, they are made from Stainless steel. Lucky me I ask him to do more than 12 cup but 15 cup , turn out 3 of them have the tap so badly angle they cannot be use , on all 15 cup , 3 are perfert the other are SO-SO , I just hope they gonna turn OK when I screw them to the arms or I will have to forget the screw thing and glue directly... that mean no re calibration of the magnet when the nylon get used, that why I made my cup like that Arm--> Glue nylon screw---> screw in Cup
|
Re: My first build, all metal delta "The Imp" February 12, 2016 01:30PM |
Registered: 8 years ago Posts: 356 |
Just finish cutting the carbon fiber, I use a copper tube cuter, the one with the little cutting wheel and you turn and apply pressure. It was wonderful , no dust at all , couple large fiber only and a clean cut because it work outside toward inside so no break fiber. Too bad I did not cut right on the line and lets me a couple MM to file down just in case because the cut were nice, I finish it with a wet sanding paper over a wet paper towel. one of them came a little short but its alright the carbon length is not important in my design. off course I wear glove but there were no need for the mask, eye suit whatever protection needed with that way of cutting it.
|
Re: My first build, all metal delta "The Imp" February 14, 2016 10:29PM |
Registered: 8 years ago Posts: 356 |
I had trouble with the shaft that were off specs , look like they are not that straight also. I have to redo half of the housing to match the shaft and spend lot of time trying to screw them to the delta without them binding but I finally did it. To add to that my drill press went dead so I had to buy another one this weekend.
I also install the motor and the tensioner , the tensioner is a spacer kind of, place on one of the frame screw so I can tight the belts by moving the motor on the slot and unscrew that spacer to block the motor in place. Those were originally made to space the bed and adjust it and screw into load cell to act as a proximity switch but I decide to screw the bed directly on the frame and use some something else as proximity.
Im gonna put the belts in place then assemble the arms.
I have some electronic I brought 2 year ago a ultimaker 1.5.7 and a mega but I now have a Arduino Due and waiting on the radds 1.5 ( its in the mail, should receive it this week). At first I wanted the duet but the 5 motor version is expensive and not available in North America , the 4 motor one the price is good from china but its only 4 motor... I was planing to buy that one from china and the expansion from reprap pro but they close so I had to switch my plan. The expansion board from UK is just too expensive with the Canadian dollars so low and radds have a North American distributor ( makerfarm) and have removable module (I consider this a plus, be able to switch them and try difference one)
here some picture:
|
Re: My first build, all metal delta "The Imp" February 15, 2016 02:47AM |
Registered: 10 years ago Posts: 14,672 |
The Duet has a North America distributor too, see [www.filastruder.com].
Large delta printer [miscsolutions.wordpress.com], E3D tool changer, Robotdigg SCARA printer, Crane Quad and Ormerod
Disclosure: I design Duet electronics and work on RepRapFirmware, [duet3d.com].
Large delta printer [miscsolutions.wordpress.com], E3D tool changer, Robotdigg SCARA printer, Crane Quad and Ormerod
Disclosure: I design Duet electronics and work on RepRapFirmware, [duet3d.com].
|
Re: My first build, all metal delta "The Imp" February 15, 2016 01:01PM |
Registered: 8 years ago Posts: 356 |
yah , I saw your make an announcement for that 1 day after I order my radds and a week after I order my Due, But hey Im planing to use your firmware! Its working with radds right ? same CPU...
I only wish they were a duet with removable drivers, not stuck on 1/16 drivers... I made a board for the due with Kicad fixing what I dont like about radds, Like radds lack mosfet driver or proper 3v logic mosfet and I prefer Dpak style for better cooling ( they not really rate for 3v logic) and no filter/bypass cap at the mosfet ( a least they got the diode at the exit of the mosfet). But since I dont want to wait couple week to get it running I chose to buy one right now and maybe make myself one later when I finish putting the track together and find a good deal for prototype board. With the intel (edison) getting into the arduino world with more cpu power, its better to wait and see what will come out of that.
I only wish they were a duet with removable drivers, not stuck on 1/16 drivers... I made a board for the due with Kicad fixing what I dont like about radds, Like radds lack mosfet driver or proper 3v logic mosfet and I prefer Dpak style for better cooling ( they not really rate for 3v logic) and no filter/bypass cap at the mosfet ( a least they got the diode at the exit of the mosfet). But since I dont want to wait couple week to get it running I chose to buy one right now and maybe make myself one later when I finish putting the track together and find a good deal for prototype board. With the intel (edison) getting into the arduino world with more cpu power, its better to wait and see what will come out of that.
|
Re: My first build, all metal delta "The Imp" February 17, 2016 07:50PM |
Registered: 8 years ago Posts: 356 |
I got some problem, the magnetic cup I receive from that %$@%@ machinist are not straight at all , on 15 cup, 4 of them are usable and all the rest were not tap straight... I also had to buy a die on that size to clean the thread because they were not screwing into the cup at all. My design was to glue a screw kind of into the carbon and then screw the cup in, so I can remove them and move the magnet when they get used and allow me some option like the length of the arm or remove the magnet in case I decide to use the string on effector design.
So unless someone can suggest another option I got only 3 option right now,
1- Pour some epoxy in the cup ( lets hope it stick to glass reinforced nylon) then drill and tap again ( already did , waiting for the epoxy to cure to try it)
2- Forget the screw and glue them directly to the carbon ( my design allow the carbon to enter the cup a little bit like before it start screwing into the thread, but since I already cut my carbon it will be only entering like 5-6 MM or my arm will be too short)
3- Buy some more reinforced nylon and contact ANOTHER machinist and spend more money to build more of them and have MORE waiting time.
I also have another problem with the build but its a minor one, I order 6 Meter of gt2 belts but in my orignal design my tower were a little shorter and when I cut the piece of my top frame (20X40) it left me 3 equal piece for my tower and the cut were nice so I decide to keep them like that ( like 10 CM higher tower) so now Im missing a good 6 inch of belts on one of my tower... I put some tie rap to close the belts for testing purpose but I cant get all my height because of that. Im waiting on a china command with more gt2 belts and other xtra stuff to came in ( metal head, 24V component,25W cartridge and more stuff)
I also receive the radds today so Im going to start the wiring and do some test preparing the electronic side.
This machinist really piss me off, for the amount of money I spend and the time it took! having all the parts butcher it really make me mad! I contact a machinist to have the part made perfectly not to have to redo all of them myself!
Edited 1 time(s). Last edit at 02/17/2016 07:51PM by GroupB.
|
Re: My first build, all metal delta "The Imp" February 18, 2016 03:48PM |
Registered: 8 years ago Posts: 356 |
|
Re: My first build, all metal delta "The Imp" February 19, 2016 09:10PM |
Registered: 8 years ago Posts: 356 |
Finally glue the arm, so no more adjustment if needed, the tap were not straight enough to risk it.
I put some tension on the belts, but I dont know how much to put really, what will happen if the tension is too weak or too strong ? anyway to fine tune those ?
Next step for tonight is to align the effector ball with the dial , same I did with the carrier one, after that put the endstop ( switch or hall sensor) then I will be ready to melts my brain trying to understand firmware part of the printer.
If everything go nicely I will be able to print this weekend with temporary 12V atx psu and clone j head ( waiting for my new head's and 24V psu probably next week or the week after)
I try to push the top frame to see if there any deflection, it just wont move at all without lifting the entire printer , I guess my angle corner really do the trick.. I went a little overboard and make them very large in every direction but Im happy I did it, the lever effect I got from those really make the frame heavy duty. Im suprise I did not saw anyone else using angle as corner so far...
|
Re: My first build, all metal delta "The Imp" February 19, 2016 09:56PM |
Registered: 8 years ago Posts: 916 |
|
Re: My first build, all metal delta "The Imp" February 22, 2016 06:49PM |
Registered: 8 years ago Posts: 356 |
Everything is hook and wiring is done , Yesterday I try to connect octoprint to the radds (reprap firmware 1.09r for radds) without the driver just to see if I can make a connection and everything work fine ( using the native US then octoprint ask me if I wanted to update and I did... Now I got everything hook up driver/endstop but octoprint just Wont connect at all whatever the USB I use on the due. My pc is too far to just hook it up directly. I dont know what the problem is... Maybe its that update, maybe its on my side im kinda loss here ...
My due is an original one with the beige/brown connector
 then octoprint ask me if I wanted to update and I did... Now I got everything hook up driver/endstop but octoprint just Wont connect at all whatever the USB I use on the due. My pc is too far to just hook it up directly. I dont know what the problem is... Maybe its that update, maybe its on my side im kinda loss here ...
My due is an original one with the beige/brown connector
|
Re: My first build, all metal delta "The Imp" February 22, 2016 07:15PM |
Registered: 8 years ago Posts: 356 |
If I remove the radds SD card with the /sys file in it, I can connect to the printer , there something in those config that broke the usb connection I guess maybe the panel due baults setting ( I dont use panel due) that conflict with the native USB, or do I need to put an ip adresse into the config file even If I dont ever connect it directly to my routeur ( arduino Due.. no ethernet) im loss here..
anyway here my base config I did yesterday trying to understand all that if anyone spot something why it wont connect to native USB lets me know :
anyway here my base config I did yesterday trying to understand all that if anyone spot something why it wont connect to native USB lets me know :
; Configuration file for The Imp

; Communication and general
M111 S0                             ; Debug off
M550 TheImp		        	; Machine name and Netbios
M551 1234                        ; Machine password (FTP)
M540 P0xBE:0xEF:0xDE:0xAD:0xFE:0xED ; MAC Address
;*** Adjust the IP address and gateway in the following 2 lines to suit your network
M552 P0.0.0.0				; IP address (0 = use DHCP)
M554 P192.168.1.1                   ; Gateway
M553 P255.255.255.0                 ; Netmask
M555 P2                         ; Set output to look like Marlin
M575 P1 B57600 S1					; Comms parameters for PanelDue

G21                                 ; Work in millimetres
G90                                 ; Send absolute coordinates...
M83                                 ; ...but relative extruder moves

; Axis and motor configuration
M569 P0 S1						; Drive 0 goes forwards
M569 P1 S1						; Drive 1 goes forwards
M569 P2 S1						; Drive 2 goes forwards
M569 P3 S1						; Drive 3 goes forwards
M569 P4 S1						; Drive 4 goes forwards
M569 P5 S1						; Drive 5 goes forwards
M574 X2 Y2 Z2 S0					; set endstop configuration (all endstops at high end, active low)
;*** The homed height is deliberately set too high in the following - you will adjust it during calibration
M665 R174.6 L350.0 B152.0 H256.0		; set delta radius, diagonal rod length, printable radius and homed height
M666 X0 Y0 Z0						; put your endstop adjustments here, or let auto calibration find them
M92 X160 Y160 Z160				; Set axis steps/mm
M201 X1000 Y1000 Z1000 E1000		; Accelerations (mm/s^2)
M203 X20000 Y20000 Z20000 E3600		; Maximum speeds (mm/min)
M566 X1200 Y1200 Z1200 E1200		; Maximum instant speed changes mm/minute

; Thermistors
;*** If you have a Duet board stickered "4.7K", change R1000 to R4700 to the following M305 commands
M305 P0 T100000 B3950 R4700 H30 L0	; Put your own H and/or L values here to set the bed thermistor ADC correction
M305 P1 T100000 B3950 R4700 H30 L0	; Put your own H and/or L values here to set the first nozzle thermistor ADC correction
M305 P2 T100000 B3950 R4700 H30 L0	; Put your own H and/or L values here to set the second nozzle thermistor ADC correction
M570 S180							; Hot end may be a little slow to heat up so allow it 180 seconds

; Tool definitions
M563 P0 D0 H1                       ; Define tool 0
G10 P0 S0 R0                        ; Set tool 0 operating and standby temperatures
;*** If you have a dual-nozzle build, un-comment the next 2 lines
;M563 P1 D1 H2                      ; Define tool 1
;G10 P1 S0 R0                       ; Set tool 1 operating and standby temperatures
M92 E663:663                       	; Set extruder steps per mm

; Z probe and compensation definition
;*** If you have an IR zprobe instead of a switch, change P4 to P1 in the following M558 command
M558 P0 X0 Y0 Z0					; Z probe is a switch and is not used for homing any axes
G31 X0 Y0 Z4.80 P500				; Set the zprobe height and threshold (put your own values here)

;*** If you are using axis compensation, put the figures in the following command
M556 S78 X0 Y0 Z0                   ; Axis compensation here

M208 S1 Z-0.2						; set minimum Z
;
T0							; select first hot end
|
Re: My first build, all metal delta "The Imp" February 22, 2016 08:01PM |
Registered: 8 years ago Posts: 916 |
Not sure about this, but I'd try adding this line:
M575 P0 B115200 S1
This should set the baud rate of the USB connection to 115200. Then of course you need to tell Octoprint to connect using 115200.
I'd also set the IP address "properly", even if you don't use it.
Eg:
M552 P192.168.1.14
That's my guess anyway.
btw Lots of G code help is available here:
http://reprap.org/wiki/G-code#M575:_Set_serial_comms_parameters
Edited 1 time(s). Last edit at 02/22/2016 08:02PM by nebbian.
|
Re: My first build, all metal delta "The Imp" February 22, 2016 08:29PM |
Registered: 8 years ago Posts: 356 |
Octoprint wont lets me log now, even when everything is disconnected from the radds, I enter my login and pass and click login and nothing happen .. I can still connect SSH. gonna have to try to reset the login or something or start over with the Image on sd card again, is this is the case im gonna use my 16gb class 10 I used in the radds in the raspberry and use the raspberry 8gb class 10 in the radds, maybe the radds dont like my lexar 16gb and its the source of my problem...
|
Re: My first build, all metal delta "The Imp" February 22, 2016 10:38PM |
Registered: 8 years ago Posts: 356 |
Fix the octiprint hang , I discover that to see the serial port or whatever usb port on due I have to hit the reset button on the radds, it look like the sd card have a hard time to boot up. Now in octoprint I can see /dev/tty/ACM0 when hook to "native port" and acm1 when hook to "programing port". none of them want to connect ... the native port while detecting baudrate hang at the first baudrate " 250000" , the programing port test all of them but fail to connect.
I add that M575 P0 B115200 S1 but I dont thing its doing anything because I hear the firmware dont use that when its a native USB port, I also try removing all of the M575 and IP thing together and its a no go.
Kind of piss me off , after all the mechanical problem I had to fix , now its electronic that lets me down
I hear about a firmware fix for due r3 on the 16u chip, maybe I will try that,even if I have an original due ( I went with an original to avoid problem LOL)
what piss me off is its connect without problem if no sd card are in the radds... its connect to native and use 250000 baudrate. Can we use this firmware without a sdcard ?
Edited 2 time(s). Last edit at 02/22/2016 10:57PM by GroupB.
|
Re: My first build, all metal delta "The Imp" February 23, 2016 02:36AM |
Registered: 10 years ago Posts: 14,672 |
You can't use RRF without the SD card because it reads the configuration and homing files from the card. Try a different SD card.
Another possibility is that something in the config.g file is upsetting the firmware. So try cutting down config.g to the first few lines.
Edited 1 time(s). Last edit at 02/23/2016 02:39AM by dc42.
Large delta printer [miscsolutions.wordpress.com], E3D tool changer, Robotdigg SCARA printer, Crane Quad and Ormerod
Disclosure: I design Duet electronics and work on RepRapFirmware, [duet3d.com].
|
Re: My first build, all metal delta "The Imp" February 23, 2016 04:16AM |
Registered: 8 years ago Posts: 356 |
Thanks for the assist DC42 I know your the man when we talk about this firmware... I spend the last hours trying and trying! here are my progress and what I did
I reload the firmware 1.09r radds a least 3 time , the instruction for the radds using bossac and the programing port do not work on my due r3-e, So I use the duet way , using the native port and pressing erase then reset ( Not easy but with a stick I was able to press erase with the radds on top)
I use this command : bossac --port=PORT -e -w -v -U true -b RepRapFirmware-1.09r-dc42-radds.bin it work and verified nicely.
The I made a folder name sys, even a gcodes and a www. I copy the content of sd-image/sys-minikossel inside the sdcard/sys folder, did some mod to the config ( I try with the stock file unmoded too, to make sure its not my config.g that is wrong)
When powering up the radds, the stepper do noise for 3-4 sec then settle, and its impossible to connect to native or programing port, using octoprint, pronterface or even the arduino serial monitor, octoprint hang when testing 250000 baudrate.
When I power the radds WITHOUT the sd card , the stepper do noise for a good 7-8 sec , then I can see a dim led flashing on the mosfet, and I can connect with all software on native port, no hang nothing its ultra fast.
If I power the radds without sd, then connect and then put the sd card and send a M503 command, I can see it read the config file in the terminal windows ( so the sd card work)
So far I try 2 micro sd card , one 16gb lexar class 10 , one 8gb kingston class 4, I even partition the 16gb to 2 gb with "Diskpart" nothing work. I also try to hook a full size sd card reader (that I know work with my Due) to the radds (miso,mosi,clk,cs0,3.3v,gnd) but it did not work the radds power like there was no sd card probably the cs0 pin not working for a ext sd card, did not try cs1.
To me it look like the firmware hang when first trying to initialize the sd card, and that why I cannot connect and dont see the mosfet led flashing....
Im loss here, I tried everything I can, next step is maybe try the 1.09k firmware see if this one is bugged also.
thanks for your help
PS: I tried the trick to hit reset after a power up see if that help the sd card problem and nah...
PS2: I also tried my GLCD that I mod the wiring , it take full size sd card and I try many diff card and it hang the radds also , the same way the micro sd onboard do , my other card reader did not work probably because the lask of CD on it.
Edited 3 time(s). Last edit at 02/23/2016 04:53AM by GroupB.
|
Re: My first build, all metal delta "The Imp" February 23, 2016 05:12AM |
Registered: 10 years ago Posts: 14,672 |
I can't really help with the RADDS port of RRF because I didn't do it. The SD card interface is different in the RADDS port, because RADDS uses SPI whereas the Duet build uses HSMCI. Dan Newman is the person who can help you. Maybe it needs a delay added between startup and trying to read the SD card.
As you can read the SD card after startup if you boot without it, the following should work:
- Boot up without the SD card and connect via USB
- Insert the SD card
- Run M503 to check that you can read config.g
- Run M98 Pconfig.g
Large delta printer [miscsolutions.wordpress.com], E3D tool changer, Robotdigg SCARA printer, Crane Quad and Ormerod
Disclosure: I design Duet electronics and work on RepRapFirmware, [duet3d.com].
|
Re: My first build, all metal delta "The Imp" February 23, 2016 05:58AM |
Registered: 8 years ago Posts: 356 |
I tried what you said but right after I send the m98 Pconfig.g command , I recv: OK , then I send 2 M105 and got no recv... it hang
I only have 4 driver in and the endstop for test purpose, no hotend or thermistor hook, is this the cause ?
I tried remove lot of line in config, like keep debug only or the name still same result...
when I remove every line and keep the empty file in the sdcard it work, I also try other printer sys, and it hang too
Edited 3 time(s). Last edit at 02/23/2016 06:09AM by GroupB.
|
Re: My first build, all metal delta "The Imp" February 23, 2016 06:42AM |
Registered: 8 years ago Posts: 916 |
|
Re: My first build, all metal delta "The Imp" February 23, 2016 06:47AM |
Registered: 8 years ago Posts: 356 |
|
Re: My first build, all metal delta "The Imp" February 23, 2016 07:55AM |
Registered: 10 years ago Posts: 14,672 |
Quote
GroupB
I tried what you said but right after I send the m98 Pconfig.g command , I recv: OK , then I send 2 M105 and got no recv... it hang
Try removing lines from the config.g file, in particular the T0 command at the end.
Edited 1 time(s). Last edit at 02/23/2016 07:55AM by dc42.
Large delta printer [miscsolutions.wordpress.com], E3D tool changer, Robotdigg SCARA printer, Crane Quad and Ormerod
Disclosure: I design Duet electronics and work on RepRapFirmware, [duet3d.com].
|
Re: My first build, all metal delta "The Imp" February 23, 2016 08:40AM |
Registered: 8 years ago Posts: 356 |
Already tried , I tried to keep only the connection setting , tried with only the name line , nothing work , im about to try the k firmware , if this also fail , i guess im gonna try another firmware repetier for testing purpose but I really want to use reprapfirmware, hear so many great thing about it specialy for delta
Sorry, only registered users may post in this forum.
