My first build, all metal delta "The Imp"
Posted by GroupB
|
Re: My first build, all metal delta "The Imp" March 16, 2016 01:05PM |
Registered: 8 years ago Posts: 356 |
The L is not only for low offset like make sure its room temps so the fail safe can activate if go under 0 ?
Its a radds so its a 4.7K divider, with 1.09r modified for dvr8825 by dan ( remember the longer pulse discussion in radds stable thread)
Anyway I found your post on omerod to calibrate with L and H using a 100K and a whatever high Celcius ohm and im gonna try that, if its narrow the offset a little Ill be happy, I dont think you need to be spot on the right Celcius but close enough is my goal.
|
Re: My first build, all metal delta "The Imp" March 16, 2016 05:28PM |
Registered: 8 years ago Posts: 356 |
So I calibrate to 250C needed a L-260, but after that while doing test I needed to go down a little more to hit the middle of the temp range I want to use 180-240, So I calibrate for 220C with a L-285.
So now im at 185 (real 183) , 200 (real 198), 220 (real 220), 230 (real 232) and 240 (real 243). that a workable range but now the ambient temps as rise from 23C to 28C , I dont really care about it unless its a problem for the fail safe to work in case of thermistor go dead... Im still near 25C if I put a 100K ohm
So now im at 185 (real 183) , 200 (real 198), 220 (real 220), 230 (real 232) and 240 (real 243). that a workable range but now the ambient temps as rise from 23C to 28C , I dont really care about it unless its a problem for the fail safe to work in case of thermistor go dead... Im still near 25C if I put a 100K ohm
|
Re: My first build, all metal delta "The Imp" March 16, 2016 07:21PM |
Registered: 10 years ago Posts: 14,672 |
Something is wrong, because you should not need an L value anything like as big as 260. I suggest you set up the L parameter using a resistor of about 220 ohms. You can use the spreadsheet I attached in an earlier post to work out what the reading should be if you plug in the B value you have used. If the temperature is still a long way off after you have done this, then your thermistor probably has a much higher B value than you think it does.
Large delta printer [miscsolutions.wordpress.com], E3D tool changer, Robotdigg SCARA printer, Crane Quad and Ormerod
Disclosure: I design Duet electronics and work on RepRapFirmware, [duet3d.com].
Large delta printer [miscsolutions.wordpress.com], E3D tool changer, Robotdigg SCARA printer, Crane Quad and Ormerod
Disclosure: I design Duet electronics and work on RepRapFirmware, [duet3d.com].
|
Re: My first build, all metal delta "The Imp" March 16, 2016 10:52PM |
Registered: 8 years ago Posts: 356 |
That what I did , I use a 220 + a 10 ohm ( my 250c is at 230 ohm).
its working so far I think me extruder problem is over and its now sticking very well to blue tape enough so I can play with z value to calibrate my first layer.
I will change the thermistor when I switch to 24 V probably next week after I finish the print calibration. Maybe I will have better luck with the next one. The one im using right now came with the clone head and my spares one are the one from the link in my previous post so they should match the thermistor table on the seller webpage.
|
Re: My first build, all metal delta "The Imp" March 17, 2016 10:46PM |
Registered: 8 years ago Posts: 356 |
Alright E step fine tuning is done , its hard to judge the 95%infill gap and the top solid infill with no 3d printing experience but I can always tune it more each print. I also did the wall thickness calibration with the extrusion multiplier, the dimension with a 100X100mm X,Y print and a 100mm high tower and enter the calibration in the config as M579 and the first layer height , finally using 0mm Z offset giving me a nice 0.3mm height exactly the slic3r setting and its stick pretty well to blue tape printing the first layer at 205C then the rest at 200C.
It should be good to go, the only thing I have to tune now its the retract , I start at 2mm then 3,4 and 5 @ 50mm/sec its fine when its go from example the skirt to the print but inside the print after a infill when it travel back to the perimeter I always get a small line of plastic following the nozzle, I try to use Z lift of 0.1 and 0.2mm but this dont help. Maybe I should try retract on layer change.
Any recommendation for a 60cm direct drive bowden ?
|
Re: My first build, all metal delta "The Imp" March 17, 2016 11:28PM |
Registered: 8 years ago Posts: 916 |
Quote
GroupB
It should be good to go, the only thing I have to tune now its the retract , I start at 2mm then 3,4 and 5 @ 50mm/sec its fine when its go from example the skirt to the print but inside the print after a infill when it travel back to the perimeter I always get a small line of plastic following the nozzle, I try to use Z lift of 0.1 and 0.2mm but this dont help. Maybe I should try retract on layer change.
Any recommendation for a 60cm direct drive bowden ?
4-5cm at 50 cm/s should be about right. Ensure that your firmware isn't limiting retraction speed (watch your idler wheel when it's retracting, it should be almost instantaneous). Travel speed for non-print moves should be really high, like 100mm/s or higher. The fast travel moves help to break off the string as the move starts.
Good to see that you're making progress. Commissioning can be quite frustrating at times! Looks like you're almost finished that stage. Now comes the fun part, actually printing stuff you want

|
Re: My first build, all metal delta "The Imp" March 18, 2016 01:33PM |
Registered: 8 years ago Posts: 356 |
I guess you mean mm/sec, im at 5mm retract at 50mm/sec and at travel speed of 180mm/sec with lift z 0.2. My firmware limitation is 3800 so good for 63mm/sec so far.. The retract are very fast but It look like its not retracting while moving inside the print infill to perimeter but outside the print when it retract its perfect. That with slic3r.
Maybe I should try higher travel then...
I calibrate for X,Y 100 but when I print a 10x10x100 tower to check the z , the X and Y came at 9.45mm I wonder if I should play with rod radius and forget the m579.
I will do more test tomorrow , my main pc is overheating I have to fix that today. As soon as my printer is calibrate im gonna print that skylake delid tool and be done with that intel crappy thermal paste!
|
Re: My first build, all metal delta "The Imp" March 18, 2016 10:21PM |
Registered: 8 years ago Posts: 916 |
Sorry, yes, mm/s. My mistake.
There's a setting in slic3r which is the min distance before retract, which means that for short hops it won't retract. It will just quickly hop over to the next point. Speeds up printing as you're not waiting for a retraction. Perhaps play with that number.
There's a setting in slic3r which is the min distance before retract, which means that for short hops it won't retract. It will just quickly hop over to the next point. Speeds up printing as you're not waiting for a retraction. Perhaps play with that number.
|
Re: My first build, all metal delta "The Imp" March 25, 2016 06:44PM |
Registered: 8 years ago Posts: 356 |
I print a little bit this week, and finalize my calibration , all my axis are now calibrate to 100mm +/- 0.02 mm, its print nicely except something on long print I have some burn filament running down the nozzle and leak on the print ( brownish stuff), I check and its not leaking from thread its the first layer that dont stick at first and left a build up on the nozzle. I guess is one of the problem of not using a heated bed.
I also think im over extruding a little bit on the solid layer but not that much, I dont want to alter the extruder multiplier because its calibrate to give me a correct wall width.
For my inside the part extraction problem , I uncheck in infill " Only retract when crossing perimeters" and its fine now. There only a minor problem I have to tune in its a little problem when the printer is going up in Z layer its left a artefact that you can see on the print... if you guys know what to check or uncheck in slic3r to help this out, im listening.
|
Re: My first build, all metal delta "The Imp" March 26, 2016 01:20AM |
Registered: 9 years ago Posts: 189 |
What firmware do you use?
In Marlin there is M92 gcode that modifies E steps of all stepper motors on the fly.
Here is my E steps setting.
I increase or decrease E###.## by 0.2% to 0.5% when I calibrate the flow rate of new filament.
For instance, if E450.67 gives little over extrusion, I subtract 2.25 (0.5% of 450.67) to make it 448.42 in middle of printing.
Once I find the good flow rate, I save it by M500.
E Steps Fine Tuning
[reprap.org]
In Marlin there is M92 gcode that modifies E steps of all stepper motors on the fly.
Here is my E steps setting.
echo: M92 X100.00 Y100.00 Z100.00 E450.67
I increase or decrease E###.## by 0.2% to 0.5% when I calibrate the flow rate of new filament.
For instance, if E450.67 gives little over extrusion, I subtract 2.25 (0.5% of 450.67) to make it 448.42 in middle of printing.
Once I find the good flow rate, I save it by M500.
E Steps Fine Tuning
[reprap.org]
Quote
Triffid Hunter
Now, with everything very close to ideal values, we can finally dial E steps in that final little bit!
Find an object with flat tops on a number of levels, such as this cube stack test (scale this object by 250% after loading in Slic3r)
Slice at 95% rectilinear infill. Use the lowest layer height you're comfortable with - the lower the layer height used for this test, the finer your resulting E steps calibration will be. I use 0.2mm for first run, and if I'm feeling ambitious I'll repeat this process at 0.1mm.
Print.
Ignore the first 5-6 layers because they're too sensitive to the exact height of the first layer. If it's obviously over-filling or under-filling, alter E steps or Z=0 point and restart the print.
Observe infill. If you can't see tiny little gaps between the lines, reduce E steps by 0.5% every 2 layers until you can see tiny gaps.
Observe solid top layers. If you can see tiny gaps, increase E steps by 0.5% every 2 layers until there's no gaps in the top.
Send the new E steps to your printer with M92 Ennn without even pausing the print - you will see the result in a couple of layers when the change is this small.
Goto 5 until the infill has tiny gaps AND the solid top layers do not.
Now, your E steps value is extremely fine-tuned! Save this value in your firmware's configuration and flash to make permanent.
|
Re: My first build, all metal delta "The Imp" March 26, 2016 04:55AM |
Registered: 10 years ago Posts: 14,672 |
Quote
GroupB
I also think im over extruding a little bit on the solid layer but not that much, I don't want to alter the extruder multiplier because its calibrate to give me a correct wall width.
I suggest leaving the E steps/mm alone after calibration, and using the M221 command to change the extrusion factor on the fly and to adjust for different filament characteristics. See [reprap.org]. If you are using the Duet web interface, there is a slider on the Print Status page that controls this.
btw the thin-wall test is not a good way of setting the extrusion factor IMO, because it assumes that the extruded filament has a rectangular cross section; but it doesn't. I always slice at extrusion factor 1 and use the slider on the web interface to vary the extrusion factor. I make a note of the best extrusion factor to use for each roll of filament, and set that on the slider before starting the print.
Edited 2 time(s). Last edit at 03/26/2016 05:01AM by dc42.
Large delta printer [miscsolutions.wordpress.com], E3D tool changer, Robotdigg SCARA printer, Crane Quad and Ormerod
Disclosure: I design Duet electronics and work on RepRapFirmware, [duet3d.com].
|
Re: My first build, all metal delta "The Imp" March 26, 2016 11:11PM |
Registered: 8 years ago Posts: 356 |
I already did my fine E step calibration at extruder multiplier 1 and it was fine but since I move it to 1.17 to have proper wall, that setting also increase the flow so that why im over extruding a little...
I guess the M221 do the same thing as slic3r setting, but how you calibrate the wall width if you dont use that setting for that ?
How can you calibrate the Over/Under extruding and the wall without altering each other ?
If I go back to 1 extruder multiplier my Over/Under will be just right but my walls set to 0.5mm will be in the 0.42ishmm
Also its maybe stupid to ask that question at this point but, is there a way alter the config.g without removing the card every time on radds ? Like if I enter a M command and want to save it to the config so next time its part of the boot or upload a new config.g via a host like octoprint?
Right now I have easy access to the sd card but this may change when I put everything under the machine.
|
Re: My first build, all metal delta "The Imp" March 27, 2016 04:03AM |
Registered: 10 years ago Posts: 14,672 |
I adjust the extrusion multiplier using M221 to get good quality top solid infill.
AFAIR the RepRapPro version of Pronterface has a button for uploading a new config.g file over USB. On the Duet, config.g is generally updated using the web interface.
Large delta printer [miscsolutions.wordpress.com], E3D tool changer, Robotdigg SCARA printer, Crane Quad and Ormerod
Disclosure: I design Duet electronics and work on RepRapFirmware, [duet3d.com].
|
Re: My first build, all metal delta "The Imp" March 29, 2016 05:09PM |
Registered: 8 years ago Posts: 356 |
|
Re: My first build, all metal delta "The Imp" March 29, 2016 06:32PM |
Registered: 10 years ago Posts: 14,672 |
Quote
GroupB
So no one who follow that thread have the wall thickness and top infill tuned ? its one or the other ?
How can you calibrate the Over/Under extruding and the wall thickness without altering each other ?
I don't believe it's possible to get them both exactly right at the same time, unless you can find a slicer that supports different extrusion factors for perimeters and infill. But nobody prints thin walls except when doing tests prints, so IMO the thin wall thickness is not critical.
Large delta printer [miscsolutions.wordpress.com], E3D tool changer, Robotdigg SCARA printer, Crane Quad and Ormerod
Disclosure: I design Duet electronics and work on RepRapFirmware, [duet3d.com].
|
Re: My first build, all metal delta "The Imp" March 30, 2016 12:03AM |
Registered: 8 years ago Posts: 356 |
|
Re: My first build, all metal delta "The Imp" April 08, 2016 12:35PM |
Registered: 8 years ago Posts: 356 |
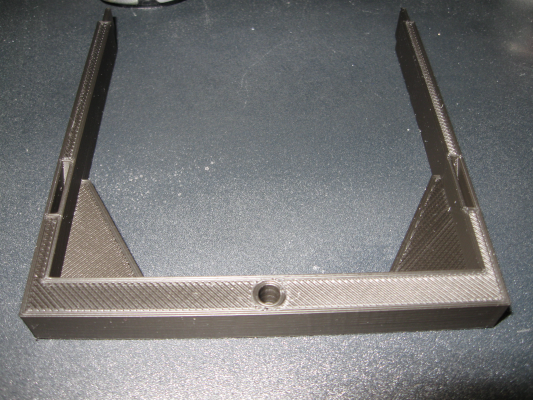
Ill share some print I did last week, My black filament is really better to my white , same brand colorfab pla/pha but the black flow so much better but black try to lift corner way more than my white.
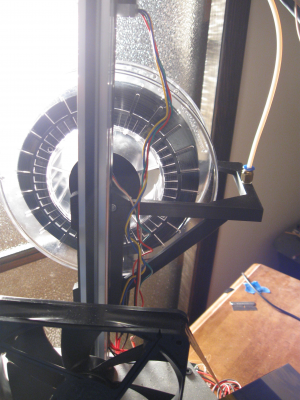
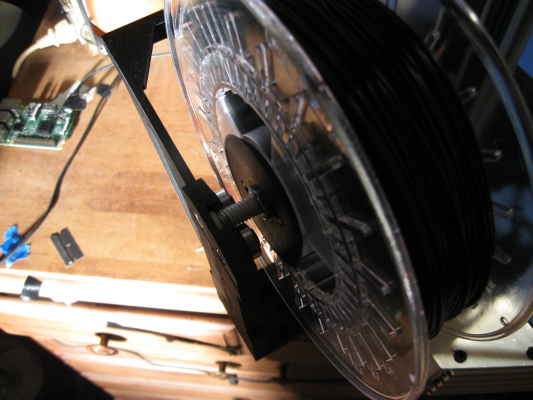
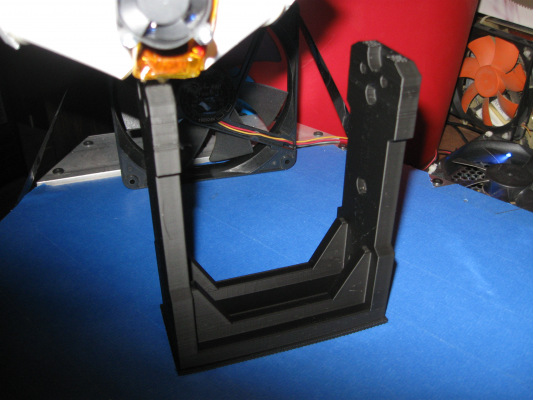
I design my spool holder for multiple size spool.
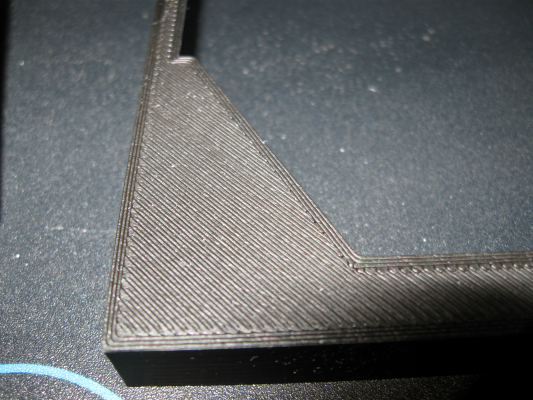
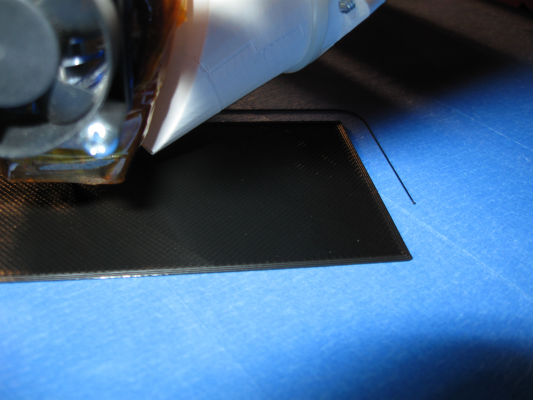
here some finish
First layer
Third layer
top layer, its so smooth under the finger vs the white
ALSO some problem I have right now on the X side of large print:
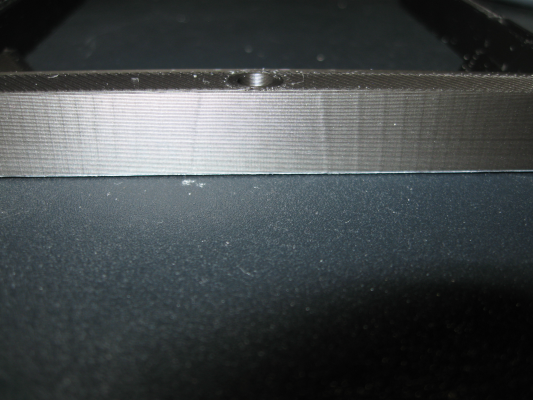
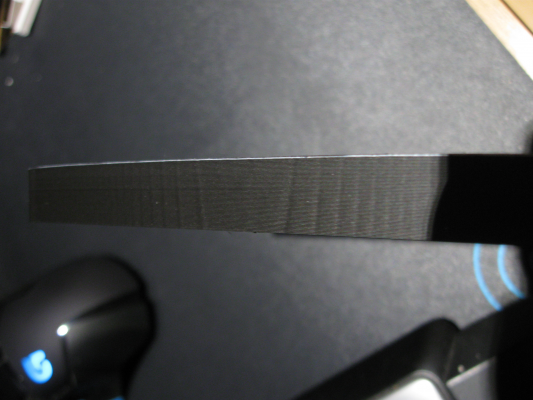
You can see some kind of tree ring on the X I have no idea whats its called or what cause it, when I slide my finger on the side you can feel the little bump Its not doing it on the Y side at all, You can see it too on my big spool holder part but its more in the center of the part, it not there past 40mm +X or -X from center. My Y side is my best side there zero amount of artefact but my X there the ring in big print and some small artefact I already show in previous post in smaller one.
Any idea whats causing this ?
I got a contract for couple part to print but I kinda want to fix this before doing the parts
|
Re: My first build, all metal delta "The Imp" April 09, 2016 10:26AM |
Registered: 8 years ago Posts: 916 |
Hi groupB,
Wow, you're really getting some quality out of your printer now. Looking great.
The tree rings on X might be due to something that's a bit 'jumpy' on your Z tower. This can be something like:
* Using a round bearing instead of a toothed pulley for idlers on that tower
* Looseness somewhere on that tower
* Using small values of microstepping on that tower
* Binding on that tower of some sort
* Improper current setting on the driver board
Try also rotating your part 120 degrees in your slicer so that a flat face is perpendicular to the X axis, instead of being perpendicular to the Z axis. Now try printing again. I'm betting that you'll see that pattern again, this time due to the X tower.
From the pattern, it looks regular enough to be belt teeth or stepping related. Good luck finding it.
|
Re: My first build, all metal delta "The Imp" April 09, 2016 01:37PM |
Registered: 8 years ago Posts: 356 |
Quote
nebbian
Hi groupB,
Wow, you're really getting some quality out of your printer now. Looking great.
The tree rings on X might be due to something that's a bit 'jumpy' on your Z tower. This can be something like:
* Using a round bearing instead of a toothed pulley for idlers on that tower
* Looseness somewhere on that tower
* Using small values of microstepping on that tower
* Binding on that tower of some sort
* Improper current setting on the driver board
Try also rotating your part 120 degrees in your slicer so that a flat face is perpendicular to the X axis, instead of being perpendicular to the Z axis. Now try printing again. I'm betting that you'll see that pattern again, this time due to the X tower.
From the pattern, it looks regular enough to be belt teeth or stepping related. Good luck finding it.
Im using only a round pulley in the bottom but its on the back of the belts, all teeth are on gt2 pulley so that rule this one out.
All my microstepping are set to 1/32, and all set to 160 step/mm , this one also rule out then
For the current all my tower use the same around 1.45A ( on 1.8A stepper) all been adjust with a multimeter checking the Amperage while they were runing at 1/32 micro, the Vref equation dont work for those stepper driver from china)
Binding is probable, since I had hard time with those custom shaft kinda binding in my bearing block but not super hard binding, but all of them kinda bind a little too. But printing something yesterday I start hearing CLICK noise coming from the top pulley of the Z tower only when I was printing like 20mm+ from the bed and only when the pulley/shaft were at a certain angle, I investigate that but cant find the cause, its not clicking when printing 20mm lower.
The Z belts have also a little less tension on it but really not much less, If my other on a guitar tuner gave me G note -45 , the Z was G note -55, when I try to tight it like the other I was feeling some hard to push carrier, again I suspect maybe the tension on the Z pulley shaft was making the small binding way worst and that what cause the hard to push carrier.
I was planing to replace my bearing block and shaft all together because I know those part were not up to my quality standards and have a real machinist shop make a new set or maybe try to source some premade block but all I find was Actobotics and they are imperial that mean drill the pulley to 1/4 and risk having the pulley wobble if its not drill straight on my drill press... but not before I can make some profit out of the printer to finance the upgrade.
Ill try a 120 degree print and report and switch the stepper driver around just in case
|
Re: My first build, all metal delta "The Imp" April 09, 2016 02:17PM |
Registered: 8 years ago Posts: 356 |
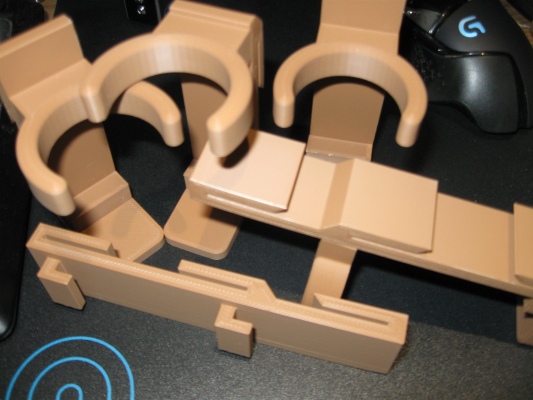
I also made those yesterday, those are actual part to produce/sell, my brother and he friends needed some holder for airsoft grenade and smoke. I just have no idea what to ask $ for one of them, It took 10.6 hour to make a batch of 4 around 2.65 hour per grenade clip and about 2.25 $ of pla colorfab .
How you guys set the price for thing you do ?
Let's say I don't charge the time I spend design them
How you guys set the price for thing you do ?
Let's say I don't charge the time I spend design them
|
Re: My first build, all metal delta "The Imp" April 09, 2016 02:55PM |
Registered: 8 years ago Posts: 356 |
Ok did the print facing X tower and also Y tower both have the tree ring...
Also both have around the same distance between the middle and the first "Ring" and the next
So its not Z tower then ? what can it be ? Bad calibration ? I know the factor 7 of DC42 calibration change my arm length little longer that they really are but I have no idea if this can affect the print this way...
|
Re: My first build, all metal delta "The Imp" April 10, 2016 10:14AM |
Registered: 8 years ago Posts: 916 |
Quote
GroupB
Ok did the print facing X tower and also Y tower both have the tree ring...
Also both have around the same distance between the middle and the first "Ring" and the next
So its not Z tower then ? what can it be ? Bad calibration ? I know the factor 7 of DC42 calibration change my arm length little longer that they really are but I have no idea if this can affect the print this way...
Yeah I thought that might happen. It happens to both my deltas as well. I'm not 100% sure what's actually going on there, apart from knowing that the faster I print, the worse they get. It's definitely some form of regular error to do with the position of the carriage slightly not matching the position that is commanded. I haven't done the maths, but I'd suspect that the dimension of the error you see in the tree ring is caused by a smaller error on the tower position system.
Could it be due to the permanent magnets in the stepper motors, and the 'cogging' you feel when you manually move the motors? I don't know. I've never found a good way to get rid of it, anyway.
|
Re: My first build, all metal delta "The Imp" April 10, 2016 10:25AM |
Registered: 8 years ago Posts: 356 |
Are you also on Reprap firmware?
I try to google this to see if someone else had this but I dont really know how someone else will call this patern on the print...
So when all 3 carriage move the print are alright but when 1 stay put and 2 more we got tree line. It feel like something wrong on the stepper that should hold the position problem with holding torque?
Im on 1/32 and if I remember you are on 1/16 do your tree ring look smaller or bigger than mine?
Edit: I google little bit about those circular problem and I end up reading about fast decay mode... help with low current micro stepping skipping, hack are avaiable for both 4988 and 8825 to switch them from mixed decay to fast decay, Do you mod your driver ?
Since the pattern is link to a tower NOT moving while the 2 other move I wonder is those pattern are in fact skipping while the motor is holding the position.. will that make sense to try to switch the driver in fast decay mode ? They talk about put 5V on the decay Pin of the driver but I guess 3.3V can do it also in my case.
Edited 1 time(s). Last edit at 04/10/2016 12:17PM by GroupB.
|
Re: My first build, all metal delta "The Imp" April 10, 2016 02:56PM |
Registered: 8 years ago Posts: 356 |
I look careful at the carrier while printing and im wrong tthe z is moving while doing a line on X axis... but it like moving slow up , stop then go back slow and the part where it kinda stop at the top is the center of the line where there are no ring.
I just put one of my spare driver in fast decay on the Z tower, im printing the test part right now and will report.
Fast decay is loud even at 1/32 , make the motor sound like a 120mm pc fan with busted bearing I have to use M84 while waiting to for the nozzle to get to print temp.
I just put one of my spare driver in fast decay on the Z tower, im printing the test part right now and will report.
Fast decay is loud even at 1/32 , make the motor sound like a 120mm pc fan with busted bearing I have to use M84 while waiting to for the nozzle to get to print temp.
|
Re: My first build, all metal delta "The Imp" April 10, 2016 03:47PM |
Registered: 8 years ago Posts: 356 |
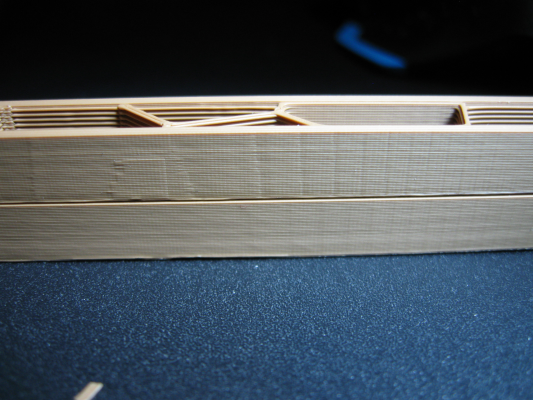
Top one before fast decay, Bottom one is with fast decay ONLY on Z tower
The result are great , you can still see some circular pattern on the part but you really have to look close and focus, at 20cm from my eye I cant see them off course the picture is with macro focus so you see them better, The top one you can feel them with your finger the bottom one not at all.
Its a great improvement, maybe they will disappear when Ill put the 2 other driver in fast decay, I will try to do that tomorrow.
Sorry, only registered users may post in this forum.
