Home
>
Developers
>
Topic
My DIY printer
Posted by Vince
|
My DIY printer November 09, 2013 06:20AM |
Registered: 10 years ago Posts: 61 |
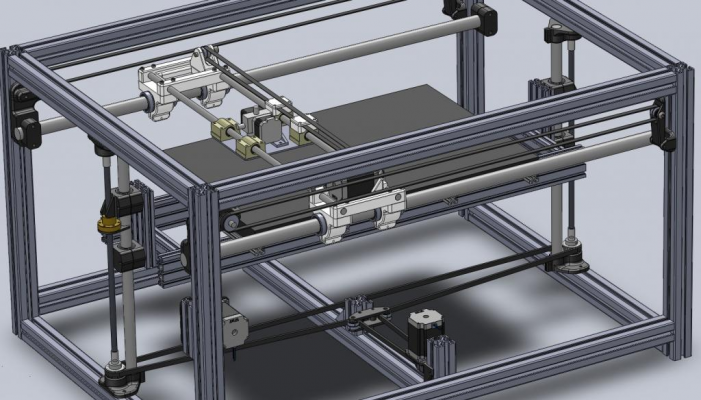
A few short months ago my son ordered a mendelmax printer which I thought was a waste of money. However I rapidly changed my mind and it has been going non stop, producing parts for many different projects, mostly to do with UAVs.
On a few occasions I have had to make a piece in two parts as the print area was rather limited so last week I took the plunge and decided to build my own larger one.
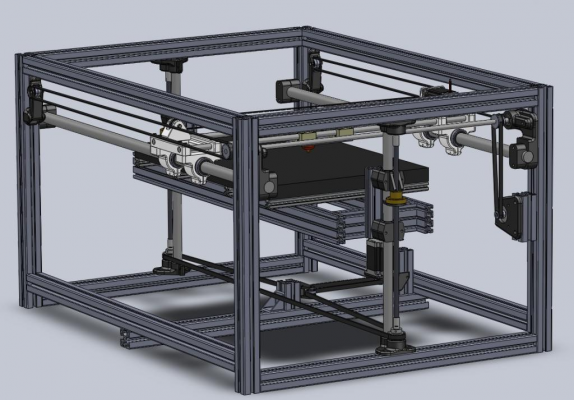
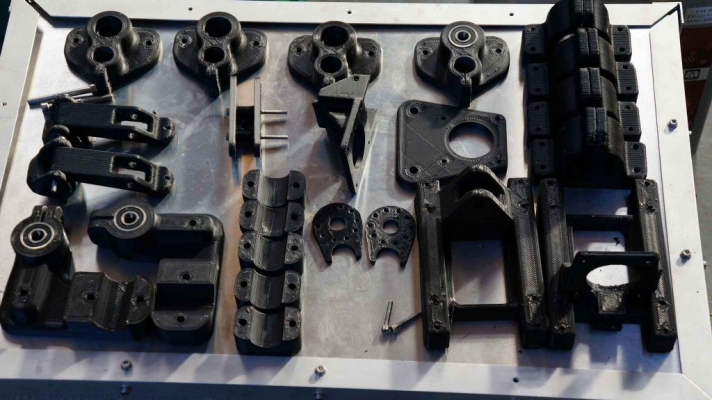
It has taken about 10 days now but the design is 95% finished, most of the parts are in the post and the plastic parts have been printed on the mendel. Phew. its been a busy week.
Print area is 710x410x200. Heated print bed is still to be finalised but it will probably be silicone heat mats stuck to 8mm glass.
|
Re: My DIY printer November 09, 2013 11:57AM |
Registered: 11 years ago Posts: 1,049 |
|
Re: My DIY printer November 09, 2013 02:59PM |
Registered: 10 years ago Posts: 61 |
|
Re: My DIY printer November 09, 2013 09:42PM |
Registered: 11 years ago Posts: 248 |
Quote
Vince
My mendel has two z motors and they somehow seem to get out of step quite regularly, fortunately not during a print, just between. I was determined to lock these new ones together and reduce the hassle.
I was thinking of using the 8825s for drive but will take a look at Core, thanks.
classic reprap mistake. set Z axis to full step and its solved.
|
Re: My DIY printer November 09, 2013 11:28PM |
Registered: 11 years ago Posts: 1,049 |
|
Re: My DIY printer November 10, 2013 05:10AM |
Registered: 10 years ago Posts: 61 |
Quote
woo
Quote
Vince
My mendel has two z motors and they somehow seem to get out of step quite regularly, fortunately not during a print, just between. I was determined to lock these new ones together and reduce the hassle.
I was thinking of using the 8825s for drive but will take a look at Core, thanks.
classic reprap mistake. set Z axis to full step and its solved.
Woo, do you have a link for that classic mistake? I guess thats driver links and a bit of recalibration then?
|
Re: My DIY printer November 10, 2013 05:18AM |
Registered: 10 years ago Posts: 61 |
O yes. I didnt know that system had a name. I looked at using that on the x only, like the cartiso printer but my gut feeling was to keep the x.y belts short. The slow z wasent as critical.
|
Re: My DIY printer November 10, 2013 04:40PM |
Registered: 11 years ago Posts: 248 |
Quote
Vince
Quote
woo
Quote
Vince
My mendel has two z motors and they somehow seem to get out of step quite regularly, fortunately not during a print, just between. I was determined to lock these new ones together and reduce the hassle.
I was thinking of using the 8825s for drive but will take a look at Core, thanks.
classic reprap mistake. set Z axis to full step and its solved.
Woo, do you have a link for that classic mistake? I guess thats driver links and a bit of recalibration then?
its logical explanation. everybody sets two motors on same driver, and turn on microsteps. when you stop printing, your motors are shutting down, and they stay on "microstep" position.
when you turn on printer again, and motors are on some microstep position, they jump to full step position, and there is possibility that each motor jump on different side.
just change to full step and it will be ok.
|
Re: My DIY printer November 15, 2013 09:39AM |
Registered: 12 years ago Posts: 972 |
In microstepping you cannot de-energize the motors as they cannot hold statically any other than full step positions. You can configure your firmware to not put driver to sleep mode on Z axis. My advice is to keep all the axis energized if your are using microstepping on them.
Edited 1 time(s). Last edit at 11/15/2013 09:39AM by misan.
Edited 1 time(s). Last edit at 11/15/2013 09:39AM by misan.
|
Re: My DIY printer November 18, 2013 03:36PM |
Registered: 10 years ago Posts: 61 |
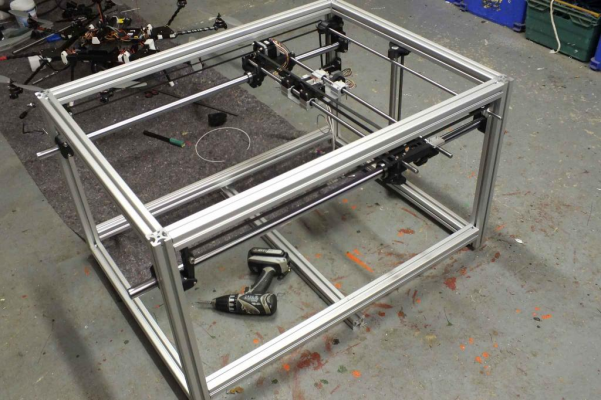
Things are moving forward with the printer now the frame profiles and rails have arrived.
For the print bed I will probably use 8mm glass with 240v silicone heat mats stuck to the underside. As I already have one on those ebay extruders I will probably fit it, but Im not expecting great things from it. The profiles were ordered from a UK site but were despatched from Austria leaving a trail of special M6 fasteners across Europe, therefore work has stopped until replacements arrive.
For the print bed I will probably use 8mm glass with 240v silicone heat mats stuck to the underside. As I already have one on those ebay extruders I will probably fit it, but Im not expecting great things from it. The profiles were ordered from a UK site but were despatched from Austria leaving a trail of special M6 fasteners across Europe, therefore work has stopped until replacements arrive.
|
Re: My DIY printer November 19, 2013 05:33PM |
Registered: 10 years ago Posts: 273 |
Looks fantastic
I'm slowly getting parts together to do something similar, but will probably try CoreXY architecture.
What size rods are you using. I've bought some 8mm and 10mm smooth rod, but I'm thinking of trying even thicker e.g. 12mm or perhaps 16mm (LM12UU or LM16UU).
At the moment I've got a load of SC10UU bearings in my components box and have some LM8UU and LM12UU on order.
I was going to use all SC10UU everywhere, but looking at them now, they look too heavy for the XCarriage, as I was trying to keep the weight down.
BTW. How were you intending to do your Z Axis? My current thoughts are Z lead screws on both left and right sides, so that the print bed is not just cantilevered on one side.
But this does clutter up the mechanics, as both the Y rails and the Z stuff are in the same place
However I still think this give me be the best chance of getting something that works ;-)
|
Re: My DIY printer November 20, 2013 05:47AM |
Registered: 10 years ago Posts: 61 |
Hi Roger.
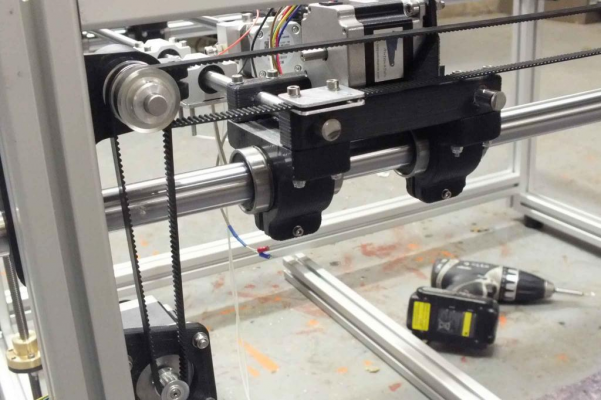
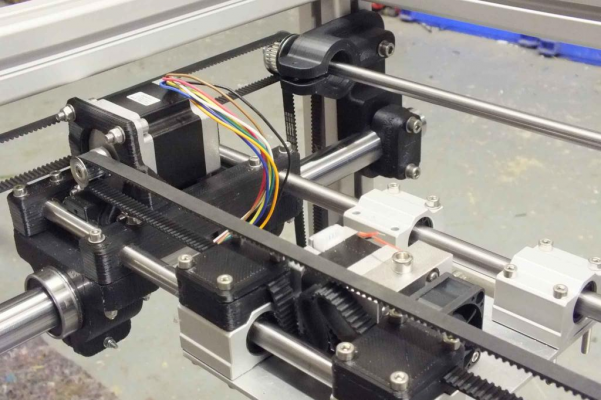
The X is on a pair of 12mm bars with a 3mm pitch belt drive
Y is on massive 25mm rails (to avoid sag over the 1m length) driven on a pair of 3mm pitch belts (9mm wide) driven from a common tortion bar. Y rails dont move so their weight dosent matter.
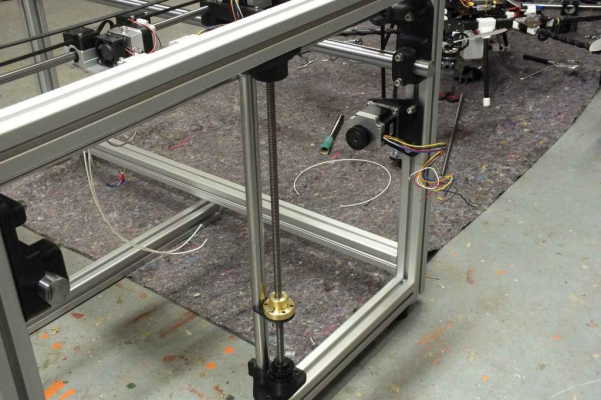
For Z I have a 10mm leadscrew at both ends, giuded by a 20mm rail. Both leadscrews are driven by a single belt (5 mm pitch) and motor.
So far it all moves very nicely except the long Y belts dont want to stay central on the tentioner bearing.
|
Re: My DIY printer December 05, 2013 04:32PM |
Registered: 10 years ago Posts: 61 |
The maching is now printing but I would like a bit of advice please.
The Z axis is occasionally stalling and I have tried adjusting the power but it still occasionally happens. It seems logical to go for less steps on the Z axis as all jumpers are in place. When I remove them (for full step) the motor just sits there buzzing. Power adjustment wont help. Im assuming its now getting step pulses too fast for a full step so I tried all the speed and acceleration (and jerk) settings in the repetier firmware but still not change.
So in simple trems, if I want to change to full step, what firmware changes also have to be made?
Thanks
|
Re: My DIY printer December 05, 2013 04:38PM |
Registered: 12 years ago Posts: 972 |
Sometimes this happens because Z-axis feed rate is too-high.
I would try with 1mm/sec or so. You can set that for the MAX_FEEDRATE of your axis or if using Pronterface you can set the proper value in the Z: textbox (60 mm/min).
If you change to full step you need to divide the calibration you have for Z-axis by 16 (as x16 microstepping is what you get when you have all three jumpers in). However you'll get a noisier machine and I am not sure you'll get an improvement in terms of torque.
|
Re: My DIY printer December 05, 2013 05:39PM |
Registered: 10 years ago Posts: 61 |
I have poped the jumpers back on and slowed down the Z rate and it seems ok now. However I am courious why I had no movement at all when full stepping. I have only done a rough calibration so far but guess its inside 10%.
Also now getting x axis slippage. Might be power or a slipping grubscrew. Anyway, some recoganisable things comming off my massive DIY printer so I will have a tinnie to celibrate.
Another thing.
My print bed is two 6mm glass sheets with nichrome wire in between. Lots as thermal mass. The temp overshoots by about 8 deg before it stabalises. Have tried adjusting D and P in the PIDs. I think 'I' is self tuning it that right? (repetier)
Advice on PID settings for a heavy bed would be welcome.
Thanks
|
Re: My DIY printer December 05, 2013 06:11PM |
Registered: 11 years ago Posts: 1,049 |
|
Re: My DIY printer December 27, 2013 09:10AM |
Registered: 10 years ago Posts: 474 |
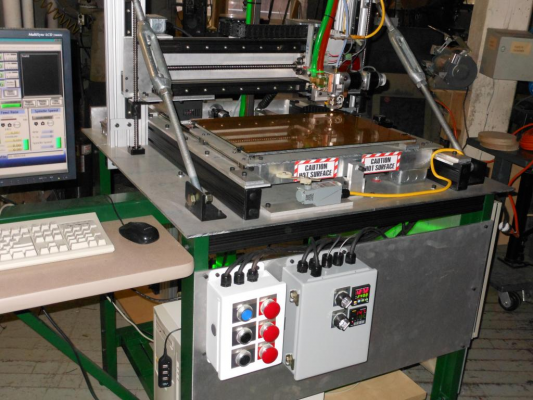
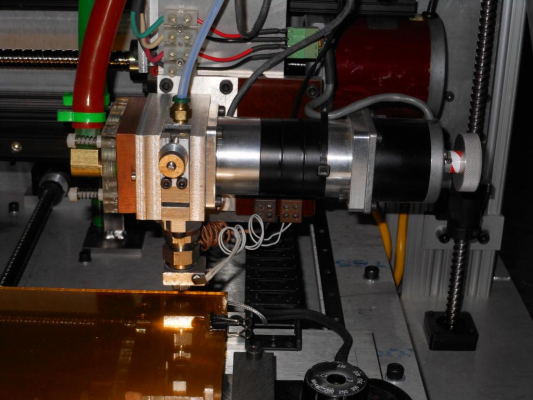
nice-looking machine I built a large heavy machine that's why I chose Mach 3 as control software and larger stepper motors and drivers and just use external temp controllers for hot end and bed. It worked very well here are a few picturesQuote
Vince
I have poped the jumpers back on and slowed down the Z rate and it seems ok now. However I am courious why I had no movement at all when full stepping. I have only done a rough calibration so far but guess its inside 10%.
Also now getting x axis slippage. Might be power or a slipping grubscrew. Anyway, some recoganisable things comming off my massive DIY printer so I will have a tinnie to celibrate.
Another thing.
My print bed is two 6mm glass sheets with nichrome wire in between. Lots as thermal mass. The temp overshoots by about 8 deg before it stabalises. Have tried adjusting D and P in the PIDs. I think 'I' is self tuning it that right? (repetier)
Advice on PID settings for a heavy bed would be welcome.
Thanks
Edited 1 time(s). Last edit at 12/27/2013 09:11AM by cnc dick.
|
Re: My DIY printer December 27, 2013 09:55AM |
Registered: 10 years ago Posts: 61 |
Thats a serious bit of kit.
Is that a gearbox and fume extractor (perhaps cooling air?) on the extruder?
I wasn’t aware mach3 could be used on printers, I will take a look into that.
I have just uploaded a brief tour vid of my unfinished machine.
[www.youtube.com]
Is that a gearbox and fume extractor (perhaps cooling air?) on the extruder?
I wasn’t aware mach3 could be used on printers, I will take a look into that.
I have just uploaded a brief tour vid of my unfinished machine.
[www.youtube.com]
|
Re: My DIY printer December 28, 2013 02:01AM |
Registered: 10 years ago Posts: 474 |
The only drawback to Mach 3 is you going to have to run external temp controllers for the hot end and bed. And then when slicing set to zero or minimum and slicer programs. If you Google large scale repstrap you should be able to find a little more on my machine maybe a couple videos still out there. You will be able to use any size motors drivers and voltages
|
Re: My DIY printer January 04, 2014 10:12AM |
Registered: 10 years ago Posts: 474 |
|
Re: My DIY printer January 04, 2014 12:28PM |
Registered: 10 years ago Posts: 61 |
I had a batch of small brackets (2cm square) to print and they came out really bad. Larger things print well so I thought its time for a nozzle blower to see if it helps.
Mk1 used a normal axial mini fan but it didn’t take kindly to being restricted and almost nothing came out of the end so I have set up a new one using a centrifugal one, like this.
[cgi.ebay.co.uk]
It can be chopped down much smaller and produces a good pressure that can be ducted without much loss.
Will be testing soon.
|
Re: My DIY printer January 05, 2014 10:08AM |
Registered: 10 years ago Posts: 474 |
Vince this is mine here is a short video clip of it operating throwing its weight around extruder is really heavy. My motors are Neema 34 and 23 for the extruder I'm surprised you had bad luck printing a bunch of small pieces this usually works fine because it has time to cool some slicers have minimum layer time in fact what a lot of people do is print more than one when you're working with small things so it has time to cool [www.facebook.com] [www.facebook.com]
Edited 3 time(s). Last edit at 01/05/2014 10:19AM by cnc dick.
Edited 3 time(s). Last edit at 01/05/2014 10:19AM by cnc dick.
Sorry, only registered users may post in this forum.
