Home
>
Developers
>
Topic
In progress - hotend
Posted by JamesK
|
In progress - hotend February 27, 2016 05:22PM |
Registered: 9 years ago Posts: 1,873 |
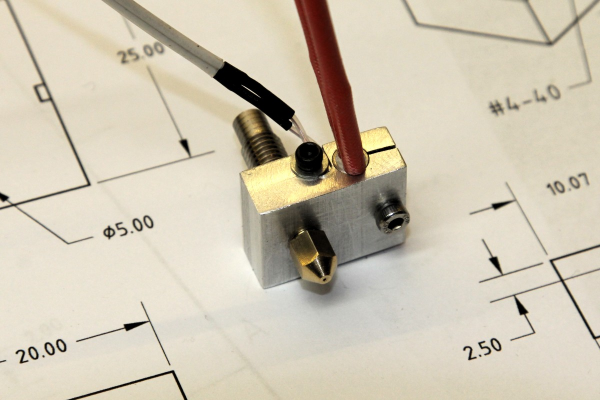
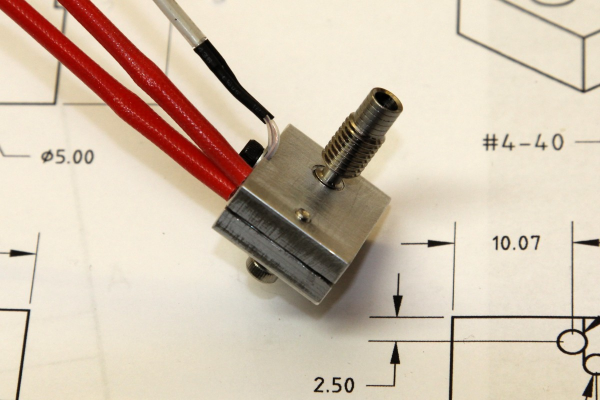
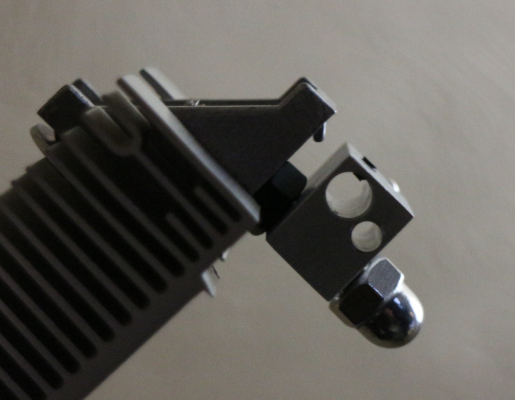
I want to see if my new extruder will work with 1.75mm filament by just swapping out the hot end, so I need a new hot end to try it with. I have some stainless steel heat breaks, but I forgot to order any heater blocks. Fortunately I have plenty of aluminum bar stock and they are fairly easy to make. I followed the e3d pattern as clamping the heater element gives far better thermal contact than pushing it off centre with a set screw. I made sure the block is wide enough to completely contain the heater - there's something annoying about seeing the element hanging out of the block.
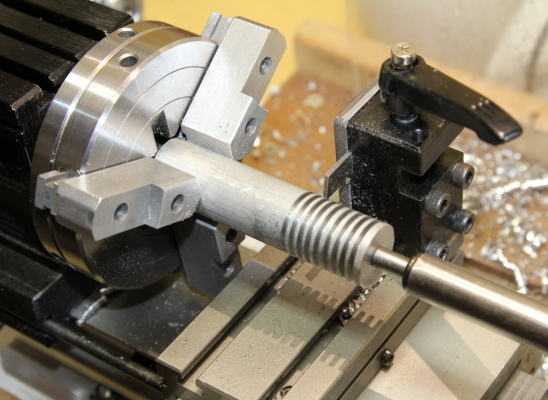
Next up is making the heatsink. I decided to cut enough stock to make three, but cutting all the grooves is tedious. I got this far and felt the need for a cup of tea and a sit down!
The heat sink will have a M7 threaded hole all the way through, the heat break screws into the bottom and then a long throat screws into the top. Above the heat sink the throat is smooth so that it can easily slide into an aluminum clamp in the X carriage. With in-line connectors in the heater and thermistor wiring I should be able to quick change the entire hot end in a few seconds. So much for the theory, it will be interesting to see if it works in practice

|
Re: In progress - hotend February 27, 2016 09:52PM |
Registered: 10 years ago Posts: 466 |
|
Re: In progress - hotend February 27, 2016 10:13PM |
Registered: 9 years ago Posts: 1,873 |
Yes, it's standard practice on the taig to use a cut-off tool on the back-side of the lathe. I've never been completely convinced I understood why, but it seems to work well enough. The chuck still runs in the normal direction, the blade is upside down in the holder. I've seen it suggested that the tool holder is more stable in tension than compression.
The 3mm version has been working pretty well, so fingers crossed for this one. To be honest, I'm being far from original with this, just picking and choosing a few well tested ideas and throwing them together. At the moment the heatsink on the working version is passively cooled, but I intend to add a fan. Then it will look even more like an e3d design.
I'd like to try making some nozzles, but the (Canadian) exchange rate and the price of shipping makes brass hex stupidly expensive at the moment. I suspect it's actually cheaper to just buy Chinese nozzles

|
Re: In progress - hotend February 27, 2016 10:39PM |
Registered: 8 years ago Posts: 1,671 |
or brass dome nuts and add the hole, I'm making a hotend too, I know I might need another sometime soon, so wanted to try out similar throat to yours, they do one that's plain 7mm after the heatbreak, [www.ebay.co.uk]
but I want mine to go through the block to other side and add the female nozzle on the throat, a longer version of this nozzle,
[www.ebay.co.uk]
ptfe all the way to nozzle, and maybe one without. just to see if that makes any difference, though i'm worried about the spread of heat, and if melt zone would be good enough, also thinking about ditching the cold end as carriage is alu' or add a little heatsink in there.
was also thinking of adding m6 copper nuts to keep or guide(bridge) heat from throat to the cold end, still waiting for the nozzle and true copper nuts are a little pricey and not sure if i'll need them or if they would work as I imagine.
|
Re: In progress - hotend February 28, 2016 07:02AM |
Registered: 9 years ago Posts: 1,873 |
Ah, the endless possibilities! Half the problem with this hobby is cutting down the choices and getting started making anything. Once I get over that hump things always feel better, but sometimes I just feel paralysed by the empty sheet of paper 
This hotend is going to need a ptfe liner as the heat breaks are sized for it. The 3mm hotend doesn't have one and seems to work fine without, so I quite like the idea of getting a suitably sized heat break and trying an all metal in 1.75. It would be nice not to have to worry about frying the liner.

This hotend is going to need a ptfe liner as the heat breaks are sized for it. The 3mm hotend doesn't have one and seems to work fine without, so I quite like the idea of getting a suitably sized heat break and trying an all metal in 1.75. It would be nice not to have to worry about frying the liner.
|
Re: In progress - hotend February 28, 2016 08:39AM |
Registered: 8 years ago Posts: 1,671 |
I'm wishing I had a little lathe like that but fear I would be scratching my head a little too, as most of the stuff I want to do needs a mill, the great thing about trying to cobble together a little all metal hotend is, it's quite cheap to buy all the little parts, a cheap little side project.
|
Re: In progress - hotend February 28, 2016 08:44AM |
Registered: 9 years ago Posts: 893 |
The lathe runs in the normal direction, but the tool is upside-down at the back. In the normal setup the forces try to push the chuck up during parting off or groove cutting - generally trying to push the tool away from the work. Doing it this way pulls the work down into the bed - everything stays together much better.
|
Re: In progress - hotend February 28, 2016 08:50AM |
Registered: 10 years ago Posts: 466 |
I asked because I saw a video the day before you posted. the reason they gave was that the blade kicks out instead of getting pulled in, so it does not bite your work peice. I'm new to lathe work, picked mine up over Chirstmas, and am learning to use it.Quote
JamesK
Yes, it's standard practice on the taig to use a cut-off tool on the back-side of the lathe.
Back to topic...
The problems I have run into with is heat creap with PLA. They work well for 15-30 minutes then jam. Material does not seem to make a difference, aluminum, brass, stainless, polished or not. I have not tried copper, but would expexct it to work like brass. I have also tried a 6mm stainless hex head bolt turned down for a nozzel, turned to look like the e3d nozzel. The .4 mm hole was not fun however. I have been looking for brass bolts, but local hardware places don't have them, and metric is hard enoughto find in the US. In the end I ended up with a PTFE liner.
|
Re: In progress - hotend February 28, 2016 09:47AM |
Registered: 10 years ago Posts: 14,672 |
Quote
MechaBits
I'm wishing I had a little lathe like that but fear I would be scratching my head a little too, as most of the stuff I want to do needs a mill, the great thing about trying to cobble together a little all metal hotend is, it's quite cheap to buy all the little parts, a cheap little side project.
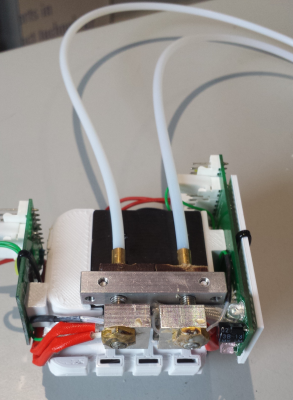
You might want to take a look at the hot end design that ReprRapPro used in their kits. It uses a one-piece stainless steel nozzle/heat break, an aluminium heater block rather like the one pictured at the start of this thread, and a small heatsink block that accommodates 1 or 2 nozzles. The heatsink block is screwed to a 40mm square finned heatsink which I presume is a standard part, and the same screws secure a 40mm fan to the front of the heatsink. See [reprappro.com] for more details.
Here is a picture of a similar dual nozzle one that I made. The black part is the heatsink.
Large delta printer [miscsolutions.wordpress.com], E3D tool changer, Robotdigg SCARA printer, Crane Quad and Ormerod
Disclosure: I design Duet electronics and work on RepRapFirmware, [duet3d.com].
|
Re: In progress - hotend February 28, 2016 10:48AM |
Registered: 8 years ago Posts: 1,671 |
Yeah nice throat, all the way down to the tip...
and the brass bell end / copper cap, keeping tip hot,
looks like the perfect tool ready for action,
I'm sure this thing could squirt all day without breaking into a sweat.
( dont get to say that very often

I'm wondering if female engineers might have an alternate solution to this problem.
I've seen those long alu' bars on ebay, was tempted, but held back as I may not need as my carriage sort of performs same function.
Mine looking like this at the moment, still waiting on nozzle, heatsinks too big.
Now if I can just get round the 90deg bend to nozzle, that would hit the spot.
Edited 1 time(s). Last edit at 02/28/2016 01:18PM by MechaBits.
|
Re: In progress - hotend February 28, 2016 11:55AM |
Registered: 9 years ago Posts: 1,873 |
Quote
MechaBits
I'm wishing I had a little lathe like that but fear I would be scratching my head a little too, as most of the stuff I want to do needs a mill, the great thing about trying to cobble together a little all metal hotend is, it's quite cheap to buy all the little parts, a cheap little side project.
Yes, the moment you get a lathe you start wanting a mill. I've have the milling attachment for the Taig, and it's serviceable enough for small work. I've even pushed the limits a bit to do some larger parts, but that gets frustrating pretty quickly.
The new hotend has gone together well. Just running a couple of test prints.
Quote
The problems I have run into with is heat creap with PLA. They work well for 15-30 minutes then jam. Material does not seem to make a difference, aluminum, brass, stainless, polished or not. I have not tried copper, but would expexct it to work like brass. I have also tried a 6mm stainless hex head bolt turned down for a nozzel, turned to look like the e3d nozzel. The .4 mm hole was not fun however. I have been looking for brass bolts, but local hardware places don't have them, and metric is hard enoughto find in the US. In the end I ended up with a PTFE liner.
Yes, my first attempts at the 3mm hotend couldn't cope with PLA. The solution was some combination of using the stainless steel heat break like the one pictured in my first post, the larger aluminum heat sink and polishing the internals. It was very satisfying once it started working

|
Re: In progress - hotend February 28, 2016 12:27PM |
Registered: 10 years ago Posts: 466 |
Even with stainless heat break and polishing, I couldn't get pla to work consistently. The problem was the transistion zone. It would swell and stick, no matter what I did. I am working on one right now that I am excited about, once I get my new grooving tool, I can get my fins cut and get it tested.
|
Re: In progress - hotend February 28, 2016 01:45PM |
Registered: 9 years ago Posts: 1,873 |
Well, I'm delighted with how that turned out. The quick swap works just the way I hoped it would, and the drive gear seems to grip the smaller filament without any problems.
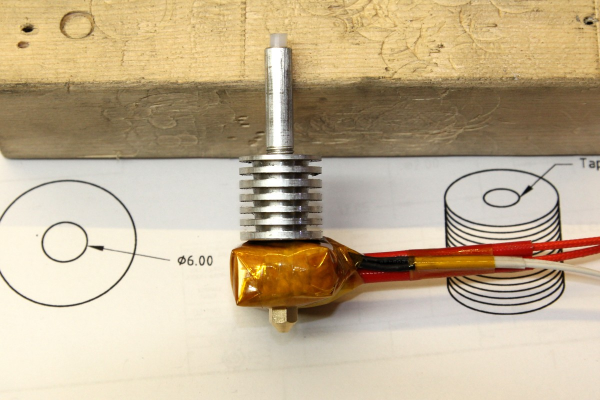
Here's the almost finished hotend. You can see the ptfe liner sticking out of the top - I trimmed it flush and added a bevel with a 1/4" drill. It's the stuff you don't expect that always turns out to be the most difficult, in this case adding the insulation around the heat block. Man was that fiddly and annoying!
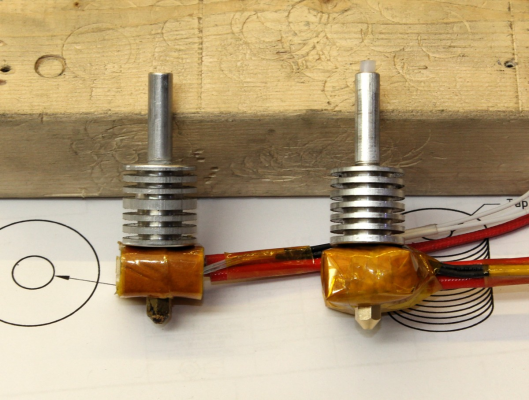
And here it is beside the 3mm version that I did first. The 3mm one (on the left) uses a commercial heat block that came with a mk8. It was immediately obvious that the new heat block gives much more stable temperature regulation than that one, either because of the better thermal connection between the block and the heater, or because the thermistor is better positioned right between the heater and the nozzle.
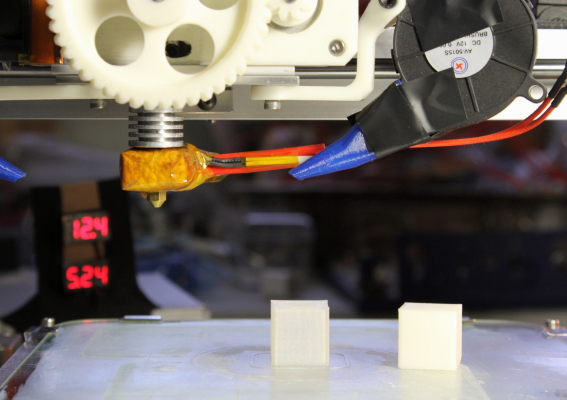
And finally, fitted to the extruder and with the first test prints, one in abs, one pla
So the obvious next task is to come up with a dual extruder design that will take these hotends.
Edited 1 time(s). Last edit at 02/28/2016 01:45PM by JamesK.
Here's the almost finished hotend. You can see the ptfe liner sticking out of the top - I trimmed it flush and added a bevel with a 1/4" drill. It's the stuff you don't expect that always turns out to be the most difficult, in this case adding the insulation around the heat block. Man was that fiddly and annoying!
And here it is beside the 3mm version that I did first. The 3mm one (on the left) uses a commercial heat block that came with a mk8. It was immediately obvious that the new heat block gives much more stable temperature regulation than that one, either because of the better thermal connection between the block and the heater, or because the thermistor is better positioned right between the heater and the nozzle.
And finally, fitted to the extruder and with the first test prints, one in abs, one pla

So the obvious next task is to come up with a dual extruder design that will take these hotends.
Edited 1 time(s). Last edit at 02/28/2016 01:45PM by JamesK.
|
Re: In progress - hotend March 01, 2016 12:28PM |
Registered: 9 years ago Posts: 1,873 |
Quote
cat.farmer
Even with stainless heat break and polishing, I couldn't get pla to work consistently. The problem was the transistion zone. It would swell and stick, no matter what I did. I am working on one right now that I am excited about, once I get my new grooving tool, I can get my fins cut and get it tested.
Ah, you were right. The 1.75mm hotend still suffers from heat creep with PLA
 It looks like there's still a small gap between the ptfe liner and the heat break that the swollen plastic gets jammed in. Looks like I might have to get some stainless steel rod so that I can make my own heat breaks.
|
Re: In progress - hotend March 01, 2016 12:55PM |
Registered: 8 years ago Posts: 1,671 |
Quote
JamesK
Quote
cat.farmer
Even with stainless heat break and polishing, I couldn't get pla to work consistently. The problem was the transistion zone. It would swell and stick, no matter what I did. I am working on one right now that I am excited about, once I get my new grooving tool, I can get my fins cut and get it tested.
Ah, you were right. The 1.75mm hotend still suffers from heat creep with PLAIt looks like there's still a small gap between the ptfe liner and the heat break that the swollen plastic gets jammed in. Looks like I might have to get some stainless steel rod so that I can make my own heat breaks.
This is the part that concerns me too, which is why I was hoping that the copper nut near the hotend would draw the heat, in my case it would be the brass nozzle complete(not as good as copper though), and then also around the heatbreak I was hoping to add the copper nut as an interface with heatsink, hoping it would draw heat from top of throat to heatsink quicker than the temp rise in the liner, (but wonder because of its ability to draw heat makes it a hotpot unless the heatsink & fan help) but also the throat at top still connected to heatsink, but pulling too much from heatsink could also cause other issues?
my logic suggests that once throat gets to a certain temp your into problems, so I'm wondering how having the steel throat/nozzle combo in above pic works, I dont see how having a few mm shaved from throat actually creates a break, I would have thought the thinner section of throat gets hotter quicker than thicker parts?
Another part of the problem is the brass throat I have my eye on because of its length, might be worse that steel one.
Edited 2 time(s). Last edit at 03/01/2016 03:26PM by MechaBits.
|
Re: In progress - hotend March 01, 2016 06:10PM |
Registered: 9 years ago Posts: 1,873 |
Quote
my logic suggests that once throat gets to a certain temp your into problems, so I'm wondering how having the steel throat/nozzle combo in above pic works, I dont see how having a few mm shaved from throat actually creates a break, I would have thought the thinner section of throat gets hotter quicker than thicker parts?
You can think of heat flowing through a piece of metal as roughly like water flowing through a pipe, more pressure gives faster flow, and a bigger diameter also gives faster flow. Water pressure translates to difference in temperature and pipe diameter is equivalent to cross sectional area. So the thin part of a heat break reduces the cross sectional area at that point, and less metal means less ability to conduct heat from the heater block. In an ideal world the heater block would just float in a vacuum, with no path to lose heat except by melting the filament and extruding it onto the print. But since that's a bit impractical the smallest cross section of steel that's strong enough to avoid breaking will have to do

I removed the extruder just now and discovered that the ptfe liner had slipped back out of the heat break. I can't know for sure if that happened before or after the jam, but if it happened before it would certainly explain the gap that the pla expanded into. I was hoping that friction along the length of the throat and heat break would be enough to keep the ptfe in place, but I guess I'll have to try another throat with a reduced diameter at the top to hold the liner in place. I'm not keen on using steel for the nozzle (unless you're using a lot of abrasive filaments and getting too much wear with brass), but that one piece throat and nozzle design sure would be nice from the point of view of not having any joints for the pla to get stuck in.
|
Re: In progress - hotend March 01, 2016 09:15PM |
Registered: 8 years ago Posts: 1,671 |
Flow, Draw, Convection, heat rising, gradients, yes get all that, a little easier to for me visualize than the flow of electricity, hopefully the 'cut' keeps the heat backed up at the gate, and any heat that jumps the gate gets clobbered by the heatsink... you would just think a few mm from throat wouldnt make much difference, and if it does, then maybe another wider bore on the inside, keeping the ptfe away from throat walls.
Of course I see the ideal way for the hotend would be held in space, (time to get the magnets out again not much use on alu' though...
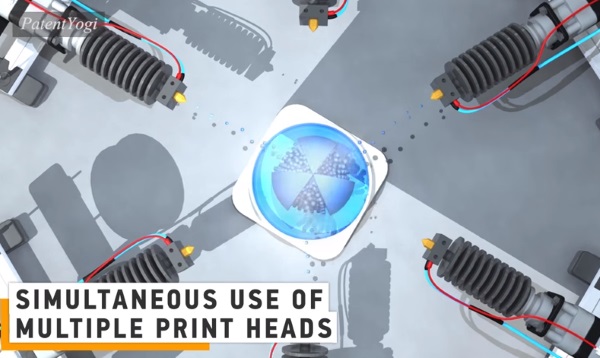
might have to talk to Boeing to figure out how to levitate stuff, and why they have used cheap clone hotend design in their animations and not some proprietary device design.
[www.3ders.org]
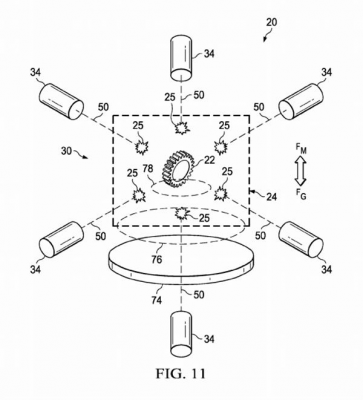
This has to be a joke submission April fools, the graphics are so bad...as is the support for the hotends...why would they need to move if the part was levitating?
"The 3D printed object could be “levitated” in a number of ways. The Boeing patent claims ownership over any 3D printing process “wherein levitating the part is performed by acoustic levitation” or “magnetic levitation”, whilst “quantum levitation and electrostatic levitation” are also mentioned. Magnetic levitation would, according to the patent, necessitate “super-cooling the part, and subjecting the part to a magnetic field that produces a magnetic force repelling the part.”
If its real they are trying to stifle printing in space, with antiquated earth bound patent system.
Of course I see the ideal way for the hotend would be held in space, (time to get the magnets out again
 not much use on alu' though...
might have to talk to Boeing to figure out how to levitate stuff, and why they have used cheap clone hotend design in their animations and not some proprietary device design.
[www.3ders.org]
This has to be a joke submission April fools, the graphics are so bad...as is the support for the hotends...why would they need to move if the part was levitating?
"The 3D printed object could be “levitated” in a number of ways. The Boeing patent claims ownership over any 3D printing process “wherein levitating the part is performed by acoustic levitation” or “magnetic levitation”, whilst “quantum levitation and electrostatic levitation” are also mentioned. Magnetic levitation would, according to the patent, necessitate “super-cooling the part, and subjecting the part to a magnetic field that produces a magnetic force repelling the part.”
If its real they are trying to stifle printing in space, with antiquated earth bound patent system.
|
Re: In progress - hotend March 02, 2016 07:57AM |
Registered: 9 years ago Posts: 1,873 |
Those are some wild ideas, surely they can't be serious?
The thin area on the heat break makes a pretty big difference to the cross sectional area at that point, so it's a pretty effective way of reducing the heat loss out of the block. That said, I measured the temperature of the heat sink and it was in the 80 to 90C range, which is still way too hot for pla. I'll take another lead from e3d and move the fan to the heatsink (which sounds so obvious that it merits a 'doh!', but the current arrangement is like the mk8 with the fan cooling the aluminum block that the throat mounts in).
I made a new upper throat with a lip to retain the liner and that worked well enough to get through a moderately complex print, but I suspect that with the current high temperatures on the heat sink a print with a slower rate of extrusion and a little more retraction would still be likely to fail.
Edited 1 time(s). Last edit at 03/02/2016 07:58AM by JamesK.
|
Re: In progress - hotend March 02, 2016 08:51AM |
Registered: 8 years ago Posts: 1,671 |
One of those FLIR cams would come in handy for testing and analyzing, and would make a great printing video,
I'm hoping to start with 1.75PLA so really dont want to run into these problems, my PTFE tupe is 4mm OD,(so would like the throat ID to be at least 5mm, or get another material to shroud it) I want to shove it as far as needed down throat, and ideally if it was only gripped in one or 2 points, I would hope the heat would take the easy route away from Liner/bowden tube.
I'm hoping to start with 1.75PLA so really dont want to run into these problems, my PTFE tupe is 4mm OD,(so would like the throat ID to be at least 5mm, or get another material to shroud it) I want to shove it as far as needed down throat, and ideally if it was only gripped in one or 2 points, I would hope the heat would take the easy route away from Liner/bowden tube.
|
Re: In progress - hotend March 02, 2016 09:09AM |
Registered: 9 years ago Posts: 1,873 |
Quote
One of those FLIR cams would come in handy for testing and analyzing, and would make a great printing video,
Yeah, it sure would. Wish they were cheaper.
Quote
ideally if it was only gripped in one or 2 points
That's an interesting idea. I made mine a close (but easy) fit. The 3mm hotend seems to work fine without a liner, so I think I'd make the 1.75mm the same way if it wasn't for the fact that the heat breaks I have are designed to take a liner. The key thing is to have as smooth a bore as possible from the melt zone to above the point where the filament softens enough to expand. If you can do that with as few joints as possible then the more chance you have of things working well. For pla temperatures you can take the ptfe liner down into the heat block so there's just the one joint, but that get's a bit dodgy if you want to also use high temp plastics.
The heat breaks I got seem to be the worst of all worlds - the narrow section is too thin to drill out the bore to take the liner all the way down, and they already drilled out the top part all the way to the top of the narrow section, so I can't stop the liner at the top of the heat break. I'm forced to have the joint at the worst place, just above the narrow section, before the heat sink has had much chance to drop the temperature.
Oh well, I just dropped the cash on some more metal stock, including some stainless tube, so maybe I can try a few alternative designs once that arrives

|
Re: In progress - hotend March 02, 2016 09:46AM |
Registered: 8 years ago Posts: 1,671 |
One of the benefits of being a late adopter in this game, I was hoping I would gain from would be the ideal nozzle, but maybe whichever is going to have some issues at some point, I wonder if there is another layer that could be added to help, a compound or something like this
[www.ebay.co.uk]
or this hot damn [www.youtube.com]
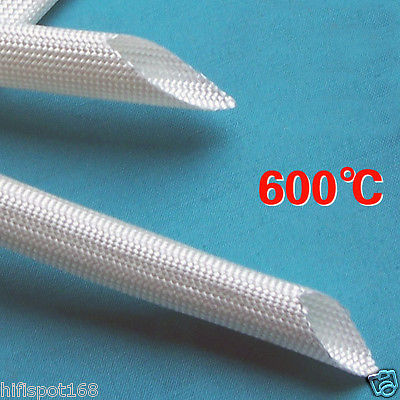
or some of this to make things look like a spaceman suit
[www.ebay.co.uk]
or [www.ebay.co.uk]
or [www.ebay.co.uk]
or this [www.ebay.co.uk] or a mix of all of them.
Some of this, around a glass fiber rod with ptfe inside, with heat damn applied too...could be good.
maybe squeeze a bit of this in too [www.ebay.co.uk] and this too [www.ebay.co.uk]
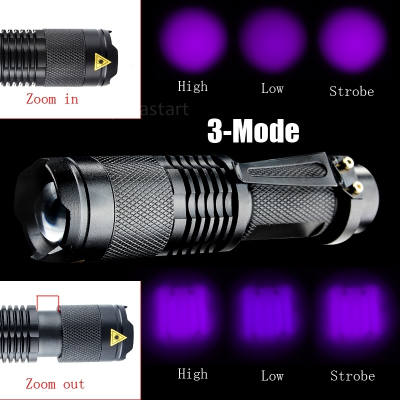
I'm thinking my next hotend needs to be a UV laser, and I'm thinking of canna'balizing one of these for £2.29 how do they do it!
just need a focus module to project a dot.
Edited 5 time(s). Last edit at 03/02/2016 12:16PM by MechaBits.
[www.ebay.co.uk]
or this hot damn [www.youtube.com]
or some of this to make things look like a spaceman suit
[www.ebay.co.uk]
or [www.ebay.co.uk]
or [www.ebay.co.uk]
or this [www.ebay.co.uk] or a mix of all of them.
Some of this, around a glass fiber rod with ptfe inside, with heat damn applied too...could be good.
maybe squeeze a bit of this in too [www.ebay.co.uk] and this too [www.ebay.co.uk]
I'm thinking my next hotend needs to be a UV laser, and I'm thinking of canna'balizing one of these for £2.29 how do they do it!
just need a focus module to project a dot.
Edited 5 time(s). Last edit at 03/02/2016 12:16PM by MechaBits.
|
Re: In progress - hotend March 02, 2016 06:26PM |
Registered: 10 years ago Posts: 466 |
The heat issue is a tough nut to crack. While the heat break is an innovative solution, it is stll a matter of removing the heat created by the heat source, to keep thing in equilibrium. And do it in the right location. I too wish I had access to a flir camera. For just that purpose. I have built a 5 channel (probe) temperature monitor that i built and can read temps at different points, and down the throat of the hotend.
MechaBits - I would guess that adding insulation inside the hotend would only slow the heat creep to the filament, you would still need to control the extraction of heat buildup.
MechaBits - I would guess that adding insulation inside the hotend would only slow the heat creep to the filament, you would still need to control the extraction of heat buildup.
|
Re: In progress - hotend March 02, 2016 07:03PM |
Registered: 8 years ago Posts: 1,671 |
Yes of course, steel is slower than copper & alu, so i'd keep all that just want to shield the ptfe from the steel, and I think a couple of those things above could work in connjuction, i'd have the ptfe((4-2) inside fibreglass tube (6-4) and instead of thermal compound stick some of that hotdamn in there, then some of that braided alu stuff(6mm) thermal grease to aid getting residual heat to the heatsink.
Sorry just read my post and I'm kinda just repeating.
Though I think the main issue with this heat creep is not from heat coming inwards from throat,
but the whole laminated tube acting like a straw, and the filament helping with that too, maybe some heat damn, or other material spread on the end, hat could harden & form another barrier?
Edited 2 time(s). Last edit at 03/02/2016 07:17PM by MechaBits.
|
Re: In progress - hotend March 03, 2016 01:46PM |
Registered: 9 years ago Posts: 1,873 |
Quote
Though I think the main issue with this heat creep is not from heat coming inwards from throat, but the whole laminated tube acting like a straw, and the filament helping with that too
I suspect it varies a bit depending on the usage. With high extrusion rates there's a continuous flow of cold filament down into the melt zone. Particularly with 1.75mm filament the high linear rate of movement of the filament is likely faster than heat can travel back up the plastic, so for this case I think the primary problem is heat moving up the steel heat break. For this, your idea of insulating the filament and ptfe from the throat would probably work well (but makes things a bit more bulky). On the other hand, at low extrusion rates like you can get with 3mm filament, and in conjunction with a lot of short extrusions with retraction, then heat moving back up the filament may well be a significant problem, so insulating the filament from the throat (which is itself being cooled by the heatsink) might be counter-productive.
|
Re: In progress - hotend March 03, 2016 01:49PM |
Registered: 10 years ago Posts: 466 |
that last post was a mess- remind me not to post things while sitting at the bar..
I was thinking of hi-temp silicon as an insulator, not sure how conductive (or non conductive) it is though.
I find it hard to get any solid information on what the best design is for a hotend. In my strolls through the web, you can read long transition zones are better, short transition zones are better, this metal over that metal. about the only truth I have come across is polished barrels work the best, which is almost a DUH statement. I think Nophead had the most through information, but it was contradicted by someone else’s testing, and with all of the designs out there you'd think that there would be some sort of consensus on what works best. I find the e3d v6 is maybe the most soild of hotends. yeah, I know, that is just my opinion. but I have had some really crappy hotends over the years. Even the ones that worked well had there short commings, PEEK/PFTE body's.
My current work is about expanding the capibilites of the hotend, and not so much in trying to reinvent the wheel, but with out a good round wheel to work from, you almost have to start at the beginning.
|
Re: In progress - hotend March 03, 2016 02:01PM |
Registered: 9 years ago Posts: 1,873 |
One of the things that I discovered when I switched from 1.75mm filament to 3mm was that a lot of things that I thought I knew were actually only applicable under some circumstances. I think a lot of the conflicting information around reflects that fact - things that are absolutely true for one usage scenario are blatantly not true in other scenarios. Add in the fact that 3d printing is the art of balancing competing compromises, and everyone has different views on which compromises are more important, and there's plenty of room for confusion!
Edited 1 time(s). Last edit at 03/03/2016 02:02PM by JamesK.
Edited 1 time(s). Last edit at 03/03/2016 02:02PM by JamesK.
|
Re: In progress - hotend March 03, 2016 02:10PM |
Registered: 8 years ago Posts: 1,671 |
|
Anonymous User
Re: In progress - hotend March 06, 2016 04:39AM |
Quote
JamesK
Yes, it's standard practice on the taig to use a cut-off tool on the back-side of the lathe. I've never been completely convinced I understood why, but it seems to work well enough. The chuck still runs in the normal direction, the blade is upside down in the holder. I've seen it suggested that the tool holder is more stable in tension than compression.
The 3mm version has been working pretty well, so fingers crossed for this one. To be honest, I'm being far from original with this, just picking and choosing a few well tested ideas and throwing them together. At the moment the heatsink on the working version is passively cooled, but I intend to add a fan. Then it will look even more like an e3d design.
I'd like to try making some nozzles, but the (Canadian) exchange rate and the price of shipping makes brass hex stupidly expensive at the moment. I suspect it's actually cheaper to just buy Chinese nozzles
It is to avoid the tool to dig in the part due to the various "play" and lack of rigidity.
I too am looking to repalce the hotend I got in the Geetech kit. I am amazed, either they can't copy properly or don't think. Wrong way to secure the heater in a 6.35 hole for a 6 diam heater, thermistor at the wrong place, teflon tube goes up to the extruder nozzle, no heat barrier, cooling at the wrong place no smooth entry throat.... and a pain to remove from the extruder head.... Yet it works with PLA

Why do you use M7 for the nozzle ? Isn't the standard M6 ?
Two M3 screws would be better to squeeze the heater block to avoid warping.
I installed the thermistor on the other side of the extruder almost touching the nozzle thread , not between the heater and extruder.
I see your teflon tube at the top, how do you prevent it from getting pushed out due to the pressure ?
How did you polish the inside ? Is it conical or straight hole ?
I am also considering the use of fiber glass, silicone tubing to cut the heat transfer instead of PTFE but it need to be lined for smoothness, may be a very thin (0.1) stainless tube ?
|
Re: In progress - hotend March 06, 2016 07:47AM |
Registered: 9 years ago Posts: 1,873 |
Quote
MKSA
I too am looking to repalce the hotend I got in the Geetech kit. I am amazed, either they can't copy properly or don't think. Wrong way to secure the heater in a 6.35 hole for a 6 diam heater, thermistor at the wrong place, teflon tube goes up to the extruder nozzle, no heat barrier, cooling at the wrong place no smooth entry throat.... and a pain to remove from the extruder head.... Yet it works with PLA
Heh, yes that sums it up. Improving the thermal transfer between the heater and the block makes a big difference, you can go a long way with just adding high temperature thermal paste to the existing block, but if you are making your own the clamp design is clearly better. Taking the ptfe all the way to the nozzle is actually a pretty good approach (if you don't need to take the hotend temperature too high). The real nightmare with pla is a joint at a place where the pla is below glass temperature but warm enough to soften and conform to any gap. Down at the nozzle joint you can be confident that the pla is fully melted, so it can't jam at that point.
Quote
Why do you use M7 for the nozzle ? Isn't the standard M6 ?
The stainless throats that I bought came with M6 threads at the nozzle end and M7 for the heatsink end. I think this is probably the E3D v6 design, and I suspect the idea was to increase the contact area between the throat and the heat-sink.
Quote
Two M3 screws would be better to squeeze the heater block to avoid warping.
Agreed, although one seems to be sufficient in practice.
Quote
I installed the thermistor on the other side of the extruder almost touching the nozzle thread , not between the heater and extruder.
Sounds good. I think I will move the thermistor in the next revision as it was a bit fiddly to do (the holes are too close together) and I don't think there's that much benefit from being directly between the heater and nozzle.
Quote
I see your teflon tube at the top, how do you prevent it from getting pushed out due to the pressure ?
Indeed, that was a mistake and it backed out and caused a blockage. I made a new upper throat with the counter bore only part of the way through, leaving about a 2mm section to retain the liner.
For the 3mm version I used a Q-tip (cotton bud) with autosol metal polish to get all the way through the bore, spinning the throats in the lathe. The 1.75mm version, the bore is too small to get into with anything I had to hand, but fortunately the stainless throat seemed to be already pretty smooth, and the aluminum upper throat has the ptfe liner so doesn't need polishing over most of its length. I machined a cone into the top of the upper throat to make filament changes easier, and I polished that with a Q-tip. The question of whether the bottom of the bore in the stainless throats is conical or flat is interesting. I had assumed it was conical as that's the easiest to do, and it's quite difficult to tell visually. However, when I cleaned up sum burs with a drill I noticed that it appeared to be biting more in the center than the edge, suggesting they may have flattened the bottom. I should find some putty or something to take an impression and see what the profile really is down there. I shaped the end of the ptfe to match a standard drill profile, so I hope it's conical down there!Quote
How did you polish the inside ? Is it conical or straight hole ?
Quote
I am also considering the use of fiber glass, silicone tubing to cut the heat transfer instead of PTFE but it need to be lined for smoothness, may be a very thin (0.1) stainless tube ?
Sounds interesting. I still can't figure out if insulating the filament from the throat is a good idea or not. I suspect it depends on the amount of retraction going on.
|
Re: In progress - hotend March 06, 2016 12:00PM |
Registered: 10 years ago Posts: 466 |
Fiberglass is a good choice. while the cloth can handle the temperature, the resin they use to make is stiff can not. They are made from most often epoxy, polyester resin – or vinylester, or a thermoplastic. more info here [en.wikipedia.org] .
I looked at it also, as a heat sheld, but ended up with a ceramic sheet, commonly used in firing ceramics in a kiln. It is thin and a little brittle, but I use a couple of layers covered with Kapton tape, and it works quite well. I picked it up at a local art supplier, for a few dollars.here is what I have, [www.amazon.com]
I agree with JamesK on thermister placement, I tend to have mine on the opposite side of the nozzle, form the heater. but as long as it's not sitting near the heater, I'm not sure it makes a huge difference.
Polishing the 2mm holes, I use a toothpick with polishing compound ( the stuff used on cars) or toothpaste. (umm.. minty fresh) on a dermal.
why silicon tubing over PTFE? - I'm not sure it could stand up to the temperature either.
Sorry, only registered users may post in this forum.
