Home
>
Developers
>
Topic
Did I develop something?
Posted by Milton
|
Did I develop something? September 15, 2016 06:39PM |
Registered: 7 years ago Posts: 59 |
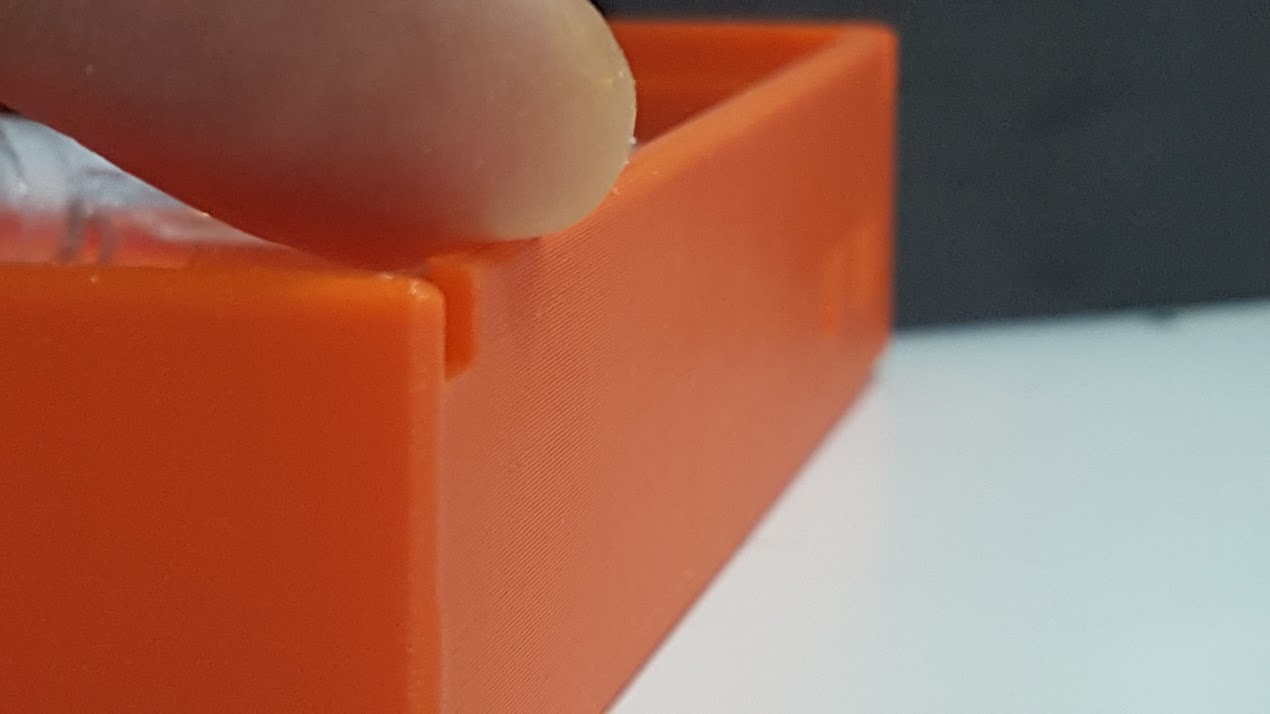
I designed a sliding bushing system that removes the linear rail 'vitamins' from 3d printers, mostly printed and with a filament that is low friction bushings can be printed as well. It uses about the same amount of screws, mostly due to desired alignment of the prints for accuracy of the bushings mounting points. Printed vertically to allow the radiused channel no overhang issues, because of that they are screwed onto the arm mounting part, 4 screws just like mounting an arm mount to a rail carriage. No screws for the rails to the extrusion so save a few there but added a compression adjustment screw and nuts for the compression adjustment, so that balances out somewhat. My metal mass is far lower though.
It removed $80-$100 and a bunch of non printed parts from my Delta design. It seems to function better than rails or V wheels as far as positional accuracy.
It might work really well for laser cutters and smaller cartesian and core x/y printers. Bushings like this could be used pressing into the 4 corners of a metal frame made from L shaped extrusions for a Z travel system on a core xy with very low vitamin count besides the frame.
Details and files here:
[www.thingiverse.com]
Print quality is beyond my expectations. I had only seen print results from my clone i3 and some powder bed printers at the design school I attended. This Delta I built is as good as the $5000+ powder bed printers my school had, from the real world results I am looking at (they were older units, old technology to be fair and honest). Better surface quality, faster printing, just lacking top and bottom surfacing abilities while the sides are better resolution. I am amazed at what I have designed and built, but would like some more experienced peoples thoughts on it. Really hope someone that has built Deltas with rails will try this, I think it could be better than any other solution for systems under an as yet unknown weight and mass. It is designed for light weight, it works excellent as long as the inertia in the linear motion is low. It is designed to complement low weight systems and further reduce moving weight of bearing blocks and steel bearings. I am continuing development for heavier weight hotend and extruder setups, larger bushings in 2020 or 3030 might work with direct drive extruders and multi color hotends.
I welcome suggestions for parts print alignment to lower the vitamin count even further with a single print part replacing the 2x carriages and arm mount causing the need for the 4 screws there. Redesign of the tension/compression system to reduce vitamins might also be possible. I posted this as 'no derivatives non commercial' as some of the remixes and redesigns of things are not so great, and I put a lot of time into researching linear motion, made many prototypes, to ensure they worked well enough that people would be happy with the results not waisting filament. But I would like those that will actually do the effort of real prototyping and offer validated improvements to redesign these at will. I questioned the licensing I chose, I am inexperienced, would it be better to just make it share alike and open to remixes? I want to give back not take anything especially since the Mini Kossel design is offered so generously and no limits were put on my redesigning what I felt necessary. Opinions?
I think it's pretty useful but am inexperienced with actual 'good' FDM printers as far as the better retail units, not much to compare my results to besides images online. I am hoping for some feedback, maybe even a tester of the concept. If it was found to be lacking its only a few $ for bushing material, it can be removed and rails or v-wheels then used, but I am betting most if not all that try it will find it fully functional and stay with the extruded rod bushing carriage design for a smaller printer with a light hotend built for speed and accuracy.
Pictures of print quality attached (links not working?) Results speak for themselves, $2 per carriage in screws and small sections of a delrin 1/4" rod, perfect positional alignment.
album here:
Extruded Rod Bushing Test Results PR1
It is my first prints with a bowden setup so extrusion is not great, but accuracy of the effector is basically flawless.
The cost for this printer is only around $370 before taxes and shipping of the components from the suppliers I used. Could be done cheaper I didn't struggle to find the best sources as I was redesigning the linear motion and didn't want to worry about every little purchasing detail to the point of exhaustion. The Duet pushes the costs up but is well worth it given the linear motion is so inexpensive.
Here is the latest BOM minus the PSU, as I am using an expensive 850w ATX modular that is my benchtop power supply for all projects and the backup for my CAD workstation.
Advice on how to do a better BOM so end users find it self explanatory and simple to follow would be appreciated! Right now its a working BOM to remind me of things, needs to be made into a BOM for an end user. Any good examples links would be of great help for how to do this right.
--------------------------------------------
MiltyKoss AlphaOne Bill of Materials
September 6, 2016
Updated 06/14/2016
Frame and Linear Motion Extrusions:
1x set OpenBeam 1515 Mini Kossel frame extrusions
Printed Parts List:
Frame Corners:
3x MKoss-Frame Motor Corner parts
3x MKoss-Frame Top Corner parts
3x MKoss-Top Corner Cap parts
3x MKoss-Endstop mount parts, or design your own for your endstops, holes for mounting are provided and it is a simple upgrade to change the size and position (Mine are the green ones with the rollers, very nice little endstops!)
MiltyKoss Rod Bushing Carriages:
Printed Parts List:
3x MKoss-Arm Mount V5 or current version (alternately print StockMiniKosselArmMount65mm and 6x Adaptor spacer parts for use of carriages with stock MK)
6x Mkoss-Rod Bushing Carriage parts
Rod Bushing Material:
12x 10mm or ¾” sections of Delrin or PTFE solid extruded rod. Available online or at plastic suppliers. Very inexpensive, 1 foot, enough for 12 bushings with room for cutting, is anywhere from $2 to $8 USD online. V Wheels start at around $10 for a set so the RBC is cheaper than the cheapest roller wheels, and performs hopefully much better, need to test this part.
Fittings and Fasteners List:
Rod Bushing Carriages:
6x M3x35mm screws
12x M3x12mm screws (must not be longer than 12mm, seriously!)
30x M3 5.5mm hex nuts, see detailed build instructions for variations such as brass inserts for some of these.
Frame Fasteners:
36x M3x8mm Hex CAP screws are prefered, these eliminate the difficult placement of M3 nuts or M3 tapped T slot nuts in the T slots. The screws stick out and are easily arranged and the extrusions attached to the frame corner, using 36x M3 threaded nuts to secure them. It can be reversed as the original MK is, nuts in the T slot, but I found that tedious compared to just lining up the screws and sticking them through the holes in the frame corners, attaching the extrusion easily.
6x M3 25mm-30mm screws for the top caps and endstop mounts, 6x M3 nuts to secure them
3x M3 30mm-35mm screws for the tension and compression lock at the top of each GT2 belt
3x M3 35mm screws for the Belt Pulleys, 3x M3 5.5mm hex nuts press fit into Top Frame Corner part and secure pulley axle 35mm screws. Extra hardware is needed to space the pulleys. 1mm printed washers filed to a cone on one side and brass inserts work well to space the bearings flanges and not contact the spinning parts.
Recommended Electronics and Hardware costs:
Duet $130
Mini IR Sensor $25
Mini Hotend $50
Nice Endstops with contact rollers $10
Zyltech Stepper Motors $45
OpenBeam 1515 kit $34
Bowden tube kit off Amazon with fittings $8
GT2 belts and top pulleys x3 $20
Stepper Motor belt drive gears x3 $10
Drive gear for printed B’struder $5
Printed frame corners $5-10 including misprints, worst case conservative estimate
Screws, nuts, bolts (cap head screws) enough for extras and other projects $20-30
Edited 1 time(s). Last edit at 09/15/2016 06:41PM by Milton.
|
Re: Did I develop something? September 16, 2016 12:03AM |
Registered: 10 years ago Posts: 580 |
Well, yes you did!
You have done a very fine job. Congratulations!
Excellent job on the write-up too.
I really do like your innovation with the rods as bearings. Elegant. And if they wear a bit, just rotate them...
My printer: Raptosaur - Large Format Delta - [www.paulwanamaker.wordpress.com]
Can you answer questions about Calibration, Printing issues, Mechanics? Write it up and improve the Wiki!
|
Re: Did I develop something? October 05, 2016 06:37PM |
Registered: 7 years ago Posts: 59 |
Thank you very much Paul!
Something interesting and possibly revolutionary about this system, zero lubrication needed, it is producing perfect accuracy and no wear on the bushings after a few spools of filament. No lubrication involved in the bushing system at all. Tried some silicon RC differential grease but wiped it off after a few minutes of testing by hand feeling the resistance, it seemed to make no difference and just be cleaned away from the contact area by the bushings. They self clean the rail with minimal friction. Full contact and slight pressure don't allow stuff to go under them and mess up the accuracy. after the silicone test I watched for it and the bushings self clean the track nicely.
This system makes a 3d printer in a warm or dusty environment, equatorial latitudes and disadvantaged economies, much more possible at a much lower price initially and in maintenance costs. It is still working far better than expected, now impressing with the delrin wear profile and ability to self clean the area it slides on with light pressure. Have not had to adjust compression even with printed thumb screws and threads in PLA. The off axis forces at work in Delta motion with smooth ball joints are such that this system appears to be just enough ability to slide easily and much better positional accuracy than most bearing based systems, far better than cheaper ones that are still far more expensive than this.
$5 (in delrin I already had from a mini plastic model engine machining project), have perfect linear motion system that rivals $100+ in rails and carriages. Confirmed from testing and print results.
good accuracy, still working on extrusion and temps.
It made the stairs and all the features perfectly, just gota get the flow right.
Great surfaces, .2 layer 60mm/s speed outer wall at 50% or 30mm/s
Great accuracy at the far edges of build area, carriages work perfectly.
Time lapse of a print, last 4 of 6 hours or so as I recall.
[www.youtube.com]
Making a second unit now, thinking of selling them at cost in 3rd world through some humanitarian agency for prosthetics etc in impoverished areas where precision bearings suffer from environmental issues (dust and heat are things that ruin bikes and carts wheel hubs in Africa and makes basic commerce and transportation very difficult according to bamboobike.org).
Something interesting and possibly revolutionary about this system, zero lubrication needed, it is producing perfect accuracy and no wear on the bushings after a few spools of filament. No lubrication involved in the bushing system at all. Tried some silicon RC differential grease but wiped it off after a few minutes of testing by hand feeling the resistance, it seemed to make no difference and just be cleaned away from the contact area by the bushings. They self clean the rail with minimal friction. Full contact and slight pressure don't allow stuff to go under them and mess up the accuracy. after the silicone test I watched for it and the bushings self clean the track nicely.
This system makes a 3d printer in a warm or dusty environment, equatorial latitudes and disadvantaged economies, much more possible at a much lower price initially and in maintenance costs. It is still working far better than expected, now impressing with the delrin wear profile and ability to self clean the area it slides on with light pressure. Have not had to adjust compression even with printed thumb screws and threads in PLA. The off axis forces at work in Delta motion with smooth ball joints are such that this system appears to be just enough ability to slide easily and much better positional accuracy than most bearing based systems, far better than cheaper ones that are still far more expensive than this.
$5 (in delrin I already had from a mini plastic model engine machining project), have perfect linear motion system that rivals $100+ in rails and carriages. Confirmed from testing and print results.

good accuracy, still working on extrusion and temps.

It made the stairs and all the features perfectly, just gota get the flow right.

Great surfaces, .2 layer 60mm/s speed outer wall at 50% or 30mm/s

Great accuracy at the far edges of build area, carriages work perfectly.
Time lapse of a print, last 4 of 6 hours or so as I recall.
[www.youtube.com]
Making a second unit now, thinking of selling them at cost in 3rd world through some humanitarian agency for prosthetics etc in impoverished areas where precision bearings suffer from environmental issues (dust and heat are things that ruin bikes and carts wheel hubs in Africa and makes basic commerce and transportation very difficult according to bamboobike.org).
|
Re: Did I develop something? October 10, 2016 01:52PM |
Registered: 9 years ago Posts: 1,873 |

|
Re: Did I develop something? October 10, 2016 08:17PM |
Registered: 7 years ago Posts: 7 |

|
Re: Did I develop something? December 10, 2016 10:03PM |
Registered: 7 years ago Posts: 59 |
I am not sure what you mean by 'printed in the wrong direction', can you clarify that? printer works great, far better than expected, don't see any issues with 'wrong direction' except once plugging Y and Z stepper in to the wrong ports on the controller which made text backwards and upside down, all objects mirrored, for like 3 prints until I caught it. The one in the image with black PLA not being one of them, orange benchy possibly has reversed text though it may be from that initial testing.
Sorry, only registered users may post in this forum.