Hilfe bei Configuration.h für umgebauten Chinadrucker (mbot 3d)
geschrieben von reneh71
|
Hilfe bei Configuration.h für umgebauten Chinadrucker (mbot 3d) 29. September 2018 08:25 |
Registrierungsdatum: 5 Jahre zuvor Beiträge: 3 |
Hallo zusammen,
ich habe vor 5 Jahren einen Chinadrucker (mbot 3d) gekauft. Jetzt habe ich ihn auf Alu-Profil-Rahmen umgebaut und das Mighty Board gegen ein MKS-base V1.5 Board (RAMPS 1.4) ausgetauscht. Ich versuche nun seit Wochen den Drucker bzw. die Configuration.h zum laufen zu bringen. Es gelingt mir einfach nicht.
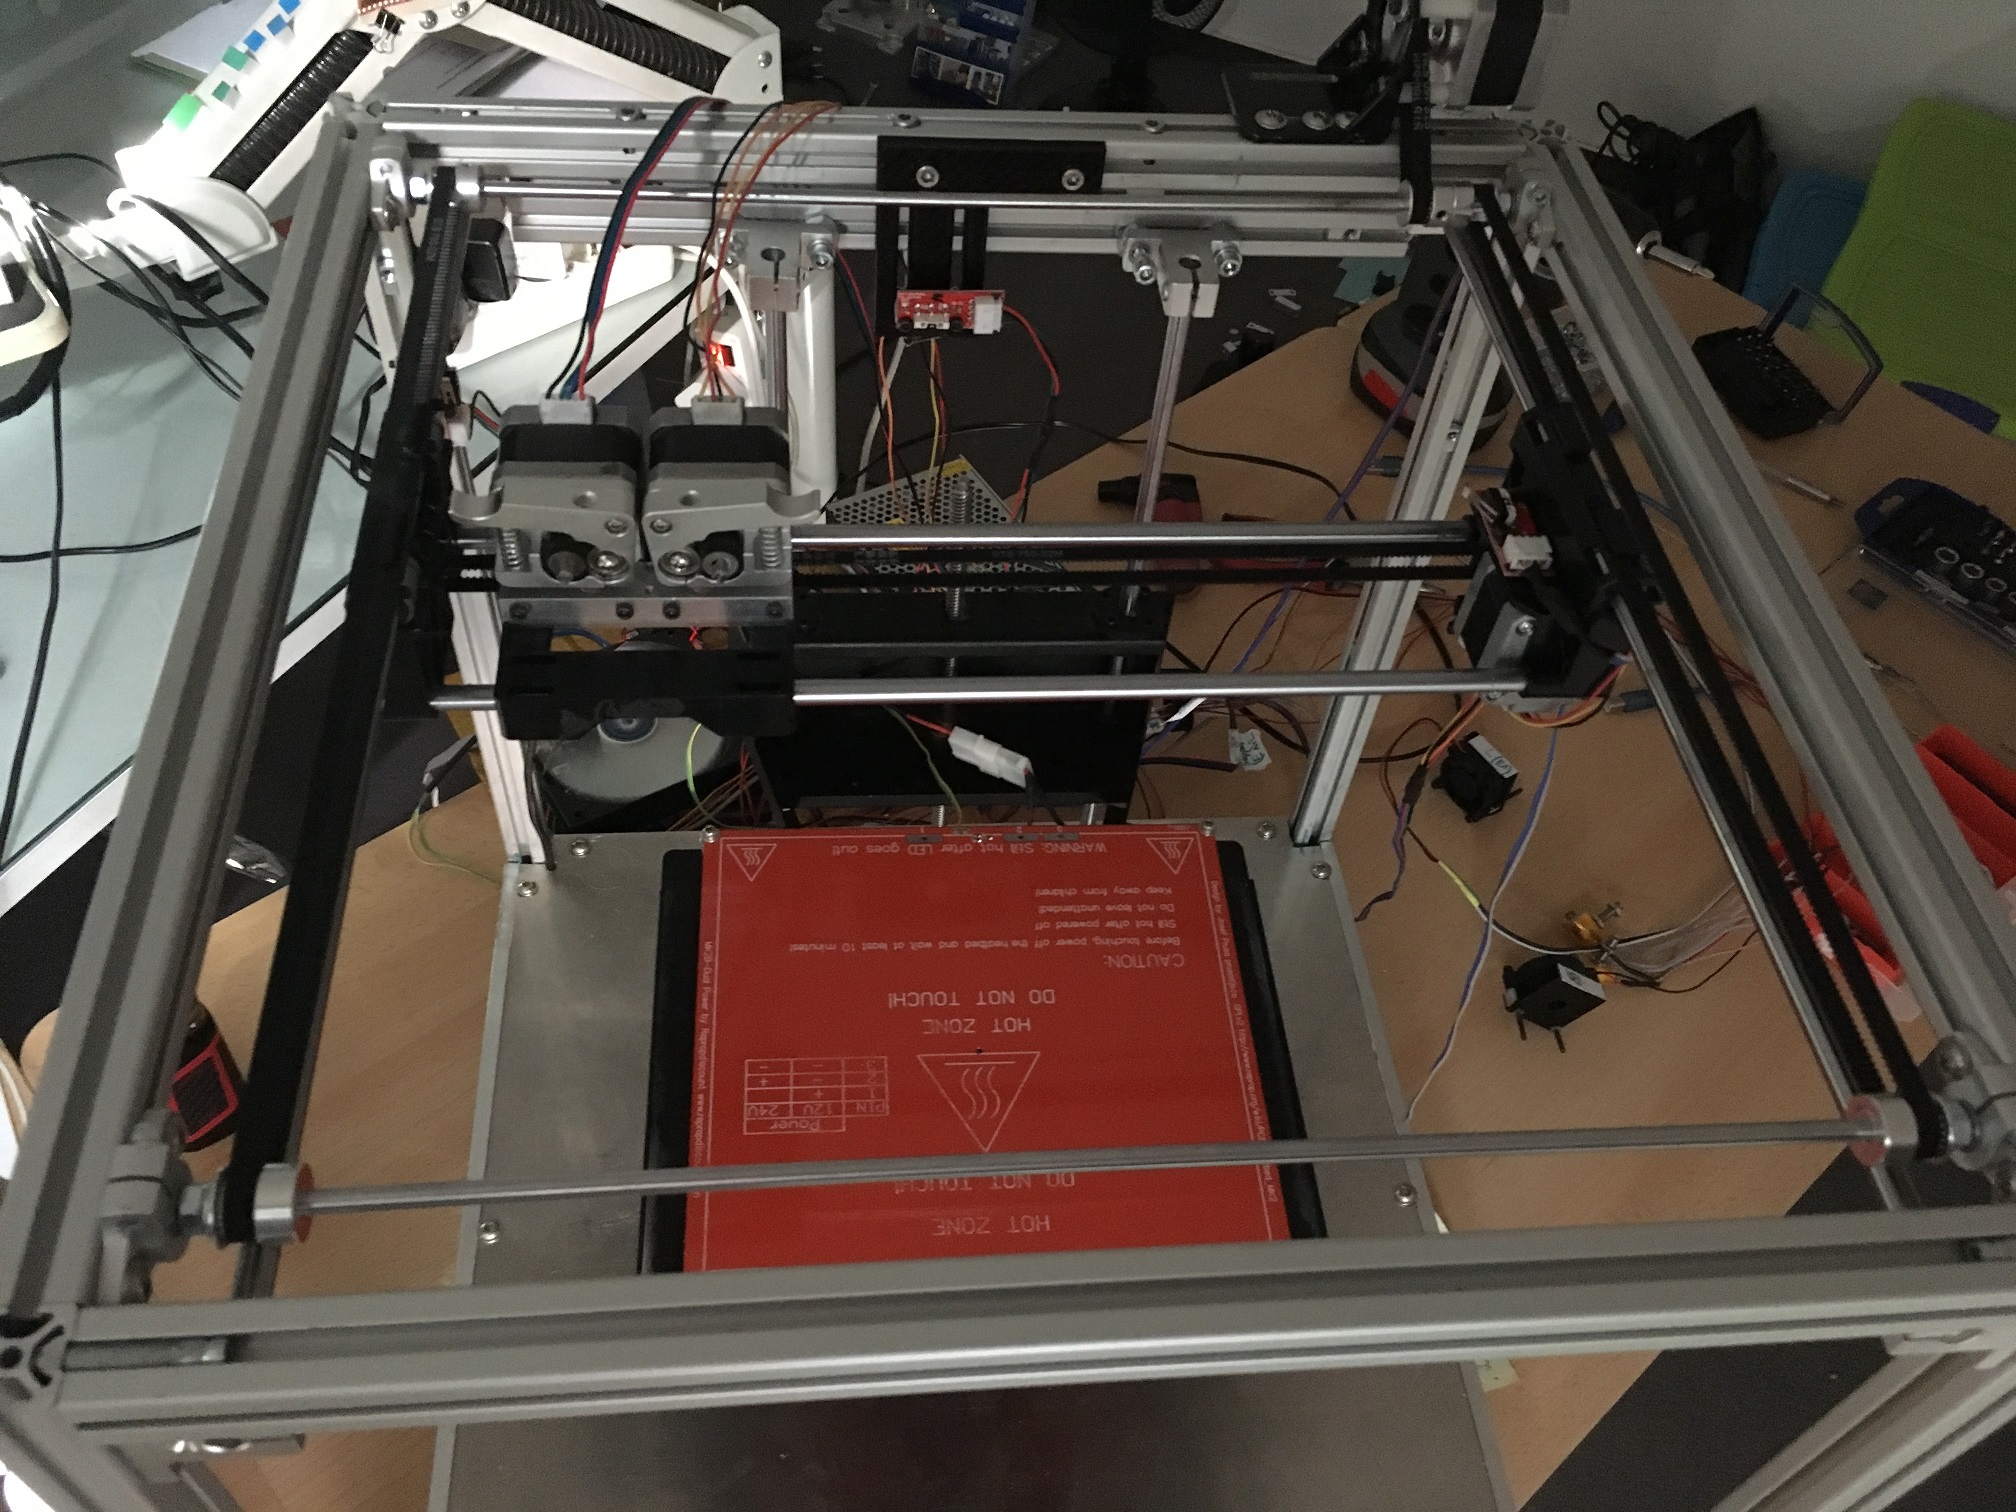
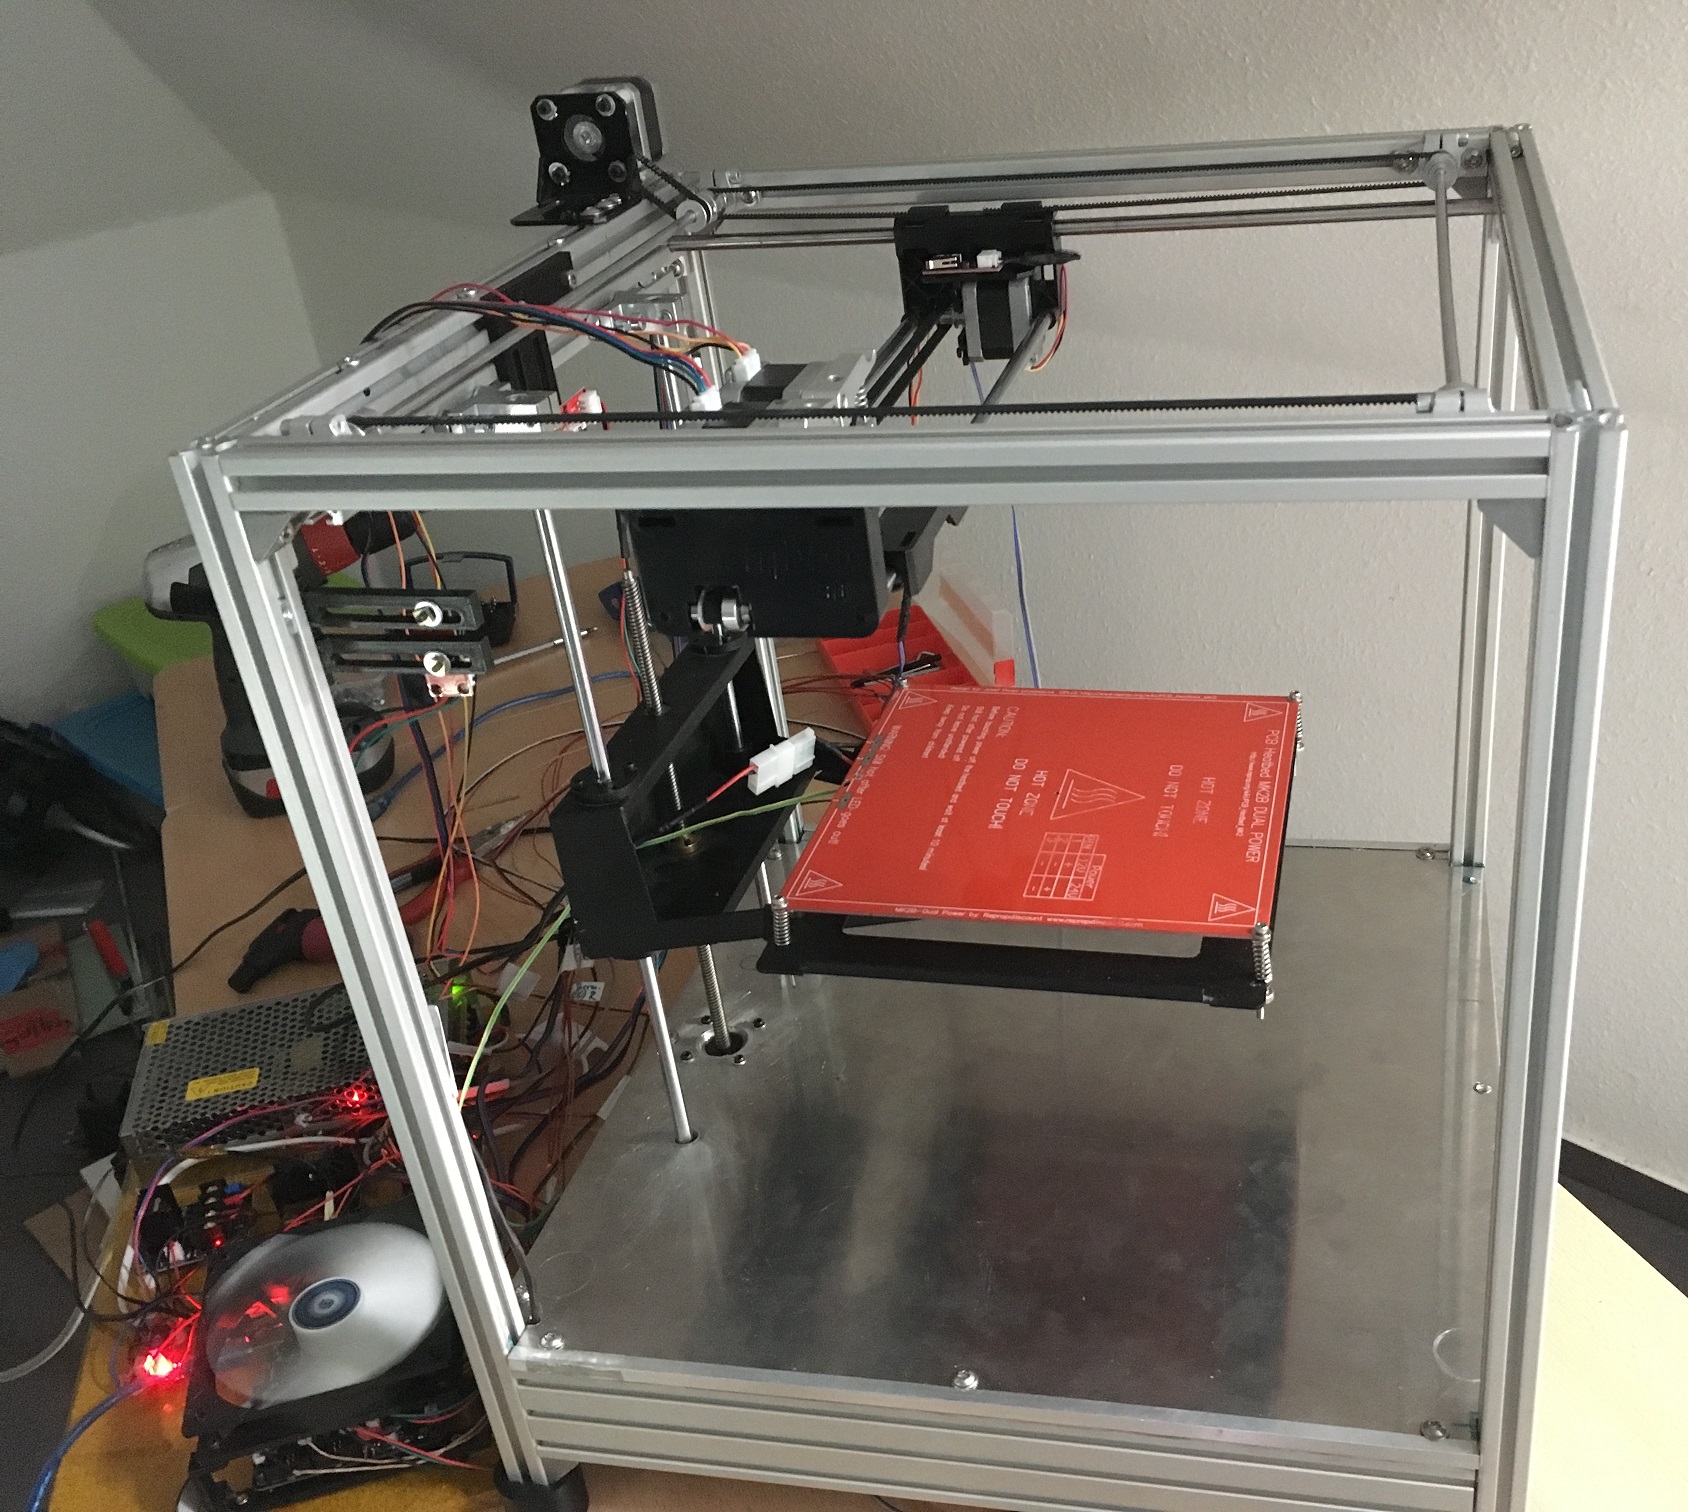
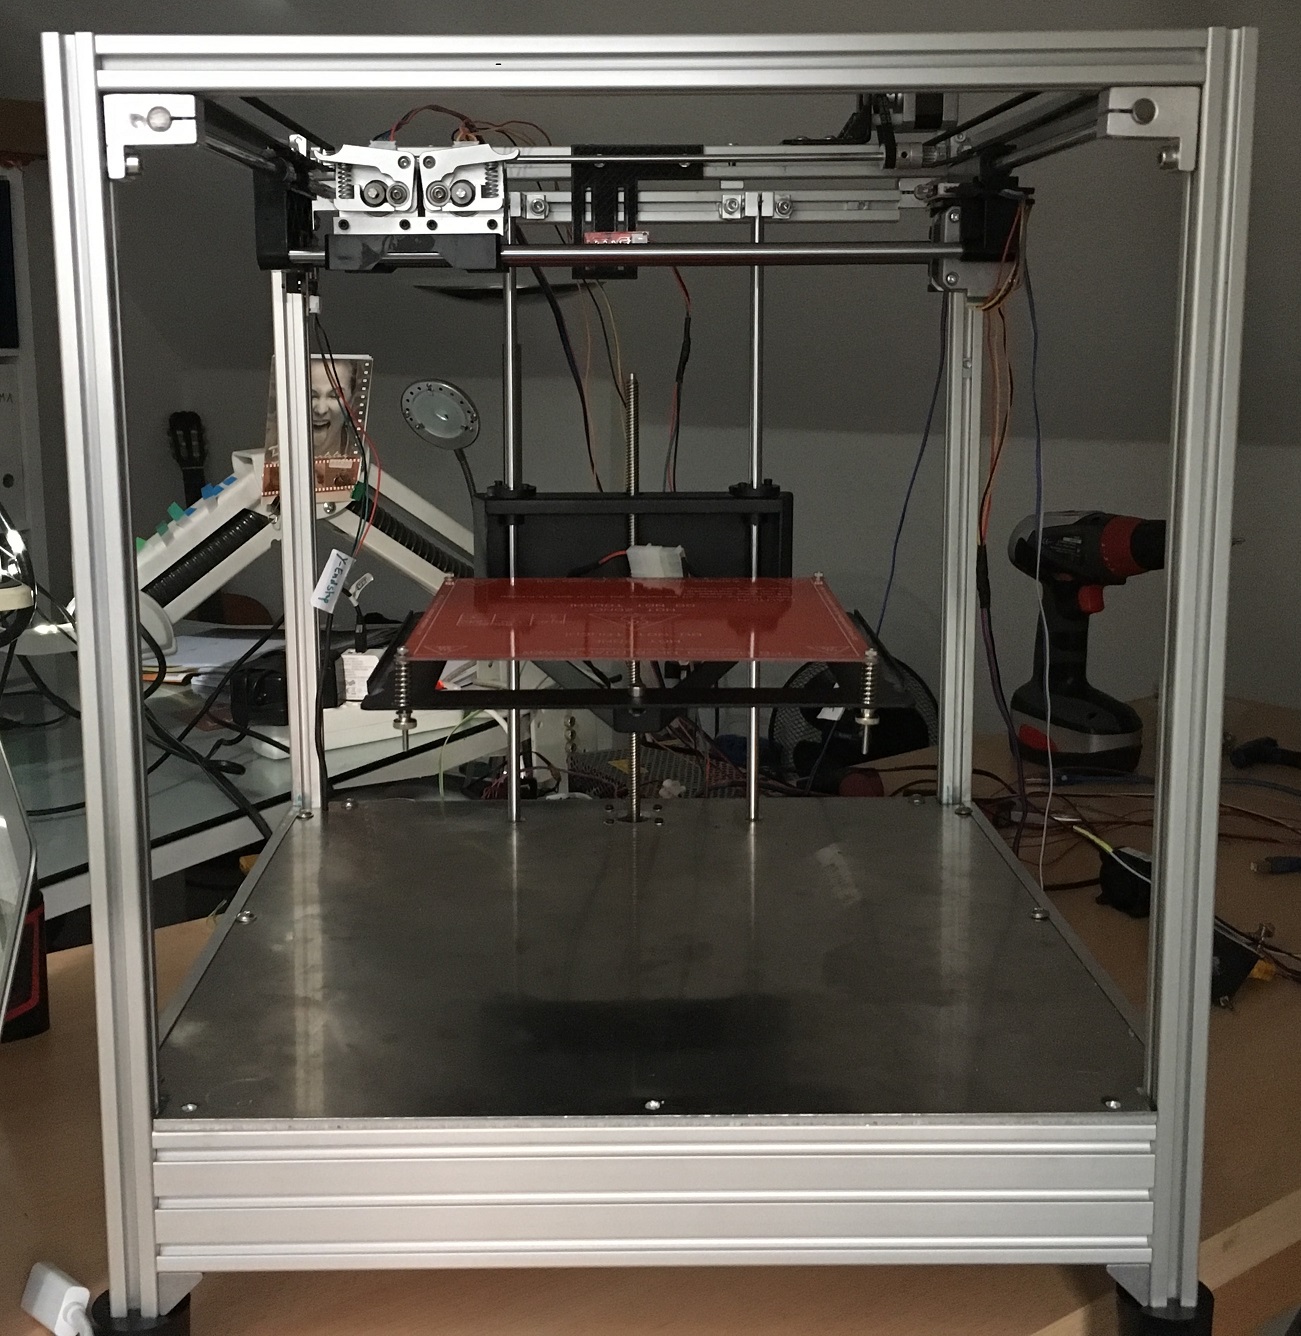
Kann mit dabei jemand behilflich sein? Die Anhänge zeigen den Aufbau des Druckers.
Vielen Dank schon mal.
Beste Grüße René
ich habe vor 5 Jahren einen Chinadrucker (mbot 3d) gekauft. Jetzt habe ich ihn auf Alu-Profil-Rahmen umgebaut und das Mighty Board gegen ein MKS-base V1.5 Board (RAMPS 1.4) ausgetauscht. Ich versuche nun seit Wochen den Drucker bzw. die Configuration.h zum laufen zu bringen. Es gelingt mir einfach nicht.
Kann mit dabei jemand behilflich sein? Die Anhänge zeigen den Aufbau des Druckers.
Vielen Dank schon mal.
Beste Grüße René
|
Re: Hilfe bei Configuration.h für umgebauten Chinadrucker (mbot 3d) 30. September 2018 04:43 |
Registrierungsdatum: 6 Jahre zuvor Beiträge: 118 |
|
Re: Hilfe bei Configuration.h für umgebauten Chinadrucker (mbot 3d) 30. September 2018 07:02 |
Registrierungsdatum: 5 Jahre zuvor Beiträge: 3 |
Hallo LundM,
danke für Dein Interesse. Es ist die Cofiguration.h, die ich zugegebenermaßen nicht verstehe und dort besonders die Absätze
//===========================================================================
//============================= Mechanical Settings =========================
//===========================================================================
//===========================================================================
//============================== Endstop Settings ===========================
//===========================================================================
//=============================================================================
//============================== Movement Settings ============================
//=============================================================================
//===========================================================================
//============================= Z Probe Options =============================
//===========================================================================
Irgendwie macht der Drucker nach dem ich bestimmte Einstellungen auf das Board geladen habe, was er will.
Könne wir die Absätze einzeln durchgehen?
Beste Grüße René
|
Re: Hilfe bei Configuration.h für umgebauten Chinadrucker (mbot 3d) 30. September 2018 18:12 |
Registrierungsdatum: 9 Jahre zuvor Beiträge: 300 |
@Hallo René
Stell mal bitte deine Configuration.h zur verfügung.
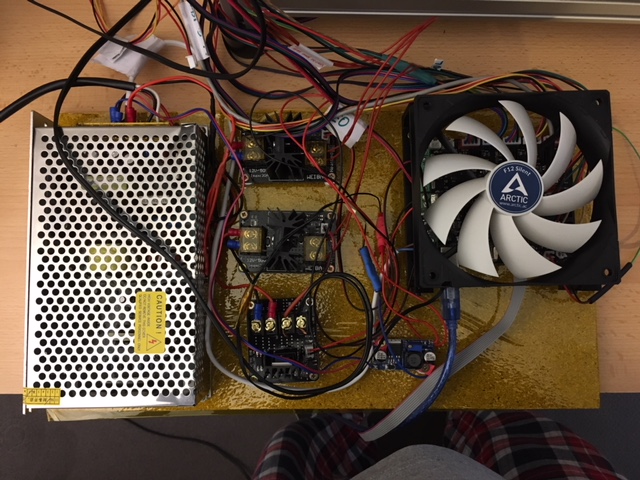
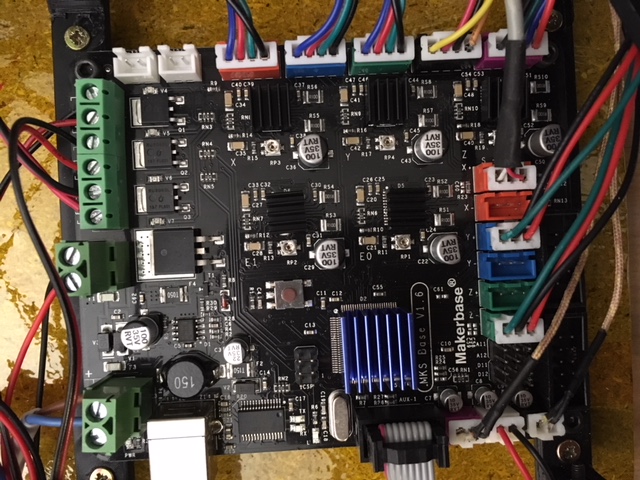
Mach mal ein Paar Bilder vom deinem Board , damit man sehen kann wo deine Endstops angeklemmt sind.
Auf deine Bilder sieht man ein X_MAX Endstop Rechts und Hinten ein Y_MAX Endstop , Oben Sollte ein Z_MIN Endstop sein.
MFG Stefan
1-mal bearbeitet. Zuletzt am 30.09.18 18:12.
Mein erster Drucker ein Prusa Mendel i2 + RAMPS 1.4 & LCD 12864 Graphic Smart Controller,
P3Steel Mein P3Steel noch im bau
Marlin 2.0
Stell mal bitte deine Configuration.h zur verfügung.
Mach mal ein Paar Bilder vom deinem Board , damit man sehen kann wo deine Endstops angeklemmt sind.
Auf deine Bilder sieht man ein X_MAX Endstop Rechts und Hinten ein Y_MAX Endstop , Oben Sollte ein Z_MIN Endstop sein.
MFG Stefan
1-mal bearbeitet. Zuletzt am 30.09.18 18:12.
Mein erster
Drucker ein Prusa Mendel i2 + RAMPS 1.4 & LCD 12864 Graphic Smart Controller,P3Steel Mein P3Steel noch im bau
Marlin 2.0
|
Re: Hilfe bei Configuration.h für umgebauten Chinadrucker (mbot 3d) 01. October 2018 06:39 |
Registrierungsdatum: 5 Jahre zuvor Beiträge: 3 |
Hallo Stefan,
die alten Configuration.h-Dateien hab ich alle gelöscht, ich kann also nur eine jungfräuliche Configuration.h schicken. die Endstops sind folgendermaßen gesteckt: X-max, Y-Max, Z-min, siehe auch Bilder vom Board.
Gruß René
die alten Configuration.h-Dateien hab ich alle gelöscht, ich kann also nur eine jungfräuliche Configuration.h schicken. die Endstops sind folgendermaßen gesteckt: X-max, Y-Max, Z-min, siehe auch Bilder vom Board.
Gruß René
|
Re: Hilfe bei Configuration.h für umgebauten Chinadrucker (mbot 3d) 01. October 2018 14:30 |
Registrierungsdatum: 9 Jahre zuvor Beiträge: 300 |
@Hallo René
Das habe ich alles geändert .
Sorgt da für das deine Bed Temp stabiel bleibt PID Tuning
Gibt wo du deine Endstops rein gesteckt hast.
Das gleiche gilt auch für pullups
Gibt an wo du Homen tust .
Ich habe die MIN/MAX SOFTWARE_ENDSTOPS deaktieviert , damit man MIN/MAX Punkte auch über fahren darf.
Ich habe diese werte neu definiert X_BAD_OFFSET/Y_BAD_OFFSET, das ist die entfernung von dem Endstop bis zu dem rechten Bed Rand.
Das musst du noch machen Triffid Hunter's Calibration Guide/de
Sollte beim ersten Homing die X_AXE nach links fahren dann musst du die AXE Invetieren
Das sollte fürs erste reichen
Deine neue Config,h
MFG Stefan
Mein erster Drucker ein Prusa Mendel i2 + RAMPS 1.4 & LCD 12864 Graphic Smart Controller,
P3Steel Mein P3Steel noch im bau
Marlin 2.0
Das habe ich alles geändert .
Sorgt da für das deine Bed Temp stabiel bleibt PID Tuning
#define PIDTEMPBED
Gibt wo du deine Endstops rein gesteckt hast.
// Specify here all the endstop connectors that are connected to any endstop or probe.
// Almost all printers will be using one per axis. Probes will use one or more of the
// extra connectors. Leave undefined any used for non-endstop and non-probe purposes.
//#define USE_XMIN_PLUG
//#define USE_YMIN_PLUG
#define USE_ZMIN_PLUG
#define USE_XMAX_PLUG
#define USE_YMAX_PLUG
//#define USE_ZMAX_PLUG
Das gleiche gilt auch für pullups
// Enable pullup for all endstops to prevent a floating state
#define ENDSTOPPULLUPS
#if DISABLED(ENDSTOPPULLUPS)
  // Disable ENDSTOPPULLUPS to set pullups individually
  #define ENDSTOPPULLUP_XMAX
  #define ENDSTOPPULLUP_YMAX
  //#define ENDSTOPPULLUP_ZMAX
  //#define ENDSTOPPULLUP_XMIN
  //#define ENDSTOPPULLUP_YMIN
  #define ENDSTOPPULLUP_ZMIN
  #define ENDSTOPPULLUP_ZMIN_PROBE
#endif
// Mechanical endstop with COM to ground and NC to Signal uses "false" here (most common setup).
#define X_MIN_ENDSTOP_INVERTING false // set to true to invert the logic of the endstop.
#define Y_MIN_ENDSTOP_INVERTING false // set to true to invert the logic of the endstop.
#define Z_MIN_ENDSTOP_INVERTING true // set to true to invert the logic of the endstop.
#define X_MAX_ENDSTOP_INVERTING true // set to true to invert the logic of the endstop.
#define Y_MAX_ENDSTOP_INVERTING true // set to true to invert the logic of the endstop.
#define Z_MAX_ENDSTOP_INVERTING false // set to true to invert the logic of the endstop.
#define Z_MIN_PROBE_ENDSTOP_INVERTING true // set to true to invert the logic of the probe.
#define X_DRIVER_TYPE  A4988
#define Y_DRIVER_TYPE  A4988
#define Z_DRIVER_TYPE  A4988
//#define X2_DRIVER_TYPE A4988
//#define Y2_DRIVER_TYPE A4988
//#define Z2_DRIVER_TYPE A4988
#define E0_DRIVER_TYPE A4988
#define E1_DRIVER_TYPE A4988
//#define E2_DRIVER_TYPE A4988
//#define E3_DRIVER_TYPE A4988
//#define E4_DRIVER_TYPE A4988
Gibt an wo du Homen tust .
// Direction of endstops when homing; 1=MAX, -1=MIN
// :[-1,1]
#define X_HOME_DIR 1
#define Y_HOME_DIR 1
#define Z_HOME_DIR -1
Ich habe die MIN/MAX SOFTWARE_ENDSTOPS deaktieviert , damit man MIN/MAX Punkte auch über fahren darf.
// Min software endstops constrain movement within minimum coordinate bounds
//#define MIN_SOFTWARE_ENDSTOPS
#if ENABLED(MIN_SOFTWARE_ENDSTOPS)
  #define MIN_SOFTWARE_ENDSTOP_X
  #define MIN_SOFTWARE_ENDSTOP_Y
  #define MIN_SOFTWARE_ENDSTOP_Z
#endif

// Max software endstops constrain movement within maximum coordinate bounds
//#define MAX_SOFTWARE_ENDSTOPS
#if ENABLED(MAX_SOFTWARE_ENDSTOPS)
  #define MAX_SOFTWARE_ENDSTOP_X
  #define MAX_SOFTWARE_ENDSTOP_Y
  #define MAX_SOFTWARE_ENDSTOP_Z
#endif
//
// EEPROM
//
// The microcontroller can store settings in the EEPROM, e.g. max velocity...
// M500 - stores parameters in EEPROM
// M501 - reads parameters from EEPROM (if you need reset them after you changed them temporarily).
// M502 - reverts to the default "factory settings".  You still need to store them in EEPROM afterwards if you want to.
//
#define EEPROM_SETTINGS // Enable for M500 and M501 commands
//#define DISABLE_M503    // Saves ~2700 bytes of PROGMEM. Disable for release!
#define EEPROM_CHITCHAT   // Give feedback on EEPROM commands. Disable to save PROGMEM.
Ich habe diese werte neu definiert X_BAD_OFFSET/Y_BAD_OFFSET, das ist die entfernung von dem Endstop bis zu dem rechten Bed Rand.
// The size of the print bed
#define X_BED_SIZE 200
#define Y_BED_SIZE 200

#define X_BAD_OFFSET 30
#define Y_BAD_OFFSET 10

// Travel limits (mm) after homing, corresponding to endstop positions.
#define X_MIN_POS 0
#define Y_MIN_POS 0
#define Z_MIN_POS 0
#define X_MAX_POS (X_BED_SIZE + X_BAD_OFFSET)
#define Y_MAX_POS (Y_BED_SIZE + Y_BAD_OFFSET)
#define Z_MAX_POS 200
Das musst du noch machen Triffid Hunter's Calibration Guide/de
/**
 * Default Axis Steps Per Unit (steps/mm)
 * Override with M92
 *                                      X, Y, Z, E0 [, E1[, E2[, E3[, E4]]]]
 */
#define DEFAULT_AXIS_STEPS_PER_UNIT   { 80, 80, 4000, 500 }
Sollte beim ersten Homing die X_AXE nach links fahren dann musst du die AXE Invetieren
// Invert the stepper direction. Change (or reverse the motor connector) if an axis goes the wrong way.
#define INVERT_X_DIR false
#define INVERT_Y_DIR false
#define INVERT_Z_DIR false

// @section extruder

// For direct drive extruder v9 set to true, for geared extruder set to false.
#define INVERT_E0_DIR false
#define INVERT_E1_DIR false
#define INVERT_E2_DIR false
#define INVERT_E3_DIR false
#define INVERT_E4_DIR false
Das sollte fürs erste reichen
Deine neue Config,h
MFG Stefan
Mein erster
Drucker ein Prusa Mendel i2 + RAMPS 1.4 & LCD 12864 Graphic Smart Controller,P3Steel Mein P3Steel noch im bau
Marlin 2.0
In diesem Forum dürfen leider nur registrierte Teilnehmer schreiben.