Wavy Surface
Posted by zencoffeehk
|
Wavy Surface January 13, 2016 12:22AM |
Registered: 9 years ago Posts: 12 |
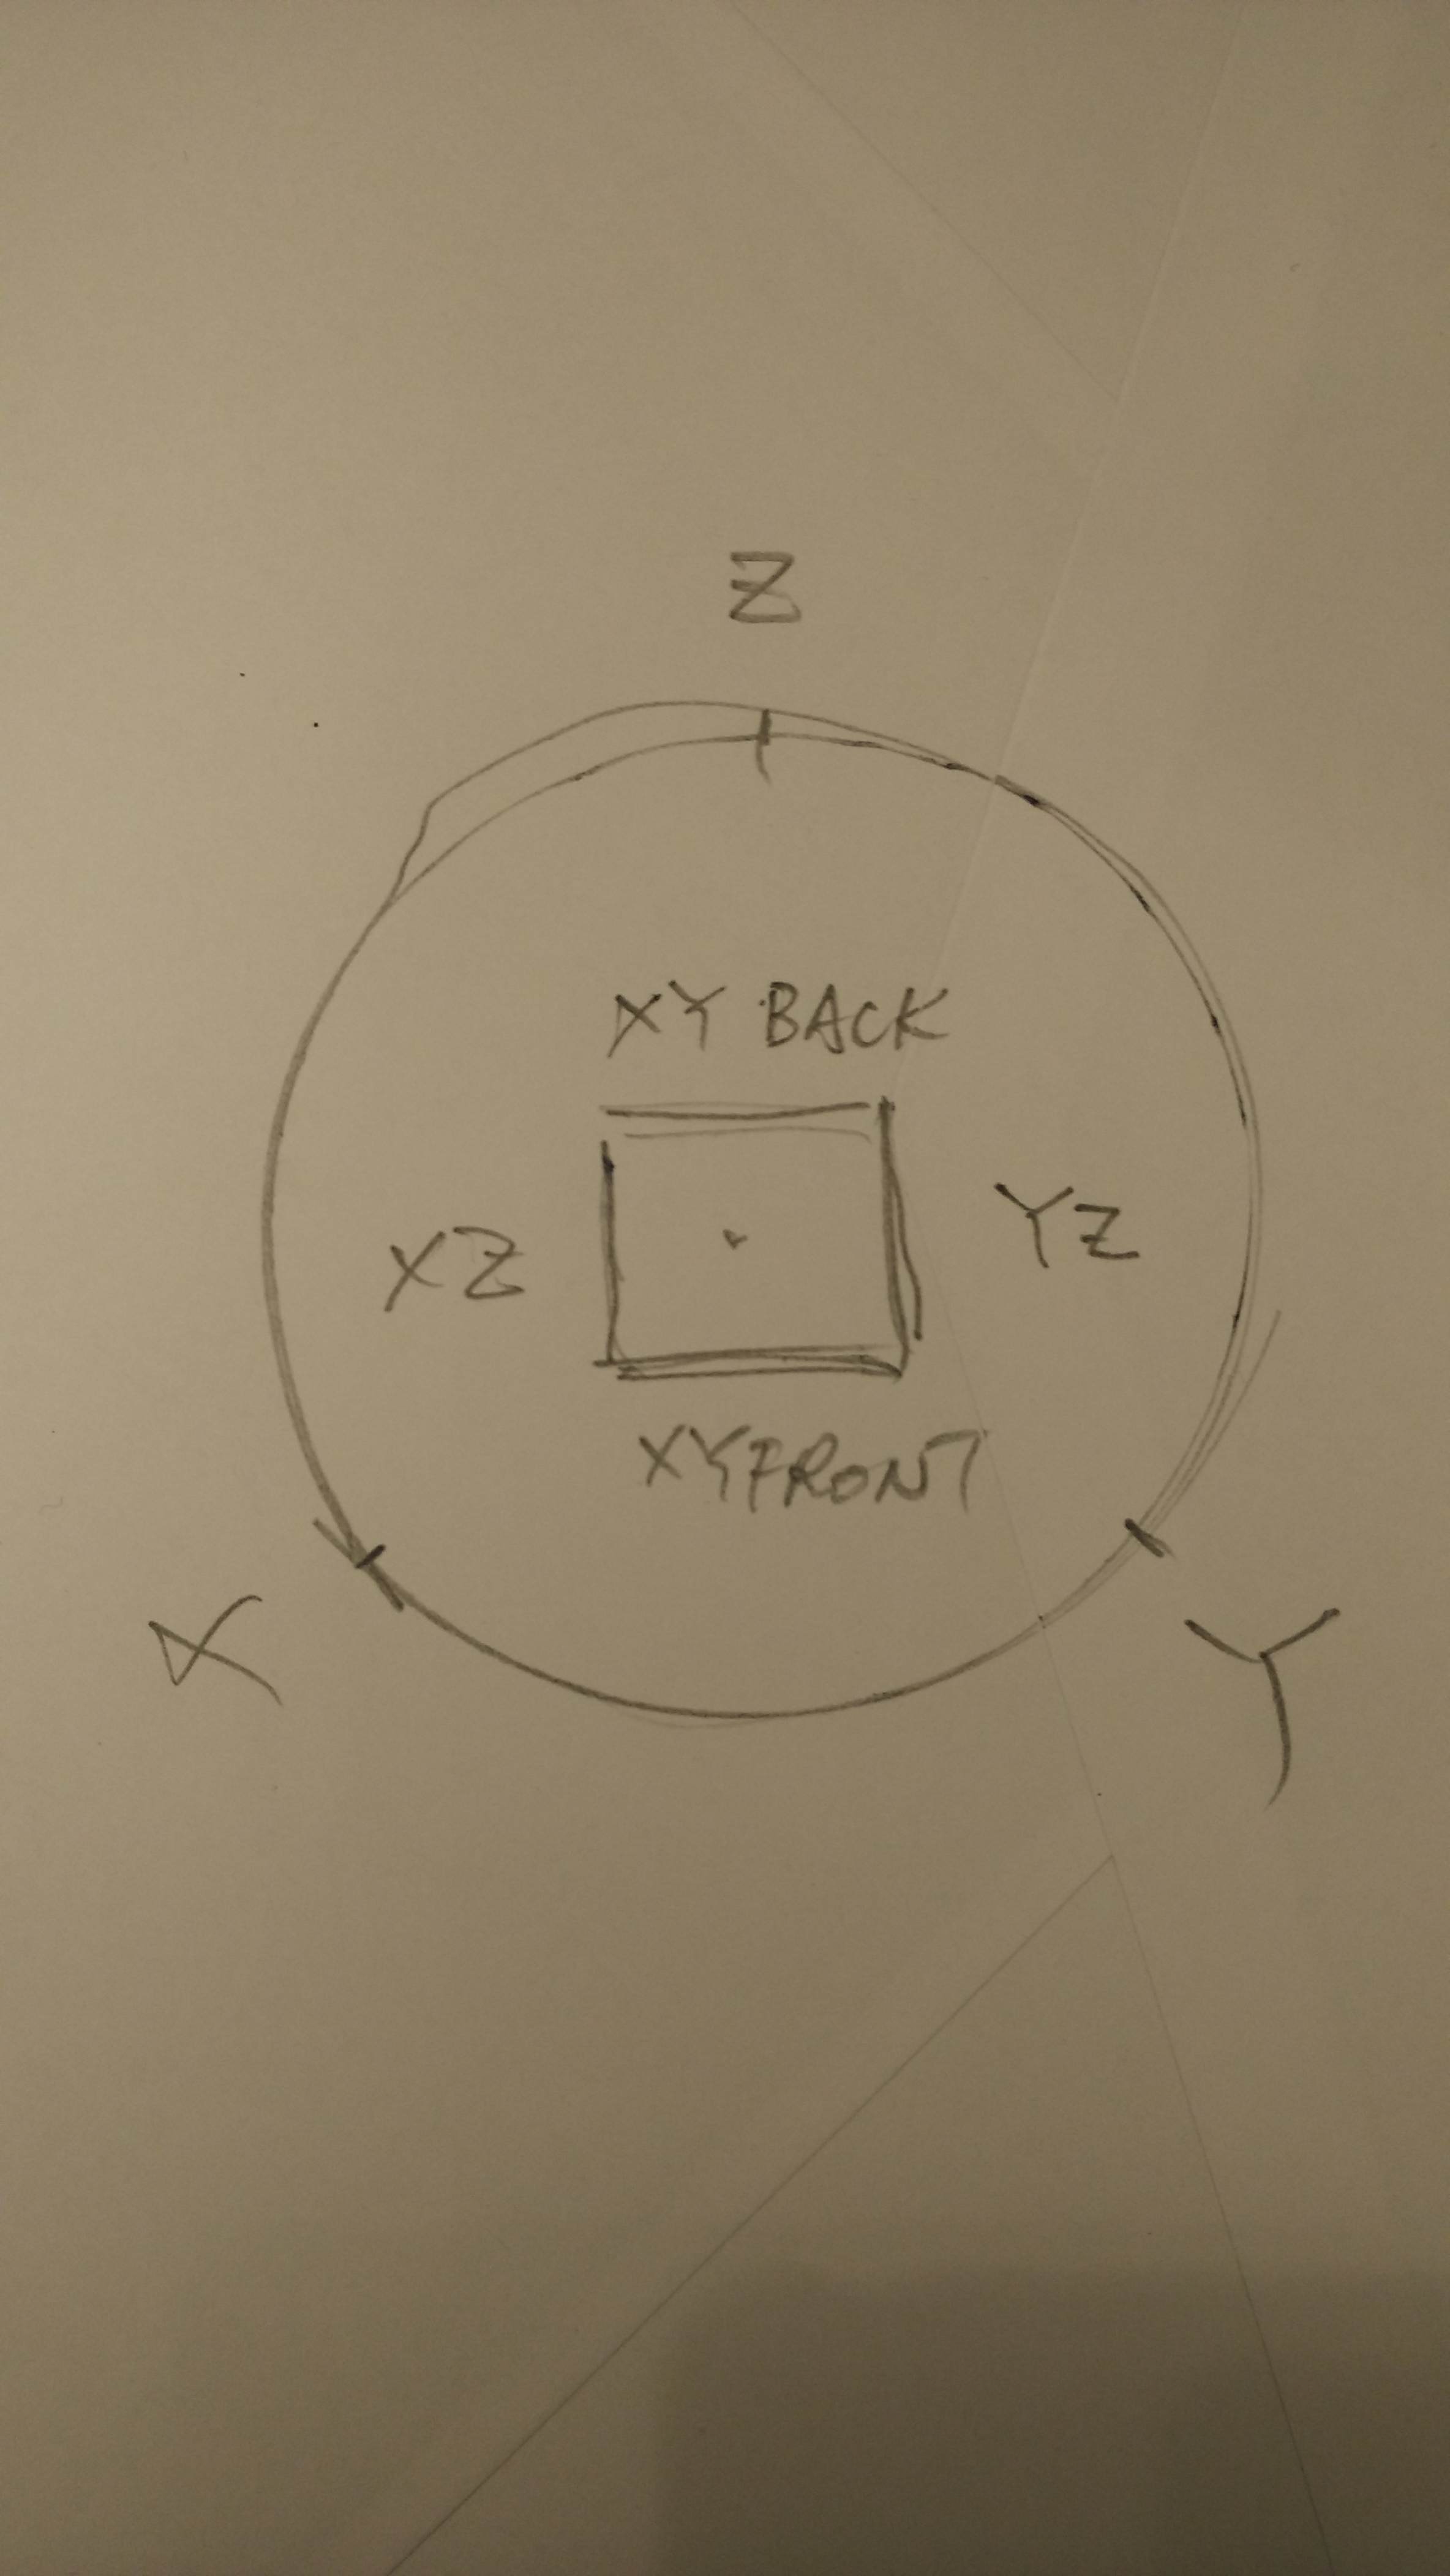
I am new to 3D printing! I built a kossel mini with RADDs board, 8825 stepper and repeiter, but the test cube surface always having wavy pattern on the XY face front and rear!
Do anyone have the same problem? Please Help!
Edited 1 time(s). Last edit at 01/13/2016 12:24AM by zencoffeehk.
Do anyone have the same problem? Please Help!
Edited 1 time(s). Last edit at 01/13/2016 12:24AM by zencoffeehk.
|
Re: Wavy Surface January 13, 2016 06:44AM |
Registered: 10 years ago Posts: 444 |
|
Re: Wavy Surface January 13, 2016 08:30AM |
Registered: 8 years ago Posts: 916 |
That's normal when using belts around an idler bearing, instead of a belt around a toothed idler pulley (with bearing).
It's due to the belt teeth hitting the idler bearing and causing the carriage to move slightly.
To lessen the effect, slow down your external perimeters, or install toothed idler pulleys.
You can also flip the belt so that the flat part goes around the idler bearing, I did this for a while on my Kossel Mini. You do need to dremel out part of the carriage so that the belt doesn't rub on the carriage where it slowly turns 180 degrees to go around the bottom toothed pulley.
Edited 1 time(s). Last edit at 01/13/2016 08:32AM by nebbian.
|
Re: Wavy Surface January 13, 2016 08:35AM |
Registered: 9 years ago Posts: 12 |
|
Re: Wavy Surface January 14, 2016 01:38PM |
Registered: 9 years ago Posts: 1,873 |
Another possible explanation is the drv8825 blanking time (missing microsteps in the low part of the voltage range).
Take a look at the excellent analysis here: [cabristor.blogspot.ca]
The short form: Put a pair of back to back diiodes in-line with each coil of each stepper motor. The original author recommends 4 diodes for each coil, but in my tests a single pair seemed to do the job.
Take a look at the excellent analysis here: [cabristor.blogspot.ca]
The short form: Put a pair of back to back diiodes in-line with each coil of each stepper motor. The original author recommends 4 diodes for each coil, but in my tests a single pair seemed to do the job.
|
Re: Wavy Surface January 15, 2016 02:04AM |
Registered: 9 years ago Posts: 12 |

|
Re: Wavy Surface January 15, 2016 05:40AM |
Registered: 9 years ago Posts: 1,873 |
I used an offcut of veroboard (copper stripboard for prototyping) to mount the diodes, but it's tucked away inside my electronics enclosure right now. I'll try and remember to take a photo next time I have the box open.
This diagram is the gist showing the diodes in-line with the outer two conductors of the 4-way connection between the stepper driver and the motor:
Except I just used one diode in each direction, so in each outer wire I put:
Edited 1 time(s). Last edit at 01/15/2016 05:40AM by JamesK.
This diagram is the gist showing the diodes in-line with the outer two conductors of the 4-way connection between the stepper driver and the motor:

Except I just used one diode in each direction, so in each outer wire I put:
   |
 /   \
+     -
D     D
-     +
 \   /
   |
Edited 1 time(s). Last edit at 01/15/2016 05:40AM by JamesK.
|
Re: Wavy Surface January 16, 2016 02:35AM |
Registered: 10 years ago Posts: 444 |
|
Re: Wavy Surface January 16, 2016 10:43AM |
Registered: 9 years ago Posts: 12 |
|
Re: Wavy Surface January 16, 2016 10:53AM |
Registered: 9 years ago Posts: 1,873 |
It's one of those "it depends" things. The problem affects drv8825 and not (as far as I know) the a4988, and only impacts microsteps in the lower 12% of the voltage range. Whether or not your motor is operating in that part of the range depends on the coil resistance and the supply voltage, and whether it shows up as a visible artefact depends on the mechanical arrangement of the printer. In my case it only really made much difference on the extruder which was pulsing before fitting the diodes, causing waves in the extruded filament. My understanding is that the motion geometry of delta printers is prone to showing the problem more easily than Cartesian ones.
|
Re: Wavy Surface January 16, 2016 12:07PM |
Registered: 9 years ago Posts: 12 |
|
Re: Wavy Surface January 16, 2016 12:13PM |
Registered: 9 years ago Posts: 1,873 |
|
Re: Wavy Surface January 16, 2016 05:01PM |
Registered: 8 years ago Posts: 916 |
|
Re: Wavy Surface January 16, 2016 08:29PM |
Registered: 9 years ago Posts: 12 |
|
Re: Wavy Surface January 17, 2016 06:27AM |
Registered: 10 years ago Posts: 444 |
|
Re: Wavy Surface January 17, 2016 06:40AM |
Registered: 9 years ago Posts: 12 |
|
Re: Wavy Surface January 17, 2016 11:59AM |
Registered: 9 years ago Posts: 1,873 |
|
Re: Wavy Surface January 17, 2016 10:20PM |
Registered: 9 years ago Posts: 12 |
|
Re: Wavy Surface January 17, 2016 10:51PM |
Registered: 9 years ago Posts: 1,873 |
No, the microstep setting on the stepper motor drivers, usually 16 for 4988 and 32 for drv8825. On RAMPS it's set with jumpers under the driver modules, I don't know what the setup is for RADDs. I just wondered if you'd decided to use full steps for some reason - that might look like the results you are getting.
|
Re: Wavy Surface January 18, 2016 12:52AM |
Registered: 9 years ago Posts: 12 |
|
Re: Wavy Surface January 18, 2016 07:51AM |
Registered: 9 years ago Posts: 1,873 |
|
Re: Wavy Surface January 18, 2016 11:17AM |
Registered: 11 years ago Posts: 1,807 |
for the DRV8825 please use all on and set the steps per mm to 1/32 MS.
sample:
GT2 pulley with 20 Tooth= 40 mm / Turn
With a Nema17 with 0,9 deg = ((400 Fullsteps/Turn * 32 MS)/ 40mm /Turn) = 320 steps per mm
Please set on repetier FW a delay from 2 ms (STEPPER_HIGH_DELAY = 2).
Reason is DRV8825 has a 1,8 micor seconds to detect the signals.
Why do you do not try the Raps128 (STEPPER_HIGH_DELAY= 0)
We have develloped it for the RADDS /Arduino Due (recomanded with 24 Volt)
[doku.radds.org]
Mein Club: [hackerspace-ffm.de]
RADDS-Shield -> Commercial [max3dshop.org]
|
Re: Wavy Surface January 20, 2016 09:27PM |
Registered: 9 years ago Posts: 12 |
Sorry, only registered users may post in this forum.