Fine tuning calibration, can't reproduce test printing results on a real print
Posted by aFrazatto
|
Fine tuning calibration, can't reproduce test printing results on a real print March 02, 2021 08:01AM |
Registered: 8 years ago Posts: 47 |
After a major upgrade to my printer, I decided to dig a little deeper on calibration to see if I could get as good prints as I see on YouTube.
Having built my own Prusa i3, I always assumed everything was too crooked and not perfectly aligned to ever really work at that level of precision....but I was wrong.....I actually did a good job back when I had no idea what I was doing and these machines are crazy tolerant to dumbasses like me
So I started following this procedure:
[www.youtube.com]
It's very complete and very helpful in isolating all the little variables that make a real difference to print quality.
But I'm also getting mixed results I can't really explain or properly deal with, so if some of you indulge me a little while, lets see if we can solve these questions, shall we?
First problem, I don't believe there is a solution just with slicing settings, I'm getting at the same time under extrusion symptoms AND thermal expansion symptoms.
If I give a go with the wall thickness calibration, it is printing too thick. But if I lower the extrusion multiplier, it starts having gaps on the top layer and outer walls.
I live in a pretty humid city and I'm also too lazy to build a dry box to the filament that is already on the printer.....so I think this is the problem and the solution.
But what else could cause this behavior that I could try to balance better?
Second problem, printing temperature.
According to the test, the best printing temperature for my printer/filament (basic PLA 1,75) is 215°. All the surfaces are smooth, overhangs and bridges are spot on! My printer never printed this great ever!!
But when I try on a real print, it's freaking impossible to control the ooze!!! I get almost solid walls of spiderwebs no matter what settings I use for retraction (went all the way up to 2mm).
This must be related with the third problem.....
Third problem, I can't reproduce the results of the retraction test on a real print.
According to the test, the optimal setting for retraction for my printer are (on Slic3r):
- Length 0.4mm
- Lift Z 0.2mm
- Speed 100mm/s
But the real print with this config, becomes just a mess of spiderweb and ooze pimples even if I set a lower temperature like 200°.
So what do you people think?
Should I just accept my fate and go back to the config I'm used to, that kind of works but not really?!
Edited 1 time(s). Last edit at 03/02/2021 08:02AM by aFrazatto.
|
Re: Fine tuning calibration, can't reproduce test printing results on a real print March 12, 2021 09:40AM |
Registered: 8 years ago Posts: 47 |
okkk....no body seams interested, so I will just document my findings for future people with similar problems.
I noticed the tests only offer 50% and 100% cooling fun speed, fixed thru the whole print. But on Slic3r I had it configured for 35% for normal layers and 100% for solid infill/bridges.
After some trying a little here and there with the settings, setting the fun on a normal print to be 75% fixed thru the whole print offered me the best results overall regarding retraction and webbing.
Plus, I also noticed the testing doesn't lift the nozzle after retracting.
I had mine to lift 0.5mm because historically the printer would knock small prints from the bed without it.
But that was many iterations ago and things seam fine during testing, so lowering the nozzle lift to 0.2mm also helped with webbing, since any little blob on the tip will be scraped on any random surface on the way.
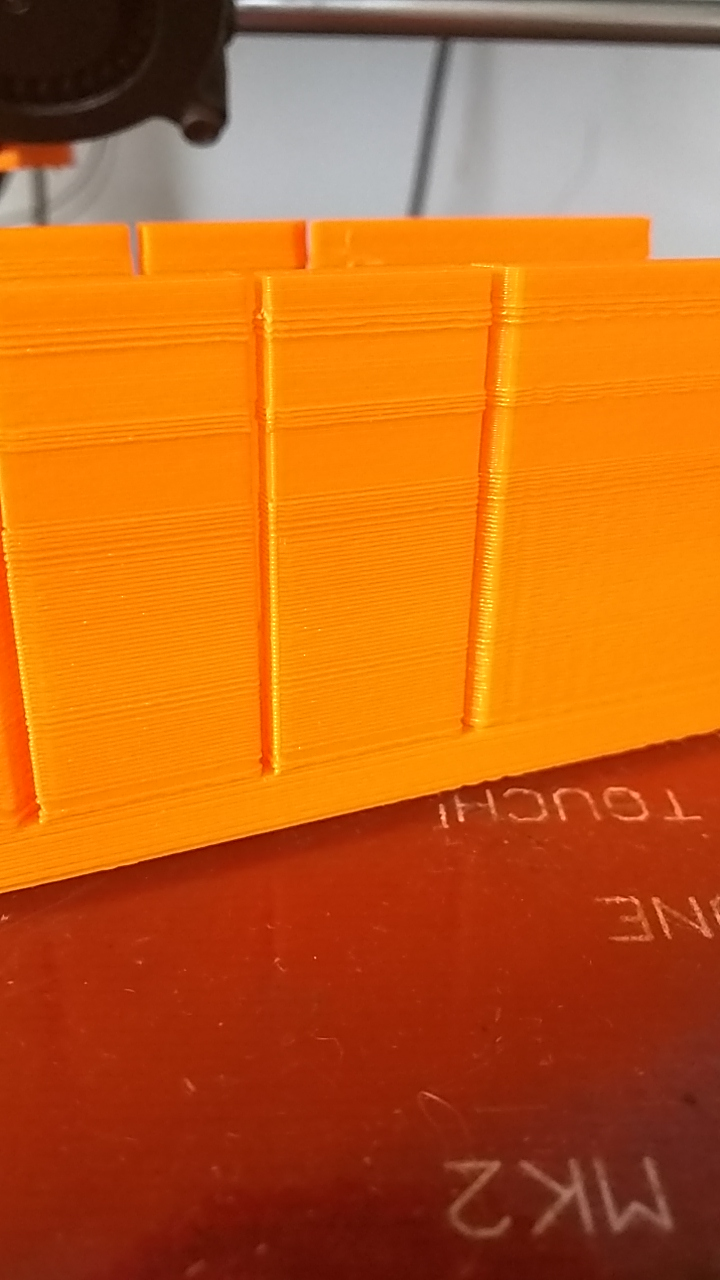
I still don't have a good answer for the over/under extrusion problem, if anything it is worse now that results are more consistent.
Please check the attached picture for an idea of what I'm talking about.
I noticed the tests only offer 50% and 100% cooling fun speed, fixed thru the whole print. But on Slic3r I had it configured for 35% for normal layers and 100% for solid infill/bridges.
After some trying a little here and there with the settings, setting the fun on a normal print to be 75% fixed thru the whole print offered me the best results overall regarding retraction and webbing.
Plus, I also noticed the testing doesn't lift the nozzle after retracting.
I had mine to lift 0.5mm because historically the printer would knock small prints from the bed without it.
But that was many iterations ago and things seam fine during testing, so lowering the nozzle lift to 0.2mm also helped with webbing, since any little blob on the tip will be scraped on any random surface on the way.
I still don't have a good answer for the over/under extrusion problem, if anything it is worse now that results are more consistent.
Please check the attached picture for an idea of what I'm talking about.
|
Re: Fine tuning calibration, can't reproduce test printing results on a real print (solved) May 26, 2021 01:53PM |
Registered: 8 years ago Posts: 47 |
Alright!
Lot's more prints and I pinpointed all the issues.
Regarding webbing, on Slic3r, just zero z-lift when retracting, enable "scrape wile retracting" and disable "avoid crossing perimeters".
Your results may vary, but for me it almost 100% solved webbing even in higher printing temperatures.
Regarding printing fan speed, the fastest I kept the better for the print, but the extruder was REALLY struggling on higher speeds and choking on long extrusions as it could not keep the temperature at the tip of the nozzle.
I have since found a nice compromise keeping it at 40% and printing temperature at 220°C, all external perimeters now look almost the same, overhangs and bridges are very consistent as also is layer adhesion.
Regarding the over/under extrusion problem, this was my issue: https://www.youtube.com/watch?v=9JyydfcOcD0
As I still use a glass plate to print, maintaining the bed temperature is a challenge and I can get 2°C variation at some times.
A PID calibration with the printing fan on stopped the temperature from overshooting, so now I only get occasional low spots that are easier to sand and fill if needed.
Sorry, only registered users may post in this forum.