Final tuning in Slic3r
Posted by Physics_Dude
|
Final tuning in Slic3r November 06, 2012 11:00PM |
Registered: 11 years ago Posts: 47 |
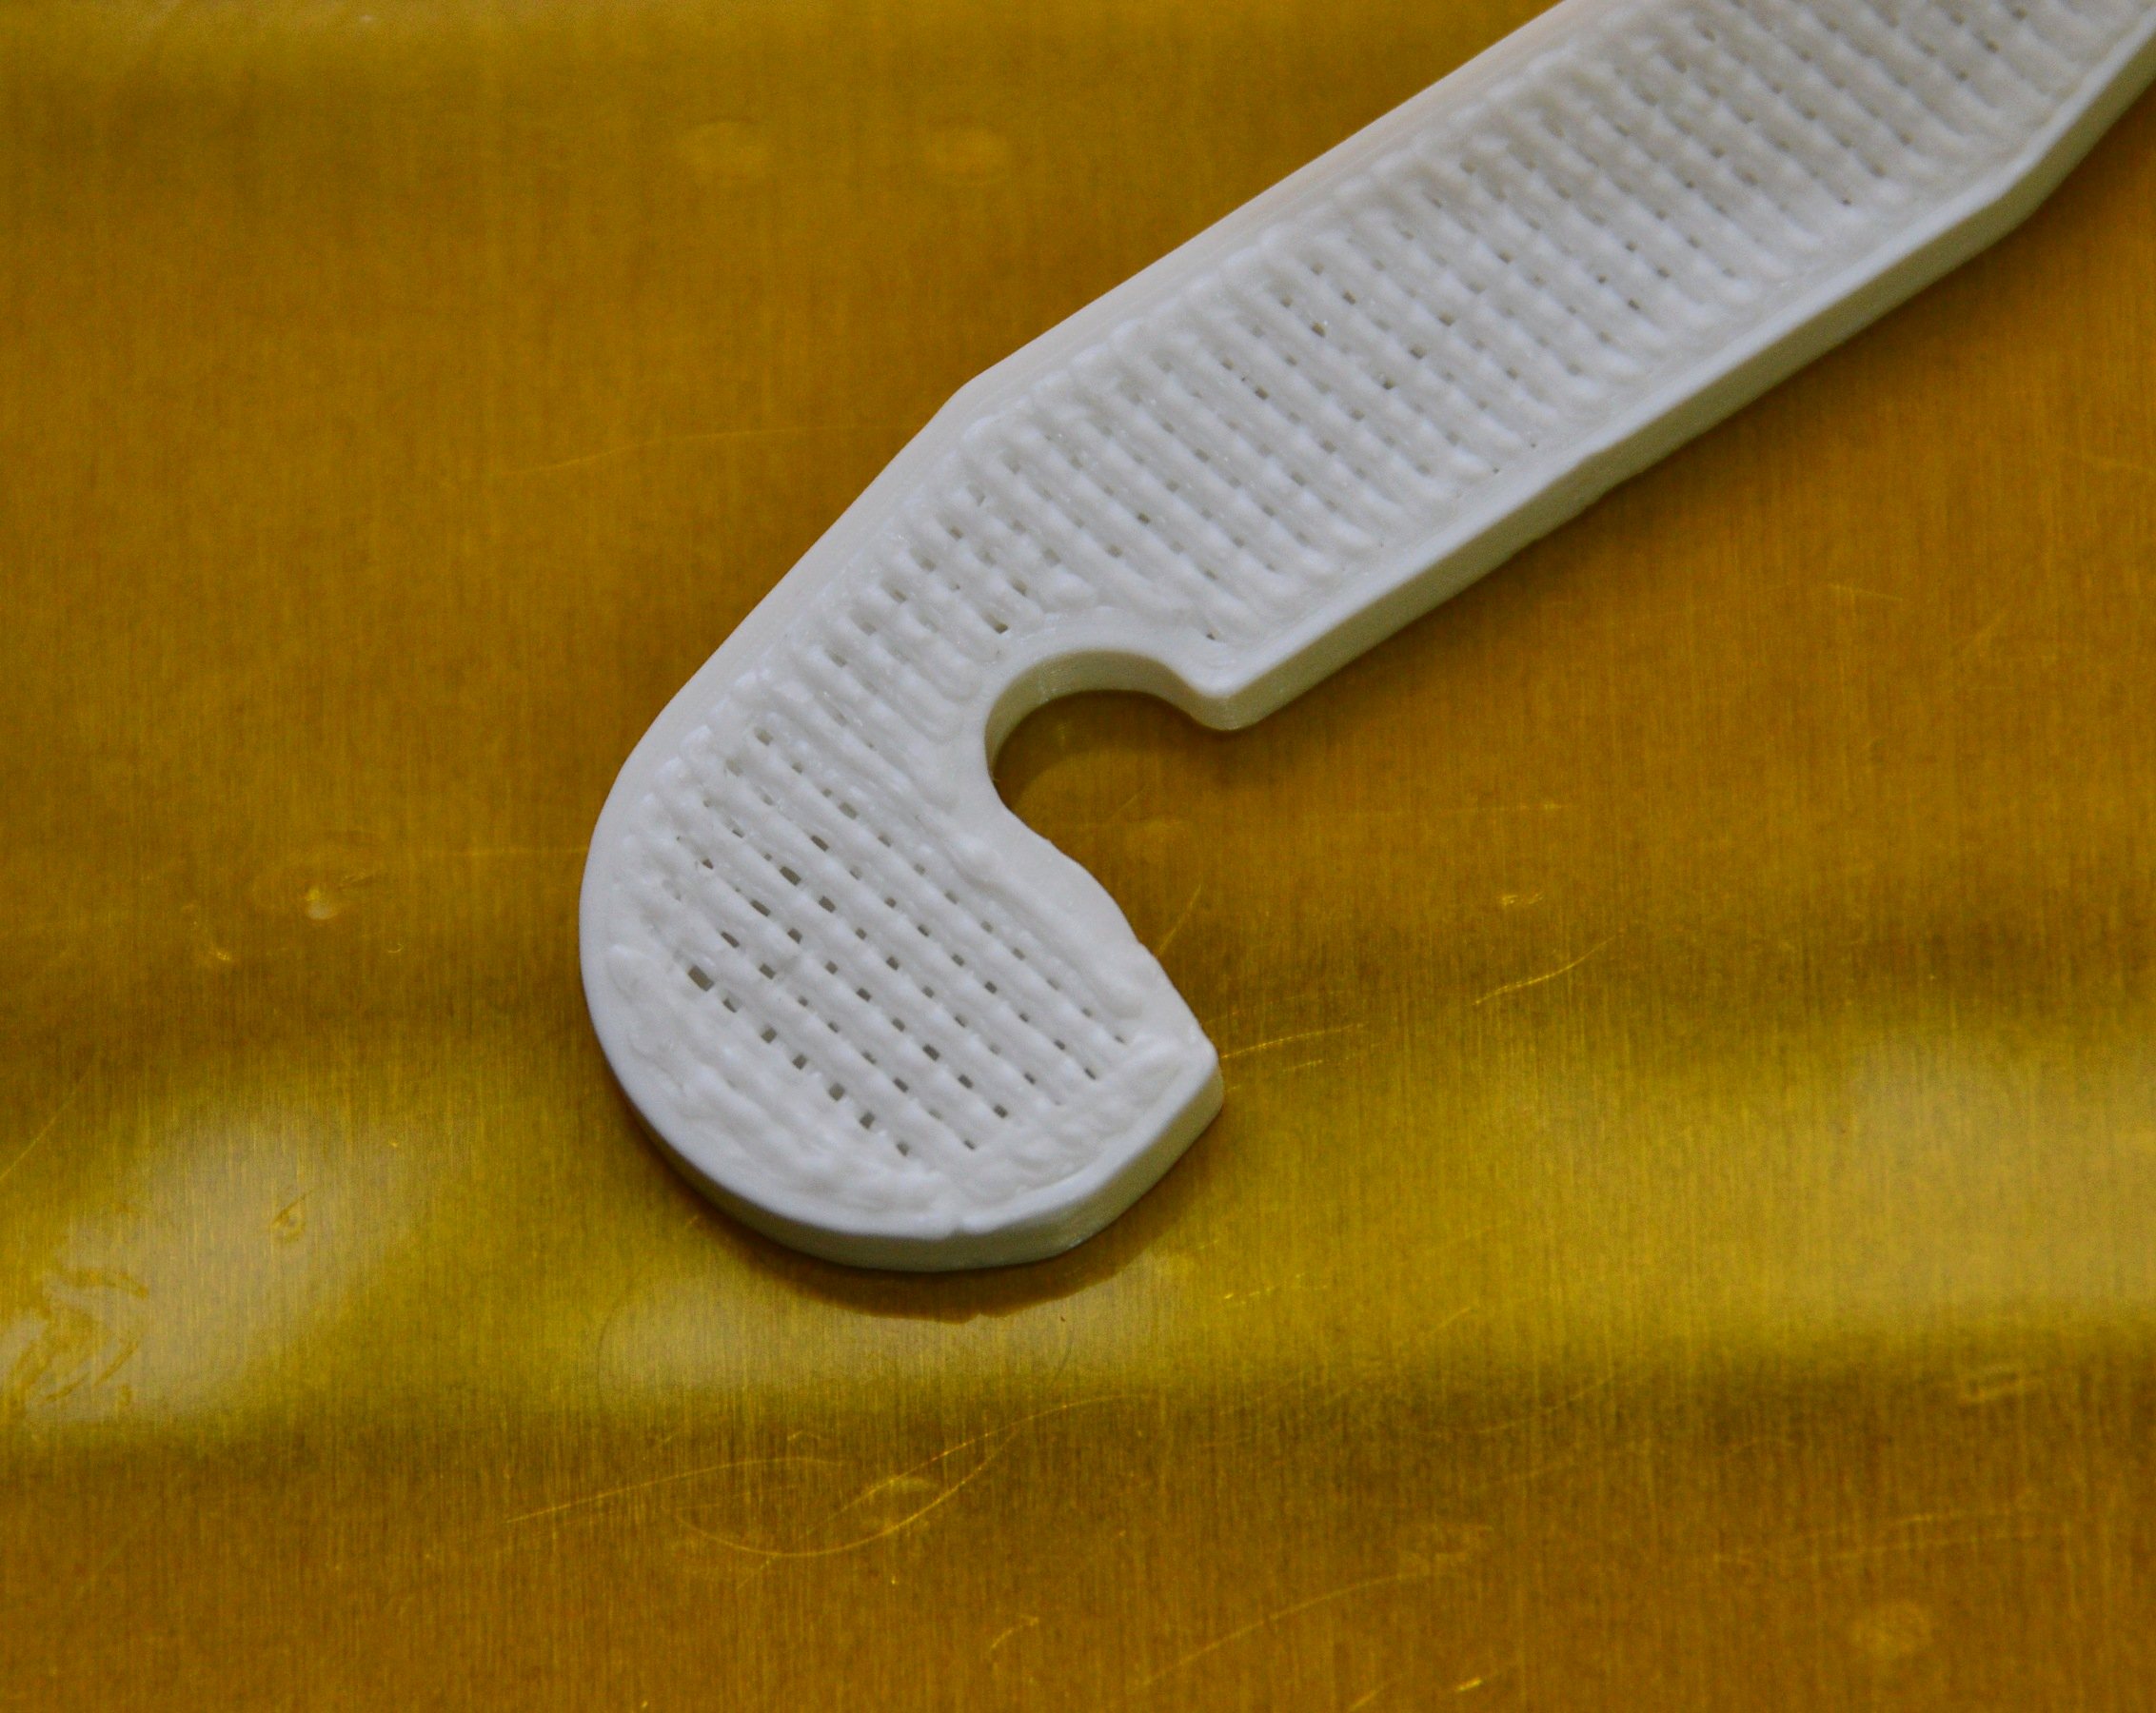
I just finished building my RepRapPro Huxley the other day and the only issue I have is one with Slic3r. For some reason I can not figure out, it is giving the horizontal shell layers a poor fill ratio. It's almost as if it is skipping every other pass on these horizontal shell layers.
Take a look at the attached picture, the main settings used there apart from what was default were 0.2 fill density, 0.3mm layer height, 3 horizontal shell layers, 2 vertical perimeters, and a 0.5mm nozzle.
Any info on how to get this thing printing normally would be great.
Take a look at the attached picture, the main settings used there apart from what was default were 0.2 fill density, 0.3mm layer height, 3 horizontal shell layers, 2 vertical perimeters, and a 0.5mm nozzle.
Any info on how to get this thing printing normally would be great.
|
Re: Final tuning in Slic3r November 06, 2012 11:14PM |
Registered: 11 years ago Posts: 98 |
calibrate.
The 2 most important calibration objects are the .5mm thin walled object, and the 20mm 100% filled cube.
From your image it looks more like you are overstruding then underextruding.
Turn off all the extra bits like add a .2 on restart from retract, in fact for the first calibration object turn retraction off completely.
objects with explanations can be found here [www.thingiverse.com]
after slicing the .5mm thin walled cube the gcode header comments should tell you an expected single wall width, measure the width of the last extruded line on all 4 sides, They should match, adjust either you filament diameter, estrusion multiplier or esteps to get them to match. Whenever changing filament I use this object to quickly adjust my filament diameter after an initial measurement of the actual filament. Once you have wall width correct go to the 20mm filled cube
20mm filled cube, set infill to 100%, slice and watch. If first layer is fat, you may have the nozzle to close to the bed, so look for further layers and assess whether each layer at the end of perimeter and infill is level, overfull or underfull. Again adjust for first layer the 0 height or offset, for subsequent layers esteps / filament diameter or extrusion multiplier till each layer fills the outline leve with the top,
both objects are quick to slice, quick to print, and if printed perfectly as above will allow you to print simple prints like the bottle opener well.
GaZ
|
Re: Final tuning in Slic3r November 11, 2012 01:20AM |
Registered: 11 years ago Posts: 47 |
After many hours of tuning, I have yet to find the optimum Slic3r settings.
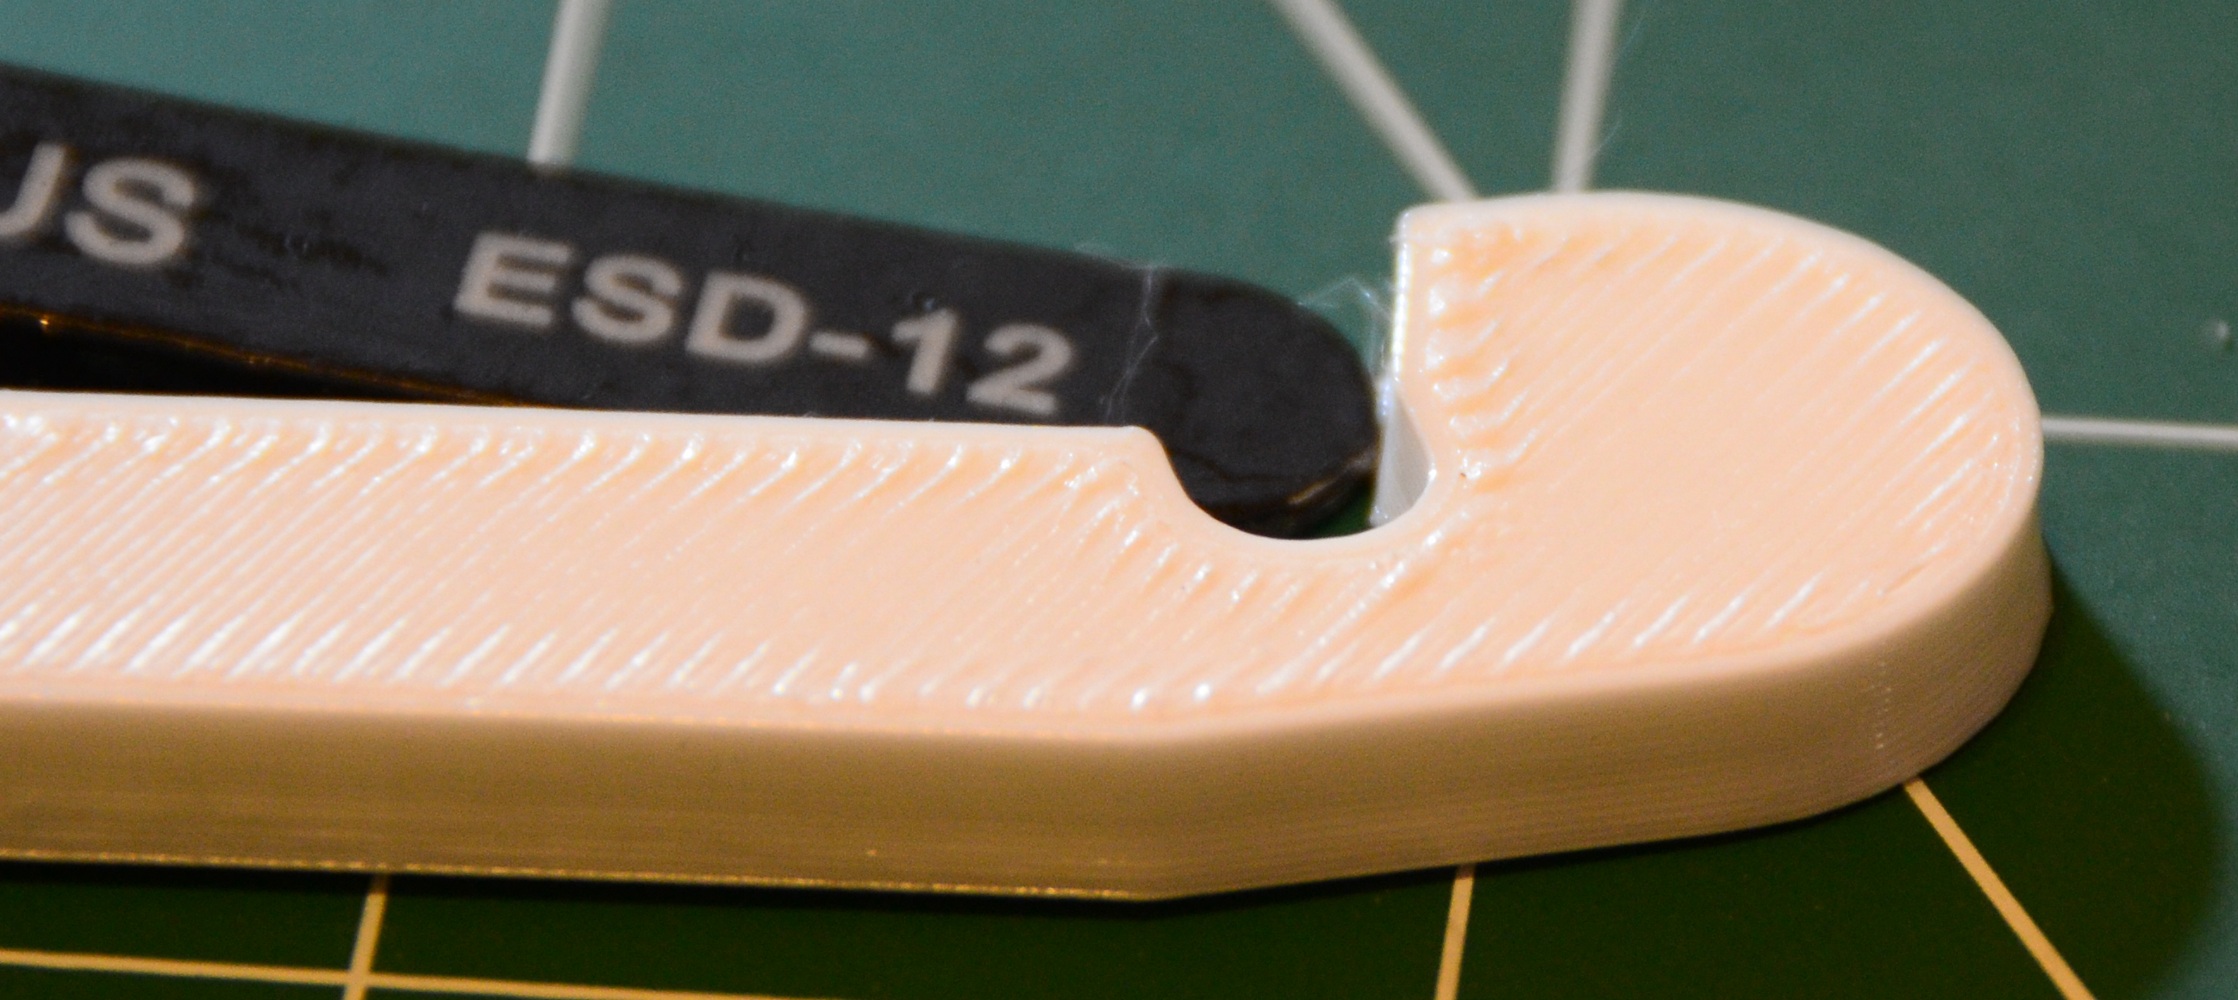
The best improvement I saw was when I told Slic3r that I am using a .4mm nozzle instead of a .5mm, witch is all that have at the moment. This produced the most perfect top layer/shell I have ever seen on any calibration cube!
However, briefly seen in the calibration cubes, and even more so in a larger item I need to print, the first layer always seems to be extruded at an irregular rate.
Take a look at the attached picture, both showing the first layer of the same item. The top piece is pretty much my original almost-default settings (stopped mid-way). The bottom piece is with no retraction, 1.025 extrusion multiplier, and the false .4mm nozzle.
So yet again, I'm stumped.
Perhaps if another Huxley owner would be so kind as to provide their own Slic3r config, that would be great. (base 0.5mm nozzle and/or 0.3mm nozzle setup.)
I have a few other ideas I'll try in the mean time.
|
Re: Final tuning in Slic3r November 11, 2012 11:28AM |
Registered: 11 years ago Posts: 560 |
|
Re: Final tuning in Slic3r November 11, 2012 06:46PM |
Registered: 11 years ago Posts: 47 |
Who would of thought; I always was keeping my nozzle temperature at 200C because, well, I thought that was the norm for PLA. I just bumped it up to 216C or 218C and everything works almost perfectly. I say almost, because I still have a few kinks left to work out.
After all this though, my 0.3mm nozzle should be in the mail soon, and when it comes, the tuning woes will have to start all over again. (granted, it's not much) I'll just focus on getting the new one working to the utmost perfection, rather then this one, for now.
Edit: For the record, attached is the most recent result.
Edited 1 time(s). Last edit at 11/11/2012 06:56PM by Physics_Dude.
|
Re: Final tuning in Slic3r November 14, 2012 08:40AM |
Registered: 11 years ago Posts: 40 |
I would like to note that I had issues with my surfaces not being flat and I adjusted my temp up and up and got it working but .... I found that the temp was not the issue and to high of a temp can cause you grief. My issue ended up bein that I was not getting enough pressure of the filament on the hobbed bolt. I increased the tenstion and am now printing at 185 instead of 210. This makes a much cleaner print for me. Just be sure your issue is not in your feeding is my suggestion. Have a great one.
|
Re: Final tuning in Slic3r November 15, 2012 12:12AM |
Registered: 11 years ago Posts: 47 |
As a final follow up,
I have found and fixed the issues. It was not exactly a temp issue, or a extrusion multiplier value, or whatever else I was changing previously. At this moment, all those previous mentioned settings are at their defaults for my printer.
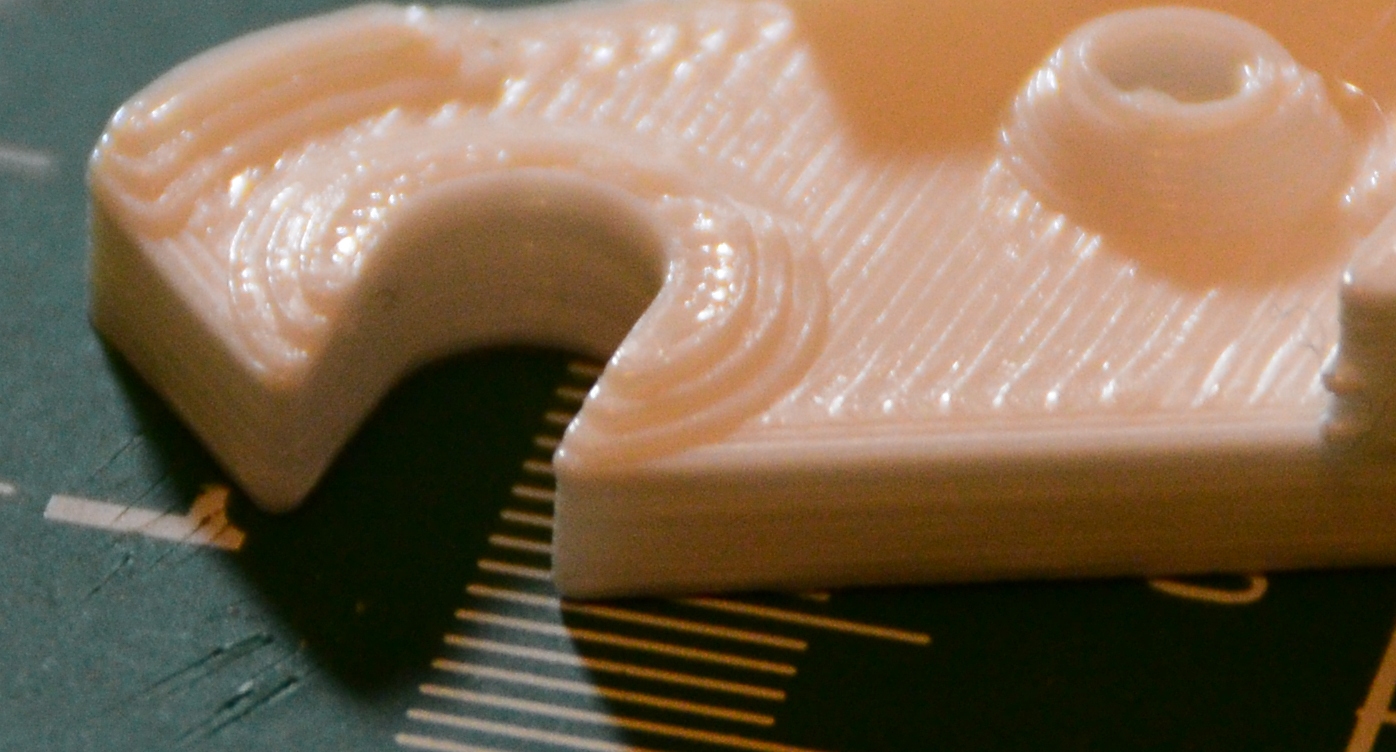
To get everything working perfectly, I went to Advanced Settings in the Print Settings tab, and there I changed all those Extrusion Width values to 0.5, my nozzle diameter.
Now there is no excess material on the edges of top shells, no gaps in the top or bottom shells, and with this new 0.3mm nozzle I just installed (along with adjusted settings for said nozzle), the results look insanely accurate.
The attached picture shows an earlier .5mm nozzle print from a while ago with the new said settings (albeit not finely tuned).
Edited 1 time(s). Last edit at 11/15/2012 12:13AM by Physics_Dude.
I have found and fixed the issues. It was not exactly a temp issue, or a extrusion multiplier value, or whatever else I was changing previously. At this moment, all those previous mentioned settings are at their defaults for my printer.
To get everything working perfectly, I went to Advanced Settings in the Print Settings tab, and there I changed all those Extrusion Width values to 0.5, my nozzle diameter.
Now there is no excess material on the edges of top shells, no gaps in the top or bottom shells, and with this new 0.3mm nozzle I just installed (along with adjusted settings for said nozzle), the results look insanely accurate.
The attached picture shows an earlier .5mm nozzle print from a while ago with the new said settings (albeit not finely tuned).
Edited 1 time(s). Last edit at 11/15/2012 12:13AM by Physics_Dude.
|
Re: Final tuning in Slic3r November 29, 2012 03:17PM |
@Physics_Dude.
After struggling with my support structures being way to thin, sometimes spiderweb size, I realized the advanced tab mouser-hoovering-help of "support material" where I had given 100%, said that the width was calculated as a percentage of the height! So with my setting of 0.1-0.2 mm layer hight the printer tried to deliver a support structure width of 0.1-0.2 mm with a 0.5 mm nozzle. To me that seems like an akward setting. Anyway, setting the support to 0.5mm made perfect support. I have strange results when printing structures of a small width (2mm). Even with fill density set to "1" I get two walls with quite a gap in between. I shall do as you and force the width-settings in the advanced tab. To me it sounds really strange to have a width setting to anything but the nozzle diameter. Except for the support maybe where you might want weaker structures.
After struggling with my support structures being way to thin, sometimes spiderweb size, I realized the advanced tab mouser-hoovering-help of "support material" where I had given 100%, said that the width was calculated as a percentage of the height! So with my setting of 0.1-0.2 mm layer hight the printer tried to deliver a support structure width of 0.1-0.2 mm with a 0.5 mm nozzle. To me that seems like an akward setting. Anyway, setting the support to 0.5mm made perfect support. I have strange results when printing structures of a small width (2mm). Even with fill density set to "1" I get two walls with quite a gap in between. I shall do as you and force the width-settings in the advanced tab. To me it sounds really strange to have a width setting to anything but the nozzle diameter. Except for the support maybe where you might want weaker structures.
|
Re: Final tuning in Slic3r November 29, 2012 06:13PM |
Registered: 12 years ago Posts: 109 |
|
Re: Final tuning in Slic3r November 30, 2012 02:33AM |
@myself
Forced 0.5 mm width on all parameters, and yepp, it printed the object as I wanted it to. 2 mm thick walls. Solid walls, no space in between. I first tried setting with perimeter = 1 and fill density = 1, but that still generated space between thin walls (outer and inner, correct distance). I guess it somewhat screws up the calculation when it is set to default (=0).
Forced 0.5 mm width on all parameters, and yepp, it printed the object as I wanted it to. 2 mm thick walls. Solid walls, no space in between. I first tried setting with perimeter = 1 and fill density = 1, but that still generated space between thin walls (outer and inner, correct distance). I guess it somewhat screws up the calculation when it is set to default (=0).
|
Re: Final tuning in Slic3r December 04, 2012 07:10AM |
|
Re: Final tuning in Slic3r August 26, 2014 06:36PM |
Registered: 9 years ago Posts: 2 |
I have been having a similar problem, the "wicker" gaps on the top fill layer. For me it turned out to be a cooling / infill issue.
I am using a Da Vinci 1.0 with both the stock XYZ software and Slic3r (latest version)
I was trying everything, changing temp, nozzle values, extrusion width, speed, filament. I calibrated the printer, callipered out the thin wall and got it set. Side textures and curves smooth (a little Z wobble but that is a separate issue). Only the top fill layer still had the problem. What is weirder is the gaps were about 1 extrusion thick, larger when I upped the extrusion width, smaller when I reduced it. I was thinking maybe it was a slicing error of some kind? Running the g-code through a visualizer with "emulate thickness" turned on showed no gaps. :/
So I sat down and printed about 30 test boxes, tweaking everything I could think of. It looked like under extrusion, but the wall thicknesses were dead on. Upping the multiplier just resulted in a over extruded mess, /still/ with gaps on the top fill. Ugh!
So I am looking at the boxes and noticing that as I over extruded, the edges of the top layer filled in, but the center still had gaps. If you look at Physics_Dude's photo you can see a hint of this.
The thing is, the Da Vinci does not have a fan...
"Bridging?" "No way I am printing like 5 top layers.... which are still warm and flex under the next layer so the print head can't get a good 'squish' to spread out the extruded filament...."
So I increase the infill to 20%. A sure enough, I still have gaps, /except/ under the infill supports. "ah HA!"
Increase the infill to 30%, no more gaps! "Success!"
I should have thought of it sooner. But on the plus side the whole exercise really familiarized me with Slic3rs advanced settings.
I am not saying this is always the issue with the top fill layer. In the beginning I was having under extrusions problems as well.
But cooling and support of the top fill layer may be another variable you want to take a look at if you are not getting the results you expect.
Especially if you are a fellow Da Vinci owner.
Edited 2 time(s). Last edit at 08/26/2014 06:47PM by licensed2hench.
Sorry, only registered users may post in this forum.