3d Stuffmaker Mega Prusa problems
Posted by CrazedWaffle
|
3d Stuffmaker Mega Prusa problems December 16, 2015 06:19PM |
Registered: 8 years ago Posts: 2 |
Hi everyone I'm newa complete noob to 3d printing in general and I'm looking for some major help with my printer. I can't even convey what's going on, I'll get the bed leveled and extruder the right height from the bed and will have some issue that will prevent a successful print. I'm basically at the point in which i hate the thing and wish I never bought it.
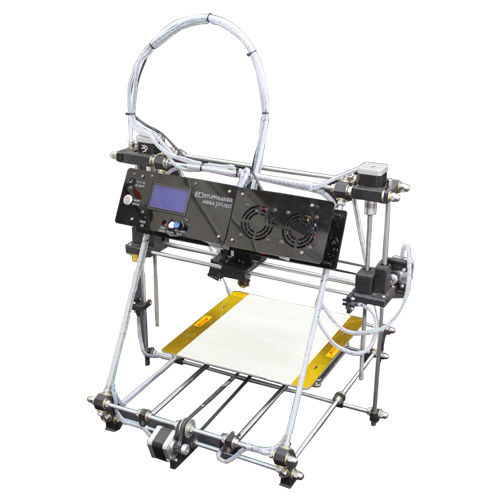
Printer: 3D StuffMaker Mega Pursa Gen3 kit
Here's a list of issues:
1. When trying to print the printer extruder is either too high or trying to bury itself in to the bed
2. Left Z motor (end motor) makes buzzing/grindy noise ( might be affecting issue above ) when printing starts
3. Some times when printing the bed will make a noise and move messing up the print
If you need any more info please let me know and i will do my best to provide the information
|
Re: 3d Stuffmaker Mega Prusa problems December 16, 2015 08:20PM |
Registered: 8 years ago Posts: 778 |
You are definately on the right way with your wish - Stuffmaker is IMHO the wrotst company out there, no quality, no matchin build manuals and of course no support at all once you showed them their worst mistakes.
Took me over 6 month to convert my crap into a working printer and only after compliling Marlin from scratch I was able able to get usable prints.
1. Is a quite common problem with their stuffed firmware, had the same issue with the original, calibrating was a nightmare, although in my case it was only in the range of 0.25mm.
2. Also quite common with them after a new build or a complete re-built.
I know you will hate me for it but I have been there before:
Take the entire z-axis assembly off.
Works best if you remove the dome nuts on the sides and carefully take out the x-axis assembly as a whole unit too.
Check the threaded rods and if required straighten them out - rolling over a flat surface should not show any part producing a gap.
By now you also noticed the weird mechanism holding the threaded rods in these mounts.
Clean it and make sure the nut mooves freely inside, same for the spring holding it in place.
Add a bit of silicone spray into the plastic before putting spring and nut back in.
When putting back together move the threaded rods up and down to check that the spring and nut allow movement without getting stuck.
When you turn the threaded rod it should move freely without getting stuck.
Clean the smooth and threaded rods with a lintfree cloth and some alcohol or acetone - if the cloth gets stuck on the threaded rod or leaves a lot of lint you have to use a steel wire brush to remove the burr from the thread.
After! putting the printer back together apply a drop of oil on the smooth rods and two or three on the threaded rods, spread them over the full length.
Adjust both sides evenly by turning the rods by hand and checking the length with calipers from the top, horizontal threaded rods onto the smooth rods of the x-axis.
Might take some time as the adjustments always interfere with each other but you should get below 1/10 of a mm in difference here.
3. The bed requires proper tension on the belt, a good alignment of the smooth rods and attention to the washers holding the belt on the bearings.
If you built it yourself using their manual your alignment will be off, measure from the back, left mounting bracket to the smooth rod and adjust the other end to exact the same length from the front, left mounting bracket.
Check the distance between the smooth rods right under the build plate.
Adjust both ends to exactly the same value but now do this adjustment on the right smooth rod only!
This way you keep it all centered and aligned, while their manual only gives you distances on the rods to work with.
Now you need to adjust the belt position so it moves as freely over the bearings as possible - don't worry it won't stay off the washers.
Move the build plate back and forth by hand while adjusting the position for motor bracket and the bearing on the other side of the printer.
Add a drop of silicone oil on the inside of the washers while moving the build platform by hand, this will provide a lubricated layer on the belt sides reducing friction on them.
If you have very bad washers you might want to replace them or sand the outer rim with fine sandpaper to make it really smooth so the belt won't get stuck with the sides.
Double check that the motor for the y-axis is mounted correctly!
In their old manuals it was shown inverted in the pictures and if mounted that way and with the distances given in the manual, the belt will run at a slight angle causing massive friction everywhere.
If it is like in your pic it should be fine.
Check if Stuffmaker finally allows you to change and store the EEPROM values, if so it makes the tuning of the Esteps possible.
Otherwise you might want to think about flashing Marlin from scratch as I think Stuffmaker still refuses to give you more than a hex file for the firmware.
|
Re: 3d Stuffmaker Mega Prusa problems December 17, 2015 05:38PM |
Registered: 8 years ago Posts: 2 |
Thank you so much for your help, going to try your suggestions this weekend when i have some free time. I also heard that i don't need the top nut (both sides) on the Z threaded rods becuse it causes binding issue, hope I decribed that well enough. Crazy to think that Home Depot has a MakerBot Replicator Mini on clearance for $699 right now, just wish i had the money for it.
|
Re: 3d Stuffmaker Mega Prusa problems December 17, 2015 08:56PM |
Registered: 8 years ago Posts: 778 |
Leave the dome nuts in place!
If there are any binding issues or movement problems it will because of alignment problems but NOT because of the nuts holding the printer together.
Been there, done that, ripped my hair out for it - well the few bits that are left anyway LOL
Whatever you do on or with the printer, don't trust the build manual and trust the Stuffmaker support even less.
Once you start complaining too much to them their support will simply cut you off and you need to make further requests with a different Email address, which often won't work as addresses not listed in their database are now being ignored too.
I gave up on them about two years ago.
You will get a printer that actually works quite well (apart from the bowden system and extruder) once you put the manual in the bin and used ruler, caliper and common sense to aligned all roads on the printer.
Best example is the threaded rods holding the top of the printer.
You want them aligned so the Z-axis is at exact 90° to the y-axis - but not so the measurements from the manual are matched.
Means you use nice carpenters angle or something else with a true 90° angle to align everything.
Once you done the things from the above posting and this stuff here you can go and start tuning everything to get exact results.
If your firmware refuses to work with EEPROM settings for easy tuning of the E steps and pid tuning let me know and I might be able to guide you through the steps of getting the latest Marlin or Repetier on it.
|
Re: 3d Stuffmaker Mega Prusa problems May 11, 2016 10:48PM |
Registered: 7 years ago Posts: 63 |
Hi
I have possibly made the same mistake and purchased a Stuffmaker the same as discussed.
My main problem is with the calibration of the printer.
I am using repetier for the software control of the printer. I am also using pla on a none heated print bed.
I have calibrated the printer so that when I send it to home, the x,y,z move it back to the far right corner with the print nozzle a fraction of a mm off the print bed. The calibration for the z axis is done relative to an optical limit switch.
When I start a print job after locating its position and slicing it, the print extruder will move to the set position correctly but the z axis moves lower than the print bed, as if it is set somewhere to drop down further than the calibration. The result is I have to kill the print before the print bed is gouged.
I don't know if there is something going wrong with the software, that it adds a -1 or -2 mms to the print in the z axis.
If you are familiar with repetier or the printer and would have an idea on what I can do that would be great.
Regards
Ian
|
Re: 3d Stuffmaker Mega Prusa problems May 12, 2016 04:19AM |
Registered: 8 years ago Posts: 778 |
|
Re: 3d Stuffmaker Mega Prusa problems May 12, 2016 08:04AM |
Registered: 7 years ago Posts: 63 |
Hi
I had a suspicion it had something to do with slicer and how the object was prepared. It does it to any object I slice.
What software do you use? If it is a free one I could try it and see if it helps sort out this problem.
Would you know how to adjust the offset in the firmware?
Regards
Ian
I had a suspicion it had something to do with slicer and how the object was prepared. It does it to any object I slice.
What software do you use? If it is a free one I could try it and see if it helps sort out this problem.
Would you know how to adjust the offset in the firmware?
Regards
Ian
|
Re: 3d Stuffmaker Mega Prusa problems May 12, 2016 08:21AM |
Registered: 8 years ago Posts: 778 |
I don't know what firmware you use but I first double check all your slicing settings in this regard are correct.
And by default there should be no offset in the firmware.
With the M501 command you should see in the status window if there are any offsets, you can change them with corresponding codes.
And by default there should be no offset in the firmware.
With the M501 command you should see in the status window if there are any offsets, you can change them with corresponding codes.
|
Re: 3d Stuffmaker Mega Prusa problems May 12, 2016 07:28PM |
Registered: 7 years ago Posts: 63 |
Hi
I will check out the offsets, although I am not sure where to look, being new to the software.
I did look at the status window for other stuff and found that when trying other commands, the software would ignore them saying that it would defer to hardcoded defaults. Have you crossed that before.
I was wondering if you had any screenshots of where I should look.
Regards
Ian
|
Re: 3d Stuffmaker Mega Prusa problems May 12, 2016 07:32PM |
Registered: 7 years ago Posts: 63 |
|
Re: 3d Stuffmaker Mega Prusa problems May 12, 2016 11:06PM |
Registered: 8 years ago Posts: 778 |
|
Re: 3d Stuffmaker Mega Prusa problems May 12, 2016 11:44PM |
Registered: 7 years ago Posts: 63 |
Hi
Mine is the very same with the threaded rods. I have attached the picture.
I assume you are referring to passing on your firmware file for it.
I wasn't sure what you meant by 'adjust Marlin to the needs of the Gen6 board'. What is Marlin?
Regards
Ian
Mine is the very same with the threaded rods. I have attached the picture.
I assume you are referring to passing on your firmware file for it.
I wasn't sure what you meant by 'adjust Marlin to the needs of the Gen6 board'. What is Marlin?
Regards
Ian
|
Re: 3d Stuffmaker Mega Prusa problems May 13, 2016 01:30AM |
Registered: 8 years ago Posts: 778 |
That is a different or at least newer model.
If you really have a display attached then I am not sure if the firmware would work.
And Marlin is a firmware for this - why do you ask about firmware if you don't know what could be available?
If you want what was designed for the machine you will have to fight a few weeks with Stuffmakers great support.
|
Re: 3d Stuffmaker Mega Prusa problems May 13, 2016 03:11AM |
Registered: 7 years ago Posts: 63 |
|
Re: 3d Stuffmaker Mega Prusa problems May 13, 2016 03:56AM |
Registered: 8 years ago Posts: 778 |
Well, you got that bit right, which was the reason to switch to Marlin as with that you at least have the support of the cummunity.
Did you try to check for a homing offset?
There is another "workaround" to get you going:
Adjust the z-endstop so you have enough clearance over the plate when starting a first layer.
Stop the first layer as soon as it starts to extrude filament and adjust the endstop until you have it at layer height, e.g. 0.2mm.
It might not be the nicest way but it works.
|
Re: 3d Stuffmaker Mega Prusa problems May 13, 2016 04:28AM |
Registered: 7 years ago Posts: 63 |
Hi
Sorry, I will check the homing offset tonight.
I did try the other way by starting a print and adjusting the endstop until it would print close to the print bed. But I found that it still would go out of position and the next print would hit the bed. Its as though there is a definite error somewhere that throws out the positioning of the z axis.
I did go and buy a mechanical limit switch but found wiring it to work on the printer instead of the optical endstop was problematic and forgo the idea.
Regards
Ian
|
Re: 3d Stuffmaker Mega Prusa problems May 13, 2016 05:40AM |
Registered: 8 years ago Posts: 778 |
|
Re: 3d Stuffmaker Mega Prusa problems May 13, 2016 10:57PM |
Registered: 7 years ago Posts: 63 |
|
Re: 3d Stuffmaker Mega Prusa problems May 14, 2016 05:49AM |
Registered: 7 years ago Posts: 63 |
Hi
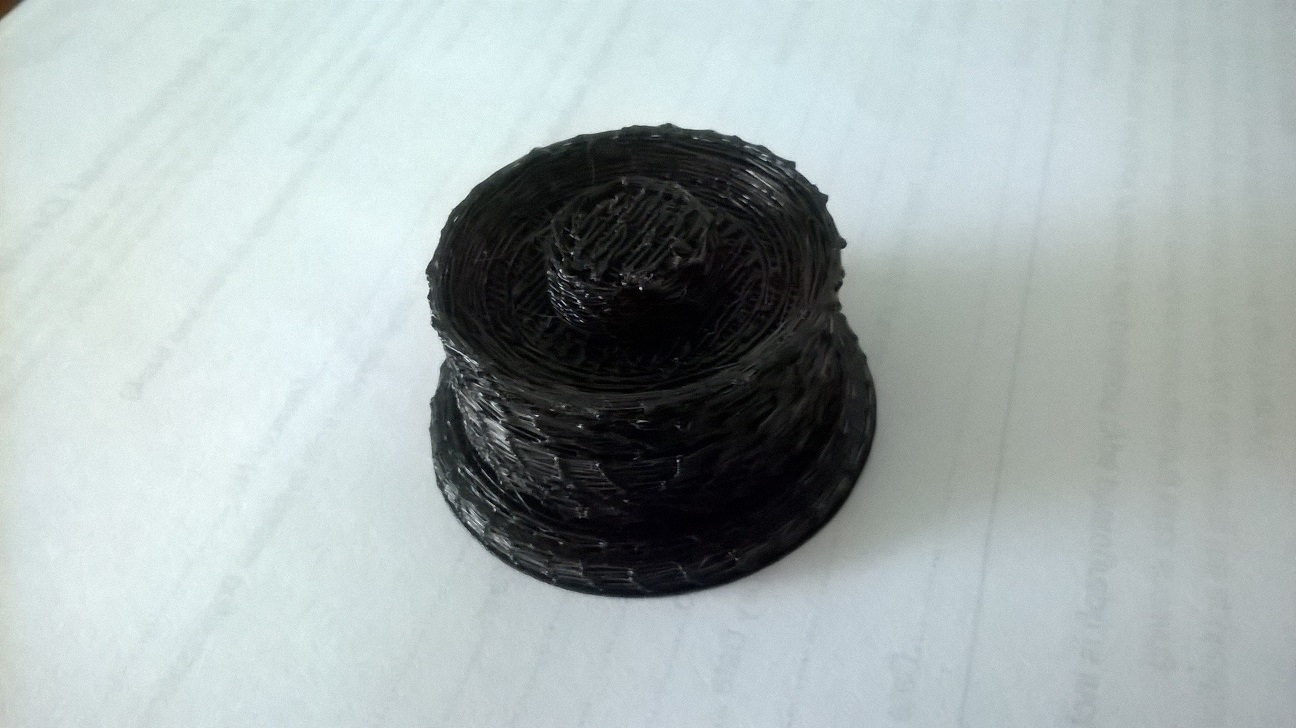
Having sorted out the z axis problem, I have my next problem and thats the print result.
What appears to be happening is that the first two layers print perfectly, the infill prints fine but the outer perimiter prints terribly.
I have attached a picture of how a print came out.
Were would I start to look at correcting this problem?
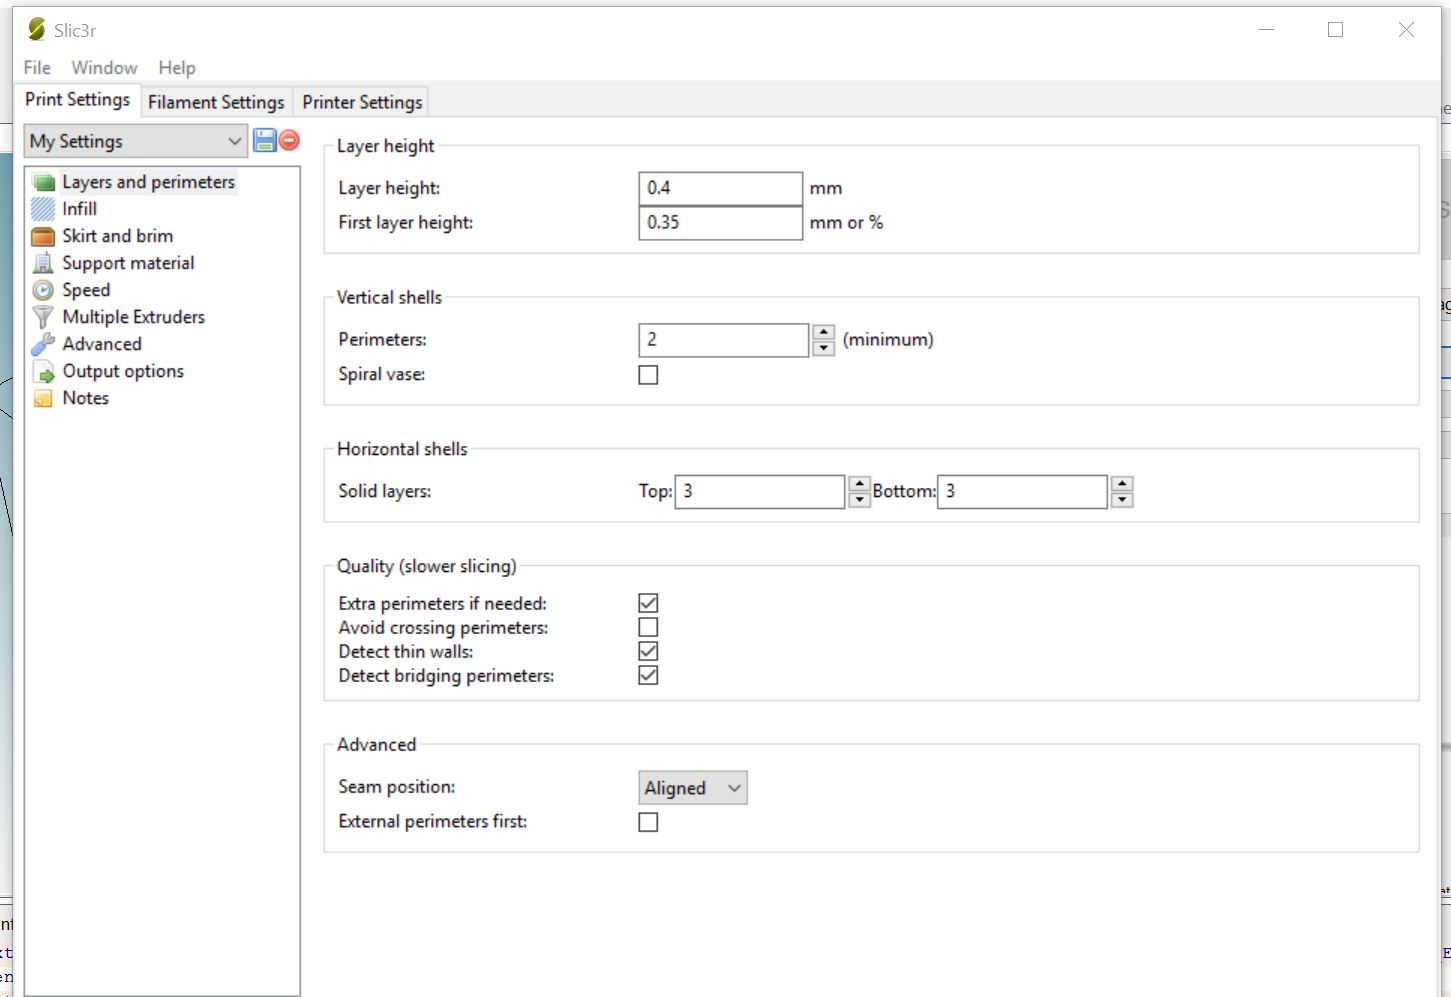
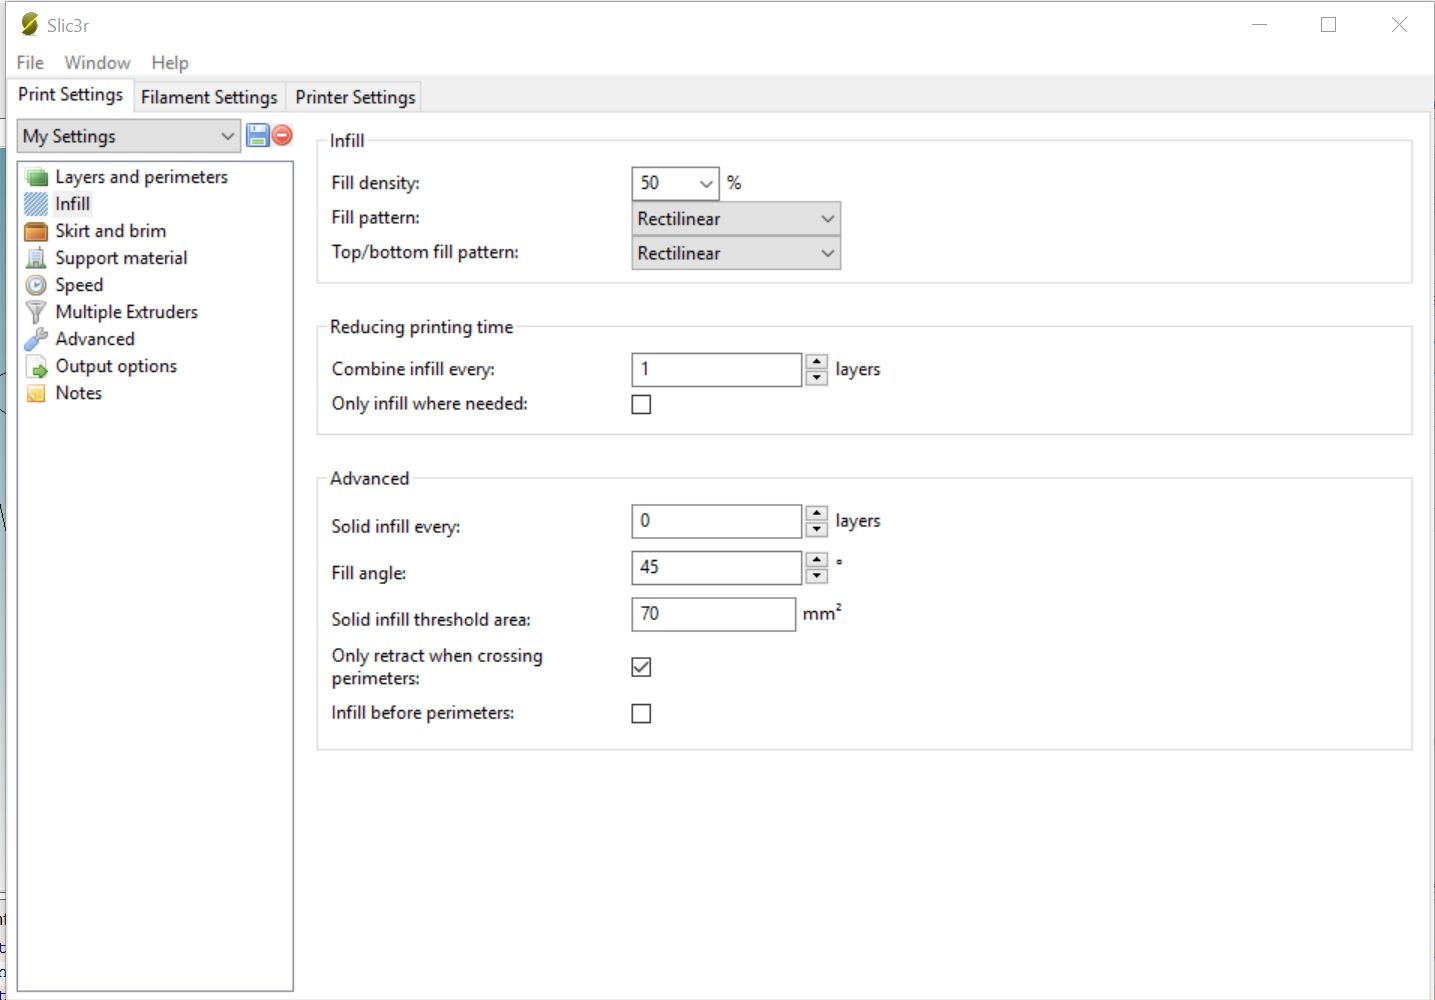
I have attached screen captures of my slic3r configuration as well.
Regards
Ian
Having sorted out the z axis problem, I have my next problem and thats the print result.
What appears to be happening is that the first two layers print perfectly, the infill prints fine but the outer perimiter prints terribly.
I have attached a picture of how a print came out.
Were would I start to look at correcting this problem?
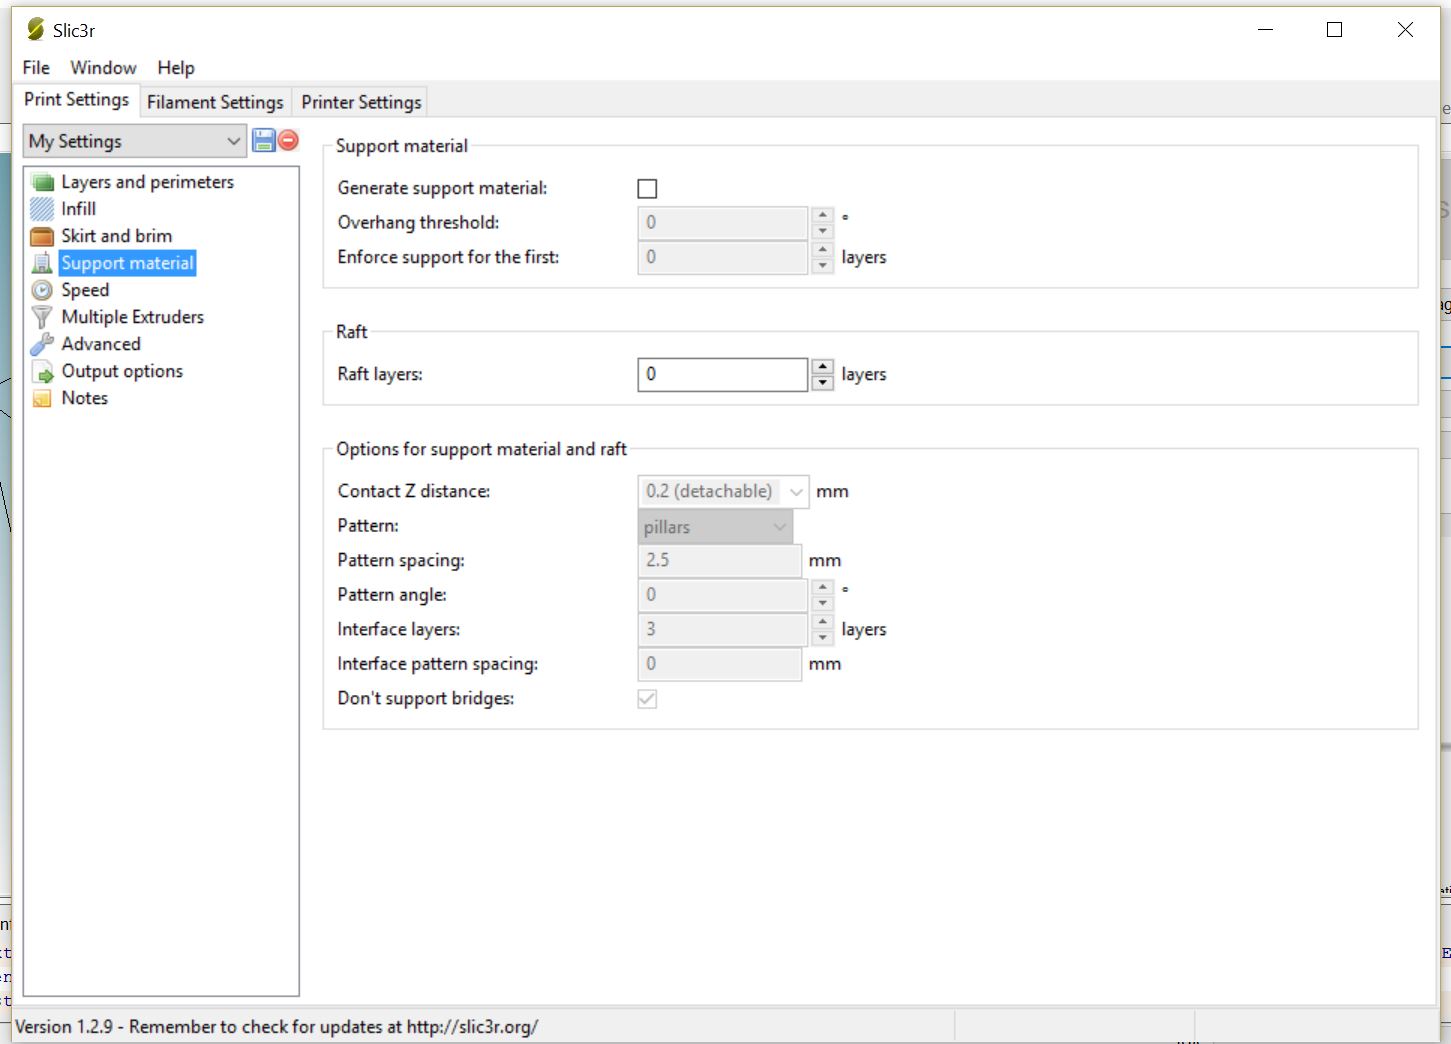
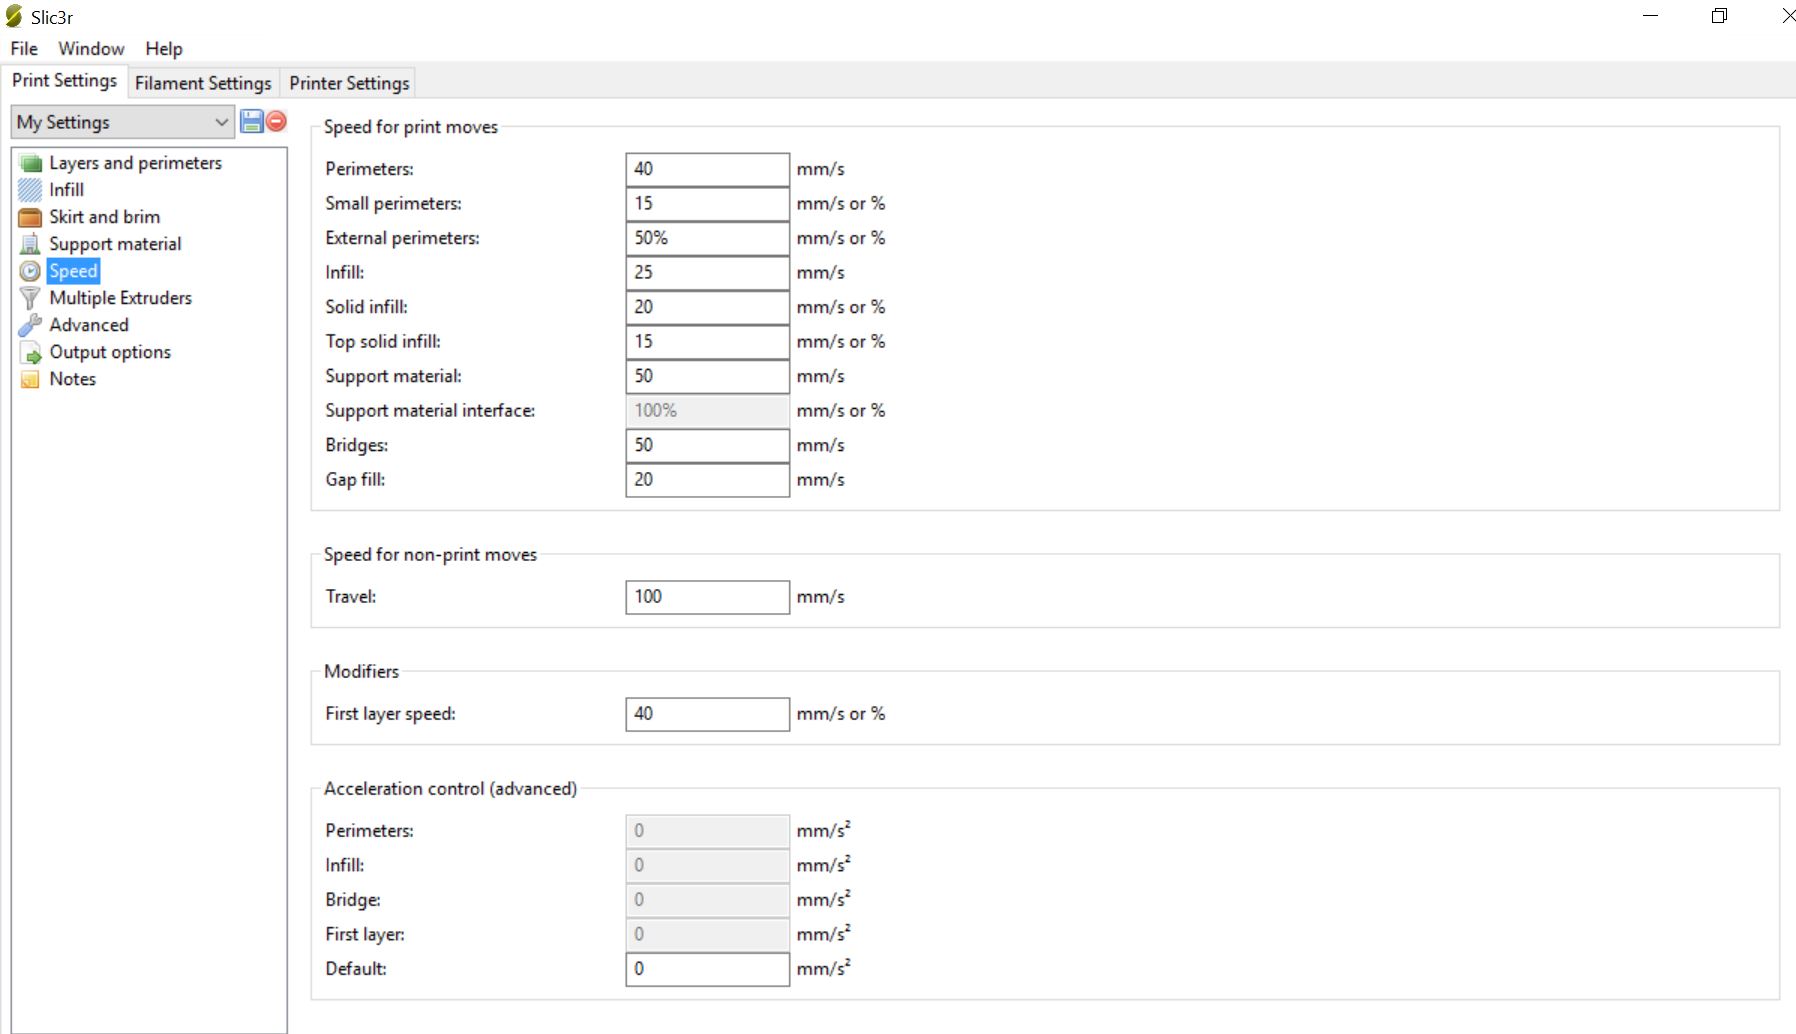
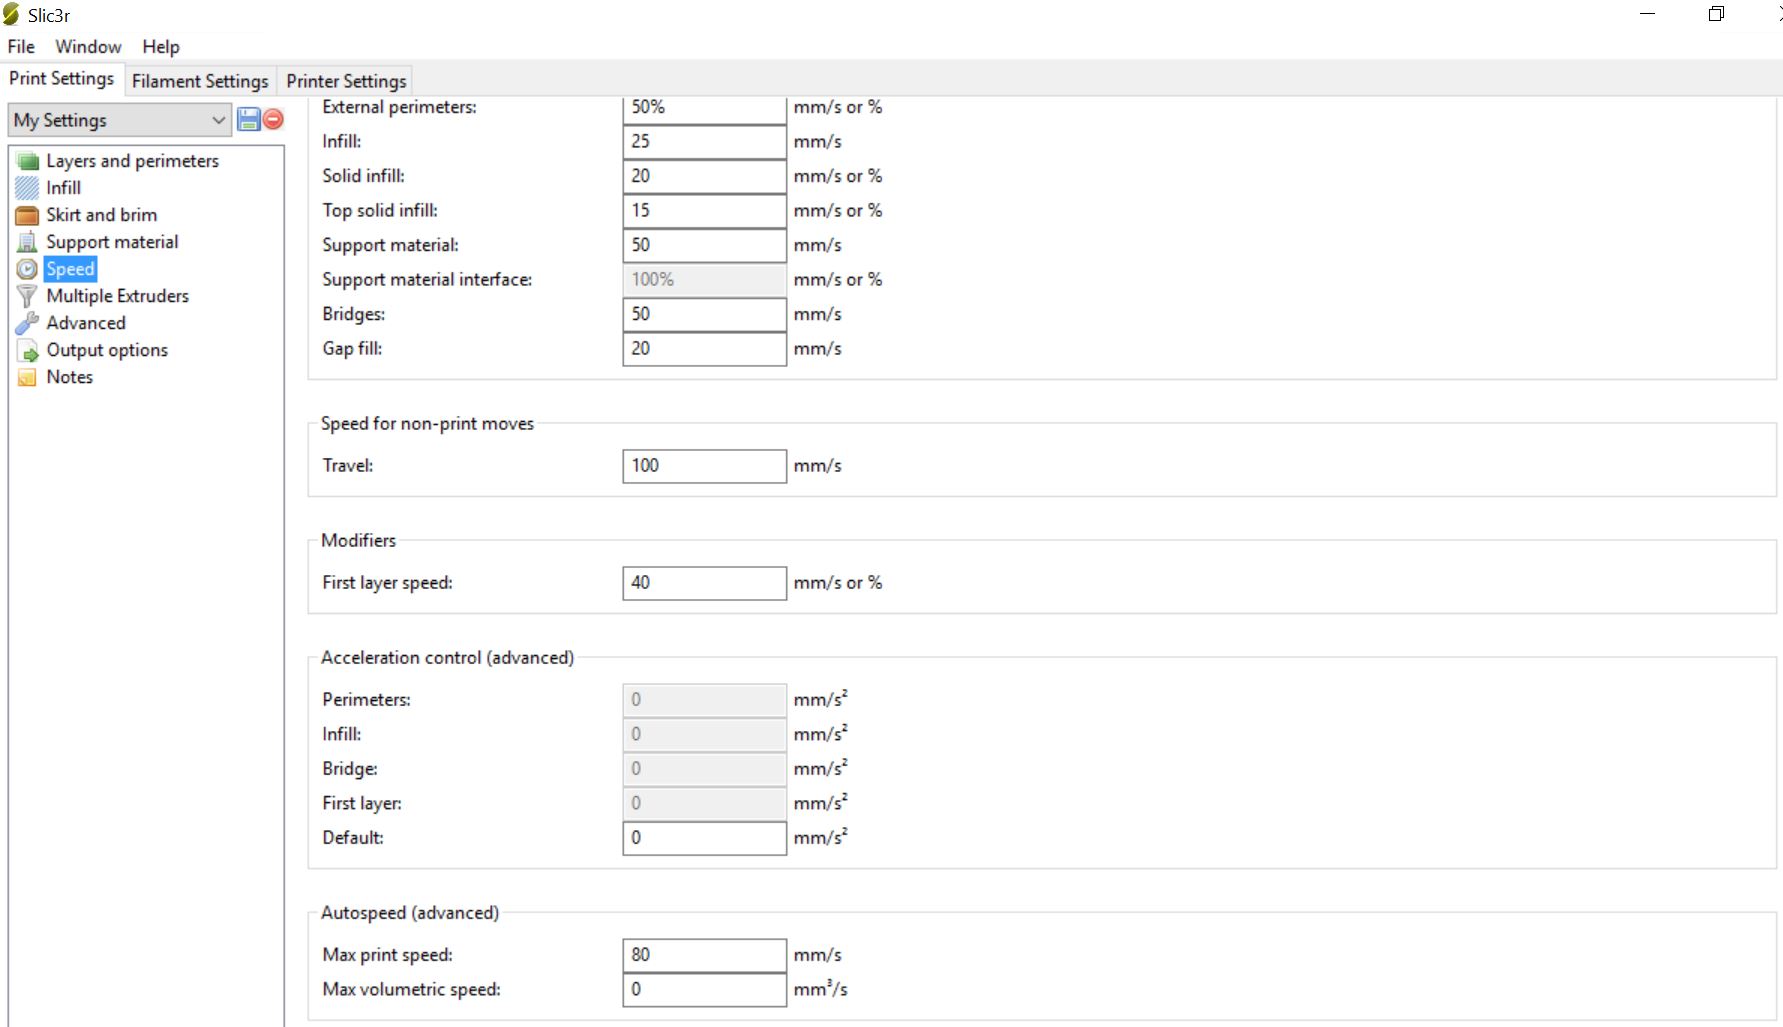
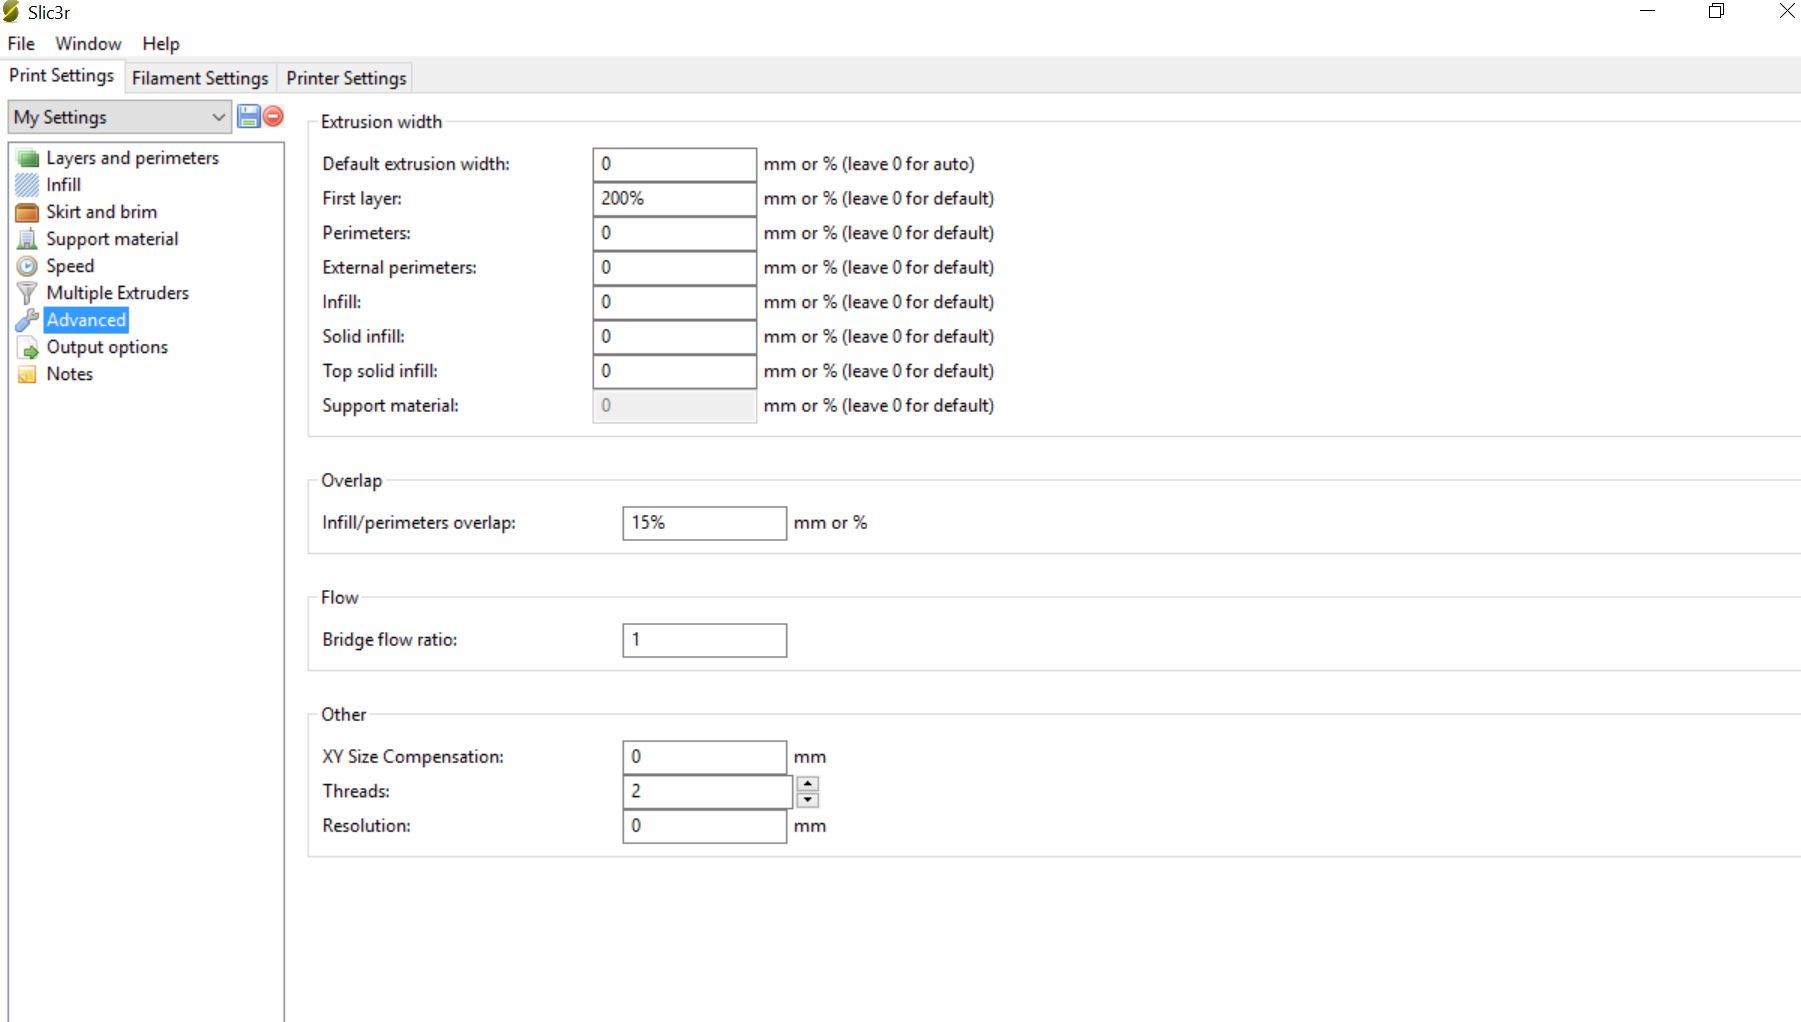
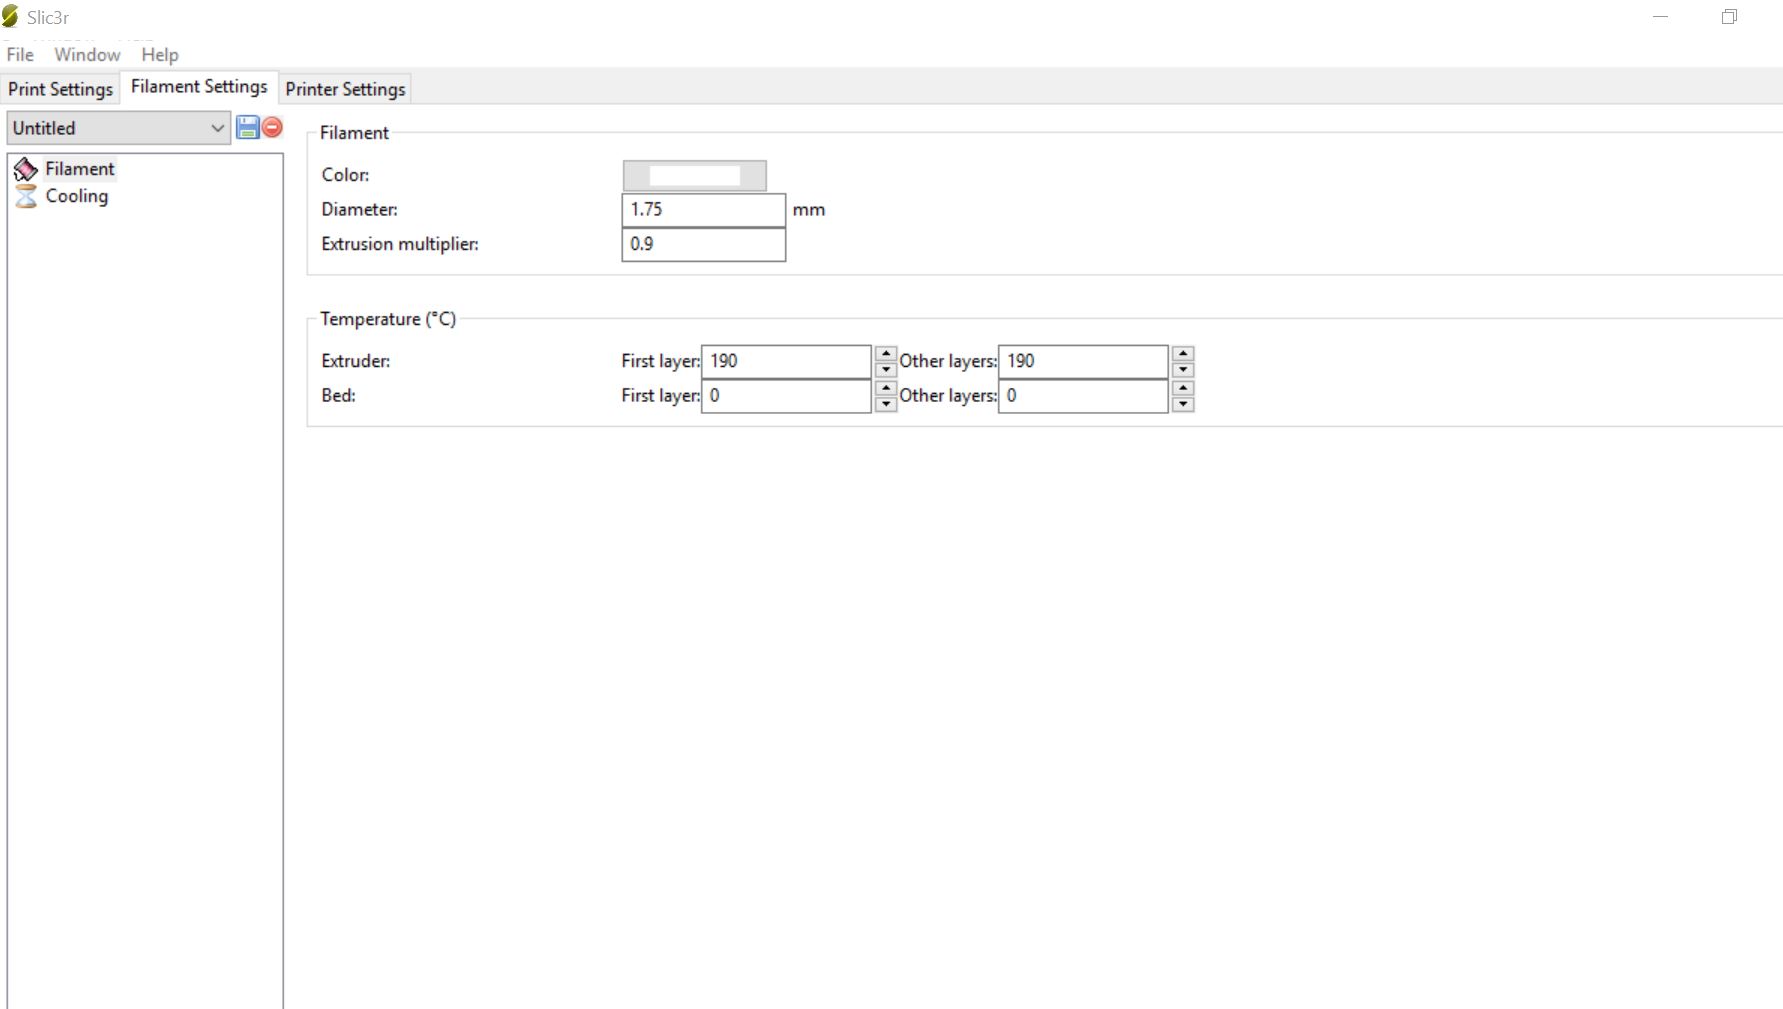
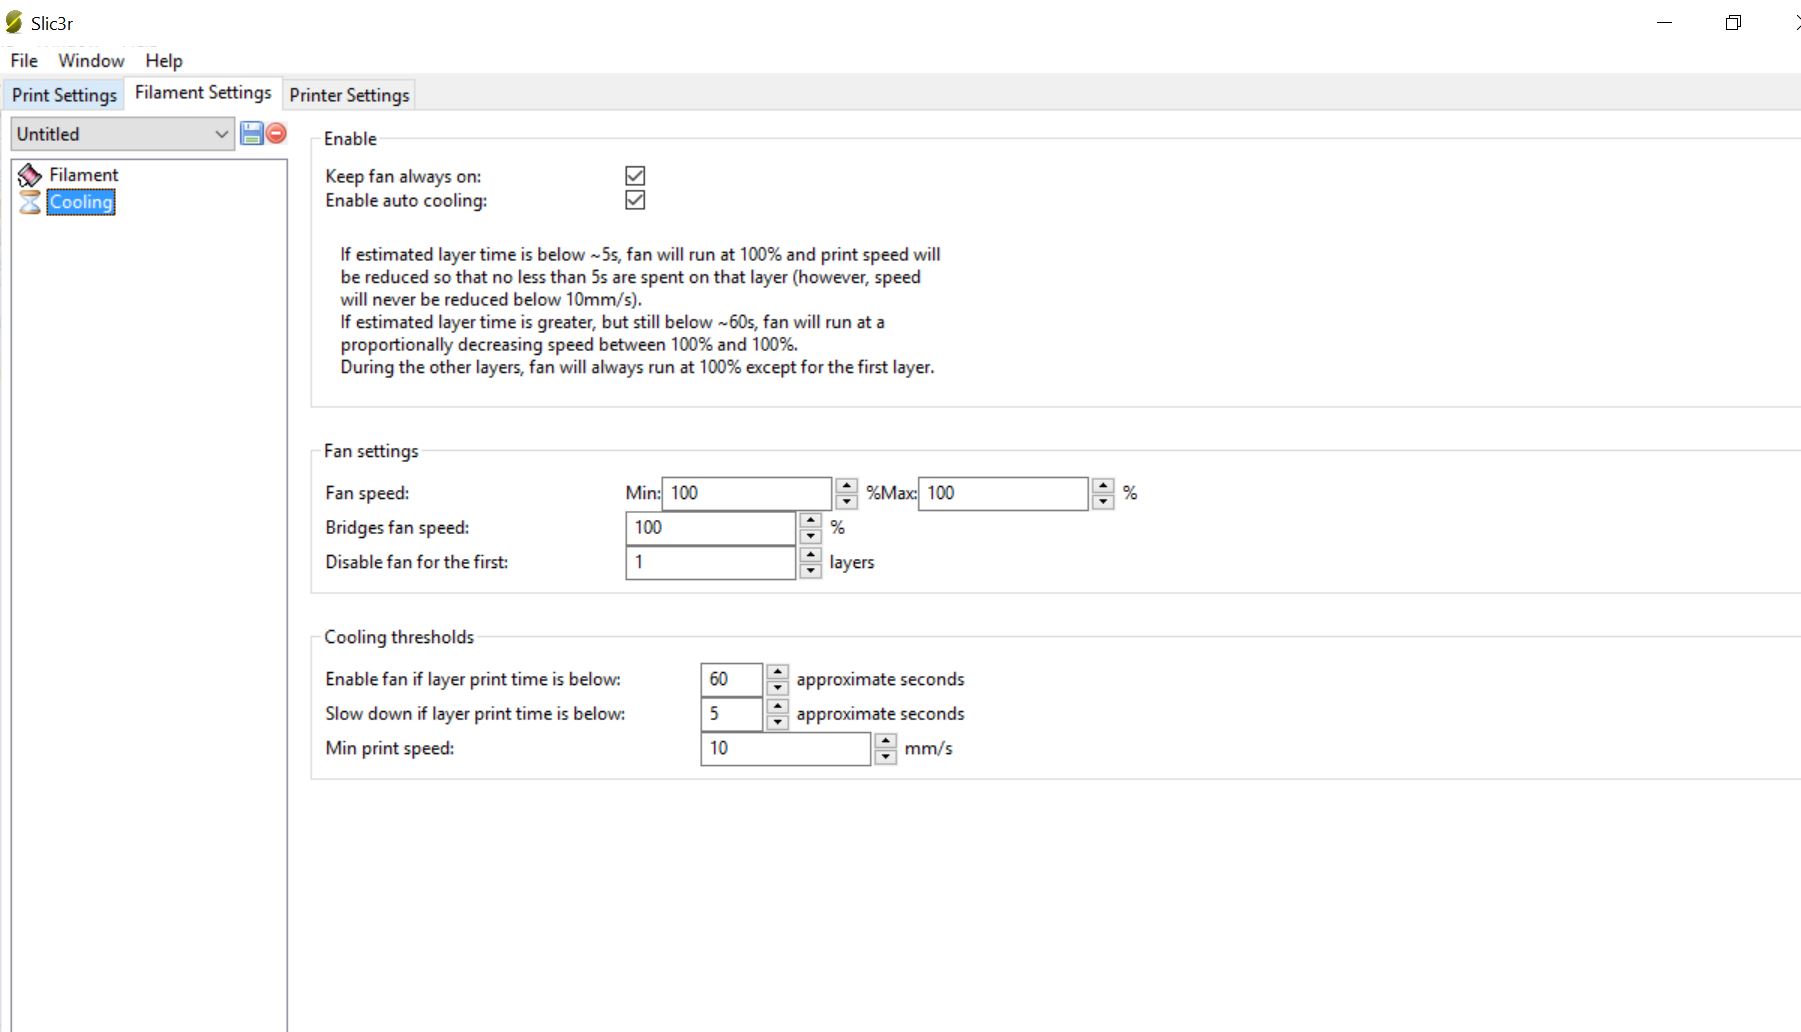
I have attached screen captures of my slic3r configuration as well.
Regards
Ian
Attachments:
open | download - WP_20160514_09_59_17_Pro.jpg (302.8 KB)
open | download - Config1.JPG (105.7 KB)
open | download - Config2.JPG (96.2 KB)
open | download - Config3.JPG (92.9 KB)
open | download - Config4.JPG (112.1 KB)
open | download - Config5.JPG (118.4 KB)
open | download - Config6.JPG (120.2 KB)
open | download - Config7.JPG (118.9 KB)
open | download - Filament1.JPG (72.7 KB)
open | download - Filament2.JPG (117.9 KB)
|
Re: 3d Stuffmaker Mega Prusa problems May 14, 2016 08:33AM |
Registered: 9 years ago Posts: 1,873 |
|
Re: 3d Stuffmaker Mega Prusa problems May 14, 2016 11:12AM |
Registered: 8 years ago Posts: 778 |
I agree 0.4 is almost overkill for the extruder if you use 1.75mm filament and as said it would require a quite big nozzle too.
Do yourself a favour and measure first if you really get 50mm or 100mm of filament moved when you extrude this amount.
If not adjust the stepping for the extruder until it is just right.
Reduce the layer height, start with 0.3 for the fisrt and then use 0.2mm - less if your nozzle is smaller than 0.3mm.
The machine is running, now it is down to finding the correct parameters.
Once you get decent quality print you cn finetune for speed and extrusion.
|
Re: 3d Stuffmaker Mega Prusa problems May 15, 2016 04:23AM |
Registered: 7 years ago Posts: 63 |
Hi
I have tried reducing the layer height to 0.2 and that hasn't helped. I have reduced the perimiter speed down so it is slowing the process down, but it still has the problem of bit printing the perimiters correctly.
I do notice the temp drops off. I keep it printing at 205 and it will drop up and down 5 or 6 degrees.
My fan has had a shroud added to it, and I was wondering if too much air on the nozzle would be a problem?
How do I adjust the stepping for the extruder?
Regards
Ian
|
Re: 3d Stuffmaker Mega Prusa problems May 15, 2016 06:23AM |
Registered: 8 years ago Posts: 778 |
If you have a Gen6 board then check Google for the thermistor problem, there are guides on how to fix this on the circuit board- I think it was by adding a simple capacitor.
And the stepping for the extruder is adjusted the same as for the axis, even in the sam line in the firmware and the same command in Proterface.
And the stepping for the extruder is adjusted the same as for the axis, even in the sam line in the firmware and the same command in Proterface.
|
Re: 3d Stuffmaker Mega Prusa problems May 16, 2016 07:41PM |
Registered: 7 years ago Posts: 63 |
Hi
I pulled the extruder off to give it a clean out to see if there was any blockage in there.
Here's what they look like:
The nozzle is a 0.7mm.
I was wondering if I could replace this piece, or change the nozzle to a smaller one. It looks as though I would have to remove the tape off but I am concerned that the tube frame the nozzle is mounted on may break if I replace it.
I understand that it would help putting a smaller nozzle on it.
Has anyone replaced this type of extruder part for this type of printer? Any directions?
Regards
Ian
I pulled the extruder off to give it a clean out to see if there was any blockage in there.
Here's what they look like:


The nozzle is a 0.7mm.
I was wondering if I could replace this piece, or change the nozzle to a smaller one. It looks as though I would have to remove the tape off but I am concerned that the tube frame the nozzle is mounted on may break if I replace it.
I understand that it would help putting a smaller nozzle on it.
Has anyone replaced this type of extruder part for this type of printer? Any directions?
Regards
Ian
|
Re: 3d Stuffmaker Mega Prusa problems May 16, 2016 10:04PM |
Registered: 8 years ago Posts: 778 |
|
Re: 3d Stuffmaker Mega Prusa problems May 16, 2016 10:28PM |
Registered: 7 years ago Posts: 63 |
|
Re: 3d Stuffmaker Mega Prusa problems May 16, 2016 10:33PM |
Registered: 7 years ago Posts: 63 |
Would any of these be of use:
[www.ebay.com.au]
Although my unit has a stepper motor on it, I wouldn't know how to mod all that. I assume I would need to find a hot end with the nozzle that would fit in the hole that's already there.
What did you do with yours.
Regards
Ian
[www.ebay.com.au]
Although my unit has a stepper motor on it, I wouldn't know how to mod all that. I assume I would need to find a hot end with the nozzle that would fit in the hole that's already there.
What did you do with yours.
Regards
Ian
|
Re: 3d Stuffmaker Mega Prusa problems May 17, 2016 12:27AM |
Registered: 8 years ago Posts: 778 |
I would not like to use these long nozzles, the shorter ones are better as they won't cool down so much.
Something like this.
See the difference in tip length?
But unless you buy a really quality one be prepared for some manual labour.
The heatbreak needs to be sanded and polished and if you don't use a teflon liner in the coldend you need to polish it too.
Similar story for gaps, for example if the heatbreak has the thread going all the way up - it is best to remove the upper few turns of the thread so it will fit in without a gap.
|
Re: 3d Stuffmaker Mega Prusa problems May 18, 2016 11:04PM |
Registered: 7 years ago Posts: 63 |
Hi
I have been reading a lot of sites about the Stuffmaker and it appears you have posted a lot of information about the printer and the work you have done.
I wish I had done research before I purchased it so I could have purchased another printer, which is the impression I am getting. I saw the fact that it had a big print bed as a plus, except not much use if you carn't print.
I am getting the impression that there is a lot of hardcoded software to the printer.
I was wondering whether the concept of buying a completely different unit like this:
[www.ebay.com.au]
And modding that whole area would make the printer workable.
I am at the stage that I have put it on ebay to resell, but don't know if anyone would buy it especially with its problems. The suggestion was to change the price to $250 to make it worth somebody using.
[www.ebay.com.au]
If you have any suggestions if I need to describe it better or even an appropriate price that would be great.
But I would like to think the printer is rescueable, and improvable, or would that necessitate an improvement in wiring and circuitry to.
Regards
Ian
PS. Do you still have your stuffmaker or have you moved on.
I have been reading a lot of sites about the Stuffmaker and it appears you have posted a lot of information about the printer and the work you have done.
I wish I had done research before I purchased it so I could have purchased another printer, which is the impression I am getting. I saw the fact that it had a big print bed as a plus, except not much use if you carn't print.
I am getting the impression that there is a lot of hardcoded software to the printer.
I was wondering whether the concept of buying a completely different unit like this:

[www.ebay.com.au]
And modding that whole area would make the printer workable.
I am at the stage that I have put it on ebay to resell, but don't know if anyone would buy it especially with its problems. The suggestion was to change the price to $250 to make it worth somebody using.
[www.ebay.com.au]
If you have any suggestions if I need to describe it better or even an appropriate price that would be great.
But I would like to think the printer is rescueable, and improvable, or would that necessitate an improvement in wiring and circuitry to.
Regards
Ian
PS. Do you still have your stuffmaker or have you moved on.
|
Re: 3d Stuffmaker Mega Prusa problems May 19, 2016 02:52AM |
Registered: 8 years ago Posts: 778 |
The only real issue with Stuffmaker is that they stuff up the hardware so it is basically only usable for PLA.
If you get a decent extruder and maybe a normal firmware like standard Marlin or Repetier they are quite usable machines.
Sure there are some basic design flaws but they are similar to other machines following the same frame concept.
I replaced hotend(s), extruder and firmware and print now whatever material I want.

Sorry, only registered users may post in this forum.