Layer thickness and printing speed.
Posted by paperfrom
|
Layer thickness and printing speed. February 12, 2016 11:24AM |
Registered: 8 years ago Posts: 25 |
|
Re: Layer thickness and printing speed. February 12, 2016 04:15PM |
Registered: 8 years ago Posts: 778 |
Nope.
It depends on the type of filament, how good your hardware is and how well everything is calibrated.
For example I can print in ABS with about 40mm/s, 70 if the shape is quite simple.
PLA I can go as high as 120mm/s if I have to but Nylon I do at only 15-20mm/s....
And these values are based on a 0.3mm nozzle.
|
Re: Layer thickness and printing speed. February 12, 2016 04:52PM |
Registered: 12 years ago Posts: 2,470 |
For me there is a range of speed that works and usually that range is lower if i print with lower layerheight. The range can be pretty broad though and very much dependent on the exact machine, material, hotend and extruder. The experience i make with one of my machines can be only vaguely applied to any of the others i have, they are just to different in behaviour.
[www.bonkers.de]
[merlin-hotend.de]
[www.hackerspace-ffm.de]
[www.bonkers.de]
[merlin-hotend.de]
[www.hackerspace-ffm.de]
|
Re: Layer thickness and printing speed. February 14, 2016 07:19PM |
Registered: 8 years ago Posts: 25 |
Thank you for your reply Downunder35m and Srek.
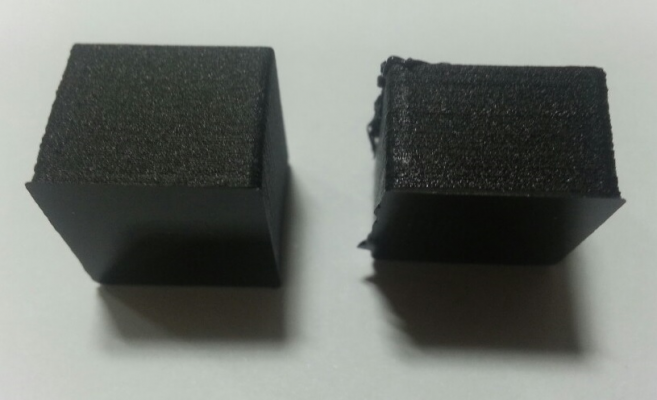
I try to reach the lowest layer thickness possible in ABS with my crappy Prusa Mendel i3. My goal is 0.01mm = 10um. Last time i printed 15x15x15 cubes in 0.1mm and 0.03mm layer thickness both with 10mm/s. Although the 0.03mm cube took a longer time, the surface of 0.1mm cube seem to be more smoother than 0.03mm. What could be the issue here?
Thank you for your time.
In the image, left cube is 0.1mm layer thickness and the other one is 0.03mm.
|
Re: Layer thickness and printing speed. February 14, 2016 08:05PM |
Registered: 10 years ago Posts: 580 |
Richard Horne (Richrap) had this same issue.
See here
I wonder if there is a mechanical limit for minimum layer heigh - perhaps some interaction between the cooling super thin extrude and the nozzle dragging over it, or difficulty getting consistent flow when the gap is so narrow and back-pressure is higher.
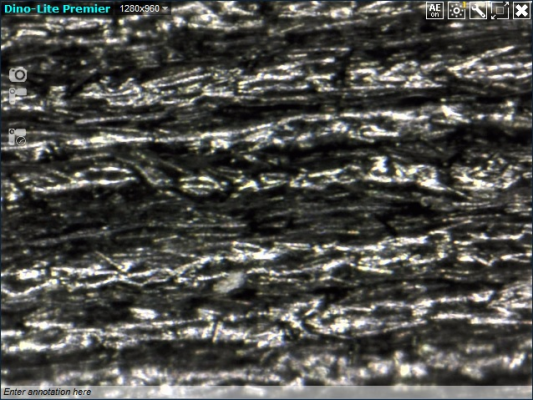
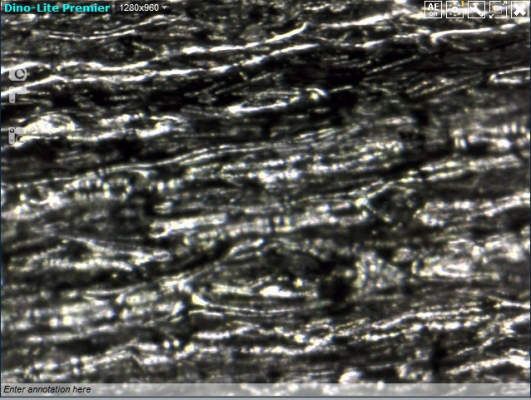
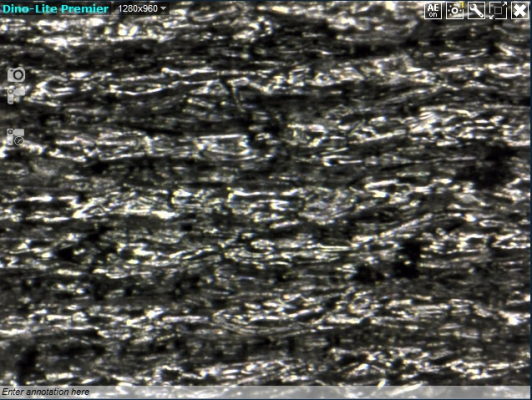
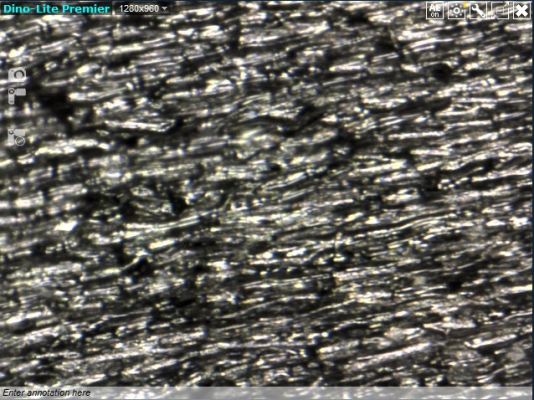
It would be interesting to view it at a microscopic level.
My printer: Raptosaur - Large Format Delta - [www.paulwanamaker.wordpress.com]
Can you answer questions about Calibration, Printing issues, Mechanics? Write it up and improve the Wiki!
|
Re: Layer thickness and printing speed. February 14, 2016 08:58PM |
Registered: 10 years ago Posts: 770 |
|
Re: Layer thickness and printing speed. February 15, 2016 02:51AM |
Registered: 12 years ago Posts: 2,470 |
With layer heights in this small range the extruder, hotend and material start to give you a complete new host of problems. Bridging and overhangs start to go wrong again etc.
I tried it several time with different printers and while the mechanical precision was sufficient the number of smaller problems made me give up. Nowadays i don't try to go below 0.05 mm, it isn't worth it usually anyway.
[www.bonkers.de]
[merlin-hotend.de]
[www.hackerspace-ffm.de]
I tried it several time with different printers and while the mechanical precision was sufficient the number of smaller problems made me give up. Nowadays i don't try to go below 0.05 mm, it isn't worth it usually anyway.
[www.bonkers.de]
[merlin-hotend.de]
[www.hackerspace-ffm.de]
|
Re: Layer thickness and printing speed. February 15, 2016 09:29AM |
Registered: 10 years ago Posts: 550 |
|
Re: Layer thickness and printing speed. February 15, 2016 11:07AM |
Registered: 8 years ago Posts: 25 |
This result come from 2 hours calibration and nameless work + 2 hours for printing. I dont know exactly is it a 0.03mm layer thickness cube, 0.04, 0.05 or whatever but i think it is better compare to the one that printed before the re-calibration or is it just my imagination, i leave the judgement to you.
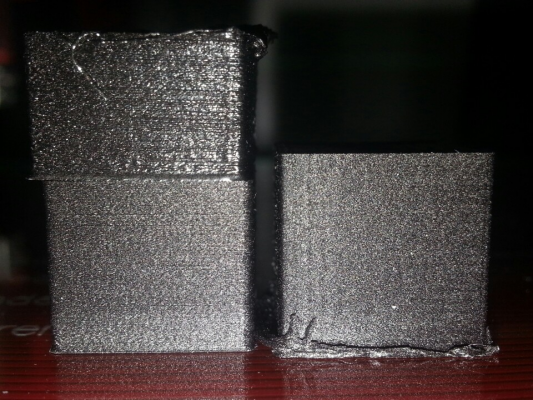
The 0.03mm after calibration cube suppose to be in 15x15x15 dimension but something went wrong at initial layers as you can see. The actual height is 14.7xxxmm. It might be because the slic3r setting i believe.
Anyone have an idea how to confirm that is 0.03mm?
Thank you for your time.
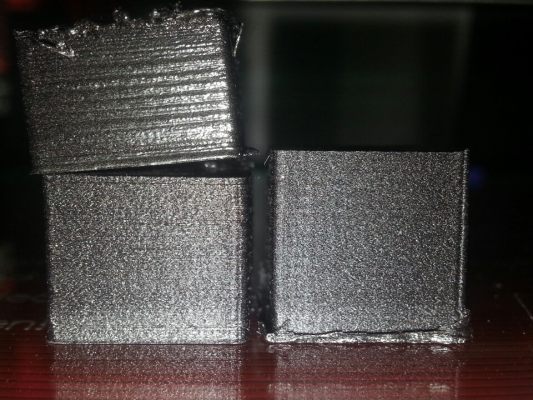
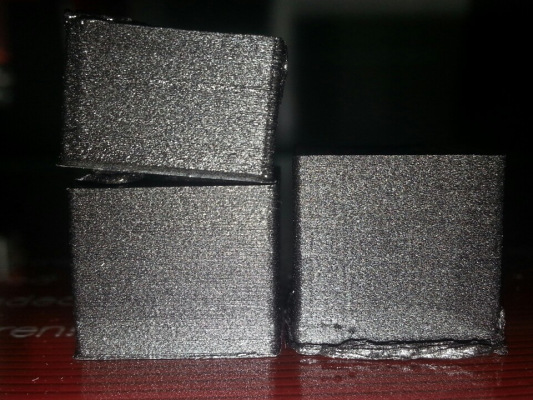
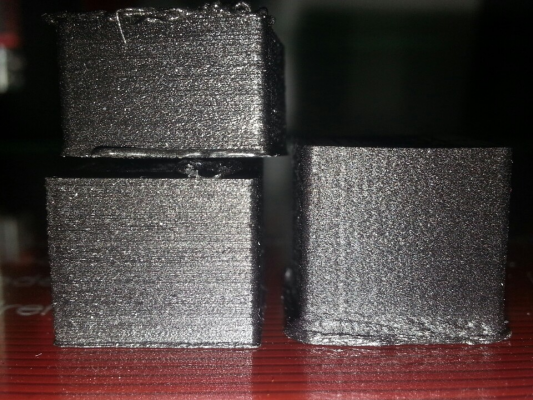
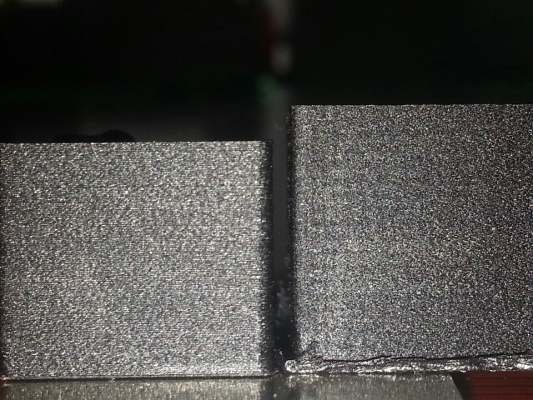
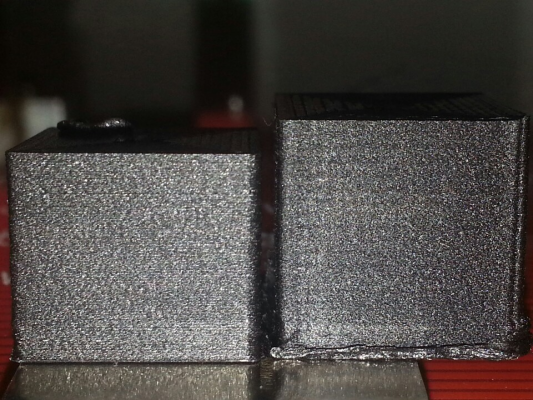
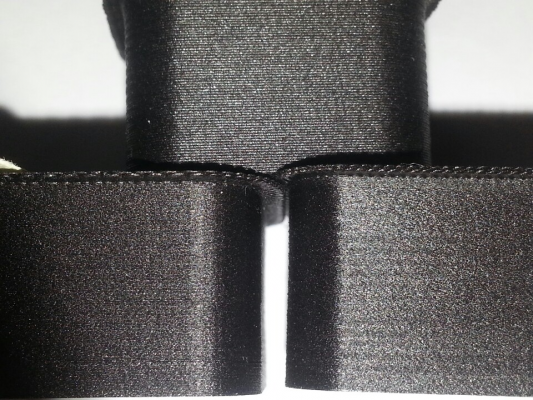
These pictures are taken by my phone. 4 sides of 3 cubes. I printed with prusa mendel i3 and slicer with slic3r.
On top 0.03mm before calibration, bottom left 0.1mm, bottom right 0.03mm after calibration.
0.1mm and 0.03mm after calibration.
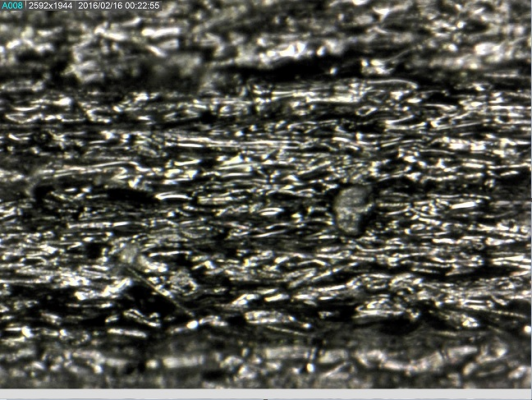
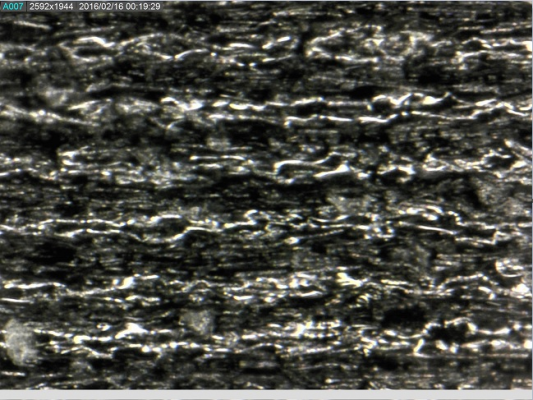
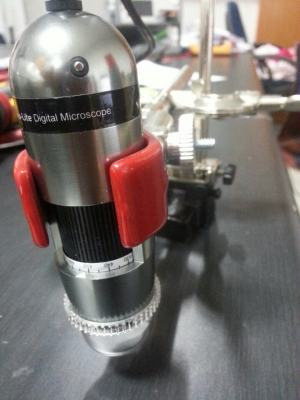
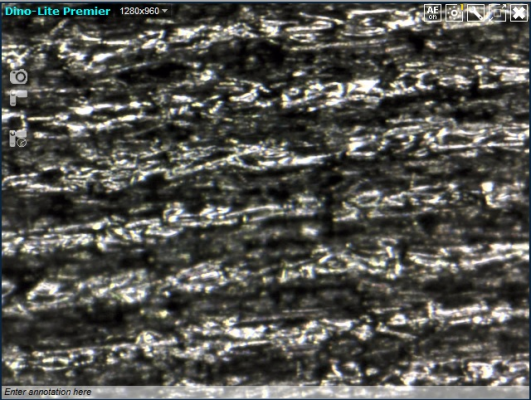
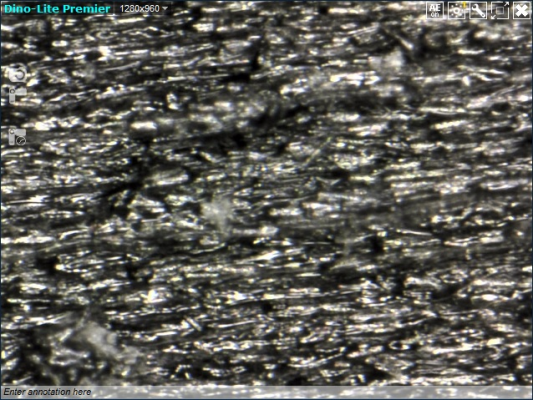
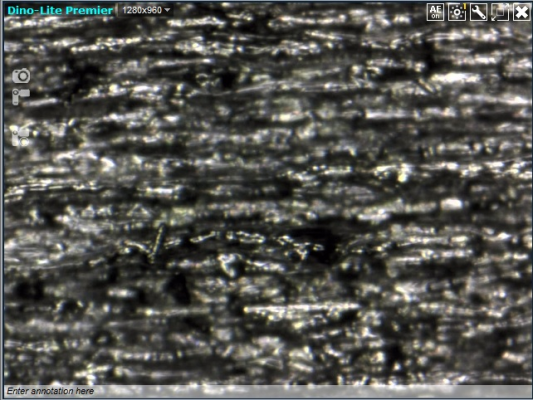
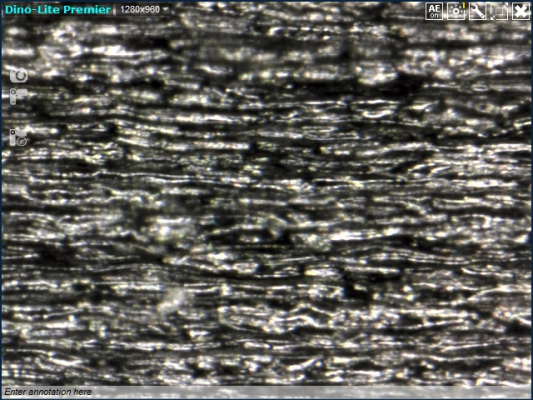
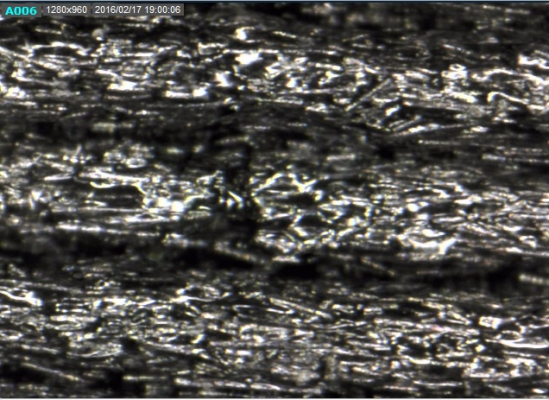
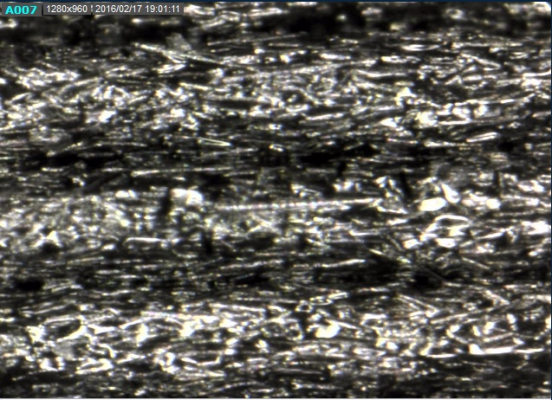
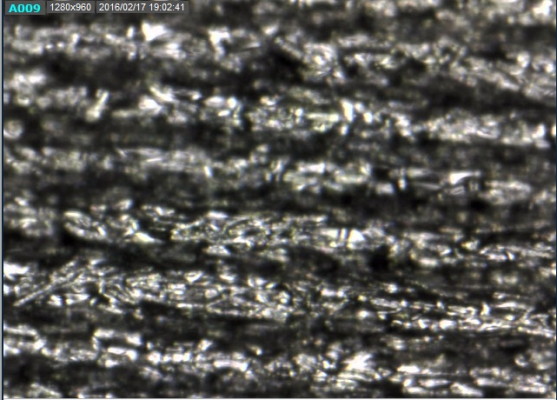
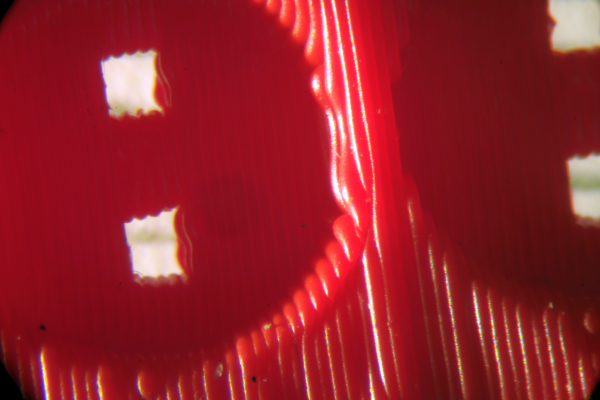
These pictures are taken by mini microscope that i borrow from my friend with following order: left 0.03mm before, right 0.1mm and 0.03mm after the calibration.
|
Re: Layer thickness and printing speed. February 16, 2016 01:48AM |
Registered: 10 years ago Posts: 580 |
paperfrom,
Those are very interesting results. I'm glad you were able to get the magnified photos. It would be interesting to see .2mm layers for comparison.
I have a couple of questions:
What is the X/Y resolution of your printer (steps per mm).
What is the Z steps per mm?
A couple of thoughts:
1) I wonder if the shorter height of that cube indicates missed steps in the Z direction.
2) The pattern on the outside is interesting. It doesn't follow strait lines.
This is my speculation of a mechanism:
If there is extra extrusion or incorrect layer height: more or less squeezes out sideways, more "squeeze" drags along with the nozzle, which is then depositing as semi-random patterns on the exterior. The lower the layer height, the more any extra will squeeze sideways, that's why extrusion calibration has been said to be critical for low layer height.
But then I got thinking, what if the layers are not perfectly aligned X/Y?
And, how low can you go?
So here's a thought problem: what layer height accuracy is required before artifacts are produced? For instance, let's say for argument that the perimeter will look OK if the layer height stays within +/- 10% of the intended height (speculation!),*. If the layer height is .03mm then the printer would need to keep the layer height within +/- .003mm. That's .0001 in. * (given the correct extrusion width, speed, and feed rate.)
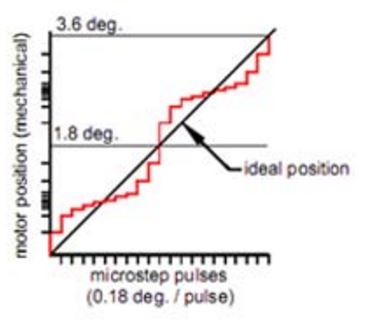
However stepper motors have errors of up to 5% per step, and accuracy is worse for microsteps, as they tend to clump together. That's why I asked about the Z steps per mm. From this page:
Add that error to the lead screw error.
Here is some more info on accuracy.
[www.euclidres.com]
Now I'm thinking about exactly what needs to be done to test this: a test case generator that would produce a test tower with layers of the same layer height, with one value increasing or decreasing: 1) extrusion width, or 2) speed, or 3) temperature, or 4) extrusion multiplier. It would probably need a multi-walled object. I already have the first 3 of these test case generators done as part of a Guided Calibration project, but not multi-walled. I have added this to my to-do list.
|
Re: Layer thickness and printing speed. February 16, 2016 03:54AM |
Registered: 8 years ago Posts: 25 |
Hi Paul Wanamaker and thank you for your discussion,
- This is the step/unit of my i3: X100.00 Y100.00 Z4000.00 E782.20.
- About the shorter height, as mentioned before, when the first layer was printing, the ABS was not extruded and the suddenly it too much. Although i had set the first layer height = 0.35mm and then = 0.1mm. The issue is still remain as you can see in the base of the cube. It might the the reason for height shortened or missing step as you suggested or both or the shrinkage of ABS.
- About the test tower, how do you slice it with different setting in one printed object? And i am still waiting for the smaller size nozzle that i have ordered.
- Do you know how to confirm an printed object with specific layer height beside the appearance? a tool or machine maybe.
- The thing is that i get my i3 from friends, and i pretty sure it is Chinese made so i just try to get the best possible result from it.
- The magnified images is taken random so it might not carry the expected information as it should be. Here are more images.
Random spots on 4 sides of 0.1mm cube
0.03mm cube
I will get the 0.2mm image for you.
Edited 1 time(s). Last edit at 02/16/2016 04:26AM by paperfrom.
- This is the step/unit of my i3: X100.00 Y100.00 Z4000.00 E782.20.
- About the shorter height, as mentioned before, when the first layer was printing, the ABS was not extruded and the suddenly it too much. Although i had set the first layer height = 0.35mm and then = 0.1mm. The issue is still remain as you can see in the base of the cube. It might the the reason for height shortened or missing step as you suggested or both or the shrinkage of ABS.
- About the test tower, how do you slice it with different setting in one printed object? And i am still waiting for the smaller size nozzle that i have ordered.
- Do you know how to confirm an printed object with specific layer height beside the appearance? a tool or machine maybe.
- The thing is that i get my i3 from friends, and i pretty sure it is Chinese made
 so i just try to get the best possible result from it.
- The magnified images is taken random so it might not carry the expected information as it should be. Here are more images.
Random spots on 4 sides of 0.1mm cube
0.03mm cube
I will get the 0.2mm image for you.
Edited 1 time(s). Last edit at 02/16/2016 04:26AM by paperfrom.
|
Re: Layer thickness and printing speed. February 16, 2016 02:27PM |
Registered: 10 years ago Posts: 580 |
Quote
paperfrom
- This is the step/unit of my i3: X100.00 Y100.00 Z4000.00 E782.20.
So that's 120 steps per layer change, so that should be enough if the Z axis is moving correctly.
If possible, can you post a link to a gcode file, sliced at .03mm, using Slic3r, with verbose gcode turned on? (with Expert option turned on, Print settings, output options, verbose gcode). I'd like to run this through my gcode debugger and check the actual extrusion amount against your e-steps per mm.
You mentioned you had a .3 mm nozzle. Is this really the case? If that is so then the first layer height should be no more than 30 * .8 or .24mm.
Quote
paperfrom
- About the test tower, how do you slice it with different setting in one printed object?
You can't do that in any slicer that I know of.
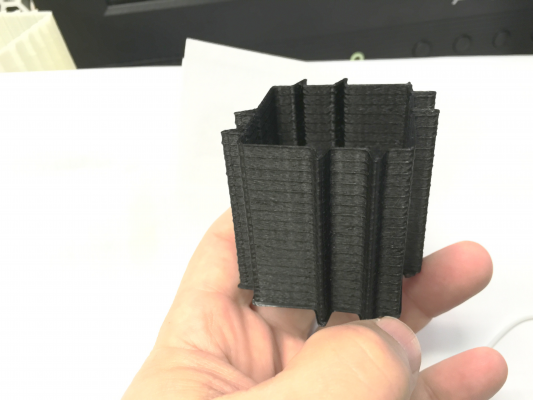
For simple things like temperature or acceleration: you can edit the gcode and insert the temperature change gcode at intervals at a layer change. That isn't the way I'm doing it - I generate the gcode from scratch using a formula like slic3r's extrusion formula. That way I can modify one parameter at the beginning of each section. This does more than could be done manually or with a script, as the extrusion amount is being recalculated. In the following photo is an example one of my early towers, testing perimeter acceleration to determine at what point ringing becomes a problem, but this tool is not finished yet.
Quote
paperfrom
- Do you know how to confirm an printed object with specific layer height beside the appearance? a tool or machine maybe.
You can look in the gcode. There will be a G0 Z... or G1 Z... where there is a layer change. If you search for that it will tell you at what height it is printing the layer. If you could get a very fine scale you could photograph that on top of the object using the microscope... But the first few layers will not have an accurate height because your printer isn't zeroed perfectly (none are). The best thing to do is to print the first layer, stop it, and measure the thickness.
|
Re: Layer thickness and printing speed. February 17, 2016 05:56AM |
Registered: 8 years ago Posts: 25 |
Hi Paul Wanamaker,
- I am currently using 0.4mm nozzle, still waiting for smaller size nozzles.
- The gcode is too much to post here, so i just post the link for the gcode file.
- I printed rectangular 20x20x15 with different layer heights with same speed 30mm/s (external perimeter = 50% by default) and other parameters.
Top 0.2mm, left 0.1mm, right 0.03mm.
0.2mm
0.1mm
0.03mm
I am going to print 0.05mm to see what happen
Thank you.
Edited 1 time(s). Last edit at 02/17/2016 06:01AM by paperfrom.
- I am currently using 0.4mm nozzle, still waiting for smaller size nozzles.
- The gcode is too much to post here, so i just post the link for the gcode file.
- I printed rectangular 20x20x15 with different layer heights with same speed 30mm/s (external perimeter = 50% by default) and other parameters.
Top 0.2mm, left 0.1mm, right 0.03mm.
0.2mm
0.1mm
0.03mm
I am going to print 0.05mm to see what happen

Thank you.
Edited 1 time(s). Last edit at 02/17/2016 06:01AM by paperfrom.
|
Re: Layer thickness and printing speed. February 17, 2016 08:05AM |
Registered: 11 years ago Posts: 5,780 |
I've been reading through this thread and a couple things jump out at me. First, kudos for examining your prints in fine detail and questioning the results. If more people did that there would be more quality printers out there than there are now.
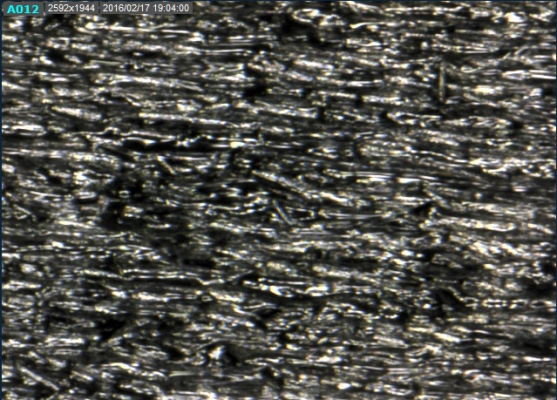
In many of the pictures it is difficult to actually see any layers at all, including the microscope pictures. I think you've got the magnification set a little higher than necessary- you're going to miss the forest because you're looking at the trees. The microscope has its own LED light source which tends to make things look flat because of the relative positions of the light and the optics. Try shutting off the microscope's light and light the print up from an angle with a different light source. That will cast some shadows and make it easier to see what's going on. This is side lit, 0.2 mm layers.
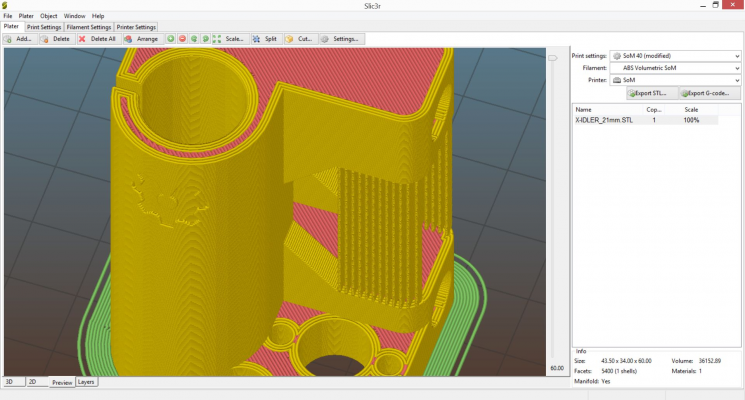
If you use slic3r, you can change the layer thickness in one object, without stopping the print, very easily. Load your test object, then click on the object>settings>layers menu then enter the z heights and the layer thickness you want to use:
Ultra MegaMax Dominator 3D printer: [drmrehorst.blogspot.com]
|
Re: Layer thickness and printing speed. February 17, 2016 09:43AM |
Registered: 8 years ago Posts: 25 |
Hi the_digital_dentist,
- Thank you for your information about slic3r.
- Actually, i am new to reprap 3d printer,currently i am participating in a project and my role is getting the finest layer height as possible. I try to get the actual printed layer height.
- About the images, unfortunately my phone can't get better image than previous images and the borrowed microscope's magnification is limited from x300-500, i will try your suggestion and hope to get better image.
|
Re: Layer thickness and printing speed. February 17, 2016 10:20AM |
Registered: 11 years ago Posts: 5,780 |
I don't think you need quite so much magnification. When you look at such small detail you may miss larger patterns that do affect subjective print quality. In many of your pictures, the apparently rough surface of the plastic (almost looks like chopped up fibers) and the flat lighting make it hard to even see that the part is printed in layers.
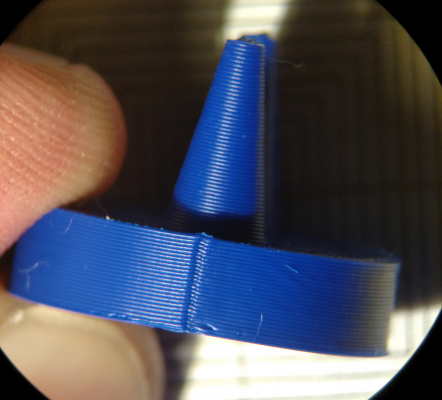
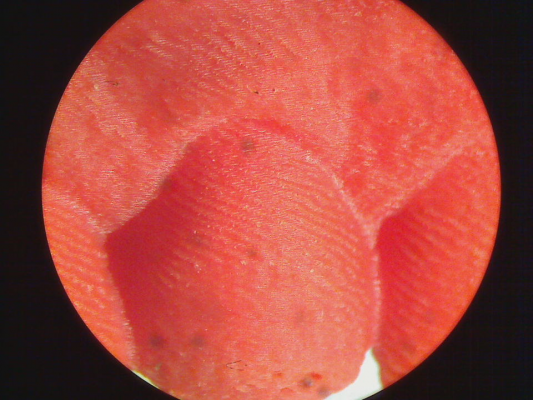
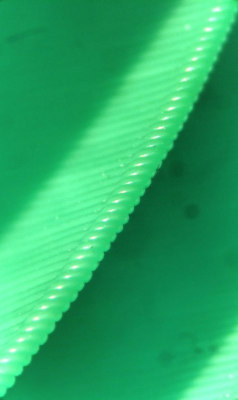
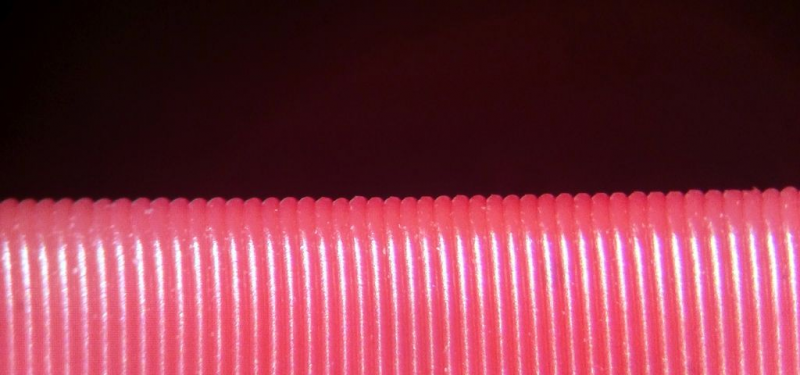
Here's an example- the print layers are 20 um. You see the oblique wavy pattern in the surface- that isn't the print layers- that's a secondary pattern of unknown cause (probably related to extruder and/or XY motor stepping). You can see the individual layers if you look toward the upper, flatter areas of the print.
The spacing of those oblique waves was small enough that I couldn't see them individually (without the microscope- I'm getting old and can't see anything very well without reading glasses) but they look like about 100-150 um, and caused the part to have a dull surface finish that looks dull even under the microscope.
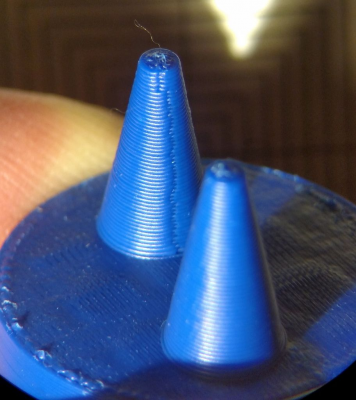
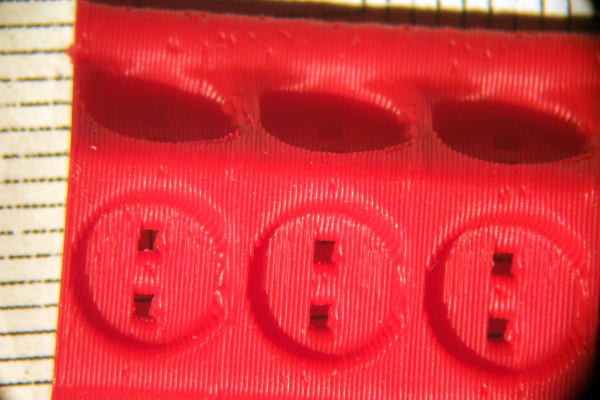
Viewing things along the edges or at odd angles and playing with the lighting direction can also be a good way to check layer registration and to look for undesirable patterns. These prints were done in 200um layers:
If you have access to a lower magnification inspection microscope, it isn't hard to adapt a phone to take pictures through it- all the pictures above, except maybe the first one, were made using my phone connected to a surgical microscope. I designed and printed the adapter: [www.youmagine.com]
You can get close up lenses for phones that just clip on and will provide plenty of magnification but you'll have to arrange some clamps to hold the phone and the specimen steady for picture taking. Ebay has hundreds of listings for 60X lenses to fit phones for <$6. 60X is plenty of magnification for inspecting prints.
I use this type of lamp for the illumination:
I recently made an adapter to connect a real camera to the microscope to get images like this:
Edited 2 time(s). Last edit at 02/17/2016 10:51AM by the_digital_dentist.
Ultra MegaMax Dominator 3D printer: [drmrehorst.blogspot.com]
|
Re: Layer thickness and printing speed. February 17, 2016 02:25PM |
Registered: 10 years ago Posts: 580 |
the_digital_dentist,
Thank you for lending your expertise! I learned something new about Slic3r.
Your photos are really good.
I will look into getting one of those lenses for my phone as well. It's important to be able to see what's really happening.
Edit: I ordered one for $8.00 with 2 day shipping from Amazon for my iPhone 6 plus... Amazing. It has an adjustable-angle light built in. I'll report how well it works.
Edited 1 time(s). Last edit at 02/17/2016 02:55PM by Paul Wanamaker.
|
Re: Layer thickness and printing speed. February 17, 2016 06:58PM |
Registered: 11 years ago Posts: 5,780 |
Since you're new to this I'll ask a question you may not have thought about. Do you realize that the thinner you print, the longer the print will take to complete? For example, going from 0.2 mm layers to 0.1 mm layers will double the print time. It is easy to get carried away with printing super thin layers and multiply your print time by 8X or more.
Ultra MegaMax Dominator 3D printer: [drmrehorst.blogspot.com]
Ultra MegaMax Dominator 3D printer: [drmrehorst.blogspot.com]
|
Re: Layer thickness and printing speed. February 18, 2016 07:41AM |
Registered: 8 years ago Posts: 155 |
Your main problem when printing those layers is temperature: you have a very hot metal part at 200+ degrees separated only 0.03 mm away from the previous layer. So you have to make a balance betwee: if you go slower a lot of heat will be transfered to the previous layer. If you go faster... you will loose quality.
So far, your results looks really GREAT. Awesome job and dcumentation.
Personally, I dont go beyonh 0.01 (prusa I3), it daesn't make sense to me. It takes toooo much time.
So far, your results looks really GREAT. Awesome job and dcumentation.
Personally, I dont go beyonh 0.01 (prusa I3), it daesn't make sense to me. It takes toooo much time.
Sorry, only registered users may post in this forum.
