My First print with problem =(
Posted by engmaster
|
My First print with problem =( April 20, 2016 09:57AM |
Registered: 8 years ago Posts: 11 |
Hello.
I am new in 3D printer and now I finished my first 3D printer.
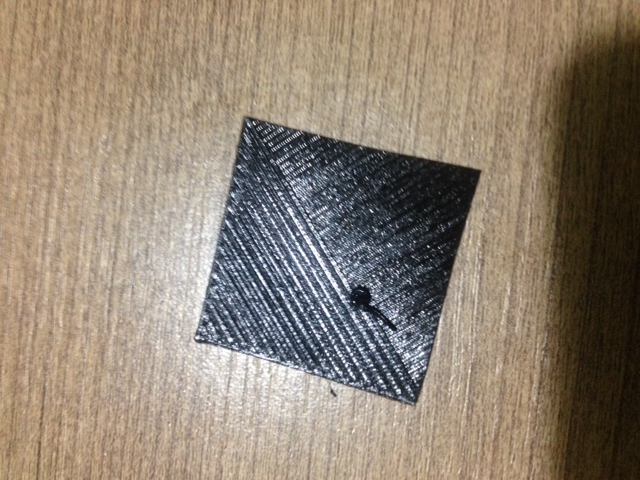
So, when I try print the 10mm cube to calibrate my printer, I have 3 problems.
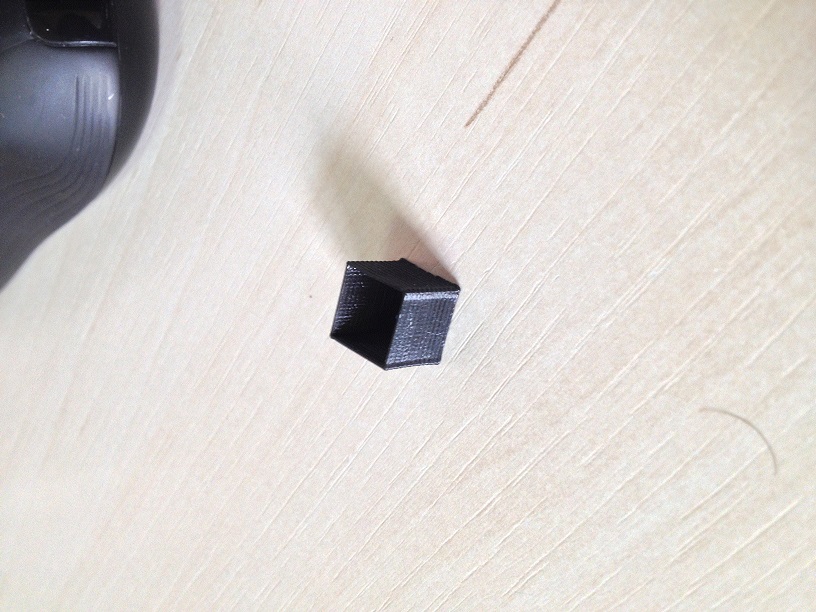
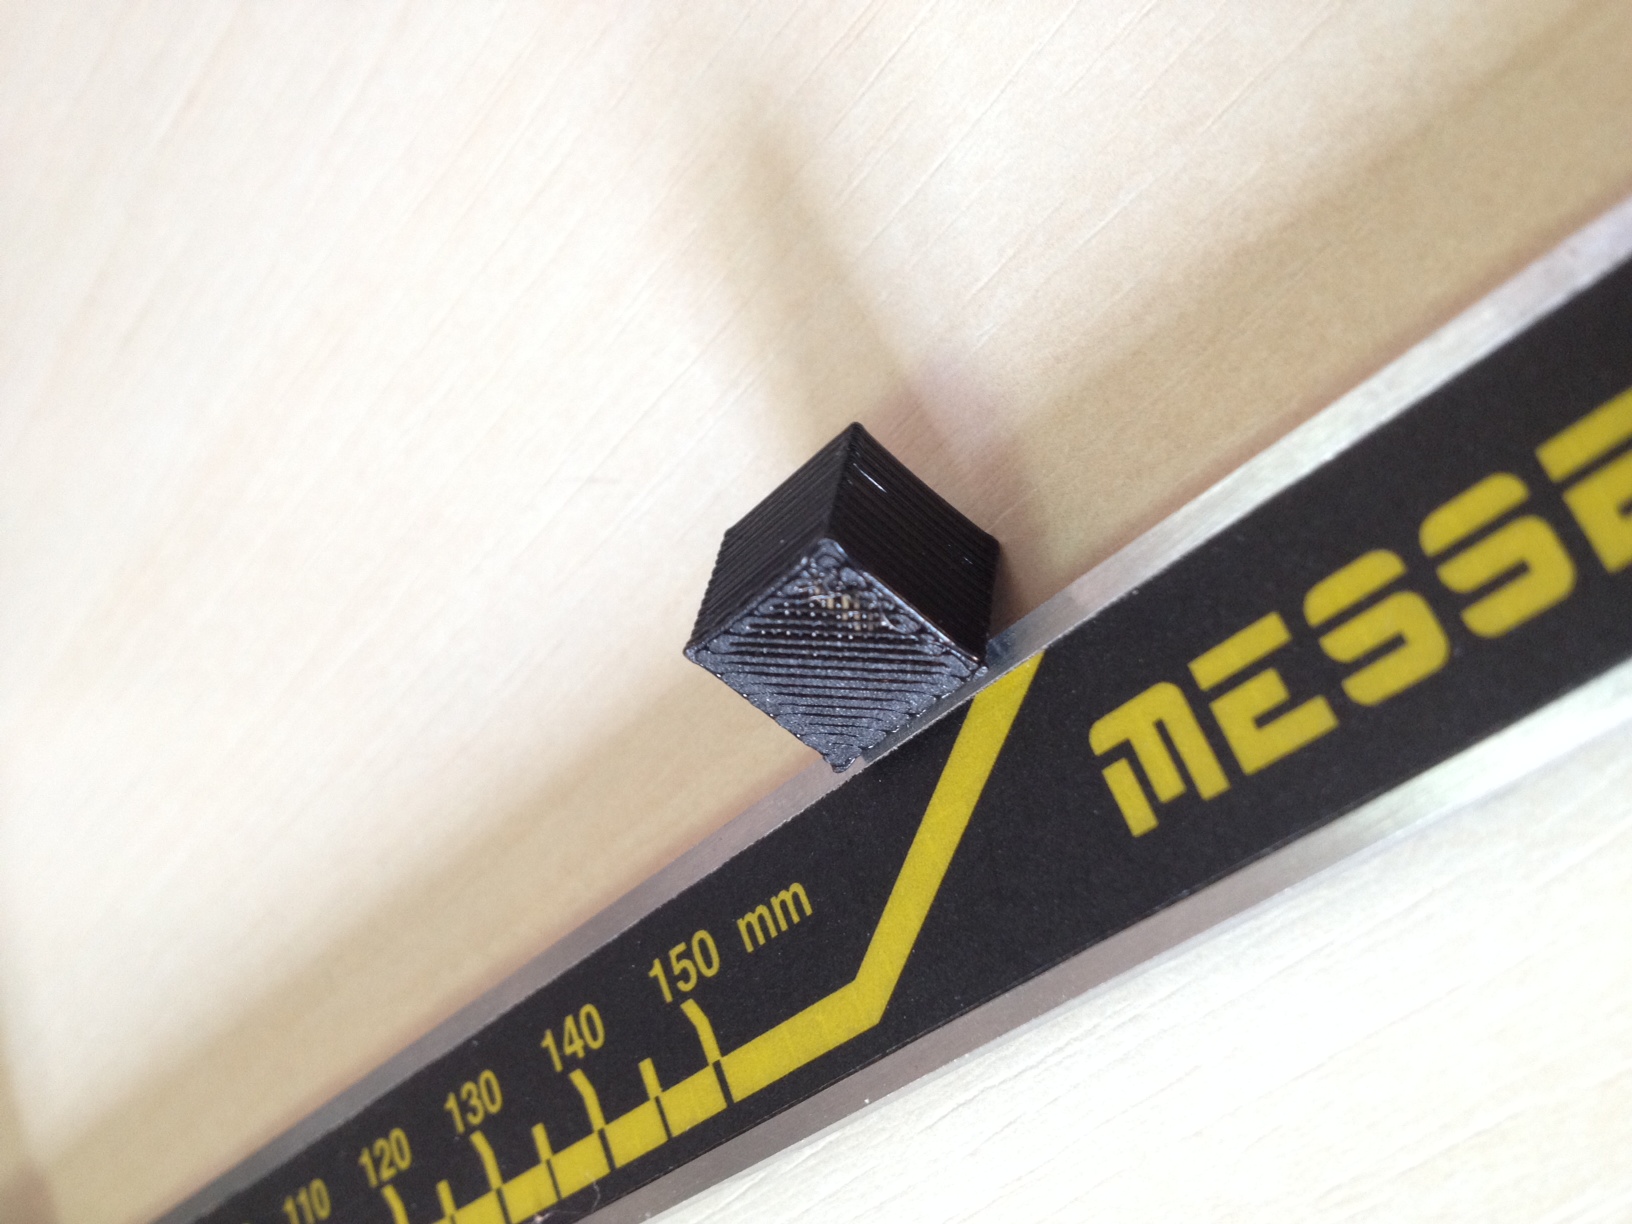
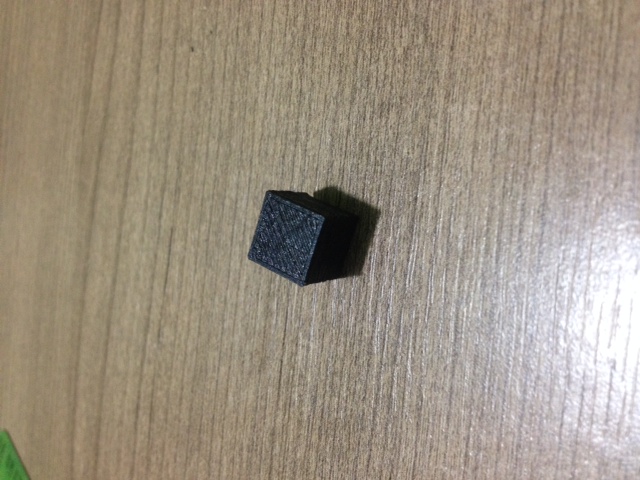
1 - The bottom is more large than top. (file foto (1).JPG)
2 - Corners are printed with "pillars". (file foto (1).JPG)
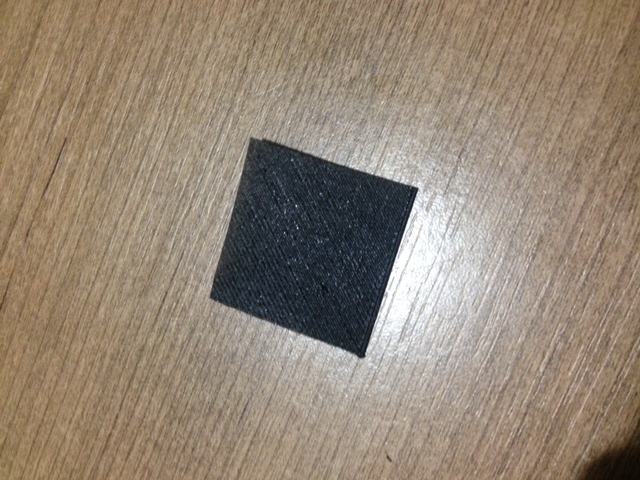
3 - First layer and other Solid Layers are not solid =( (file foto.JPG)
I have more than 20 cubes printed with this problems..
Anyone can help me?
My setup: Firmware Marlin RC5 + Slic3r + Pronterface
Marlin RC5 >
Thank you
Edited 6 time(s). Last edit at 04/20/2016 02:07PM by engmaster.
I am new in 3D printer and now I finished my first 3D printer.
So, when I try print the 10mm cube to calibrate my printer, I have 3 problems.
1 - The bottom is more large than top. (file foto (1).JPG)
2 - Corners are printed with "pillars". (file foto (1).JPG)
3 - First layer and other Solid Layers are not solid =( (file foto.JPG)
I have more than 20 cubes printed with this problems..
Anyone can help me?
My setup: Firmware Marlin RC5 + Slic3r + Pronterface
Marlin RC5 >
/**
 * MOVEMENT SETTINGS
 */

#define HOMING_FEEDRATE {1500, 1500, 150, 0}  // set the homing speeds (mm/min)

// default settings
#define DEFAULT_AXIS_STEPS_PER_UNIT   { 80.5642698905136, 80.5642698905136, 3969.1600944271922, 100.558274724933 } // XYZE Default steps per unit for Ultimaker
#define DEFAULT_MAX_FEEDRATE          { 300, 300, 2, 25 }              // XYZE (mm/sec)
#define DEFAULT_MAX_ACCELERATION      { 400, 400, 100, 10000 }         // XYZE Maximum start speed for accelerated moves. E default values are good for Skeinforge 40+, for older versions raise them a lot.

#define DEFAULT_ACCELERATION          100    // XYZE acceleration in mm/s^2 for printing moves
#define DEFAULT_RETRACT_ACCELERATION  1000   // E acceleration in mm/s^2 for retracts
#define DEFAULT_TRAVEL_ACCELERATION   400    // XYZ acceleration in mm/s^2 for travel (non printing) moves

// The speed change that does not require acceleration (i.e. the software might assume it can be done instantaneously)
#define DEFAULT_XYJERK                5.0    // (mm/sec)
#define DEFAULT_ZJERK                 0.4    // (mm/sec)
#define DEFAULT_EJERK                 5.0    // (mm/sec)
Thank you
Edited 6 time(s). Last edit at 04/20/2016 02:07PM by engmaster.
|
Re: My First print with problem =( April 20, 2016 12:18PM |
Registered: 8 years ago Posts: 778 |
|
Re: My First print with problem =( April 20, 2016 01:06PM |
Registered: 8 years ago Posts: 11 |
|
Re: My First print with problem =( April 20, 2016 05:36PM |
Registered: 10 years ago Posts: 154 |
|
Re: My First print with problem =( April 20, 2016 06:23PM |
Registered: 8 years ago Posts: 11 |
Quote
MrBaz
Bed isn't level (can tell by the first level).
Extruder pulses could be causing the moire.
My bed still close from extruder, tested with office paper. I need nozzle touching the bed or one office paper? With office paper distance, when print start the nozzle still in 0,3mm away showed in M114(first layer size).. So I have the officepaper size + 0,3mm... It is correct or need change?
The first layer have 0.3mm and my nozzle is 0.4mm (filament PLA 3,00mm)
humm.. The problem 2(corners) is caused by moviment(pulse) in extruder? I will revise it!
So, How I will resolve the the bootom and solid layers? All solid layers have this problem.
|
Re: My First print with problem =( April 20, 2016 11:07PM |
Registered: 10 years ago Posts: 154 |
Quote
engmaster
Quote
MrBaz
Bed isn't level (can tell by the first level).
Extruder pulses could be causing the moire.
My bed still close from extruder, tested with office paper. I need nozzle touching the bed or one office paper? With office paper distance, when print start the nozzle still in 0,3mm away showed in M114(first layer size).. So I have the officepaper size + 0,3mm... It is correct or need change?
The first layer have 0.3mm and my nozzle is 0.4mm (filament PLA 3,00mm)
humm.. The problem 2(corners) is caused by moviment(pulse) in extruder? I will revise it!
So, How I will resolve the the bootom and solid layers? All solid layers have this problem.
Office paper is roughly in the vicinity of 0.2mm thick. Measure at least 3 points far apart from each other (something like X:0 and Y:Max, then X:Min and Y:Min, then lastly X:Max and Y:Min) When you check those 2D coordinates, check what your spacing is when you are at Z:0. They should all ready the same value, but in reality, you will most likely find that you are getting vastly different measurements. I could be wrong, but it doesn't hurt to check it out.
|
Re: My First print with problem =( April 21, 2016 02:50AM |
Registered: 8 years ago Posts: 778 |
Ok, if you claim your stepping and extrusion multiplicator is really good then try my way of getting the final levelling done:
Basic calibration like I do involves creating a box close the max print size (x-y) that the machine will support.
Only needs to be a few layers thick.
Start the print and as soon as the nozzle reaches the bed you puase the print and shut down the heating.
The nozzle is no positioned at the right height for the first layer according to the gcode and hardware calibration.
Clean the oozing plastic carefully while the nozzle is still hot, once cool enough find some paper or feeler gauge that just fits under the nozzle.
Move by hand or through G0 moves through all corners and get them to the same height.
Once satisfied you start the print again and let it run at least 3 perimeters.
Watch closely how the filament is put onto the bed and adjust the bed levelling screws on the fly (if you can otherwise pause the print) until you get even line widths and adhesion.
At this stage it can look a bit a ugly as long as the ugly is even all around the bed.
Usually you can stop the print after 5 to 10 perimeters on the bed.
Now you adjust the limit switch and peel off a single extruded line (stop the print after one loop) to measure the thickness with calipers.
If it differs too much from your set layer height adjust the endstop accordingly.
Some people prefer to give a bit of squash for the first layer - I try to avoid this as it only brings problems if you need to start with a low first layer height.
It is far easier and better to adjust any offset through the slicer on directly in the gcode.
This way you won't have problems when using very fine nozzles.
|
Re: My First print with problem =( April 24, 2016 07:17PM |
Registered: 8 years ago Posts: 11 |
|
Re: My First print with problem =( April 25, 2016 08:10AM |
Registered: 8 years ago Posts: 413 |
|
Re: My First print with problem =( April 25, 2016 11:10AM |
Registered: 8 years ago Posts: 11 |
Quote
MCcarman
In slicer set the Z offset to NEGATIVE paper thickness. You have it at 0. This should get the first layer height correct. I.E. Paper is 0.1mm the Z offset should be -0.1
infill_overlap = 15% Seems a bit high for me. I would start with 0 and then increase it slightly if I had an issue.
So. I need before any print, the offset between Nozzle and Bed = 0mm?
If I adjust with paper 0,1mm tickness,I need compesate this tickness to remove paper offset.. and when I move Z to 0 point, the nozzle will rest in glass without any space?
Sorry my questions, but my problem still the same =(
I appreciate the patience of all who are helping me!
|
Re: My First print with problem =( April 26, 2016 07:42AM |
Registered: 8 years ago Posts: 413 |
Hi.
When you home the printer the nozzle will be at 0 (defined by the end stop switch). You adjust the bed to be lower. You can use paper at 0.1 thickness. The Z offset in Slic3r tells the program the bed is at -0.1mm (paper thickness) position. If your first layer is 0.3mm high the slicer will calculate 0.3mm (layer height) - 0.1 (Z offset) = 0.2 position of the extruder. That is up 0.2mm, with the bed 0.1 lower giving the total gap of 0.3mm for the first layer.
When you have levelled the bed and have the z offset set there is no need to change the z offset unless you change from the paper. Just check the bed is level using the paper. You can change the first layer thickness without needing to change the Z offset.
Note that if the bottom solid layer has an issue the next layer will have the correct height but the filament will be distorted by any issues in the first layer.
|
Re: My First print with problem =( April 27, 2016 08:03PM |
Registered: 8 years ago Posts: 11 |
Sorry, only registered users may post in this forum.