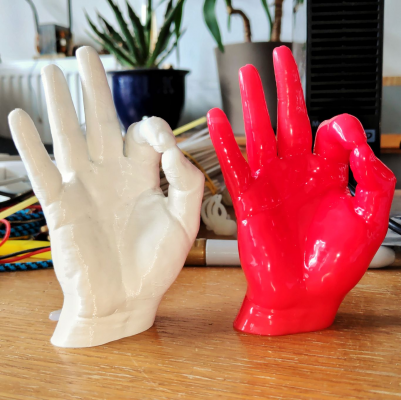
Printing ABS in a closed box failing
Posted by Ohmarinus
|
Printing ABS in a closed box failing August 21, 2020 09:12AM |
Admin Registered: 11 years ago Posts: 3,096 |
Hi all, a copy-paste from a topic about the machine, but I decided to make a topic about it here.
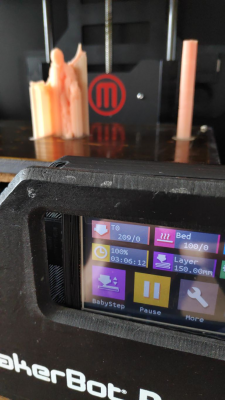
My prints are coming out worse and worse. It seems the closed chamber is not ideal for ABS but I read everywhere it is... After calibrating extrusion perfectly, both with flow and retraction calibration I'm running into these issues:
[youtu.be]
[youtu.be]
[youtu.be]
[youtu.be]
The first few prints were very good (mostly single wall items), but somehow it's not wanting to print right anymore. Single wall extrusion cube works really well, but any object with infill gets warped corners and stays soft during the print.
0.4mm nozzle
0.2mm layer height
0.385mm line width (because otherwise the lines in the model aren't touching, this is a common fix and most people lower their line width)
20% infill
240ºC nozzle
110ºC bed closed system
55mm/s print speed
27.5mm/s outer wall speed
120mm travel speed (high speeds are fine)
2.5mm retraction (this was perfect after calibration, even though I use a bowden system)
0 extra prime amount after retraction (so no messed up 'too high' extrusion)
I'm a bit lost now. The initial vase prints I did worked really well, but now I made a bigger vase mode print and the walls just stayed soft and warped all over the place. Was about to open a topic about this in Printing Issues. I've never had failure like this before and am now trying to fix it for two full days.
Btw, already did a complete teardown and fixed everything.. The machine runs fine otherwise.
As a last resort, could it be the ABS filament being of low quality? In that case of course it doesn't matter what I try.
http://www.marinusdebeer.nl/
|
Re: Printing ABS in a closed box failing August 21, 2020 10:21AM |
Registered: 11 years ago Posts: 5,780 |
I think that the main problem is pretty obvious. The object being printed is very small. That means the layer time is small, which means the plastic from previous layer hasn't cooled and solidified before the nozzle comes back and dumps more molten plastic on the print. Try printing 3 or 4 objects separated on the bed to allow more time for the plastic to cool and solidify, or print a larger object. Turn on print cooling, but not the fan - use the layer time adjustment and set it for a minimum layer time of 30 seconds or so. The slicer will adjust the print speed to take at least 30 sec per layer which should improve things.
This is one of the things that people who want to print super fast usually fail to consider. What good does it do to print at 300 mm/sec if after every layer you have to stop and wait for the print to cool enough that you can print the next layer?
Another problem- never print with the line width set narrower than the nozzle diameter. If the line width is actually narrower than the nozzle, where is the extruded plastic going to end up? It will wander back and forth and print quality will suffer. If you are over extruding, correct the extrusion, not the line width. If you set the line width to 0.4 mm and extrusion to 100%, you should get a 0.4 mm wide line. If you're getting a wider or narrower line, recalibrate. If your controller's firmware has pressure advance and nonlinear extrusion, use them.
That 20 mm "calibration" cube is worse than useless because of all the problems it creates for printing noobs. When you calibrate, use the largest object you can measure accurately. If you have a 250mm caliper, print a square or rectangle that is 175 mm on a side and if you have a 150 mm caliper, print a 100 mm square, then measure the sides and the diagonals. Use the side dimensions to do your XY calibration and use the diagonal measures to check squareness of the X and Y axes (the diagonals will be the same length if the axes are square). Any measurement you make will include some error. If you calibrate using a 20 mm cube, when you print objects larger than 20 mm the error will get multiplied. If you calibrate using a large object, when you print smaller objects the error will get divided. The % error will remain constant, but in the real world, it's the absolute error, not the percent error that matters.
Edited 1 time(s). Last edit at 08/21/2020 10:24AM by the_digital_dentist.
Ultra MegaMax Dominator 3D printer: [drmrehorst.blogspot.com]
|
Re: Printing ABS in a closed box failing August 21, 2020 01:54PM |
Admin Registered: 11 years ago Posts: 3,096 |
Quote
the_digital_dentist
I think that the main problem is pretty obvious. The object being printed is very small. That means the layer time is small, which means the plastic from previous layer hasn't cooled and solidified before the nozzle comes back and dumps more molten plastic on the print. Try printing 3 or 4 objects separated on the bed to allow more time for the plastic to cool and solidify, or print a larger object. Turn on print cooling, but not the fan - use the layer time adjustment and set it for a minimum layer time of 30 seconds or so. The slicer will adjust the print speed to take at least 30 sec per layer which should improve things.
Thanks, indeed, I was thinking of making a 'sacrificial tower' on another spot on the bed. I have found that the 'minimum layer time' will make some prints harder if they have a small surface, turning the items into goop because the nozzle is close for a longer time.
Quote
This is one of the things that people who want to print super fast usually fail to consider. What good does it do to print at 300 mm/sec if after every layer you have to stop and wait for the print to cool enough that you can print the next layer?
Indeed, I had revived this machine so that I could print objects really fast and without trouble. After upgrading the machine. Because I had read a lot of topics of people pushing this Replicator 2x to its limits. I also saw that a few had added a fan to actually blow on the ABS. I think I can get away with it so will design a new mount with integrated fan. It's a closed system and the ABS doesn't tend to warp, so I think I can get away with moderate cooling.
Quote
Another problem- never print with the line width set narrower than the nozzle diameter. If the line width is actually narrower than the nozzle, where is the extruded plastic going to end up? It will wander back and forth and print quality will suffer. If you are over extruding, correct the extrusion, not the line width. If you set the line width to 0.4 mm and extrusion to 100%, you should get a 0.4 mm wide line. If you're getting a wider or narrower line, recalibrate. If your controller's firmware has pressure advance and nonlinear extrusion, use them.
No worries, all is well-calibrated, I have found that with all my printers that use this type of nozzle, it only works exactly right if the nozzle diameter is set to a slightly smaller value, this may be due to the fact that the nozzle size in fact isn't 0.4mm exactly. I have spent hours and hours calibrating multiple machines and have read just about every guide there is about this. Sadly I do not have the equipment to measure the nozzle diameter. I knew someone was going to say this and was hesitant to share my extrusion width

Quote
That 20 mm "calibration" cube is worse than useless because of all the problems it creates for printing noobs. When you calibrate, use the largest object you can measure accurately. If you have a 250mm caliper, print a square or rectangle that is 175 mm on a side and if you have a 150 mm caliper, print a 100 mm square, then measure the sides and the diagonals. Use the side dimensions to do your XY calibration and use the diagonal measures to check squareness of the X and Y axes (the diagonals will be the same length if the axes are square). Any measurement you make will include some error. If you calibrate using a 20 mm cube, when you print objects larger than 20 mm the error will get multiplied. If you calibrate using a large object, when you print smaller objects the error will get divided. The % error will remain constant, but in the real world, it's the absolute error, not the percent error that matters.
Thanks for your detailed help, buuuut the 20mm calibration cube was not used for calibration, sorry to throw you off there maybe. It was simply the first item that showed up when I checked my harddisk for an stl. Of course I have already measured the travel distance and size of objects with self-designed calibration pieces
 (For example one square made with beams and cross-beams diagonally, one triangle, one circle and one cross).
I know it's hard to convey knowledge over a post, but there are already many things really well calibrated with this machine. However, I haven't printed ABS since 2013 and it's really something I have to get back into. Because I want to both print parts that can handle higher temps, and because I want to print models that I can vapor smooth with ease. This Replicator 2x was given to me for free with the promise that I could print parts for students that needed higher temp plastics, so I converted it to use new and open source parts. So far so good, it's mainly getting back into ABS again. I'll try a sacrificial tower next and see if that makes any sense. I'll also design some small simple model to see how that prints. I'll update here how it went!
Update:
Bigger object and sacrificial tower indeed seems to work, however, the tower is probably too small. The smaller the object I'm printing, the wider the tower should probably be:
[youtu.be]
Edited 1 time(s). Last edit at 08/21/2020 02:39PM by Ohmarinus.
http://www.marinusdebeer.nl/
|
Re: Printing ABS in a closed box failing August 21, 2020 05:29PM |
Admin Registered: 11 years ago Posts: 3,096 |
Indeed bigger object and a sacrificial tower did help. Had one little hickup near the top of the dome and of course I still need to tweak the support material settings. But it's already quite promising. Also, the ABS print just doesn't want to release from the bed at all so I'm quite confident about doing larger prints soon.
Raised the printing speed to 80mm/s now with great results.
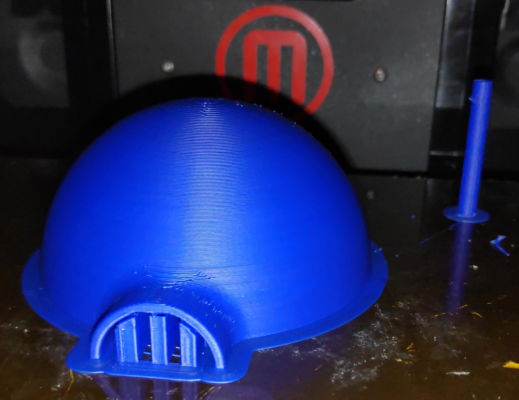
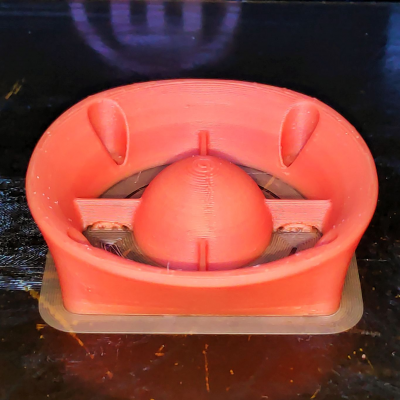
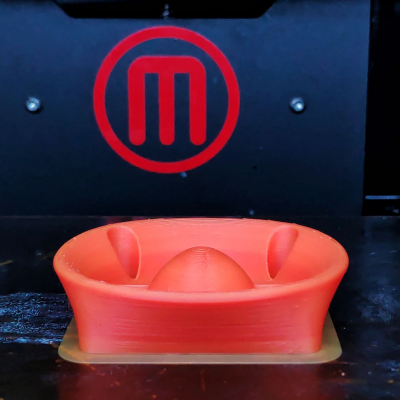
Quickly designed test igloo with Makerbot logo in the back:
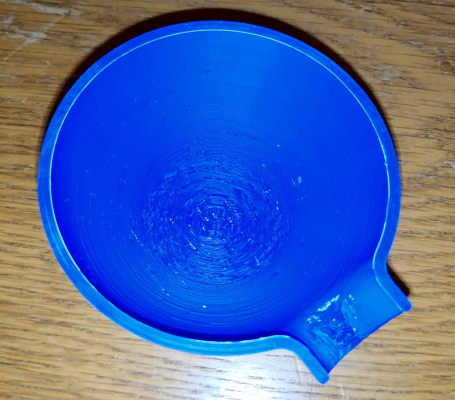
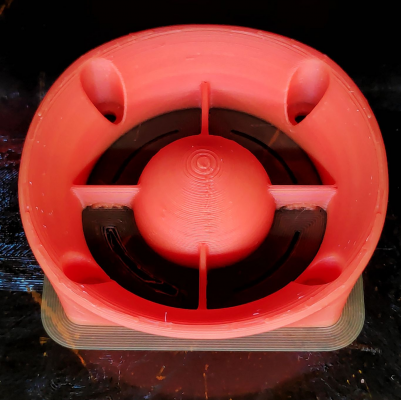
Insides, not that good yet, will vapor smooth it tomorrow and do a reprint with better tweaked support:
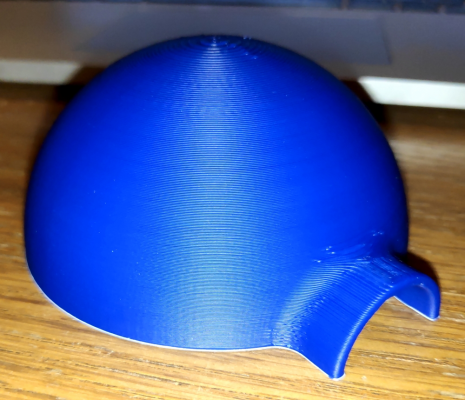
Oustide perimeter looks great:
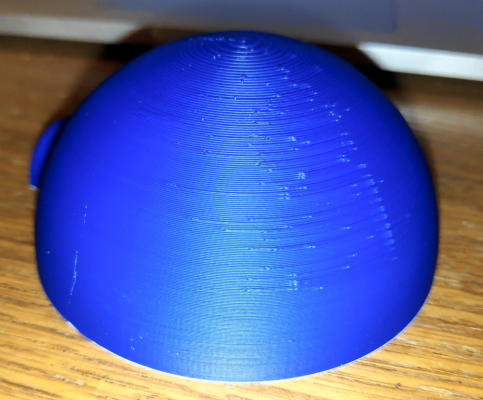
Backside is a bit more messy:
Top detail:
http://www.marinusdebeer.nl/
|
Re: Printing ABS in a closed box failing August 22, 2020 01:22PM |
Admin Registered: 11 years ago Posts: 3,096 |
Alright, turns out that the model was easy to print any way. I'm trying some more bigger models now with a sacrificial tower, but it keeps giving me problems. Somehow everything curls up. Even with the nozzle set to 0.4 and having everything tuned absolutely correctly. I wonder if it could help to insulate the heater block? So that it doesn't radiate out as much heat when it's above the printed material?
Does anyone have some suitable advice for printing ABS in a closed chamber? I'm going nuts.
http://www.marinusdebeer.nl/
Does anyone have some suitable advice for printing ABS in a closed chamber? I'm going nuts.
http://www.marinusdebeer.nl/
|
Re: Printing ABS in a closed box failing August 22, 2020 04:38PM |
Registered: 5 years ago Posts: 17 |
|
Re: Printing ABS in a closed box failing August 22, 2020 04:42PM |
Admin Registered: 16 years ago Posts: 13,884 |
... the "sacrifice tower" is not only for adding time, but too, reduces oozig 
Viktor
--------
Aufruf zum Projekt "Müll-freie Meere" - [reprap.org] -- Deutsche Facebook-Gruppe - [www.facebook.com]
Call for the project "garbage-free seas" - [reprap.org]

Viktor
--------
Aufruf zum Projekt "Müll-freie Meere" - [reprap.org] -- Deutsche Facebook-Gruppe - [www.facebook.com]
Call for the project "garbage-free seas" - [reprap.org]
|
Re: Printing ABS in a closed box failing August 23, 2020 10:35AM |
Admin Registered: 11 years ago Posts: 3,096 |
Sooooo meanwhile I've gotten to the point where a better sacrificial tower has improved the print quality drastically. Layer minimal time didn't work wonders because somehow Cura doesn't add in a retract when moving the nozzle away and it only moves the head 2cm away so it still keeps radiating heat onto the piece.
I am currently printing an entirely new X-carriage and will also pack the hotend heat block in some ceramic insulation with kapton tape and silicone tape on top of that to keep radiation heat at bay. I hope that with this setup the ABS will cool down a bit better without separating at the layers. Also, I'm currently having the issue that the ABS sticks too well to the kapton tape, I never thought I would complain about this. So I'm looking for a solution to make the ABS stick less
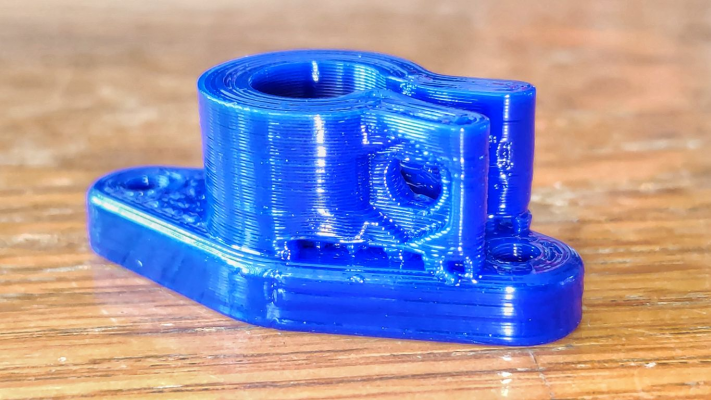
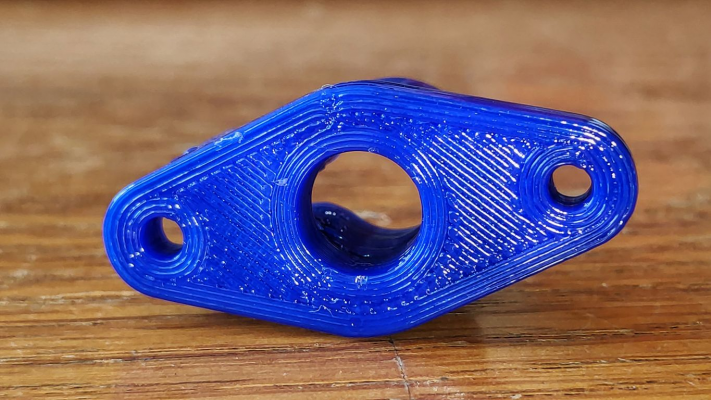
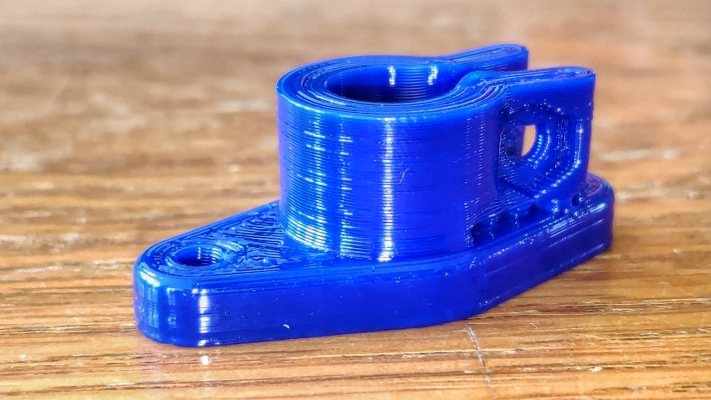
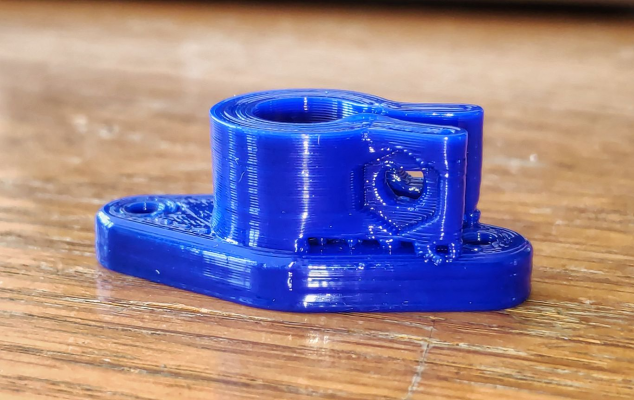
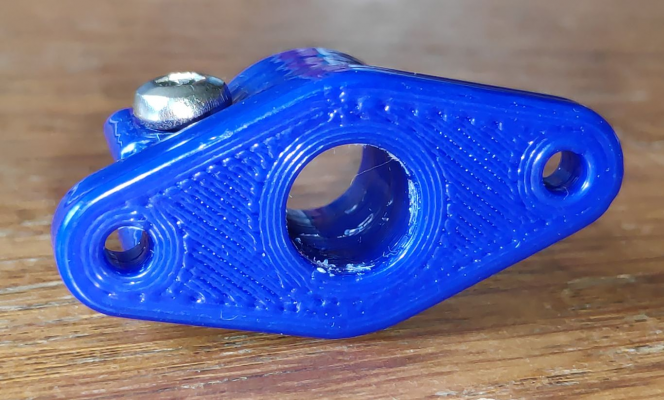
Forgot to take a picture of the immediate result. This was after 5 minutes of vapor smoothing:
(Ps, never mind the crap underneath the clamp, it was meant to have it partially floating so the clamp can actually close, and I decided to simply leave the support material in there as it isn't in the way and doesn't obstruct anything)
Edited 3 time(s). Last edit at 08/23/2020 10:42AM by Ohmarinus.
http://www.marinusdebeer.nl/
I am currently printing an entirely new X-carriage and will also pack the hotend heat block in some ceramic insulation with kapton tape and silicone tape on top of that to keep radiation heat at bay. I hope that with this setup the ABS will cool down a bit better without separating at the layers. Also, I'm currently having the issue that the ABS sticks too well to the kapton tape, I never thought I would complain about this. So I'm looking for a solution to make the ABS stick less

Forgot to take a picture of the immediate result. This was after 5 minutes of vapor smoothing:
(Ps, never mind the crap underneath the clamp, it was meant to have it partially floating so the clamp can actually close, and I decided to simply leave the support material in there as it isn't in the way and doesn't obstruct anything)
Edited 3 time(s). Last edit at 08/23/2020 10:42AM by Ohmarinus.
http://www.marinusdebeer.nl/
|
Re: Printing ABS in a closed box failing August 23, 2020 11:09AM |
Registered: 11 years ago Posts: 5,780 |
Your vapor smoothing looks like it's softening the bulk of the print. 5 minutes seems like a long time.
In the rare event that I vapor smooth prints, I heat the acetone to about 100C in a big pot with a cover, then lower the print into the vapor for a few seconds- just long enough for the vapor to condense on the print surface, never more than 5 seconds, then pull it back out and replace the cover on the pot. I let the print sit for a couple minutes for the acetone to evaporate and then dip the print in the vapor again. It usually only takes 2 or 3 dip and dry cycles to get a nice glossy finish. Handle the print and hang it from a wire so you don't end up with fingerprints in the surface.
Why are you polishing this piece?
Ultra MegaMax Dominator 3D printer: [drmrehorst.blogspot.com]
|
Re: Printing ABS in a closed box failing August 23, 2020 12:29PM |
Admin Registered: 16 years ago Posts: 13,884 |
... is it meant for better layer fusing?
Viktor
--------
Aufruf zum Projekt "Müll-freie Meere" - [reprap.org] -- Deutsche Facebook-Gruppe - [www.facebook.com]
Call for the project "garbage-free seas" - [reprap.org]
Viktor
--------
Aufruf zum Projekt "Müll-freie Meere" - [reprap.org] -- Deutsche Facebook-Gruppe - [www.facebook.com]
Call for the project "garbage-free seas" - [reprap.org]
|
Re: Printing ABS in a closed box failing August 23, 2020 06:35PM |
Admin Registered: 11 years ago Posts: 3,096 |
Quote
the_digital_dentist
Your vapor smoothing looks like it's softening the bulk of the print. 5 minutes seems like a long time.
In the rare event that I vapor smooth prints, I heat the acetone to about 100C in a big pot with a cover, then lower the print into the vapor for a few seconds- just long enough for the vapor to condense on the print surface, never more than 5 seconds, then pull it back out and replace the cover on the pot. I let the print sit for a couple minutes for the acetone to evaporate and then dip the print in the vapor again. It usually only takes 2 or 3 dip and dry cycles to get a nice glossy finish. Handle the print and hang it from a wire so you don't end up with fingerprints in the surface.
Why are you polishing this piece?
I was trying to get even stronger layer fusing as VDX asked.
Ahhh, I should've taken a before photo. The print is misshapen because of the print error, the filament not cooling down enough during the print. The acetone didn't melt it, no worries
 I did mess up a few times, but not on this model. I'll upload a new picture tomorrow morning to show what it should look like.
Besides getting a stronger part because the layers are adhered better, I just like the way it looks. As long as you let the acetone vaporize from the part it will become harder again as well. The heating up is a good tip. I have now found a special jar for it that has a PP cap. It's a glass jar with a glass lid and in between is a filler made with PP and it doesn't degrade with acetone. Really nice solution to make sure the aceton doesn't evaporate out of the jar. Good for many consecutive uses with minimal refueling.
Edited 1 time(s). Last edit at 08/24/2020 06:28AM by Ohmarinus.
http://www.marinusdebeer.nl/
|
Re: Printing ABS in a closed box failing August 31, 2020 10:28AM |
Admin Registered: 11 years ago Posts: 3,096 |
I'm nearing some level of perfection, but I'm curious, is it common to have a fan blow on the ABS in an enclosed case? I have switched filaments and must say it has gotten a LOT better, also tuned some settings, but the temperature and bed temp are still mostly the same. Since the case is closed and the heated bed is quite good, I figure that having a fan blow on the filament just enough to get it to solidify but not enough so that it also causes bad adhesion... That sounds like a good theoretical design yes? In that case I'll have to figure out how I can add another PWM fan to my SKR 1.4 because one fan is the case fan for the controller and it's PWM regulated, the other fan is the hotend cooling fan which is also PWM configured to run a bit slower so it's more silent.
Edit;
I realize that I can use one of the IRLB8743 mosfets to add another PWM controlled fan to the SKR 1.4 in a breakout style. Can I just hook it up, or would I need to add other electronics like resistors and an LED indicator? I think it's plug & play right. Just choose a 5v capable pin to set fan control to for an additional fan and add the mosfet while pulling the supplied power from one of the leftover non-PWM 'fan' pins of the SKR 1.4??
Edited 2 time(s). Last edit at 08/31/2020 10:34AM by Ohmarinus.
http://www.marinusdebeer.nl/
|
Re: Printing ABS in a closed box failing August 31, 2020 12:17PM |
Registered: 6 years ago Posts: 1,863 |
I have heard from the start of 3D Printing that ABS does not like fans and is difficult to get any good ABS layer adhesion when using one.
.
Now for what I do to get really good results for My 3D Printers, Filament is always kept is a storage containers with moisture absorber tubs.
My enclosure is heated by the 3D Printers only, Model cooling fan on slightly, vent fan running just enough to move ABS smells outdoors.
Print speed up to 9.6MM^3 per second sometimes slowing to 7.8mm^3 per second for Infills and top/bottom Layers
Bridging requires a little more fan control to keep from drooping successful perfect bridge is around 80mm changes with filament.
.4mm nozzle
.28 layer height
Retraction 40mm/s distance 4.5mm
ABS Print temperature 232C
Bed temperature 96C any hotter on my Hot-bed and the beds start to warp : straightened it twice now.
Internal enclosure temperature ~40C
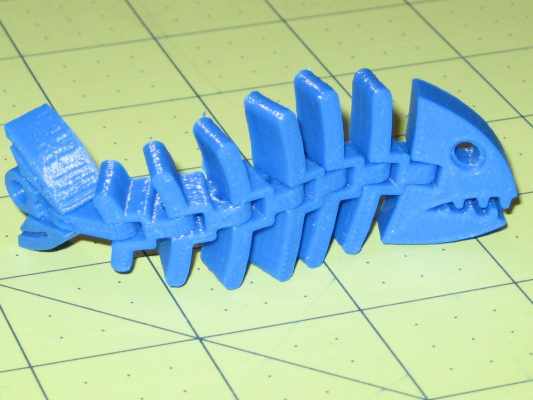
To get and idea of the quality. This model is right off the Bed.
Sample 30 minute print, printed for Halloween cost 10 cents...
Fossil Fish key ring
Computer Programmer / Electronics Technician
|
Re: Printing ABS in a closed box failing August 31, 2020 02:30PM |
Registered: 11 years ago Posts: 5,780 |
Why do you use an enclosure to print ABS? Because it keeps the print from cooling too fast and delaminating.
What happens if you use a print cooling fan while printing ABS? The print cools too fast and delaminates.
If the enclosure temperature was around the glass transition temperature of the ABS, blowing air on the print might not cause a problem.
What do you hope to achieve by blowing air on ABS prints as they are printing?
It is generally best to let ABS prints cool slowly after they are finished. Keep the enclosure closed, and let the bed cool at it's own rate. I usually wait until the bed is down to about 40C or so before I remove ABS prints from the machine unless they are very small prints.
Ultra MegaMax Dominator 3D printer: [drmrehorst.blogspot.com]
|
Re: Printing ABS in a closed box failing September 01, 2020 05:28AM |
Admin Registered: 11 years ago Posts: 3,096 |
Just a follow up, of course I want to tune the fan that it cools down the ABS to an inbetween state. I think there is a nuance here, not simply full on or off. But from what I read it sounds like it could work so I'll give it a try soon.
And to update on experimentation, switching filaments has helped a great deal, plus some more tuning and using a different extruder has helped a great deal as well.
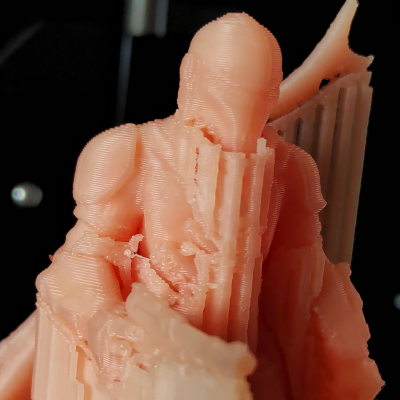
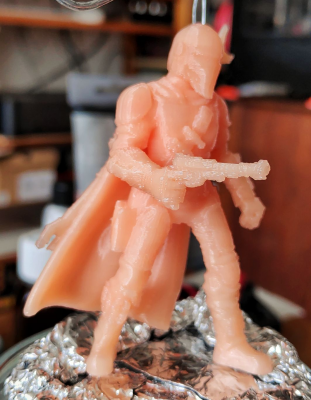
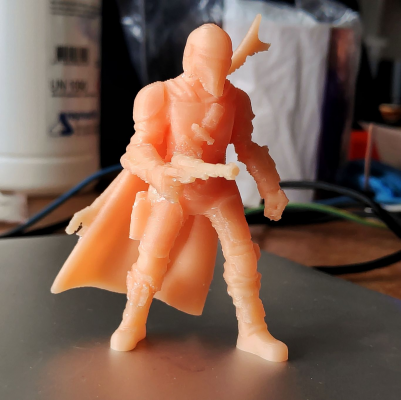
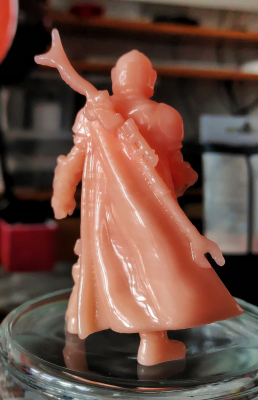
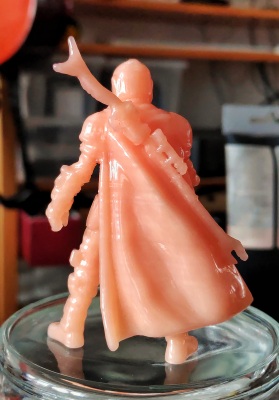
Some images of a Mandalorian model that is 7cm tall (pretty small) with before and after vapor smoothing:
With supports:
Supports removed and removed all blobs and bits:
All printer marks are definitely gone after vapor smoothing. I use a glass jar with a PP airtight seal in which I keep an aceton-soaked paper towel that holds itself upright. The model is placed in the jar for only 3 minutes per run in various positions. Upright, upside down suspended in a metal wire frame, sometimes turned around a bit to allow every crevice to be smoothed out. Most of the smoothing happened outside of the jar anyway. With this 3-minute soak method the model never became soft and really only the outside shell smoothed out. Very happy with the result. In some areas you can see the layers still, but they cannot be felt so I assume these parts of the model are a bit translucent and will be covered once spray-on primer has been applied and then model paint will be applied by hand. I just don't have model paint yet so I would need to find out what's best. I also have lots of acrylic paint which I can mix so maybe that's a better solution.
Quite happy with the results so far. I did however get a few edges curling up which I had to press down on with a heated screwdriver flat tip to keep the nozzle from snagging on it.
Total print time was three hours including supports with a layer height of 0.2mm and average printing speed of 70mm/s.
http://www.marinusdebeer.nl/
|
Re: Printing ABS in a closed box failing September 01, 2020 07:49AM |
Registered: 6 years ago Posts: 1,863 |
Quote
Ohmarinus
a Mandalorian model that is 7cm tall (pretty small) with before and after vapor smoothing:
This is what I need to learn more about vapor smoothing, I have read a few posts, articles on vapor smoothing just do not have an area to safely setup.
Sample Video
When vapor smoothing is there a layer height that works best or is it ok to 3D Print as say .15mm - .28mm layer heights.
Computer Programmer / Electronics Technician
|
Re: Printing ABS in a closed box failing September 01, 2020 09:01AM |
Admin Registered: 11 years ago Posts: 3,096 |
Quote
Roberts_Clif
Quote
Ohmarinus
a Mandalorian model that is 7cm tall (pretty small) with before and after vapor smoothing:
This is what I need to learn more about vapor smoothing, I have read a few posts, articles on vapor smoothing just do not have an area to safely setup.
Sample Video
When vapor smoothing is there a layer height that works best or is it ok to 3D Print as say .15mm - .28mm layer heights.
From what I understand there are two methods:
Cold vaporsmoothing
Warm vaporsmoothing
When using heat, the acetone in the air seems to work much faster, when doing the cold method the acetone seems to be less aggressive. I prefer the cold option.
Beyond that I have no clue, just trying out different options. I just set the layer height to what correlates best to my nozzle size and model dimensions. 0.2 is the best height in my personal experience. Also no division errors when divided by degrees/revolution of the Z-axis stepper. When smoothing I rather do it too short than too long. The only drawback of cold vaporsmoothing is that I notice the bottom area gets smoothed more than the top area of the model, that's why I have to turn it around every time. When using heat, the vapor is more equally distributed throughout the vessel.
http://www.marinusdebeer.nl/
|
Re: Printing ABS in a closed box failing September 01, 2020 05:41PM |
Registered: 6 years ago Posts: 1,863 |
Quote
Ohmarinus
From what I understand there are two methods:
Cold vaporsmoothing
Warm vaporsmoothing
When using heat, the acetone in the air seems to work much faster, when doing the cold method the acetone seems to be less aggressive. I prefer the cold option.
Beyond that I have no clue, just trying out different options. I just set the layer height to what correlates best to my nozzle size and model dimensions. 0.2 is the best height in my personal experience. Also no division errors when divided by degrees/revolution of the Z-axis stepper. When smoothing I rather do it too short than too long. The only drawback of cold vaporsmoothing is that I notice the bottom area gets smoothed more than the top area of the model, that's why I have to turn it around every time. When using heat, the vapor is more equally distributed throughout the vessel.
Thank you this gives me a few more options to getting better results.
Computer Programmer / Electronics Technician
|
Re: Printing ABS in a closed box failing September 05, 2020 03:13PM |
Admin Registered: 11 years ago Posts: 3,096 |
I think I've got it down almost completely now.
In contrary to what seems to be popular belief, on my machine I can print perfectly with a bed temperature of 80ºC and a hotend temperature of 235ºC. I read everywhere people suggest an even higher bed temperature when experiencing warping, but in my personal experience I experience no warping at all at 80ºC (first layer temp is 85ºC). Lowering the bed temp might be quite counter-intuitive to some people, but I realized that was the last thing to try that I could think of. Now the material solidifies enough to not warp, but it stays hot enough to still have good inter-layer adhesion. No issues with the part coming off the bed, I still have to use extreme force to get it off. I guess my blend of ABS juice is also exactly the right consistency. I see a lot of people smear on thick-ass layers of ABS juice, but you really only need a subtle film.
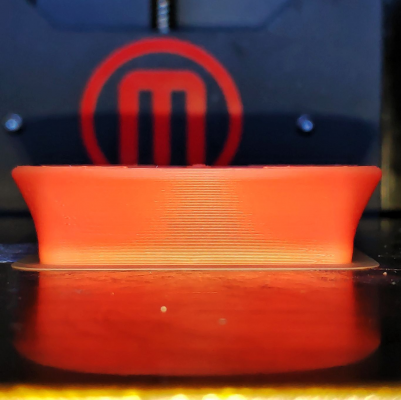
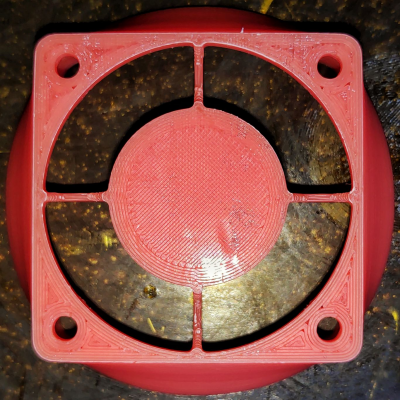
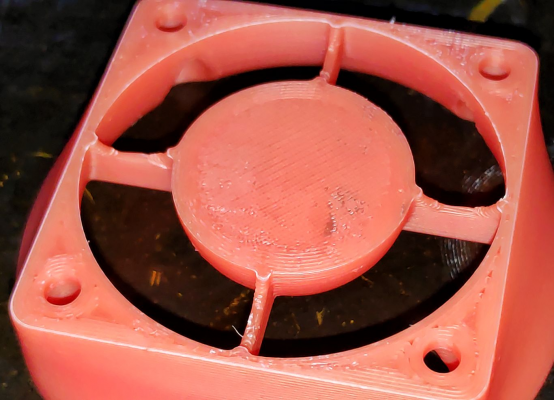
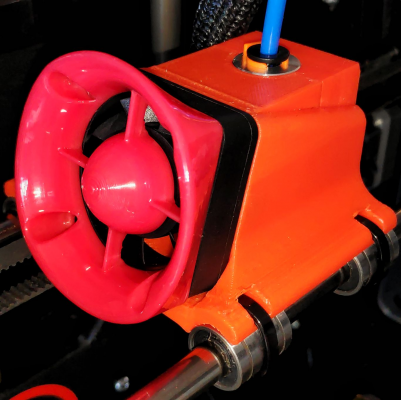
Also, I've added a fan duct that I printed with the Delta machine I've built as well. And am now in the process of vapor smoothing the part that I reprinted with the Replicator 2x which I now call Replicator 3x since it's been upgraded by me. This fan duct will also help with air flow being minimized over the part that's being printed as I did notice that even though my new X-carriage design works incredibly well **best I've ever designed so far**, there was still some turbulence being pulled under the carriage by the airflow that is sucked into the 40mm hotend cooling fan.
I used this design as I see it's the best one I could find with good flow characteristics. I don't understand why people use grate-type fan guards/ducts/inlets, they 'suck':
[www.thingiverse.com]
Some example images:
Edited 3 time(s). Last edit at 09/05/2020 03:19PM by Ohmarinus.
http://www.marinusdebeer.nl/
|
Re: Printing ABS in a closed box failing September 06, 2020 05:36AM |
Admin Registered: 11 years ago Posts: 3,096 |
Quote
the_digital_dentist
Your vapor smoothing looks like it's softening the bulk of the print. 5 minutes seems like a long time.
In the rare event that I vapor smooth prints, I heat the acetone to about 100C in a big pot with a cover, then lower the print into the vapor for a few seconds- just long enough for the vapor to condense on the print surface, never more than 5 seconds, then pull it back out and replace the cover on the pot. I let the print sit for a couple minutes for the acetone to evaporate and then dip the print in the vapor again. It usually only takes 2 or 3 dip and dry cycles to get a nice glossy finish. Handle the print and hang it from a wire so you don't end up with fingerprints in the surface.
Why are you polishing this piece?
I'm just curious how parts will come out, this piece wasn't printed right (hence the melty look, it was like this before smoothing) so I decided to try it out. I have been working on this machine to specifically be able to print ABS models and smooth them so I can offer ABS as a material to my students at the art academy. The printers on the art academy only print in PLA and while it's a great material, it doesn't always have the properties one might need for a project. Whether that be vapor smoothing to somewhat hide the printed quality (muy importante in artworks) or having plastic models that withstand some heat. So I'm now running one machine geared towards PLA, another one that runs PETG and a third with ABS. The PLA and PETG machines can both run PLA and PETG though. I just don't like to switch filaments a lot and I had the machines anyway.
I did a lot of vapor smoothing in the meantime and have discovered that indeed heating it up will speed up and improve the process. When using cold vapor, the vapor tends to sit on the bottom of the vessel. What I tried out so far was to heat the glass vessel under hot tap water to around 40/50ºC and inject acetone with a needle onto paper kitchen towel that is secured around the wall of the glass vessel. The hot glass will evaporate the acetone and circulate is through the vessel so it gets everywhere. Then I leave the part in for max 2 minutes (I think this may actually already be too long) and then take it out. Usually have to do 2 or 3 passes, but this smooths out the part top and bottom and also in small crevices.
Cold vapor smoothing doesn't get into the holes of the part so it really isn't the best way. It is great for simple parts, but I realize now that heat will improve the quality drastically and also preserve more detail because it doesn't go as deep, but the surface that gets smoothed out really is smoothed nicely. On top of that, it seems the acetone dissolves out of the model faster as well.
Fan duct smoothed out so there's less noise:
Just a test to see if it's ok:
Edited 1 time(s). Last edit at 09/06/2020 05:36AM by Ohmarinus.
http://www.marinusdebeer.nl/
|
Re: Printing ABS in a closed box failing September 06, 2020 09:02AM |
Admin Registered: 17 years ago Posts: 7,879 |
Quote
Ohmarinus
Sooooo meanwhile I've gotten to the point where a better sacrificial tower has improved the print quality drastically. Layer minimal time didn't work wonders because somehow Cura doesn't add in a retract when moving the nozzle away and it only moves the head 2cm away so it still keeps radiating heat onto the piece.
I don't think radiation from the nozzle is significant. The heat dumped into to the part in the form of molten filament is far more. There comes a point where slowing down is not sufficient if you have a single tiny island because you have an almost constant bridge of plastic conducting heat from the nozzle as well.
[www.hydraraptor.blogspot.com]
|
Re: Printing ABS in a closed box failing September 09, 2020 02:50AM |
Registered: 5 years ago Posts: 45 |
In slic3r and Prusa Slicer, enable auto cooling for your filament. If it is still too molten, you can modify your layer change gcode.
in "Printer Settings->After layer change G-code", something like the following may be useful:
;
G91 ; relative
G0 Z10 ; lift Z
G4 S15 ; wait 15 seconds
G0 Z-10 ; lower Z
G90 ; absolute
;
Also, regarding too-narrow nozzle width settings: I've found that one may emulate Cura's ironing feature by setting
top solid infill to 0.3mm when using a 0.4mm nozzle.
|
Re: Printing ABS in a closed box failing May 11, 2021 02:10AM |
Registered: 2 years ago Posts: 1 |
I do like those hands, they look amazing!Quote
Ohmarinus
Quote
the_digital_dentist
Your vapor smoothing looks like it's softening the bulk of the print. 5 minutes seems like a long time.
In the rare event that I vapor smooth prints, I heat the acetone to about 100C in a big pot with a cover, then lower the print into the vapor for a few seconds- just long enough for the vapor to condense on the print surface, never more than 5 seconds, then pull it back out and replace the cover on the pot. I let the print sit for a couple minutes for the acetone to evaporate and then dip the print in the vapor again. It usually only takes 2 or 3 dip and dry cycles to get a nice glossy finish. Handle the print and hang it from a wire so you don't end up with fingerprints in the surface.
Why are you polishing this piece?
I'm just curious how parts will come out, this piece wasn't printed right (hence the melty look, it was like this before smoothing) so I decided to try it out. I have been working on this machine to specifically be able to print ABS models and smooth them so I can offer ABS as a material to my students at the art academy. The printers on the art academy only print in PLA and while it's a great material, it doesn't always have the properties one might need for a project. Whether that be vapor smoothing to somewhat hide the printed quality (muy importante in artworks) or having plastic models that withstand some heat. So I'm now running one machine geared towards PLA, another one that runs PETG and a third with ABS. The PLA and PETG machines can both run PLA and PETG though. I just don't like to switch filaments a lot and I had the machines anyway.
I did a lot of vapor smoothing in the meantime and have discovered that indeed heating it up will speed up and improve the process. When using cold vapor, the vapor tends to sit on the bottom of the vessel. What I tried out so far was to heat the glass vessel under hot tap water to around 40/50ºC and inject acetone with a needle onto paper kitchen towel that is secured around the wall of the glass vessel. The hot glass will evaporate the acetone and circulate is through the vessel so it gets everywhere. Then I leave the part in for max 2 minutes (I think this may actually already be too long) and then take it out. Usually have to do 2 or 3 passes, but this smooths out the part top and bottom and also in small crevices.
Cold vapor smoothing doesn't get into the holes of the part so it really isn't the best way. It is great for simple parts, but I realize now that heat will improve the quality drastically and also preserve more detail because it doesn't go as deep, but the surface that gets smoothed out really is smoothed nicely. On top of that, it seems the acetone dissolves out of the model faster as well.
Fan duct smoothed out so there's less noise:
Just a test to see if it's ok:
Sorry, only registered users may post in this forum.
