Yonder's Tantillus Build
Posted by Yonderboy
|
Re: Yonder's Tantillus Build August 26, 2012 09:39PM |
Registered: 11 years ago Posts: 51 |
So now I'm gearing up to do my first print test... however I have an unresolved problem:
The build platform height is too low.
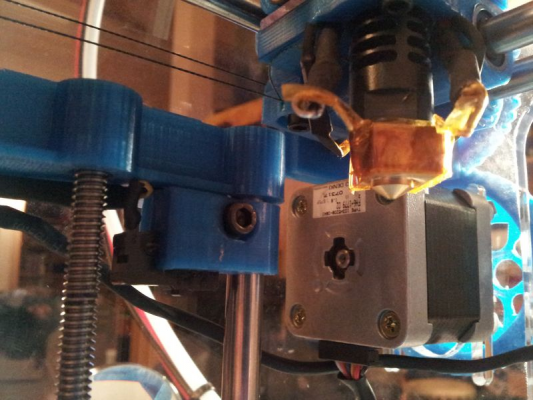
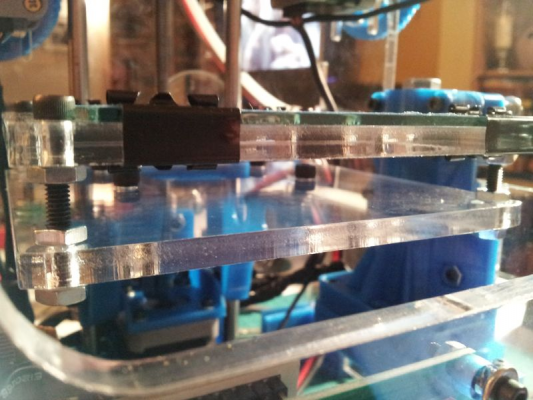
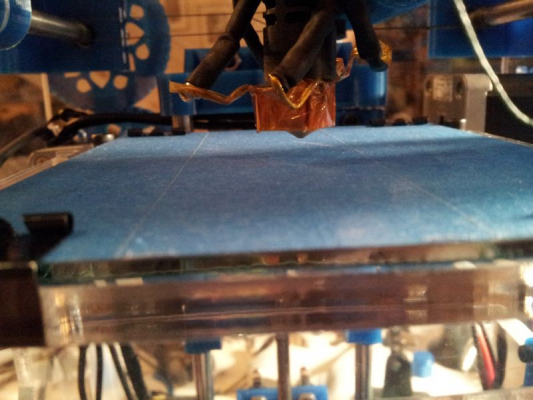
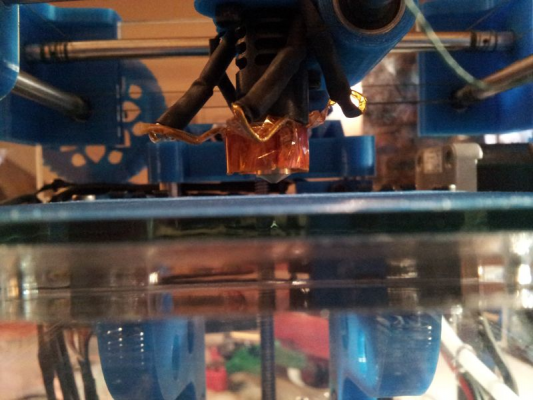
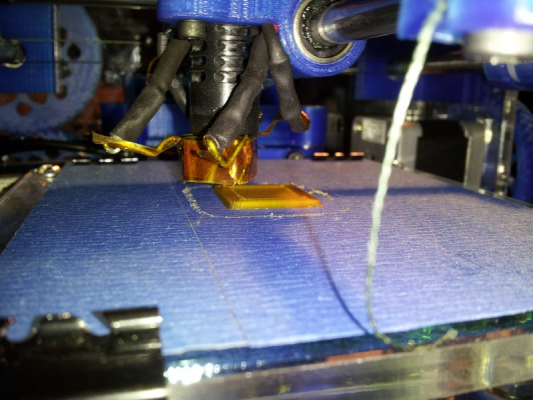
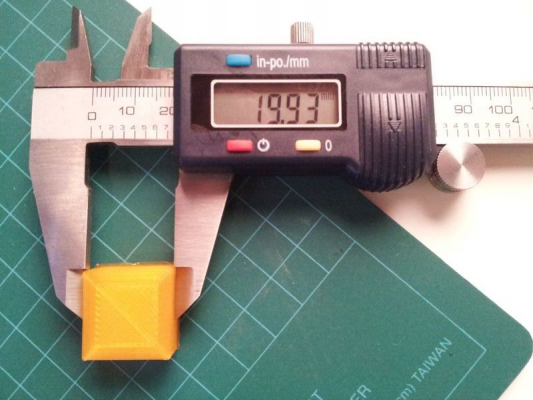
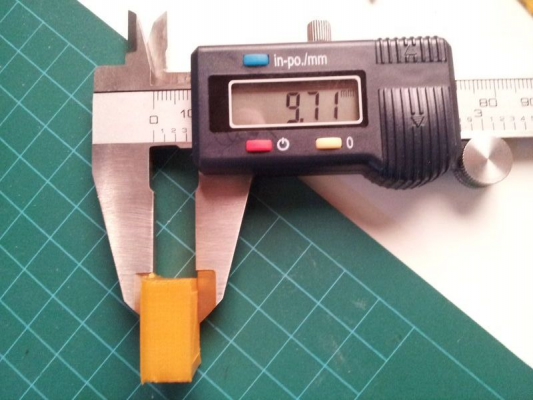
Like the others my build platform started out way too low when I was using the 1 inch #8-32 bolts. I found some 1.5 inch #8-32 pan head bolts at Home Depot, but I switched those back to the 1.25" cap head bolts that Sublime passed back to me through GeraldO. Now taking the calipers to my glass on my build platform, it's 2.5mm thick, I've raised the platform as high as I can go on the 1.25" bolts, and I've slid the endstop as high up as humanly possible on the Z-axis rod. I've show you below a bunch of reference images, but the punchline is that with everything I do, I'm still sitting with the platform a good ~3mm down from the hotend.
I'm not sure what else I can do here... should I switch back to those 1.5" pan head screws that I got to eek out that extra quarter inch? I skimmed through the most recent updates to the instructions, but I didn't see anything that helped with my situation here.
Help me SublimeWan...you're my only hope. ;-)
|
Re: Yonder's Tantillus Build August 26, 2012 10:47PM |
Registered: 13 years ago Posts: 2,947 |
Ahhh yes, you are the first self sourced build to reach this point and I now see an issue with the self sourced kits. The height would be perfect with a J-head mk-IVb even with the 1" bolts. The 1-1/4" bolts work perfect with the J-head mk-Vb's that I supplied with my kits because I had them made 5mm longer then a stock J-head mk-Vb. I have a standard mk-Vb on a machine and looking at it now I see it has 2" bolts that stick out the bottom of the bed really far. My suggestion to you is to use your 1-1/2" ones and I will send out 1-3/4" ones to the people that ordered just hardware kits and/or acrylic kits.
| FFF Settings Calculator | Gcode post processors | Geometric Object Deposition Tool Blog |
| Tantillus.org | Mini Printable Lathe | How NOT to install a Pololu driver |
|
Re: Yonder's Tantillus Build August 26, 2012 11:49PM |
Registered: 11 years ago Posts: 51 |
Okay... I'll give that a try and see how I fare. I'm not certain that the 1.5" bolts will cover the distance. I may need to go for 1.75" as well.
I guess that the new stock J-heads are a whole bunch shorter. Does raising the platform seem like a good long-term solution? I should probably do some tests and ensure that I still get a full 100mm travel downwards once I've levelled the bed.
I guess that the new stock J-heads are a whole bunch shorter. Does raising the platform seem like a good long-term solution? I should probably do some tests and ensure that I still get a full 100mm travel downwards once I've levelled the bed.
|
Re: Yonder's Tantillus Build August 26, 2012 11:54PM |
Registered: 13 years ago Posts: 2,947 |
Yonderboy Wrote:
-------------------------------------------------------
> Okay... I'll give that a try and see how I fare.
> I'm not certain that the 1.5" bolts will cover the
> distance. I may need to go for 1.75" as well.
>
> I guess that the new stock J-heads are a whole
> bunch shorter. Does raising the platform seem
> like a good long-term solution? I should
> probably do some tests and ensure that I still get
> a full 100mm travel downwards once I've levelled
> the bed.
Yeah raising the bed will be fine and should not effect the build height as the build height is determined by the actual travel of the axis which will be the same.
| FFF Settings Calculator | Gcode post processors | Geometric Object Deposition Tool Blog |
| Tantillus.org | Mini Printable Lathe | How NOT to install a Pololu driver |
|
Re: Yonder's Tantillus Build August 27, 2012 12:54AM |
Registered: 11 years ago Posts: 51 |
Sounds good.
I'm just working on this now, and it looks like the extra length on the 1.5" screws is enough to allow me to make the bed touch the hotend. Lookin' promising.
One clarification needed:
Now that I'm actually this close, I'm going through the "levelling the bed" process, and I think there needs to be a clarification of instruction. In the build guide you say: "Raise the bed manually by turning the threaded rod by hand until the bed contacts the glass bed surface.". However, because of a reasonable amount of latitude due to the screw length, when I raise the bed to touch the J-head, I can do so with a somewhat variable height relative to the actual height of the Z-axis platform.
So my question is: How high up do I want the Z-axis platform to be relative to the endstop, while I'm tuning the bed to a paper-width from the J-head? Do I want the endstop switch engaged when the bed is tuned to the right height? Should it be below hitting the endstop when tuned? If it were, wouldn't that risk slamming the J-head into the glass surface while the Z-axis is homing to the endstop? I've noticed that when I home the Z-axis, the bed seems to travel as much as 1mm higher after I hear the click of the endstop switch before it tweaks itself back down. I'm trying to figure out how to get the right height while still allowing to home Z and not risk cracking the glass bed.
|
Re: Yonder's Tantillus Build August 27, 2012 01:01AM |
Registered: 13 years ago Posts: 2,947 |
|
Re: Yonder's Tantillus Build August 27, 2012 01:14AM |
Registered: 11 years ago Posts: 149 |
Looks like things are coming along nicely Yonder!
My glass was hitting the hotend just a little too hard for my comfort so I ended up sticking a little washer between the gap of the endstop holder and top bracket as a shim. It's a temporary fix, but works great and satisfied my anxiousness at the time to get printing. Depending on your own machines gap distances I imagine this may or may not work for yours. My endstop holder was also flexing a bit when homing and the washer helps keep it from moving at all.
Edit:
I should add more to this: The reason I used the washer is because it just worked out to be almost the perfect height to keep the glass from hitting too hard after I'd leveled the bed (and I didn't want to re-level it). At the time I didn't know about the Z-offset option in Slic3r though. Since you can offset the Z easily with Slic3r I'd say place the encoder at a height so that the hotend just barely touches the glass (or doesn't touch at all) when Z is homed. Then play with the Z-offset in Slic3r to dial in the Z height for printing. Sublime recommended to use .05mm offset increments when dialing it in and for me an offset of -0.30mm is what seems to work best.
Edited 2 time(s). Last edit at 08/27/2012 01:50AM by Eric Young.
|
Re: Yonder's Tantillus Build August 27, 2012 07:10AM |
Registered: 11 years ago Posts: 51 |
I confess, I hadn't seen that tutorial yet, Sublime. I'd been simply living in the Build Guide lately, so it never occurred to me to hop on over to the tutorial section.
After swapping my 1.25" cap head bolts back to the 1.5" pan head screws that I bought, I seemed to have gotten then height I needed to start levelling the bed properly. Ultimately I got the bed to the height it was homing to based on where my endstop is (it's in a secure spot, as high as I can get it, and working very reliably right now... so I'm loathe to move it), and then I tuned and levelled the bed height based on that position. I got it so that a paper slid in (with just a bit of friction) in all four corner positions.
Okay... that's as prepped as I can make it, I figured. Time for the moment of truth.
I loaded and sliced Sublime's calibration cube and then started loading some filament. As I've had no joy with getting one of my encoders working just yet, for now I was just gonna try the print straight from Pronterface.
I started to feed in some white PLA that I'd bought from RepRapers.com, and this was when I'd exposed my next challenge. While the extruder seemed to move forward and reverse okay when empty, as soon as I had some filament in there, it seemed to have to work quite a bit harder and it wasn't totally happy about that. It had started okay but then seemed to get stuck while trying to feed in the 850mm that I had told the extruder to feed in (which Sublime said would match what the Load Filament command would've done anyway). A little manual pressure from me seemed to get it unstuck the first two times or so, but it was happening pretty often and both the sound and feel of it made me think that it might just need a little tweak up on the extruder motor's pot. I did that and it seemed to smooth out the movement okay for now.
I waited patiently as the filament travelled up the Bowden tube before it met the hotend. Finally the extruder stopped it's cycle and it seemed that the filament was at the hotend, but I didn't see any plastic getting extruded. That's when I realized that I still had the bed nearly touching the hotend from when I had been levelling it, and I wasn't certain that the gap was large enough to let it squeeze out. I jogged the Z-axis down 10mm and then a stream of filament came out. Apparently, even though I'd tuned the level, it had been holding the plastic back until I moved the bed out of the way. It continued leaking out a string of filament for about a minute before it seemed that the pressure had died out and no more plastic was being forced out yet.
Okay, so it seemed to be primed and ready now. I figured it was time to let er rip, so I re-homed the z-axis and started the print on the calibration cube. The head started going through the motions dutifully, but nothing was coming out and no initial strand of filament was sticking. I glanced down and could see, once again that the extruder had jammed again, so I nudged the filament again and it started to come out.
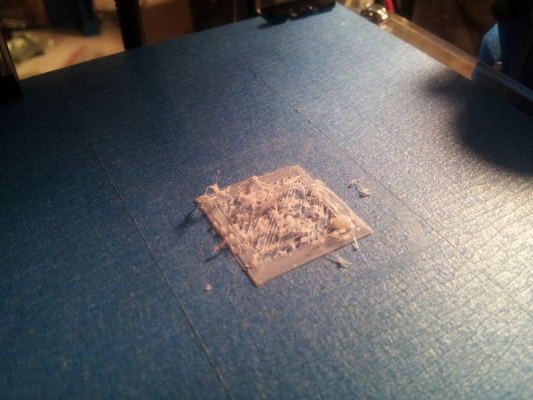
It was somewhat magical watching it try to put down the first couple of layers and then infill. There were obviously problems... it seemed to be squashing the plastic down too much and then dragging the hot end through it, but at least it was trying to work. Then the extruder stopped again, and this time no nudging from me seemed to help. A further glance down and I could see that the large extruder gear was wobbling and not moving consistently at all. Oh will, seems like a fail. So I killed the printed and pulled the bed out of the way. This is what did get printed:
Definitely a fail, but promising nonetheless...
Still it seems like I have an extruder problem and right down at the gears... so I unloaded the filament (somewhat tricky with a failing extruder) and then started dismantling the extruder assembly.
It seems like there may be a couple of problems at play. I'm not sure how well the gears are working given the herringbone teeth... looking closely at them, they are now more worn than when I'd first installed them. The bigger problem, however, is that the large gear and the lower nut holding it, had worked themselves loose during my testing the extruder. Eventually it looked like this (apologies for the sounds of Farscape in the background):
Loose extruder gear
This is without me doing any loosening myself. It's just how loose it had worked itself without assistance.
Now I confess that I had always been a little worried about this part... I had to play with the placement of a couple of washers both at the top and bottom of the hobbed bolt, in order to ensure that the groove was lining up properly with the filament hole. The problem I kept encountering, however, was that with any washers there, if I really tightened the large gear (and its captive nut) down to the end of the threads on the hobbed bolt, it would grip the two bearings so tightly as to not actually let the bolt rotate smoothly any more. But if I removed one or both of the washers, then when I tried to tighten down the gear and it's nut, it would spin up high enough that it would bottom out and cause friction on the contact point between the large gear and the bottom surface of the extruder itself. It seemed I couldn't win. I really couldn't find an arrangement where it was tightened adequately but could still rotate smoothly... so I think that my compromise was that it *wasn't* adequately tightened... as evidenced by it ultimately working itself loose.
I'm going to ask GeraldO if he can reprint my gears for me using the other teeth... but that still doesn't solve my problem of securing the gear in place while still having the bolt rotate with minimal friction.
Any good suggestions?
I admit that it feels like I'm getting so close I can taste it. ;-)
|
Re: Yonder's Tantillus Build August 27, 2012 11:08AM |
Registered: 12 years ago Posts: 195 |
Just to be clear, you're trying to tighten the captive bolt in the gear to the bottom bearing? Ignore if I'm mistaken but read on if not:
The gear is supposed to be secured to the bolt by tightening it against the nut that goes behind it. You should not be trying to torque the head of the bolt and the gear itself. There should be a little slack between the bolt head at the top bearing and the gear itself otherwise the bearings bind (I assume because they're not meant to take much force along their axis).
The way I did mine:
1) start with loosening the free nut at the end
2) holding the bolt head spin the gear until it's close to the extruder body while still allowing the bolt to spin freely
3) holding the bolt still with a wrench on the head and holding the gear still with your hand, use a wrench at the nut to tighten it to the gear
4) if the bolt binds: loosen the nut by doing #3 in reverse, loosen the gear back 1/4 turn, then do #3 and #4 until the nut and gear are tight but the bolt isn't binding
5) if the bolt spins loosely but the bolt assembly wiggles too much along its length (i.e. you can wiggle the bolt head and the hob moves significantly off center), put a 5/16" washer between the gear and the bearing and do the procedure over again.
6) since you changed the position of the gear along the extruder's length, you'll likely have to reposition the gear on the motor's shaft.
TL;DR: torque the gear to the nut not the bolt to the gear.
|
Re: Yonder's Tantillus Build August 27, 2012 12:53PM |
Registered: 11 years ago Posts: 7 |
|
Re: Yonder's Tantillus Build August 27, 2012 03:05PM |
Registered: 13 years ago Posts: 2,947 |
Pokey's description is good and I will most likely steal some of it for the instructions as it explains it fairly well.
As for the play vertically and adding washers to space it correctly. This is not really needed, the groove in the hobbed bolt will hold the bolt in the correct place when the filament is going past it. This may be a good way to assemble it, install a piece of filament in the filament hole across the hobbing and then proceed to install the lower gear as Pokey described and it should be fine. Just remember to tighten the nut while holding the bolt and gear not the other way around.
As for the play vertically and adding washers to space it correctly. This is not really needed, the groove in the hobbed bolt will hold the bolt in the correct place when the filament is going past it. This may be a good way to assemble it, install a piece of filament in the filament hole across the hobbing and then proceed to install the lower gear as Pokey described and it should be fine. Just remember to tighten the nut while holding the bolt and gear not the other way around.
| FFF Settings Calculator | Gcode post processors | Geometric Object Deposition Tool Blog |
| Tantillus.org | Mini Printable Lathe | How NOT to install a Pololu driver |
|
Re: Yonder's Tantillus Build August 27, 2012 04:48PM |
Registered: 11 years ago Posts: 51 |
Thanks for the advice guys...
I suspect that while I had tried to tighten it like that at first, I was probably too gutless with how hard I tightened down the nut when I first did it, for fear of compressing the plastic too much and breaking it. However I'm sure I could've gone much harder.
Also, the tendency that the loaded filament might draw the bolt to the correct height does make sense. I had also done that the first time, but I suspect that I got a bit anxious about getting the height right, because the herringbone gears have no forgiveness if the height is off.
Thanks again.
|
Re: Yonder's Tantillus Build August 28, 2012 11:41PM |
Registered: 11 years ago Posts: 51 |
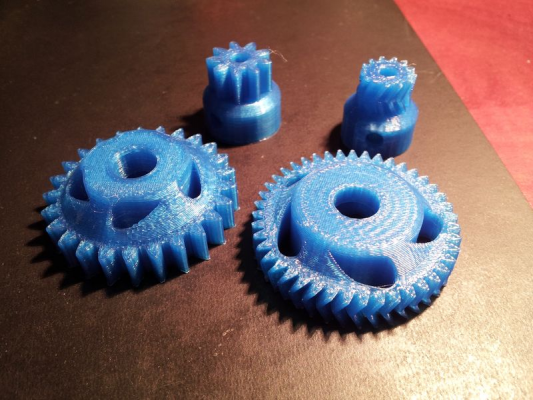
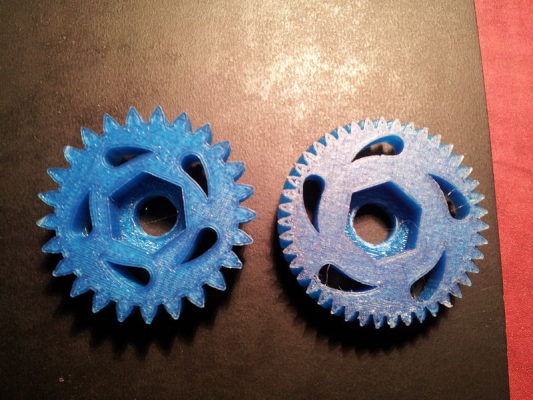
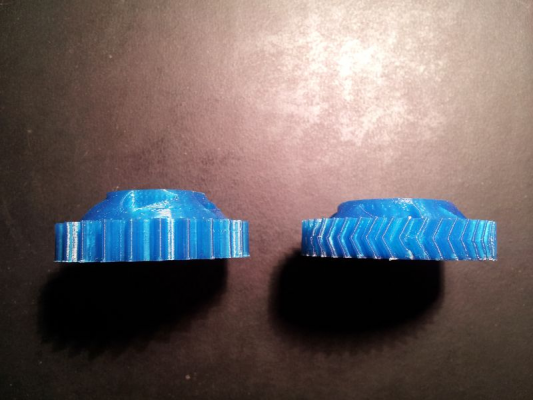
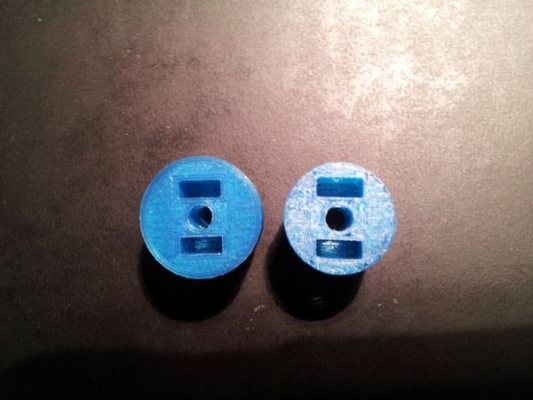
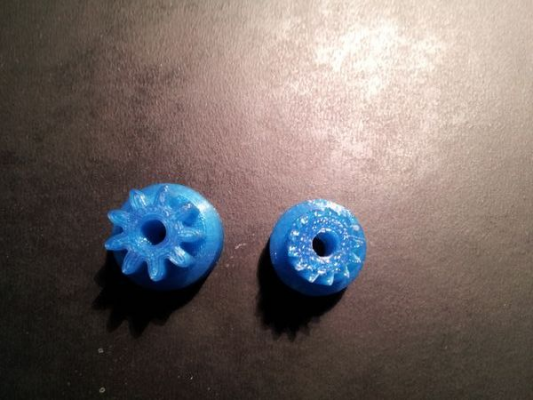
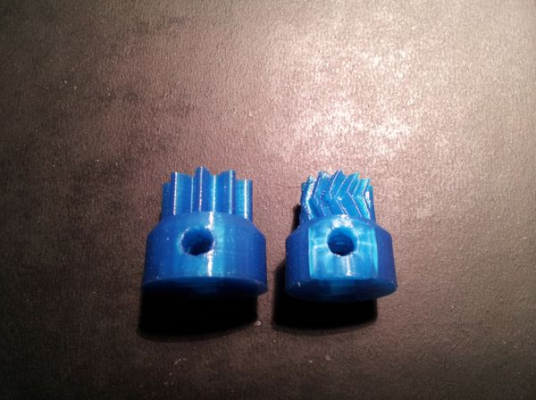
So I just got home and am about to get stuck in rebuilding and remounting my extruder, and hopefully I can make some good progress tonight. GeraldO did me the favour of reprinting my extruder gears for me yesterday. Wow! I hadn't realized what a difference there was between the earlier herringbone version and the new one. It's not just the teeth on the the gears, but the overall dimensions of the parts in their entirety. The updated gears look *SO* much sturdier. Here are some photos of the side by side comparisons:
I must admit that I'm very optimistic that I've have more success with these new parts. Not only should I get a more positive engagement between the teeth, but I should be able to secure the large gear down much more firmly with the nut, without fearing cracking the part. You can also see in that last image that as I secured the smaller gear to the driveshaft with the setscrews, there was enough force on the nut outward to actually start cracking the plastic... but there's much more thickness between the nut and the outer wall in the new version.
So if, like me, you're building a printer around parts that you printed yourself (or with the help of a friend) you'll definitely want the newer gears. ;-)
Wish me luck.
|
Re: Yonder's Tantillus Build August 29, 2012 12:17AM |
Registered: 11 years ago Posts: 149 |
|
Re: Yonder's Tantillus Build August 29, 2012 01:36AM |
Registered: 11 years ago Posts: 7 |
|
Re: Yonder's Tantillus Build August 29, 2012 06:58AM |
Registered: 11 years ago Posts: 51 |
Yup... GeraldO called it right. One word...
SUCCESS!!!
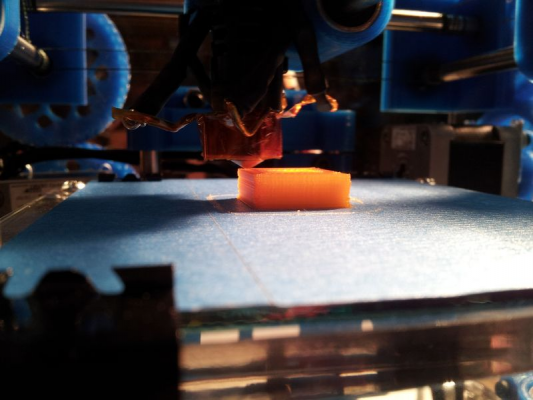
From when I started tonight... I rewired my power connector, and then rebuilt my extruder and reassembled my Tantillus. From there I loaded some filament (translucent Repraper orange this time), extruded a bit to test, tweaked the pot on my extruder motor, re-sliced the calibration cube, and then hit the print button on Pronterface.
It took a couple of layers before it started sticking (obviously I gotta play with slicing different Z offsets)... but then it got rolling:
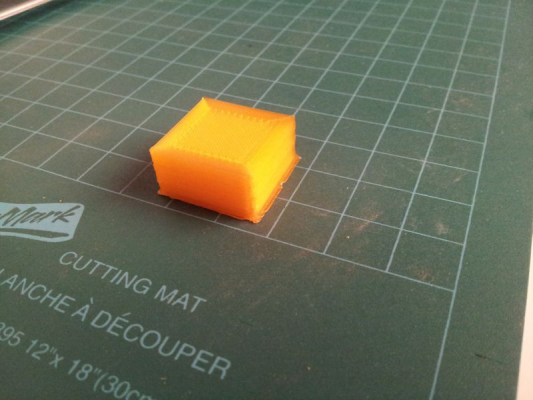
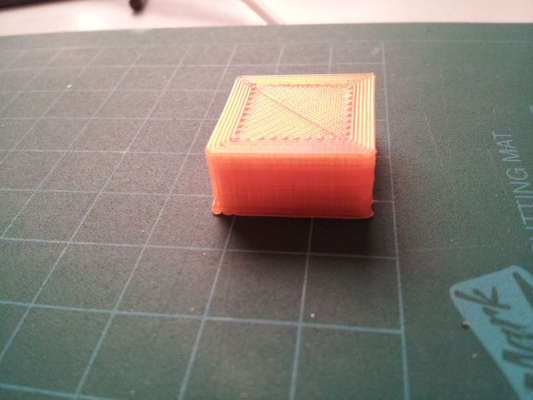
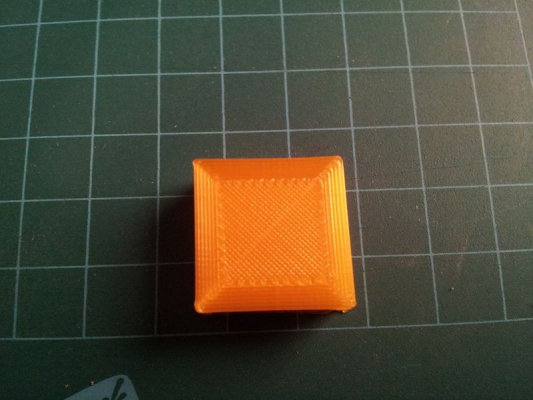
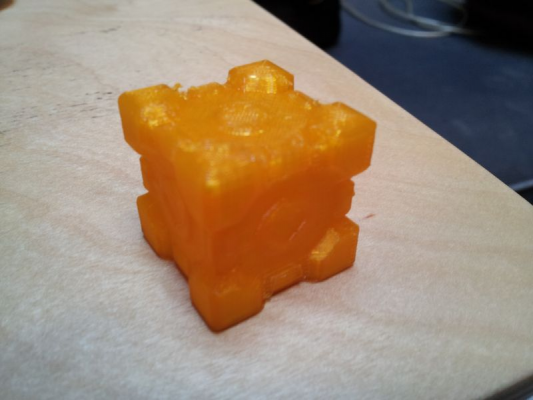
Startlingly, it made it through the whole print. The result:
I'd like to tweak the flow rate a bit, but it seems like that process is hard to do without a working encoder. I may wait until I see Sublime on Thursday and get his help with that.
Here's a minute of video of it in action during the first successful print, if you're interested: Yonderboy's First Print
There's obviously plenty more to tweak and tune with this fabulous little printer, but the fact that I could get this far with it, this fast, is kind of staggering...
Wow.
|
Re: Yonder's Tantillus Build August 29, 2012 07:02AM |
Registered: 11 years ago Posts: 51 |
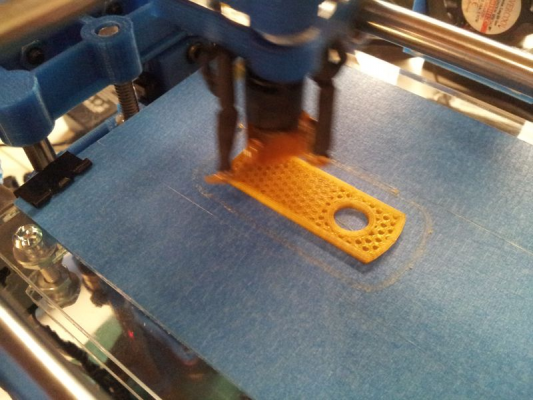
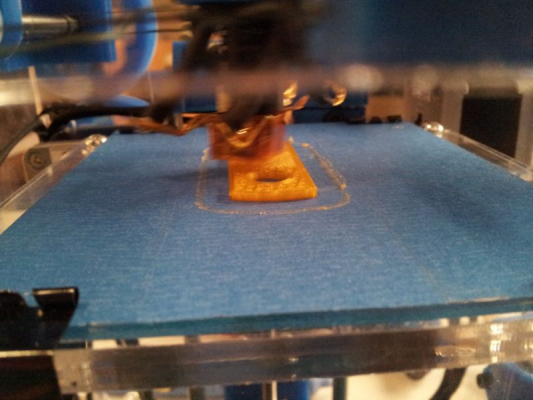
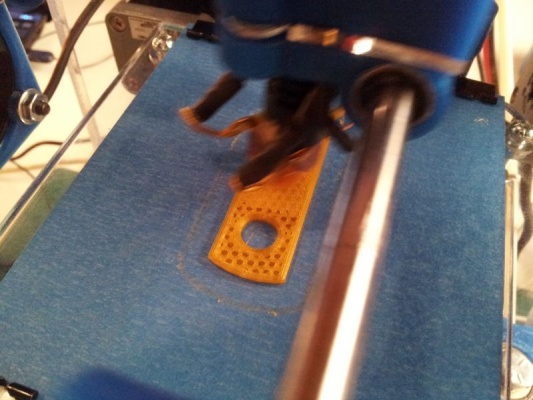
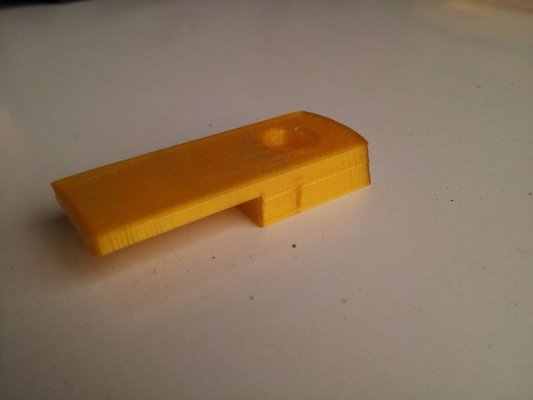
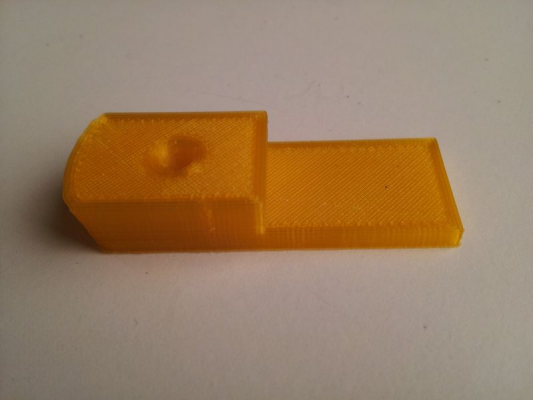
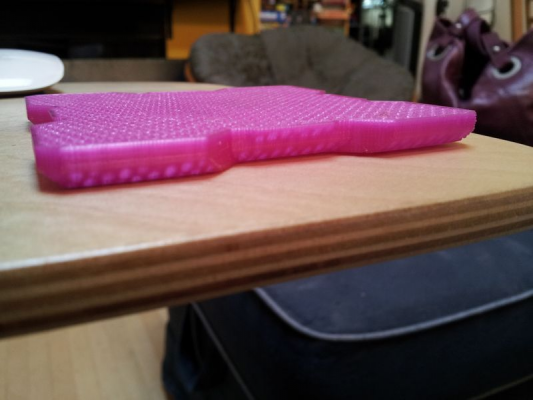
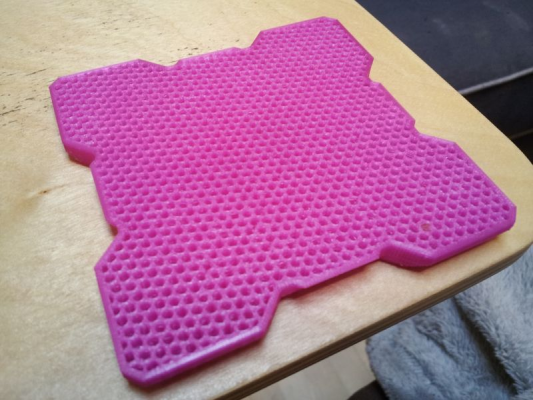
I decided to follow up by getting a bit more ambitious and printing the two components for the Repraper.com-sized spool holder, since I don't have one yet. I started with the smaller piece.
I gotta say that it's fun to watch this little guy doing the honeycomb infills.
So much fun!
I gotta say that it's fun to watch this little guy doing the honeycomb infills.
So much fun!
|
Re: Yonder's Tantillus Build August 29, 2012 11:07AM |
Registered: 12 years ago Posts: 195 |
|
Re: Yonder's Tantillus Build August 29, 2012 12:28PM |
Registered: 11 years ago Posts: 59 |
pokey9000 Wrote:
-------------------------------------------------------
> Congratulations!
>
> I'm itching to see the Tantillus do high frequency
> infill like honeycomb or narrow rectilinear paths.
> My Prusa sounds like a paint shaker when doing
> these.
You will be very pleasantly surprised, and pleased.
----------------
Lem Fugitt
3D Printing Dreams
Robots Dreams
"The map is not the territory."
-------------------------------------------------------
> Congratulations!
>
> I'm itching to see the Tantillus do high frequency
> infill like honeycomb or narrow rectilinear paths.
> My Prusa sounds like a paint shaker when doing
> these.
You will be very pleasantly surprised, and pleased.

----------------
Lem Fugitt
3D Printing Dreams
Robots Dreams
"The map is not the territory."
|
Re: Yonder's Tantillus Build August 29, 2012 01:38PM |
Registered: 11 years ago Posts: 149 |
|
Re: Yonder's Tantillus Build August 29, 2012 03:52PM |
Admin Registered: 15 years ago Posts: 1,470 |
Looks excellent! I want my next printer to be a smaller one (I'm currently running an oversized MendelMax). The Tantillus is high on my list of printers I am considering. I think it is a testament to Sublime's excellent design that you are able to get such nice prints so quickly.
|
Help improve the RepRap wiki!
Just click "Edit" in the top-right corner of the page and start typing. Anyone can edit the wiki! |
|
Re: Yonder's Tantillus Build August 29, 2012 04:02PM |
Registered: 13 years ago Posts: 2,947 |
Great work. I get the biggest smile on my face when I see a printer printing for the first time. > <
<
To tune the flow you can use pronterface but instead of being able to adjust the flow via the LCD and get the actual steps per mm we have to use a percentage and do some math.
We would type in "M221 S100" to have the flow set to 100% of the one set in the firmware (currently 350).
To raise the flow we type in something like M220 S105 for 105% of the flow and keep increasing it until it is correct. We then take the 350 and multiply it by the percentage that we found worked. Like 350 * 1.05 = 367.5 This 367.5 would be your new steps per mm on E that you replace the 350 in the firmware with.
To lower the flow we type in something like M220 S95 for 95% of the flow and keep decreasing it until it is correct. We then take the 350 and multiply it by the percentage that we found worked. Like 350 * 0.95 = 332.5 This 332.5 would be your new steps per mm on E that you replace the 350 in the firmware with.
 <
<To tune the flow you can use pronterface but instead of being able to adjust the flow via the LCD and get the actual steps per mm we have to use a percentage and do some math.
We would type in "M221 S100" to have the flow set to 100% of the one set in the firmware (currently 350).
To raise the flow we type in something like M220 S105 for 105% of the flow and keep increasing it until it is correct. We then take the 350 and multiply it by the percentage that we found worked. Like 350 * 1.05 = 367.5 This 367.5 would be your new steps per mm on E that you replace the 350 in the firmware with.
To lower the flow we type in something like M220 S95 for 95% of the flow and keep decreasing it until it is correct. We then take the 350 and multiply it by the percentage that we found worked. Like 350 * 0.95 = 332.5 This 332.5 would be your new steps per mm on E that you replace the 350 in the firmware with.
| FFF Settings Calculator | Gcode post processors | Geometric Object Deposition Tool Blog |
| Tantillus.org | Mini Printable Lathe | How NOT to install a Pololu driver |
|
Re: Yonder's Tantillus Build August 30, 2012 03:35AM |
Registered: 11 years ago Posts: 51 |
Bah! I'm so frustrated.
I can't seem to figure out why, but after my amazing successes last night, I now can't make a single successful successful print.
When I arrived home, I had wanted to trade out from the translucent orange that I had been printing with, and try a different colour of plastic. I unloaded my filament by heading the print head and then reversing the extruder 850mm. That seemed successful, but then I proceed to try loading my black, then white, and finally red plastic, and in each case, I failed utterly to print.
In every case I was only trying to print Sublime's calibration "cube" with the calibration settings. And every time, I could not get the filament to stick to the tape. I tried fresh tape a couple of times. I started at a Z offset of zero and incremented it by 0.05mm all the way to 0.3mm without any of them working. in every case, the filament seemed to bunch up around the extruder head every time, and never stuck down to the tape.
I tried re-levelling the bed, readjusting the head height with paper as a feeler gauge, extruding a bunch of filament with the print bed out of the way, just to ensure that I wasn't dealing with some plastic gummed up in the head or something. Nothing helped.
What do you recommend if the plastic just isn't sticking. Should I be trying different temperatures? something else? Dang this is frustrating.
|
Re: Yonder's Tantillus Build August 30, 2012 03:53AM |
Registered: 13 years ago Posts: 2,947 |
Well yes this can be a little frustrating. It could be that you are too close to the bed. It could be oils from your fingers on the tape (clean it with acetone or nail polish remover). It could be that you need to raise the temperature of your first layer.
| FFF Settings Calculator | Gcode post processors | Geometric Object Deposition Tool Blog |
| Tantillus.org | Mini Printable Lathe | How NOT to install a Pololu driver |
|
Re: Yonder's Tantillus Build August 30, 2012 03:54AM |
Registered: 11 years ago Posts: 149 |
I don't know if all this is correct, but it's worked for me:
I believe you should move the bed even closer to the extrude nozzle using Z-offset. About half the time my prints won't stick on that first layer or two and I get results similar to what you're describing. If I move the bed closer by .05 or .010 from my original offset I can usually get it to work. I've also toyed with the .5 or so bottom layer speed (option in Slic3r - the Printer and Filament tab) and had what seem to be good results. I imagine upping the flow may help too though I've not tried it. For one part I had to try about 5-6 prints in a row before I got it to stick. Good luck.
I believe you should move the bed even closer to the extrude nozzle using Z-offset. About half the time my prints won't stick on that first layer or two and I get results similar to what you're describing. If I move the bed closer by .05 or .010 from my original offset I can usually get it to work. I've also toyed with the .5 or so bottom layer speed (option in Slic3r - the Printer and Filament tab) and had what seem to be good results. I imagine upping the flow may help too though I've not tried it. For one part I had to try about 5-6 prints in a row before I got it to stick. Good luck.
|
Re: Yonder's Tantillus Build August 30, 2012 06:09AM |
Admin Registered: 15 years ago Posts: 1,470 |
In my experience, cleaning blue tape with rubbing alcohol makes PLA stick fantastically. Just be prepared for the possibility that a bit of the tape may come off on your print 

|
Help improve the RepRap wiki!
Just click "Edit" in the top-right corner of the page and start typing. Anyone can edit the wiki! |
|
Re: Yonder's Tantillus Build September 03, 2012 09:50PM |
Registered: 11 years ago Posts: 51 |
So, it's been a little while since my last update.
While I'd had a few successful prints last week, there definitely were some remaining problems with my Tantillus. Thanks to everyone for the advice on how to get my prints to stick... your advice has been assimilated.
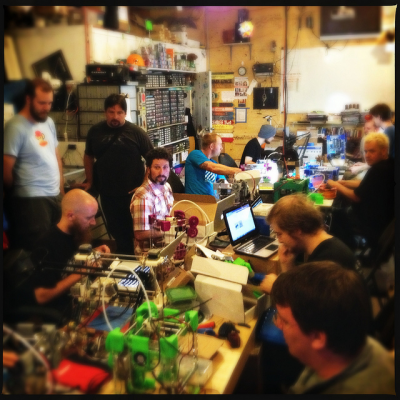
Thursday, last week, Sublime held a gathering here in Vancouver to get many of us Tantillus users on our feet. That was an amazing and fun experience (a busy room filled with a bunch of enthusiastic users tinkering with 11 Tantilli). John Biehler blogged about it and posted a couple of photos: http://johnbiehler.com/2012/08/31/tantillus-3d-printer-build-night/
I'm the blonde dude at the extreme right of the top photo. Thanks for grabbing the photo, John.
I know that not everyone will be able to get one-on-one support time with Sublime themselves... but here's hoping that his witnessing of everyone's tinkering efforts, their trials and tribulations, ultimately helps him support all the Tantillus builders out there.
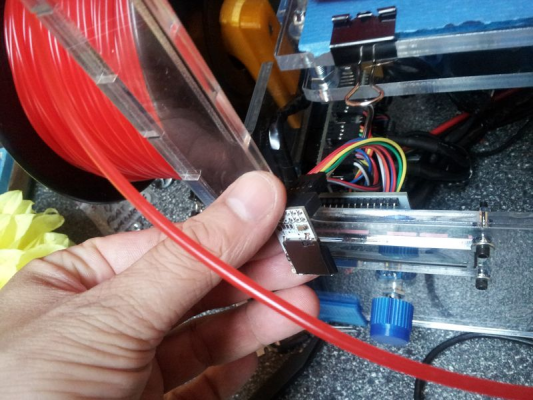
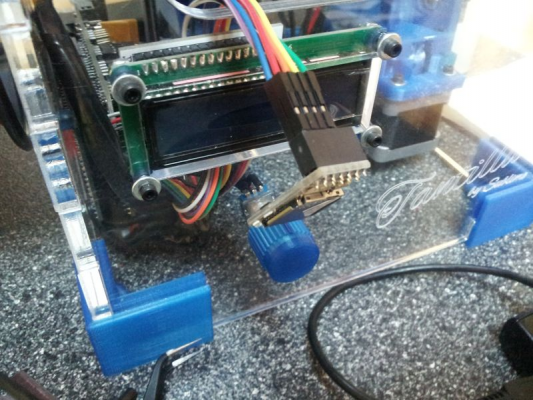
I've documented a couple of key problems that I had with my Tantillus going in to that build night. The main one being that, for the life of me, I could not get my rotary encoder to work so that I could actually interface with the printer without a computer attached. I tried one of the encoders that Sublime had made that he'd already tested (I had already made and tested 3 rotary encoders myself, all of which failed) and his one failed too. This meant that there were two potential sources for the problem. It looks like the pins that the encoder are supposed to connect to were bad. Either that indicates a problem with the RAMPS v1.4 board, or with the Arduino itself. Since Sublime had one of each of those spare with him, I tried swapping just one and then the other with my own hardware. Turns out that the problem was clearly the Arduino... but instead of just calling it broken and accepting defeat, GeraldO helped me modify the firmware to point the pinouts for the rotary encoder to another set of unused pins. Compile, upload, test... . it WORKS! Yay! So now the rotary encoder problem is solved.
As I had to pull out all of the wiring to get to the boards, this gave me an opportunity to tidy up the wiring a bit as I reinstalled it. I then spent the rest of the night, re-levelling the bed, tuning and testing... trying to get the machine to print out that crucial first layer more reliably. I hadn't updated my firmware in a little while, and Sublime had tweaked a couple of things... the key setting being to stop blocking any commands that would go into negatives when moving the X, Y, or Z axis. I updated that so that I could now also go into negative Z axis offset, which is really helpful when tuning the height to get the first print to stick. However, it has a somewhat nasty side-effect. Once you've made that change, you can now send X and Y move commands that will take it back past home. This means that very frequently when controlling the printer through Pronterface, I'll accidentally move the head in a way that makes the motors make an unhappy sound as they push against the physical limits of the X or Y axis trying to go past home position. I wish it were posible to selectively allow negative movement... i.e. just allow it on Z, but prevent it on X and Y.
Anyway, I went home that night and then tried to print off a couple more of the Companion Cubes as print tests. They were all pretty small and I was using some of the preset configs from Sublime for speed. Mainly is Draft and Course settings (0.25 and 0.20 layer heights respectively). Btw, as a sidenote Sublime, you currently have a small bug in your config files.... the 0.5mm (Fine) and the 0.35mm (Fine) files are swapped. The 0.5mm one has a nozzle diameter of 0.3 and the 0.3mm one has a nozzle diameter of 0.45. Those should probably be updated.
So I printed a couple of reasonable looking Companion Cubes...
... but I wanted something smoother-looking, and I wanted to go bigger. I wasn't sure how much slower the "Fine" profile would print, but for fun I decided to try it out on a scaled up cube.
Newbie error... I hadn't figured out the Slic3r settings that I might've wanted to tweak, yet. I hadn't figured out what the advantage of "infill every N layers" was yet, so it was infilling every layer, rather than just every two or three. Also, I didn't check the default infill in that config and I think Sublime had left it at 40% in that config. Yikes! So five and a half hours later, my gigantic cube was maybe 5% printed. I aborted it and accepted that I've succeeded in printing the world's coolest beverage coaster now. Woot!
So, generally speaking I have a pretty functional Tantillus now, with just a few further tweaks to keep working on.
I did a little more work trying to get the top of my two Y axis gears to rotate without this annoying wobble that it was suffering. I seem to have improved that gear's behaviour somewhat. I also haven't yet figured out what to do with my SD RAMPS. I've got it connected at the end of a bundle of jumpers, so that I could keep it out of the way of my build platform... but I haven't yet decided where and how to mount it.
Any suggestions? Sublime? Anyone?
|
Re: Yonder's Tantillus Build September 03, 2012 10:22PM |
Registered: 13 years ago Posts: 2,947 |
Yonderboy Wrote:
-------------------------------------------------------
> I know that not everyone will be able to get
> one-on-one support time with Sublime themselves...
> but here's hoping that his witnessing of
> everyone's tinkering efforts, their trials and
> tribulations, ultimately helps him support all the
> Tantillus builders out there.
It has definitely benefited everyone as I have gone an redesigned some of the parts and have improvements to the instructions from all the talking.
Once you've made that change,
> you can now send X and Y move commands that will
> take it back past home. This means that very
> frequently when controlling the printer through
> Pronterface, I'll accidentally move the head in a
> way that makes the motors make an unhappy sound as
> they push against the physical limits of the X or
> Y axis trying to go past home position. I wish it
> were posible to selectively allow negative
> movement... i.e. just allow it on Z, but prevent
> it on X and Y.
If I was a better programmer I would change this immediately but as it is I only hack my way through the changes I make. I would be more than happy to merge a solution if someone solves this.
>
> Anyway, I went home that night and then tried to
> print off a couple more of the Companion Cubes as
> print tests. They were all pretty small and I
> was using some of the preset configs from Sublime
> for speed. Mainly is Draft and Course settings
> (0.25 and 0.20 layer heights respectively). Btw,
> as a sidenote Sublime, you currently have a small
> bug in your config files.... the 0.5mm (Fine) and
> the 0.35mm (Fine) files are swapped. The 0.5mm
> one has a nozzle diameter of 0.3 and the 0.3mm one
> has a nozzle diameter of 0.45. Those should
> probably be updated.
Fixed now, thank you.
> Newbie error... I hadn't figured out the Slic3r
> settings that I might've wanted to tweak, yet. I
> hadn't figured out what the advantage of "infill
> every N layers" was yet, so it was infilling every
> layer, rather than just every two or three.
> Also, I didn't check the default infill in that
> config and I think Sublime had left it at 40% in
> that config. Yikes! So five and a half hours
> later, my gigantic cube was maybe 5% printed. I
> aborted it and accepted that I've succeeded in
> printing the world's coolest beverage coaster now.
> Woot!
Yeah this is so the profiles are capable of printing anything. If you lower the infill you will find that the top surface of somethings may not turn out solid at 0.1mm because they do not do the first solid layer as a bridge which results in the need for a lot of solid layers and fairly dense infill. This is not to say everything needs this just that I wanted profiles capable of printing anything without the need to adjust settings (possibly at the cost of print time).
> I did a little more work trying to get the top of
> my two Y axis gears to rotate without this
> annoying wobble that it was suffering. I seem to
> have improved that gear's behaviour somewhat. I
> also haven't yet figured out what to do with my SD
> RAMPS. I've got it connected at the end of a
> bundle of jumpers, so that I could keep it out of
> the way of my build platform... but I haven't yet
> decided where and how to mount it.
>
> Any suggestions? Sublime? Anyone?
Well, Eric Young has designed a mount for it already. He is just waiting on my relocation cable so he can mount it. Maybe he will release it soon so others can try?
| FFF Settings Calculator | Gcode post processors | Geometric Object Deposition Tool Blog |
| Tantillus.org | Mini Printable Lathe | How NOT to install a Pololu driver |
|
Re: Yonder's Tantillus Build September 04, 2012 01:20AM |
Registered: 11 years ago Posts: 51 |
> It has definitely benefited everyone as I have
> gone an redesigned some of the parts and have
> improvements to the instructions from all the
> talking.
That's great to hear. I'm not sure about all of the redesigns, but there was definitely talk about the XY ends. It seems like many, including myself, have broken theirs by tightening the cable-anchoring screws too much. In my case I was able to glue it well enough to hold, but it's really hard to feel how tight it needs to be to hold the cable, before being too tight and breaking.
> If I was a better programmer I would change this
> immediately but as it is I only hack my way
> through the changes I make. I would be more than
> happy to merge a solution if someone solves this.
I may know a guy... *cough* Gerald *cough*
> Fixed now, thank you.
No no... thank you.
> Yeah this is so the profiles are capable of
> printing anything. If you lower the infill you
> will find that the top surface of somethings may
> not turn out solid at 0.1mm because they do not do
> the first solid layer as a bridge which results in
> the need for a lot of solid layers and fairly
> dense infill. This is not to say everything needs
> this just that I wanted profiles capable of
> printing anything without the need to adjust
> settings (possibly at the cost of print time).
That makes a good amount of sense. Thanks for clarifying.
> Well, Eric Young has designed a mount for it
> already. He is just waiting on my relocation
> cable so he can mount it. Maybe he will release it
> soon so others can try?
That would be great. I hope he does share it... it looks like a perfect solution! Incidentally, if anyone doesn't want to wait for you to supply them with a relocation cable, they could do what I did and bundle up eight one-pin male-to-female jump wires. The reader works great for me... it's just not yet in the optimal position.
|
Re: Yonder's Tantillus Build September 04, 2012 01:52AM |
Registered: 13 years ago Posts: 2,947 |
Yonderboy Wrote:
-------------------------------------------------------
> That's great to hear. I'm not sure about all of
> the redesigns, but there was definitely talk about
> the XY ends. It seems like many, including
> myself, have broken theirs by tightening the
> cable-anchoring screws too much. In my case I was
> able to glue it well enough to hold, but it's
> really hard to feel how tight it needs to be to
> hold the cable, before being too tight and
> breaking.
The XYends are easier to print now. They no longer use zip ties to hold in the bushing. They are a little longer in one direction (still fit the printed case and does not lower any clearances). The nut traps opening is now from the end so the perimeters are continuous which makes them much stronger.
I am testing an upper gear that does not use the hex collar but may require flats on the shaft.
I may make the top lip on fan mounts a little thicker.
And after seeing Ernestos broken extruder I want to find a way to make it stronger.
| FFF Settings Calculator | Gcode post processors | Geometric Object Deposition Tool Blog |
| Tantillus.org | Mini Printable Lathe | How NOT to install a Pololu driver |
Sorry, only registered users may post in this forum.
