Eric's Tantillus build
Posted by Eric Young
|
Re: Eric's Tantillus build August 22, 2012 07:35PM |
Registered: 13 years ago Posts: 2,947 |
The direction of the motor plugs may be backwards but it will only make them move backwards and can be switched after without issue. Do not unplug them while the power is on EVER.
| FFF Settings Calculator | Gcode post processors | Geometric Object Deposition Tool Blog |
| Tantillus.org | Mini Printable Lathe | How NOT to install a Pololu driver |
|
Re: Eric's Tantillus build August 22, 2012 11:29PM |
Registered: 11 years ago Posts: 149 |
Thanks for the input guys.
I got it all put together, plugged in the USB and nothing turned on. No LED's were on, the computer wouldn't recognize it - just nothing at all. I pulled the RAMPS board off the Arduino, plugged the Arduino all by itself and it seems perfectly fine and connects to Pronterface. Any ideas about what might be going on here?
I got it all put together, plugged in the USB and nothing turned on. No LED's were on, the computer wouldn't recognize it - just nothing at all. I pulled the RAMPS board off the Arduino, plugged the Arduino all by itself and it seems perfectly fine and connects to Pronterface. Any ideas about what might be going on here?
|
Re: Eric's Tantillus build August 23, 2012 02:26AM |
Registered: 13 years ago Posts: 2,947 |
It sounds like something is pulling down the 5v rail. Try unplugging everything from the Ramps board including the drivers and then testing it again. If it still works install one thing at a time (with the power unplugged) and test after plugging each driver in and then the cables.
Edited 1 time(s). Last edit at 08/23/2012 02:42AM by Sublime.
Edited 1 time(s). Last edit at 08/23/2012 02:42AM by Sublime.
| FFF Settings Calculator | Gcode post processors | Geometric Object Deposition Tool Blog |
| Tantillus.org | Mini Printable Lathe | How NOT to install a Pololu driver |
|
Re: Eric's Tantillus build August 23, 2012 06:15AM |
Registered: 11 years ago Posts: 149 |
Thanks Sublime, I did what you suggested and after unplugging and re-plugging everything in one at a time it's working fine now  Not sure what the problem was, but it's gone.
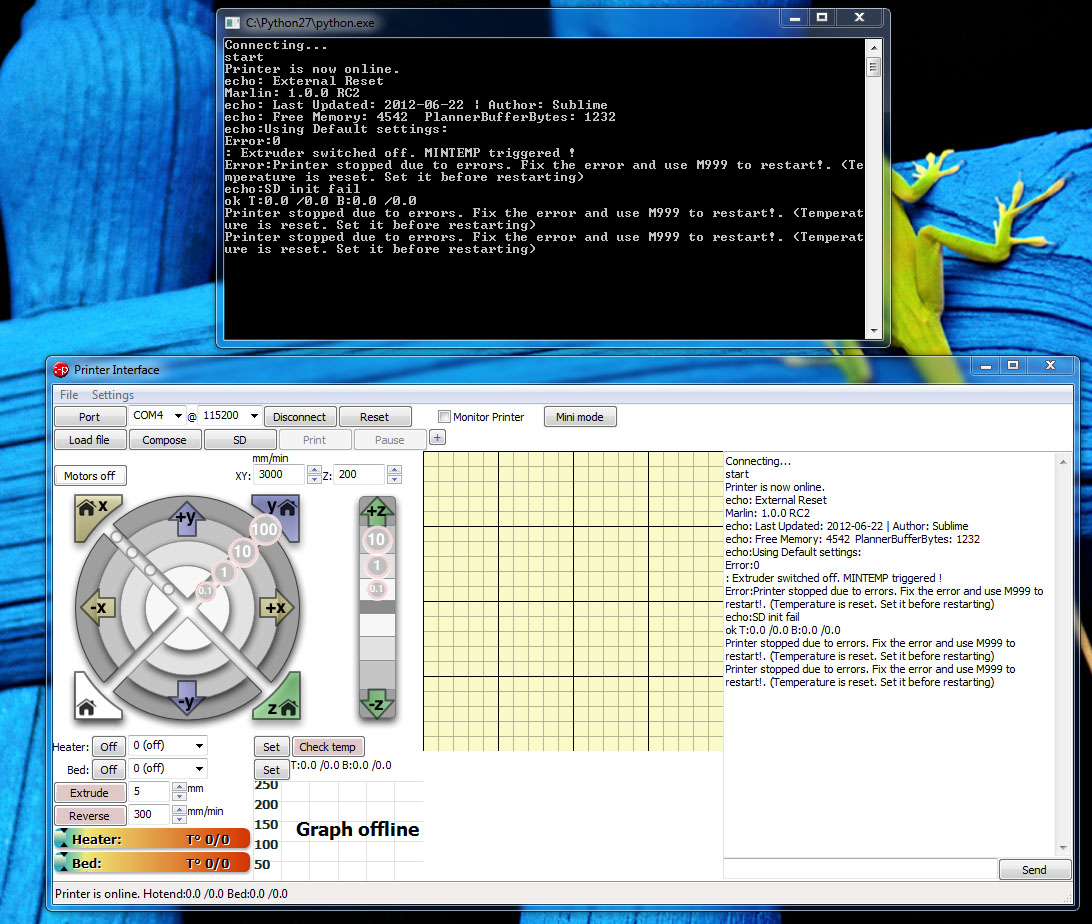
I've now plugged in both USB and 12V and connected to Pronterface. When I try to set the temperature of the hotend, Pronterface gives a message that it is setting the temp, but the hotend does not change temperature at all. 12V power lights up the LCD and Arduino LED without the USB hooked up, so I don't think it's a connection issue with the 12V as others have had. The motors will not move either.
Attached is a Pronterface screenshot after connecting, trying to set the extruder temp to 185, then trying to move the motors 4 times.
Any suggestions?
Not sure what the problem was, but it's gone.I've now plugged in both USB and 12V and connected to Pronterface. When I try to set the temperature of the hotend, Pronterface gives a message that it is setting the temp, but the hotend does not change temperature at all. 12V power lights up the LCD and Arduino LED without the USB hooked up, so I don't think it's a connection issue with the 12V as others have had. The motors will not move either.
Attached is a Pronterface screenshot after connecting, trying to set the extruder temp to 185, then trying to move the motors 4 times.
Any suggestions?
|
Re: Eric's Tantillus build August 23, 2012 03:21PM |
Registered: 13 years ago Posts: 2,947 |
Eric Young Wrote:
-------------------------------------------------------
> Thanks Sublime, I did what you suggested and after
> unplugging and re-plugging everything in one at a
> time it's working fine now Not sure what the
> problem was, but it's gone.
>
> I've now plugged in both USB and 12V and connected
> to Pronterface. When I try to set the temperature
> of the hotend, Pronterface gives a message that it
> is setting the temp, but the hotend does not
> change temperature at all. 12V power lights up the
> LCD and Arduino LED without the USB hooked up, so
> I don't think it's a connection issue with the 12V
> as others have had. The motors will not move
> either.
>
> Attached is a Pronterface screenshot after
> connecting, trying to set the extruder temp to
> 185, then trying to move the motors 4 times.
>
> Any suggestions?
I see you posted at 3:15 am so the missing picture seems about right.
It really sounds like the power supply is not connected to the RAMPS board in some way. Maybe it is a faulty connection or bad power supply. Can you confirm that you have 15v at the RAMPS board.
-------------------------------------------------------
> Thanks Sublime, I did what you suggested and after
> unplugging and re-plugging everything in one at a
> time it's working fine now
Not sure what the> problem was, but it's gone.
>
> I've now plugged in both USB and 12V and connected
> to Pronterface. When I try to set the temperature
> of the hotend, Pronterface gives a message that it
> is setting the temp, but the hotend does not
> change temperature at all. 12V power lights up the
> LCD and Arduino LED without the USB hooked up, so
> I don't think it's a connection issue with the 12V
> as others have had. The motors will not move
> either.
>
> Attached is a Pronterface screenshot after
> connecting, trying to set the extruder temp to
> 185, then trying to move the motors 4 times.
>
> Any suggestions?
I see you posted at 3:15 am so the missing picture seems about right.
It really sounds like the power supply is not connected to the RAMPS board in some way. Maybe it is a faulty connection or bad power supply. Can you confirm that you have 15v at the RAMPS board.
| FFF Settings Calculator | Gcode post processors | Geometric Object Deposition Tool Blog |
| Tantillus.org | Mini Printable Lathe | How NOT to install a Pololu driver |
|
Re: Eric's Tantillus build August 23, 2012 03:53PM |
Registered: 11 years ago Posts: 149 |
Yeah I've gotten into quite the night owl phase over the last month - screenshot is attached this time.
Do I need a multimeter to check the 15v to RAMPS? I can't find mine, but will go buy a new one if I need to since I should really have one around anyways.
Do I need a multimeter to check the 15v to RAMPS? I can't find mine, but will go buy a new one if I need to since I should really have one around anyways.
|
Re: Eric's Tantillus build August 23, 2012 04:25PM |
Registered: 13 years ago Posts: 2,947 |
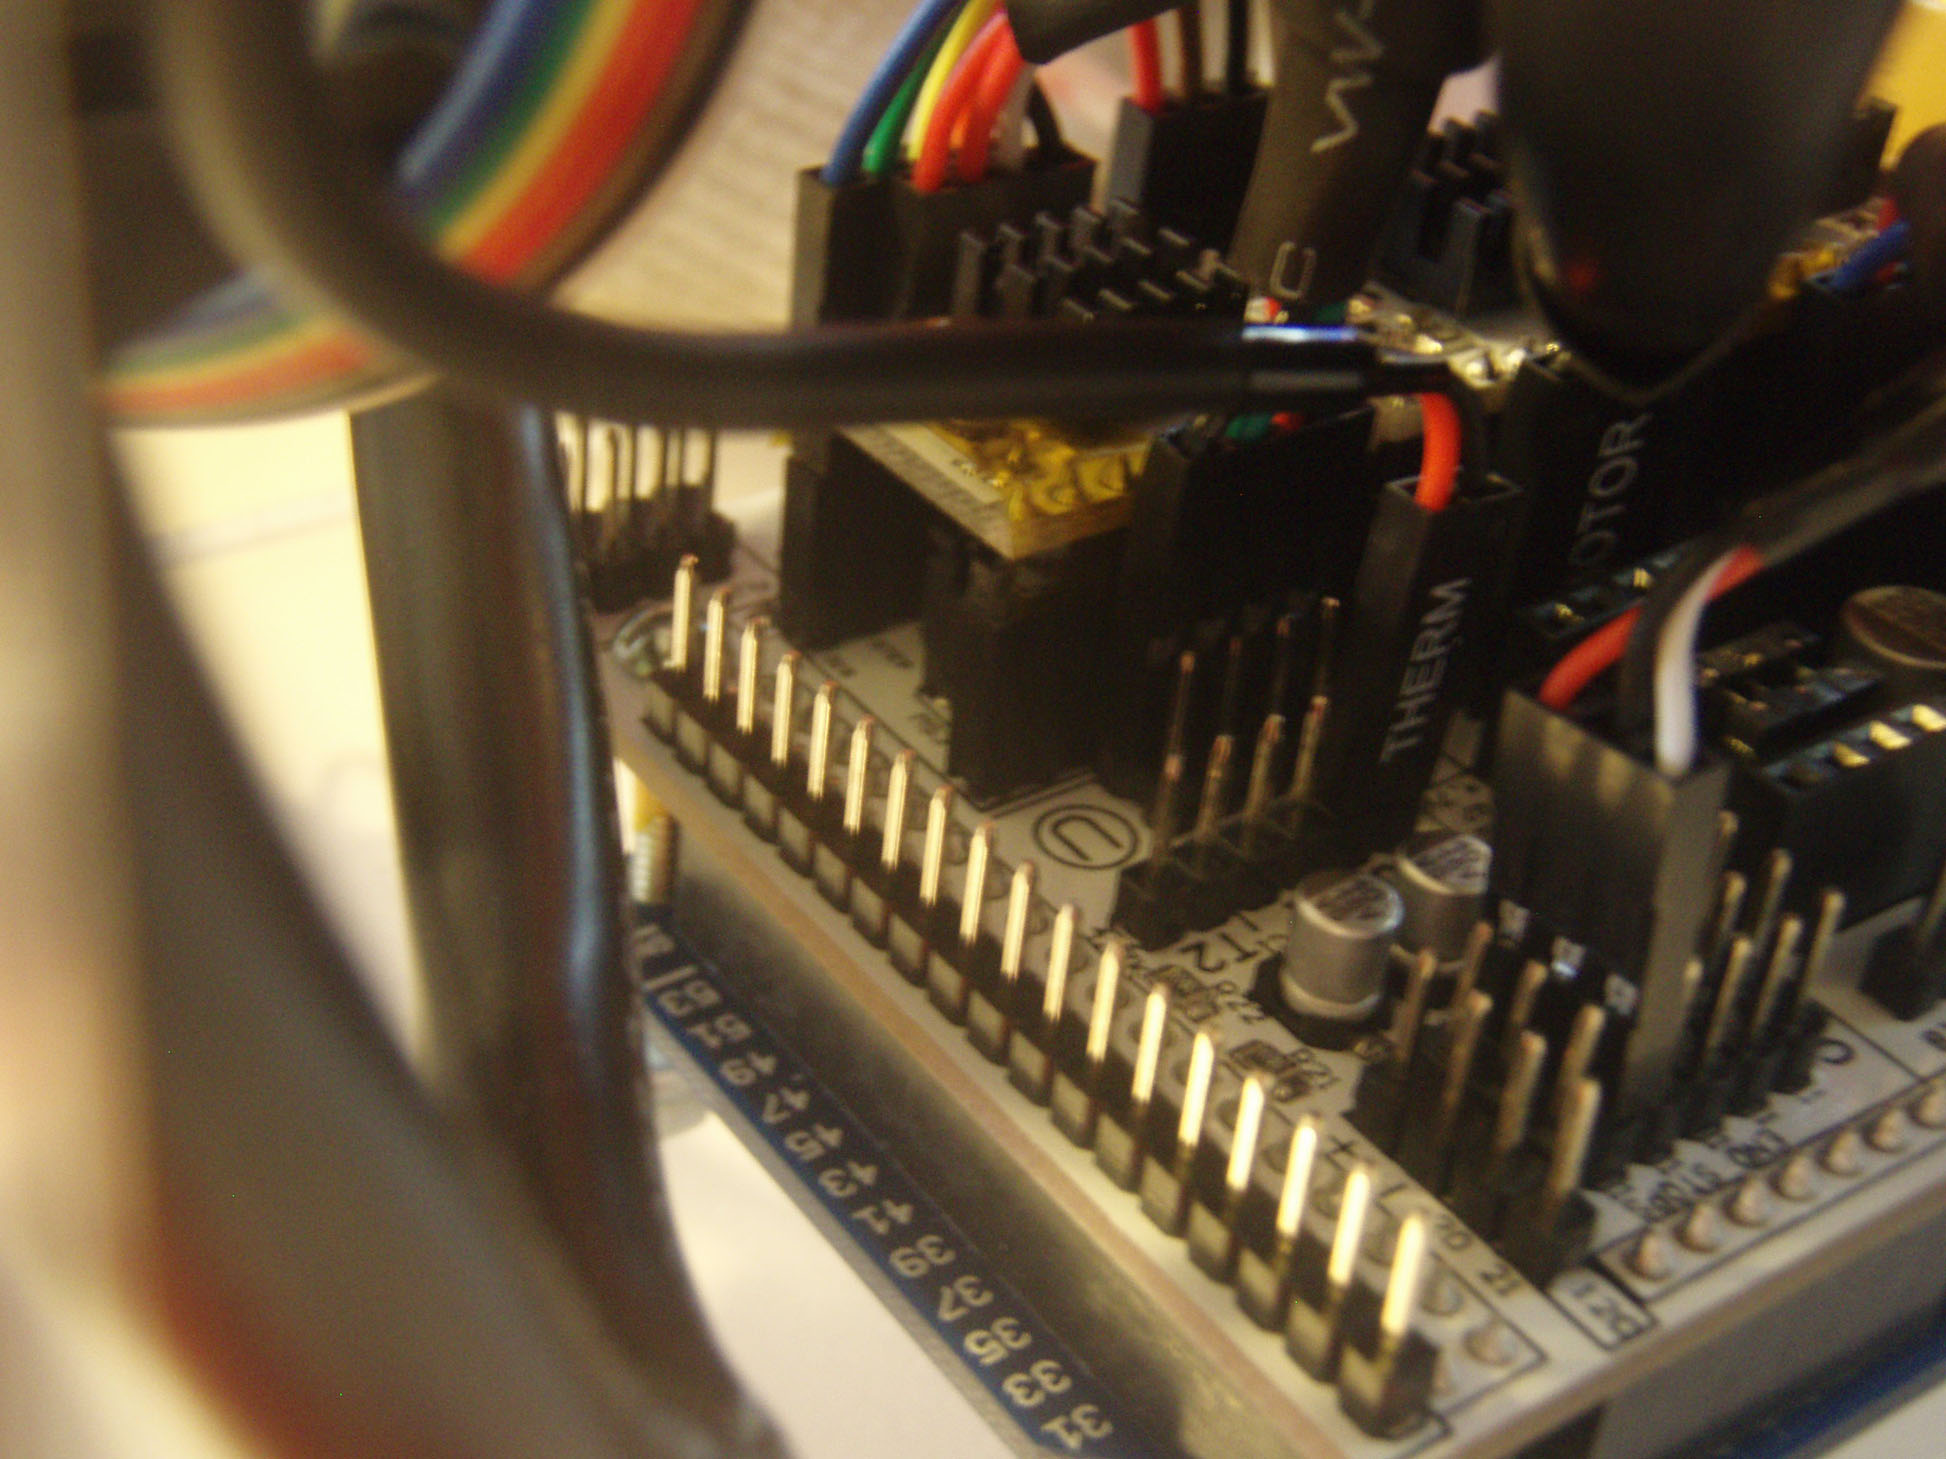
The min temp cutoff is being triggered, I would say your thermistor is not connected. Or maybe it is plugged into the wrong thermistor location (should be T0).
If anything lights up when the power is plugged in and the USB is unplugged then the power supply is working correctly. If nothing lights up then the power is not working.
If anything lights up when the power is plugged in and the USB is unplugged then the power supply is working correctly. If nothing lights up then the power is not working.
| FFF Settings Calculator | Gcode post processors | Geometric Object Deposition Tool Blog |
| Tantillus.org | Mini Printable Lathe | How NOT to install a Pololu driver |
|
Re: Eric's Tantillus build August 23, 2012 04:52PM |
Registered: 11 years ago Posts: 149 |
Sublime Wrote:
-------------------------------------------------------
> The min temp cutoff is being triggered, I would
> say your thermistor is not connected. Or maybe it
> is plugged into the wrong thermistor location
> (should be T0).
>
Thermistor connector looks to be correct (see attached). Are the butt connectors up at the hotend the next thing to check?
> If anything lights up when the power is plugged in
> and the USB is unplugged then the power supply is
> working correctly. If nothing lights up then the
> power is not working.
It does power up with only the power supply connected and no USB.
|
Re: Eric's Tantillus build August 23, 2012 05:38PM |
Registered: 13 years ago Posts: 2,947 |
Thermisitor is connected correctly so the next place to check would be the butt connectors. If you had a multimeter I would say check the resistance across the thermistor connector to confirm it is connected correctly (should be around 100k at room temp).
| FFF Settings Calculator | Gcode post processors | Geometric Object Deposition Tool Blog |
| Tantillus.org | Mini Printable Lathe | How NOT to install a Pololu driver |
|
Re: Eric's Tantillus build August 24, 2012 07:45AM |
Registered: 11 years ago Posts: 149 |
Got myself a new multimeter and it was the butt connector, thanks Sublime.
Powered it up and the hotend seems to heat up nicely to 185. The temp readout gets to a little over 200 degrees at first and then drops back down to 185ish where it holds steady within a few degrees. Super sweet
I started to play with the motor buttons and these were the results ( I have not yet used the +/- 100mm command for any of the motors):
X-axis:
- seems to move decently for the +/- .1 command
- motor "stutters" for +/- 1, sometimes moving and sometimes not.
- will not move at all for +/- 10, just makes a sound like it's trying for about half a second
Y-axis
- seems to move well for +/- .1, 1 and 10 commands.
- something emits a continuous ringing sound when the Y-motor buttons are hit, and the frequency of the sound changes depending on the direction of the movement. It's not very loud, but is noticeable. It's kinda like ringing ears after a concert, but the sound will also hit lower frequencies than ringing ears ever do.
Z-axis:
- Seems to move well for +/- .1, 1 and 10 commands.
- Also emits a sound like that described for the Y-axis, but fainter.
Extruder:
- The gears are jammed up so I plan to remove the extruder and tune them up a bit.
Edit: It looks like you already addressed all of these things in the "Pronterface says Motors are Off" thread after going back and re-reading it. I'll start tweaking the X-axis POT and see what happens.
Edited 3 time(s). Last edit at 08/24/2012 02:25PM by Eric Young.
|
Re: Eric's Tantillus build August 24, 2012 04:44PM |
Registered: 13 years ago Posts: 2,947 |
OK i will not add to much info to confuse you just yet. Let us know how this goes.
The smooth rods may need a little lubricant.
The motors may need the current adjusted.
The smooth rods may need a little lubricant.
The motors may need the current adjusted.
| FFF Settings Calculator | Gcode post processors | Geometric Object Deposition Tool Blog |
| Tantillus.org | Mini Printable Lathe | How NOT to install a Pololu driver |
|
Re: Eric's Tantillus build August 24, 2012 08:10PM |
Registered: 11 years ago Posts: 149 |
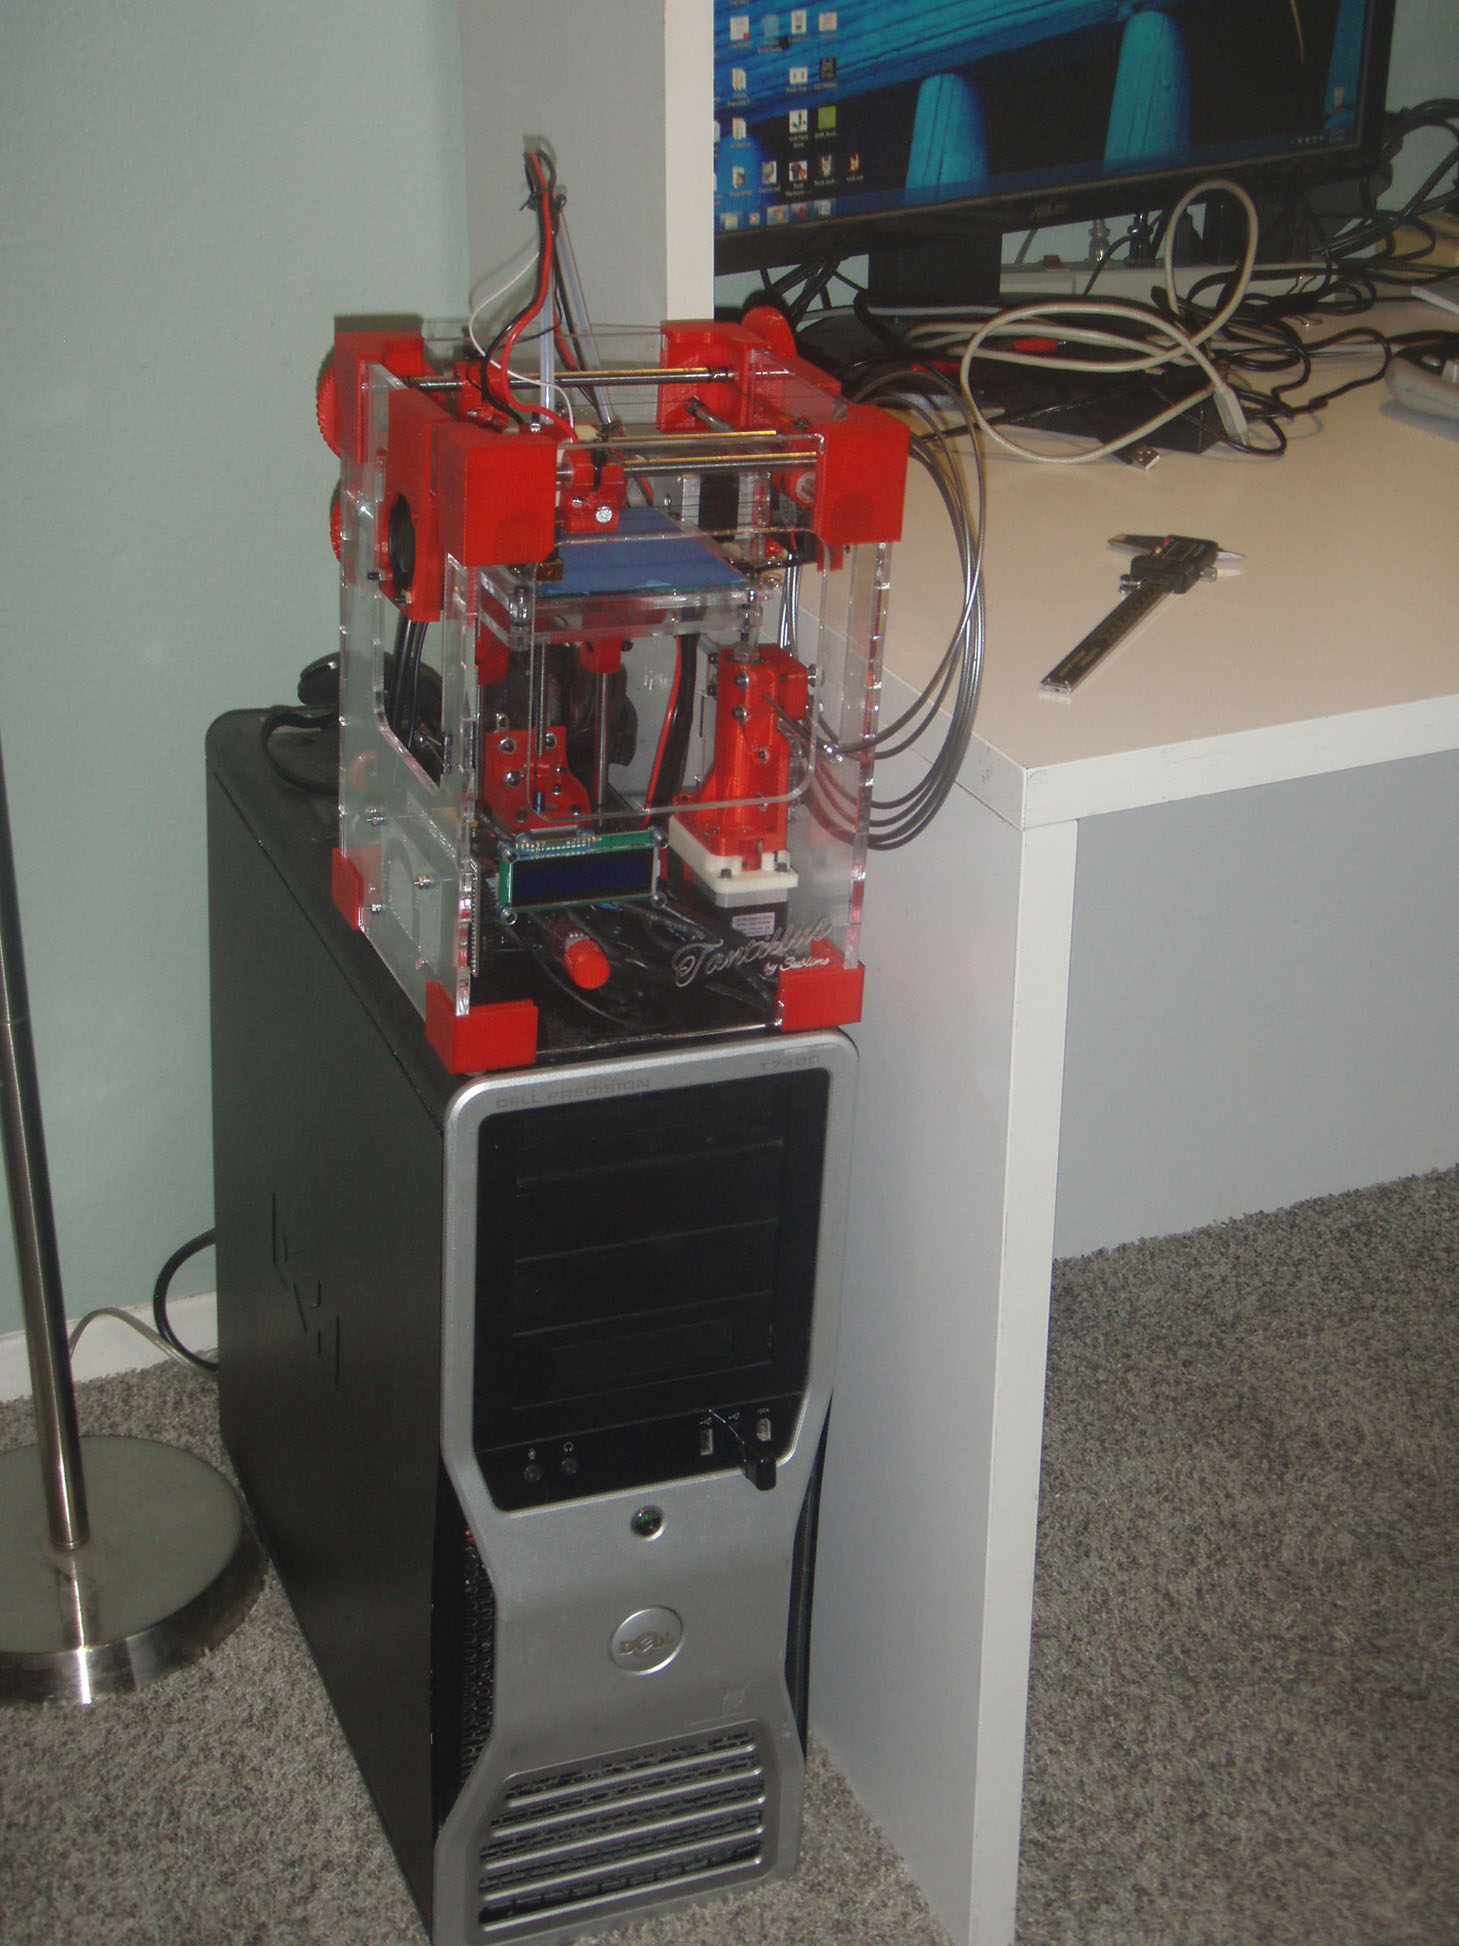
Well everything seems to be working pretty smoothly and I'm starting to feel tingly! Snapped a pic of it sitting on top of my desktop computer, love how it sits right on top so perfectly 
Rods and lead screw are all lubed up, filament has been loaded, motors seem to be functioning well and don't appear to be skipping steps or otherwise misbehaving. Even got rid of nearly all the ringing sound from the motors. The XY is all squared up and the bed is about as level as I'll be able to get it.
Awaiting further commands Captain. (no rush)
One question: If the home is the back right corner, then wouldn't any movement in the +X (right) and +Y (backwards) directions send the carriage in the wrong direction and into the physical stops? Not sure what I'm misunderstanding about the coordinate system.
Edited 1 time(s). Last edit at 08/24/2012 08:45PM by Eric Young.
|
Re: Eric's Tantillus build August 24, 2012 08:37PM |
Registered: 13 years ago Posts: 2,947 |
Looks good, the red is my favourite filament to print with.
You just made me realize I had not re-read that setup section since I wrote it a few months ago and before I moved home to the back right corner for safety.
I have fixed that section and am writing the next section right now (be up in a few minutes).
All you need to do to fix the problem is reverse both the X and Y motor plugs and you will be set.
Edited 1 time(s). Last edit at 08/24/2012 09:48PM by Sublime.
| FFF Settings Calculator | Gcode post processors | Geometric Object Deposition Tool Blog |
| Tantillus.org | Mini Printable Lathe | How NOT to install a Pololu driver |
|
Re: Eric's Tantillus build August 24, 2012 08:45PM |
Registered: 11 years ago Posts: 149 |
 on this machine.
|
Re: Eric's Tantillus build August 24, 2012 08:47PM |
Registered: 11 years ago Posts: 95 |
|
Re: Eric's Tantillus build August 24, 2012 09:48PM |
Registered: 13 years ago Posts: 2,947 |
Ok here is a little more for you.
[www.tantillus.org]
[www.tantillus.org]
| FFF Settings Calculator | Gcode post processors | Geometric Object Deposition Tool Blog |
| Tantillus.org | Mini Printable Lathe | How NOT to install a Pololu driver |
|
Re: Eric's Tantillus build August 24, 2012 10:29PM |
Registered: 11 years ago Posts: 149 |
Edit: Scratch that stuff below - my encoder is working fine, just not when it's mounted to the front panel. I wonder if Lisa'a encoder has the same issue? I think the encoder compression distance is somehow limited when mounted on the front panel, but I can't figure out why.
Looks like my encoder isn't working, but there's a local electronics shop open for another hour and a half tonight and I think they have encoders. Does it need to be a specific type or just any old 20-position encoder? I'll go grab one now if I can get the specs right.
Or, would I be able to do the purging etc from Pronterface?
Edited 1 time(s). Last edit at 08/24/2012 10:36PM by Eric Young.
|
Re: Eric's Tantillus build August 24, 2012 10:47PM |
Registered: 13 years ago Posts: 2,947 |
Lisa's was not working because it was plugged in wrong. Yours is a new problem and one that I have not seen. I can send you a new one with the bolts and Allen keys.
| FFF Settings Calculator | Gcode post processors | Geometric Object Deposition Tool Blog |
| Tantillus.org | Mini Printable Lathe | How NOT to install a Pololu driver |
|
Re: Eric's Tantillus build August 24, 2012 11:09PM |
Registered: 11 years ago Posts: 149 |
|
Re: Eric's Tantillus build August 24, 2012 11:17PM |
Registered: 11 years ago Posts: 149 |
Sublime Wrote:
-------------------------------------------------------
> Lisa's was not working because it was plugged in
> wrong. Yours is a new problem and one that I have
> not seen. I can send you a new one with the bolts
> and Allen keys.
Thanks for the offer, but there's no need. I have the allen keys and bed bolts, and can pick up an encoder for a few bucks at the local shop if I'm not able to fix this one. I'd rather not give Fed-Ex a bunch of money when the encoder is so cheap.
|
Re: Eric's Tantillus build August 25, 2012 02:17AM |
Registered: 11 years ago Posts: 149 |
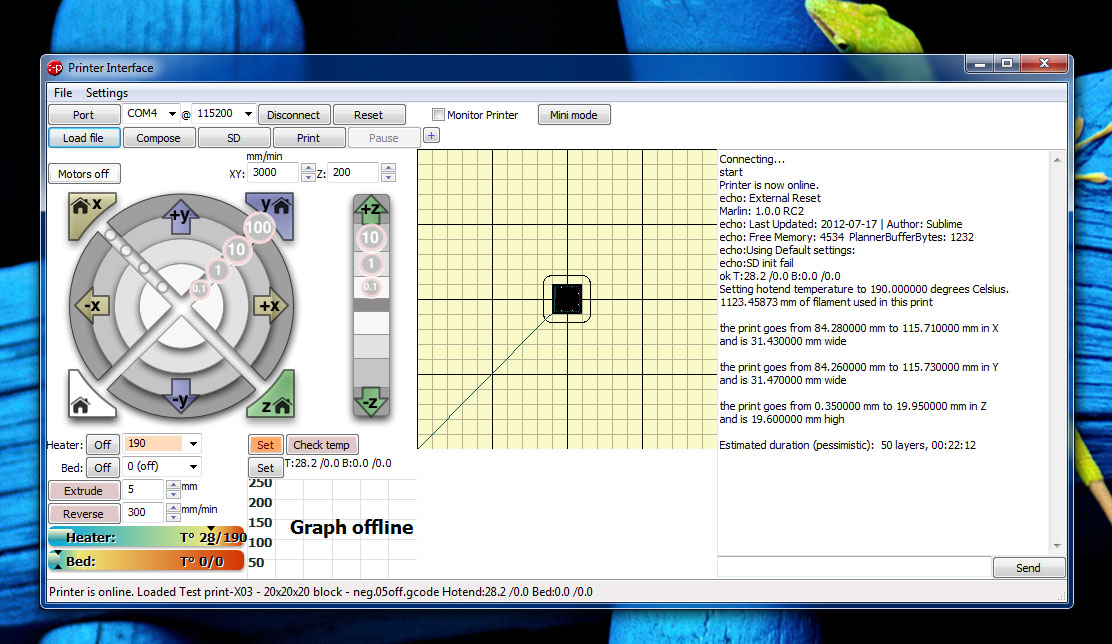
Took a shot at a test print and everything seems okay as far as I can tell, except that the plastic doesn't seem to come out of the nozzle at nearly a high enough rate to build the model.
The logical thing to do seems to be either increase temp (currently set at 190, but goes to 200 once the print starts) or increase the extrude rate (currently 300mm/min). Or both.
Any thoughts?
The logical thing to do seems to be either increase temp (currently set at 190, but goes to 200 once the print starts) or increase the extrude rate (currently 300mm/min). Or both.
Any thoughts?
|
Re: Eric's Tantillus build August 25, 2012 02:27AM |
Registered: 13 years ago Posts: 2,947 |
This is a tough one to explain just yet.
If you would like to play you can try increasing the extrusion multiplier in slic3r. The main thing though is getting the first layer the correct height and then the flow will most likely be correct or near correct. Its only after you get the first layer to stick that you can deal with the flow rate. The first layer needs to be really close, to get it close you adjust the Z-offset until the first layer sticks and then once it can print you adjust the extrusion multiplier to get the flow correct. To get the flow correct you can slice a 20mm x 20mm cube at 100% infill and then when it is printing you should be able to tell if the layers turn out sparse, perfect or over filled.
I will be posting a tutorial on this over the weekend so do not worry to much if you can not get it just yet.
| FFF Settings Calculator | Gcode post processors | Geometric Object Deposition Tool Blog |
| Tantillus.org | Mini Printable Lathe | How NOT to install a Pololu driver |
|
Re: Eric's Tantillus build August 25, 2012 02:43AM |
Registered: 11 years ago Posts: 149 |
I think I understand, you explained it well. Going to play around and see what happens.
Can you recommend increment size(s) for Z-offset changes once the paper-gauge height is set? Is the offset in the positive or negative Z-direction? For example if I want to put the bed .1mm closer to the nozzle, do I type in .1mm, or -.1mm?
Is the current setting of 300mm/min for the extruder a good place to start?
Edited 1 time(s). Last edit at 08/25/2012 02:45AM by Eric Young.
|
Re: Eric's Tantillus build August 25, 2012 03:04AM |
Registered: 13 years ago Posts: 2,947 |
Eric Young Wrote:
-------------------------------------------------------
> I think I understand, you explained it well. Going
> to play around and see what happens.
>
> Can you recommend increment size(s) for Z-offset
> changes once the paper-gauge height is set? Is the
> offset in the positive or negative Z-direction?
> For example if I want to put the bed .1mm closer
> to the nozzle, do I type in .1mm, or -.1mm?
If it is too high you would enter a negative value and if it was too low you would enter a positive. The increment you want is probably around 0.05 at a time.
One problem I just realized is I have a flag in Marlin set so it will not go into the negative because I use an advanced technique to set the offset that I will be explaining later. For now I will update Tantillus's Marlin to allow the negative moves and tell you how to do it right now.
Open Marilin in the Arduino IDE and go to the configuration.h file. Go to line 161:
#define min_software_endstops true //If true, axis won't move to coordinates less than HOME_POS.
And change it to say false, like:
#define min_software_endstops false //If true, axis won't move to coordinates less than HOME_POS.
This will allow you to use the Z-offset in Slic3r. I will update the firmware for everyone after I post this.
>
> Is the current setting of 300mm/min for the
> extruder a good place to start?
Do not worry about anything in Pronterface. It has nothing to do with the print settings. All the settings are set for you in the preconfigured slic3r profiles I provided.
Edited 1 time(s). Last edit at 08/25/2012 03:08AM by Sublime.
| FFF Settings Calculator | Gcode post processors | Geometric Object Deposition Tool Blog |
| Tantillus.org | Mini Printable Lathe | How NOT to install a Pololu driver |
|
Re: Eric's Tantillus build August 25, 2012 03:09AM |
Registered: 13 years ago Posts: 2,947 |
Tantillus Marlin on Github is now updated to allow negative moves.
| FFF Settings Calculator | Gcode post processors | Geometric Object Deposition Tool Blog |
| Tantillus.org | Mini Printable Lathe | How NOT to install a Pololu driver |
|
Re: Eric's Tantillus build August 25, 2012 03:29AM |
Registered: 11 years ago Posts: 149 |

|
Re: Eric's Tantillus build August 25, 2012 04:17AM |
Registered: 11 years ago Posts: 149 |
|
Re: Eric's Tantillus build August 25, 2012 07:46AM |
Registered: 11 years ago Posts: 149 |
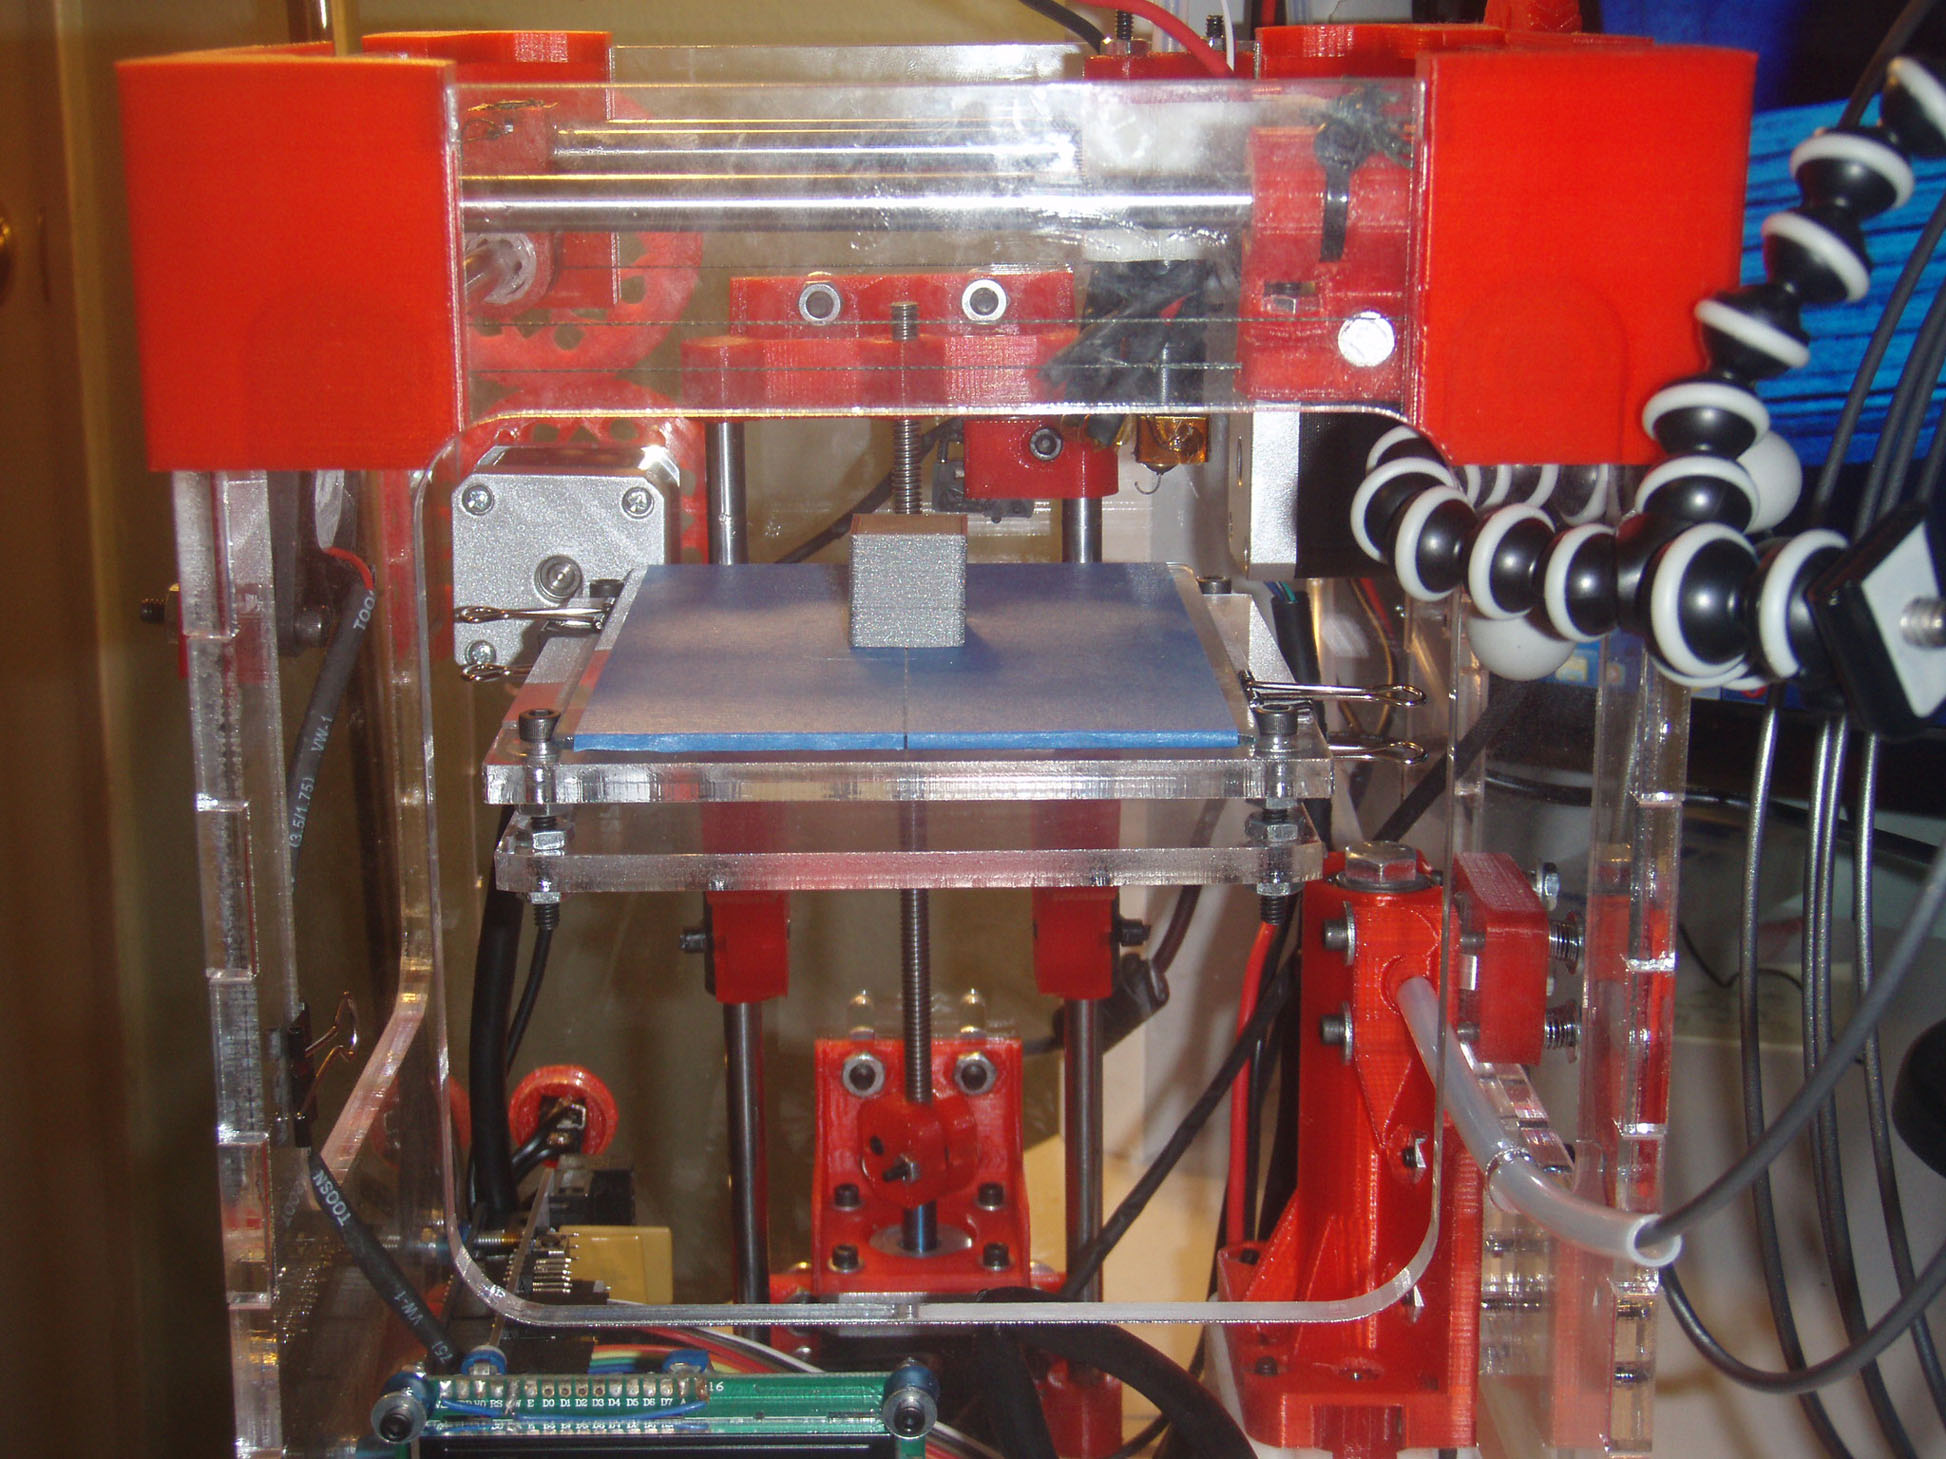
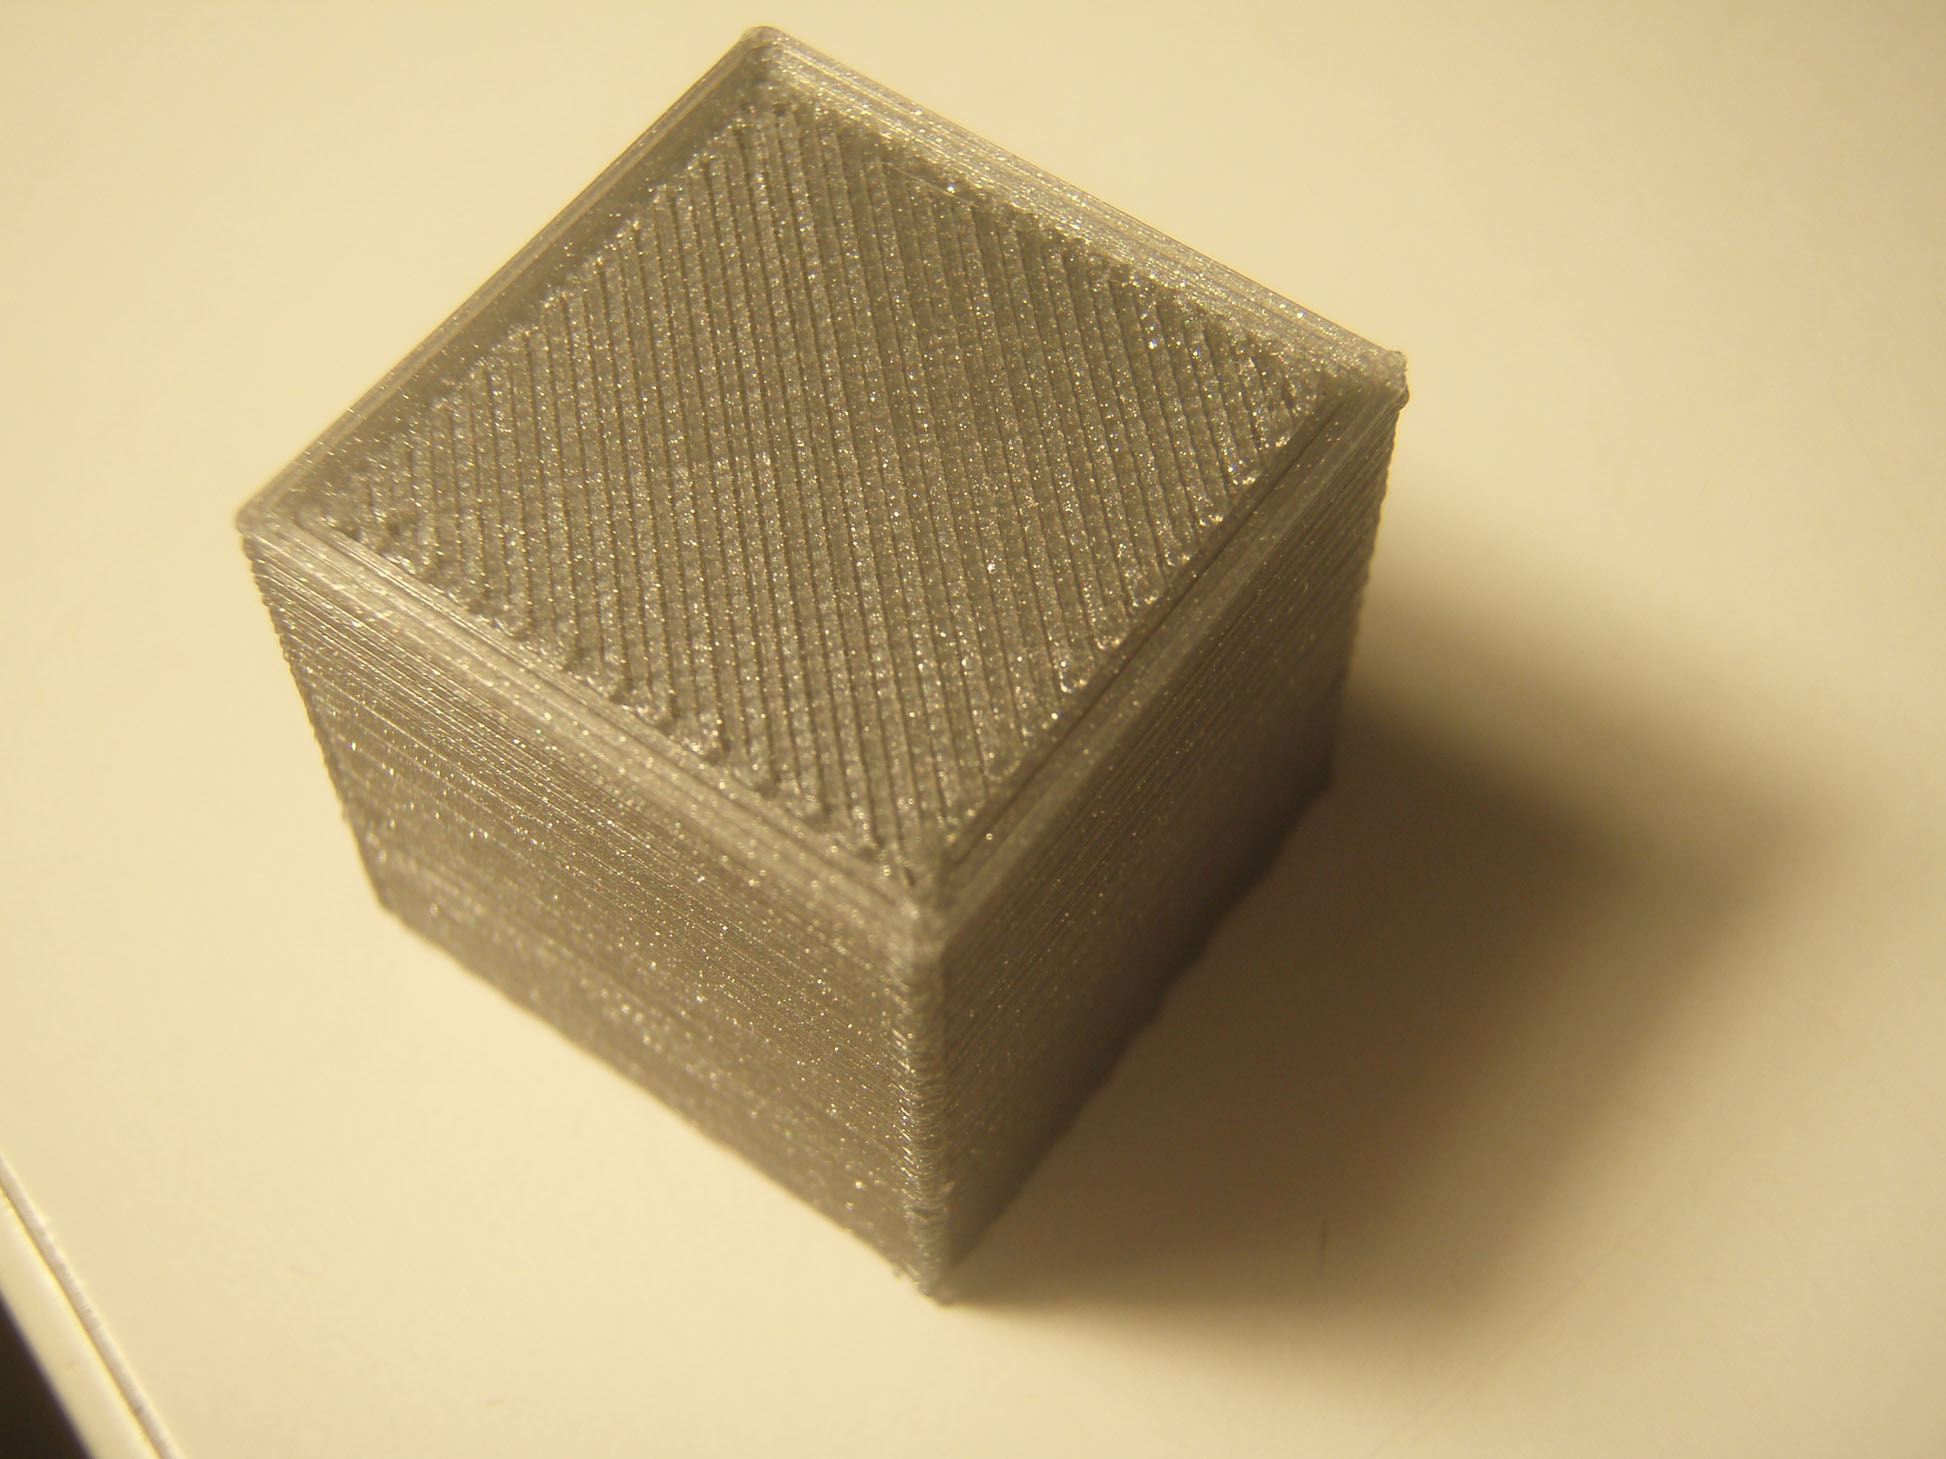
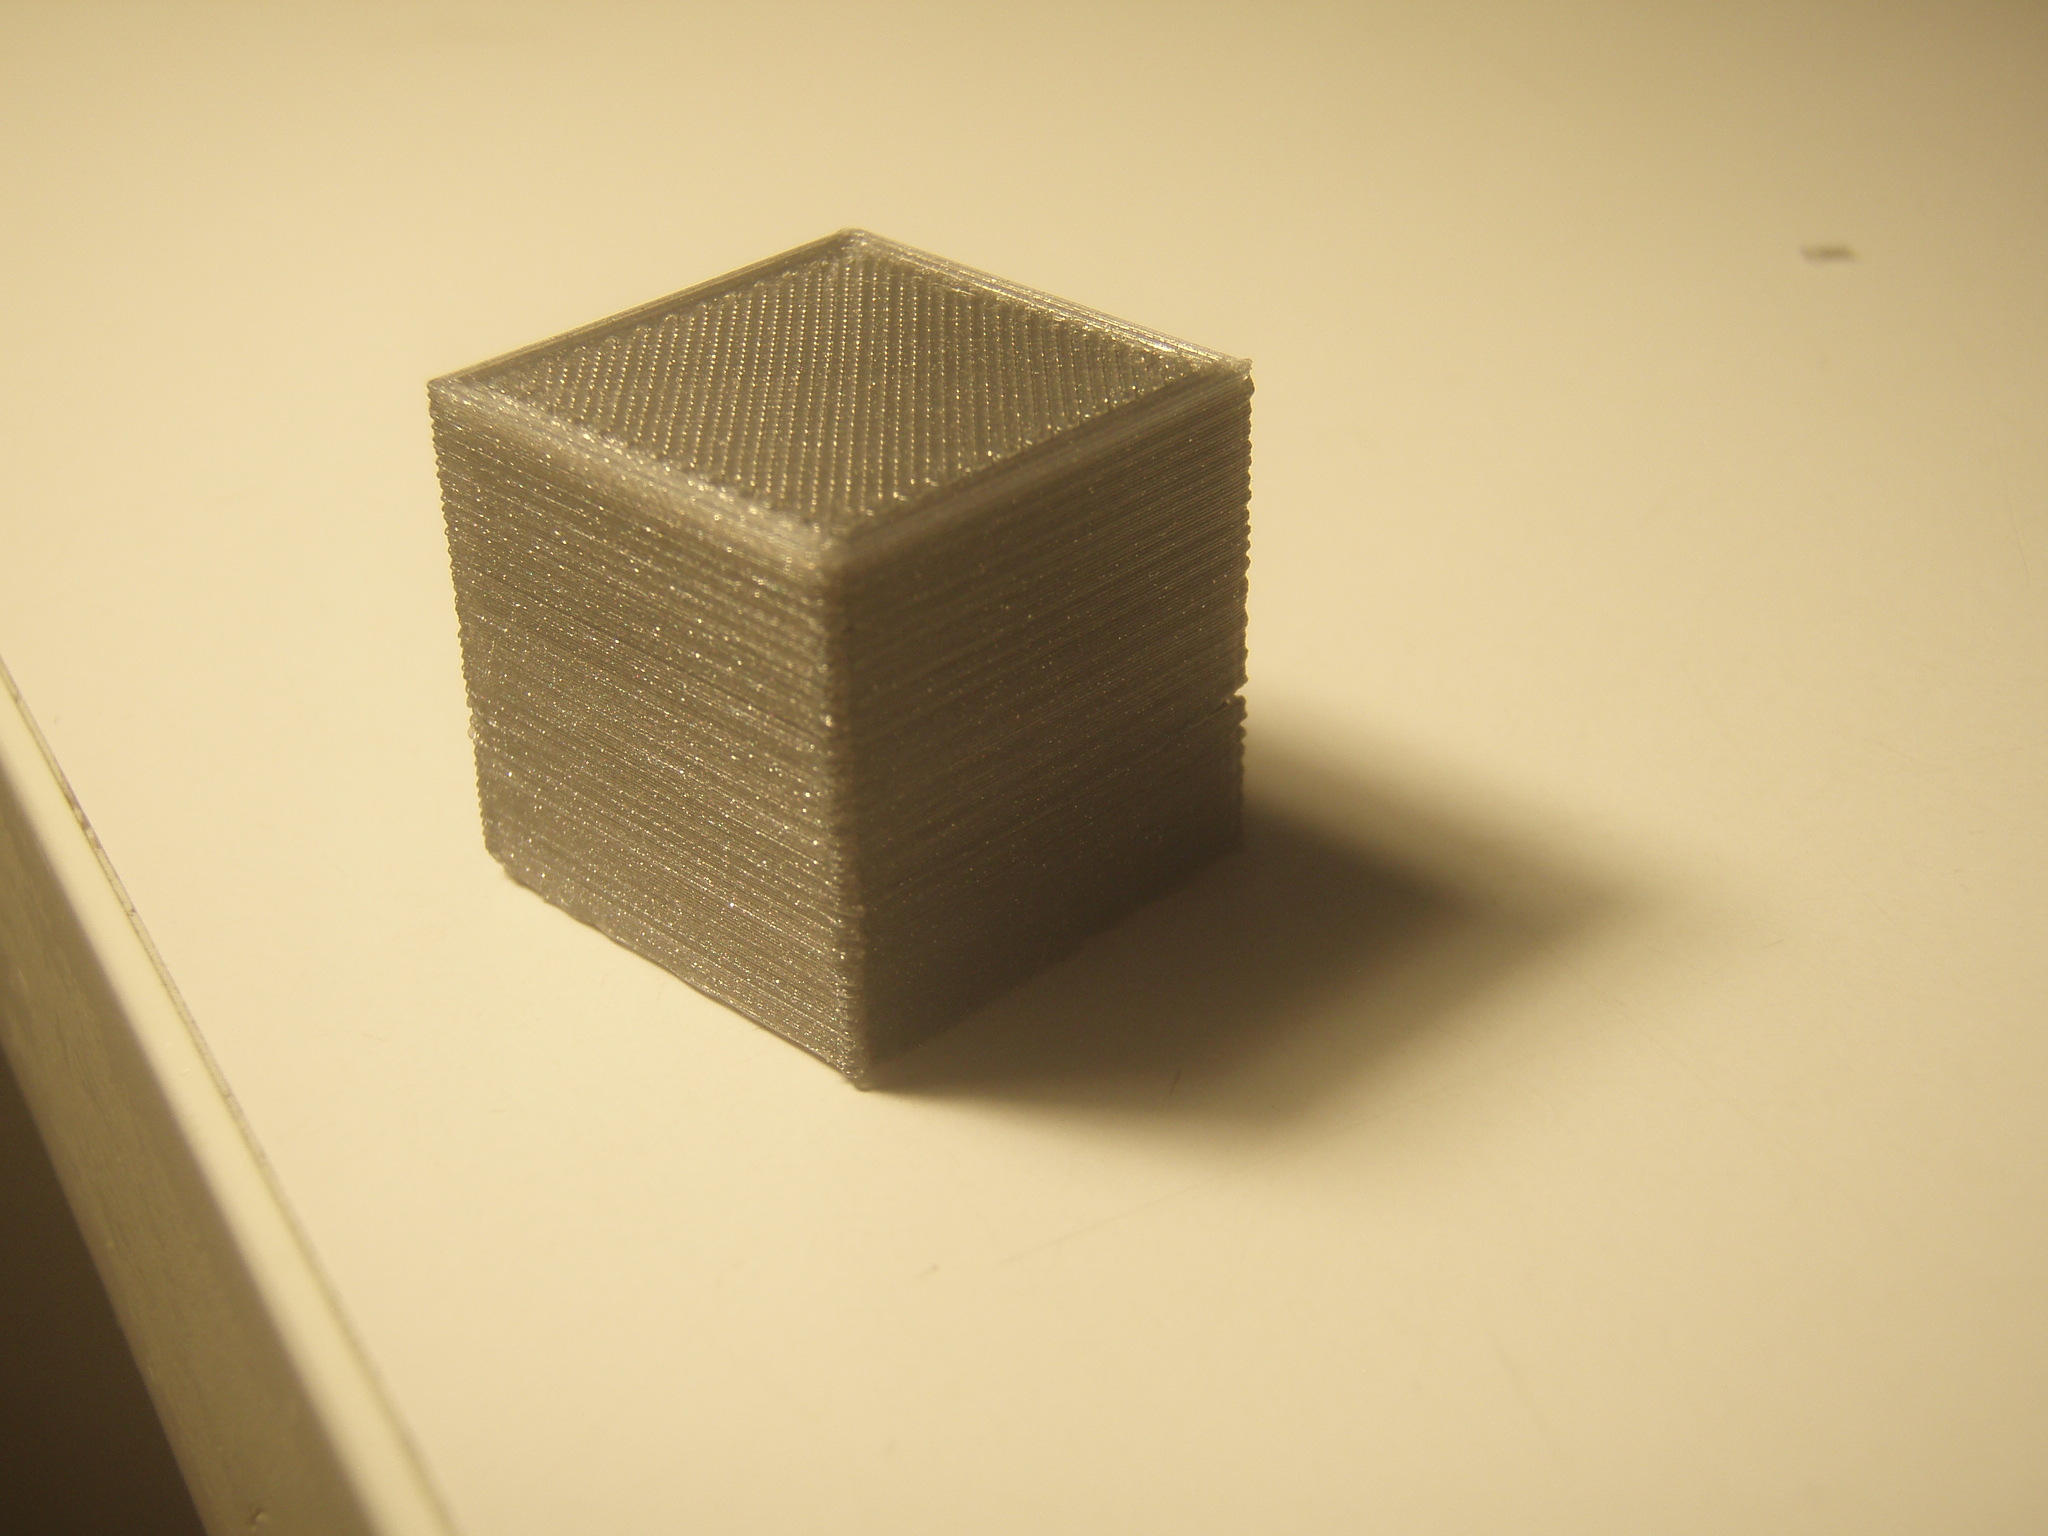
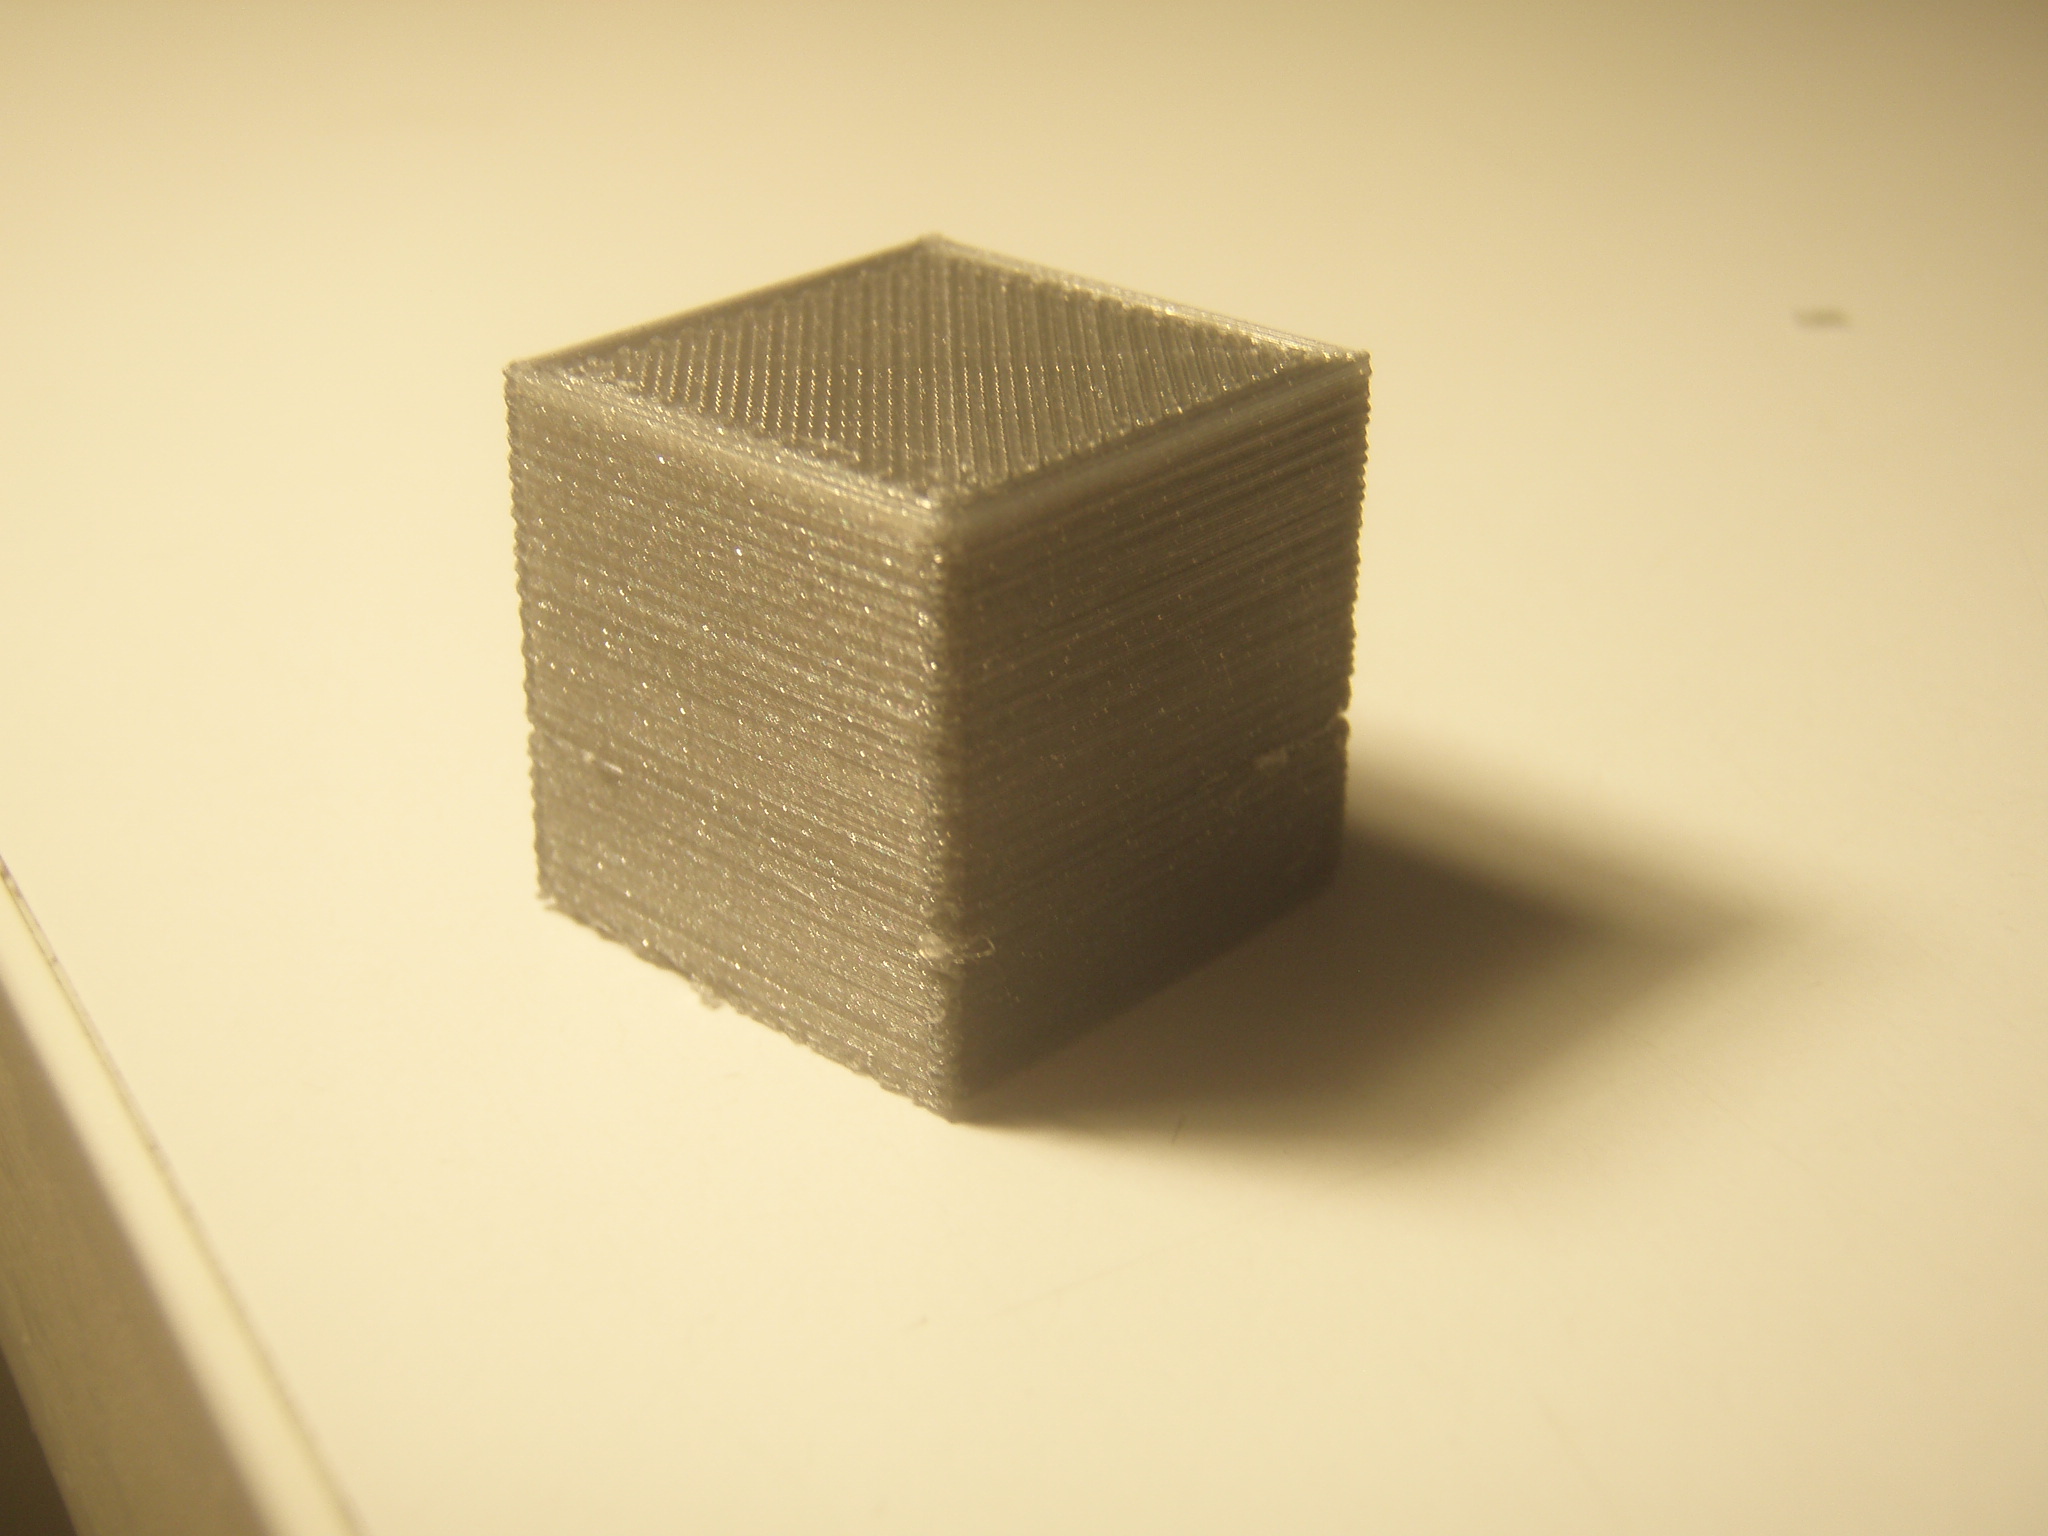
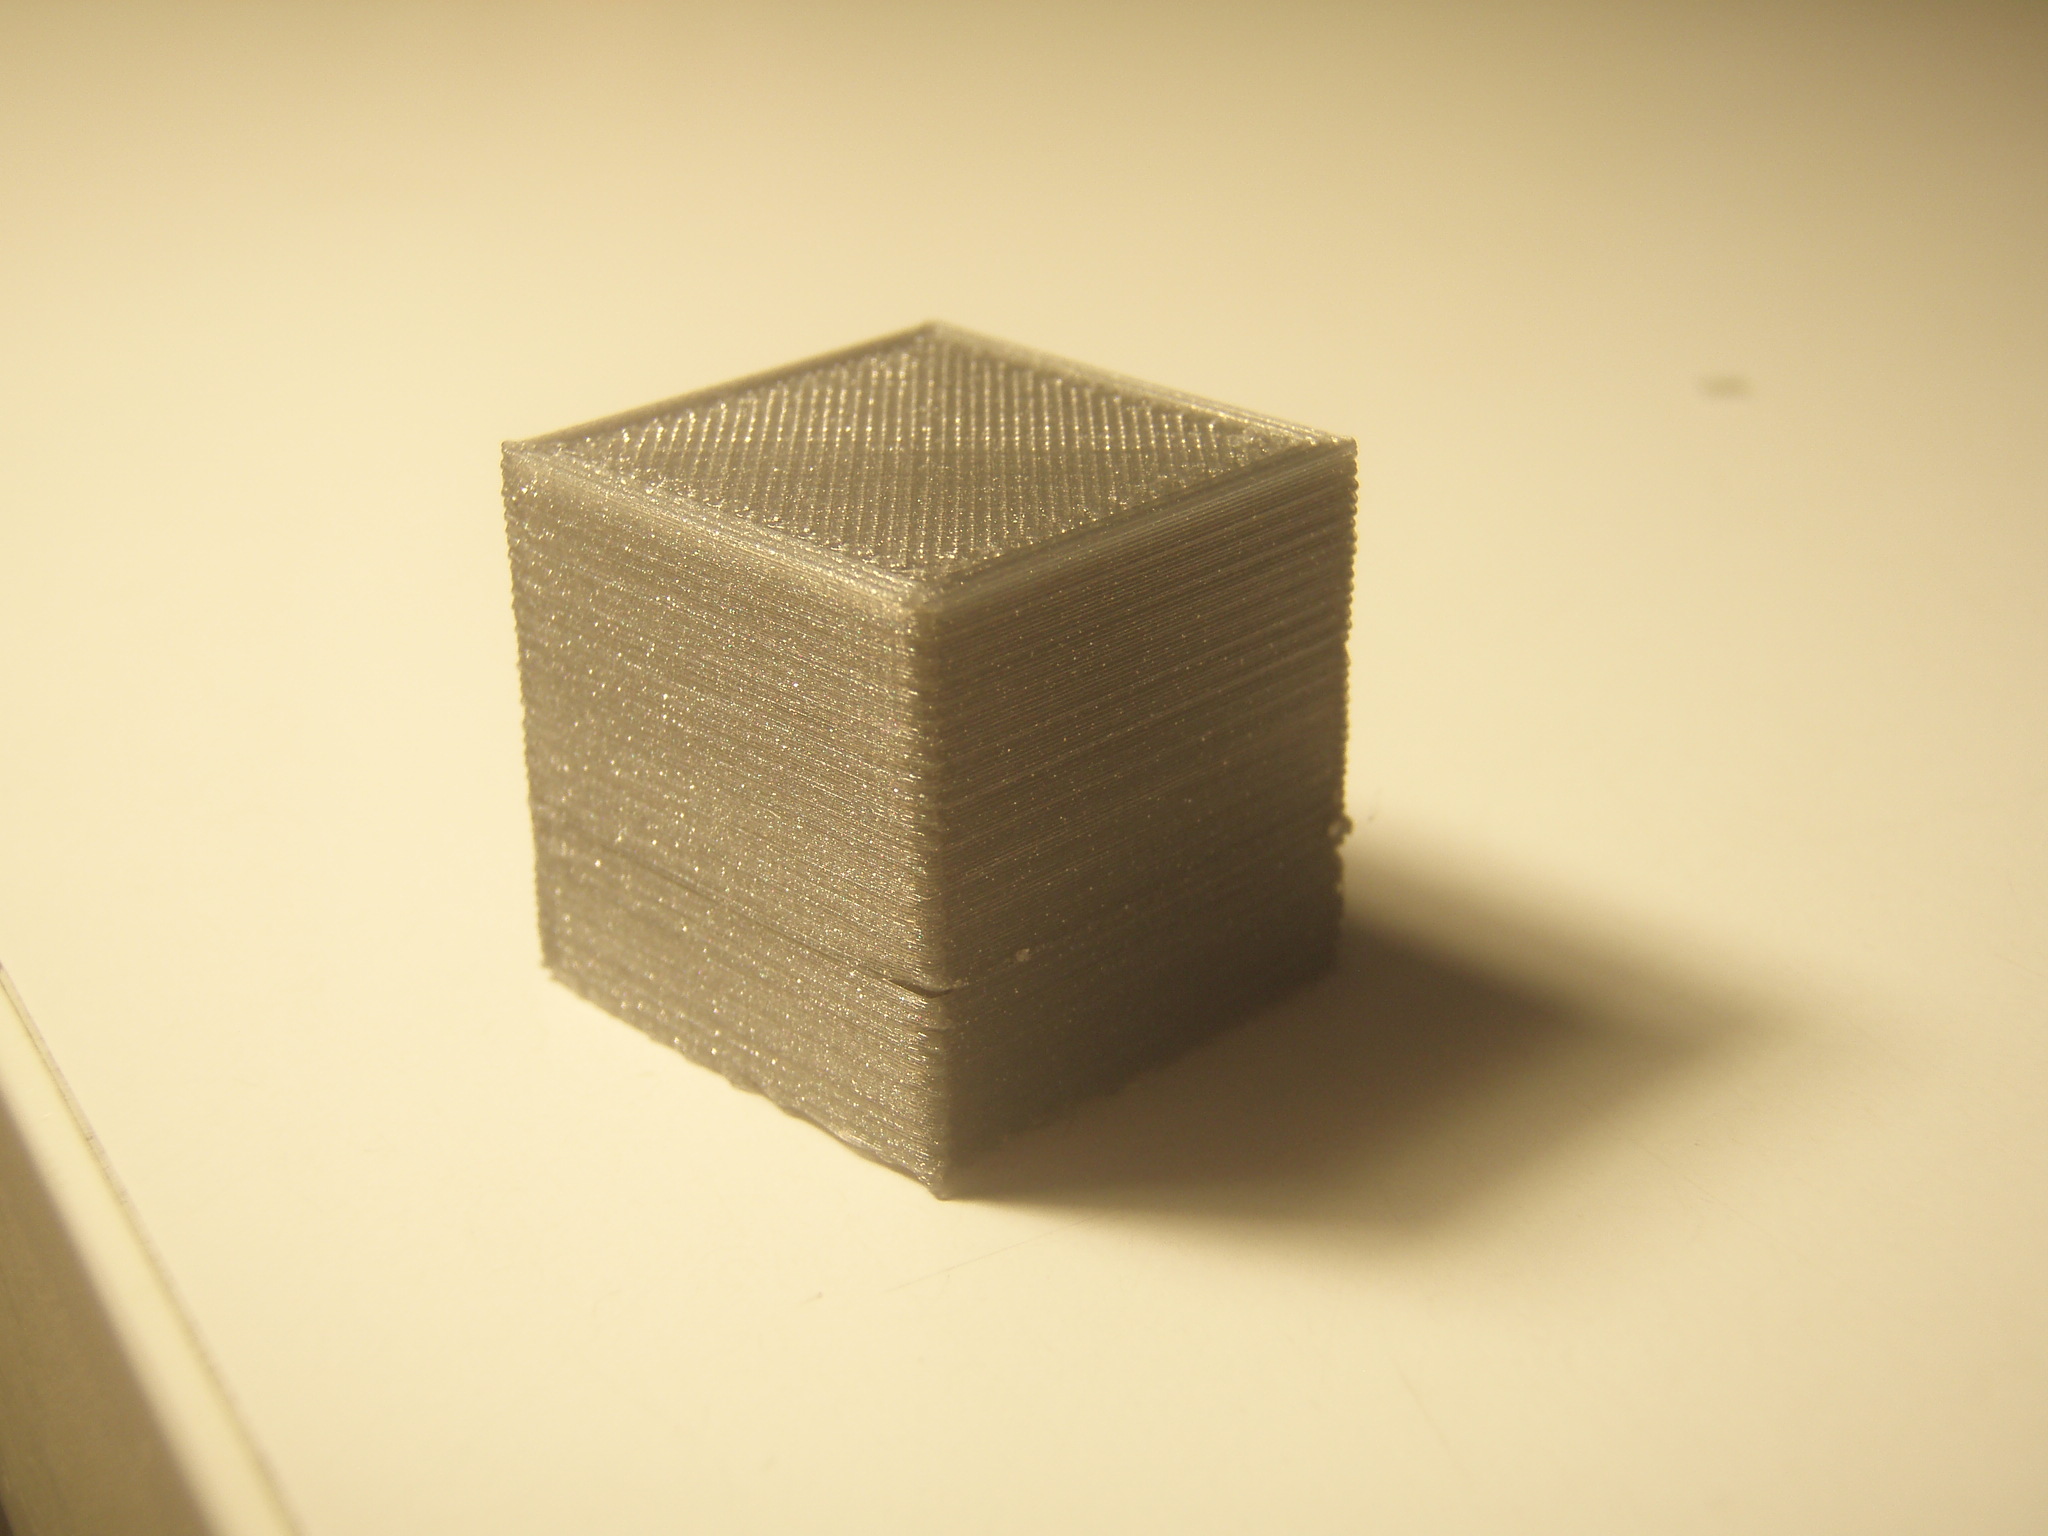
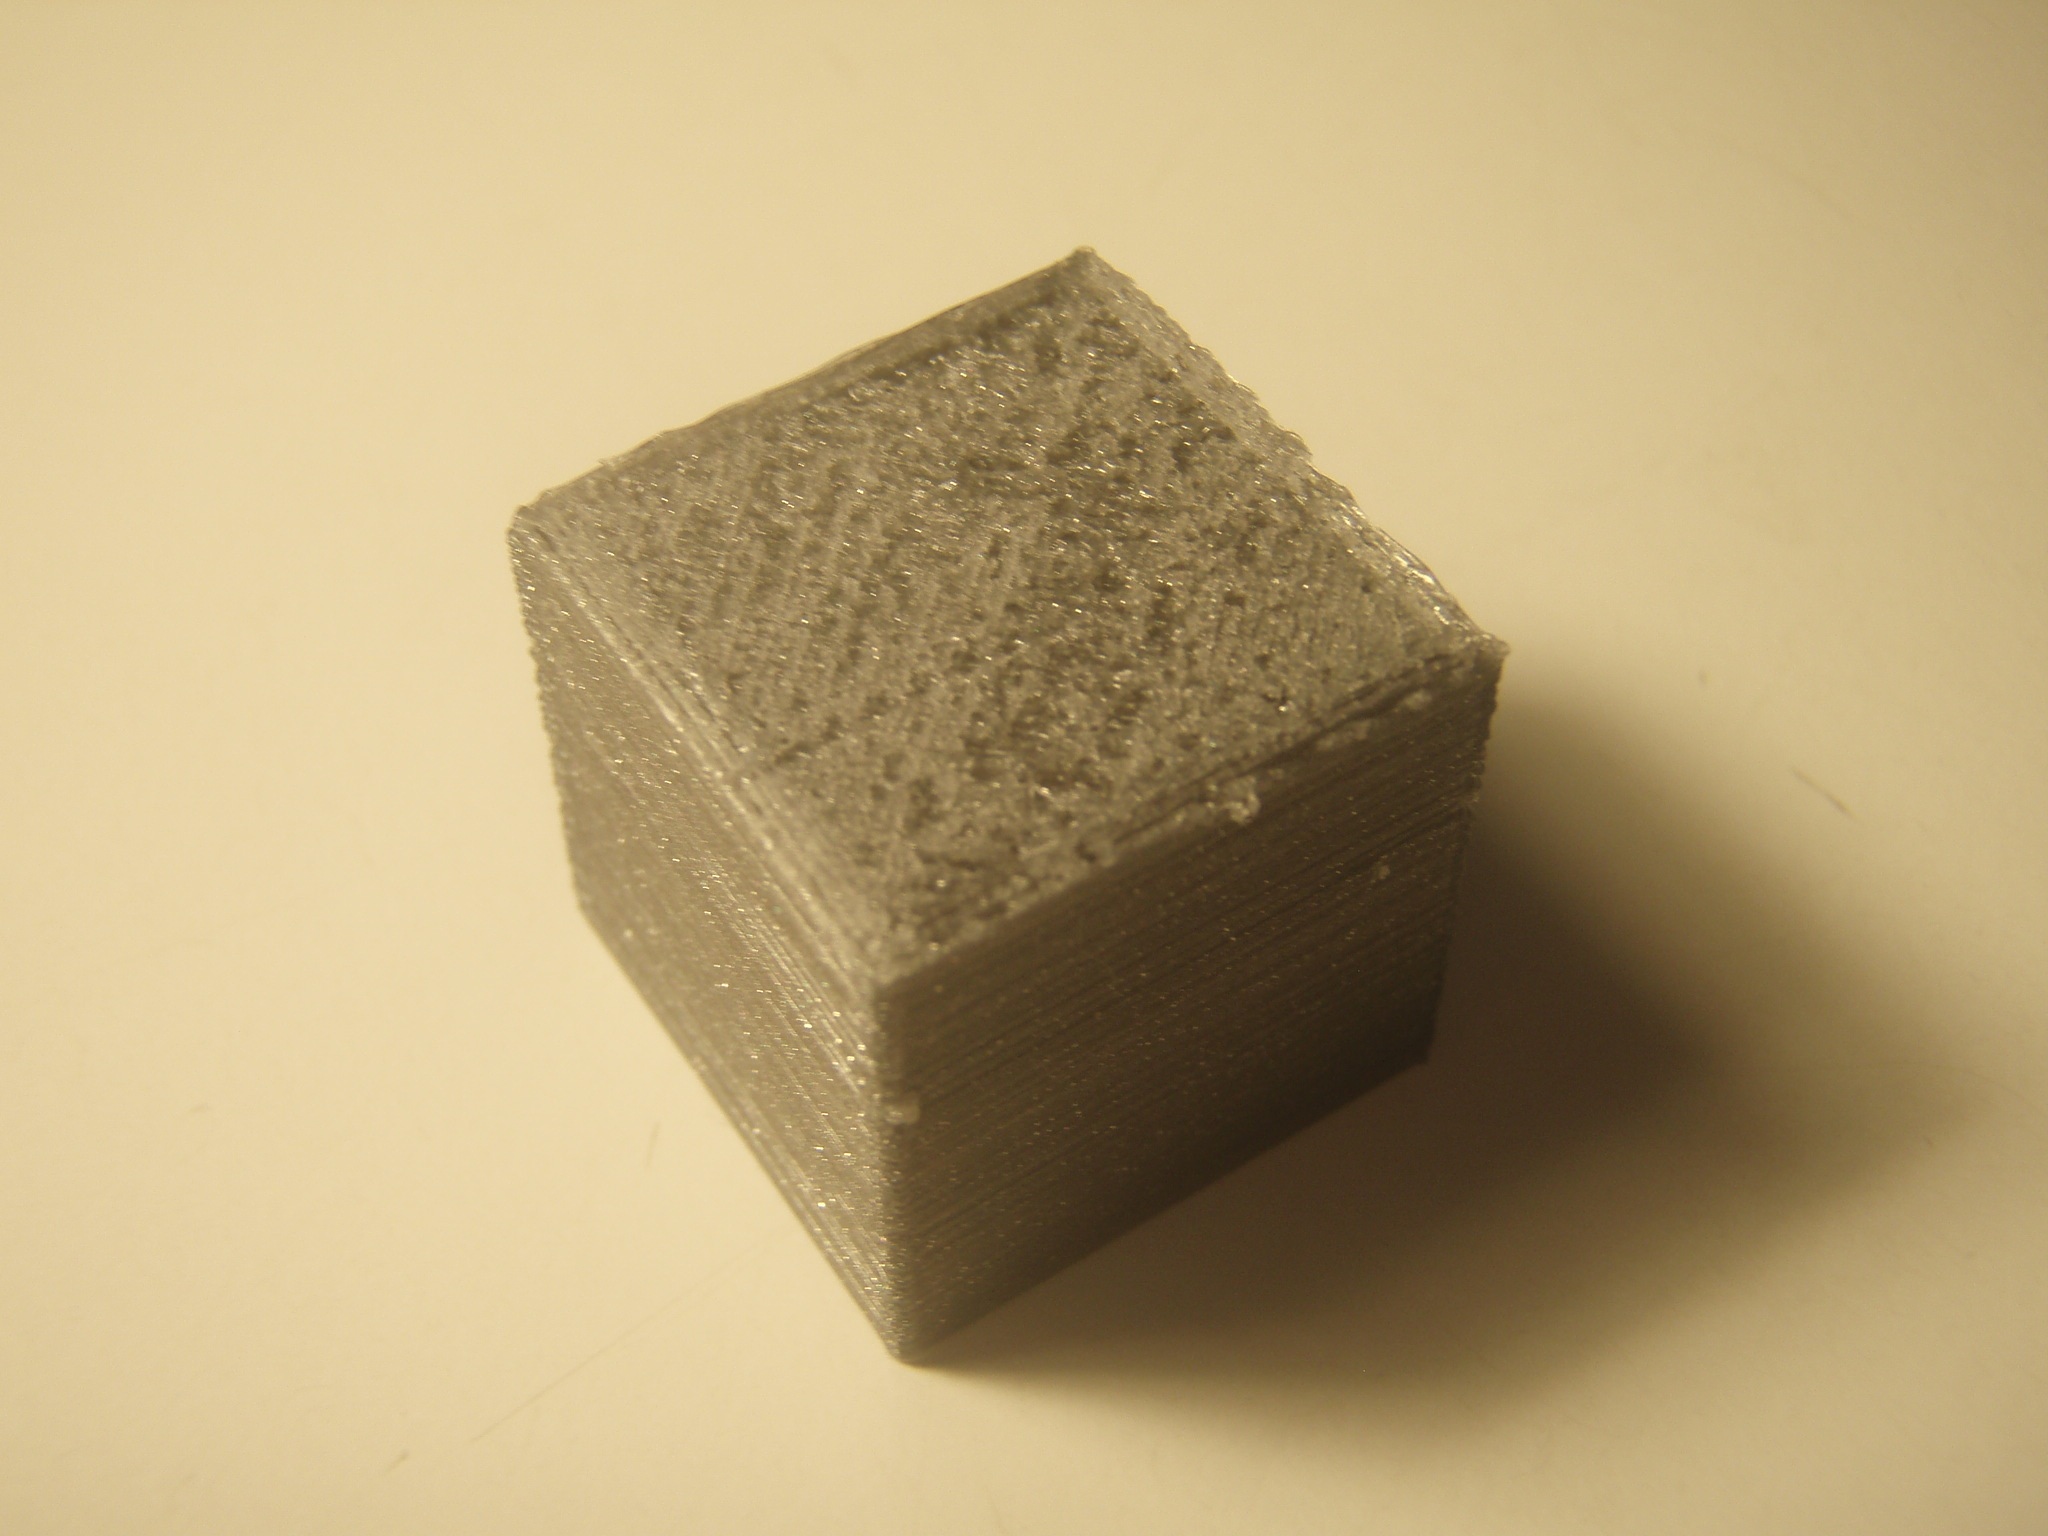
Success!!! It really is a beautiful thing to see your first print come to life layer by layer.
After playing with the Z-offset in .05mm increments it didn't take too long to get the first layer to take hold and a 20mm calibration cube to print. A bunch of pics are attached. Dimensions of the cube (using $30 calipers) are 19.95mm x 19.96mm x 19.68mm. That's quite a lot better than the $30,000 machine I used to work with had ever printed (in the X/Y that is, and still close in the Z). And this was just the first try! Are you kidding me? I mean...
The infill looks great to me, though I'm no infill connoisseur or anything. There were a handful of layers where the infill was a little messed up while printing (was detaching and bowing upwards), but that layer always got pushed down and covered up after a couple more layers, after which the nice looking pattern of lines would take over again.
I'm just floored right now. Thanks so much Sublime
Attachments:
open | download - P8240095.JPG (522.4 KB)
open | download - P8240109.JPG (465.6 KB)
open | download - P8240103.JPG (284.1 KB)
open | download - P8240104.JPG (513.6 KB)
open | download - P8240105.JPG (486.7 KB)
open | download - P8240106.JPG (482 KB)
open | download - P8240107.JPG (488 KB)
open | download - P8240108.JPG (452.8 KB)
|
Re: Eric's Tantillus build August 25, 2012 11:03AM |
Registered: 12 years ago Posts: 195 |
|
Re: Eric's Tantillus build August 25, 2012 03:25PM |
Registered: 11 years ago Posts: 95 |


Sorry, only registered users may post in this forum.