Wingnut's build
Posted by wingnut
|
Wingnut's build October 09, 2013 11:57AM |
Registered: 10 years ago Posts: 80 |
Finally making some progress with my build. Thanks again to Nyarlathotep's for the printed parts. I'll post some pics tonight but I have couple of question. I'd like to install a heated bed but I can't find much info on how this works with the Tantillus. There are lots of heated beds on ebay but they are all for larger printers. Also, does the heated bed take the place of the second layer of acrylic or does it attach to it?
|
Re: Wingnut's build October 09, 2013 03:52PM |
Registered: 13 years ago Posts: 2,947 |
The only heated bed that I have seen on a Tantillus is WillWorkForPlastics one. He has holes cut int he lower bed for fans and then the upper bed is custom made by him. You can look through the metric thread for pictures of his as well as links to his files that include his modified bed.
For the simplest bed you could find a old cupcake or thingomatic heated bed. You could also order a silicone heater pad from qu-bd [store.qu-bd.com] (which is a little larger than the bed) or the supplier on allixpress that Jimjimma got his large one made (also makes qu-bd ones) and have them make a small one.
For the simplest bed you could find a old cupcake or thingomatic heated bed. You could also order a silicone heater pad from qu-bd [store.qu-bd.com] (which is a little larger than the bed) or the supplier on allixpress that Jimjimma got his large one made (also makes qu-bd ones) and have them make a small one.
| FFF Settings Calculator | Gcode post processors | Geometric Object Deposition Tool Blog |
| Tantillus.org | Mini Printable Lathe | How NOT to install a Pololu driver |
|
Re: Wingnut's build October 11, 2013 10:30PM |
Registered: 10 years ago Posts: 80 |
guess I'll punt on the heat bed for now. ordered some pla . should be able to melt some plastic this weekend.
I did notice that the common heatbeds sold on fleebay are nothing more than printe circuit boards and the source files are open source. It would be simple enough to resize the boards for the tantillus. If I do end up going that route, would anyone here be interested in one?
I did notice that the common heatbeds sold on fleebay are nothing more than printe circuit boards and the source files are open source. It would be simple enough to resize the boards for the tantillus. If I do end up going that route, would anyone here be interested in one?
|
Re: Wingnut's build October 15, 2013 02:06PM |
Registered: 10 years ago Posts: 80 |
I installed the cables for the X/Y and tightened them according to the build guide procedure. When I was done, I tried moving the carriage around by hand and was surprised by how much friction I felt. I was expecting to move the carriage around with just light fingertip pressure but I found that it was a bit stiffer then that. I realize that this is subjective but I was expected almost no friction. Another test I tried was spinning the shafts by hand. It feels smooth turning at the pulley but turning the shaft directly is pretty hard. The steppers are disconnected. Any thoughts? Is this normal?
|
Re: Wingnut's build October 15, 2013 02:18PM |
Registered: 13 years ago Posts: 2,947 |
It sounds fairly normal but like you said it is subjective.
One thing that has thrown off others is getting the incorrect hotend acrylic (should be 3mm not 6mm). Also did you make sure the bushings slide nicely along the shafts as in this step [www.tantillus.org] ? Are the axis nice and square to each other? Were your linear bearings really tight on the shafts?
One thing that has thrown off others is getting the incorrect hotend acrylic (should be 3mm not 6mm). Also did you make sure the bushings slide nicely along the shafts as in this step [www.tantillus.org] ? Are the axis nice and square to each other? Were your linear bearings really tight on the shafts?
| FFF Settings Calculator | Gcode post processors | Geometric Object Deposition Tool Blog |
| Tantillus.org | Mini Printable Lathe | How NOT to install a Pololu driver |
|
Re: Wingnut's build October 15, 2013 03:26PM |
Registered: 10 years ago Posts: 80 |
Unfortunately, the printed bearings I received with my printed parts were not usable so early on I tried running with nylon bushings that I turned on my lathe. That didn't work as well as I liked so I drilled them out and sleeved them with brass inserts. That worked much better. Sliding a single bushing along the the shaft is pretty smooth. The acrylic for the carriage is 3mm.
Thanks, I'll hook up the motors tonight and see how it behaves.
Thanks, I'll hook up the motors tonight and see how it behaves.
|
Re: Wingnut's build October 17, 2013 05:02PM |
Registered: 10 years ago Posts: 80 |
Got Pronterface talking to the printer last night. I noticed that the steppers were stalling just jogging around the XY which got me thinking about friction issues again but I went through the stepper driver adjustment and it seems to be working fine after all. I noticed that Pronterface started up with the print volume set to 200x200x200. I changed the XY range to 100x100 but all that seemed to do was change the numbers on the jog window. The travel limits don't seem to be connected to these numbers. Also, as far as I can tell, the home buttons don't seem to do anything. Home is wherever the printer was when I started Pronterface and hitting the home button does not seem to move it. Thoughts?
I was also surprised to discover that 3d printing involved so many different separate tools. CAD->Slicer->Pronterface->Printer. Are there any alternate tool chains out there that are more integrated?
I was also surprised to discover that 3d printing involved so many different separate tools. CAD->Slicer->Pronterface->Printer. Are there any alternate tool chains out there that are more integrated?
|
Re: Wingnut's build October 17, 2013 09:10PM |
Registered: 13 years ago Posts: 2,947 |
The size in pronterface changes the preview window size. The limits of the machine travel are set in the config of Marlin. The homing in pronterface sends a command to find the endstops but since Tantillus only uses a Z endstop, only homing Z should do anything. For X and Y home is in the very corner where it was when the machine was powered up.
For the tool chain you have lots of choices.
CAD:
Any program that will output a mesh model in STL format.
Slicing:
Kisslicer
Cura
Skeinforge
Sfact
Repsnapper
Slic3r
Host:
Cura (for Cura slices only)
Skeinforge (command line sending tools)
Pronterface
Sfact (same command line tools as Skeinforge)
Repsnapper
Repetier (really nice 3d preview at the expense of memory and CPU)
Pronterface and Repetier can integrate any slicer with command line interfaces like Skeinforge, Sfact and Slic3r
I recommend Kisslicer as the slicer and then Cura and Skeinforge/Sfact
For the host I recommend Pronterface and Repetier.
Edited 1 time(s). Last edit at 10/17/2013 10:01PM by Sublime.
| FFF Settings Calculator | Gcode post processors | Geometric Object Deposition Tool Blog |
| Tantillus.org | Mini Printable Lathe | How NOT to install a Pololu driver |
|
Re: Wingnut's build October 20, 2013 01:17AM |
Registered: 14 years ago Posts: 47 |
|
Re: Wingnut's build October 21, 2013 12:34PM |
Registered: 10 years ago Posts: 80 |
Thanks. Looking forward to it myself. Had a bit of a setback this weekend. I realized that my Z axis drive screw had come out a bit too long after it was all installed. Getting all those nuts in place behind the z support brackets was kind of a pain so instead of unmounting it all, I got lazy and took a dremel tool it with a cut-off wheel. I completely forgot about how much metal dust this would produce. I ended up having to disassemble the X/Y carriage so that I could thoroughly clean everything out. I flushed the bearings out with copious amounts of WD40 so I hope that did the trick.
The up shot is that the cable installation and alignment came out much better this time so there's much less friction now. This also fixed the tendency for the machine to eject the rods with the pulleys. I guess the alignment was off enough before that the bushing were grabbing that rod and forcing it out.
I do have a question regarding the Z axis end stop. After getting everything back together, I tried moving the Z axis for the first time and discovered that it move up fine but didn't want to come back down. This turned out to be because the limit switch was not plugged in so the controller thought that Z axis was hitting the limit. If this is the case though, shouldn't the firmware prevent the z axis from moving up instead of preventing it from moving down?
|
Re: Wingnut's build October 21, 2013 12:40PM |
Registered: 10 years ago Posts: 80 |
|
Re: Wingnut's build October 21, 2013 11:58PM |
Registered: 10 years ago Posts: 80 |
|
Re: Wingnut's build October 22, 2013 12:09AM |
Registered: 13 years ago Posts: 2,947 |
The upper acrylic is used to level the bed via the four bolts and the glass is then clipped to it. If you had some way to attach the glass to the adjustment bolts then yes I guess you could skip the upper acrylic. But that would then lead you having only one glass bed and not being able to switch between prints which can greatly speed thing up. It also allows you to prep really well prior to printing whether it is with blue tape or PVA or hairspray or Lemon juice or ?
The glass can be purchased from a local glass shop where they will cut it the right size and even grind the edges for you. They usually cost around $5 each. Or you can get a picture frame from the dollar store with a piece of glass around the right size and/or cut it yourself.
Edited 1 time(s). Last edit at 10/22/2013 11:33AM by Sublime.
| FFF Settings Calculator | Gcode post processors | Geometric Object Deposition Tool Blog |
| Tantillus.org | Mini Printable Lathe | How NOT to install a Pololu driver |
|
Re: Wingnut's build October 25, 2013 10:24AM |
Registered: 10 years ago Posts: 80 |
|
Re: Wingnut's build October 31, 2013 11:43AM |
Registered: 10 years ago Posts: 80 |
My first print attempt didn't get very far. Hot end is at temperature but I get no flow. Extruder stepper seems to stall so I'm guessing that it's not a problem with slipping. Can I test for a clogged hot end by hand feeding the plastic?
Also, the instructions for loading the filament are specific to the LCD panel which I elected to omit. I can't find a "load " button on pronterface so I just used the extrude button with the length set to 800. Is there a better way?
Also, the instructions for loading the filament are specific to the LCD panel which I elected to omit. I can't find a "load " button on pronterface so I just used the extrude button with the length set to 800. Is there a better way?
|
Re: Wingnut's build October 31, 2013 03:47PM |
Registered: 13 years ago Posts: 2,947 |
If you disconnect the bowden tube up at the carriage can you feed the filament?
Are you trying to feed it too quickly? A setting of 30-60mm/min is about the max it can extrude and it will run out of molten plastic pretty quick.
You can test by trying to push some filament through by hand but it will take a little bit of force. Try letting the filament sit in the hotend for a few seconds before pushing.
Without the LCD using the extrude buttons is the only way. You could also create your own macro button in pronterface.
| FFF Settings Calculator | Gcode post processors | Geometric Object Deposition Tool Blog |
| Tantillus.org | Mini Printable Lathe | How NOT to install a Pololu driver |
|
Re: Wingnut's build November 01, 2013 10:17AM |
Registered: 10 years ago Posts: 80 |
Extruding now. I think that the problem was an insert used in this hot end that allows for using 1.75 mm filament. The insert makes a step inside the tube that the filament jams against if it's not perfectly centered. I had to pull off the bowden clamp and hand feed the end of the tube down the center.
Here's my first print attempt. It's just the first layer of the calibration cube (really hard to get a clear picture with my phone)
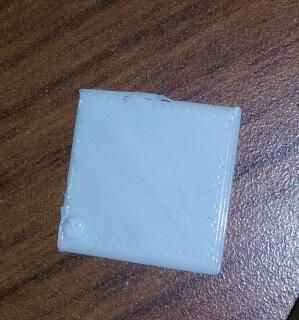
One thing I noticing is that the printer seemed to pause soon after starting the second layer. I'd read that this could be a problem with streaming the gcode instead of uploading to an SD card. Is there a way around this without using the SD card? If not, can I use the SD card without the LCD? Maybe upload the whole part then tell it to print from Pronterface?
Another question is how do you keep the hot end clear of blobs of plastic? I'm having a hard time keeping it from building up between print attempts.
Edited 1 time(s). Last edit at 11/03/2013 12:47AM by wingnut.
|
Re: Wingnut's build November 01, 2013 01:33PM |
Registered: 13 years ago Posts: 2,947 |
wingnut Wrote:
-------------------------------------------------------
> Extruding now. I think that the problem was an
> insert used in this hot end that allows for using
> 1.75 mm filament. The insert makes a step inside
> the tube that the filament jams against if it's
> not perfectly centered. I had to pull off the
> bowden clamp and hand feed the end of the tube
> down the center.
Is it a real J-head from hotends.com? If so I would contact him and let him know the issue.
>
> Here's my first print attempt. It's just the first
> layer of the calibration cube (really hard to get
> a clear picture with my phone)
>
> href="http://s1198.photobucket.com/user/wingnut323
> 2/media/20131101_095352-1.jpg.html"
> target="_blank"> src="http://i1198.photobucket.com/albums/aa456/win
> gnut3232/20131101_095352-1.jpg" border="0" alt="
> photo 20131101_095352-1.jpg"/>
Pretty good for a first attempt
>
> One thing I noticing is that the printer seemed to
> pause soon after starting the second layer.
Are you using the official Tantillus Kisslicer profiles? They are set to use M104 to change temperatures but if for some reason it was changed to M109 it would cause a pause as it changed temperatures. Maybe you pressed one of the default buttons in Kisslicer that inserts default values useless to all RepRaps and only good for BFB printers and makerbots? You can search through the gcode file with a text editor for M109 to see if this is the issue.
I'd
> read that this could be a problem with streaming
> the gcode instead of uploading to an SD card. Is
> there a way around this without using the SD card?
If it is a streaming issue (which i doubt) and you are using an Arduino Mega and Windows or Mac you could change the buad rate in the firmware to the highest setting and that should speed up communications a little. The higher buad rate does not work well with Linux and some boards like Sanguinololu.
> If not, can I use the SD card without the LCD?
Yes just put the gcode files on the card with your file browser (not pronterface) and then use pronterface to start the print.
> Maybe upload the whole part then tell it to print
> from Pronterface?
>
> Another question is how do you keep the hot end
> clear of blobs of plastic? I'm having a hard time
> keeping it from building up between print
> attempts.
If you were completing the print it would turn off the heater as soon as it is done and then the fans would cool off the hotend really quickly so you do not end up with much ooze. If the heater is left on then you need to do a purge using the extrude buttons in pronterface until you get even extrusion, then remove the extruded plastic and then start your print.
| FFF Settings Calculator | Gcode post processors | Geometric Object Deposition Tool Blog |
| Tantillus.org | Mini Printable Lathe | How NOT to install a Pololu driver |
|
Re: Wingnut's build November 03, 2013 12:52AM |
Registered: 10 years ago Posts: 80 |
Thanks for the help Sublime. You were right on the money with the M109 command. Not sure what I'm doing wrong though. I notice that sometimes the slicer uses 109 and sometimes 104 but I can't tell what I'm doing different.
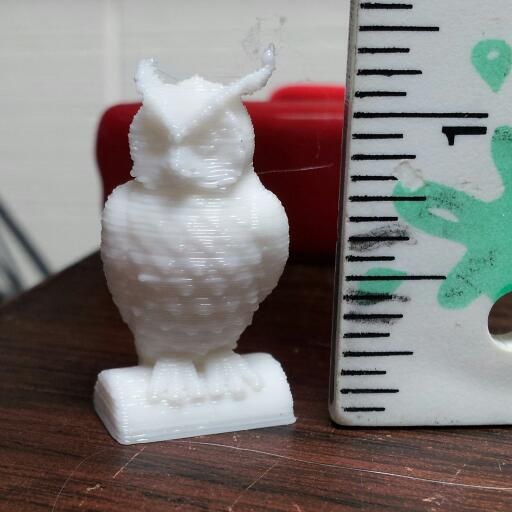
Here's a shrunk down version of an owl I downloaded off Thingiverse. I printed this with no supports and no fans (not installed yet). My bowden tube is too large for my filament as well so I have lots of room for improvement.
Edited 1 time(s). Last edit at 11/03/2013 12:54AM by wingnut.
Here's a shrunk down version of an owl I downloaded off Thingiverse. I printed this with no supports and no fans (not installed yet). My bowden tube is too large for my filament as well so I have lots of room for improvement.

Edited 1 time(s). Last edit at 11/03/2013 12:54AM by wingnut.
|
Re: Wingnut's build November 03, 2013 01:19AM |
Registered: 13 years ago Posts: 2,947 |
I believe that owl and Kisslicer do not play to well together and Kisslicer shows all kinds of warnings so be careful using it for calibration as it causes strange extra extrusions and voids in the model (at least when it tried it).
There should be one M109 at the very beginning of the file that is a result of the start code (prefix). If there are any more it would be in the extruder select or deselect tabs. Beyond that I would try deleting the config files and replace them with a fresh copy.
There should be one M109 at the very beginning of the file that is a result of the start code (prefix). If there are any more it would be in the extruder select or deselect tabs. Beyond that I would try deleting the config files and replace them with a fresh copy.
| FFF Settings Calculator | Gcode post processors | Geometric Object Deposition Tool Blog |
| Tantillus.org | Mini Printable Lathe | How NOT to install a Pololu driver |
|
Re: Wingnut's build November 03, 2013 10:54AM |
Registered: 14 years ago Posts: 47 |
|
Re: Wingnut's build November 03, 2013 02:21PM |
Registered: 10 years ago Posts: 80 |
Thanks!
A couple things I noticed when printing the calibration box. First, the printer seems to really speed up when printing in-fill. It seems like the fillament cant keep up. The result is a stringy mess instead of a honeycomb pattern. What knob do I tweak to fix this? The second issue may be related. The bottom layer of the box seems nice and smooth and solid but the top layer is stringy and has gaps.
Thoughts?
|
Re: Wingnut's build November 03, 2013 02:30PM |
Registered: 13 years ago Posts: 2,947 |
Sounds like the extruder may be slipping. This could be a result of the idler not being tight enough. Temperature too low. No cooling fans so the hotend is getting warm up too high which results in the PLA jamming. Dirt in the hotend.
Are you using the Tantillus profile for Kisslicer? Have you checked that the correct nozzle size profile is being used? Is the correct material profile being used (PLA)? Is the speed slider in Kisslicer in the middle (not the fastest and not the slowest)?
Are you using the Tantillus profile for Kisslicer? Have you checked that the correct nozzle size profile is being used? Is the correct material profile being used (PLA)? Is the speed slider in Kisslicer in the middle (not the fastest and not the slowest)?
| FFF Settings Calculator | Gcode post processors | Geometric Object Deposition Tool Blog |
| Tantillus.org | Mini Printable Lathe | How NOT to install a Pololu driver |
|
Re: Wingnut's build November 03, 2013 04:28PM |
Registered: 10 years ago Posts: 80 |
Yes on the tantillus profile, the nozzle size and material selection. My first attempt did have the speed setting set to fastest which did cause some bad slipping. Subsequent prints have used the slowest setting which I believe fixed the slipping. I was mainly wondering why it was printing the infill so fast. Is that tunable?
|
Re: Wingnut's build November 03, 2013 04:39PM |
Registered: 13 years ago Posts: 2,947 |
In the Printer/Speed tab you can adjust the speeds but the infill should only be a couple of mm/s faster than the perimeters. The profiles are created using the Tantillus calculator which has the infill 0.5 cubic mm/s faster then the perimeters and the solid infill is 0.5 cubic mm/s slower than the perimeter. The profiles try and recreate this but it does not work exactly as it should since the settings are for speed of the axis not the cubic volume per second.
| FFF Settings Calculator | Gcode post processors | Geometric Object Deposition Tool Blog |
| Tantillus.org | Mini Printable Lathe | How NOT to install a Pololu driver |
|
Re: Wingnut's build November 04, 2013 07:23PM |
Registered: 10 years ago Posts: 80 |
One step forward and two back today. I discovered that had copied the setup files to the wrong directory. I thought they had to be co-located with the kisslicer executable. I figured out where to put them by looking for where kisslicer was generating it's own.
The bad news is that now my flow rate is way too low. I adjusted the filament diameter (1.72 for mine) but it doesn't seem to have helped. The first layer actually looks kind of interesting because it's completely filled in and incredibly thin but subsequent layers have large gaps.The flow is so much lower that I could tell right away by just noting the way the extruder gear was turning. What did I do wrong now? :-)
The bad news is that now my flow rate is way too low. I adjusted the filament diameter (1.72 for mine) but it doesn't seem to have helped. The first layer actually looks kind of interesting because it's completely filled in and incredibly thin but subsequent layers have large gaps.The flow is so much lower that I could tell right away by just noting the way the extruder gear was turning. What did I do wrong now? :-)
|
Re: Wingnut's build November 04, 2013 07:58PM |
Registered: 13 years ago Posts: 2,947 |
Are you using the version of marlin linked from Tantillus.org?
If you are NOT using the Tantillus marlin you will need to change the firmware to use Relative extrusion.
If it is not that then maybe the temperature is a little too low for your filament but works for the first layer becasue it is set a little higher and the first layer is slower. Look at the material tab and raise both temps by 5 or 10 degrees.
If you want a thicker first layer you can use the setting called bed roughness to increase the first layer thickness. Its value gets added to the layer thickness for the first layer.
| FFF Settings Calculator | Gcode post processors | Geometric Object Deposition Tool Blog |
| Tantillus.org | Mini Printable Lathe | How NOT to install a Pololu driver |
|
Re: Wingnut's build November 04, 2013 08:51PM |
Registered: 10 years ago Posts: 80 |
Yes on the firmware.
It seems to me that I need to increase the flow for the whole print. I tried adjusting the Flow Adjust parameter in Kisslicer as high as 50 but no change. The calibration step in the Tantillus instructions require the use of the LCD which I do not have.
I tried reprinting a file that I had sliced before updating the configs and it still prints OK so the problem seems to be in Kisslicer...
|
Re: Wingnut's build November 04, 2013 09:25PM |
Registered: 13 years ago Posts: 2,947 |
Can you post the settings used in the first print (at the beginning of the gcode file if comments are enabled). And the ones from the one that will not work too.
| FFF Settings Calculator | Gcode post processors | Geometric Object Deposition Tool Blog |
| Tantillus.org | Mini Printable Lathe | How NOT to install a Pololu driver |
|
Re: Wingnut's build November 04, 2013 09:27PM |
Registered: 13 years ago Posts: 2,947 |
Can you also confirm the filament size is set to 1.75 s and not the default 3mm. Also make sure you have the correct material assigned to the extruder in the Printer/Extruder tab.
| FFF Settings Calculator | Gcode post processors | Geometric Object Deposition Tool Blog |
| Tantillus.org | Mini Printable Lathe | How NOT to install a Pololu driver |

Sorry, only registered users may post in this forum.