Mendel90 inside the envelope heated chamber implementation
Posted by svanteg
|
Mendel90 inside the envelope heated chamber implementation August 12, 2015 04:10PM |
Registered: 10 years ago Posts: 27 |
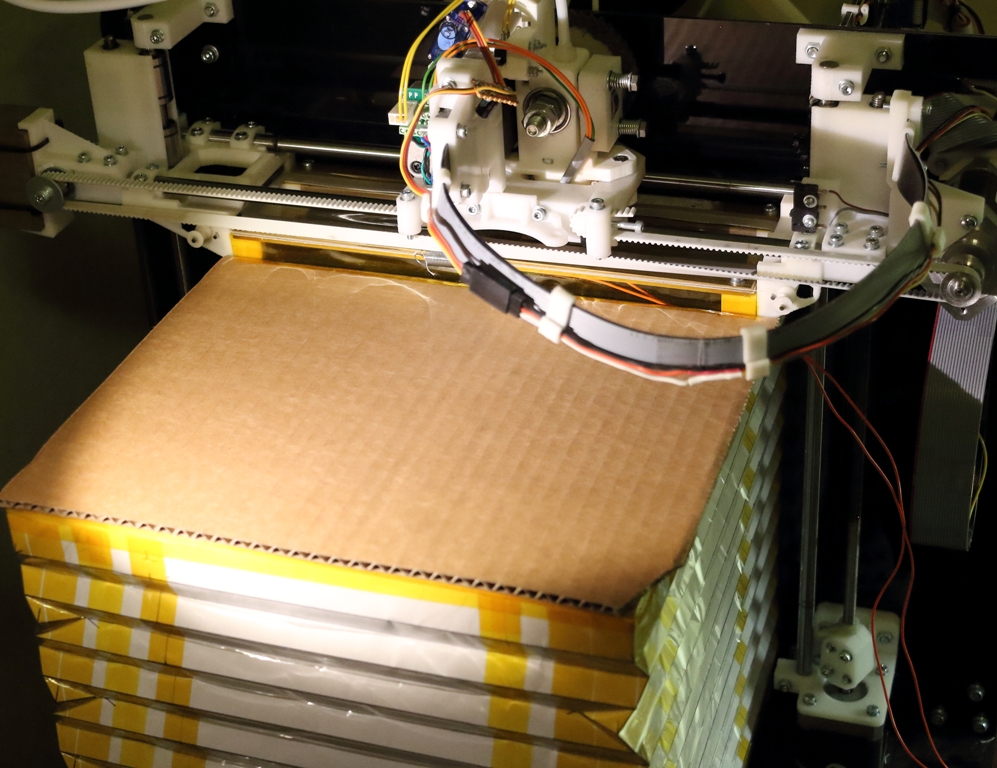
Here is my implementation of an inside the envelope heated chamber for the Mendel90. I am sharing it to inspire others and to get ideas to simplify and improve on it.
Basically it is a bellow with a top labyrinth seal for the standard jhead hotend and it fits inbetween the XZ plate hole and the bed. It clips on to the X axis and follows that up and down during a print. It uses only the bed as heat source. With that at 120 degrees the inside temperature levels off at 70+ degrees. I don't know how accurate the hotend thermistor is at those temperatures but I see 72 degrees after about 40 minutes. The envelope gets up to that temperature maybe in 15 minutes or so but it takes a while for the heat to soak through the brass nozzle.
First parts done with it feels solid and stronger. Before when printing ABS without it larger pieces would come out a bit brittle and you could make them pop or crackle a bit under force.
Challenges ahead is how to add cooling as thin pillars are more prone to overheat. There is also the need for ventilation / downregulation of the temperature for e.g. PLA.
In the following days I will be posting more details. Meanwhile I hope the image will give you a clue to how it works.
|
Re: Mendel90 inside the envelope heated chamber implementation August 13, 2015 09:12AM |
Registered: 11 years ago Posts: 57 |
Nice :-)
I thought about a print enclosure for a while, as my results trying to print Nlyon all failed due to curling.
My design requirements for an enclosure:
- Stepper Motors outside of the heated enclosure
- easy Acces to the build plate to easily and quickly switch out the Buildplate
I split the "problem" into 2 parts: behind the gate and in front of it.
the first part ist easy
Just simply to cover up the volume behind the "gate". as it is already boxshaped.
the second part is more difficult as there are some moving parts that penetrate the virtual box around the printbed.
I came up with some idea with small gaps to let the rods throug and making the x-Axis vertical like on the i3 so I just have one slot in the box.
But your Idea to make the box collapse and expand with the whole X-Achsis is brilliant!
Greetings,
Marius
|
Re: Mendel90 inside the envelope heated chamber implementation August 13, 2015 04:56PM |
Registered: 8 years ago Posts: 22 |
For a complete clean looking enclosure, take a look at this one: [www.thingiverse.com]
|
Re: Mendel90 inside the envelope heated chamber implementation August 15, 2015 06:30AM |
Registered: 10 years ago Posts: 27 |
@kitemare: Thanks, I went through quite a few ideas before I settled on this approach. I was concerned about heat loss with only the bed as heatsource and wanted to keep the heated volume to a minumum.
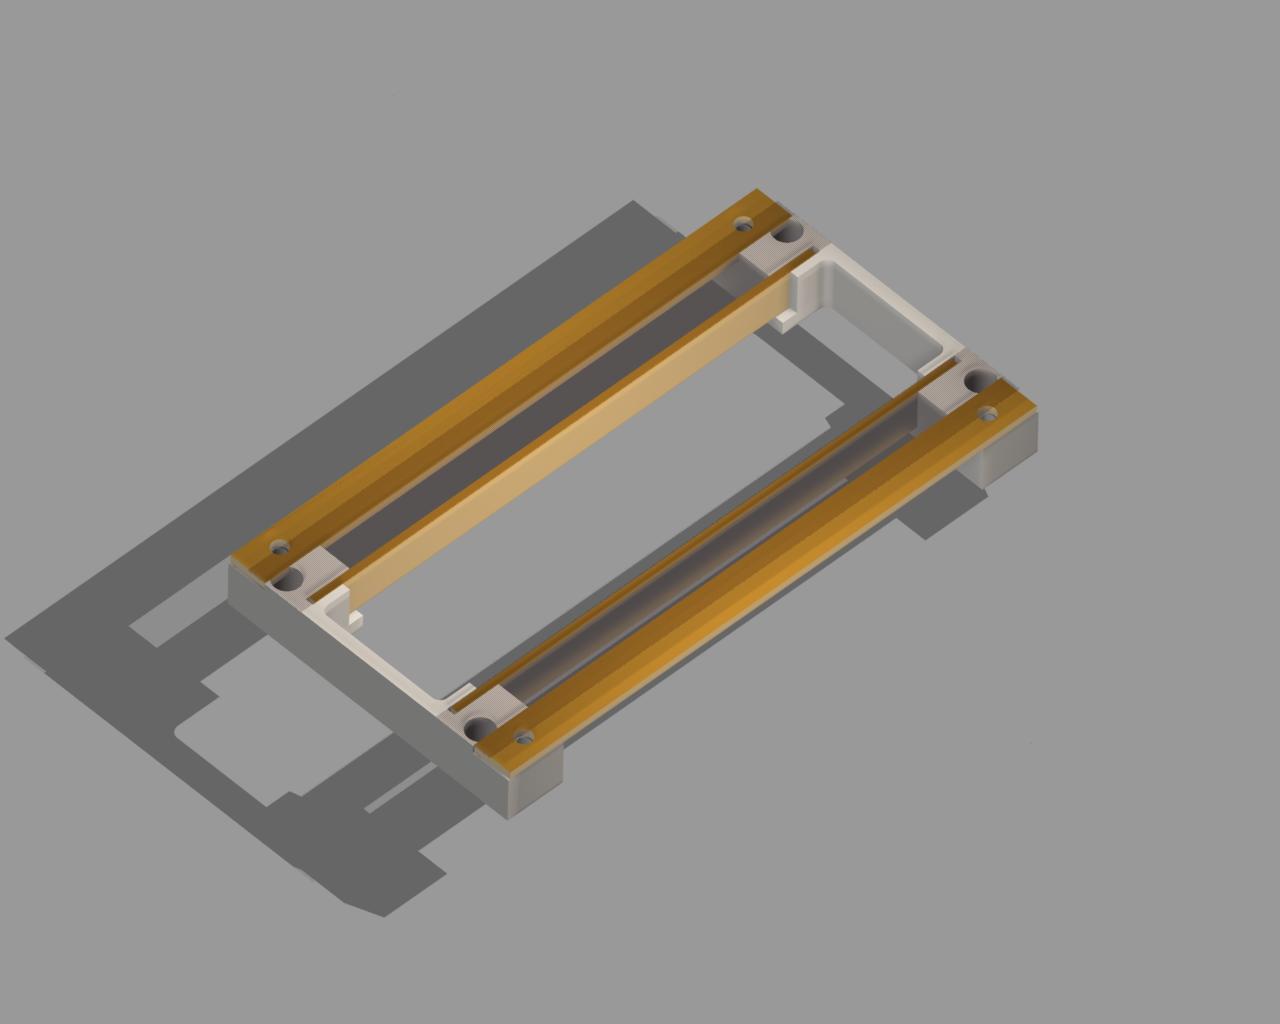
Here are the pieces for the seal. I tried a few other variants without the vertical rails but this was the only one I could get flat and rigid enough for a descent seal.
The rail_connectors sits right on top of the upper frame (which is a 15x20mm bar wooden frame). It is attached to the frame with 3x20mm countersunk 90 degree screws. The rails (2x10mm brass bar in my case) should be just shy of the total width. The top frame should leave 0.5 - 1 mm clearance to the XZ plate hole. Each side rails are spanned by a 15mm wide capton tape strip. The top seal is formed by a carton cutout that is as wide and long as the lower part with a hole to match. This is held down by two more of the edge rails.
Note that the top surface of the rail_connector and the bars should be flush. I had to sand the connector down slightly which also had the benefit of making it flatter.
The moving sealing strip that is attached to the hotend runs inbetween. It is important that it runs freely so I added a paper shim between each outer rail.
A simplification would be to replace a vertical and a side rail with a wider bar.
Edited 7 time(s). Last edit at 08/15/2015 11:07AM by svanteg.
Here are the pieces for the seal. I tried a few other variants without the vertical rails but this was the only one I could get flat and rigid enough for a descent seal.

The rail_connectors sits right on top of the upper frame (which is a 15x20mm bar wooden frame). It is attached to the frame with 3x20mm countersunk 90 degree screws. The rails (2x10mm brass bar in my case) should be just shy of the total width. The top frame should leave 0.5 - 1 mm clearance to the XZ plate hole. Each side rails are spanned by a 15mm wide capton tape strip. The top seal is formed by a carton cutout that is as wide and long as the lower part with a hole to match. This is held down by two more of the edge rails.
Note that the top surface of the rail_connector and the bars should be flush. I had to sand the connector down slightly which also had the benefit of making it flatter.
The moving sealing strip that is attached to the hotend runs inbetween. It is important that it runs freely so I added a paper shim between each outer rail.
A simplification would be to replace a vertical and a side rail with a wider bar.
Edited 7 time(s). Last edit at 08/15/2015 11:07AM by svanteg.
|
Re: Mendel90 inside the envelope heated chamber implementation August 15, 2015 10:44AM |
Registered: 10 years ago Posts: 27 |
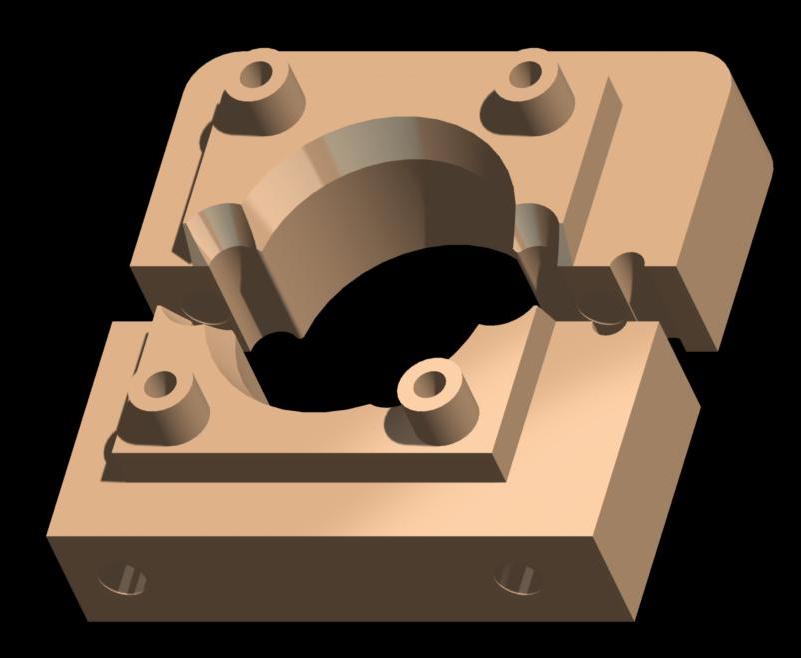
Here is the hotend clip. As it needs to cope with high temperature I've milled it from oak which seems to hold up ok at 245 degrees but with some darkening. the four posts (of which three are visible) are clearance around the fastening screws for milling. As I have a probe rod coming though there is a separate hole for that.
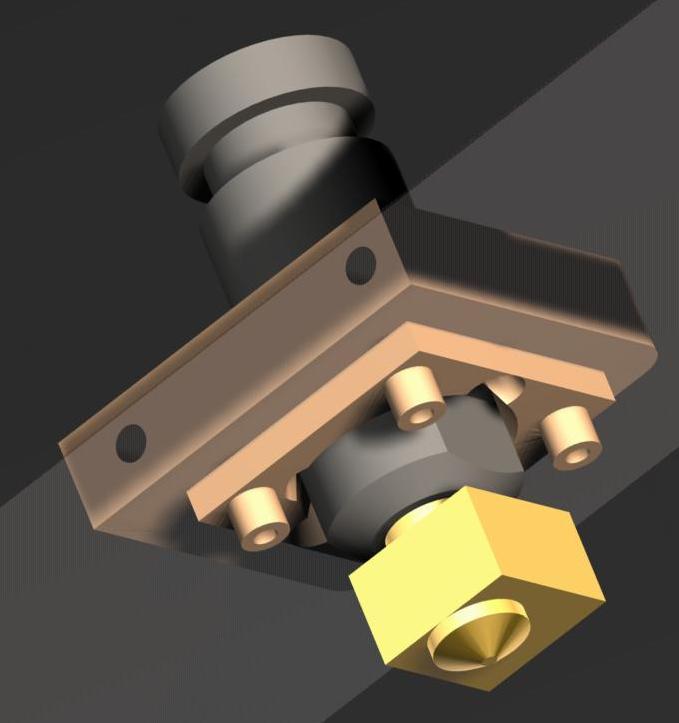
Here is the clip and seal together. Note that as kapton tape and oven bag plastic become too soft @ printing temp to hold shape I taped an extra cardboard reinforcement around the hole in the strip to spread the stress. This seems to work well. A note about oven bags - get the largest available size as that usually has thicker harder plastic.
If this part could be made without special tools it would make it possible for a lot more people to make one for themselves. Any ideas?
Edited 5 time(s). Last edit at 08/15/2015 11:02AM by svanteg.

Here is the clip and seal together. Note that as kapton tape and oven bag plastic become too soft @ printing temp to hold shape I taped an extra cardboard reinforcement around the hole in the strip to spread the stress. This seems to work well. A note about oven bags - get the largest available size as that usually has thicker harder plastic.

If this part could be made without special tools it would make it possible for a lot more people to make one for themselves. Any ideas?
Edited 5 time(s). Last edit at 08/15/2015 11:02AM by svanteg.
|
Re: Mendel90 inside the envelope heated chamber implementation August 15, 2015 11:35AM |
Registered: 10 years ago Posts: 27 |
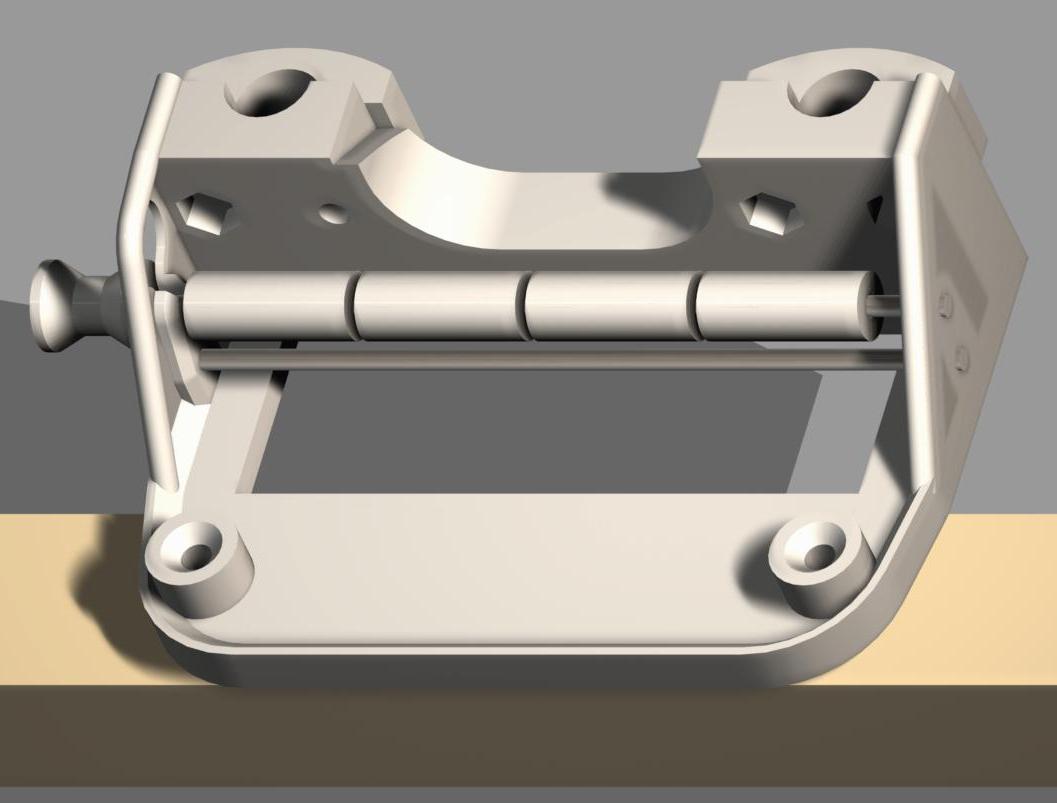
Here is the right x-axis clip. The moving sealing strip comes in above the inner rod and goes down to attach "under" the rollers so the uptake point is at the lowest. The tensioning string winds round the outer wheel in the same direction exiting on top. The inner rod should be fixed so the hole needs to grab onto that. The outer roller rod much run freely so use a 0.1 - 0.2 mm larger drill plus a drop of oil.
A special on this side is that the m3x16 screw that sits under the x endstop must be fitted before from the underside. The rest has captive nuts.
The straight edge should be flush with the frame top and the clip screws in with 3x20mm countersunk wood screws.
I used 2mm silver steel rod ("drill rod") for the axles. Any 2mm smooth rod stock should work.
...and another angle...
Edited 4 time(s). Last edit at 08/15/2015 11:49AM by svanteg.
A special on this side is that the m3x16 screw that sits under the x endstop must be fitted before from the underside. The rest has captive nuts.
The straight edge should be flush with the frame top and the clip screws in with 3x20mm countersunk wood screws.
I used 2mm silver steel rod ("drill rod") for the axles. Any 2mm smooth rod stock should work.

...and another angle...

Edited 4 time(s). Last edit at 08/15/2015 11:49AM by svanteg.
Attachments:
open | download - xaxis_clip1.jpg (48.2 KB)
open | download - xaxis_clip2.jpg (41.1 KB)
open | download - frame_bracket_left_lower2.stl (374.7 KB)
open | download - frame_bracket_right_lower3.stl (268.8 KB)
open | download - uptake_roller.stl (31.3 KB)
open | download - uptake_wheel.stl (120 KB)
open | download - frame_bracket_upper_both.stl (72.8 KB)
open | download - frame_bracket_upper_rounds.stl (91.1 KB)
|
Re: Mendel90 inside the envelope heated chamber implementation August 15, 2015 12:04PM |
Registered: 10 years ago Posts: 27 |
...and the bellow template (BellowTest2). It's designed to fit on one row of standing A4 paper. I used paper for folding and shape rigidity and oven plastic to make it air tight. Use your best long rulers and be meticulous with alignment. I taped all up on a flat table where I was ok with scoring the surface when cutting paper and plastic sheets.
BellowTest contains a single A4 template for practice folding.
One approach is to drop the full height bellow and just use a ~100mm skirt which is way simpler to make. That would cover almost all day to day prints.
Edited 2 time(s). Last edit at 08/15/2015 12:16PM by svanteg.
BellowTest contains a single A4 template for practice folding.
One approach is to drop the full height bellow and just use a ~100mm skirt which is way simpler to make. That would cover almost all day to day prints.
Edited 2 time(s). Last edit at 08/15/2015 12:16PM by svanteg.
Sorry, only registered users may post in this forum.