Leveling, Dial Gauge, and nopheads's Clamp
Posted by Phrank916
|
Leveling, Dial Gauge, and nopheads's Clamp May 27, 2015 02:32AM |
Registered: 8 years ago Posts: 2 |
Greetings! I recently purchased a nophead kit and this will be my very first post. I've done a number of searches already and didn't see my exact question, so here goes:
I'm almost up to the bed leveling section of my build, and I'm aware that proper leveling is key to smaller layer height and higher quality prints. So, I was given a dial gauge as a birthday gift, and planned to use it in the bed leveing and calibration process, but I understand there is a clamp that I need to utilize the dial gauge properly. I've thought of various solutions but wondered what the current recommendation of this community might be?
1) Level the bed initially with a smooth rod or feeler gauges and hope for a good enough print result to successfully print the clamp, then proceed with dial gauge leveling?
2) Try and find a local person to print the widget through one of the 3D printing registrars?
3) Hope there's possibly a kind soul reading this who is willing to print the widget for me and let me PayPal them a token of my appreciation?
I'm open to any other ideas or suggestions. Thanks!
Edited 1 time(s). Last edit at 05/27/2015 10:24AM by Phrank916.
|
Re: Leveling, Dial Gauge, and nopheads's Clamp May 27, 2015 03:09AM |
Registered: 9 years ago Posts: 64 |
Hi,
I can print that for you if you like.
It will be shipped from germany.
I faced the same as you and even now I do not have printed that clamp but am still using the gauge.
I took a 6mm peace of plywood and cut it to the size that it fits under the x-carriage. Drilled three holes in it.
The two on the ouside to fit the extruder fixing fastener holes of the x-carriage and the middle one for the gauge.
I am only pushing the gauge in the middle hole and it sitts tight there and is secure enough wihout any additional fixing.
Take care to not make the hole to tight. You want to install or remove the gauge without putting too much force on the construction.
But you can do the leveling with a peace of paper also. Once you feel the nozzle is touching the paper you know there is 0.1mm space between bed and nozzle.
Lars
|
Re: Leveling, Dial Gauge, and nopheads's Clamp May 27, 2015 04:45AM |
Admin Registered: 17 years ago Posts: 7,879 |
Since the clamp is small and printed in the middle of the bed it doesn't need to be very level to get a working print.
Also levelling with a bit a of smooth rod can very accurate. It is just a bit easier and quicker with a gauge.
[www.hydraraptor.blogspot.com]
Also levelling with a bit a of smooth rod can very accurate. It is just a bit easier and quicker with a gauge.
[www.hydraraptor.blogspot.com]
|
Re: Leveling, Dial Gauge, and nopheads's Clamp June 07, 2015 11:03AM |
Registered: 10 years ago Posts: 68 |
Hi,
I bought the kit for about 20 months ago, and I first levelled it with metod 1. This will be enough to be able to print the dial gauge mount device.
Note however that many dial gauges gauges have a too short feeler, so it doesnt reach the bed.
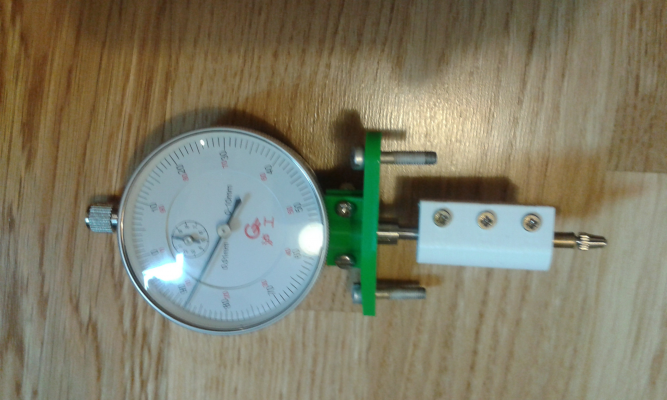
In that case you can 3d-print some device to prolong it, dependent on how it is constructed. In my case, I could detach the tip of the feeler, and put it in a small brass pin I had left over. Then i printed a clamp to attach it to the original feeler:
This particular solution may not apply to you, but maybe you can do in a similar way.
|
Re: Leveling, Dial Gauge, and nopheads's Clamp June 07, 2015 02:04PM |
Admin Registered: 17 years ago Posts: 7,879 |
I have an imperial one and a metric one. The metric one was too short but I solved it simply by unscrewing the tip and replacing it with an M3 cap screw. However, I prefer the imperial one because it puts a lot less pressure on the glass.
Note the clamp is upside down in the picture above and it mounts underneath the carriage, not above. That way a much shorter probe is needed.
[www.hydraraptor.blogspot.com]
Note the clamp is upside down in the picture above and it mounts underneath the carriage, not above. That way a much shorter probe is needed.
[www.hydraraptor.blogspot.com]
|
Re: Leveling, Dial Gauge, and nopheads's Clamp July 07, 2015 10:53PM |
Registered: 8 years ago Posts: 2 |
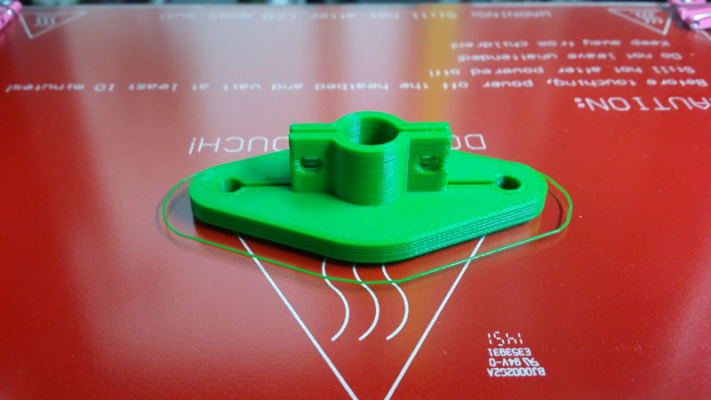
Sorry for the long delay before following up here, but because of a few unforeseen life challenges, I literally just finished the printer testing and calibration last weekend. As you can see from the picture, I had success printing the clamp and will be further leveling and calibrating with my dial gauge this weekend. I used a smooth rod, but felt it wasn't as accurate as I should be able to get with a dial gauge. Looking forward to refining the tune.
Ted
Ted
|
Re: Leveling, Dial Gauge, and nopheads's Clamp July 08, 2015 04:05AM |
Registered: 9 years ago Posts: 49 |
Spent a few evenings with a dial gauge but were only able to get the edges level not the sides. Figured my mk3 heatbed was warped so I tried bending it and use shims without any improvement. A few days later I realised the problem must lie somewhere else and tried rotating the smooth rods, voilà the rods were bent by a 10th of a millimetre in the middle. The dial gauge showed an variation of 0.05mm but when reassembled the weight of the extruder visually increased the gap in one end. The solution for this was to place the extruder in each corner, place a light source behind and adjust the height of the pillars/z-screw's until almost no light passed through (<45 degree adjustment on the pillars).
The 150x150mm calibration square then came out perfect.
The 150x150mm calibration square then came out perfect.
|
Re: Leveling, Dial Gauge, and nopheads's Clamp July 08, 2015 04:12AM |
Admin Registered: 17 years ago Posts: 7,879 |
You can only level the corners with a dial gauge because the spring is strong enough to bend the glass a little in the middle and the middle of the edges.
[www.hydraraptor.blogspot.com]
[www.hydraraptor.blogspot.com]
|
Re: Leveling, Dial Gauge, and nopheads's Clamp July 08, 2015 04:44AM |
Registered: 9 years ago Posts: 49 |
With a alu heatbed I had no problems getting the sides next to perfect as long as the rods pointed in the "right" direction (visually confirmed after assembly). But you are correct, the spring does seem to affect the result slightly. I guess next step would be to remove the spring and use gravity only.
Edited 1 time(s). Last edit at 07/08/2015 04:45AM by hsbontop.
Edited 1 time(s). Last edit at 07/08/2015 04:45AM by hsbontop.
|
Re: Leveling, Dial Gauge, and nopheads's Clamp July 08, 2015 12:34PM |
Registered: 10 years ago Posts: 439 |
Sorry, only registered users may post in this forum.

