Modifications to printer
Posted by 3djim
|
Modifications to printer February 05, 2014 10:11AM |
Registered: 10 years ago Posts: 16 |
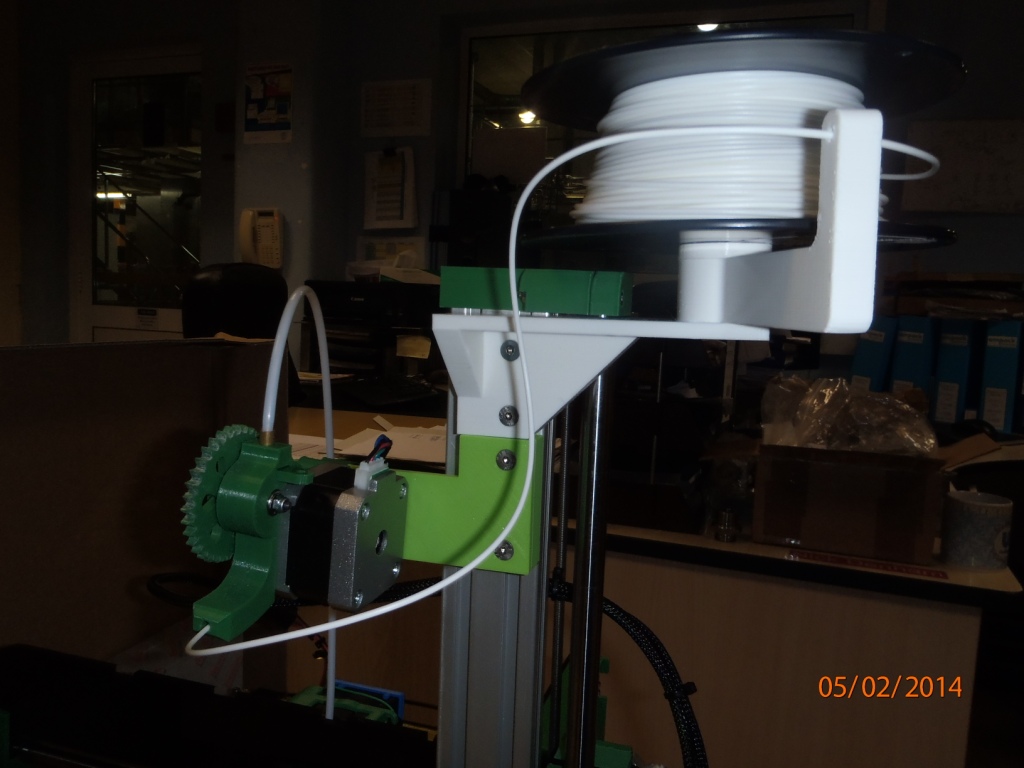
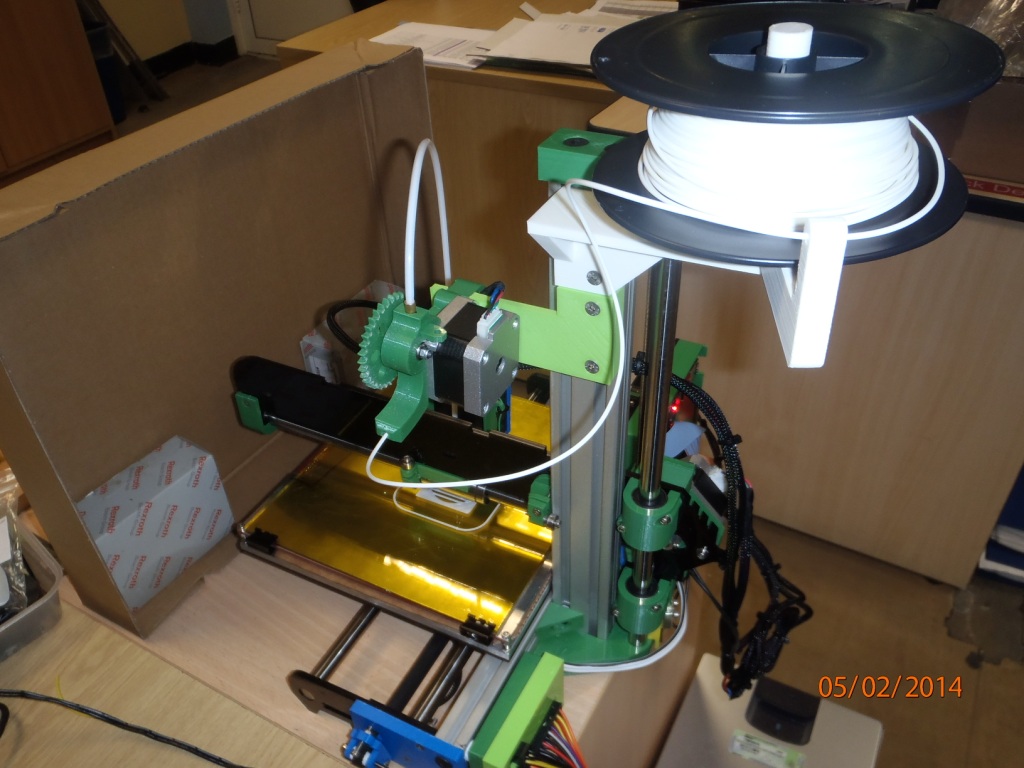
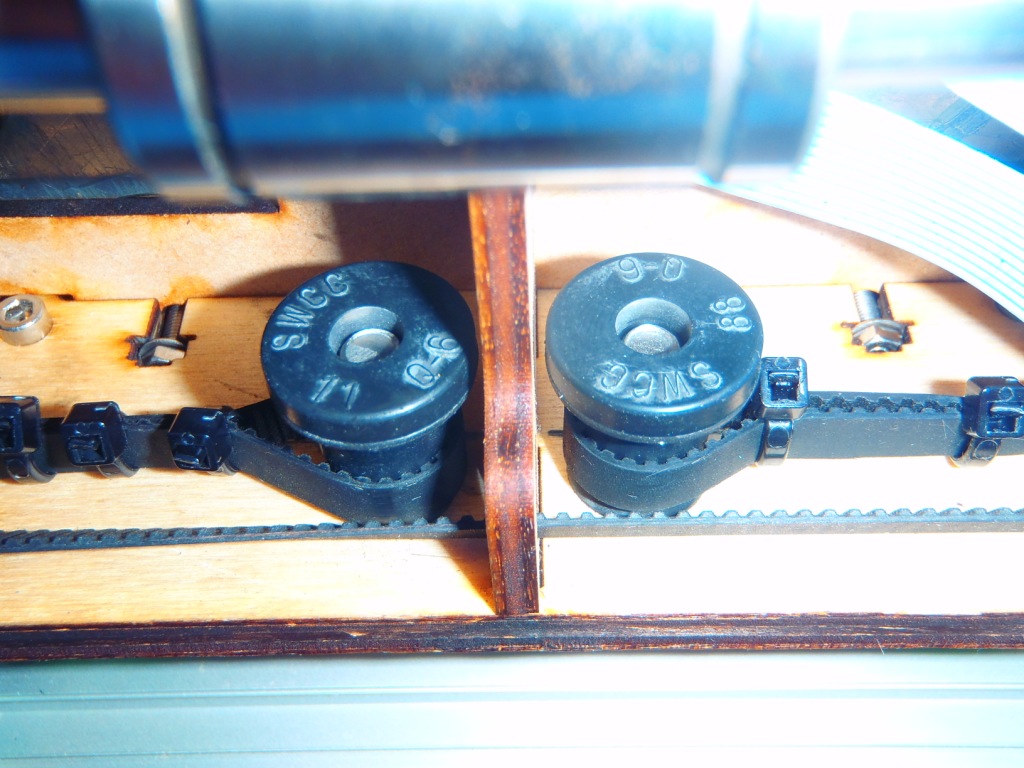
See attached photos of some of the mods i have fitted to my printer. Some are implementations of ideas from threads in this forum and some are my own modifications.If anyone would like more details of any of the mods including stl files please let me know.
|
Re: Modifications to printer February 05, 2014 11:08AM |
Registered: 10 years ago Posts: 23 |
|
Re: Modifications to printer February 05, 2014 11:33AM |
Registered: 10 years ago Posts: 16 |
Hi.
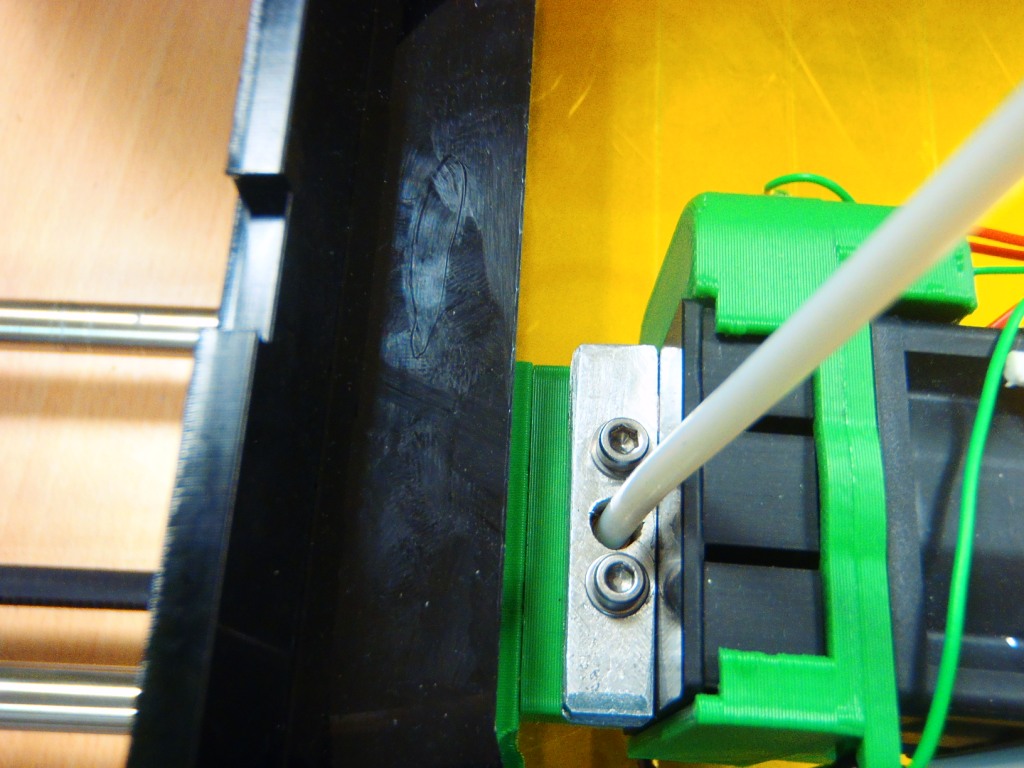
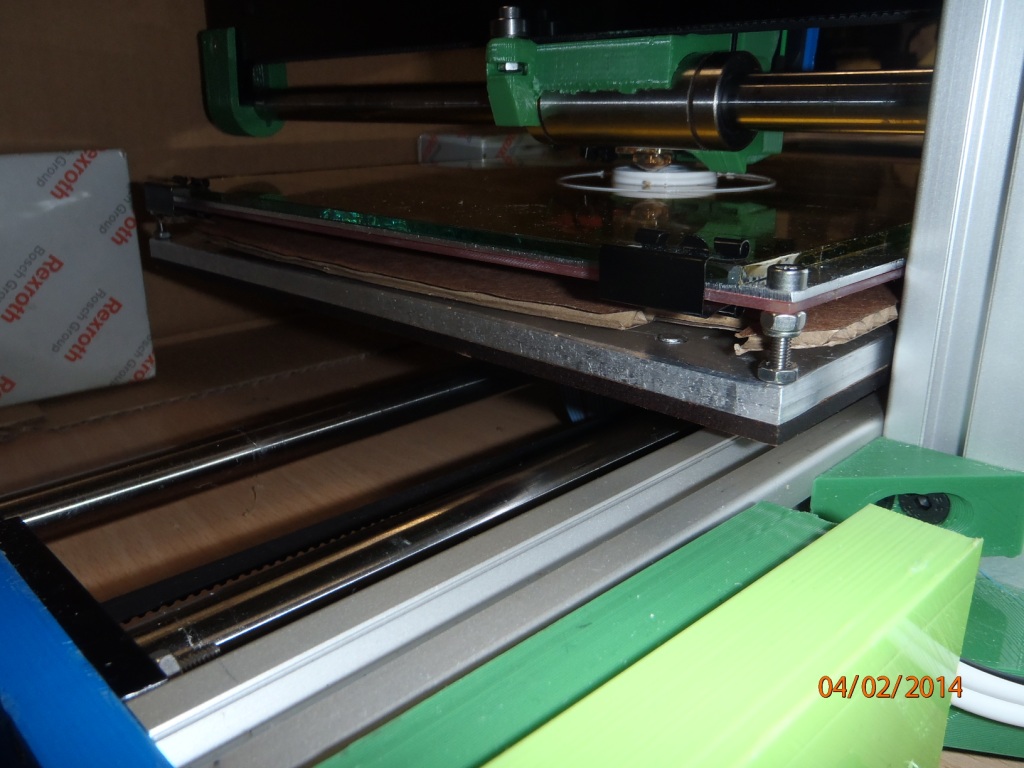
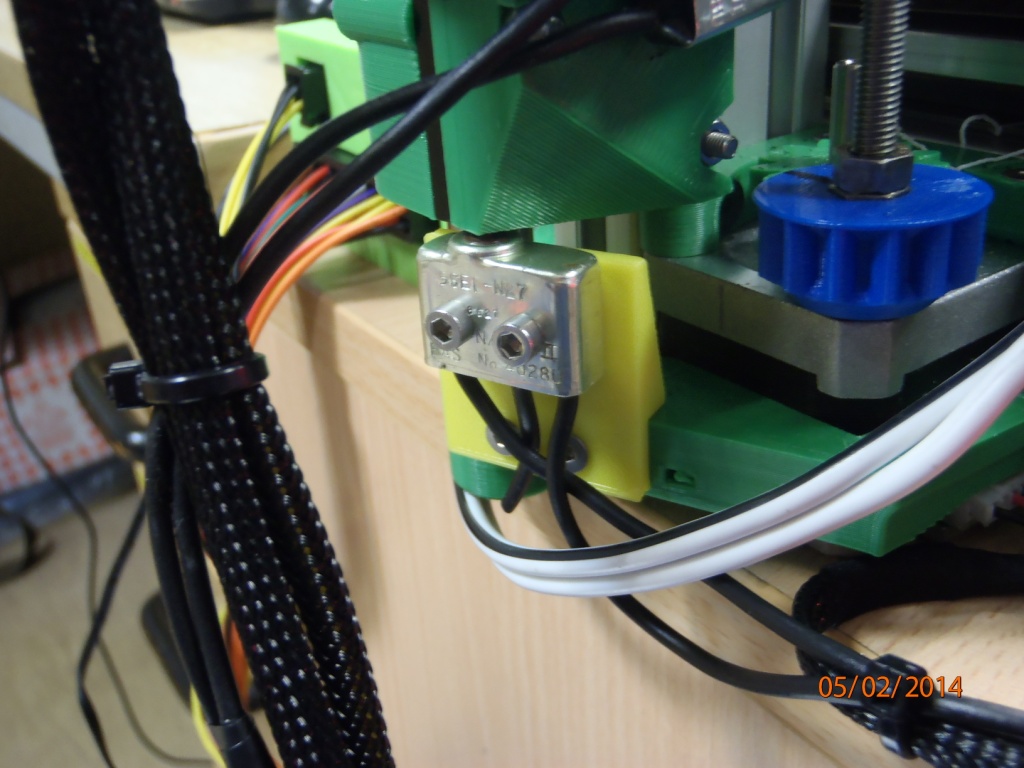
I can successfully print at 0.12 layer heights consistently. The bed modifications along with zeroing the x and z axis with micro switches means I no longer have to adjust the bed at all and I don't have to use any compensation. The idea behind moving the extruder was to take any unnecessary weight off the x axis and to allow me to fit a piece of aluminium angle in the near future to further support the x axis.
I can successfully print at 0.12 layer heights consistently. The bed modifications along with zeroing the x and z axis with micro switches means I no longer have to adjust the bed at all and I don't have to use any compensation. The idea behind moving the extruder was to take any unnecessary weight off the x axis and to allow me to fit a piece of aluminium angle in the near future to further support the x axis.
|
Re: Modifications to printer February 05, 2014 01:09PM |
Registered: 10 years ago Posts: 265 |
Some very nice mods Jim, i like the idea of moving the extruder off the X arm, have you replaced the Z axis with a longer peice of aluminium box extrusion?
Matt
Limited Edition Red RS Ormerod 1 #144 of 200 - RRP 1.09fw
iamburnys Ormerod Upgrades Github
Follow me on ThingiVerse My Designs
Matt
Limited Edition Red RS Ormerod 1 #144 of 200 - RRP 1.09fw
iamburnys Ormerod Upgrades Github
Follow me on ThingiVerse My Designs
|
Re: Modifications to printer February 05, 2014 01:30PM |
Registered: 10 years ago Posts: 55 |
Looks good Jim,
I for one would be interested in your filament reel holder (You don't want to see the lash-up I currently use, reel runs on a skewer held on the top of my PC by a large book )
)
Is that a solid piece of aluminium used on the table or did you cut holes in it to lighten it?
When it gets warmer (old bones) and I can get back in the shed I aim to make lots of the suggested modifications. Is there some place on this site (is it possible to make a sticky thread) where we could catalog all the mods suggested in the many disparate topics?
Alan
Edited 1 time(s). Last edit at 02/05/2014 01:34PM by alanbattersby.
I for one would be interested in your filament reel holder (You don't want to see the lash-up I currently use, reel runs on a skewer held on the top of my PC by a large book
)Is that a solid piece of aluminium used on the table or did you cut holes in it to lighten it?
When it gets warmer (old bones) and I can get back in the shed I aim to make lots of the suggested modifications. Is there some place on this site (is it possible to make a sticky thread) where we could catalog all the mods suggested in the many disparate topics?
Alan
Edited 1 time(s). Last edit at 02/05/2014 01:34PM by alanbattersby.
|
Re: Modifications to printer February 05, 2014 03:26PM |
Registered: 10 years ago Posts: 16 |
Hi Matt The Ali extrusion is the original part the bracket for the extruder and reel holder are rebated on the inside edge to allow the x axis arm the pass through.
Alan. I will attach the still files for the reel holder tomorrow, The table has large holes cut out of it to lighten it, I have increased the speeds for printing quite considerably without any issues.
I have a few more mods but didn't have time to upload photos today. I will put them on the forum tomorrow.
Edited 1 time(s). Last edit at 02/05/2014 03:29PM by 3djim.
|
Re: Modifications to printer February 05, 2014 04:24PM |
Registered: 10 years ago Posts: 103 |
|
Re: Modifications to printer February 06, 2014 03:26AM |
Registered: 10 years ago Posts: 145 |
|
Re: Modifications to printer February 06, 2014 04:27AM |
Registered: 10 years ago Posts: 1,230 |
Quote
GregL
A 1Kg reel of filament is more like 1.18Kg. When (soon) we have three colours, we will have nearly 3.5Kg of reels - definitely not want that hanging off the Z axis
Greg
I may have overdone it at bit, but it should be safe for 500kg :-)

Erik
|
Re: Modifications to printer February 06, 2014 04:35AM |
Registered: 10 years ago Posts: 265 |
Over engineering can never be a bad thing!
=D
Limited Edition Red RS Ormerod 1 #144 of 200 - RRP 1.09fw
iamburnys Ormerod Upgrades Github
Follow me on ThingiVerse My Designs
=D
Limited Edition Red RS Ormerod 1 #144 of 200 - RRP 1.09fw
iamburnys Ormerod Upgrades Github
Follow me on ThingiVerse My Designs
|
Re: Modifications to printer February 06, 2014 05:13AM |
Registered: 10 years ago Posts: 19 |
I would like to use the Z micro switch to get rid of the IR probe for Z homing (still using the IR probe for X homing).
Where do you have plugged the z micro switch on the duet and how do you have changed the config file to make it work?
Can you share the stl of your yellow support of the micro switch?
Congrats, great work!
Where do you have plugged the z micro switch on the duet and how do you have changed the config file to make it work?
Can you share the stl of your yellow support of the micro switch?
Congrats, great work!
Quote
3djim
Hi.
I can successfully print at 0.12 layer heights consistently. The bed modifications along with zeroing the x and z axis with micro switches means I no longer have to adjust the bed at all and I don't have to use any compensation. The idea behind moving the extruder was to take any unnecessary weight off the x axis and to allow me to fit a piece of aluminium angle in the near future to further support the x axis.
|
Re: Modifications to printer February 06, 2014 05:53AM |
Registered: 10 years ago Posts: 14,672 |
The connections for a z microswitch are right next to the z motor connections, just as the connections for the y microswitch are right next to the y motor connections. Connect the z-microswitch in a similar way to the y-microswitch, skipping the middle pin of the three.
To use the IR probe for x-homing but not z homing, you would need to edit the homez and homeall.g files. Currently, to home the z axis, these files do a G30 and then a G1 Z0. Instead, I suggest you disable the IR sensor using M558 P0, home the Z axis using a similar technique as used to home the y-axis in homey.g (except that you will be moving in the -z direction instead of the +y direction), then re-enable the IR probe using M558 P1 so that x-homing will work again.
Large delta printer [miscsolutions.wordpress.com], E3D tool changer, Robotdigg SCARA printer, Crane Quad and Ormerod
Disclosure: I design Duet electronics and work on RepRapFirmware, [duet3d.com].
|
Re: Modifications to printer February 06, 2014 08:14PM |
Registered: 10 years ago Posts: 58 |
|
Re: Modifications to printer February 07, 2014 03:59AM |
Registered: 10 years ago Posts: 1,230 |
Quote
onno
That makes me wonder: would replacing the IR probe by a microswitch still allow for bed-level compensation? I would place the microswitch in roughly the same spot as the probe, but would (hopefully) get rid of the problems with the probe.
Yes but will require a servo to lift the microswitch after measurement as you will have touchdown of the switch before nozzle
Erik
|
Re: Modifications to printer February 07, 2014 04:13AM |
Registered: 10 years ago Posts: 14,672 |
As Erik says, you would need a mechanism to raise/lower the microswitch.
An alternative proposal a while back was to incorporate a force sensor into the support for the 9mm or 10mm bearing on the x-carriage. The idea is that when the head touches the bed, the sideways force on that bearing reduces, which is sensed by the force sensor. I already have the force sensor, all that is needed is a redesigned x-carriage that has a slot for it.
However, the combination of adding modulation to the IR sensor and relocating it on the print head has made the IR sensor work reliably for me.
Large delta printer [miscsolutions.wordpress.com], E3D tool changer, Robotdigg SCARA printer, Crane Quad and Ormerod
Disclosure: I design Duet electronics and work on RepRapFirmware, [duet3d.com].
|
Re: Modifications to printer February 07, 2014 06:49AM |
Registered: 10 years ago Posts: 1,230 |
onno
Mechanical bed auto leveling in action:
[www.youtube.com]
Thingiverse, Auto bed-level for Ultimaker
[www.thingiverse.com]
Erik
Mechanical bed auto leveling in action:
[www.youtube.com]
Thingiverse, Auto bed-level for Ultimaker
[www.thingiverse.com]
Erik
|
Re: Modifications to printer February 07, 2014 07:38AM |
Registered: 10 years ago Posts: 16 |
I have fitted micro switches to both the X and Z axis and as long as the bed is level and stable on the linear bearings there is no need to have compensation running. I have been using the micro switches for the past 2 weeks, printing every day and have had no compensation running. Setting the machine up correctly mechanically in the first instance is key. As for the z axis micro switch I have altered the homing config file so the X axis is at 2 mm when the Z axis homes this means that the nozzle is clear of the side of the table. I take the Z axis down so that it operates the micro switch at -0.1mm and then drives up to the zero point. No need for servos to drive the micro switch into and out of homing position.
|
Re: Modifications to printer February 07, 2014 08:18AM |
Registered: 10 years ago Posts: 256 |
Quote
3djim
I have fitted micro switches to both the X and Z axis and as long as the bed is level and stable on the linear bearings there is no need to have compensation running. I have been using the micro switches for the past 2 weeks, printing every day and have had no compensation running. Setting the machine up correctly mechanically in the first instance is key. As for the z axis micro switch I have altered the homing config file so the X axis is at 2 mm when the Z axis homes this means that the nozzle is clear of the side of the table. I take the Z axis down so that it operates the micro switch at -0.1mm and then drives up to the zero point. No need for servos to drive the micro switch into and out of homing position.
Yep. A microswitch seems like the best solution to me! Keep it simple!
regards
Andy
Ormerod #318
www.zoomworks.org - Free and Open Source Stuff

Sorry, only registered users may post in this forum.