Replacement Fan Duct/Heatsink Duct - iamburny 
Posted by iamburny
Replacement Fan Duct/Heatsink Duct - iamburny  February 12, 2014 05:59AM |
Registered: 10 years ago Posts: 265 |
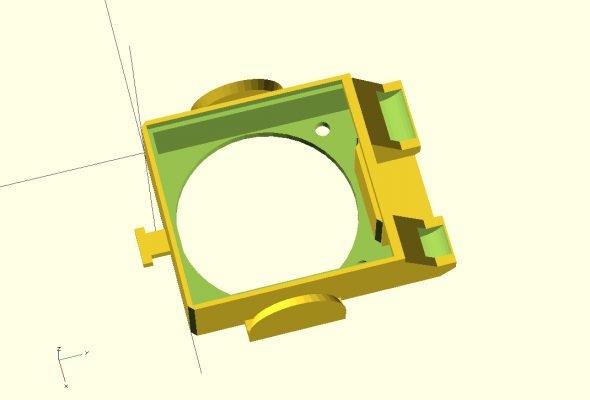
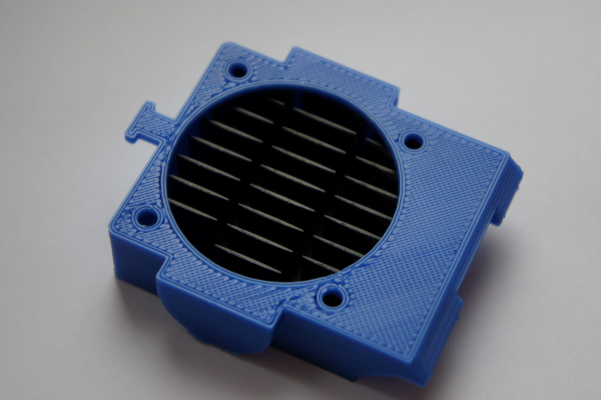
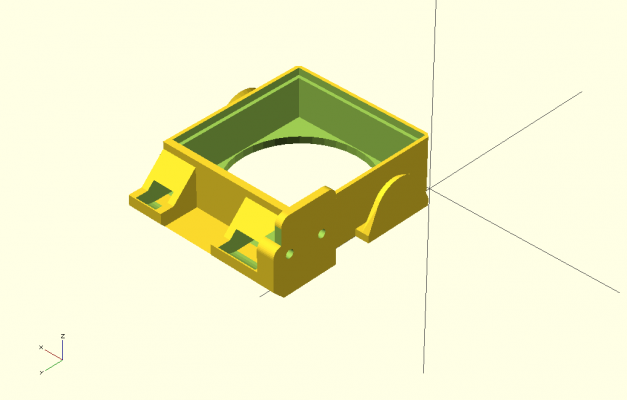
My main goal for this replacement part was to make the air flow from the fan more direct so i could use a slower a much much quieter fan without loosing the air flow across the print, while i was at it i raised the vents slightly to increase clearance and added cable supports and a tie wrap attachment, it is also one piece which replaces both other parts.
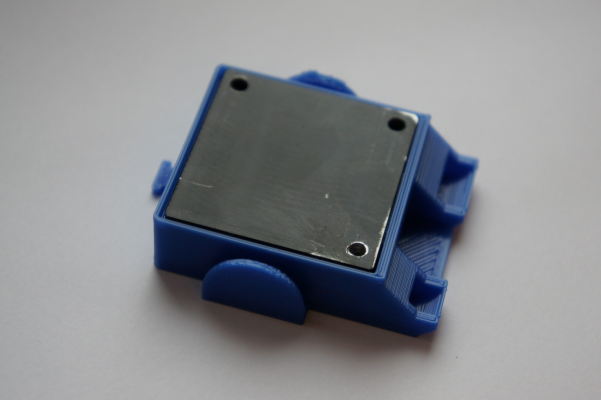
I wanted to make it a direct replacement like most of my other parts, however i had to rotate the heat sink 90 degrees so the air flowed down (not sideways) this required drilling an additional 3mm hole in the heat sink, not a huge deal though.
I have attached my gcode file, however these are my own custom Slic3r settings, and may not be suitable for your printer/filament
Matt
one-peice-hotend-airduct.stl
one-peice-hotend-airduct.scad
Edited 1 time(s). Last edit at 02/12/2014 05:59AM by iamburny.
Limited Edition Red RS Ormerod 1 #144 of 200 - RRP 1.09fw
iamburnys Ormerod Upgrades Github
Follow me on ThingiVerse My Designs
Re: Replacement Fan Duct/Heatsink Duct - iamburny  February 12, 2014 06:41AM |
Registered: 10 years ago Posts: 14,672 |
That looks nice! What are the round pieces on the side for: keeping wires under control?
I'll look at adapting it to accommodate the IR sensor board, as johneato kindly did for the original, see [forums.reprap.org].
Large delta printer [miscsolutions.wordpress.com], E3D tool changer, Robotdigg SCARA printer, Crane Quad and Ormerod
Disclosure: I design Duet electronics and work on RepRapFirmware, [duet3d.com].
Re: Replacement Fan Duct/Heatsink Duct - iamburny  February 12, 2014 07:02AM |
Registered: 10 years ago Posts: 265 |
@dc42 - yes the "ears" are narrow channel to hold the heater cartridge and thermistor wires, if johneato provides his scad i can add the adaption he made, unless of course he would like to add it himself to mine, either way is fine =)
Matt
Limited Edition Red RS Ormerod 1 #144 of 200 - RRP 1.09fw
iamburnys Ormerod Upgrades Github
Follow me on ThingiVerse My Designs
Matt
Limited Edition Red RS Ormerod 1 #144 of 200 - RRP 1.09fw
iamburnys Ormerod Upgrades Github
Follow me on ThingiVerse My Designs
Re: Replacement Fan Duct/Heatsink Duct - iamburny  February 12, 2014 08:43AM |
Registered: 10 years ago Posts: 780 |
Hi Matt,
Thank you for a great design, I have used many of your parts especially the gears.
What fan will you be using with this mod?
Anything to make the fan quieter will be a big benefit.
At long last, with the help of all the posts on the form I have now got a good printer that seems to be working consistently. I did despair a few days ago when everything was going wrong, it seemed as if the settings were changing each time I tried a print and that coupled with the filament not sticking lead to some hair pulling, not that I have much to pull.
Good job Mat
Paul
Thank you for a great design, I have used many of your parts especially the gears.
What fan will you be using with this mod?
Anything to make the fan quieter will be a big benefit.
At long last, with the help of all the posts on the form I have now got a good printer that seems to be working consistently. I did despair a few days ago when everything was going wrong, it seemed as if the settings were changing each time I tried a print and that coupled with the filament not sticking lead to some hair pulling, not that I have much to pull.

Good job Mat
Paul
Re: Replacement Fan Duct/Heatsink Duct - iamburny  February 12, 2014 08:45AM |
Registered: 10 years ago Posts: 132 |
Matt, dc
Can't supply in Scad, I don't use it. I am happy to modify your STL for dc.
I have aligned the IR holder inline with the existing duct. You will have to let me know if the alignment is still correct.
Only other obvious problem is that duct blocks the cable slot.
John
Can't supply in Scad, I don't use it. I am happy to modify your STL for dc.
I have aligned the IR holder inline with the existing duct. You will have to let me know if the alignment is still correct.
Only other obvious problem is that duct blocks the cable slot.
John
Re: Replacement Fan Duct/Heatsink Duct - iamburny  February 12, 2014 09:03AM |
Registered: 10 years ago Posts: 14,672 |
John, thanks for that. Can you reduce the thickness of the top 7mm or so of the add-on piece to 2.5mm, 2mm so that the front is still flat but the back has a step? Then I think the thermistor wire could go behind the top of the piece instead of through the slot - and I think that would make it easier to fit as well.
Edited 1 time(s). Last edit at 02/12/2014 09:05AM by dc42.
Large delta printer [miscsolutions.wordpress.com], E3D tool changer, Robotdigg SCARA printer, Crane Quad and Ormerod
Disclosure: I design Duet electronics and work on RepRapFirmware, [duet3d.com].
Edited 1 time(s). Last edit at 02/12/2014 09:05AM by dc42.
Large delta printer [miscsolutions.wordpress.com], E3D tool changer, Robotdigg SCARA printer, Crane Quad and Ormerod
Disclosure: I design Duet electronics and work on RepRapFirmware, [duet3d.com].
Re: Replacement Fan Duct/Heatsink Duct - iamburny  February 12, 2014 09:12AM |
Registered: 10 years ago Posts: 780 |
Re: Replacement Fan Duct/Heatsink Duct - iamburny  February 12, 2014 09:18AM |
Registered: 10 years ago Posts: 14,672 |
Quote
appjaws1
Question for dc42,
I understand that you have moved your sensor to the fan assembly. What have you done so that X-home works?
Paul
johneato kindly modified the design of the z-carriage part for me, see [forums.reprap.org].
Large delta printer [miscsolutions.wordpress.com], E3D tool changer, Robotdigg SCARA printer, Crane Quad and Ormerod
Disclosure: I design Duet electronics and work on RepRapFirmware, [duet3d.com].
Re: Replacement Fan Duct/Heatsink Duct - iamburny  February 12, 2014 10:04AM |
Registered: 10 years ago Posts: 132 |
Re: Replacement Fan Duct/Heatsink Duct - iamburny  February 12, 2014 10:32AM |
Registered: 10 years ago Posts: 14,672 |
Many thanks John, I'll print it this afternoon.
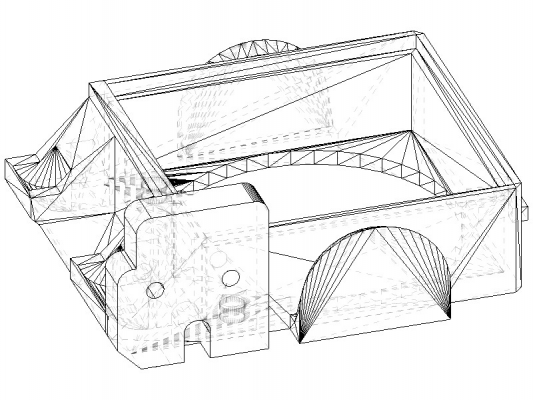
Matt, I got part-way towards modifying your openscad file for the IR sensor mount, so I'm attaching the file I produced. It is missing the angled bottom left edge that John's version has, and doesn't have the nicely-rounded corners of his version either.
EDIT - it looks as though the ear will get in the way of the IR sensor connector, and will have to be trimmed to about 8mm height.
Edited 1 time(s). Last edit at 02/12/2014 10:44AM by dc42.
Large delta printer [miscsolutions.wordpress.com], E3D tool changer, Robotdigg SCARA printer, Crane Quad and Ormerod
Disclosure: I design Duet electronics and work on RepRapFirmware, [duet3d.com].
Re: Replacement Fan Duct/Heatsink Duct - iamburny  February 12, 2014 11:12AM |
Registered: 10 years ago Posts: 265 |
@appjaws1 - Paul i'm currently using this fan which is massively quieter, 21dBA to be exact, it makes a massive difference the noisiest part now is the steppers by a long way. you'd probably be ok with any half decent 40mm x 40mm fan either 20mm or 10mm deep should be fine.
@johneato - thanks John looks great, out of interest what cad package do you use?
@dc42 - i'll take a look at modifying the scad once John has finished his mods.
Matt
Limited Edition Red RS Ormerod 1 #144 of 200 - RRP 1.09fw
iamburnys Ormerod Upgrades Github
Follow me on ThingiVerse My Designs
@johneato - thanks John looks great, out of interest what cad package do you use?
@dc42 - i'll take a look at modifying the scad once John has finished his mods.
Matt
Limited Edition Red RS Ormerod 1 #144 of 200 - RRP 1.09fw
iamburnys Ormerod Upgrades Github
Follow me on ThingiVerse My Designs
Re: Replacement Fan Duct/Heatsink Duct - iamburny  February 12, 2014 11:35AM |
Registered: 10 years ago Posts: 132 |
MattQuote
iamburny
@johneato - thanks John looks great, out of interest what cad package do you use?
@dc42 - i'll take a look at modifying the scad once John has finished his mods.
Unless dc has any more changes I think I am done with it, so go ahead with your scad.
I use Turbocad, its a paid for product, but not silly money. I have used it for a few years now on my CNC, so it gave me a head start when it came to 3d printing.
John
Re: Replacement Fan Duct/Heatsink Duct - iamburny  February 12, 2014 01:32PM |
Registered: 10 years ago Posts: 265 |
@dc42 - here is the scad tweaked a bit. rounded off the IR sensor mount, moved and re-sized cable "ears".
one-peice-hotend-airduct-with-irsensor.stl
one-peice-hotend-airduct-with-irsensor.scad
Limited Edition Red RS Ormerod 1 #144 of 200 - RRP 1.09fw
iamburnys Ormerod Upgrades Github
Follow me on ThingiVerse My Designs
one-peice-hotend-airduct-with-irsensor.stl
one-peice-hotend-airduct-with-irsensor.scad
Limited Edition Red RS Ormerod 1 #144 of 200 - RRP 1.09fw
iamburnys Ormerod Upgrades Github
Follow me on ThingiVerse My Designs
Re: Replacement Fan Duct/Heatsink Duct - iamburny  February 12, 2014 01:38PM |
Registered: 10 years ago Posts: 22 |
Re: Replacement Fan Duct/Heatsink Duct - iamburny  February 12, 2014 01:47PM |
Registered: 10 years ago Posts: 265 |
Quote
5dala
Tried using a radial fan. It may not be in the ideal position, but it made a huge difference, you cant even hear it.
It looks a bit bizarre, though
nice mod =)
Would be a fairly simple mod to mount the "blower" directly on top of the air duct blowing through the rotated heat sink straight down and out the vents, wiring needs a little thought though =)
Matt
Limited Edition Red RS Ormerod 1 #144 of 200 - RRP 1.09fw
iamburnys Ormerod Upgrades Github
Follow me on ThingiVerse My Designs
Re: Replacement Fan Duct/Heatsink Duct - iamburny  February 12, 2014 03:11PM |
Registered: 10 years ago Posts: 22 |
Re: Replacement Fan Duct/Heatsink Duct - iamburny  February 14, 2014 06:34AM |
Registered: 10 years ago Posts: 14,672 |
Matt, can you explain your design of the air outlets? You have no outlet directly in front of the nozzle (unlike the original), and the outlets on either side are of different sizes.
Large delta printer [miscsolutions.wordpress.com], E3D tool changer, Robotdigg SCARA printer, Crane Quad and Ormerod
Disclosure: I design Duet electronics and work on RepRapFirmware, [duet3d.com].
Large delta printer [miscsolutions.wordpress.com], E3D tool changer, Robotdigg SCARA printer, Crane Quad and Ormerod
Disclosure: I design Duet electronics and work on RepRapFirmware, [duet3d.com].
Re: Replacement Fan Duct/Heatsink Duct - iamburny  February 14, 2014 09:58AM |
Registered: 10 years ago Posts: 265 |
@dc42 - the heater block sits offset by 2.5mm because the threaded hole for the nozzle isn't centered (left <->right), so the left vents cannot be the same size unless i enlarge one side of the duct. The heater block extends back under the heat sink, not leaving adequate space for a vent, i didn't want to cool the heater block or nozzle this is handled by the heat sink, the intention was only to pass air over the extruded plastic after it has been laid.
Matt
Limited Edition Red RS Ormerod 1 #144 of 200 - RRP 1.09fw
iamburnys Ormerod Upgrades Github
Follow me on ThingiVerse My Designs
Matt
Limited Edition Red RS Ormerod 1 #144 of 200 - RRP 1.09fw
iamburnys Ormerod Upgrades Github
Follow me on ThingiVerse My Designs
Re: Replacement Fan Duct/Heatsink Duct - iamburny  February 24, 2014 09:42AM |
Registered: 10 years ago Posts: 14,672 |
Hi Matt,
I printed my standard dodecahedron test piece using your one-piece duct today, using my standard extruder temperatures (195C first layer, 190C remaining layers). The print went OK except for the bridges, which were worse than usual. The extruded filament tended to detach from the starting point of the bridge and curl under, leading to a string that was attached at the end of the bridge only.
I presume this is because your design doesn't direct a jet of air at the nozzle, unlike the original. I suspect that this jet is needed to cool the filament rapidly so that the start of the bridge is less likely to detach.
Have you any issues with bridging? Have you adjusted your print temperatures since switching to the modified duct?
Large delta printer [miscsolutions.wordpress.com], E3D tool changer, Robotdigg SCARA printer, Crane Quad and Ormerod
Disclosure: I design Duet electronics and work on RepRapFirmware, [duet3d.com].
Re: Replacement Fan Duct/Heatsink Duct - iamburny  February 24, 2014 01:54PM |
Registered: 10 years ago Posts: 2,472 |
I have blocked all the filament cooling nozzles as I found it works better with ABS. When I am printing a part with bridges, I manually reduce the hotend temperature when it gets to the bridging layer (you can usually tell when that's about to happen by the solid fill being laid down as anchors in preparation on the previous layers). It would be great if Slic3r had a setting to do that automatically. What might be better however would be to get a small hand held fan and blow that on the part whenever bridges are being laid.
Dave
(#106)
Dave
(#106)
Re: Replacement Fan Duct/Heatsink Duct - iamburny  February 24, 2014 03:37PM |
Registered: 10 years ago Posts: 265 |
@dc42 - I haven't noticed any bridging problems with the new duct. I could barely feel any 'breeze' from the nozzles of the original old duct even using the noisy 9600rpm fan, so maybe the addition of some airflow has had a negative effect on this particular print, the problem I had with the hollow dodecahedron was the layers not having time to cool before the head was back on them again, I've been meaning to try a cooling pillar for this. I have noticed that Slic3r is pretty poor when it comes to bridging and I've have a reasonable amount of success with KISSlicer and to a lesser extent Cura. I usually print at head 190 first -> 180 rest and bed 65 first -> 50 rest, I have accidentally (due to a model fault) bridged about 50mm with only minimal sagging and no problems with filament attachment at either end.
Matt
Limited Edition Red RS Ormerod 1 #144 of 200 - RRP 1.09fw
iamburnys Ormerod Upgrades Github
Follow me on ThingiVerse My Designs
Matt
Limited Edition Red RS Ormerod 1 #144 of 200 - RRP 1.09fw
iamburnys Ormerod Upgrades Github
Follow me on ThingiVerse My Designs
Re: Replacement Fan Duct/Heatsink Duct - iamburny  February 24, 2014 04:44PM |
Registered: 10 years ago Posts: 578 |
@matt - (quoting " I could barely feel any 'breeze' from the nozzles of the original old duct even using the noisy 9600rpm fan) -my vents used to howl a gale - when I chopped them off I saw there was a lot of random plastic inside - I guess there's some variation on this (mine weren't blocked, but maybe yours were - now that your original is redundant maybe you could check inside  )
)
@dave - I think that slic3r does have the ability to detect these things, and might want to spin up the external cooling fan if you let it (though that's not implemented on the Ormerod, there's a whole cooling tab in Slic3r's filament settings, and options in printer settings that affect those ) - I haven't tried slicing with those options on to see if it sends codes for fan speed, but I think it should do (I'll look in the firmware and see if it can handle them - if so it's just a case of connecting an external fan to the fan output). I'm thinking of setting a desktop fan above the Ormerod and giving it a burst now and then (especially for fast infill with PLA, which tends to get ripped up on mine as the head melts it on the next pass)
Ray
 )
)@dave - I think that slic3r does have the ability to detect these things, and might want to spin up the external cooling fan if you let it (though that's not implemented on the Ormerod, there's a whole cooling tab in Slic3r's filament settings, and options in printer settings that affect those ) - I haven't tried slicing with those options on to see if it sends codes for fan speed, but I think it should do (I'll look in the firmware and see if it can handle them - if so it's just a case of connecting an external fan to the fan output). I'm thinking of setting a desktop fan above the Ormerod and giving it a burst now and then (especially for fast infill with PLA, which tends to get ripped up on mine as the head melts it on the next pass)
Ray
Re: Replacement Fan Duct/Heatsink Duct - iamburny  February 25, 2014 03:19AM |
Registered: 10 years ago Posts: 1,230 |
Quote
dc42
Hi Matt,
....Have you any issues with bridging? Have you adjusted your print temperatures since switching to the modified duct?
Hi dc42
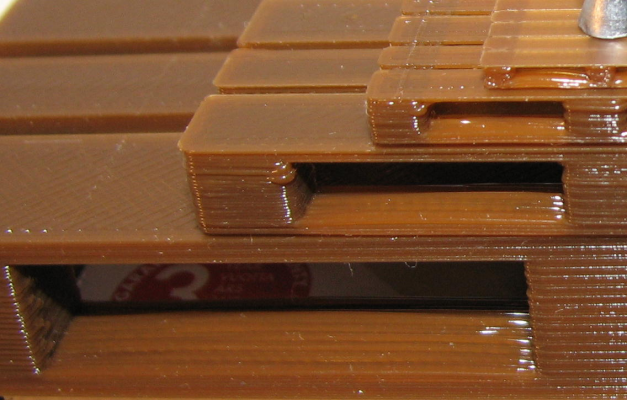
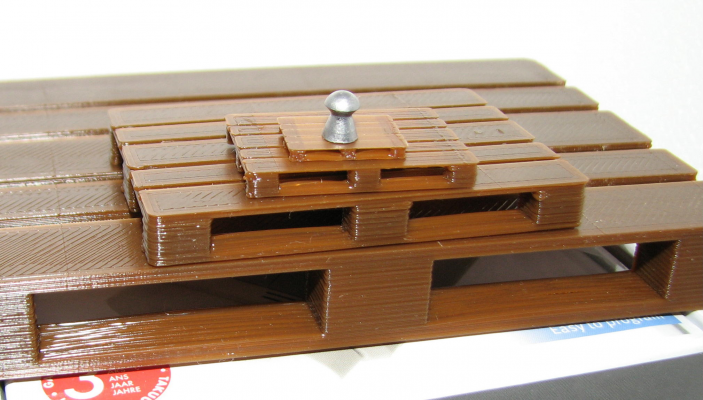
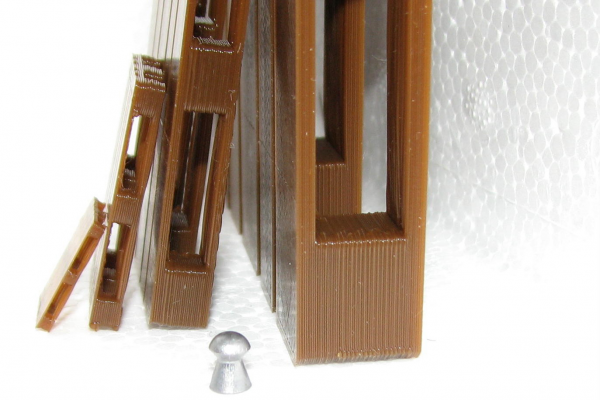
I too was worried about the change in the airflow, so after mounting Matt's new Fan Duct, I printed these pallets as a bridging torture test, was to make a post about it here (the shame), but then it kind of fizzed out in the "Printing Wood!!!" tread - I had no problem bridging with the new version - Thank You Matt!
Sliced with Your Ormerod-0.5 ini's (Thank You), smallest in layer 0.10, rest in 0.24
PLA only, have not tried anything warmer
Erik
Re: Replacement Fan Duct/Heatsink Duct - iamburny  February 25, 2014 03:27AM |
Registered: 10 years ago Posts: 14,672 |
Hi ormerod168, those look good! Were you using the temperatures in my .ini files, 195 first layer and 190 after that?
Large delta printer [miscsolutions.wordpress.com], E3D tool changer, Robotdigg SCARA printer, Crane Quad and Ormerod
Disclosure: I design Duet electronics and work on RepRapFirmware, [duet3d.com].
Large delta printer [miscsolutions.wordpress.com], E3D tool changer, Robotdigg SCARA printer, Crane Quad and Ormerod
Disclosure: I design Duet electronics and work on RepRapFirmware, [duet3d.com].
Re: Replacement Fan Duct/Heatsink Duct - iamburny  February 25, 2014 04:08AM |
Registered: 10 years ago Posts: 1,230 |
Quote
dc42
Hi ormerod168, those look good! Were you using the temperatures in my .ini files, 195 first layer and 190 after that?
Yes of cause, I dare not change your perfect settings aka if it ain't broken, don't fix it :-)
I only have problem with those settings whilst printing pointy parts where the heat seems to build up at the top, but had the same problems before the new fan duct was mounted, I then reduce the after temperature setting to 175
I would be nice if one could reduce the temperature in the higher layers only (am I missing something in slic3r here?) - or could I just edit the g-file manually?
Erik
Re: Replacement Fan Duct/Heatsink Duct - iamburny  February 25, 2014 07:28AM |
Registered: 10 years ago Posts: 2,472 |
Quote
ormerod168
Quote
dc42
Hi ormerod168, those look good! Were you using the temperatures in my .ini files, 195 first layer and 190 after that?
Yes of cause, I dare not change your perfect settings aka if it ain't broken, don't fix it :-)
I only have problem with those settings whilst printing pointy parts where the heat seems to build up at the top, but had the same problems before the new fan duct was mounted, I then reduce the after temperature setting to 175
I would be nice if one could reduce the temperature in the higher layers only (am I missing something in slic3r here?) - or could I just edit the g-file manually?
Erik
You can send temperature commands via Pronterface while the Ormerod is printing and they will take effect. To stop tall thin objects melting, include another object just as tall outside the part so the head has to move between the two, giving the plastic time to cool - you could simply add an STL of a tall column to Slic3r's "plater" window alongside the part. Or set your skirt to print full height (same number of layers as the print).
Dave
(#106)
Re: Replacement Fan Duct/Heatsink Duct - iamburny  February 25, 2014 09:28AM |
Registered: 10 years ago Posts: 578 |
Quote
rayhicks
I haven't tried slicing with those options on to see if it sends codes for fan speed, but I think it should do (I'll look in the firmware and see if it can handle them - if so it's just a case of connecting an external fan to the fan output).
I sliced in Cura with fan control this morning, hooked up a fan to the fan output and hit two snags (in increasing order of snaggishness) - Cura produces M106 S values in the range 0-255, Reprapfirmware is looking for numbers between 0.0 and 1.0 (this could be easily cured I'm sure -either by making an option in firmware to process both ranges of numbers, or by plugins in cura) - the second snag is more of an issue - it looks as though the fan control pin (34) isn't set up to do PWM. It's fully on with a value of 0-0.9 and fully off with a value of 1-128, then on for 129-I got bored
 .
.Looking at the pin mapping gives me a headache (I'm only presuming that this is where the problem lies), but hopefully RRP will fix this (or it might be the very thing that dc42 needs to fill in all of his spare time !
 ) (it might be worth it to help with bridging and printing fast layers...)
Ray
Re: Replacement Fan Duct/Heatsink Duct - iamburny  February 25, 2014 09:50AM |
Registered: 10 years ago Posts: 2,472 |
Quote
rayhicks
Quote
rayhicks
I haven't tried slicing with those options on to see if it sends codes for fan speed, but I think it should do (I'll look in the firmware and see if it can handle them - if so it's just a case of connecting an external fan to the fan output).
I sliced in Cura with fan control this morning, hooked up a fan to the fan output and hit two snags (in increasing order of snaggishness) - Cura produces M106 S values in the range 0-255, Reprapfirmware is looking for numbers between 0.0 and 1.0 (this could be easily cured I'm sure -either by making an option in firmware to process both ranges of numbers, or by plugins in cura) - the second snag is more of an issue - it looks as though the fan control pin (34) isn't set up to do PWM. It's fully on with a value of 0-0.9 and fully off with a value of 1-128, then on for 129-I got bored.
Looking at the pin mapping gives me a headache (I'm only presuming that this is where the problem lies), but hopefully RRP will fix this (or it might be the very thing that dc42 needs to fill in all of his spare time !) (it might be worth it to help with bridging and printing fast layers...)
Ray
I don't think it's a good idea to switch the fan off on the Ormerod while the extruder is hot, because it is used to cool the upper block as well as cooling the extruded plastic. Switching off the fan will allow heat to travel up to the top block, causing all sorts of problems. It would need a second fan that is used only to cool the extruded plastic. I'm guessing the fan control uses data bit 7 of the LSB of the integer value adjusted to a floor of 1 rather than 0 (byte value = input value -1). i.e. off from 1-128, on for 129-256, off for 257-384 etc in intervals of 128 (80 hex). 0 would be adjusted to -1 (bit values of all 1's).
Dave
(#106)
Re: Replacement Fan Duct/Heatsink Duct - iamburny  February 25, 2014 10:00AM |
Registered: 10 years ago Posts: 14,672 |
It looks to me that the SAM3X mcu supports PWM on that pin, but the Arduino core library doesn't. I would expect it to be fully on with a M106 parameter below 0.5, and fully off with a parameter of 0.5 or more.
Large delta printer [miscsolutions.wordpress.com], E3D tool changer, Robotdigg SCARA printer, Crane Quad and Ormerod
Disclosure: I design Duet electronics and work on RepRapFirmware, [duet3d.com].
Large delta printer [miscsolutions.wordpress.com], E3D tool changer, Robotdigg SCARA printer, Crane Quad and Ormerod
Disclosure: I design Duet electronics and work on RepRapFirmware, [duet3d.com].
Re: Replacement Fan Duct/Heatsink Duct - iamburny  February 25, 2014 10:35AM |
Registered: 10 years ago Posts: 578 |
Quote
dmould
I don't think it's a good idea to switch the fan off on the Ormerod while the extruder is hot, because it is used to cool the upper block as well as cooling the extruded plastic. Switching off the fan will allow heat to travel up to the top block, causing all sorts of problems. It would need a second fan that is used only to cool the extruded plastic.
Yes Dave - I'm talking about the provision on the board for a print cooling fan, not the extruder cooler which is just connected to 12V - the ouputs are labelled "fan0" on the board, they're just next to the extruder, and it's there as a slicer controlled fan (by inserting M106 Sxxx through out the gcode)
dc42 - shouldn't this be provided for in SamNonDuePin? I can't decipher it, but maybe there's an oversight?

Ray
Sorry, only registered users may post in this forum.
