Day 2 of using the standard IR Probe...
Posted by KimBrown
|
Day 2 of using the standard IR Probe... February 19, 2014 09:09AM |
Registered: 10 years ago Posts: 859 |
Yesterday I started using the standard IR Probe to Home the Z axis with good prints being produced.
I think it/s to early to say for sure if this is reliably repeatable, but the signs are it's ok at the moment.
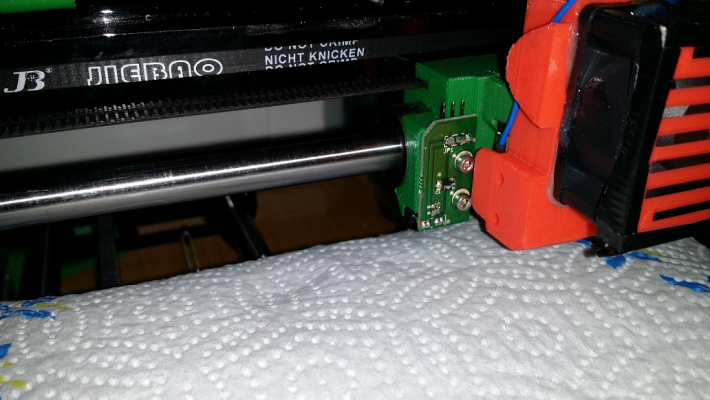
Only two things I've done, is ensured the IR emitter and sensor are facing down wards. Mine out of the packet
were bent. The other thing I've done is started to use 4mm thick Dark Red Float glass in place of the clear
glass supplied in the the kit. My thinking being, the Red glass will allow the IR light to pass.
I set the threshold in the SD card config file to G31 Z0.1 P230 which seems to be working.
When Homing the Z axis at the moment the HotEnd stops at either Zero or 0.1mm which seems to be working
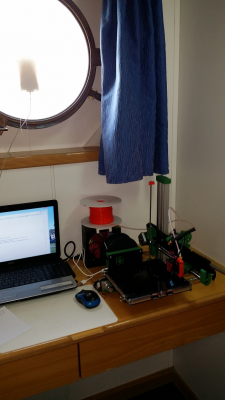
here for my printing. Here at work I've checked the IR Probe readings with the cabin light on and off, and am getting
similar readings.. I'm going to wait until I can try the printer in different environments before saying that it works for sure,
but at the moment the signs are promising. If anyone else tests this idea, then let us know how you get on with it.
Kim.....
Please send me a PM if you have suggestions, or problems with Big Blue 360.
I won't see comments in threads, as I move around to much.
Working Link to Big Blue 360 Complete
I think it/s to early to say for sure if this is reliably repeatable, but the signs are it's ok at the moment.
Only two things I've done, is ensured the IR emitter and sensor are facing down wards. Mine out of the packet
were bent. The other thing I've done is started to use 4mm thick Dark Red Float glass in place of the clear
glass supplied in the the kit. My thinking being, the Red glass will allow the IR light to pass.
I set the threshold in the SD card config file to G31 Z0.1 P230 which seems to be working.
When Homing the Z axis at the moment the HotEnd stops at either Zero or 0.1mm which seems to be working
here for my printing. Here at work I've checked the IR Probe readings with the cabin light on and off, and am getting
similar readings.. I'm going to wait until I can try the printer in different environments before saying that it works for sure,
but at the moment the signs are promising. If anyone else tests this idea, then let us know how you get on with it.
Kim.....

Please send me a PM if you have suggestions, or problems with Big Blue 360.
I won't see comments in threads, as I move around to much.
Working Link to Big Blue 360 Complete
|
Re: Day 2 of using the standard IR Probe... February 19, 2014 09:15AM |
Registered: 10 years ago Posts: 14,672 |
Is the cabin light incandescent, fluorescent, or LED?
Large delta printer [miscsolutions.wordpress.com], E3D tool changer, Robotdigg SCARA printer, Crane Quad and Ormerod
Disclosure: I design Duet electronics and work on RepRapFirmware, [duet3d.com].
Large delta printer [miscsolutions.wordpress.com], E3D tool changer, Robotdigg SCARA printer, Crane Quad and Ormerod
Disclosure: I design Duet electronics and work on RepRapFirmware, [duet3d.com].
|
Re: Day 2 of using the standard IR Probe... February 19, 2014 09:54AM |
Registered: 10 years ago Posts: 859 |
Fluorescent, but I have the printer is sat under the port hole here.... Just got to wait for a break in the Welsh
weather..... (that's not going to happen). I might have a rummage in the bin later and see if I can find some
thin black plastic to make a shade/cover for the probe as its to prone to tangling with the glass clips and my
swiss clips are on the dinning room table at home...
Getting repeatable readings (with the probe 0.1mm above glass) of 245/247 with the curtain open or closed.
It's not sunny here, over cast, but fairly bright..... In Wales it just means it's gonna rain.....lol
I still want to make a cover for the probe as one day the glass clip might short the probe out and that might kill the Duet...
I've been lucky so far...
I'll use some torches to flood the glass will incandescent light next and see what happens then....
But I'm happy with it so far..
Edited 1 time(s). Last edit at 02/19/2014 09:56AM by KimBrown.
Please send me a PM if you have suggestions, or problems with Big Blue 360.
I won't see comments in threads, as I move around to much.
Working Link to Big Blue 360 Complete
|
Re: Day 2 of using the standard IR Probe... February 19, 2014 11:14AM |
Registered: 10 years ago Posts: 9 |
|
Re: Day 2 of using the standard IR Probe... February 19, 2014 12:07PM |
Registered: 10 years ago Posts: 300 |
Hi Kim, Interesting that you set the Z probe reference point to just 0.1mm above the bed... is this to reduce the ambient coming in from the sides? I suppose if the probe can be used to shadow itself it could help. If that's the case would it help to form a jacket around it?
RS Components Reprap Ormerod No. 481
RS Components Reprap Ormerod No. 481
|
Re: Day 2 of using the standard IR Probe... February 19, 2014 11:55PM |
Registered: 10 years ago Posts: 859 |
Hi guys, yes I know IR remotes have red lens... That's why I tried the Dark Red Glass... It works a treat... There's no room for a lens under the probe without moving it. I will be making a cover for the probe tomorrow, but that's to cover up the circuit board to stop shorting out the Duet board.
@Radian I use to set the Z axis up with a 0.1mm feeler gauge (some times paper), but those days are gone for me now the probes working.
Yes I set the probe to home to 0.1mm, which as the readings from the probe do wonder by a small amount (1 unit normaly) it lets the HotHead settle at zero to 0.1mm. I can now load my print on SD, Tell the printer to home all axi, and then select print straight away. I don't have to stay near by, as it does it all automatically now, so I can get on with work or watch TV.....
Please send me a PM if you have suggestions, or problems with Big Blue 360.
I won't see comments in threads, as I move around to much.
Working Link to Big Blue 360 Complete
|
Re: Day 2 of using the standard IR Probe... February 20, 2014 03:09AM |
Registered: 10 years ago Posts: 14,672 |
I think the reason Kim is calibrating at 0.1mm and P230 is because he is not using Kapton tape or white tapes. So he is either detecting the refection from the aluminium heat spreader under the glass, or getting IR scattering from within the glass, or a weak reflection from the surface of the glass. It would be interesting to know whether putting black paper under the glass makes a difference to the sensor reading.
Large delta printer [miscsolutions.wordpress.com], E3D tool changer, Robotdigg SCARA printer, Crane Quad and Ormerod
Disclosure: I design Duet electronics and work on RepRapFirmware, [duet3d.com].
Large delta printer [miscsolutions.wordpress.com], E3D tool changer, Robotdigg SCARA printer, Crane Quad and Ormerod
Disclosure: I design Duet electronics and work on RepRapFirmware, [duet3d.com].
|
Re: Day 2 of using the standard IR Probe... February 20, 2014 05:37AM |
Registered: 10 years ago Posts: 42 |
Quote
dc42
I think the reason Kim is calibrating at 0.1mm and P230 is because he is not using Kapton tape or white tapes. So he is either detecting the refection from the aluminium heat spreader under the glass, or getting IR scattering from within the glass, or a weak reflection from the surface of the glass. It would be interesting to know whether putting black paper under the glass makes a difference to the sensor reading.
We had the same low readings when we were trying to print straight onto the glass without the tape. The readings went back up to the regin of 950 @ .1mm when we went back to using kapton tape.
|
Re: Day 2 of using the standard IR Probe... February 20, 2014 06:42AM |
Registered: 10 years ago Posts: 48 |
|
Re: Day 2 of using the standard IR Probe... February 20, 2014 07:44AM |
Registered: 10 years ago Posts: 859 |
Hi, I'm printing straight to glass as its easy after washing the glass in washing up liquid (really rub it in, rinse off
with hot water).
Once mounted I give the glass a final clean with Vinegar (as DC42 had suggested), and the print grips like mud
to a blanket....
The glass is 4mm Dark Red float glass. The probe is standard, the only thing I did before mounting was line up the two IR parts
(sender/pickup) so they were pointing down and not at 45' like they were when I got them. No tape any where.
Under the glass is the Ally spreader. I gave that a gentle clean about 3 days ago, but otherwise everything it's standard apart from Glass.
The glass cost £12 and I picked it up from my local Glass shop last time I was home but haven't got around to testing it till a couple of days ago.
I'll follow up on this post with some readings when I get a chance, at the moment we are pushing a super tanker and
vibrating like mad.
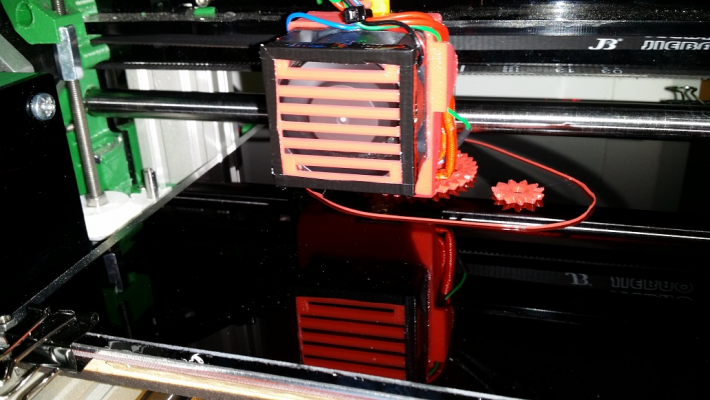
As you will see I am now using the Modified Fan housing, but I started using the IR probe on the Red glass
with the standard fan ducting.
Edited 3 time(s). Last edit at 02/20/2014 08:35AM by KimBrown.
Please send me a PM if you have suggestions, or problems with Big Blue 360.
I won't see comments in threads, as I move around to much.
Working Link to Big Blue 360 Complete
|
Re: Day 2 of using the standard IR Probe... February 20, 2014 09:15AM |
Registered: 10 years ago Posts: 859 |
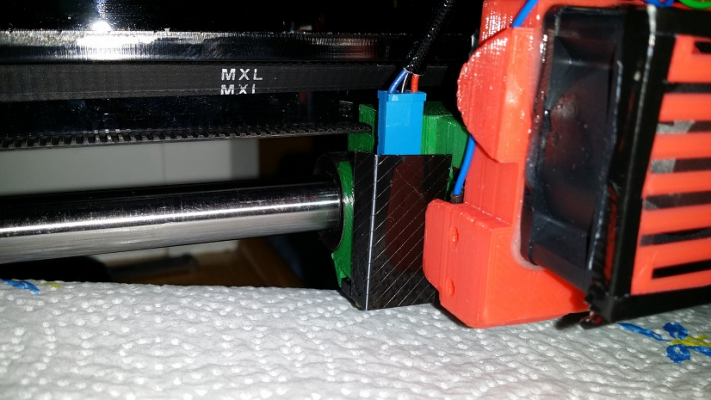
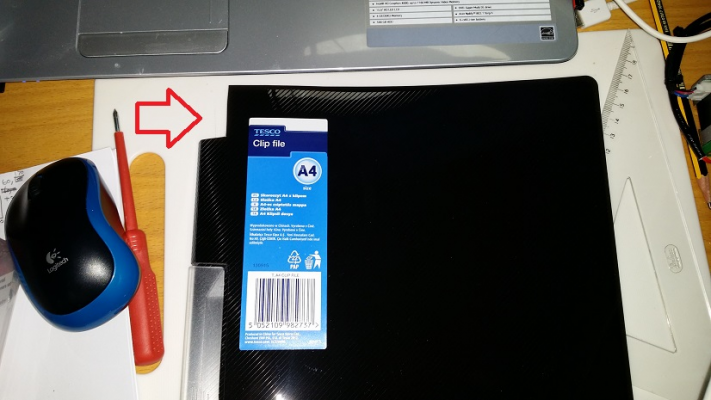
Just added a neat cover for the IR Probe...
I wonder if you can see where it came from.....
Here's a HINT......
I added this for two reasons....
1) I manage to tangle my probe on the supplied clips quite often (My replacement Swiss clips are on the Dinning room table
360 miles away.... Grrrrrrrrrrrrr!
2) Cosmetic improvement.... I think the IR board looks ugly.... Not that the rest of the printer is pretty...But....
I might add a tiny bit of gaffer tape as a shade / cover of the sensor it's self... Not that it seems to need it...
Edited 1 time(s). Last edit at 02/20/2014 09:20AM by KimBrown.
Please send me a PM if you have suggestions, or problems with Big Blue 360.
I won't see comments in threads, as I move around to much.
Working Link to Big Blue 360 Complete
I wonder if you can see where it came from.....

Here's a HINT......

I added this for two reasons....
1) I manage to tangle my probe on the supplied clips quite often (My replacement Swiss clips are on the Dinning room table
360 miles away.... Grrrrrrrrrrrrr!
2) Cosmetic improvement.... I think the IR board looks ugly.... Not that the rest of the printer is pretty...But....
I might add a tiny bit of gaffer tape as a shade / cover of the sensor it's self... Not that it seems to need it...
Edited 1 time(s). Last edit at 02/20/2014 09:20AM by KimBrown.
Please send me a PM if you have suggestions, or problems with Big Blue 360.
I won't see comments in threads, as I move around to much.
Working Link to Big Blue 360 Complete
|
Re: Day 2 of using the standard IR Probe... February 20, 2014 09:20AM |
Registered: 10 years ago Posts: 314 |
I did this some time ago with some (ancient) black "flock paper #55" bits that I had laying around from an old optics project. It is dark black and felt like to absorb light.Quote
Radian
Hi Kim, Interesting that you set the Z probe reference point to just 0.1mm above the bed... is this to reduce the ambient coming in from the sides? I suppose if the probe can be used to shadow itself it could help. If that's the case would it help to form a jacket around it?
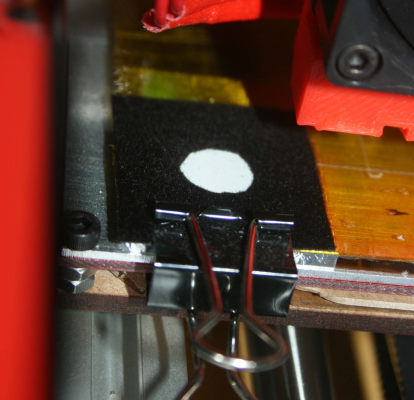
I made a crude tube to surround the sensor with a top hat type brim at the bottom.
I also played with fixed targets of white tape as a disk with a ring (washer) of this black stuff.
My logic was that the sensor had a side response sensitivity as evident by the person who printed a black sensor mount on place of the red and got better performance.
The top hat rim was to act as a shadow from light from above and the complimentary target ring was to reduce light coming from an angle which seems to be very effective with a narrow gap (tested with an incandescent torch).
My findings were that this worked exceptionally well in my environment, but I needed time to make it a proper design and test thoroughly before 'publishing' again, this hasn't happened and I now await DC42's enhanced sensor solution, but this assembly could still improve matters for those not needing to print in the corners.
Ormerod #007 (shaken but not stirred!)
|
Re: Day 2 of using the standard IR Probe... February 20, 2014 11:40AM |
Registered: 10 years ago Posts: 300 |
@KimBrown - I do like the look of your dark red glass, although it's not for the squeamish! I wonder if my other half would mind me raiding her stained glass making supplies!!! Probably not worth the risk.
@Treth - I understand what you mean about waiting before publishing. If you do get round to it though, I hope you put some photos in your topic.
RS Components Reprap Ormerod No. 481
@Treth - I understand what you mean about waiting before publishing. If you do get round to it though, I hope you put some photos in your topic.
RS Components Reprap Ormerod No. 481
|
Re: Day 2 of using the standard IR Probe... February 20, 2014 03:46PM |
Registered: 10 years ago Posts: 19 |
An hypothesis that I made a couple of weeks ago but I haven't tested yet (I preferred the quick temporary solution of the microswitch) is that dark patch as the reflector for the IR probe would work better than a light colored one.
The rationale behind this idea is that a white/mirror/light patch reflects much more IR (here I'm simplifying by assuming that IR reflection is similar to the visible light reflection) also from distant sources (thus including light coming from lamps, windows etc) while a dark one (dark also with respect to the IR spectrum) "saturates" and reflects IR only when the IR source is very close and relatively intense.
Kim's setup somewhat goes toward this direction with positive results.
Maybe this could be a step towards finding a simple way to filter out ambient IR.
I would like to test the use of IR-dark patches, but my wife needs the printer for an urgent work and I cannot put it offline.
Does anyone is willing to experiment on this?
Andrea.
|
Re: Day 2 of using the standard IR Probe... February 20, 2014 04:43PM |
Registered: 10 years ago Posts: 314 |
Quote
Radian
@Treth - I understand what you mean about waiting before publishing. If you do get round to it though, I hope you put some photos in your topic.
You prompted me to take the plunge! Unfortunately the holes for the z height sensor have become stripped/loose, so not sure how good my results will be.
Initial results for stray light (night, hence dark outside), with 3 room incandescent 60W spot lights on at the ceiling on a 180 degree arc at about 2m radius and 2m height.
Lights on 224, lights off 212.
I'll leave in this position (about 2mm nozzle height) and repeat during the day tomorrow.
Any idea what this change in G31 reading means in equivalent mm's?
That will determine whether this test is worth pursuing!
Picture has been photoshop'd to make the sensor window (hole) visible.
This has now been moved to below the glass on the aluminium heat spreader.
There can be many improvements, currently this 'floppy' light shield on the sensor clashes with the home sensor lug, but small changes to these printed parts could accommodate this design.
I am also unsure if IR is taken in by the edge of the glass and transmitted across the plate (like a light pipe), if so this will be easy to block by painting/taping up the edges.
As you can see this is a very crude setup and is 'on my list' to investigate properly, but here it is for comment. Thanks.
Ormerod #007 (shaken but not stirred!)
|
Re: Day 2 of using the standard IR Probe... February 20, 2014 05:36PM |
Registered: 10 years ago Posts: 14,672 |
Quote
aesuli
An hypothesis that I made a couple of weeks ago but I haven't tested yet (I preferred the quick temporary solution of the microswitch) is that dark patch as the reflector for the IR probe would work better than a light colored one.
The rationale behind this idea is that a white/mirror/light patch reflects much more IR (here I'm simplifying by assuming that IR reflection is similar to the visible light reflection) also from distant sources (thus including light coming from lamps, windows etc) while a dark one (dark also with respect to the IR spectrum) "saturates" and reflects IR only when the IR source is very close and relatively intense.
No, that "saturation" won't happen. Only a few materials are nonlinear in the visible or infrared spectrum, and they need very strong light (usually a laser) to exhibit appreciable nonlinearity. OTOH the following should decrease the sensitivity to ambient light:
- Putting a top hat around the sensor, to prevent ambient light from most directions from reaching the area under the sensor
- Reducing the distance above the reflecting surface at which calibration is carried out, so that the ratio of reflected IR to reflected ambient light increases, and also the sensor head itself shields the area below it from ambient light to some extent. This requires the sensitivity of the IR sensor to be reduced, so as to keep the sensor reading below 750. Kim's use of the top surface of dark red glass instead of white tape achieves that. Using coloured paper or tape that reflects IR less well would be an alternative. Another way is to reduce the 15K load resistor on the sensor board, or (easier for those who are not into SMD soldering), put another resistor in parallel with it, i.e. between the blue and black wires that connect to the sensor.
Edited 1 time(s). Last edit at 02/20/2014 05:38PM by dc42.
Large delta printer [miscsolutions.wordpress.com], E3D tool changer, Robotdigg SCARA printer, Crane Quad and Ormerod
Disclosure: I design Duet electronics and work on RepRapFirmware, [duet3d.com].
|
Re: Day 2 of using the standard IR Probe... February 20, 2014 05:54PM |
Registered: 10 years ago Posts: 578 |
hmm, well mostly, people seem to be presuming that the light from the IR LED is going to be reflected specularly by the front glass surface, and glass doesn't do this very efficiently (which is why mirrors, the latin stem of specular, have metallised film behind glass, or a metal surface) - The aluminium plate beneath the glass will (even though it's not very highly polished) give better specular reflection than the glass, and greater diffuse refelection too. The glass will give pretty good grazing reflection (as evidenced by sunlight and halogens giving problems from large angles).
Using a matt surface might well improve signal to noise (colour is a bit ambiguous, as is light and dark since materials can be opaque to the eye yet transmit or reflect IR efficiently) by a greater amount than local shading (using a top-hat or self-shading by proximity). Perhaps Kim's glass works by transmitting ambient IR more efficiently.
Ray
|
Re: Day 2 of using the standard IR Probe... February 20, 2014 07:09PM |
Registered: 10 years ago Posts: 859 |
Test 5 (I did 4 tests on this subject on another thread)
Alterations:- I've placed a sheet of plain White paper under the Dark Red Glass. Otherwise its a standard setup....
This has nearly Doubled the IR Probe reading stopping the HotEnd at 1.2mm instead of the o.1mm it would normally stop at.
When lowered to 0.1mm I'm getting constant readings in the order of 424 (+/- 1).
Test 6 (incandescent light test)
Alterations Threshold now set to 410 for the probe in the config file....
Initial test to prove repeatability without incandescent light..... All ok 100%
With a torch at about 2' away directed at the same point that the prove is viewing...
Total Failure.... Probe refused to Home....
Oh I wish I had some Black Paper to test under the glass.
This has proved that the probe is seeing through the glass !!!!!!
Please send me a PM if you have suggestions, or problems with Big Blue 360.
I won't see comments in threads, as I move around to much.
Working Link to Big Blue 360 Complete
Sorry, only registered users may post in this forum.
