Newbie Questions / Comments
Posted by RichMo
|
Newbie Questions / Comments March 11, 2014 08:40PM |
Registered: 10 years ago Posts: 7 |
Hello,
So I saw this printer on RS for just over £600 (inc VAT) which has good spec and seems straightforward enough...
After a couple of days building it I've tried to calibrate and print but so far I'm just making mess.
Maybe i'm just tired as I really was not expecting it to take so long to make (and compensate for problems with supplied parts).
Does anyone have some 'top tips' or things you wish you knew before starting?
Do I always have to take out the memory card, edit the files then put back in the machine every time i adjust some calibration? There is no way to write to the SD card over USB?
What s the web interface for? I don't see any way to upload a file to it for printing.
£600 and 2 days spent, Please convince me it wasn't wasted.
|
Re: Newbie Questions / Comments March 11, 2014 08:59PM |
Registered: 10 years ago Posts: 578 |
Richmo - first off, update your firmware to dc42's latest (you might have to update to reprappro's version 0.57a linked off the commissioning instructions first) you can find dc42's version here [github.com], once you've done that you should get iamburny's web interface (which along with dc42's firmware will allow you to transfer files easily), there's a thread here [forums.reprap.org] it's a long one but you should be able to find a link to the current download of his interface in his signature. As an aside I use a mac and find Repetier Host for the mac does a great job, letting you store gcodes as macros on the mac then run them when you need to.
Other than that, well done for doing a two day build - quite an achievement - browse through the forum and you'll see that most of us have had the odd struggle but pulled through and are producing parts we're pleased with (some of which make the Ormerod better!). Unfortunately no-one seems to be able to make subjects "sticky" here, so similar topics come up frequently, and some of them probably cover issues you're having with your first prints - come back with some pictures and you'll get a lot of opinions on what to do next (many of them probably right!) - rest assured though, you'll get a real kick when it suddenly starts pooping out magic plastic bits.
Cheers
Ray
|
Re: Newbie Questions / Comments March 11, 2014 09:03PM |
Registered: 10 years ago Posts: 2,472 |
Welcome to the community, RichMo. It is going to be worth it, but you still have a bit of a learning-curve ahead of you - but you'll get plenty of assistance here. Yes, you will be able to upload via USB or a web interface - but it requires updating the firmware and software to get a reasonable upload speed. Best to start out by removing the SD card to put print files onto it and doing a manual Z height and bed calibration before each print - it doesn't take long. Once you start seeing results your enthusiasm will increase and you'll also appreciate the issues and the solutions better. There is a "tips" and "mods" list on the forum - I'll look it up tomorrow (as it's pretty late here now), and point you to it if nobody else steps in before.
Meanwhile if you detail what problem(s) you have with what you are trying to do right now, there are probably some simple solutions that will get you ahead quickly.
I think we all went through the frustration of realising that it was not a quick "screw a few parts together and start printing" product. Those ones cost a lot more - but this one will end up printing just as well (if not better) once you've got over the hurdles.
Dave
(#106)
|
Re: Newbie Questions / Comments March 12, 2014 02:49AM |
Registered: 10 years ago Posts: 101 |
I can only agree with the two others - after one and a half month of struggling with the Ormerod. It _is_ worth the effort. While you are struggling, you learn a ton about the machine. It will help you get faster and better results in the end. Just be aware, the Ormerod is not a finishes plug and play product - then it would cost at least twice as much!
I'm not a big fan of pulling out the SD-card every time. Over time it might wear down the contacts.
Here's my procedure:
1. Use Pronterface
2. Click "load file" and chose the file. This will load it into pronterface
3. Click SD->Upload and chose a file-name. This will put the file onto the SD-card
4. Click SD->Print and choose the newly uploaded file. This will print directly from the SD card.
I have had problems with bad printing quality (as well as others) when printing directly from Pronterface - probably due to USB timing issues.
The print-bed is very flimsy - and can be hard to calibrate. I have struggled a lot, but others have had good results. Some are upgrading to a more stable bed - myself inclusive.
Right now I do a manual Z-calibration right at the center of the bed before each print. It takes less than a minute.
I use a paper and lower the nozzle until it just touches the paper. Then I type in "G92 Z0" in pronterface - and done. It's described in the manual.
This gives me a secure printing area of about 5 x 5 centimeters, which is good enough for 90% of the prints I do right now (Ormerod upgardes :-).
Let us know, if this short Z-calibration explanation is totally black talk.
Best regards,
Carsten
|
Re: Newbie Questions / Comments March 12, 2014 04:58AM |
Registered: 10 years ago Posts: 776 |
I'm a relative newbie here too, took me three days to build, another couple of days to debug, tweak and discover that it really was not plug-and -play (not that i was expecting that for this money) and I am now taking orders for laser-cut upgrade bed supports as that was identified as a major weakness in the design. I have already printed better extruder gears and am now learning OpenScad so i can design my own stuff.
Believe me, when you finally see it print something, you will forget all the issues in a flash
As for upgrading the firmware, I still have not done that as i wanted to learn the machine in its raw state first without throwing more variables into the mix, but i will be doing it soon that's for sure. The SD card pulling or uploading from Pronterface gets tiring very quickly but it works and works well.
If you are using Slic3r, make sure you have the right profiles loaded, it should say "Ormerod 0.5" in the settings boxes, I wasted a lot of time on the wrong profiles. Change the retraction to 4mm and save the changes too.
3d home printing is still pretty cutting edge stuff so a fairly bumpy ride is to be expected i think.
This forum is a great source of help too.
Another RS Ormerod Mk1 meets the world
Retired now but I used to make....
CNC Machined Mk1 aluminium bed support plates for the Ormerod
CNC machined X-plates and ribs for Mk1 & Mk2 Ormerods
CNC machined bed support arms for the Mk2 Ormerod.
Dual Hot-End heatsink blocks.
|
Re: Newbie Questions / Comments March 12, 2014 05:46AM |
Registered: 10 years ago Posts: 14,672 |
Hi RichMo, welcome to the forum. You've received lots of good advice in the earlier replies. You might also want to take a look at my unofficial troubleshooting guide here [forums.reprap.org] in case you have any of the issue listed and are looking for a fix.
Edited 1 time(s). Last edit at 03/12/2014 05:47AM by dc42.
Large delta printer [miscsolutions.wordpress.com], E3D tool changer, Robotdigg SCARA printer, Crane Quad and Ormerod
Disclosure: I design Duet electronics and work on RepRapFirmware, [duet3d.com].
Edited 1 time(s). Last edit at 03/12/2014 05:47AM by dc42.
Large delta printer [miscsolutions.wordpress.com], E3D tool changer, Robotdigg SCARA printer, Crane Quad and Ormerod
Disclosure: I design Duet electronics and work on RepRapFirmware, [duet3d.com].
|
Re: Newbie Questions / Comments March 12, 2014 11:21AM |
Registered: 10 years ago Posts: 7 |
Thanks all. I thought I had the latest firmware on it, but it seems not so I will sort that later today.
When I was looking at the thing for buying, I really thought it must be a few hours build time tops! Haha!
Haha!
Re: Calibration. Should the nozzle tip be lower than the sensor? It seems to me that it should be so the sensor still gets a reading when the tip is at the bed. My sensor seems lower than the tip as it hits the bed when zeroing Z. I'm pretty sure this is not right so will adjust and try again.
BTW: what is the cost of a more solid bed?
When I was looking at the thing for buying, I really thought it must be a few hours build time tops!
Haha!Re: Calibration. Should the nozzle tip be lower than the sensor? It seems to me that it should be so the sensor still gets a reading when the tip is at the bed. My sensor seems lower than the tip as it hits the bed when zeroing Z. I'm pretty sure this is not right so will adjust and try again.
BTW: what is the cost of a more solid bed?
|
Re: Newbie Questions / Comments March 12, 2014 12:01PM |
Registered: 10 years ago Posts: 14,672 |
Yes, the nozzle should be about 1mm to 2mm lower than the sensor, and about the same amount lower than the bottom of the fan duct. Check that your print head is level and adjust the x-runner bearing position if necessary.
There are a number of threads that discuss a more solid bed support, the latest is this one [forums.reprap.org].
Large delta printer [miscsolutions.wordpress.com], E3D tool changer, Robotdigg SCARA printer, Crane Quad and Ormerod
Disclosure: I design Duet electronics and work on RepRapFirmware, [duet3d.com].
|
Re: Newbie Questions / Comments March 12, 2014 12:02PM |
Registered: 10 years ago Posts: 1,230 |
Quote
RichMo
Thanks all. I thought I had the latest firmware on it, but it seems not so I will sort that later today.
Welcome!

Latest firmware here, click Raw to download
[github.com]
With Bossac.exe and bin file in same directory, String for flashing:
bossac --port=COM(...) -U true -e -w -v -b RepRapFirmware-057t-dc42.bin -R
Edit:COM port number will vary of cause
Quote
When I was looking at the thing for buying, I really thought it must be a few hours build time tops!
LOL!
Quote
Re: Calibration. Should the nozzle tip be lower than the sensor? It seems to me that it should be so the sensor still gets a reading when the tip is at the bed. My sensor seems lower than the tip as it hits the bed when zeroing Z. I'm pretty sure this is not right so will adjust and try again.
Yes it should be a couple of mm lower - is your hot end assembly sagging?, if so adjust the supporting bearing running along the x-axis, I changed mine for a 10mm but it should not be necessary, if that won't do it you could make a extra spacer to put under the MDF heat insulator
..and make sure the X-axis plate is straight and the screw at the end of it is properly tightened, you don't want the axis to move as the hotend hangs from its side and a any twisting movement will change you nozzle hight
Quote
BTW: what is the cost of a more solid bed?
A very cheap fix is to move the heat spreader down as support for the bed, you will only need to drill one hole for the temp. probe, this is what I did to get printing, the two corners near the extrusion is now stable, I have now only one spring loaded adjusting point at the front, the bed will change position a bit when you struggle to remove a print as the bed still rests on the front bearing through the plywood rib, BTW be sure to fix the rib to the bearing with a plastic strip
Sagging MDF, the Q & D fix that anyone can do
[forums.reprap.org]
Erik
Edited 1 time(s). Last edit at 03/12/2014 12:05PM by ormerod168.
|
Re: Newbie Questions / Comments March 12, 2014 02:05PM |
Registered: 10 years ago Posts: 7 |
|
Re: Newbie Questions / Comments March 12, 2014 02:34PM |
Registered: 10 years ago Posts: 1,230 |
Quote
RichMo
Quote
With Bossac.exe and bin file in same directory, String for flashing:
bossac --port=COM(...) -U true -e -w -v -b RepRapFirmware-057t-dc42.bin -R
Where do I get Bossac...
You will find it in your arduino folder:
....\Arduino IDE 1.5.5\hardware\tools\bossac.exe
Quote
...and where do I type that string?
Copy the string to memory
with bossac.exe and RepRapFirmware-057t-dc42.bin in the same directory,
open a command prompt (CMD),
right click, paste, press enter
..and remember to look up (win device manager) and insert the right com port in the string, it might change between the erase and flashing, mine do (COM10->COM9)
Erik
|
Re: Newbie Questions / Comments March 12, 2014 02:46PM |
Registered: 10 years ago Posts: 1,230 |
Quote
RichMo
... and where do I type that string?
Hey...Kev made a batch file for that, maybe easier for you, here it is:
[forums.reprap.org]
Erik
|
Re: Newbie Questions / Comments March 12, 2014 06:18PM |
Registered: 10 years ago Posts: 7 |
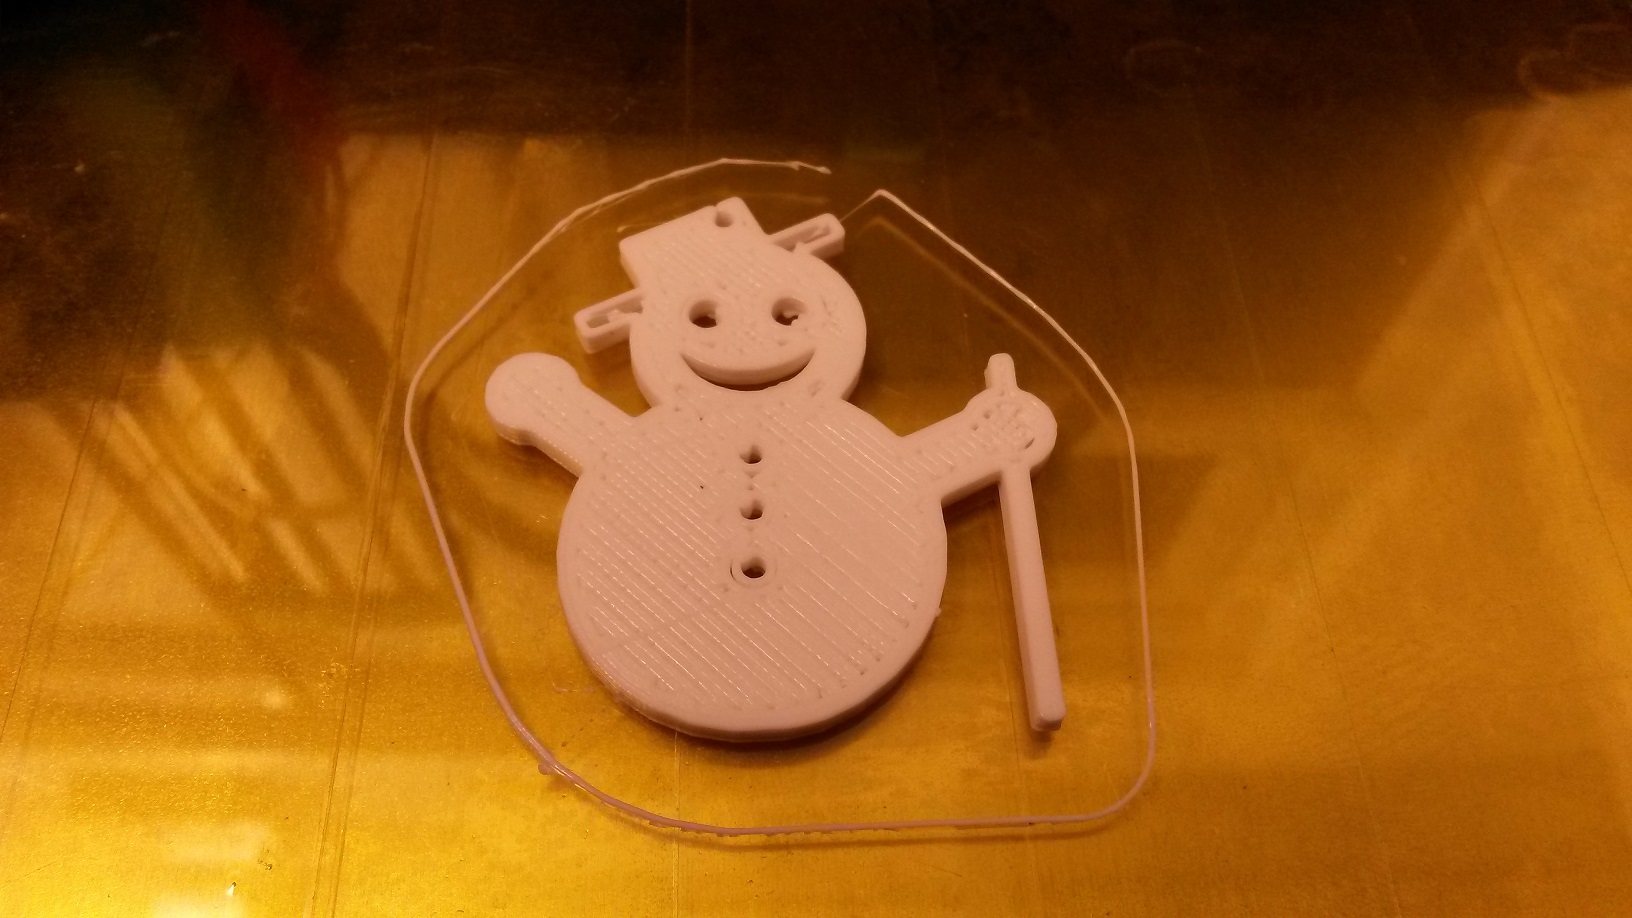
Thanks everyone! I made the snowman, yay!
Adjusted the tip a little lower then calibrated it. Updated the firmware and web interface which is much nicer to use.
I feel much happier with it now and look forward to printing something interesting. Thanks again!
Adjusted the tip a little lower then calibrated it. Updated the firmware and web interface which is much nicer to use.
I feel much happier with it now and look forward to printing something interesting. Thanks again!
|
Re: Newbie Questions / Comments March 13, 2014 05:46AM |
Registered: 10 years ago Posts: 1,230 |
..and a very fine snowman it is! - congrats!
lots of printing ideas found here:
[www.thingiverse.com]
some tips for slicing with slic3r, I don't know much but share it gladly
uncheck "avoid crossing perimeters" in slic3r or it will take ages to slice
make sure slic3r finish slicing the file before printing, not alway obvious when using pronterface as frontend, if in doubt open the file in a file viewer, there should be a "park the machine", "stop", filament used" or something like that in the end of the file
You can also check the slicing visually e.g. drag and drow the file on the site [gcode.ws]
nozzle hight is important, the print expect your z-zero as the nozzle touching the bed, every measure over zero will be added to the first layer
on the other hand, if you zero to low e.g. at -0.24, first layer at 0.24 will make the nozzle touch the bed and block the flow of the filament and you will then hear a knocking sound from the filament step motor
step motor current is default config.g on you SD-card: M906 X800 Y800 Z800 E800
I change mine to this: M906 X800 Y1000 Z800 E1200 (raised Y a to get more power for faster print and moving more weight, raised E (filament) a bit for stable supply af filament at lower temperatures)
Erik
|
Re: Newbie Questions / Comments March 13, 2014 09:14AM |
Registered: 10 years ago Posts: 2,472 |
Quote
RichMo
Thanks everyone! I made the snowman, yay!
Adjusted the tip a little lower then calibrated it. Updated the firmware and web interface which is much nicer to use.
I feel much happier with it now and look forward to printing something interesting. Thanks again!
Hey, that is a really excellent first print - considerably better than my first print back in December. You'll probably be doing lots more work and many modifications to the machine over the coming months (years?), but for me it was no longer frustrating after I was getting prints out and (usually) seeing the improvements after every change I made to the machine. Maybe browse through the threads on this forum to get an idea of the modifications others have done - it's a good way to pass the time while you are waiting for a print to finish!
Dave
(#106)
|
Re: Newbie Questions / Comments March 13, 2014 10:32AM |
Registered: 10 years ago Posts: 7 |
I'm really looking forward to making things like gears and mountings for robotics projects! I have another newbie question though.....
Is there a jumper I need to set to make the thing run without USB power?
It works fine on the network as long as USB is plugged in too. Without USB, It does nothing but spin the fan.
I see this note in the instructions, but mine is a brand new green one. What am I missing?
Is there a jumper I need to set to make the thing run without USB power?
It works fine on the network as long as USB is plugged in too. Without USB, It does nothing but spin the fan.
Quote
NOTE: The first 220 Ormerod (red plastics) printers supplied by RS Components need the USB lead to be connected at all times, to supply the logic side of the board with 5V.
I see this note in the instructions, but mine is a brand new green one. What am I missing?
|
Re: Newbie Questions / Comments March 13, 2014 10:37AM |
Registered: 10 years ago Posts: 14,672 |
Quote
RichMo
I see this note in the instructions, but mine is a brand new green one. What am I missing?
You need a jumper across JP9 on the Duet board to run from 12V power only.
Large delta printer [miscsolutions.wordpress.com], E3D tool changer, Robotdigg SCARA printer, Crane Quad and Ormerod
Disclosure: I design Duet electronics and work on RepRapFirmware, [duet3d.com].
|
Re: Newbie Questions / Comments March 19, 2014 05:50AM |
Registered: 10 years ago Posts: 7 |
Did I miss a mention of the jumper in the instructions? doh!
Anyway I designed and printed my first file (see attached). It came out OK, but quite rough. I think I probably need to calibrate slic3r because the provided print for calibrating the axis came out perfectly.
Is there some spec for the max speed, and min layer size somewhere? Like how many mm/s can it realistically print at, and what is the actual max speed the motors will go? If adjusting the print speed, will the feed rate of the filament automatically be adjusted to compensate?
|
Re: Newbie Questions / Comments March 19, 2014 07:22AM |
Registered: 10 years ago Posts: 275 |
Quote
RichMo
Did I miss a mention of the jumper in the instructions? doh!
Anyway I designed and printed my first file (see attached). It came out OK, but quite rough. I think I probably need to calibrate slic3r because the provided print for calibrating the axis came out perfectly.
Is there some spec for the max speed, and min layer size somewhere? Like how many mm/s can it realistically print at, and what is the actual max speed the motors will go? If adjusting the print speed, will the feed rate of the filament automatically be adjusted to compensate?
looking at the picture I have just a suggestion ...

perfectly clean all the printer and load a filament clean and uncontaminated
Dario
|
Re: Newbie Questions / Comments March 21, 2014 01:10PM |
Registered: 10 years ago Posts: 2,472 |
Quote
RichMo
Did I miss a mention of the jumper in the instructions? doh!
Anyway I designed and printed my first file (see attached). It came out OK, but quite rough. I think I probably need to calibrate slic3r because the provided print for calibrating the axis came out perfectly.
Is there some spec for the max speed, and min layer size somewhere? Like how many mm/s can it realistically print at, and what is the actual max speed the motors will go? If adjusting the print speed, will the feed rate of the filament automatically be adjusted to compensate?
The stringing is probably fixed by increasing the retraction length in Slic3r (printer settings / extruder 1). Default is 1mm which is too small - increase to 4mm. The maximum speed I can manage is 70mm/s for printing moves. Any faster than that and it cannot extrude fast enough so the extruder starts slipping. Increase all your stepper currents in config.g to 1000 (you can go higher if you dare - check the motors don't get too hot). Theoretically there is no practical maximum for non-printing moves - a higher speed does not cause the motors or belts to slip, only increased acceleration. I use 150mm/s for non-printing moves.
Also set slic3r to do 3 loops (or more) in the skirt (print settings) - this is only to ensure that the plastic starts flowing properly before it starts printing the part - and it gives you time to pause the print and adjust the Z height if you started with the nozzle too close or too far from the bed without needing to abort and start again.
Note that in order to increase your print speed you *must* use dc42's firmware, and you also need to send the G code to set the printer's max speed higher - put it in the start G code in sic3r (under printer settings). My start code is:
G21 ; set units to millimeters
M203 X6000 Y6000 Z240 E3000 ; Allow 100mm/s speeds
G90 ; use absolute coordinates
M83 ; use relative distances for extrusion
G1 Z5 F200 ; lift nozzle
G1 X2 Y50 F2000; Go to wait for warm position
M140 S[first_layer_bed_temperature] ; Set bed heater
M116 ; Wait for everything (Bed temp)
T0; Select extruder
M104 S[first_layer_temperature]
M116; Wait for extruder temp as well
Copy & paste the above verbatim (including the terms in square brackets)
Note that slic3r does not use any changes you have made until you have saved them. Best to close slic3r after making any changes, then re-open and check your changes are still there. For some reason they don't always "take".
Yes, feed rate is automatically adjusted, and you should be able to print with a layer height of 0.1mm or even less - but such layer height takes a long time to print!
Happy printing!
Dave
(#106)
Edited 2 time(s). Last edit at 03/21/2014 01:16PM by dmould.
|
Re: Newbie Questions / Comments March 21, 2014 06:12PM |
Registered: 10 years ago Posts: 31 |
Quote
dmould
Also set slic3r to do 3 loops (or more) in the skirt (print settings) - this is only to ensure that the plastic starts flowing properly before it starts printing the part - and it gives you time to pause the print and adjust the Z height if you started with the nozzle too close or too far from the bed without needing to abort and start again.
It may be better to set loops to 1 and alter the 'Minimum extrusion length' parameter to generate extra loops for items with a smaller footprint rather than waste filament on three loops for a print with a large footprint.

The tooltip text could be slightly misleading, it does not refer to the entire bottom layer extrusion length but the bottom layer of skirt.
Kev.
|
Re: Newbie Questions / Comments March 22, 2014 09:51AM |
Registered: 10 years ago Posts: 46 |
Just a warning regarding USB jumper
I have a RS Ormerod when jumper installed to power the board of the PSU everything appeared to be working properly bt I would get occasional inconsistencies (in prints, interface behavior, among other things) I would never have made the conclusion that it was coursed by irregular power-source (but wiser men than I on this forum advised me), and now I am powering the Duet from a powered USB hub, and this helped on multiple problems I newer would have thought related (and let me turn of the PSU overnight for safety or momentary for the noise without taking power from the board, thus leaving the calibration intact)
I have a RS Ormerod when jumper installed to power the board of the PSU everything appeared to be working properly bt I would get occasional inconsistencies (in prints, interface behavior, among other things) I would never have made the conclusion that it was coursed by irregular power-source (but wiser men than I on this forum advised me), and now I am powering the Duet from a powered USB hub, and this helped on multiple problems I newer would have thought related (and let me turn of the PSU overnight for safety or momentary for the noise without taking power from the board, thus leaving the calibration intact)
|
Re: Newbie Questions / Comments March 22, 2014 11:08AM |
Registered: 10 years ago Posts: 14,672 |
I normally run my Ormerod just from the ATX PSU, however I've installed a 470uF capacitor in parallel with C3 on the Duet board to increase the tolerance to mains brownouts. This is because in the event of a brownout, the 12V output from the PSU will drop very rapidly if the bed heater is on. I would have preferred to use 1000uF but I didn't have one small enough to fit in the space.
Some other users have added wires to supply 5V to the Duet board from the ATX power board. This should also help improve the tolerance to brownouts.
Large delta printer [miscsolutions.wordpress.com], E3D tool changer, Robotdigg SCARA printer, Crane Quad and Ormerod
Disclosure: I design Duet electronics and work on RepRapFirmware, [duet3d.com].
|
Re: Newbie Questions / Comments March 28, 2014 08:15AM |
Registered: 10 years ago Posts: 7 |
Thanks for the tips. I have had a go at increasing the speed and it seemed to work well for a bit, but now the nozzle keeps blocking up part way through a print. It still does it even when reducing the speed again. Has altering speeds done this or is that coincidence?
I can unblock it when the end is hot by just pushing the filament through by hand and it seems to work ok again for a while.
I can unblock it when the end is hot by just pushing the filament through by hand and it seems to work ok again for a while.
Sorry, only registered users may post in this forum.