How to correct Y-axis twist
Posted by bitfield
|
How to correct Y-axis twist January 06, 2017 11:07AM |
Registered: 9 years ago Posts: 88 |
I have a typical case of a twisted Y-axis.
However, I'm not entirely sure how to fix it. Is there a good sum up somewhere? I'v read that I should loosen the screws that attaches the end parts to the printed parts. I tried that but don't feel it allows for much movement. Perhaps I'm just doing it wrong? I've only tried the non-motor end. Perhaps I should give the other end a try? That needs some more effort though since I have to remove the Y-axis motor (unless I can attack it from the nut side and loosen it).
There's also supposed to be modified printed parts that aids in this. I found this thread [1], but it's for Ormerod 2 (I have Mk1) and the thread ends with a promise of an update for Mk1 soon.
[1] [forums.reprap.org]
|
Re: How to correct Y-axis twist January 06, 2017 11:54AM |
Registered: 9 years ago Posts: 88 |
Maybe I should give this a try? The Dropbox links gives 404 though.
[forums.reprap.org]
Edited 1 time(s). Last edit at 01/06/2017 12:00PM by bitfield.
[forums.reprap.org]
Edited 1 time(s). Last edit at 01/06/2017 12:00PM by bitfield.
|
Re: How to correct Y-axis twist January 06, 2017 05:05PM |
Registered: 10 years ago Posts: 14,672 |
Quote
bitfield
Maybe I should give this a try? The Dropbox links gives 404 though.
[forums.reprap.org]
Try sending the author of that post a PM.
Large delta printer [miscsolutions.wordpress.com], E3D tool changer, Robotdigg SCARA printer, Crane Quad and Ormerod
Disclosure: I design Duet electronics and work on RepRapFirmware, [duet3d.com].
|
Re: How to correct Y-axis twist January 09, 2017 06:15AM |
Registered: 9 years ago Posts: 176 |
I designed a small piece that clips on to the Y axis rods from underneath and reaches down to the bottom of the printer. I printed 2 of them on high quality, then compared them to ensure they were identical. I made sure the board under the printer was flat and not warped itself then clipped the pieces on either side of the axis. I could then clearly see the axis twist. I loosened the two large screws into the ally extrusion and the small screw into the T-nut on the Y210 side of the extrusion (far side) and just "massaged" the acrylic and plastic printed part until the axis rods were at the same height above the board. I then re-tightened the screws carefully, making sure that the twist didn't return while tightening.
If the twist is on the motor side, you would need to remove the motor and belt to get to the screws.
NB note:
It's worth getting large washers for the end screws because overtightening them into the printed part will result in your part splitting!
[edit] Uploaded STL to Thingiverse: [www.thingiverse.com]
Good luck
Edited 2 time(s). Last edit at 01/09/2017 07:25AM by VortyZA.
|
Re: How to correct Y-axis twist January 09, 2017 07:39AM |
Registered: 10 years ago Posts: 2,472 |
Quote
VortyZA
If the twist is on the motor side, you would need to remove the motor and belt to get to the screws.
It doesn't matter which side the misalignment is, it can always be corrected by twisting the non-motor side only. The goal is to get the Y rods exactly parallel, you can then raise or lower the front of the bed to get it level.
Dave
|
Re: How to correct Y-axis twist January 09, 2017 09:06AM |
Registered: 9 years ago Posts: 191 |

|
Re: How to correct Y-axis twist January 09, 2017 03:14PM |
Registered: 9 years ago Posts: 88 |
|
Re: How to correct Y-axis twist January 10, 2017 01:57AM |
Registered: 10 years ago Posts: 1,230 |
|
Re: How to correct Y-axis twist January 10, 2017 02:08AM |
Registered: 9 years ago Posts: 191 |
What ever solution you choose I would recommend clamping the printer down to a board. I have done that in combination with my solution above and had consistent results since then. My and other solutions primary function is to help in remove the twist, not keeping it straight.
Edited 1 time(s). Last edit at 01/10/2017 02:12AM by fotomas.
Edited 1 time(s). Last edit at 01/10/2017 02:12AM by fotomas.
|
Re: How to correct Y-axis twist January 10, 2017 11:09AM |
Registered: 9 years ago Posts: 88 |
|
Re: How to correct Y-axis twist January 10, 2017 11:57AM |
Registered: 9 years ago Posts: 638 |
|
Re: How to correct Y-axis twist January 11, 2017 01:45AM |
Registered: 9 years ago Posts: 176 |
Quote
dmould
Quote
VortyZA
If the twist is on the motor side, you would need to remove the motor and belt to get to the screws.
It doesn't matter which side the misalignment is, it can always be corrected by twisting the non-motor side only. The goal is to get the Y rods exactly parallel, you can then raise or lower the front of the bed to get it level.
Dave
I agree, it was poorly worded - the twist would be across the whole length, but there isn't a hang of a lot of "twist" room with only one side moving, so in extreme cases it might be necessary.
|
Re: How to correct Y-axis twist January 11, 2017 01:50AM |
Registered: 9 years ago Posts: 176 |
|
Re: How to correct Y-axis twist January 11, 2017 02:11AM |
Registered: 9 years ago Posts: 191 |
Quote
VortyZA
Quote
Darathy
Dont think its a mirror ,the distance betweetn rods is slightly different i think.
It's not unfortunately a mirror. The Ormerod 1 is 80mm horizontally, 12 vertically between the centers of the rods, while the Ormerod 2 is 78mm horizontally (measured from the DXF files)
For my design the distance between the rods is irrelevant. It is the distance from the extrusion to the first rod and from the extrusion to the belt that matters.
|
Re: How to correct Y-axis twist January 27, 2017 01:22AM |
Registered: 9 years ago Posts: 10 |
Appjaws' design for the Ormerod 1 (linked above) is now available on Thingiverse.
Edited 1 time(s). Last edit at 01/27/2017 01:23AM by aniron.
Edited 1 time(s). Last edit at 01/27/2017 01:23AM by aniron.
|
Re: How to correct Y-axis twist January 27, 2017 07:20AM |
Registered: 10 years ago Posts: 2,472 |
That looks great, although I noticed that the "Y idler adjustment ring" is not included. This is just a thumb wheel to fit the bolt head, so is easy enough to design.
Dave
|
Re: How to correct Y-axis twist January 27, 2017 07:27AM |
Registered: 10 years ago Posts: 2,472 |
Hmmm - on second examination, I see that Appjaws' design on Thingiverse is completely different to his design in the forum (link) There does not appear to be any diagram of how the Thingiverse design fits onto the Ormerod, but I expect it will be easy to figure out.
Dave
Edited 1 time(s). Last edit at 01/27/2017 07:28AM by dmould.
Dave
Edited 1 time(s). Last edit at 01/27/2017 07:28AM by dmould.
|
Re: How to correct Y-axis twist February 01, 2017 11:54AM |
Registered: 10 years ago Posts: 780 |
Hi,
I am posting a picture on Thingiverse showing the modification to my ormerod 1.
sorry it's a bit dark, will try and post a better photo in the future
appjaws - Core XYUV Duet Ethernet Duex5
firmware 3.1.1 Web Interface 3.1.1
Ormerod 1-converted to laser engraver, Duet wifi
OpenSCAD version 2020.07
slic3r-1.3.0, Simplify3D 4.1.2, Cura-4.4.1
I am posting a picture on Thingiverse showing the modification to my ormerod 1.

sorry it's a bit dark, will try and post a better photo in the future
appjaws - Core XYUV Duet Ethernet Duex5
firmware 3.1.1 Web Interface 3.1.1
Ormerod 1-converted to laser engraver, Duet wifi
OpenSCAD version 2020.07
slic3r-1.3.0, Simplify3D 4.1.2, Cura-4.4.1
|
Re: How to correct Y-axis twist February 08, 2017 01:07PM |
Registered: 7 years ago Posts: 28 |
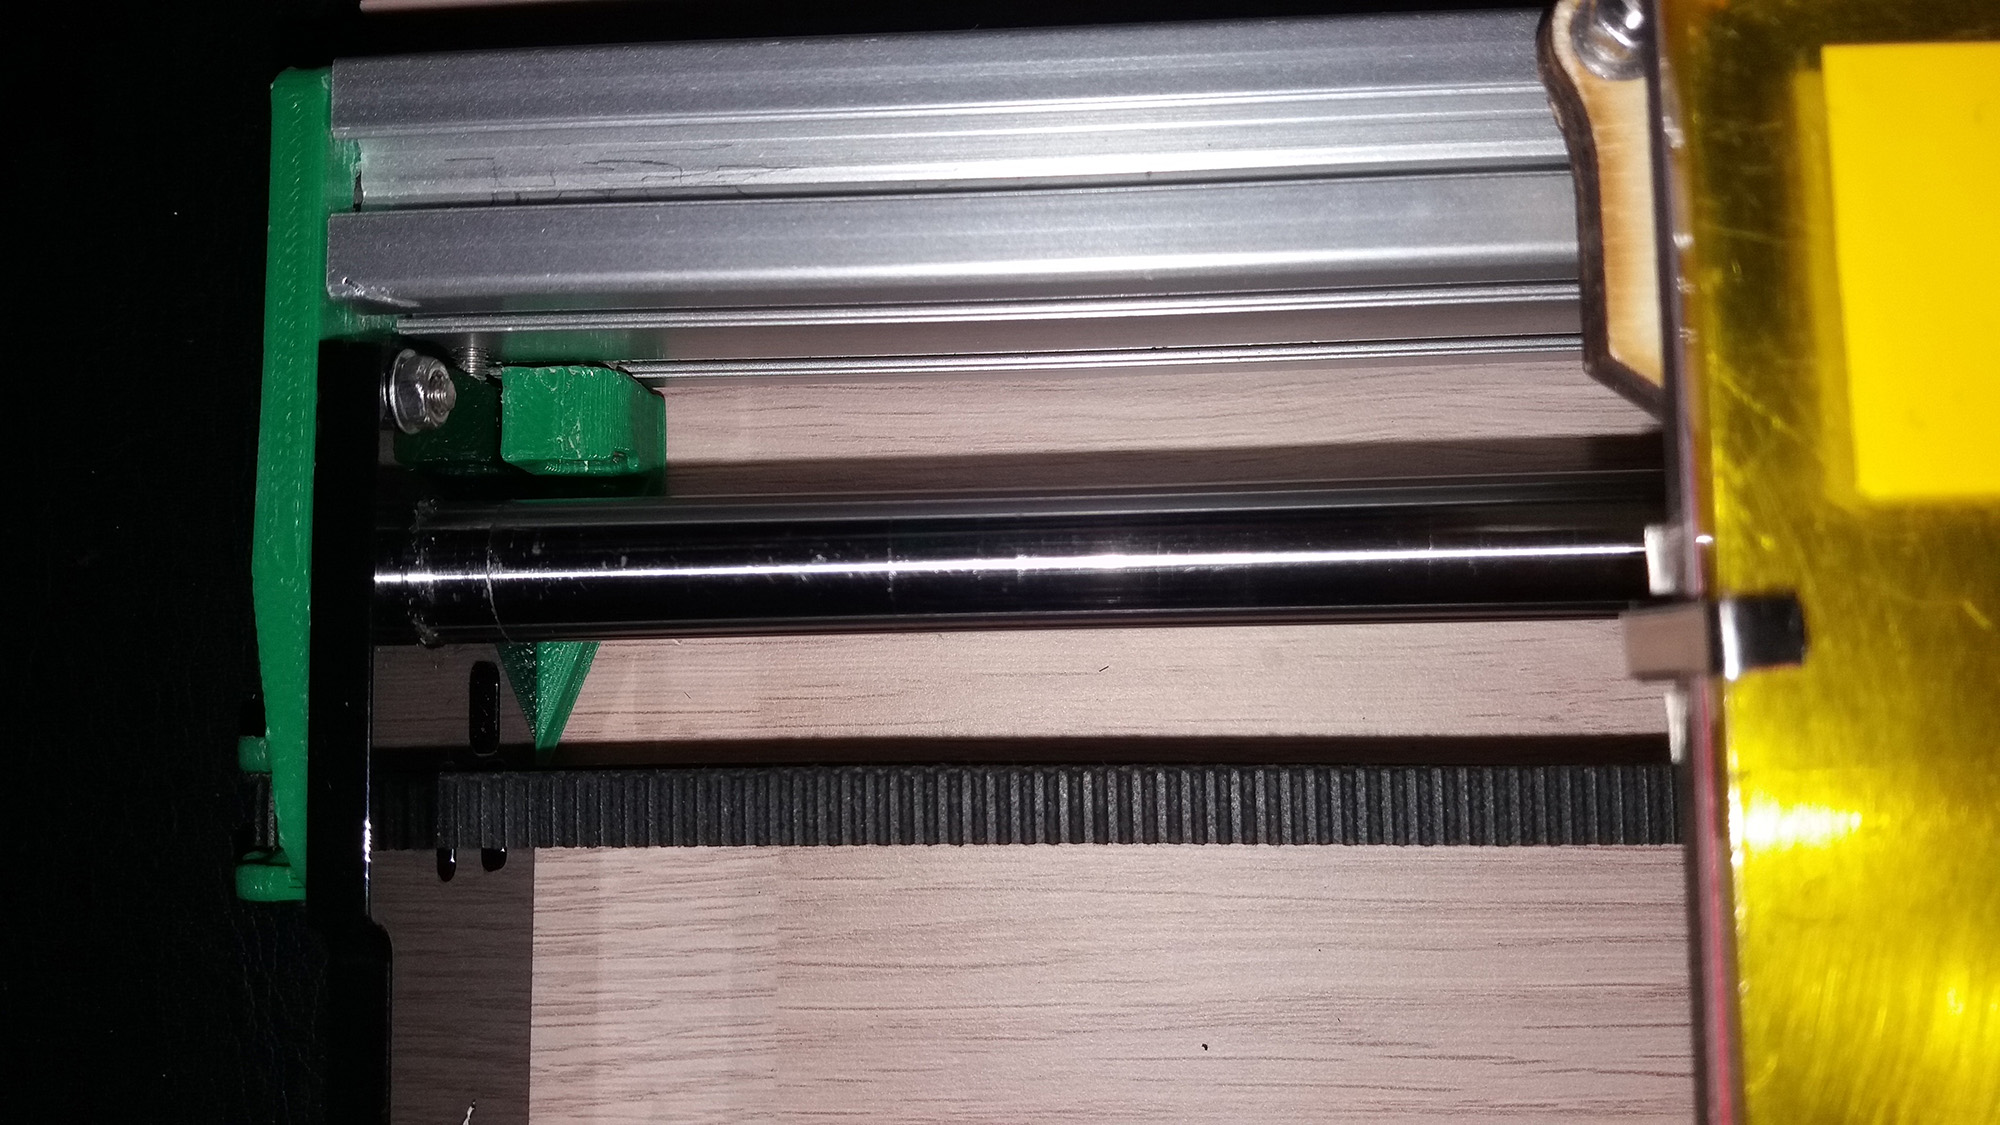
I have seen some different solutions on this forum regarding to fix Y-axes twist ,a common Ormerod problem and they all seems to be good. Here is my solution:
1. First grind away about 1,5 mm of the inner edge of the Y-axes end plate on the non motor side. This to give a space between the Aluminium extrusion and the end plate.
2 Grind the upper hole for the screw between the aluminium extrusion and the Idler bracket oblong.
3 Grind away about 1 mm of the Idler bracket on the surface where the screw in the bottom is connected to the Aluminium extrusion in 90 degrees angle.
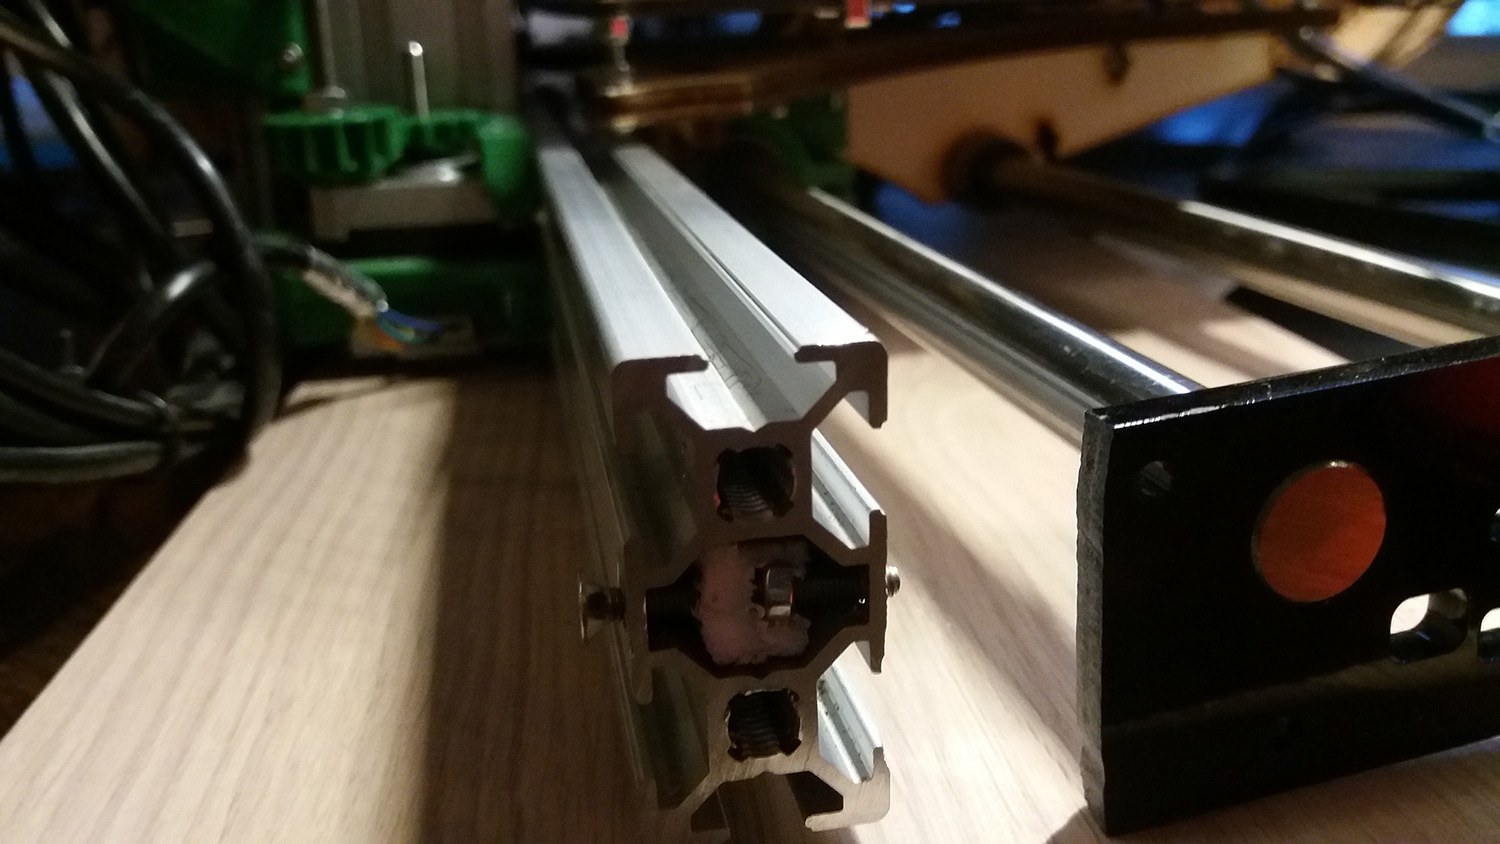
4 Drill a hole though the Aluminimm extrusion ( see attached picture) and put a screw through it and a nut inside. This is the adjustment scew for the height of the two
Rods so they align paralell to eachother.
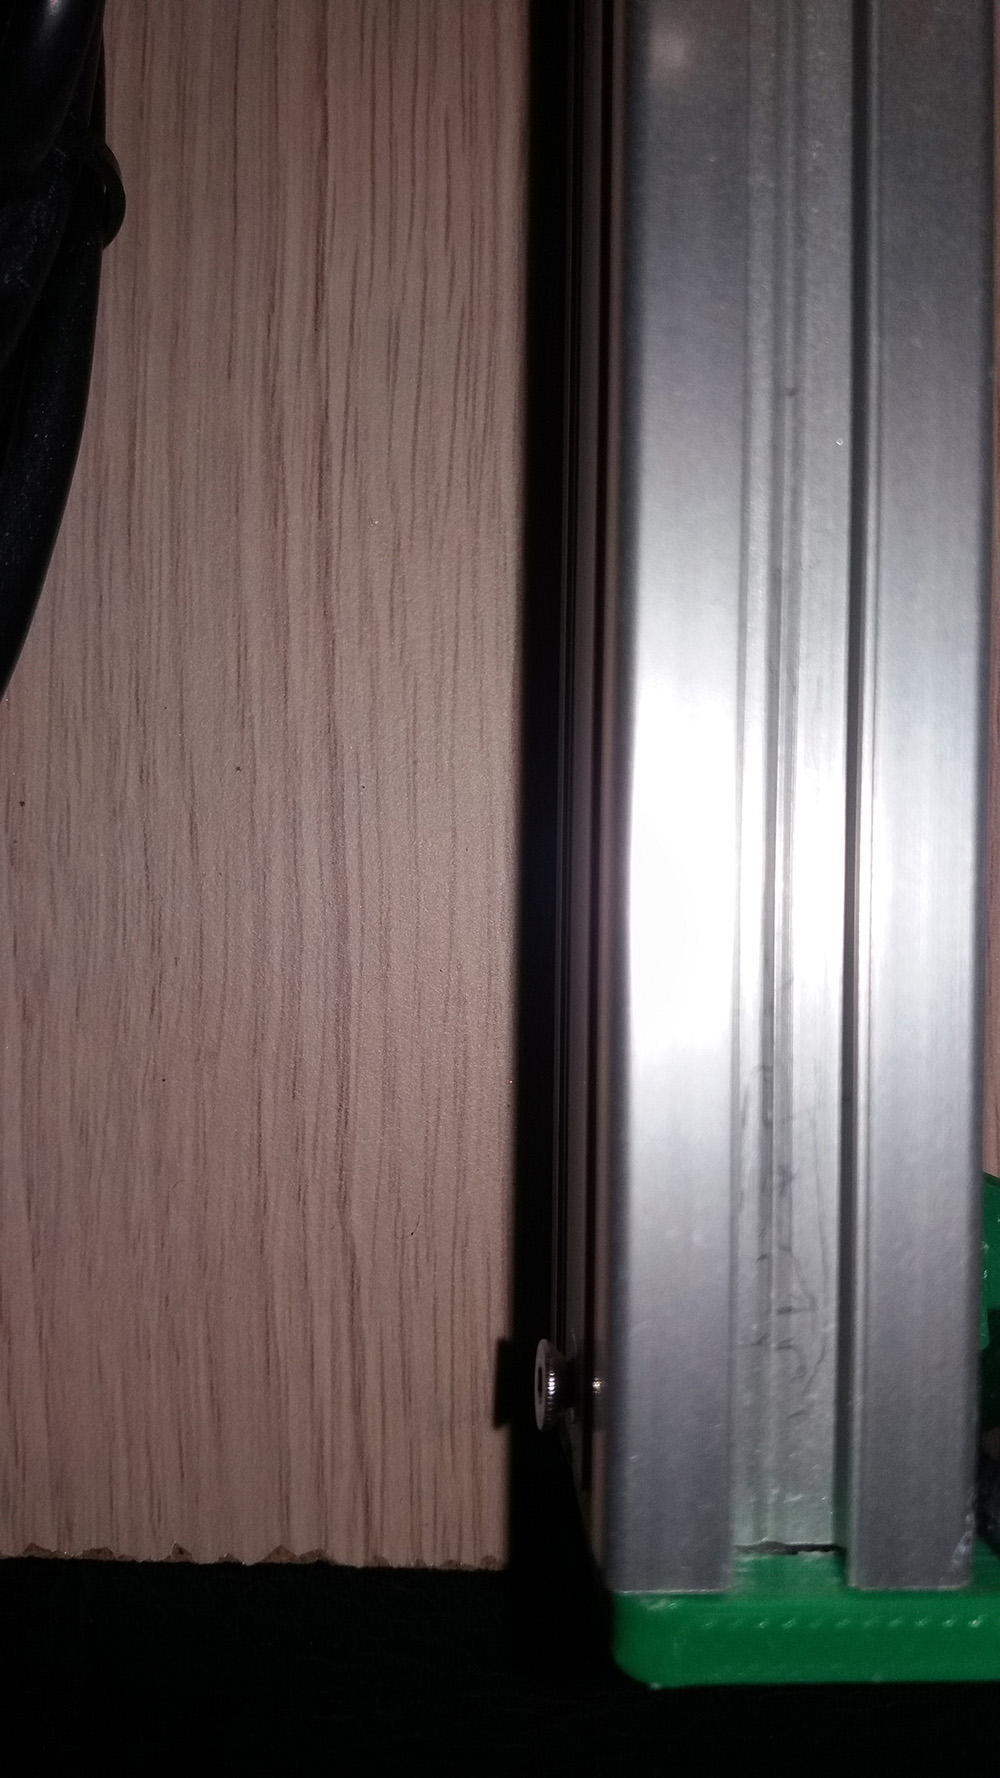
5 I found it easy to align the two rods so they were absolutely paralell after this by adjusting whith the screw. See my attached picture whith the ruler. I just measure the
length to the end of the ruler where it hits the table on both sides, they should of course be equal. I will also check this whith the new firmware by DC42 but first i must do
some other adjustments on my Ormerod. I have a problem whith the holder of the Y stepper motor as the scew hole on the backside cracks when I adjust the tension of the
Y-drive-belt, the printed part is to weak, any ideas to fix this?
I hope my solution of the y-axes twist is understandable and will help som other Ormerod owner who has had the same problem. It is difficult for me to explain as I am Swedish,
so english are just my second language. Check my attached pictures for more understanding.
Lasse
1. First grind away about 1,5 mm of the inner edge of the Y-axes end plate on the non motor side. This to give a space between the Aluminium extrusion and the end plate.
2 Grind the upper hole for the screw between the aluminium extrusion and the Idler bracket oblong.
3 Grind away about 1 mm of the Idler bracket on the surface where the screw in the bottom is connected to the Aluminium extrusion in 90 degrees angle.
4 Drill a hole though the Aluminimm extrusion ( see attached picture) and put a screw through it and a nut inside. This is the adjustment scew for the height of the two
Rods so they align paralell to eachother.
5 I found it easy to align the two rods so they were absolutely paralell after this by adjusting whith the screw. See my attached picture whith the ruler. I just measure the
length to the end of the ruler where it hits the table on both sides, they should of course be equal. I will also check this whith the new firmware by DC42 but first i must do
some other adjustments on my Ormerod. I have a problem whith the holder of the Y stepper motor as the scew hole on the backside cracks when I adjust the tension of the
Y-drive-belt, the printed part is to weak, any ideas to fix this?
I hope my solution of the y-axes twist is understandable and will help som other Ormerod owner who has had the same problem. It is difficult for me to explain as I am Swedish,
so english are just my second language. Check my attached pictures for more understanding.
Lasse
Sorry, only registered users may post in this forum.