Ormerod FreeCAD Rework & My Ormerod Itteration
Posted by WesBrooks
|
Ormerod FreeCAD Rework & My Ormerod Itteration November 21, 2018 05:07AM |
Registered: 9 years ago Posts: 383 |
Morning all,
Updates on my project are scattered over a few threads so I thought I'd condense and summerise here.
I kicked off this goal mainly as an exercise in FreeCAD and in order to adapt a few of the parts in order to reduce the failure rate of the PLA components. I appreciate some people have already done many of these mods and I am re-inventing the wheel in many places but what the heck!
Progress:
Currently Outstanding:
mk3?
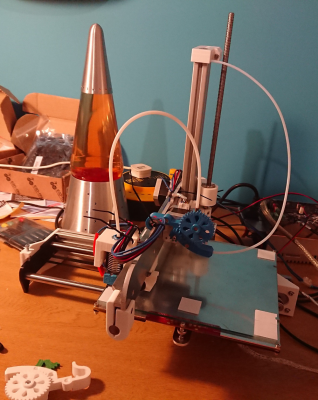
Here's a teaser from the most recent mock up before it was stripped to replace bits that interfered with the build support and use bits to get my work horse Ormerod back running again after more bits broke! The last one may be Ormegog. Running with a Ramps board that I've recently acquired with an Ebay salvage lot! Not that I expect to get the RAMPs to out perform the Duet 0.6, but I would like to be able to see the difference between the two in the flesh.
Edited 3 time(s). Last edit at 11/21/2018 05:13AM by WesBrooks.
Updates on my project are scattered over a few threads so I thought I'd condense and summerise here.
I kicked off this goal mainly as an exercise in FreeCAD and in order to adapt a few of the parts in order to reduce the failure rate of the PLA components. I appreciate some people have already done many of these mods and I am re-inventing the wheel in many places but what the heck!
Progress:
- CAD reverse engineered from STL into FreeCAD with many parts built and tested (minus extruder ands electronics enclosure parts)
- Modifications made to site a TR8 lead screw on the electronics side (ormerod2) of the z-axois extrusion using a modified bearing clamp to hold the anti-backlash nut.
- Many parts adjusted to avoid size-for-size interference fits which exacerbated PLA part failures.
- x-axis idler modified to include a guard to prevent my sons curious fingers from getting too close!
- y-axis idler tweaked from thingverse (will credit original design soon!) with an adjusting nut and pulley finger guard / cover.
- y-axis motor mount modified to remove rear bolt, add thirds bolt to front, and diagonal bracing above and below the motor back to the extrusion end plate surface.
- Above necessitated the dropping of the y-axis belt by ~5mm which meant modifications to z-lower, y-axis-end-plates, y-idler, y-motor-mount, and y-axis bearing clamps.
- E3D V6 (/lite) mount onto standard x-carriage.
Currently Outstanding:
- Redesigning the z-lower mount to remove the need for the corner bracket and to only locate on one side of the z-axis extrusion.
- Update FreeCAD assembly file.
- Sort out GitHub repository to make a bit more sense. This will be sorted into copies of RepRapPro parts, my version of the Ormerod, and extra parts which are relevant to other machines such as my PanelDue support.
- Create a RepRapPro style build manual.
- Remove remaining countersunk bolts.
- Move the bolts that secure ont o the face of teh y-axis extrusion to bolt on to the base of the extrusion on the y-dler and motor mount parts. For ease of assembly and repair.
- Part cooling fan mount & duct design.
mk3?
- Reduce fastener bill of materials?
- V-slot version? - Not much work.
- V-slot x-arm? - Pretty much complete rework of z, and x-axis.
- Change bed support to use more off-the-shelf parts rather than the three cut profiles.
Here's a teaser from the most recent mock up before it was stripped to replace bits that interfered with the build support and use bits to get my work horse Ormerod back running again after more bits broke! The last one may be Ormegog. Running with a Ramps board that I've recently acquired with an Ebay salvage lot! Not that I expect to get the RAMPs to out perform the Duet 0.6, but I would like to be able to see the difference between the two in the flesh.
Edited 3 time(s). Last edit at 11/21/2018 05:13AM by WesBrooks.
|
Re: Ormerod FreeCAD Rework & My Ormerod Itteration November 21, 2018 05:15AM |
Registered: 9 years ago Posts: 383 |
I've currently only got PLA running on my printers but plan to enclose them and move onto PETG soon. Once that is done I may consider creating an update bundle to include the parts needed to convert an existing Ormerod into one of the tweaked versions. To be honest though I doubt there'd be enough interest in it.
Edited 1 time(s). Last edit at 11/21/2018 05:16AM by WesBrooks.
Edited 1 time(s). Last edit at 11/21/2018 05:16AM by WesBrooks.
|
Re: Ormerod FreeCAD Rework & My Ormerod Itteration November 21, 2018 08:52AM |
Registered: 8 years ago Posts: 123 |
Wes,
I'm interested! Great work.
I love the idea of a V-slot version, especially the V-slot X-arm.
The X-arm and the design of the bed is a limiting factor of the X-axis, I wonder how reasonable the idea would be to make a 200x300x300 version of the Ormerod 2 though?
If you're going E3D V6, have a think about the possibility of dual (or tri) extrusion (probably not possible due to the amount of space being removed from the X-axis)
Regardless, I have the parts for a second Ormerod 2, so if you publish this work (and I hope you do, even if it's an "unorganised dump") I may be tempted to follow in your footsteps.
Enclose and PETG, definitely worth it!
I'm interested!
 Great work.
I love the idea of a V-slot version, especially the V-slot X-arm.
The X-arm and the design of the bed is a limiting factor of the X-axis, I wonder how reasonable the idea would be to make a 200x300x300 version of the Ormerod 2 though?
If you're going E3D V6, have a think about the possibility of dual (or tri) extrusion (probably not possible due to the amount of space being removed from the X-axis)
Regardless, I have the parts for a second Ormerod 2, so if you publish this work (and I hope you do, even if it's an "unorganised dump") I may be tempted to follow in your footsteps.
Enclose and PETG, definitely worth it!
|
Re: Ormerod FreeCAD Rework & My Ormerod Itteration November 21, 2018 10:53AM |
Registered: 6 years ago Posts: 174 |
Wow. Exiting!
I am looking forward to seeing what ideas you have to upgrade and improve the Ormerod.
I have grown quite fond of the printer and think there is still much the design has to offer.
One thing that plays against the cantilever arm is 'ghosting' in prints but with the Ender 2 an the Cetus both being cantilever style printers they still proved to be very successfull.
The use of linear rails would be a game changer but sadly they are quite expensive still and would mean a massive redesign in order to implement it.
I still need to convert a few of the Alumerod's parts to Aluminium. Especially the Z motor bracket and the Z-Axis Clamp. I also want to change the X-motor spacer to Aluminium.
With the addition of a lathe with milling achine attachment this will make it a bit easier for me to achieve.
Thanks for your great effort in livening up the Ormerod community.
|
Re: Ormerod FreeCAD Rework & My Ormerod Itteration November 30, 2018 01:44AM |
Registered: 9 years ago Posts: 383 |
The machine is alive and all heaters tuned. Delays from over extrusion on my work horse Ormerod and trying to get decent parts off a Mendel with a big heavy diamond 3-1 hot end on it.
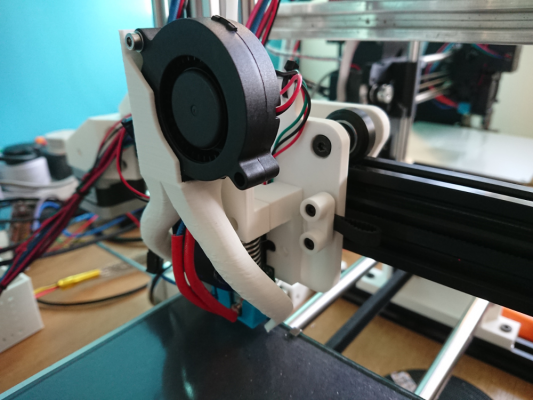
Not much progress on my to-dos list but have sorted the z-lower mount and am currently printing first attempt of a radial fan mount (more fit check than expecting right first time) that has two long slots either side of the E3D V6 hot end.
I've Print Bite on order (they're experiencing delays too) and I'm using my V6 rather than second hand Lite as after stripping and unblocking the latter I found it had a knackered temp sensor.
This printer will Run PETG and once tuned will re-print the parts for my first Ormerod.
Fan mount is a chunky beast but I wanted it to deflect most of the hot air from the hot end fan up as well as hold the fan and direct the air down two long prongs. Do wonder if the radial on my current machine is drawing much air from the hot end fan. Will add pictures shortly.
Edited 1 time(s). Last edit at 11/30/2018 01:46AM by WesBrooks.
|
Re: Ormerod FreeCAD Rework & My Ormerod Itteration November 30, 2018 01:54AM |
Registered: 9 years ago Posts: 383 |
Just noticed my new fans are 0.25A rather than 0.15. Should shit some more air! :-)
Edit:
*smugmode* :-)
That whole assembly should fit on a standard Ormerod 2. Not bolted on the machine yet and thinking about some heat reflective tape close to the heater block.
Edit 2: You do loose some y axis travel.
Edited 2 time(s). Last edit at 11/30/2018 02:53AM by WesBrooks.
|
Re: Ormerod FreeCAD Rework & My Ormerod Itteration November 30, 2018 03:32AM |
Registered: 10 years ago Posts: 1,230 |
Quote
WesBrooks
Just noticed my new fans are 0.25A rather than 0.15. Should shit some more air! :-)
Your design looks very nice! - yes a centrifugal blower is the way to go, I nicked a 0.24A (Delta Electronics BUB0512Hb) from a Makita charger and that's plenty of air
Quote
Edit 2: You do loose some y axis travel.
How much did you offset the nozzle?
|
Re: Ormerod FreeCAD Rework & My Ormerod Itteration November 30, 2018 04:06AM |
Registered: 9 years ago Posts: 383 |
|
Re: Ormerod FreeCAD Rework & My Ormerod Itteration December 01, 2018 03:05AM |
Registered: 9 years ago Posts: 383 |
Standard nozzle position looks to be about 5mm from the x carriage, This would put the whole system about 18mm further from the x-arm than standard. With a bit of a re-think (after the system has proven itself!) I think I should be able to get that below 15mm. The whole working area could be recoverable if desperate by moving the IR sensor -y a little (and changing the trigger) and shifting the z axis extrusion +y a little. That, however would only be possible if you have moved the threaded rod.
This unit may interfere with the standard acrylic x-arm as there is a protrusion around one of the nuts for the z-axis guide that may get very close.
Another thing on my to-do list is to swap to a switch for the x-axis limit other than not having to tipex my trigger it would also allow getting the sensor a little closer to the nozzle.
|
Re: Ormerod FreeCAD Rework & My Ormerod Itteration February 13, 2019 11:58AM |
Registered: 9 years ago Posts: 383 |
Update!
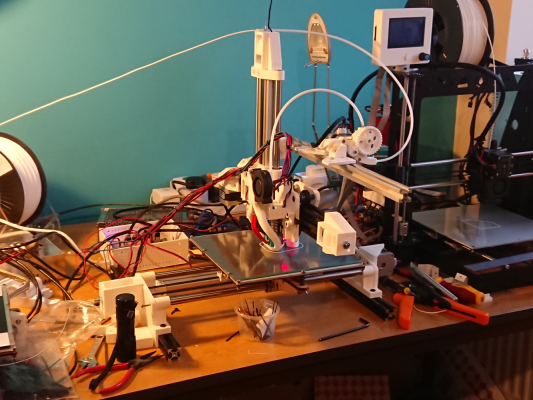
This is the first major itteration but it is definately draft, and bits to mount extruder is a bodge.
Only design things that remain from the Ormerod 2 is the plates that make the bed support, and the extruder.
It reuses the smooth rods, extrusion, bed support, extruder, and bearings.
Major changes are:
All designed in FreeCAD, printed using slic3r on other ormerods. Designs will be on github when I'm happy with them. This is the first print.
Edited 1 time(s). Last edit at 02/14/2019 10:47AM by WesBrooks.
This is the first major itteration but it is definately draft, and bits to mount extruder is a bodge.
Only design things that remain from the Ormerod 2 is the plates that make the bed support, and the extruder.
It reuses the smooth rods, extrusion, bed support, extruder, and bearings.
Major changes are:
- GT2 Belts
- Belt driven z
- 4:1 Reduction belt drive on z.
- Belt tension done on idlers, with one bolt similar to some P3Steel systems.
- 40x20 extrusion for x-axis.
- dc42 IR probe.
- Mk3 alloy bed.
- E3D V6.
- Duet 0.8.5 (because I didn't have a 0.6 spare!)
- Blower fan with cooling duct on z.
- ... probably other bits but I'm late to pick up my son!
All designed in FreeCAD, printed using slic3r on other ormerods. Designs will be on github when I'm happy with them. This is the first print.
Edited 1 time(s). Last edit at 02/14/2019 10:47AM by WesBrooks.
|
Re: Ormerod FreeCAD Rework & My Ormerod Itteration February 14, 2019 05:51AM |
Registered: 9 years ago Posts: 383 |
Other mods:
Edited 5 time(s). Last edit at 02/14/2019 11:12AM by WesBrooks.
- Ditched acrylic end plates in favour of printed parts mounted onto 2020 extrusion that mounts onto original y axis extrusion.
- Screws in y axis rod supports, screwing axially onto rods to ensure belt tension doesn't pull sides in.
- Microswitch x-axis limit.
- Rotated x axis belt 90 degrees about x axis and run half of it in extrusion.
- Used x axis smooth rod on z axis.
- Dropped y axis belt slightly in z axis from bed support and redesigned bearing caps to suit. (hang over from interim design of a braced y axis motor mount using all four face bolts and not the rear bolt)
Edited 5 time(s). Last edit at 02/14/2019 11:12AM by WesBrooks.
|
Re: Ormerod FreeCAD Rework & My Ormerod Itteration February 15, 2019 07:35PM |
Registered: 8 years ago Posts: 123 |
|
Re: Ormerod FreeCAD Rework & My Ormerod Itteration February 16, 2019 02:50AM |
Registered: 10 years ago Posts: 14,672 |
Quote
WesBrooks
[*] Duet 0.8.5 (because I didn't have a 0.6 spare!)
The Duet Maestro works well in the Ormerod too, despite the Ormerod using only 12V. I used my Ormerod as the test bed for the original prototype of the Maestro.
Large delta printer [miscsolutions.wordpress.com], E3D tool changer, Robotdigg SCARA printer, Crane Quad and Ormerod
Disclosure: I design Duet electronics and work on RepRapFirmware, [duet3d.com].
|
Re: Ormerod FreeCAD Rework & My Ormerod Itteration February 16, 2019 03:27AM |
Registered: 9 years ago Posts: 383 |
Yes thanks, I'm aware the newer boards are nicer, and I am keen to see the progression of the multithread (or multiprocess) capabilities such as simulation of non-active jobs during print. Also really not a fan of the naff hot end connectors on the v0.8.5 and even less so the doubled up header pins on the 0.6.
I've got some resolution test cases that I discussed on the duet forums an age ago that suggested the major steps of the stepper was a significant factor over microstepping. If that is still the case on these machines then reduction drives and 24V on the other axis will be a priority for me over a higher controlled (rather than interpolated) microstepping.
At the end of the day I'm providing a service and unless I can demonstrate a clear time or cost saving I can't justify swapping the board out just because I want to and it will run quieter. Dahm metwork switch makes more noise than my printers anyhow! :-D
More pictures soon.
|
Re: Ormerod FreeCAD Rework & My Ormerod Itteration February 25, 2019 04:04AM |
Registered: 9 years ago Posts: 383 |
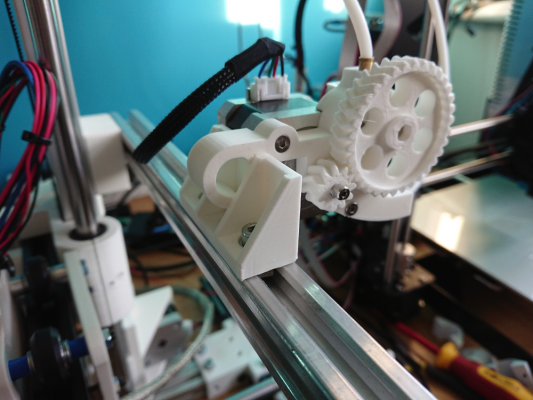
Bodgeish: Standard extruder with helical gears mounted on a static extrusion.
X carriage running on large vslot wheels. Since found some smaller ones but not worth rebuilding just for a few mm of extra travel until I have evaluated the whole machine better. There are other tweaks I would like to do too since finding the smaller wheels in my stash!
Not sure who had the idea for this originally but like it. I saw it first on P3Steel parts. Toothed idler running in a shell that is pulled back by one bolt on the centre line of the x-axis belt.
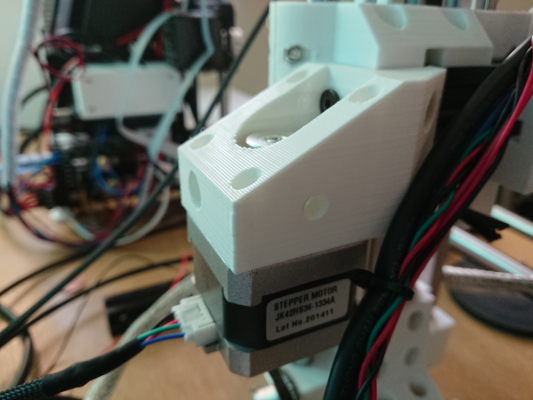
X axis stepper. Half the belt path is within the extrusion. The hole on the side allows access to the pulley grub screws.
|
Re: Ormerod FreeCAD Rework & My Ormerod Itteration February 25, 2019 04:11AM |
Registered: 9 years ago Posts: 383 |
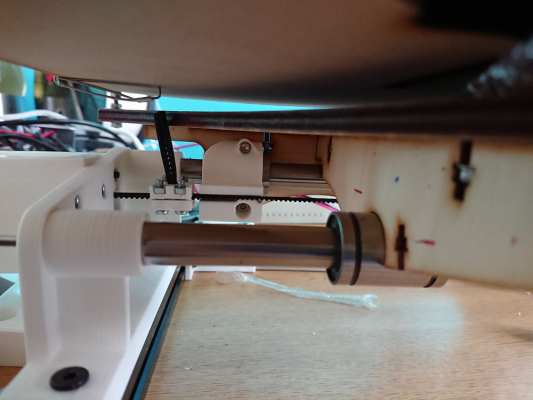
Bodgeish: Almost standard shape bearing caps. belt clamp is not great. Will rework this when I have no major issues to solve.
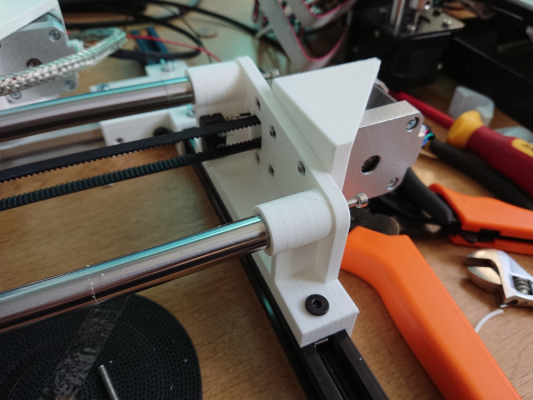
Y axis rod supports mounted direct on-top of 20x20 extrusion. M3 bolts screw axially onto the rods so that the belt tension doesn't pull the ends in, and allows larger error in cutting the length of rods. The other side is simply a mirror. Microswitch mounted in a similar location to normal Ormerod 2.
Rear view of x carriage, z axis motor, and z axis smooth rods.
Pulley reduced z-axis drive. Same physical step size per mm as a TR8 four start screw. No screw related over constraint or wobble. Axle not cut yet as I don't need the extra yet and I may still tweak the design a bit.
Edited 1 time(s). Last edit at 02/25/2019 04:44AM by WesBrooks.
|
Re: Ormerod FreeCAD Rework & My Ormerod Itteration February 25, 2019 04:13AM |
Registered: 9 years ago Posts: 383 |
Currently swapping belts and re-designing z-base to reduce a ringing like wobble.
So far no z-wobble! :-)
I will compile a bill of materials soon but so far the major extras (over Ormerod 2) are:
3 x 20x20 vslot extrusion.
1 x 20x40 vslot extrusion.
3 x vslot wheels with nuts, bolts, spacers, and excentric spacers.
GT2 belt.
3 x 20t drive pulleys (may revise to smaller tooth count later)
3 x 20t 5mm bore idle pulleys
1 x 60t drive pulley
1 x microswitch (x axis)
1 x dc42 IR sensor
1 x mk3 alloy bed.
1 x mosfet heated bed driver & fuse/mount.
1 x radial fan.
1 x E3D V6 complete (bowden)
All printed parts aside from extruder.
Various fasteners (only 1 countersunk screw now other than what is in extruder.)
Will look at using polymer smooth rod bearings another time.
Will build in PETG when design is more settled.
Edited 2 time(s). Last edit at 02/25/2019 04:21AM by WesBrooks.
|
Re: Ormerod FreeCAD Rework & My Ormerod Itteration February 25, 2019 04:37AM |
Registered: 8 years ago Posts: 123 |
|
Re: Ormerod FreeCAD Rework & My Ormerod Itteration February 25, 2019 04:44AM |
Registered: 9 years ago Posts: 383 |
Cheers.
I give very little consideration to the aesthetics of colour to be honest! I had used black but got nervous about heat absorption near the hot end (both during print and in use on the machine) so I went full opposite to white, but I am now wondering if this is exacerbating part cooling issues as white cools slowest. After being recently asked about environmental issues, and as I have still not enclosed these machines I think I will move to natural colour next time.
I give very little consideration to the aesthetics of colour to be honest! I had used black but got nervous about heat absorption near the hot end (both during print and in use on the machine) so I went full opposite to white, but I am now wondering if this is exacerbating part cooling issues as white cools slowest. After being recently asked about environmental issues, and as I have still not enclosed these machines I think I will move to natural colour next time.
|
Re: Ormerod FreeCAD Rework & My Ormerod Itteration February 25, 2019 04:51AM |
Registered: 9 years ago Posts: 32 |
|
Re: Ormerod FreeCAD Rework & My Ormerod Itteration February 25, 2019 04:55AM |
Registered: 9 years ago Posts: 383 |
First iteration was building on a level surface and mounting the rod supports directly to that. Edit: The extrusions all touch the bench when the machine is placed down.
There is still a slight twist so I am currently planning to add a third bolt at the front edge of both sides to add a rotation of the side pieces by bolting down onto the extrusion.
This is the next issue to tackle after I've got rid of the ringing.
Edited 1 time(s). Last edit at 02/25/2019 04:56AM by WesBrooks.
|
Re: Ormerod FreeCAD Rework & My Ormerod Itteration March 13, 2019 11:35AM |
Registered: 10 years ago Posts: 466 |
|
Re: Ormerod FreeCAD Rework & My Ormerod Itteration March 13, 2019 04:03PM |
Registered: 9 years ago Posts: 383 |
Ha ha! Cheers. Just going through another itteration to get rid of some wobble. Cheeseandham will be pleased to see some metal brackets coming in! I'll add a couple more photos later.
Edit: I can confirm cheap GT2 pulleys are off centre and naff!
Edited 1 time(s). Last edit at 03/13/2019 04:13PM by WesBrooks.
Edit: I can confirm cheap GT2 pulleys are off centre and naff!
Edited 1 time(s). Last edit at 03/13/2019 04:13PM by WesBrooks.
|
Re: Ormerod FreeCAD Rework & My Ormerod Itteration March 13, 2019 05:32PM |
Registered: 9 years ago Posts: 383 |
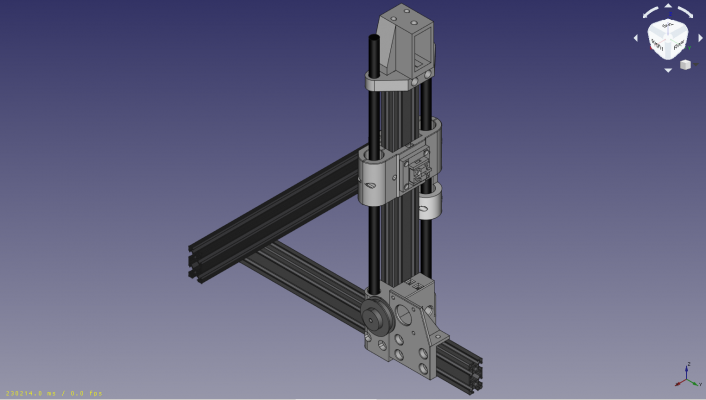
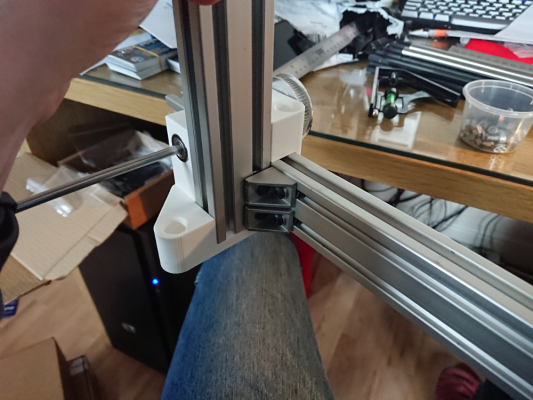
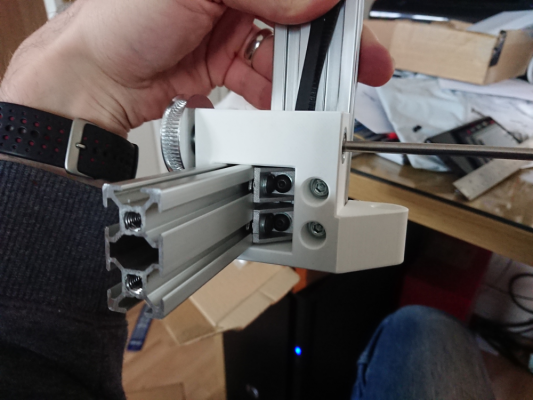
Long story short the machine was exhibiting a ripple in the surfaces parallel to the table motion but much better in the hotend motion. I discussed the issue at length in the Duet forums incase it was an issue with bed level compensation or a limitation of the v0.8.5 board that is running on the machine. Changed alsorts including belts, better quality pulleys, and bigger motors. Things did improve but not to the degree that I was happy with. This CAD rendering below is the main core of the rebuild that aimed to have the main junction between the x-axis and z-axis extrusions made by 4 metal corners. In doing this I decided to move the belt outside of the z-axis extrusion rather than lift the hole machine up high enough to clear the reduction pulley.
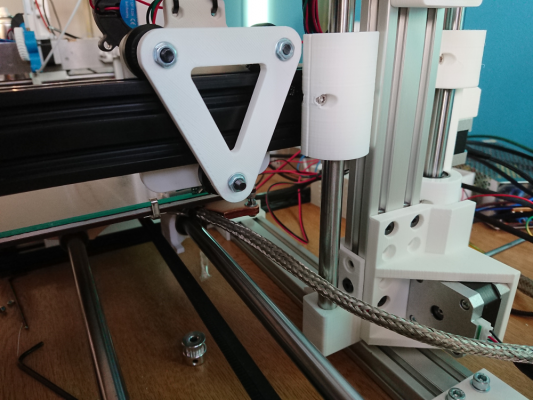
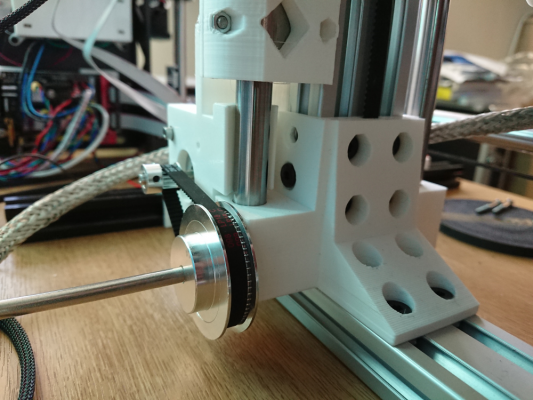
Here are some other pics following the assembly of the main y-axis/z-axis joint.
Edit: On my next mod I'll make sure there is a hole to tighten the grub screws on the drive pulley on the reduction shaft!
Edit 2: The obvious howler being I've nowhere to put my extruder so I will need to rework the back of the x-axis shoulder to mount the extrusion there. Happy accident really as that bodges my previous effort on extruder mounting!
Edited 2 time(s). Last edit at 03/14/2019 01:30PM by WesBrooks.
|
Re: Ormerod FreeCAD Rework & My Ormerod Itteration July 05, 2019 03:29AM |
Registered: 6 years ago Posts: 174 |
|
Re: Ormerod FreeCAD Rework & My Ormerod Itteration September 20, 2019 01:52AM |
Registered: 9 years ago Posts: 383 |
Thanks. This project had been snoozed for a while as I got some other things setup. Hopefully dusting it off again soon.
Lessons learnt in time or on the other machines mean the following will be tackled:
* Needs a far less restrictive fan duct.
* Motors may be over specced contributing to ripples.
* Y axis rsils to be dropped and mount sizes reduced.
* x carriage redesign for more travel.
* Worm drive to replace belt as the latter always drops with no power and worm is simpler than stepper brske.
|
Re: Ormerod FreeCAD Rework & My Ormerod Itteration November 19, 2019 03:08AM |
Registered: 6 years ago Posts: 174 |
|
Re: Ormerod FreeCAD Rework & My Ormerod Itteration November 19, 2019 03:18AM |
Registered: 9 years ago Posts: 383 |
Sorry, I've been mad busy trying to get a couple of P3Steels reliable to rely on for my business.
That said one of the reasons I moves o0nto the P3s was because I was disheartened by some strong vertical artefacts on this machine. As it happens I ended up chasing the same on those too. Long story short it appears to be a mix of both the 16 step drivers and counter intuitively (at least at first) a more rigid frame exacerbating ringing issues. I'll take another look at this project this week or next. Need to reduce the height of the bed (from the surface the machine rests on) and get a worm drive on the z. I'll be nearly done at that point.
That said one of the reasons I moves o0nto the P3s was because I was disheartened by some strong vertical artefacts on this machine. As it happens I ended up chasing the same on those too. Long story short it appears to be a mix of both the 16 step drivers and counter intuitively (at least at first) a more rigid frame exacerbating ringing issues. I'll take another look at this project this week or next. Need to reduce the height of the bed (from the surface the machine rests on) and get a worm drive on the z. I'll be nearly done at that point.
|
Re: Ormerod FreeCAD Rework & My Ormerod Itteration November 19, 2019 05:34AM |
Registered: 6 years ago Posts: 174 |
|
Re: Ormerod FreeCAD Rework & My Ormerod Itteration June 20, 2020 10:31AM |
Registered: 5 years ago Posts: 44 |
Sorry, only registered users may post in this forum.

